I love free sewing patterns. I bet you do too! Here’s a few of my favorites from SMP.
The cold weather doesn’t seem to want to let go this year – at least where I live. As much as I’m yearning for warm days so I can get outside and enjoy nature, it’s a perfect time to sew. I love free sewing patterns. I bet you do too! Here’s a few of my favorites from SMP.
I love that it’s soft and easy to remove, but keeps the dust off and the pet hair out.
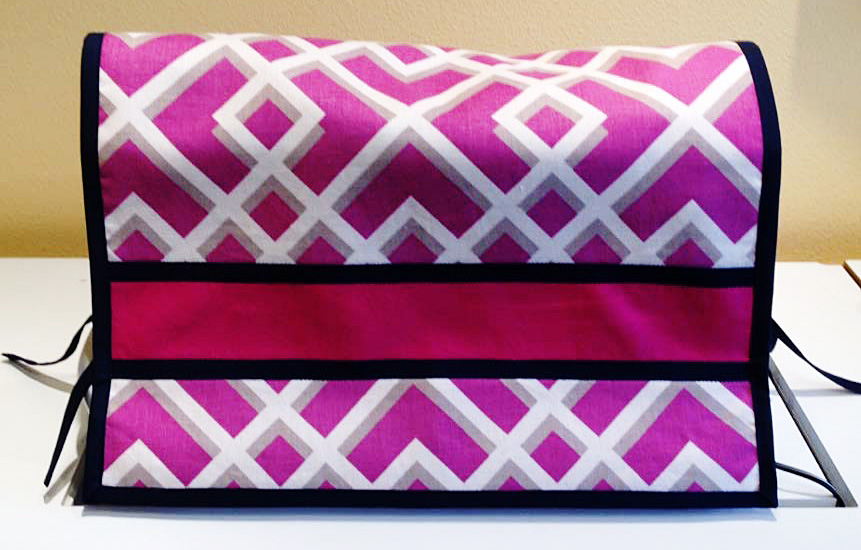
My mom made one of these for the Singer she taught me on many years ago. I love that it’s soft and easy to remove, but keeps the dust off and the pet hair out. With four cats, everything gets covered in fur fairly quickly if it’s not covered. I also love that it can be made with any fabric or print so you match it to the décor and colors in your sewing room.
Bring a little color & spring into your home, no matter what the weather is doing outside with some fancy kitchen towels.
They’re easy to make, no matter what your skill level.
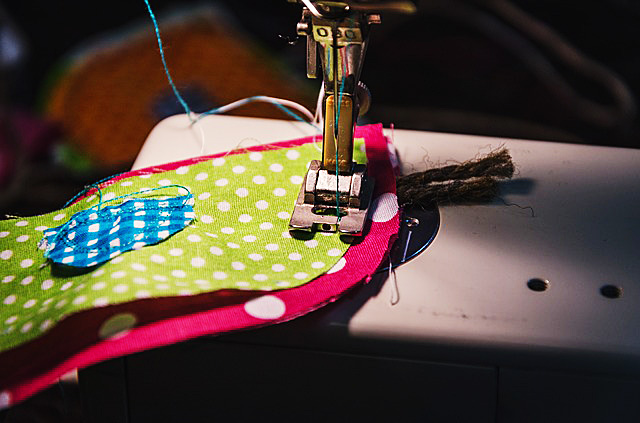
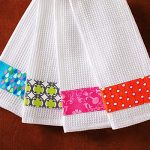
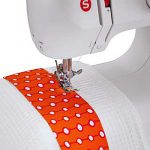
Bring a little color and spring into your home, no matter what the weather is doing outside with some fancy kitchen towels. They’re easy to make, no matter what your skill level. Even better, they’re a great way to use up some of your fabric stash and require nothing more than a white kitchen cloth (or any other color if you prefer).
This awesome sewing pouch makes it easy to carry all the colors I need & look fashionable to boot.
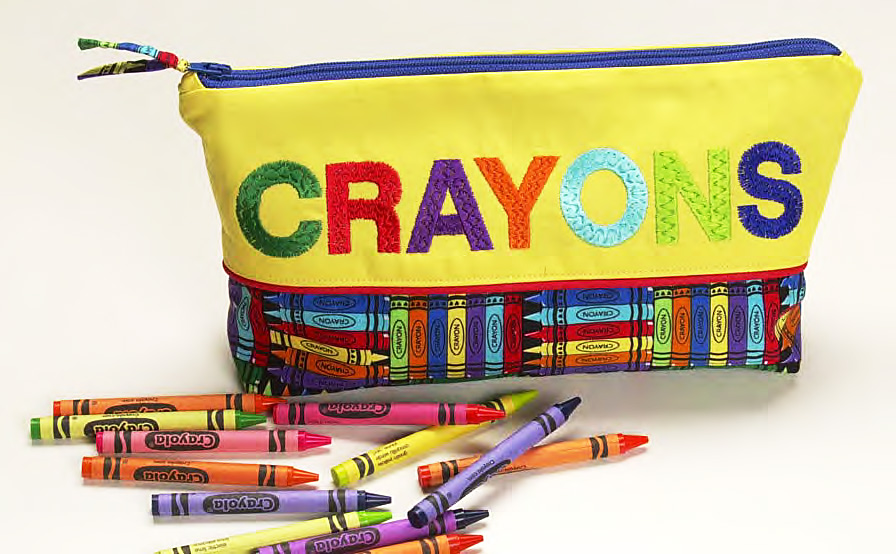
Have you been bitten by the adult coloring bug yet? I have! And I love using crayons. I bought a container of around 120 crayons that I can carry, but if I’m working on a specific picture, I may not need all 120 colors. This awesome sewing pouch makes it easy to carry all the colors I need and look fashionable to boot. The ladies in the sewing group at the public library will swoon if I bring this in…maybe an extra source of income? *wink
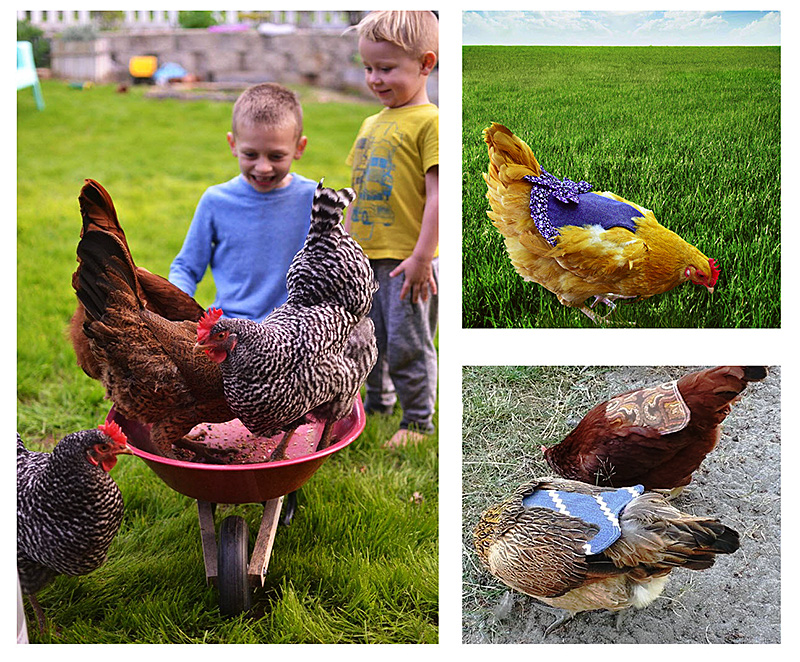
When my girlfriend, Ella, asked me if I could make her a ‘chicken apron’ I thought perhaps she meant something like a heavy duty cover for when she is out in her yard working with her chickens. I of course said yes, but she quickly corrected me and explained that the aprons in questions were actually for her chickens.
Who knew chickens wore clothes?
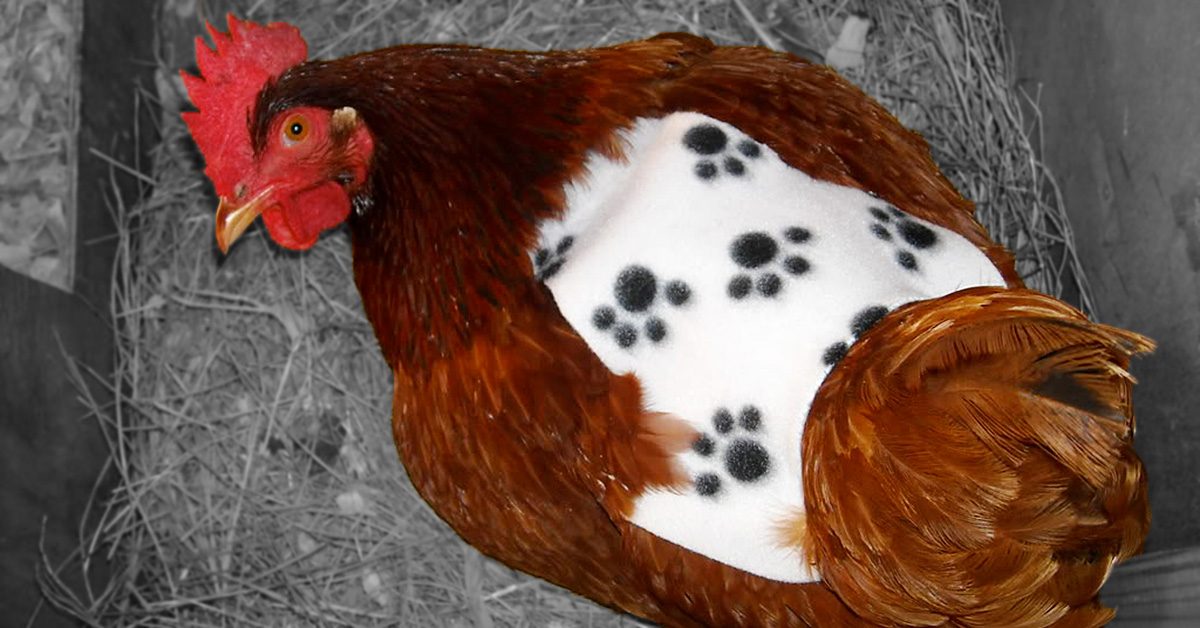
It turns out that other chickens can be mean and may pick on or peck a member of their brood (even to death). Additionally, roosters can sometimes be too aggressive with hens. Chicken aprons, also called chicken capes, or hen saddles, can protect their backs from the claws of the roosters.
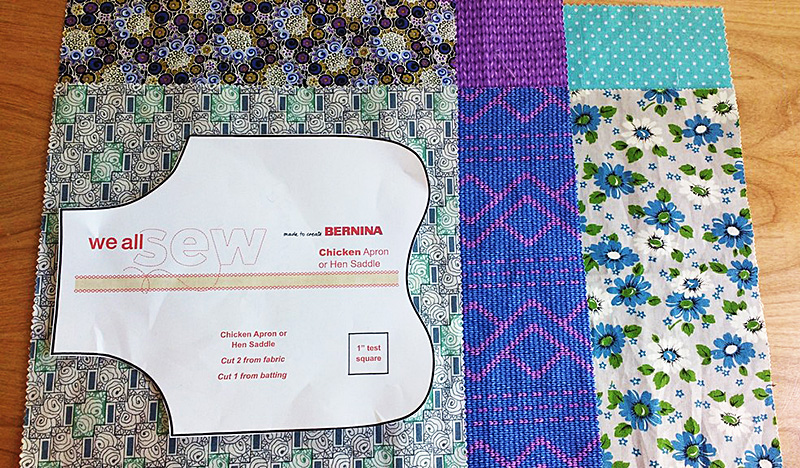
While I often create my own patterns when I sew, creating something like this for Ella’s chickens was beyond me. She found me a free pattern, which you can also follow here, and I got to work.
Heads up that this project is perfect for any pre-cut layer cakes (10″ x 10″ squares) you may have on hand.
Photo credit, left to right: Ella Sherman, MyPetChicken.com & WeAllSew.com.
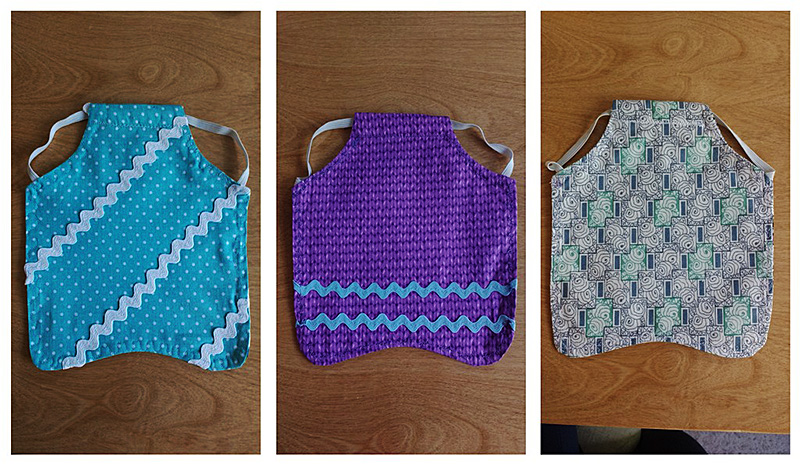
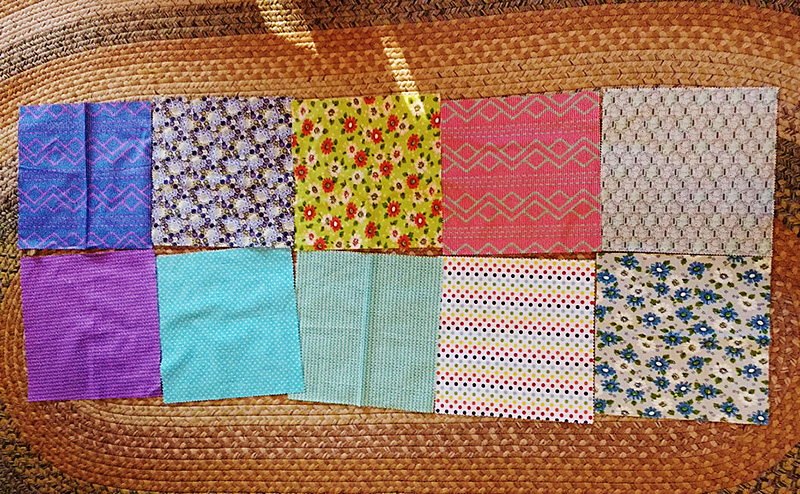
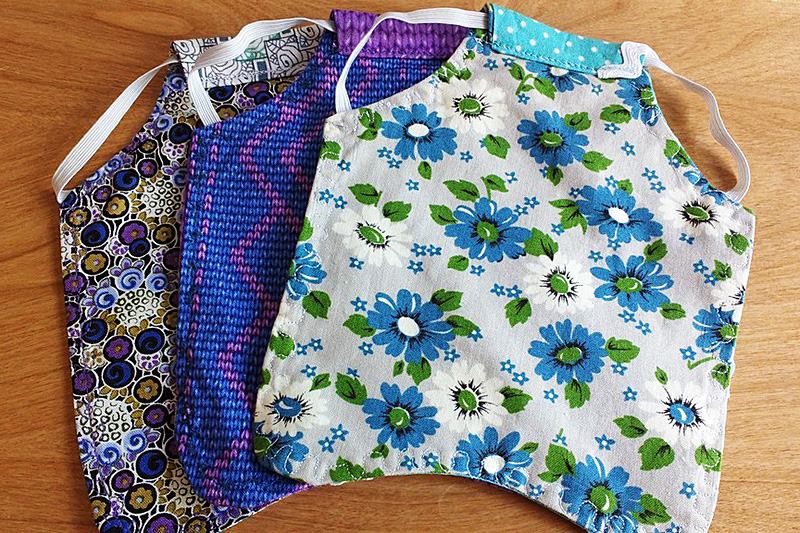
My oldest daughter helped me pick out some fabrics and we sent a picture for Ella to choose from. I planned to make her three reversible aprons.
Here’s another interesting thing we learned
Never dress your chickens in pink, or red; it brings out their cannibalistic instincts and could result in the chicken getting pecked to death. Red & pink = no no.
Beware of chicken scratch. Red & pink = no no.
Sketch it out
With my six fabrics decided, I drew out a pattern on each one. All of these are layer cakes squares I had in my fabric stash.
All of these are layer cakes squares I had in my fabric stash.
Ella lives in Southern California so she didn’t need any type of warmth or real thickness for batting. Still, I wanted them to be crisp, so I added a layer of Pellon 931TD, Fusible Midweight Interfacing to one side of each apron.
I wanted them to be crisp, so I added a layer of Pellon 931TD, Fusible Midweight Interfacing to one side of each apron.
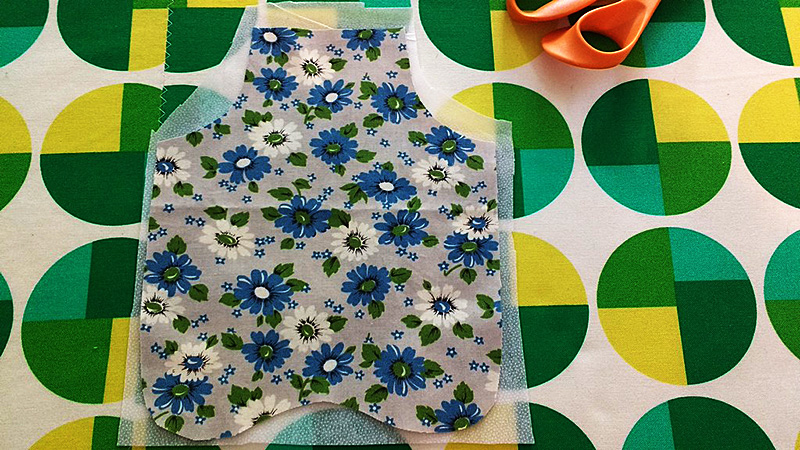
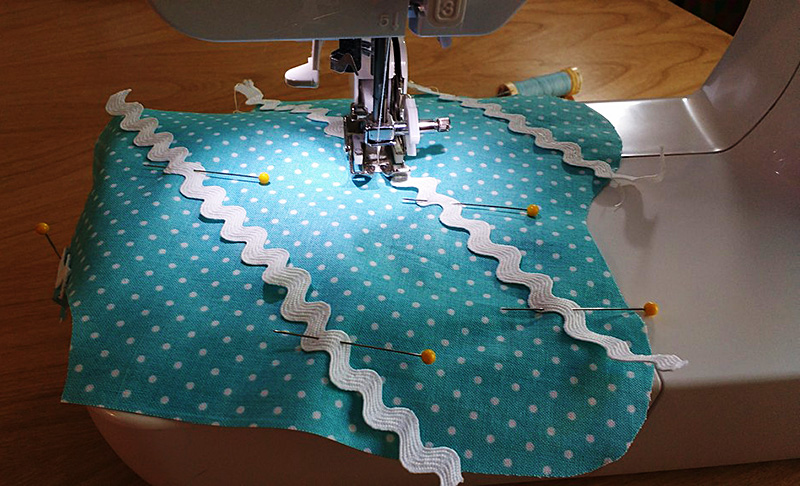
Once three of the sides had interfacing, I turned to decoration. If you plan to add rick rack or bows, do it before you sew the sides together.
Once three of the sides had interfacing, I turned to decoration.
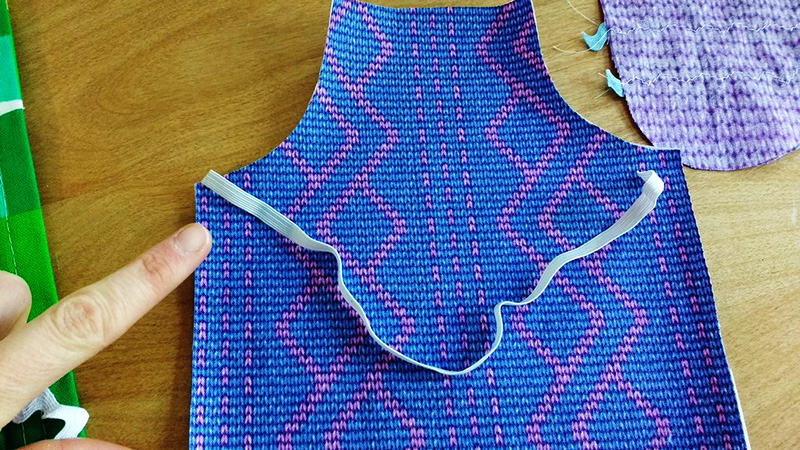
Cut out a 10.5″ piece of elastic for each bib. You will pin each end where the arm (wing?) holes would be.
You will pin each end where the arm (wing?) holes would be.
Place the layers, right sides together and pin (here you can see the elastic sandwiched between the layers).
Here you can see the elastic sandwiched between the layers.
Ok, here we go…
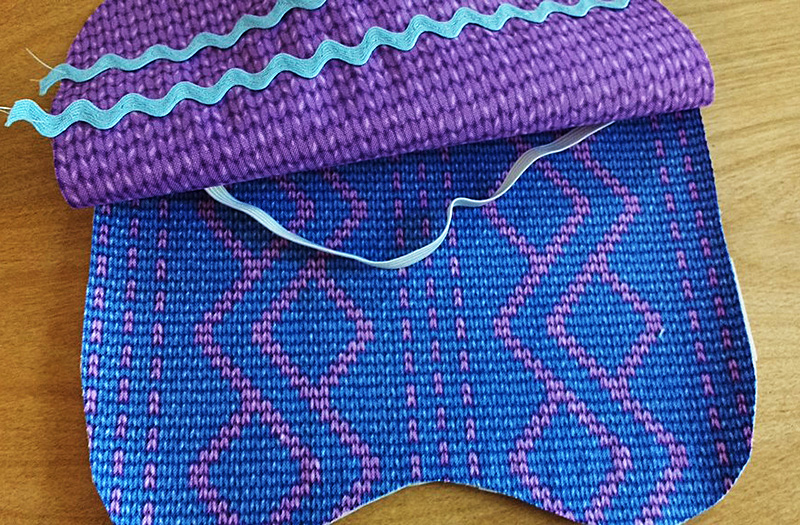
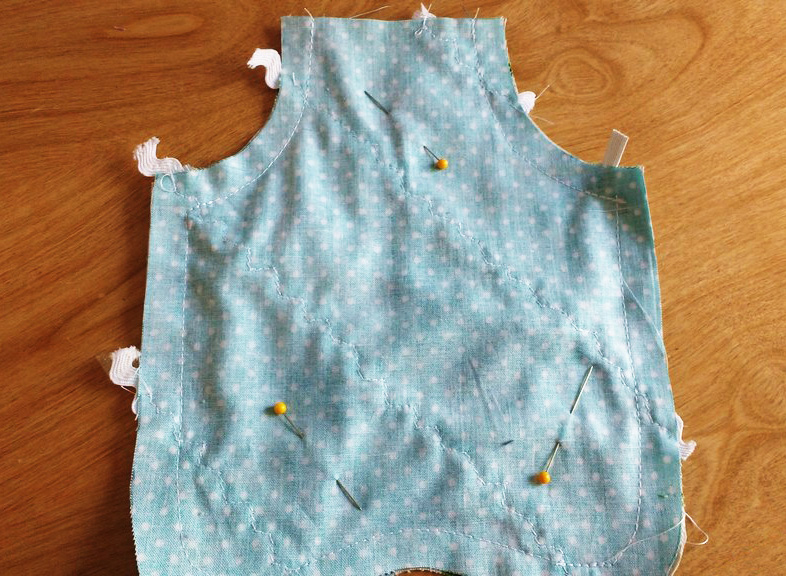
This is how it should look before you begin sewing. The pattern I used called for a ½” seam allowance, probably because it also called for thick batting. Choose your own seam allowance and sew all the way around, leaving only the neck hole completely open.
This is how it should look before you begin sewing.
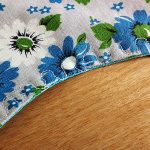
Here’s how mine looked after sewing all the way around. I trimmed away the excess fabric and made small snips around the inner and outer curves so they would lie flat once I turned the fabric right sides out.
Here’s how mine looked after sewing all the way around.
Two important things to do once you’ve turned the fabric
Take your time and run your fingers along the inside seam, popping the fabric out so it shows a great shape.
Iron! I both ironed and starched mine once I had turned them.
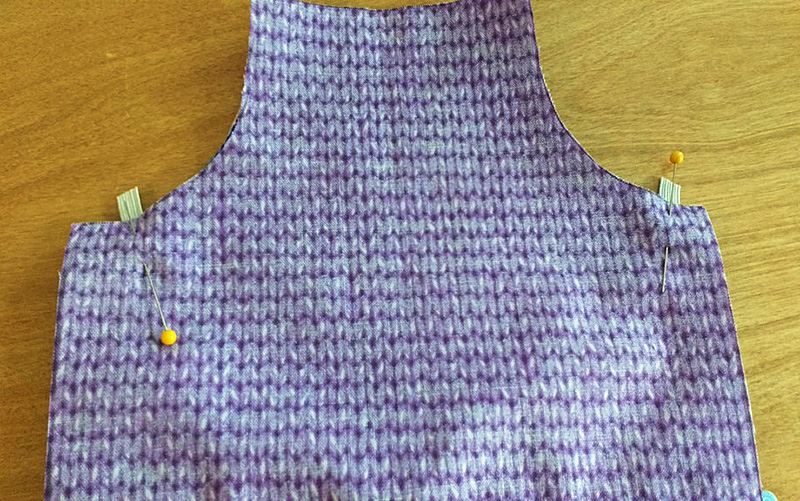
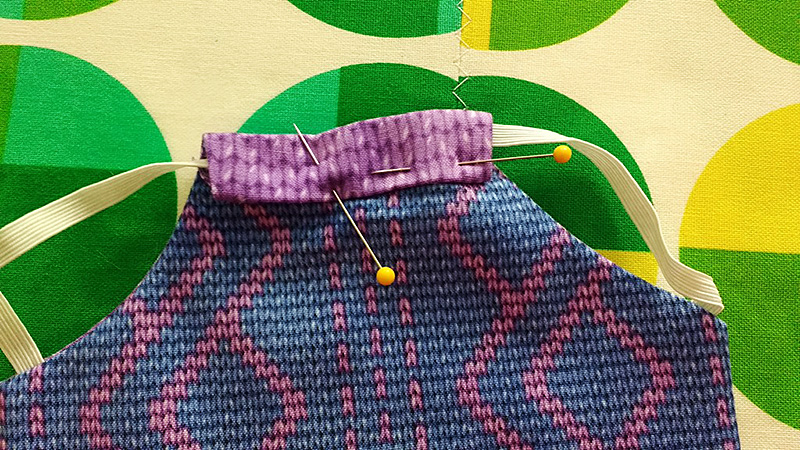
Next, turn the neck hole down first a ½ inch then another ½ inch. Tuck the piece of elastic into where you’ve turned it, creating a casing. You will sew across the bottom of the folded fabric, taking care not to catch the elastic. When you are done, you should be able to move the piece of elastic freely back and forth in the casing.
When you are done, you should be able to move the piece of elastic freely back & forth in the casing.
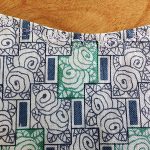
Top stitch!
Have fun with your top stitching. I used a different decorative stitch on each apron.
Have fun with your top stitching.
I used a different decorative stitch on each apron.
And there you have it
This is easily a 20 minute project if you have all your supplies at hand. It’s wonderful for layer cakes and if you have friends who own chickens, these would make great handmade gifts.
It’s wonderful for layer cakes & if you have friends who own chickens, these would make great handmade gifts.
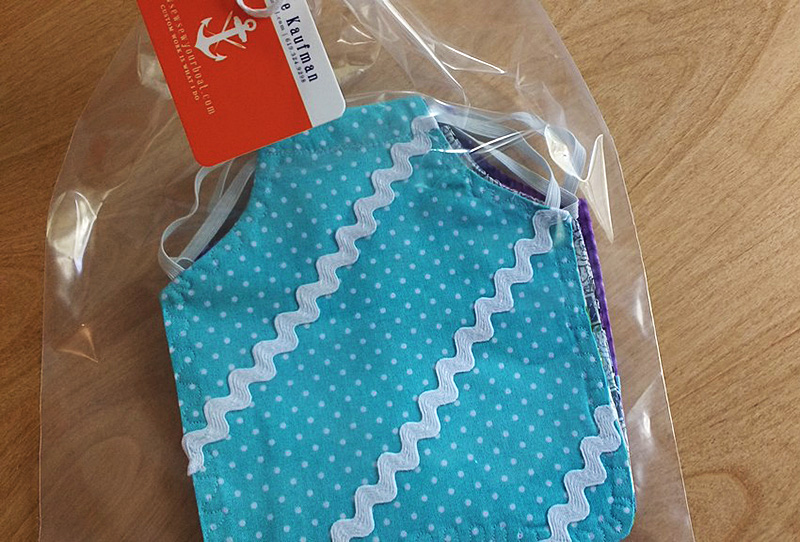
Pop your presents in some pretty wrapping and send them off to be wild with some hens!
Pop your presents in some pretty wrapping and send them off to be wild with some hens!
Have you ever made chicken aprons or a unique piece of clothing for an animal? Tell us about it in the comments!
Have you ever made chicken aprons or a unique piece of clothing for an animal?
Tell us about it in the comments!
———————————————————————————– Charlotte Kaufman is a writer and sewist in Mammoth Lakes, California. She specializes in marine and home interiors and continues to fall more and more in love with quilting. You can follow her at charlottekaufman.com.
If there’s one thing I’m interested in regarding sewing, it’s finding new ways to use my leftover fabric. In fact, if you’ve been keeping up with my posts (I won’t hate you forever because you haven’t! Honest!), it’s a concept that’s been explored already. But I still have fabric at my disposal, so the idea of how to use those pieces continues as a subject worth looking into.
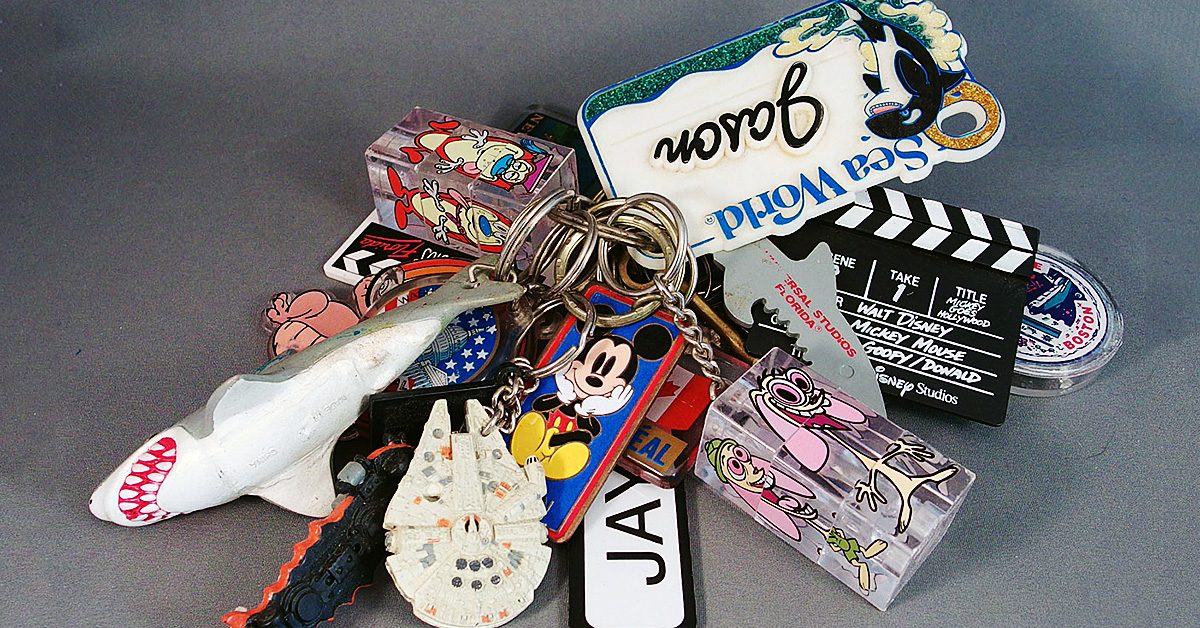
So, for today’s post, I’m going to give you yet another way to use your leftover fabric — even if that leftover fabric is fairly small! Need proof? The project I’ll use for an example was made out of ONE fabric block that was less than ten inches in either direction. Sound good? Then let’s dive into this project, which for the record, is a keychain!
What you’ll need:
One fabric block. The size varies depending on what shape you want to make your keychain — and what size you want your keychain to be — but you don’t need anything over 10″ x 10″. Also, remember that flimsy fabric might not keep your keychain shape too well, so try something that’s sturdy — maybe even felt.
Key ring. It isn’t really a keychain if you can’t hang a key on it!
Sewing essentials like needle, thread, and straight pins, as usual!
What you’ll do:
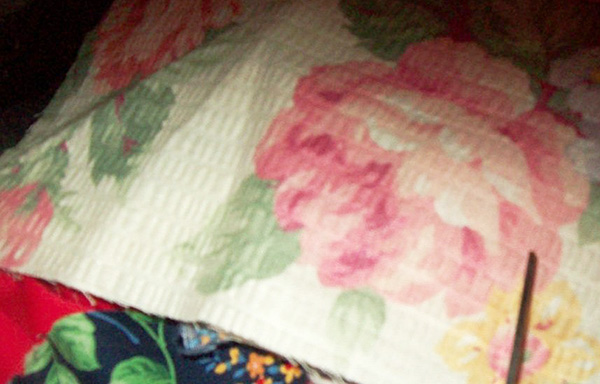
Step One: Choose your fabric, keeping in mind the guidelines about size and texture. You should also note that your shapes for your keychain will only be so big, so you should consider that size. If your final goal is a one-inch shape, for instance, you should pick a fabric that’ll look good when cut down to that size. I changed my fabric choice on this detail because with my initial decision, I would’ve potentially had part of a flower, a whole lot of plain color, or scattered bits that didn’t really look that fantastic to me. It might be something you want to consider as well!
I changed my fabric choice on this detail because with my initial decision, I would’ve potentially had part of a flower, a whole lot of plain color, or scattered bits that didn’t really look that fantastic to me.
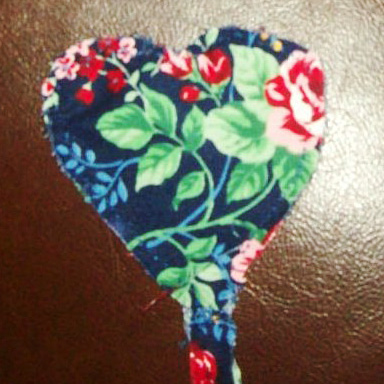
Also, decide what shape you want your keychain to be. For me, I went with a heart because it was simple and traditional, but there are plenty of other options. Once you know your shape, you can create a stencil, or use an existing stencil, to make sure your fabric is going to be cut in the right way.
Cut it out
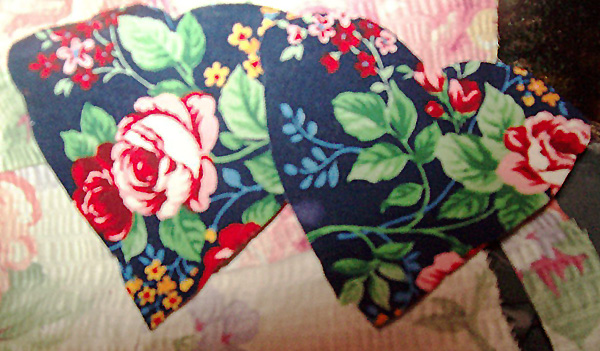
Step Two: Cut out your shapes! This was a perk to choosing a heart because you can make one by only cutting one side of the heart, as many of us might have learned in childhood. I don’t need to cut both sides if I fold the fabric in half, and I ended up only having to make that folded cut once for both sides of my keychain by folding the fabric into fourths. That way, with one swooping I-want-a-heart-shape cut, I got two bits of fabric that admittedly needed a bit of tailoring, but were good starting places for my heart.
With 1 swooping I-want-a-heart-shape cut, I got 2 bits of fabric that admittedly needed a bit of tailoring, but were good starting places for my heart.
Whether you find a simple method to make both pieces at once or use a stencil, cut two shapes out of the block of fabric — one for the keychain’s front side and one for the back. Make sure they’re even enough so that too much excess material doesn’t show on either side and that you’ve accomplished cutting the shape you wanted — or at least one you can live with! Also, remember to cut a line of fabric that is a couple of inches long and wide enough to suit your purpose (maybe ¼”). This will be your loop to put the keyring through. NOTE: These numbers can vary depending on what size you want your keychain to be!
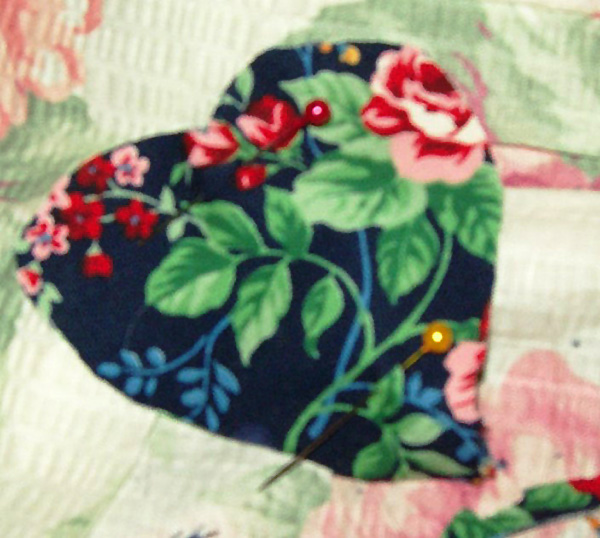
Step Three: Once your shapes are cut and trimmed, it’s time to start planning your sewing. Even though this is a small project, it could still pay to have straight pins keeping your work in place, so you might want to break out a couple! Be sure before you pin or sew that your main fabric pieces are together with their patterned sides facing outward, and don’t forget to fold that additional line of fabric and place the tips of both ends between the two shapes.
Be sure before you pin or sew that your main fabric pieces are together with their patterned sides facing outward.
Put a ring on it
You might think about going ahead and adding your keyring here as well so that you don’t have to put your fabric through the stress of being twisted through the keyring. To do that, you’d just need to loop the line of fabric through the ring before you pin it between the shaped fabric pieces for sewing.
Step Four: Sew! Since this is a keychain, the process won’t take long! And be sure to cut off the excess thread when you finish!
Sew! Since this is a keychain, the process won’t take long!
Whether you are attending a sewing class or planning a leisurely vacation, sewing on the go is something you will want to do sooner or later.
We’ve talked a lot about sewing rooms here on the blog, but we haven’t addressed the issue of sewing on the go here before now.
Sewing on the go won’t work if you aren’t properly prepared, so I’ve made this short video to cover all the areas you need to address to ensure you have what you need when you take your sewing on the road.
Sewing on the go: machine carriers, luggage and totes
You definitely want to think about this before you get ready to take your sewing to go. I hadn’t ever considered this myself until the day before I taught my first sewing class at the community center. I suddenly realized I was going to have a lot of equipment and gear to lug and I had no idea how I was going to carry it all!
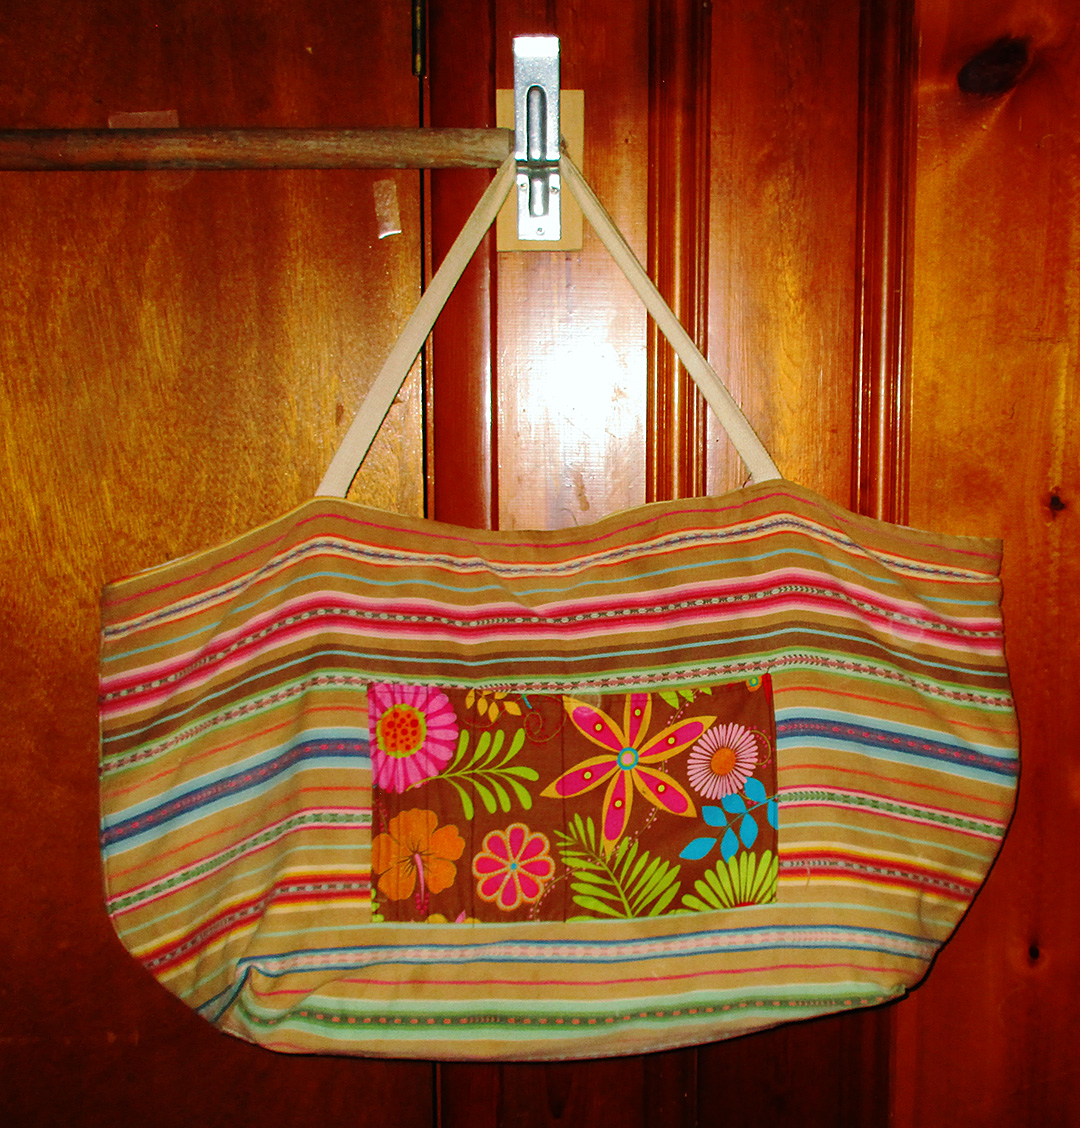
So I grabbed a thick piece of table linen and whipped up a humongous bag to carry everything.
So I grabbed a thick piece of table linen & whipped up a humongous bag to carry everything.
While this bag has proven itself to be quite useful in other ways, I don’t recommend this solution for sewing supplies and gear. I only used it that one time for this purpose and then I found a more suitable option. I have appreciated the ample sack for carrying beach supplies for myself and my kids, and it carries three of our ukuleles in boxes safely in the trunk when we travel with them these days.
For toting your sewing machine and supplies, save time and trouble by ordering one of these great choices from Sewing Machines Plus:
Here is a link to SMP’s full selection of trolleys, totes, and cases.
Sewing on the go: sewing supplies
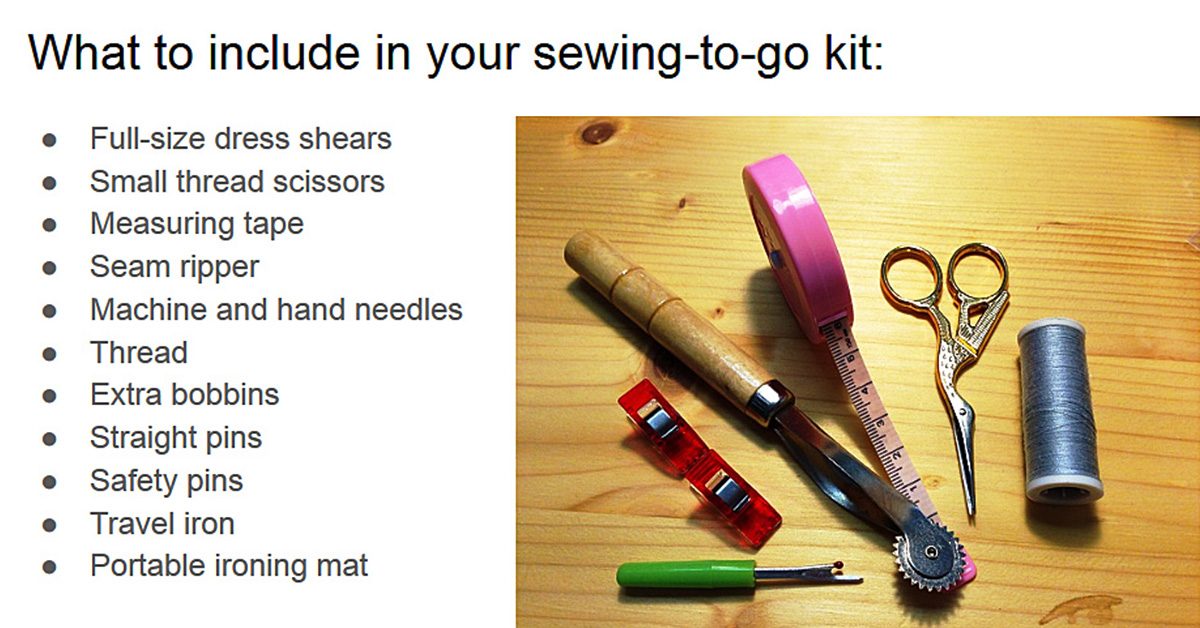
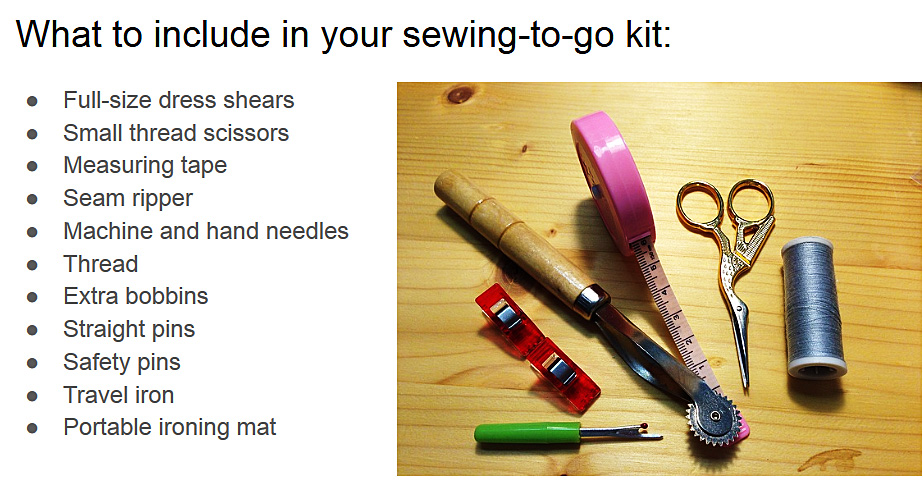
Here is the list of supplies to be sure to include in your travel sewing kit:
Be sure to get an extra pair of dress shears to keep in your go bag at all times.
You’ll also like to have a portable rotary cutter.
Here is the combo cutting mat/ pressing board mentioned in the video.
And here is that Rowenta travel iron.
The clover mini-iron is available in a couple of different options:
Here are the cooling sleeves for the mini-iron.
And that’s what you need to be well equipped for sewing on the go. Happy travels to you!
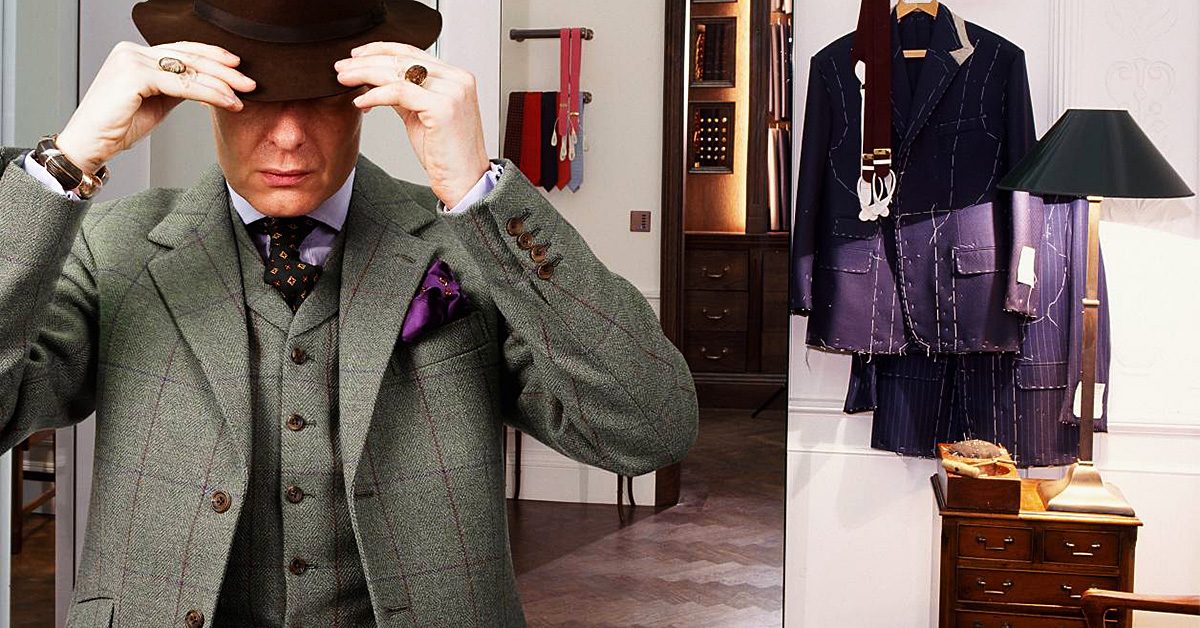
Sewing machines and supplies aren’t exactly the most portable things. Sometimes, when I’m not working fulltime on a show, I’ll get a one or two day job that requires me to schlep a machine and supplies to a work space. These are my least favorite kind of jobs – for no other reason than I have to transport my machine and a small kit of sewing supplies somewhere.
I live in New York City. I haven’t owned a car in over ten years.
What’s the big deal, you may ask, just throw it all in your car and go. Well, that’s the thing: I live in New York City. I haven’t owned a car in over ten years. The last time I drove was about two years ago. And I’m not a huge fan of Uber or even good old-fashioned yellow cabs. Cars are just not the most efficient way to get around the city. So, I’m usually dragging a sewing machine up and down the subway stairs to get to where I need to go.
On the go
I know I’ve recommended these machines before, but Brother makes some incredibly good and lightweight machines. I have two SC9500s. They are so lightweight that I carry them in a tote bag on my shoulder. I then use a backpack to carry my supplies: scissors, threads, rulers, chalk, a small collection of notions.
Other Brother machines that are very light weight are the CS5055 and the ES2000.
I also bike a lot, which is always the most efficient way to get around the city, and have been known to strap a machine (in a box) to the rear rack on my bicycle.
When going to a job that is only one or two days, sometimes it’s hard to figure out what to bring, especially if you’re trying to not lug your entire shop down the length of Manhattan and across the bridge to Brooklyn.
Here’s a list of what I usually bring to a short one-day job:
1 pair of tailor’s points or small scissors
1 pair of medium sized shears
1 pair of pinking shears (because I’m certainly not bringing a serger along to finish seams.)
1 gallon sized Ziploc of thread. Must have colors include black, grey, white, tan, a greeny-brown, nude, and a yellow-orange for topstitching on jeans.
12” see through 2” wide ruler
1 soft tape measure
Tailor’s chalk, red marking pencil, pencil, black disappearing ink pen
Seam ripper
Metal hem gauge ruler
Small container of straight pins
Extra bobbins for machine
Small collection of hand and machine needles (I always bring some leather needles and double needles, just in case.)
1 gallon sized Ziploc of bias tape (black and white), elastics, twill tape, and hem tape.
Small containers of snaps and hook & eyes.
Muslin pressing cloth
Small collection of nude spandex and netting scraps and interfacings
Lighting is key
Sometimes it’s nice to bring along a small light of some kind. I often find myself sewing in inadequately lighted spaces. I tend not to bring a lamp because, well, the subway. I always make sure the light in the machine is working. And the flashlight on an iphone can be extremely helpful in especially dark circumstances.
Gear up
I’m not very high tech with my carrying cases but there are lots of really lovely ones out there if you’re not into backpacks and tote bags.
The key is to keep everything super organized. And don’t worry about not having all the thread. Unless you’re topstitching, most things can be sewn with black, white, or tan. I know some tailors that only use those colors of thread. It really is ok if your thread doesn’t match exactly. And sometimes you just have to use what you have, especially if you are a traveling tailor.
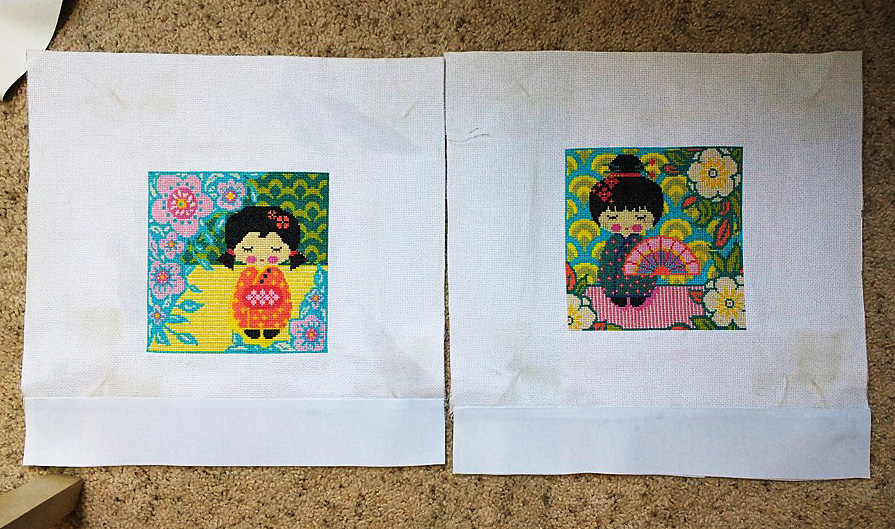
My sister, Sariah, and I are both talented sewists, though we tend to focus on sewing different types of things.
My sister, Sariah, and I are both talented sewists, though we tend to focus on sewing different types of things (however we both are unified in our love of quilting!). While my sister can sew entire outfits in mere hours, I don’t have the handmade clothing gene. Instead, I do pillows, cushions, drapes and other marine and home décor. Because our talents diverge, sometimes we collaborate. I will often send fabric to her and she will sew Halloween costumes for my girls, whereas, she will send me something like these two beautiful cross stitch panels, and I will turn them into decorative pillows.
Because cross stitch fabric is fairly sturdy, I used white canvas duck to match the fabric thickness.
Sariah had purchased 16″ x 16″ pillow forms for these so I needed to add some fabric onto the bottom of each cross stitch panel to make them into large enough fabric squares for the pillows. Because cross stitch fabric is fairly sturdy, I used white canvas duck to match the fabric thickness.
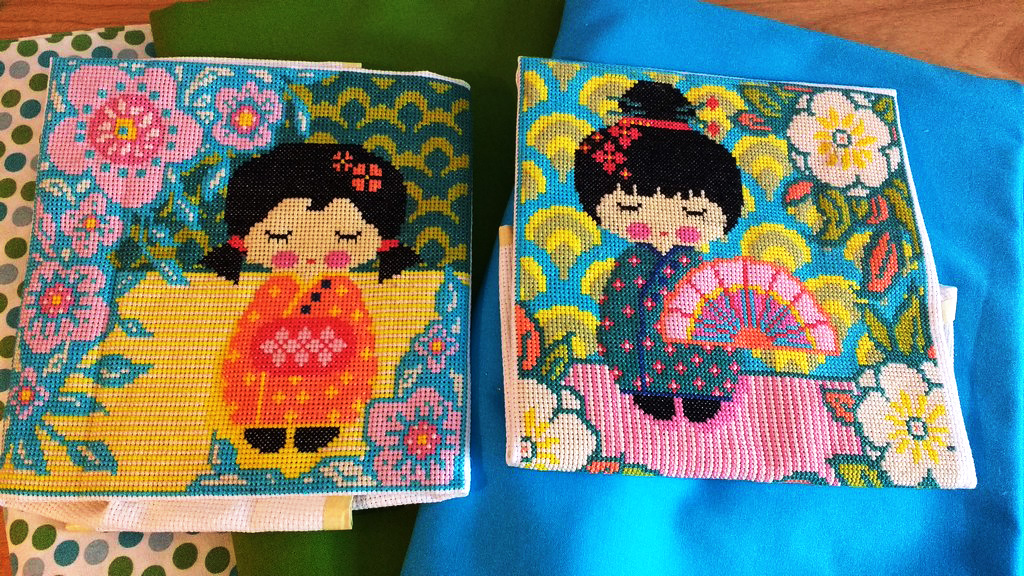
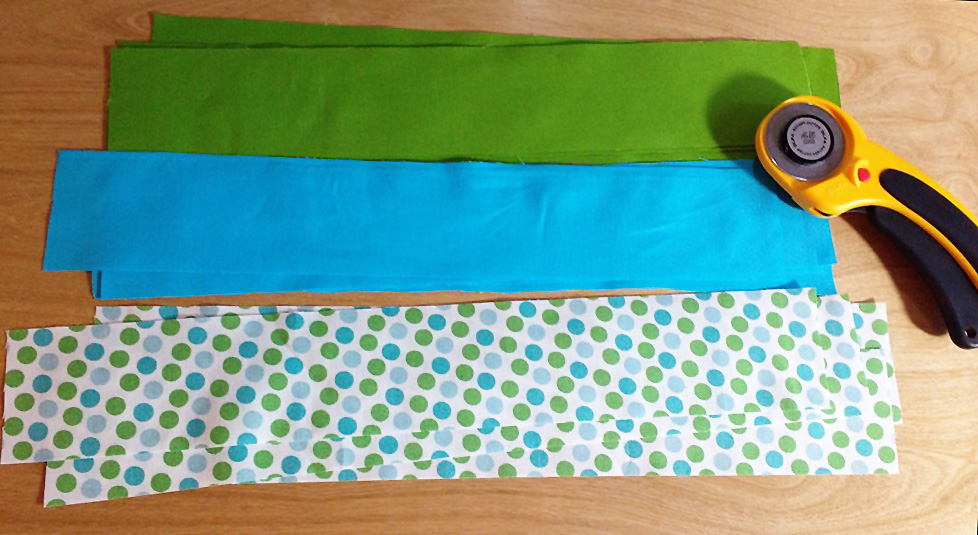
Next up was taking a look at the fabric she had sent.
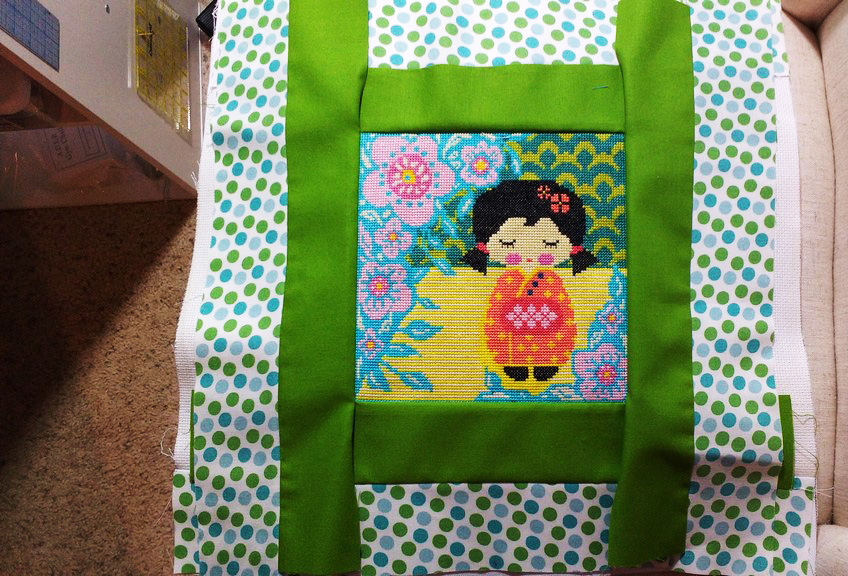
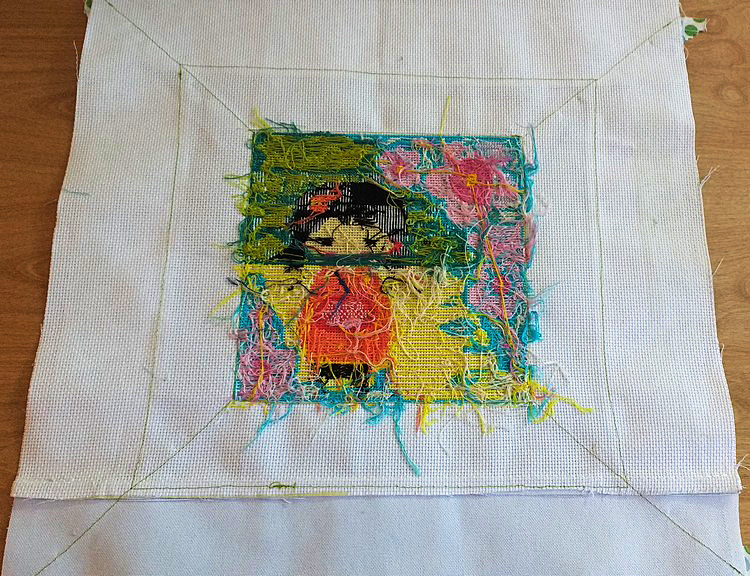
Next up was taking a look at the fabric she had sent. She told me I could be as creative as I’d like and as soon as I saw her talented cross stitching, I knew I wanted to frame each one and to make sure the corners were mitered.
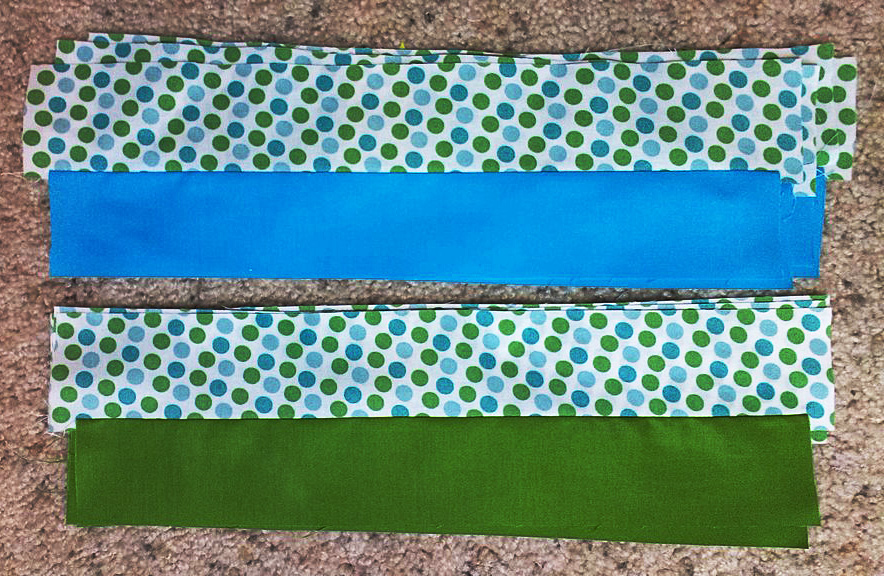
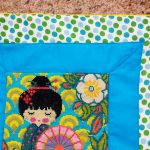
I assigned green to one of the dolls and blue to the other.
I assigned green to one of the dolls and blue to the other. Both panels got dots for the outer edging. Once I’d sewn the dots and blue and the dots and green into cohesive strips, I meticulously sewed the strips around all four sides of the dolls’ squares.
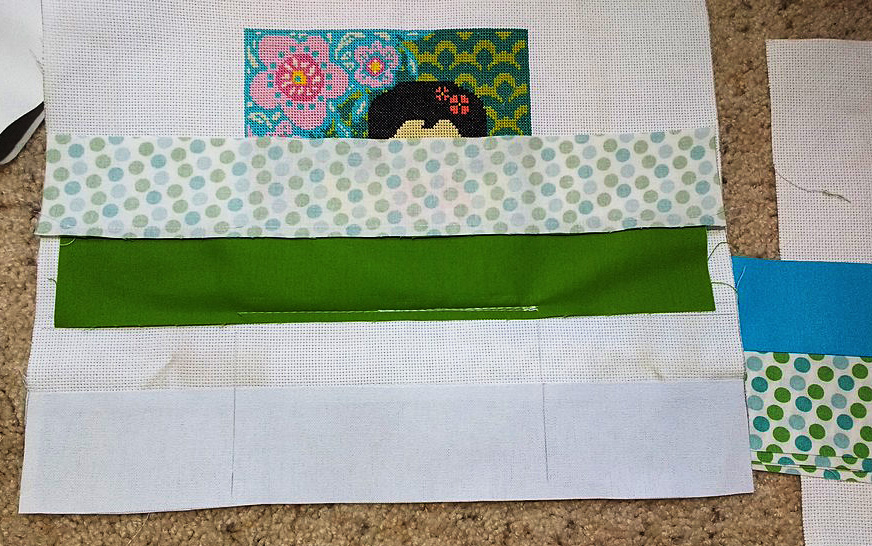
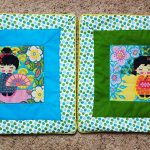
I only stitched around the actual cross stitching, leaving the rest of the fabric loose on all four sides like this.
I only stitched around the actual cross stitching, leaving the rest of the fabric loose on all four sides like this.
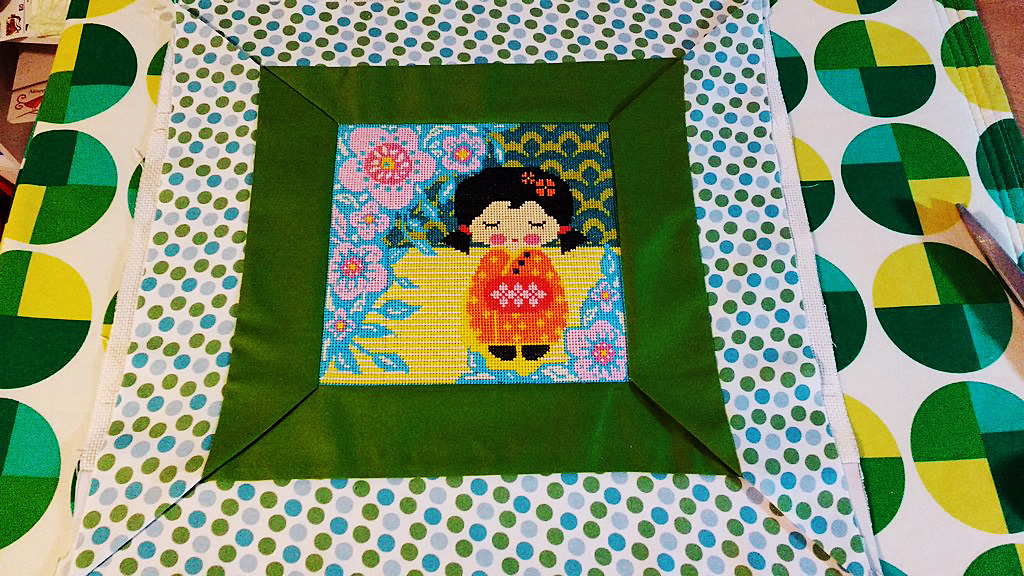
Next I hand folded the top and bottom panels back, using my fingers to crease the fabric exactly on the mitered corners, where each fabric strip met the next one.
Next I hand folded the top and bottom panels back, using my fingers to crease the fabric exactly on the mitered corners, where each fabric strip met the next one.
Once I was sure I’d nailed it, I ironed the panels and then trimmed off the extra fabric from all the strips.
Once I was sure I’d nailed it, I ironed the panels and then trimmed off the extra fabric from all the strips.
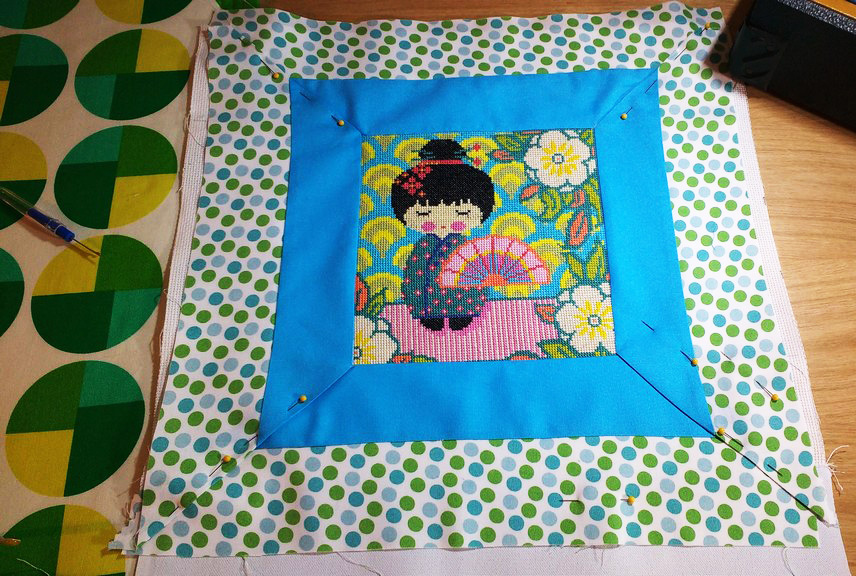
The pieces were pinned until I could topstitch the mitered corners in place.
The pieces were pinned until I could topstitch the mitered corners in place.
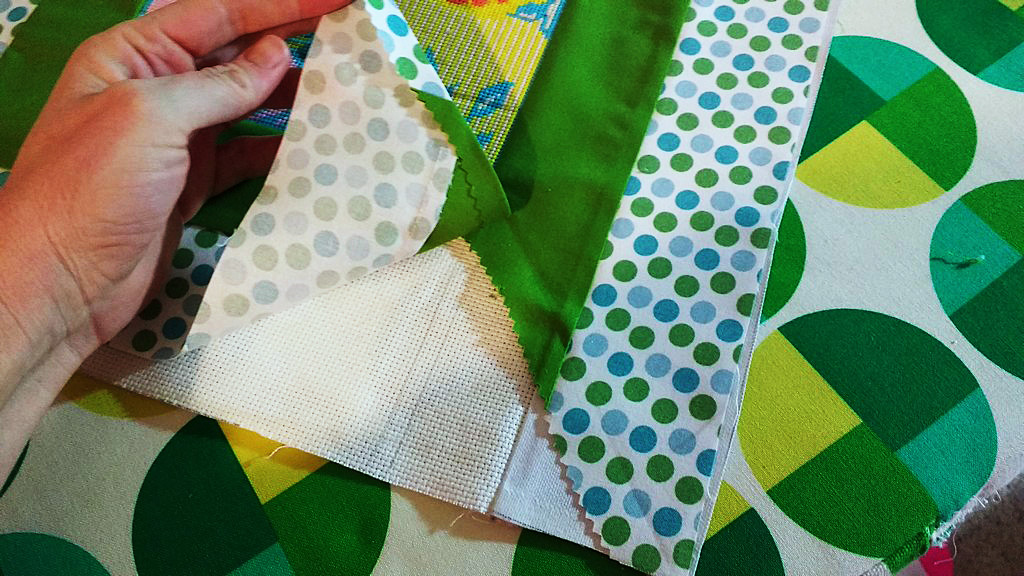
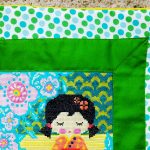
I love this shot from the wrong side of the fabric.
I love this shot from the wrong side of the fabric. The chaos of the underside of the cross stitching is very beautiful, and you can perfectly see the backside of the top stitching.
Once the panels were top stitched it was time to add piping.
Once the panels were top stitched it was time to add piping. If your machine comes with a piping foot, now is when you would add one. I have two machines and I generally use my industrial one, a Sailrite LSZ-1 for piping and cording. Its standard foot has a built-in arch that makes sewing piping a dream.
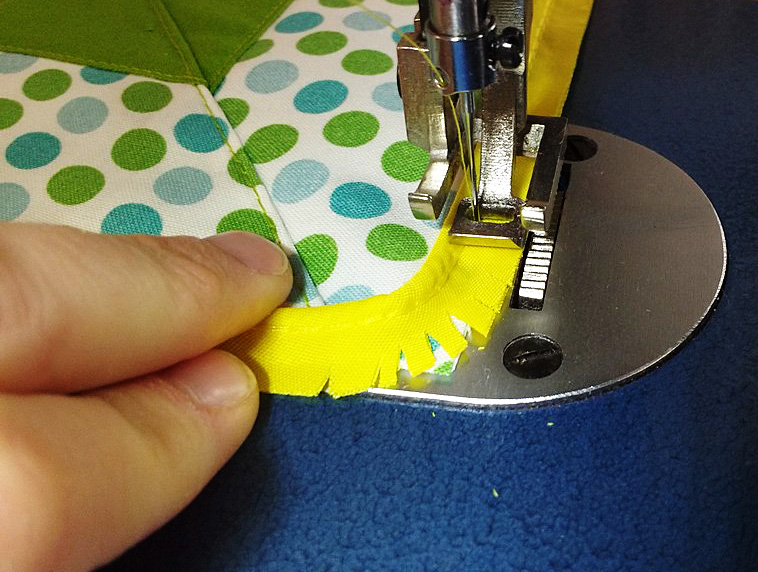
When you come to corners, don’t forget to trim your piping right up, but not into, the stitching of the finished piping.
This will help it to lay flat as you turn.
When you come to corners, don’t forget to trim your piping right up, but not into, the stitching of the finished piping. This will help it to lay flat as you turn.
When both front panels were piped, I cut out four back panels to create an envelope close on their backs.
When both front panels were piped, I cut out four back panels to create an envelope close on their backs.
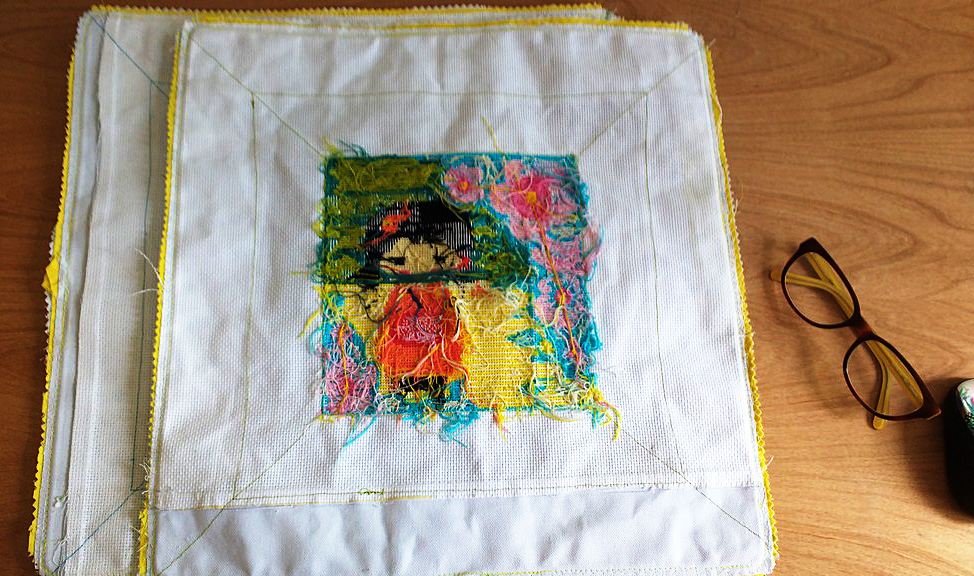
Here are the pillows fully sewn, but not yet turned right sides out.
Here are the pillows fully sewn, but not yet turned right sides out. Before you turn your pillows out always double, and triple check your seams.
I like to reinforce each corner with additional stitching and often will sew around twice for added stability.
I like to reinforce each corner with additional stitching and often will sew around twice for added stability. I also zig zag stitch the very edge of the fabric to prevent future unraveling or fraying.
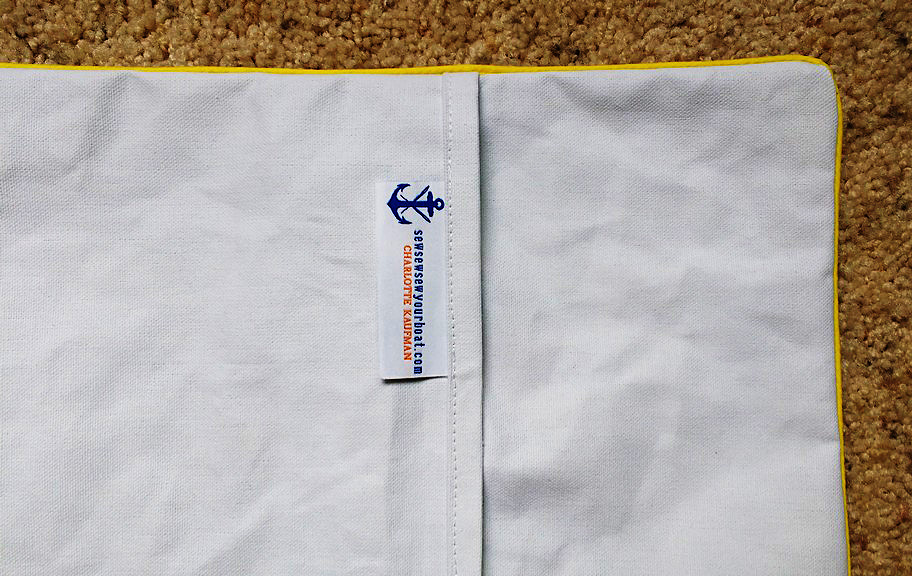
Here is a shot of the back of one of the pillows.
Here is a shot of the back of one of the pillows. Don’t forget to add your handmade tags!
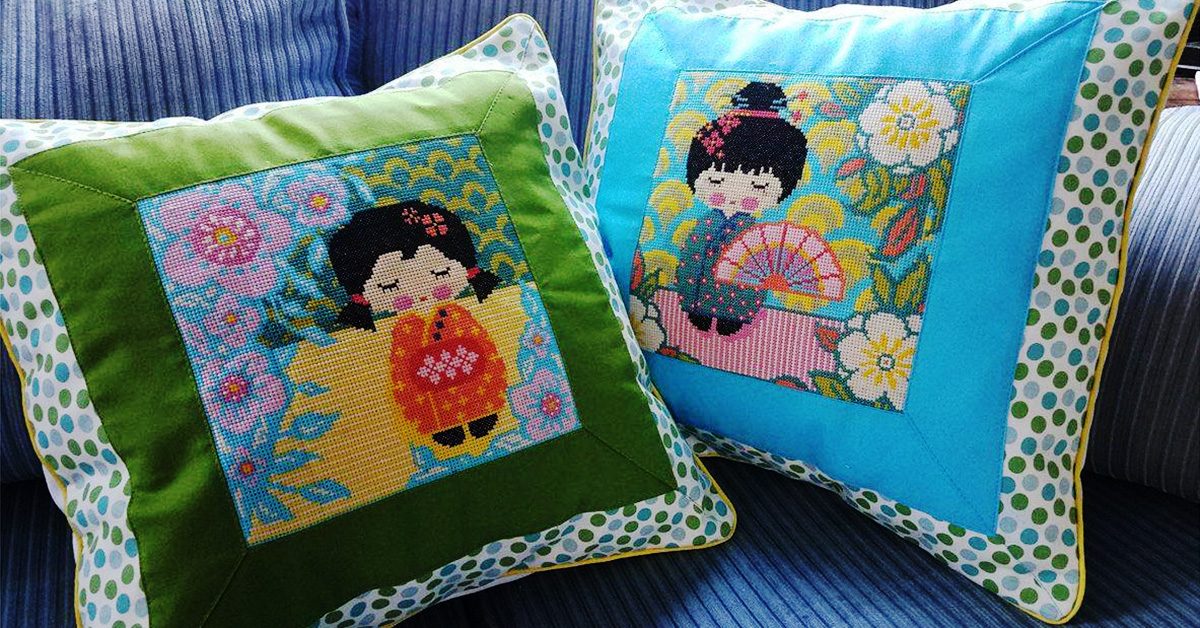
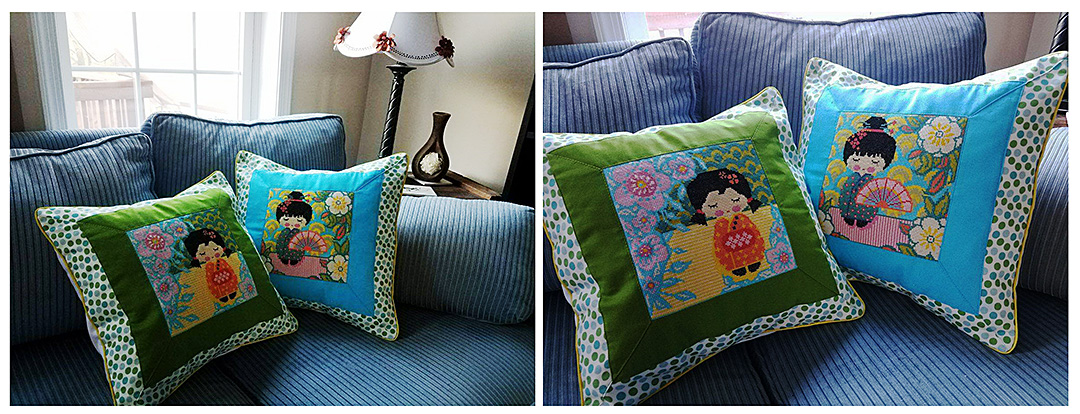
Ta-da! What a gorgeous, collaborative project.
Ta-da! What a gorgeous, collaborative project.
I put these in the mail right away so she could get them on her couch and today while writing this post, I got pictures of the final product!
I put these in the mail right away so she could get them on her couch!
Do you ever collaborate on sewing projects? Tell us about your work in the comments!
———————————————————————————– Charlotte Kaufman is a writer and sewist in Mammoth Lakes, California. She specializes in marine and home interiors and continues to fall more and more in love with quilting. You can follow her at charlottekaufman.com.
Maintenance. It can be a big deal in home, car and… quilt upkeep. That’s right. Just like letting your car go well beyond its oil change moment can snowball into a vehicle that isn’t budging without a major repair bill, not maintaining a quilt in the proper way could result in a sentimental treasure that’s good for little else than — maybe — scrap material. Sure, your quilt might not cost as much as, say, an engine to replace, but there’s more value in something handmade than a dollar sign. Maybe it was a wedding gift from a relative or a crib accessory that your mother started making before you slept your first night in said crib. Those types of belongings can have a lot of worth, so preserving them might be a big deal.
Wear, tear & time
Don’t break your own heart by letting this kind of damage happen to something close to it!
One of the most important details about this preservation is to keep an eye on the products on a regular basis since smaller complications that come from wear, tear and time could be much easier to repair than those that have been expanding for some time. Other important details are to know how to fix the damage and determining if the damage is even fixable. As an example for these aspects, I’ll use a quilt that has some sentimental value to me, but a lack of maintenance has taken its toll. Don’t break your own heart by letting this kind of damage happen to something close to it!
Damage control
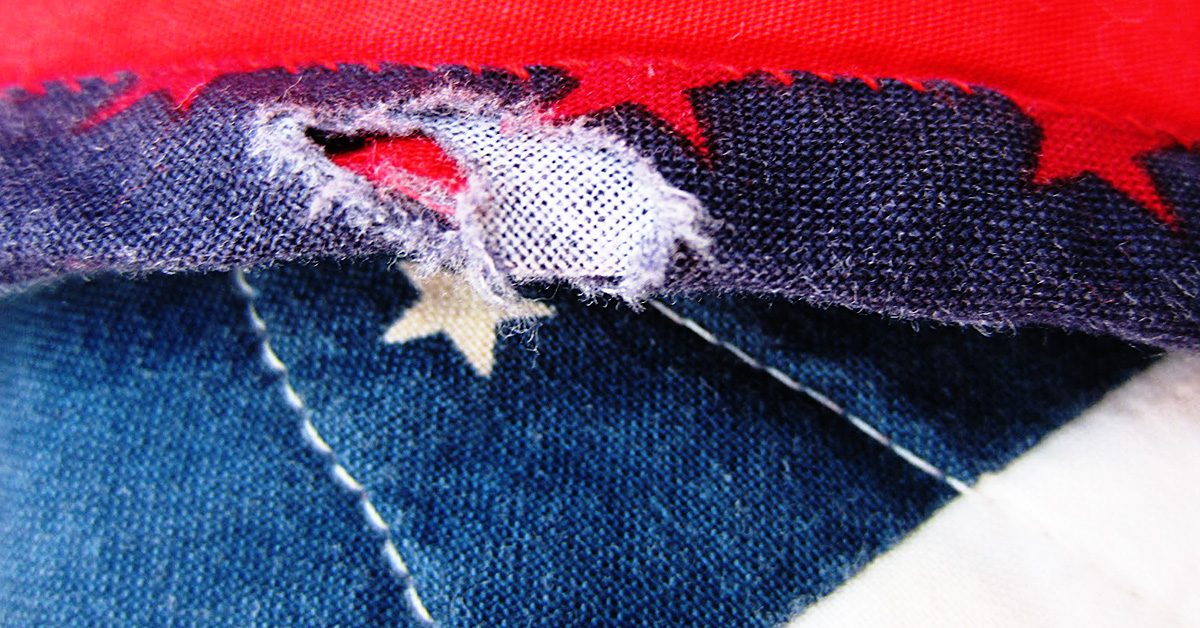
Let’s examine this first spot of damage, shall we?
Let’s examine this first spot of damage, shall we?It looks fairly simple with just two simple holes in the top layer of fabric, so if I begin this examination with the basic question of whether or not it’s fixable, the answer would be yes! The smaller sizes here would allow a little bit of embellishment— maybe a patch— to be placed directly over the damaged area. Since this is a quilt that has a floral design, I could add something like a butterfly there so that it looks like it’s landing on the flower. Sure, it changes the design a bit, but it fits and is corrective. This issue, it seems, was detected in time!
Do away with the fray
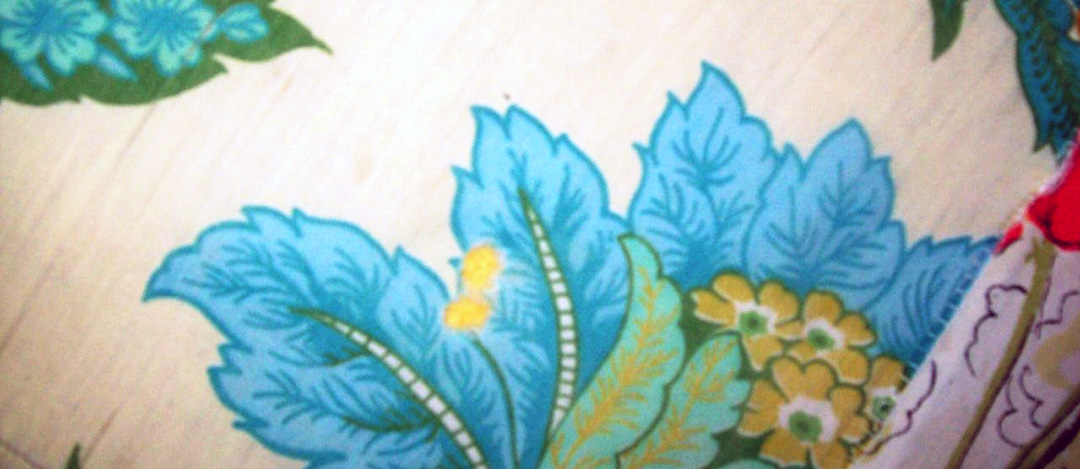
The material is showing wear & tear around the seams and that’s not very surprising!
Now, let’s try this one. The material is showing wear and tear around the seams and that’s not very surprising! The damage does extend a bit beyond the immediate area surrounding the seam, but it still seems to stem from that one line where the thread is running through. So, is it fixable? Yes! All I would need to do is add a border around the block to cover the issue, and if I did that for every block, the strategy would be replicated throughout so that this block wouldn’t look out of place. Again, it would change the design of the quilt, but not in a way that would necessarily make it look odd. I could match the border to the colors already present, and the addition could actually create a popping look for each block.
To fix or not to fix
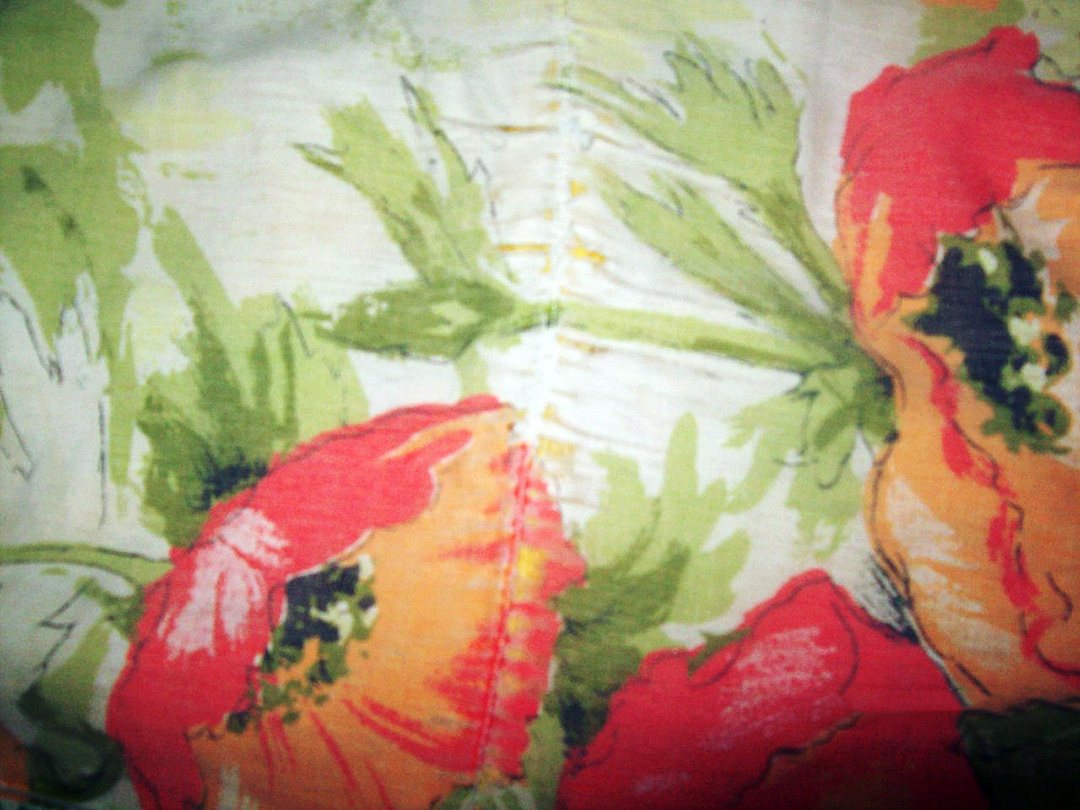
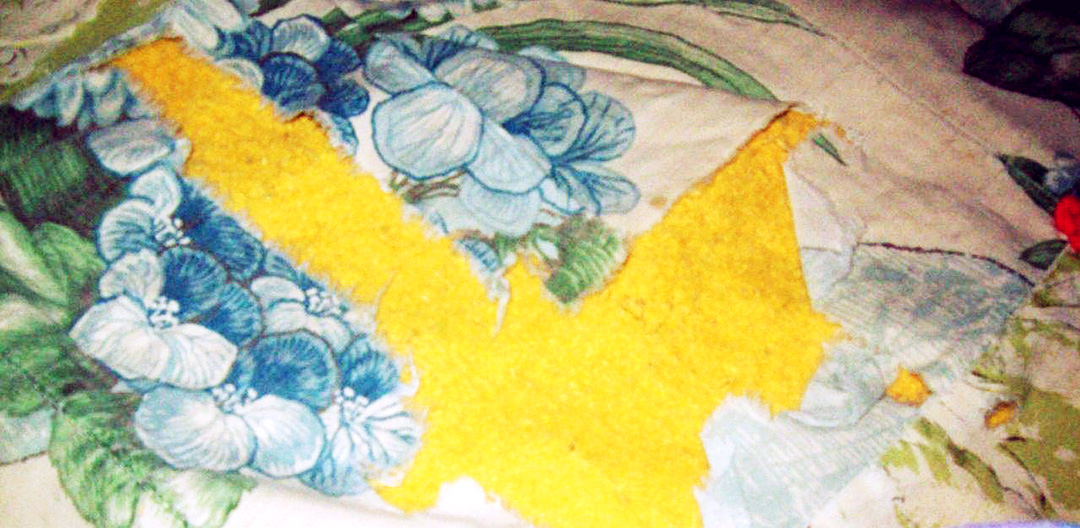
This one is shredded, & the top layer isn’t covering as much material as it did in the prior pictures. But is it fixable? Believe it or not, yes!
How about this one? Well, the damage here is much more drastic than a simple tearing from stitching or tiny holes in the fabric. Instead, this looks more shredded, and the top layer isn’t covering as much material as it did in the prior pictures. But is it fixable? Believe it or not, yes! Since this area is at the end of the quilt, changing the size of the quilt could work. I would need to cut off enough material on this side of the quilt so that the damaged territory is done away with and redo the border work. It’s not as easy of a fix as sewing on a butterfly embellishment, and the appearance of the quilt would definitely be altered by the smaller territory. But, if pressed, this would be a fix!
Too far gone?
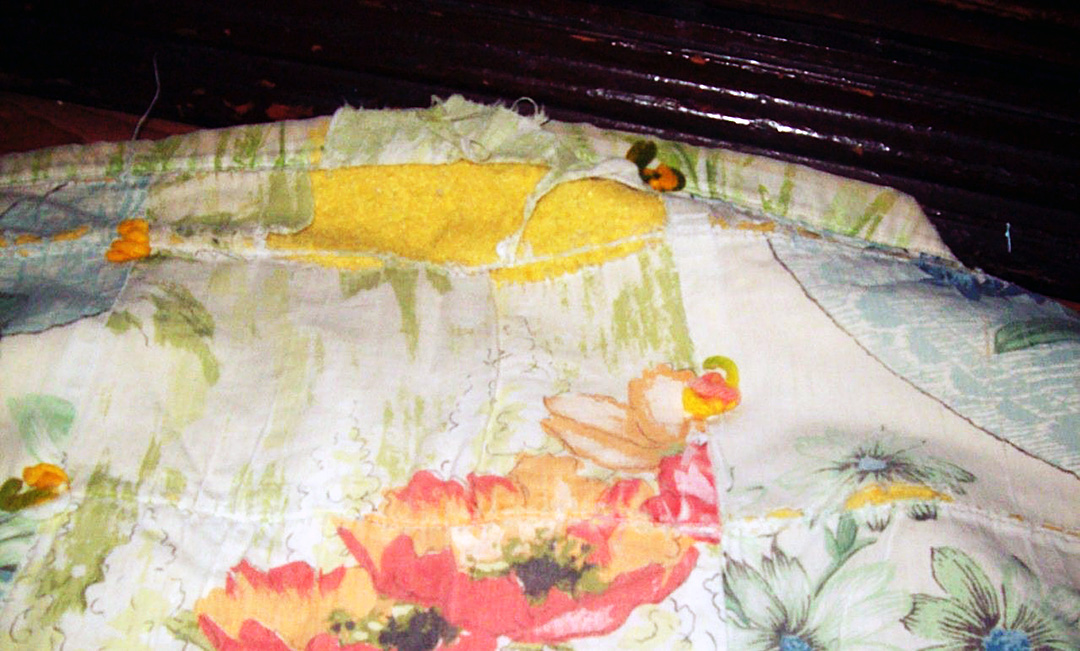
The fabric became too worn, whether from use, washing, time, or some other variable, & without the proper methods to fix the problem, it spread.
Now, we get to this one. Here, this looks as if the fabric became too worn, whether from use, washing, time, or some other variable, and without the proper methods to fix the problem, it spread. Of course, there could be another explanation for it. Perhaps someone ripped it, and the damage grew. Whatever the reason, the faulted block is in the midst of the quilt, and this fabric probably won’t go together at this point. This one, dear readers, doesn’t seem to be strategically fixable. In my defense, this damage could have happened before I got into sewing, but if I’d paid attention and caught a small hole in the fabric, I could have embellished it. If there was a tiny rip, I could’ve stitched it. As it stands though, the only ways I can see to fix this would be to add on an embellishment that would be too large to look natural or change the entire block— which would throw off the pattern of the quilt. This one, it seems, has gone too far.
And this is precisely why you should keep an eye out for damage! If you catch the smaller problems, you can fix them. If you let them escalate, you could be looking at a ruined quilt. So to preserve your works, keep tabs on them and— through borders, embellishments, and adjustments— tend to those issues as they show up!
This week, I decided I’d write a bit about popular sewing myths. I have my own list but thought I’d do a quick Google search to see what others had written about the subject. This brought me to a few sewing myth lists that I found rather odd, and not at all myth-like – meaning I thought the myths were myths. Do you follow me?
I’m going to start with some things I do believe are myths, and then get the myth myths part.
Myth 1: quilting direction
It’s ok to quilt some rows up and some rows down when quilting a garment.
Not true. There will be less possibility of bubbling or puffing if you quilt all the rows in the same direction. Overall, the whole garment will look better.
Myth 2: smaller underlining
The underlining should be smaller than the fashion fabric, especially on a jacket.
Not always true. It really depends on the fabrics being used. Hair canvas should be slightly smaller to prevent buckling but it will also restrict the give or stretch of a fabric it is joined with. Many tailors cut their canvas on the bias to prevent this.
Myth 3: cutting selvage edge
Always cut off the selvage edge.
Not true. If you think the selvage will shrink, clip the edges so it will lie flat. Otherwise, there is no need to cut it off.
Myth 4: basting stitches
Stitch next to basting stitches when sewing a basted seam lines.
Not true. If you do have the need to baste seams together, always sew right on top of the basted lines for accuracy.
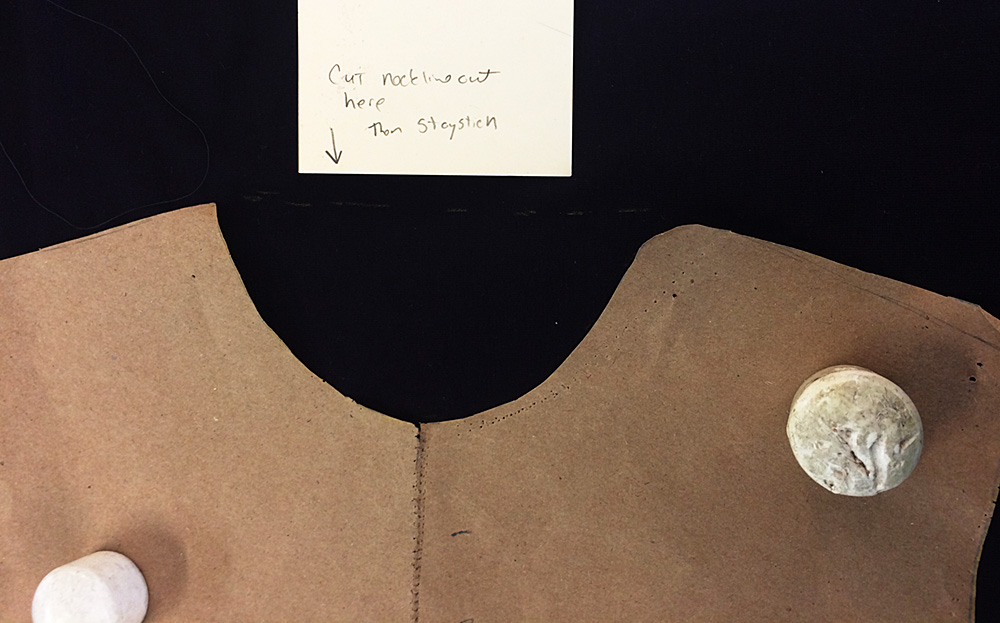
Myth 5: necklines
Machine stay stitch necklines to prevent stretching.
Another, more accurate way to prevent any stretching in your necklines (and arms eyes) is to leave a whole bunch of seam allowance until you’ve done your stay stitching.
Not always true. You can also hand baste your seam line, also called thread tracing. If you do machine stitch your necklines, take special care not to stretch the fabric as you sew. Another, more accurate way to prevent any stretching in your necklines (and arms eyes) is to leave a whole bunch of seam allowance until you’ve done your stay stitching. When it comes to necklines, I usually cut a straight line from shoulder seam to shoulder, leaving all the extra fabric there. If I’m bias binding the neck edge, I attach my bias without trimming anything away too. This prevents any possibility of the neckline stretching.
Myth 6: top = waistline
The top of your pants or skirt is your waistline.
Very often not true. Your waistline is where your body is the smallest, most times an inch or so above your navel. This is why, often, when you measure a pair of pants that is sized as a 27, the waistband of the pants measures more than 27.
And now, for a few sewing myth myths.
Myth myth 1: $ewing cost too much
Sewing is too expensive.
This really depends on how you look at. Sewing is not necessarily expensive but it isn’t cheap either. Especially, most especially, if you are taking into account your time. I earn my living by sewing. And my years of experience and knowledge aren’t cheap. Sewing is a skill. I always ask people what they pay their car mechanic or plumber an hour. Often, it’s somewhere in the 60 to 100 dollar and hour range. If you don’t want to pay that amount of money, you figure out how to do it yourself. The same goes for sewing.
If you’re making something for yourself or as a gift out of love then it could possibly be cheaper than buying the same thing. But remember, nice high-end fabric and supplies are not cheap, nor should they be. If you want cheap, buy clothing made in Malaysia or Bangladesh sold at Old Navy or someplace like that.
Myth myth 2: sewing is the hardest
Sewing is too hard.
Well isn’t not exactly easy, either. To sew really well takes practice. I find it incredibly annoying when someone says something like, “It’s just an easy alteration, it won’t take long.” If you don’t sew, how do you know? And if you do sew, you should know that sometimes you open a thing up to do what should be an easy alteration and find you’ve just taken the lid off a proverbial can of worms.
Myth myth 3: sewing super powers
Sewers have special creative talents.
I believe everyone, if they put their mind to it, can learn how to sew. But saying that sewers (I actually hate that word) do not have special creative talent is ridiculous. I think I’ve said this before, but really good tailors and pattern makers know the language of fabric. I don’t know how else to put it. And that, is indeed, a special talent.
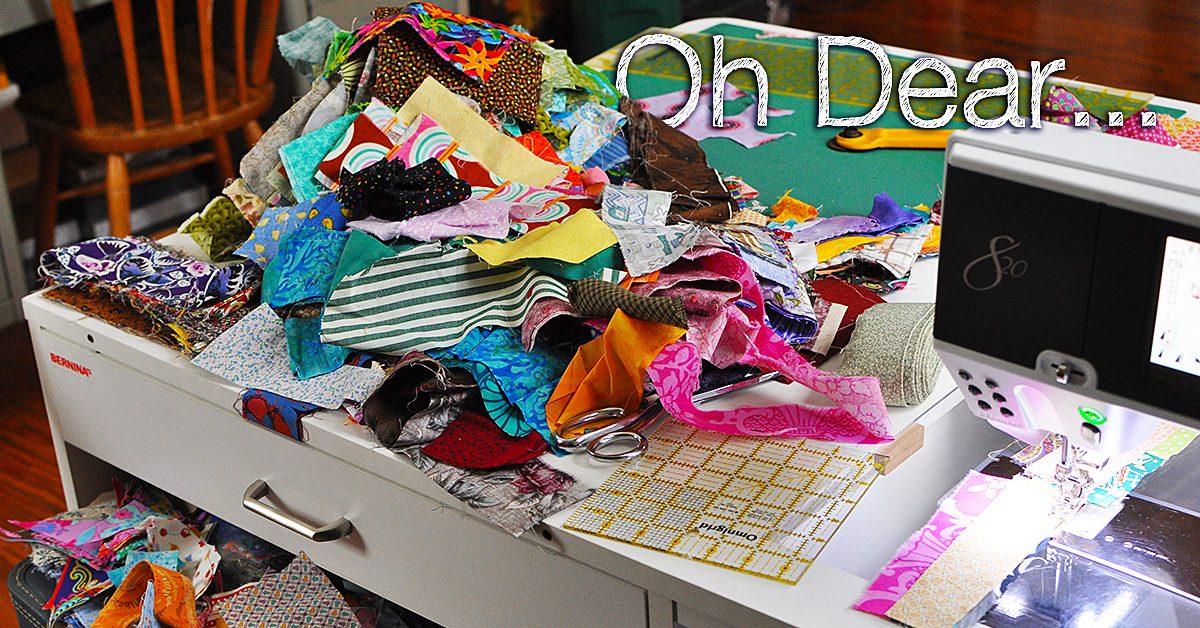
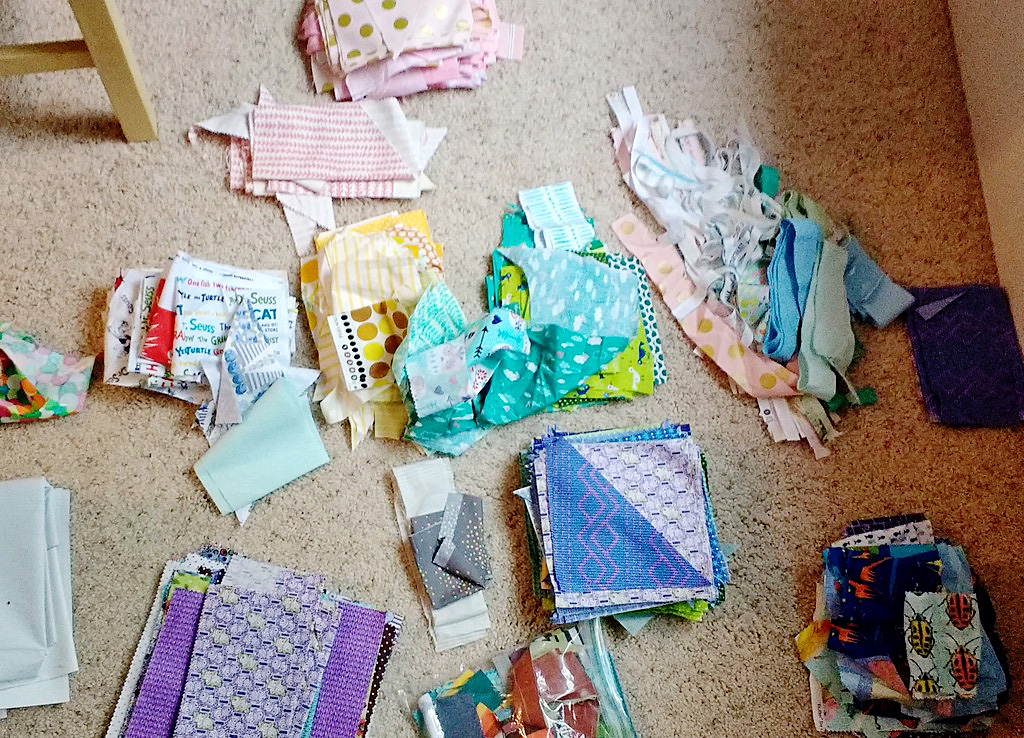
It only took me six months, but I finally organized my fabric scraps after our move.
It only took me six months, but I finally organized my fabric scraps after our move to this new town and new house. When we made the move, I dumped my two huge bins of scraps into a few shopping bags and tucked them away until this glorious moment when they would not only be sorted, but have a place to reside.
Bits and pieces
Why should one keep & organize fabric scraps?
Why should one keep and organize fabric scraps? Here are some reasons to consider.
Fabric is expensive. Long sized strips, and smaller pieces can be reused for a vast amount of projects. The internet is a trove of fabric scrap project ideas.
Out of sight, out of mind. The reverse of this is true as well. When you have your scraps visible, you are much more likely to use them and be aware of what you have available.
Have a favorite color? It probably shows in the types of fabric you buy. Take a look at your pile of scraps and try to use up more of that color before you buy a few more yards.
Many people cut their scraps to standard sizes. If you have a size of fabric you constantly seem to go to, make your life easier by making your own pre-cuts out of scraps.
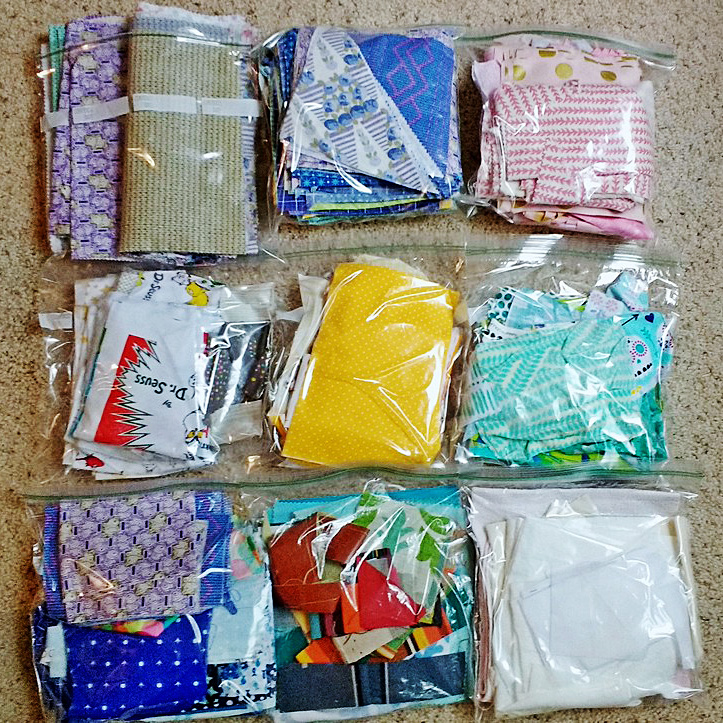
Scrap bags
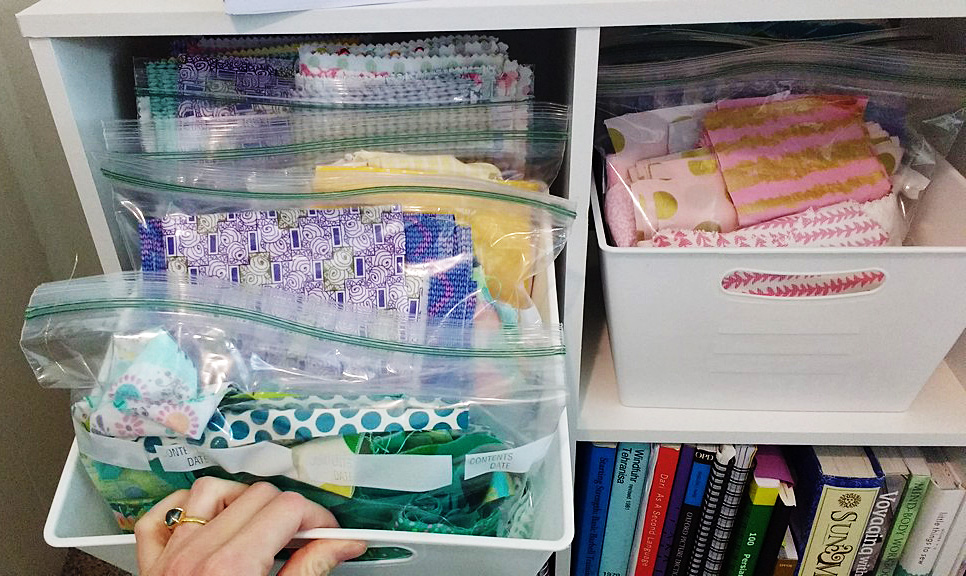
I ultimately made 9 bags of folded scraps.
I ultimately made 9 bags of folded scraps. They included the following (from left to right):
All of my precut Layer Cakes (10” x 10” squares)
All of my other-sized precuts
Pinks
Whites
Yellows, tans and oranges
Greens, teals and aquas
Blues and purples
Heavy duty fabric scraps (canvas, Sunbrella, etc)
Utility fabric scraps (batting, white out fabric, mesh, etc.)
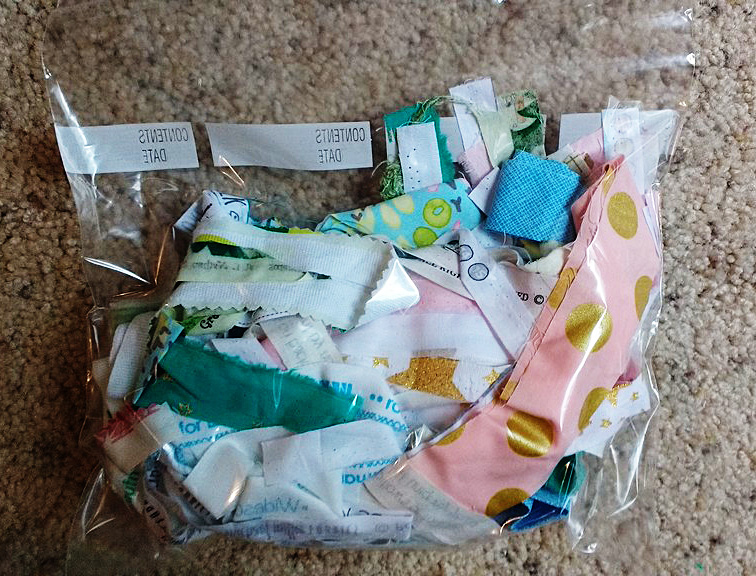
One of these things is not like the others…
Bag #10 holds all of my selvage edges & very thin strips of fabric.
There is also a 10th bag (but it didn’t fit well in the group photo above). This holds all of my selvage edges and very thin strips of fabric. I have a huge wish list of projects to make from selvage edges. Perhaps I’ll write a post soon showing you the world of possibility with saving those thin strips!
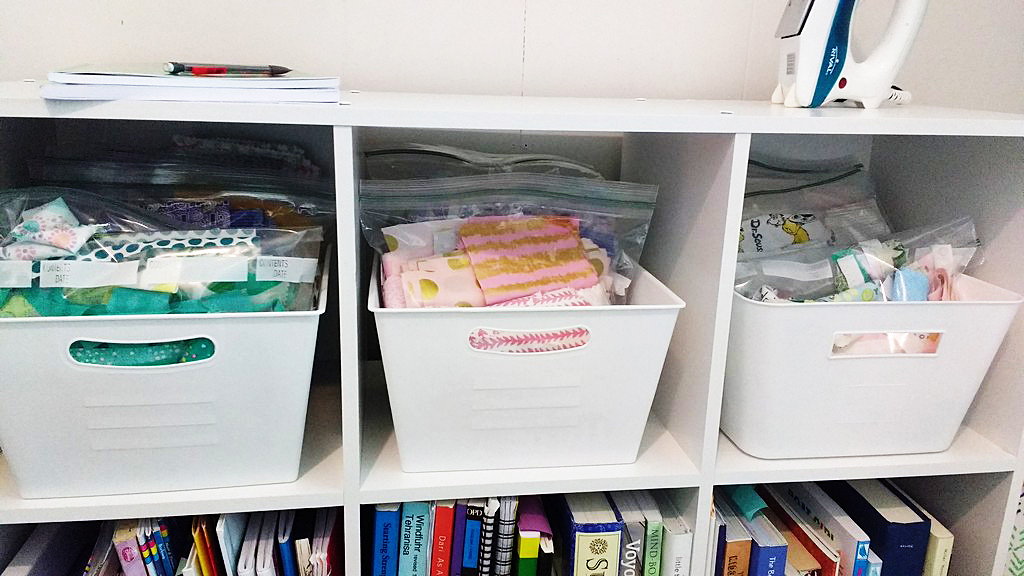
A place of and for my own making
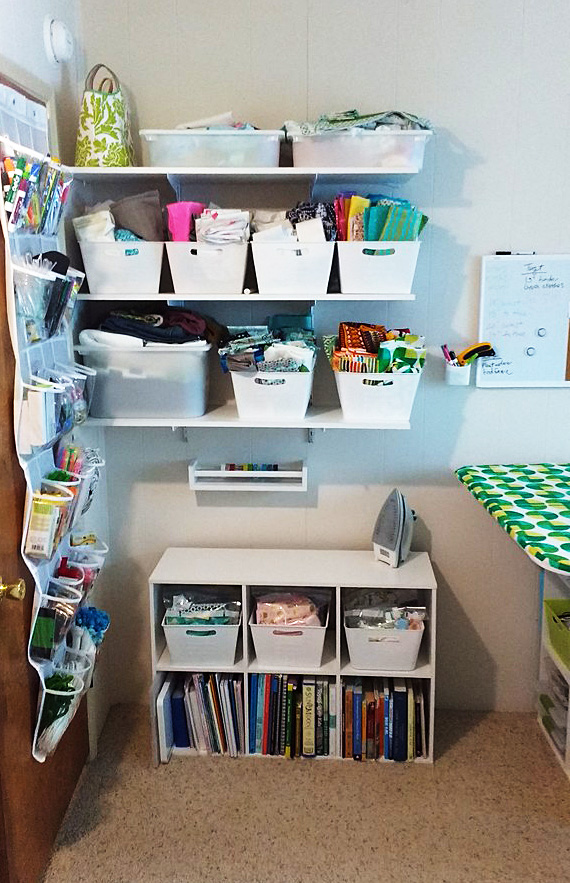
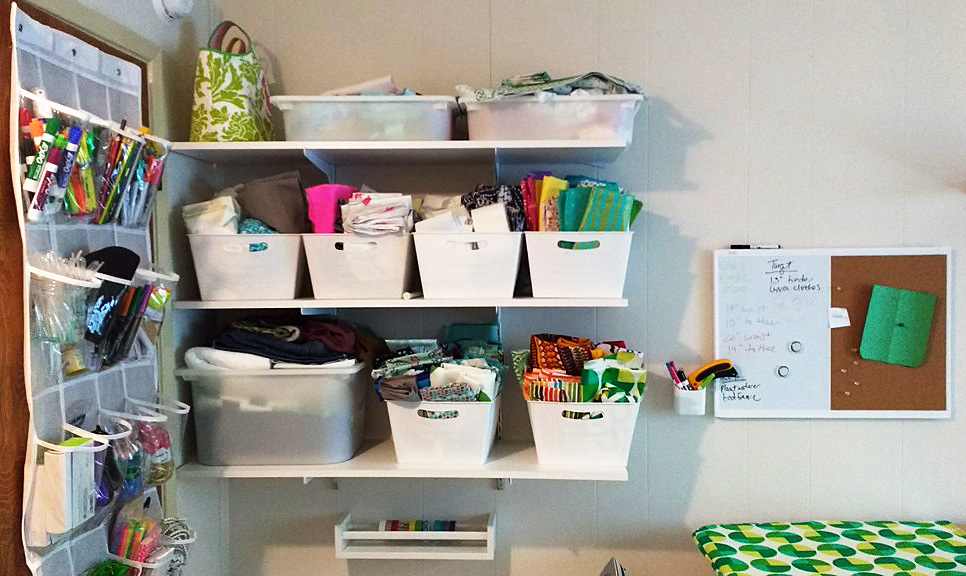
Welcome to my fabric corner.
This is my fabric corner. The upper shelves hold my larger stash of fabrics, so pieces that are a fat quarter size or larger. The lower shelves hold my iron on top, and my fabric scraps in the bins below.
Dirty little secret: I just tuck larger pieces in wherever I find room.
I’d love to tell you that I have my larger pieces organized in some kind of fancy way, but I really don’t. I just tuck them in wherever I find room.
Behold! A place for everything & everything in its place.
Can you see how lovely the organization of these scraps is? The easy access and keeping them visible by my work space means I’m often including them in my daydreaming when it comes to new sewing projects.
Do you store your fabric scraps? If so, tell us where or how you do!
———————————————————————————– Charlotte Kaufman is a writer and sewist in Mammoth Lakes, California. She specializes in marine and home interiors and continues to fall more and more in love with quilting. You can follow her at charlottekaufman.com.
Choose the right type of sewing thread for your next project
Any sewing enthusiast knows that a seam is only as good as the thread that holds it together. From polyester to silk, the type of thread you choose for your next project can leave you happy — or horrified. Luckily, we’ve put together a brief rundown of five popular types of thread, so that next time you’re at the fabric store, staring down hundreds of spools, you can confidently pick the right one for the job.
Cotton thread
Cotton thread is washable & wearable but has “give” — which makes it great for quilting, piercing & appliqué projects.
A common “go-to” for many sewing enthusiasts, cotton thread is washable and wearable but has “give” — which makes it great for quilting, piercing, and appliqué projects. Keep in mind, though, that the lower the weight, the heavier and thicker the thread. If your next project is a thin blouse or lingerie set for example, consider using 50 weight cotton thread: this thin thread has less bulk, so your seams will lay flatter. For an “all-purpose” quilting thread, a middle-of-the-road 40 weight cotton thread is ideal (for both machine and long-arm quilting); it’s thin enough to glide easily through thick fibers, but strong enough to secure your quilt. Finally, a 30 weight cotton thread has the thickness necessary for dramatic accents in topstitching and quilting stitches.
Rayon thread
Rayon is relatively inexpensive & provides a decorative finish with shine.
The most commonly used thread for embroidery, rayon is relatively inexpensive and provides a decorative finish with shine. Rayon thread also has high tensile strength: it doesn’t break easily and is very stretchable and flexible, even when wet. However, rayon is usually not colorfast and often fades or bleeds from fabric.
Polyester thread
Stronger than rayon thread, polyester thread is a great “all-purpose” choice that can be used for most sewing projects, both hand- & machine-sewn.
Stronger than rayon thread, polyester thread is a great “all-purpose” choice that can be used for most sewing projects, both hand- and machine-sewn. Polyester thread has some “give” to it, so unlike cotton, it won’t break when you use it with stretchy fabrics; polyester thread also remains bright after several washes. If you need a thread that will slip through fabric easily, you can also choose a glazed polyester thread, which will have a wax or silicone finish. It’s important, however, to avoid using glazed threads for machine-sewn projects, because the glaze can rub off and jams your machine.
Metallic thread
Designed for embroidery, quilting, & decorative stitching projects, metallic thread can be used to create beautiful topstitching designs.
If your handbag needs touching up, metallic thread may be the perfect choice. Designed for embroidery, quilting, and decorative stitching projects, metallic thread can be used to create beautiful topstitching designs. Often available in gold, silver, and copper varieties, metallic threads are smooth, strong and vibrant.
Silk thread
Thin but strong & flexible with a lot of “give,” silk thread is also ideal for basting stitches and tailoring curved areas.
When sewing silk or wool fabrics, silk thread is the obvious choice. Thin but strong and flexible with a lot of “give,” silk thread is also ideal for basting stitches and tailoring curved areas.
Now choose wisely
Overall, the key to a durable and professional-looking finish is choosing a high-quality thread that closely matches the weight and fiber content of the fabric you’re working with. Take it from us: using the perfect thread will make sewing your next project that much more enjoyable.