It's National Sewing Month!

It’s National Sewing Month!

As a writer, I was well aware there’s a National Novel Writing Month (NaNoWriMo) that happens in November. As a person who sews though, I had no idea there was a month dedicated to sewing, until this week. Imagine my surprise to find that not only does National Sewing Month exist, but it’s this month — September! Essentially, I found this detail out with less than a month left to officially celebrate, but I suppose learning late in the month is better than having to wait until next year to utilize the concept.

I was surprised as well that this status isn’t something that a random sewing fan made up. Rather, this is something that Ronald Reagan declared back in the 1980s. That’s right. This is a former president’s declaration, and it pretty much boggles my mind that something like a sewing month would be noted by a President of the United States. It seems solid evidence that the world of sewing is more far-reaching and popular than what I might have thought when I first dove into it.

Now that I’m aware — and maybe you are too because of this post — that this month is dedicated to sewing, the question arises about how to celebrate it. There are plenty of options to do so, but seeing as how over half of the month is already gone, whatever celebrating you do would have to be fairly quick-paced! Regardless, there are still ways to fit your celebration into your end-of-the-month schedule, like with these possibilities!

Make a quick project

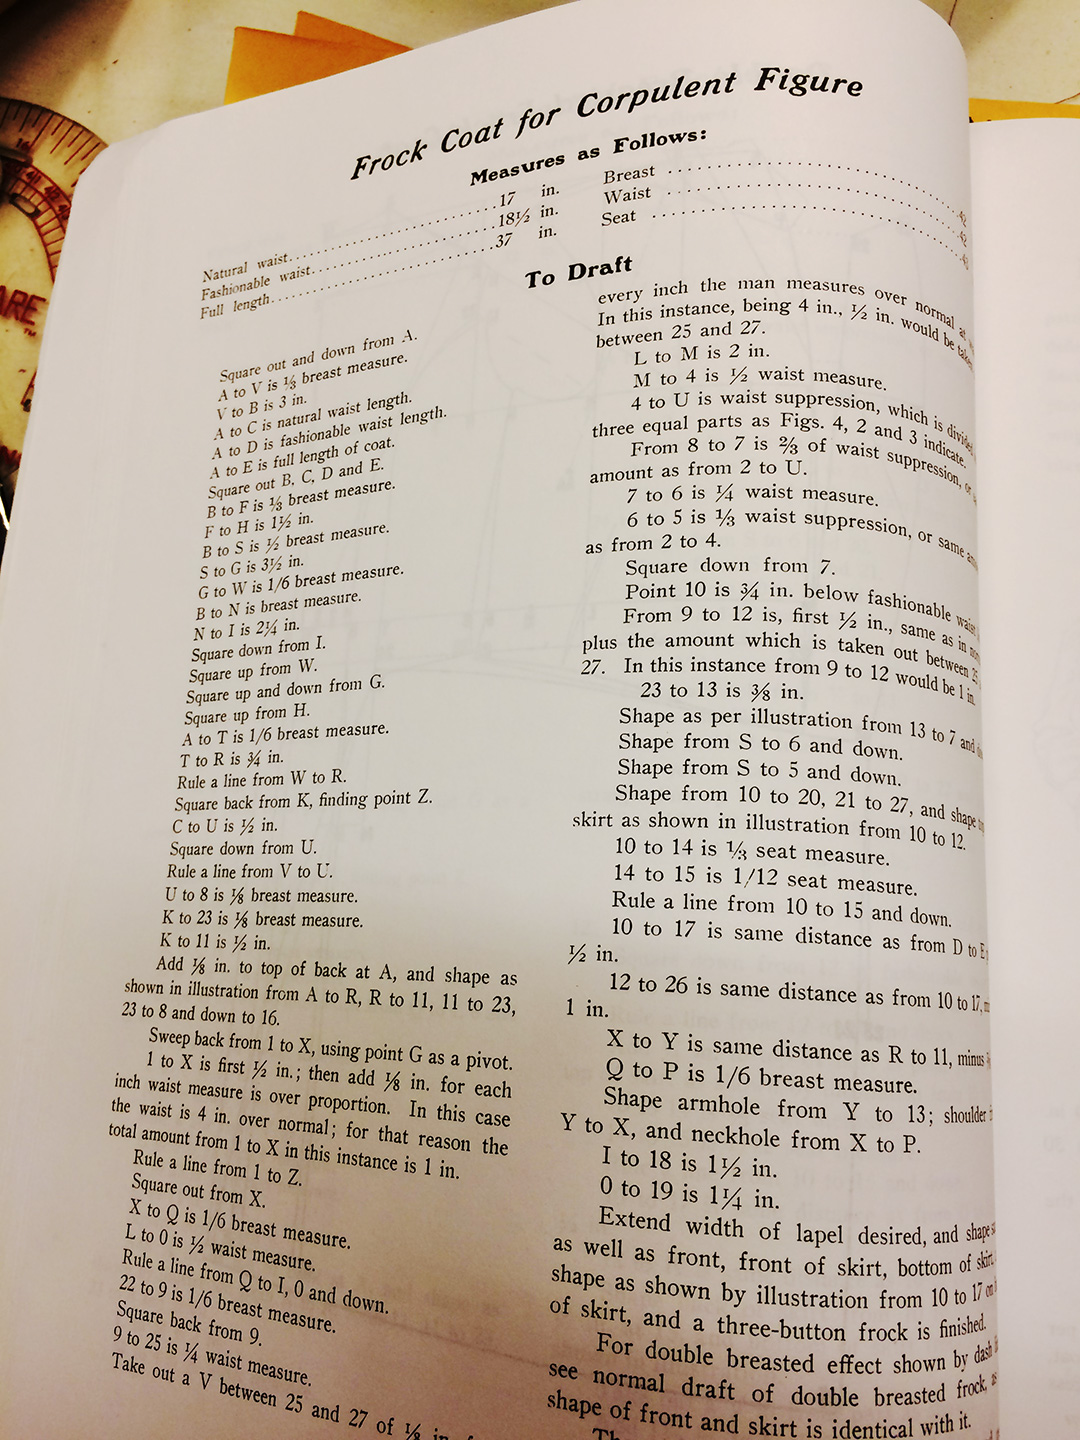
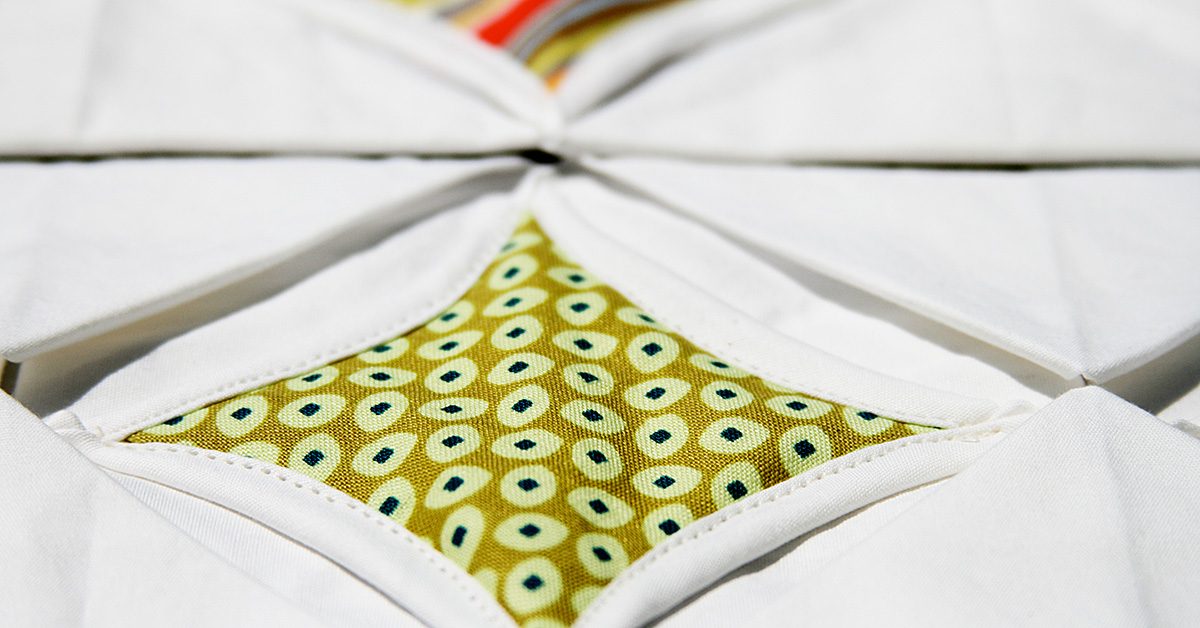
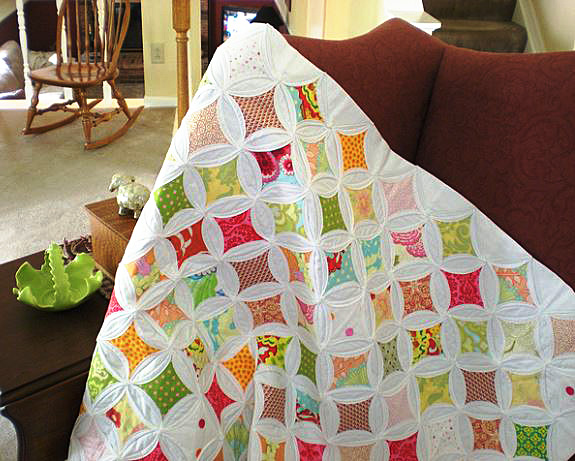
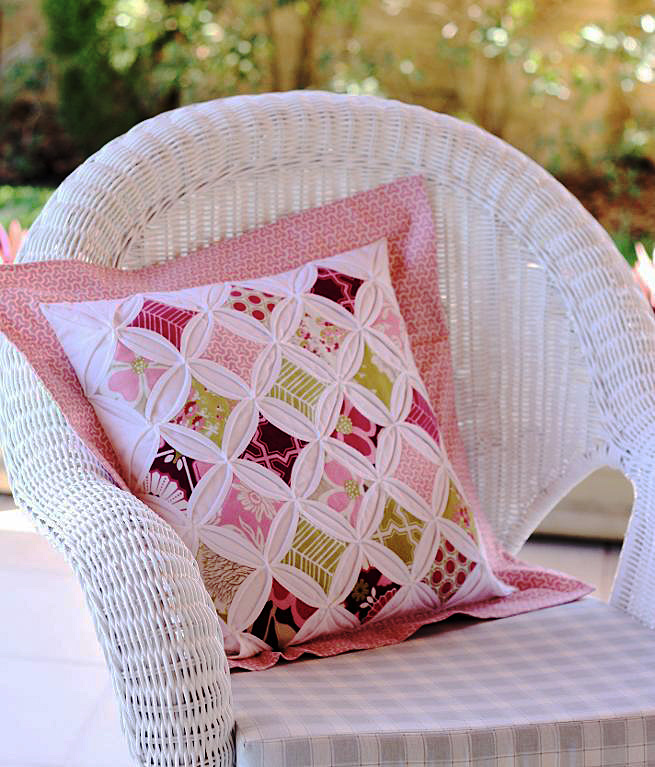
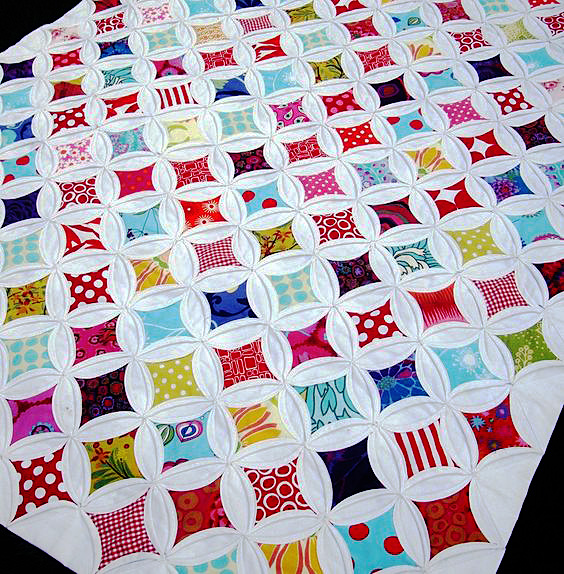
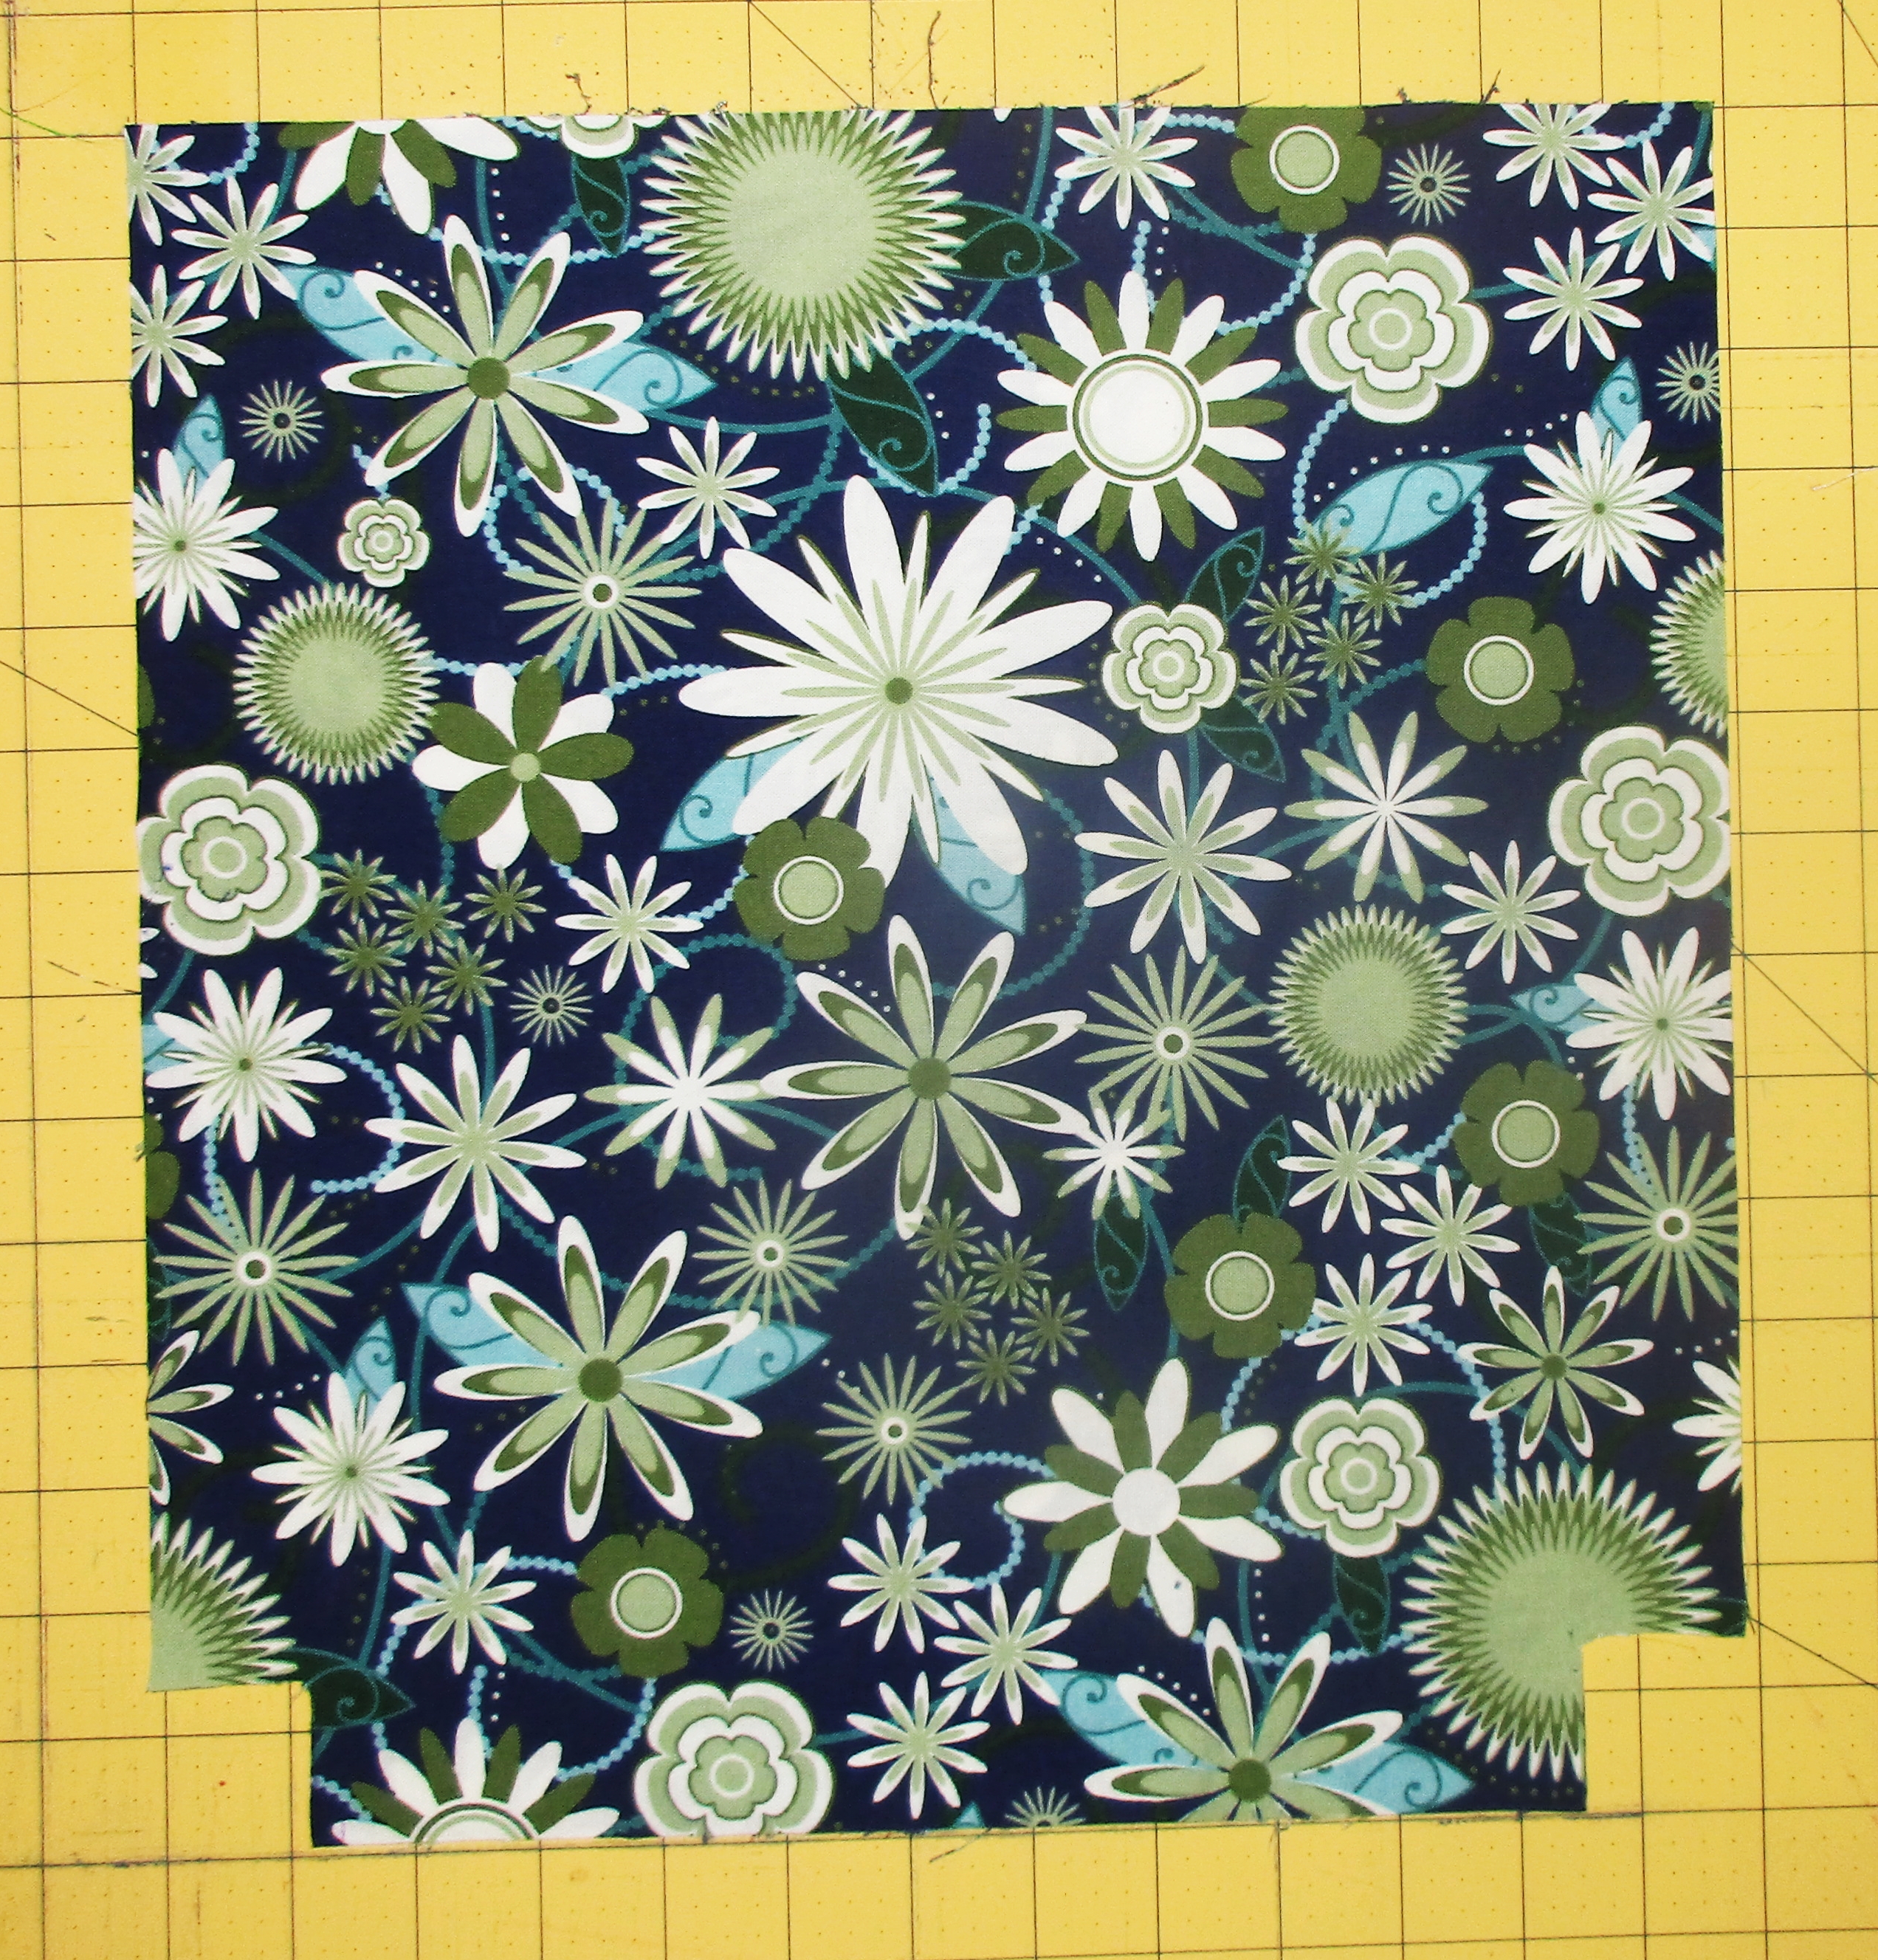
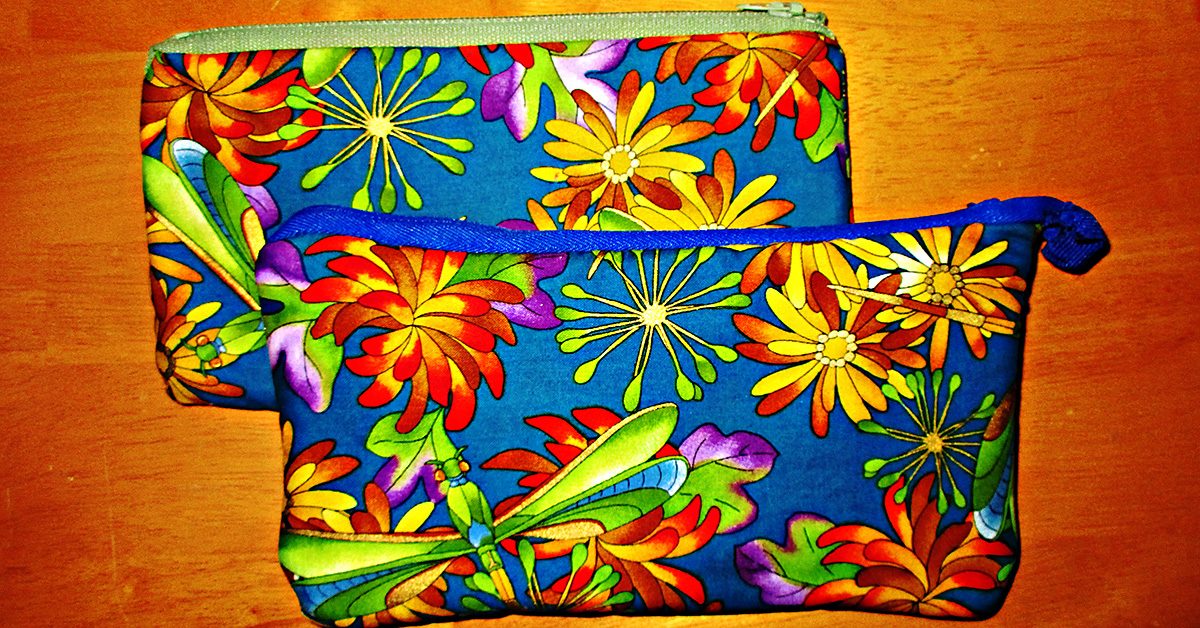
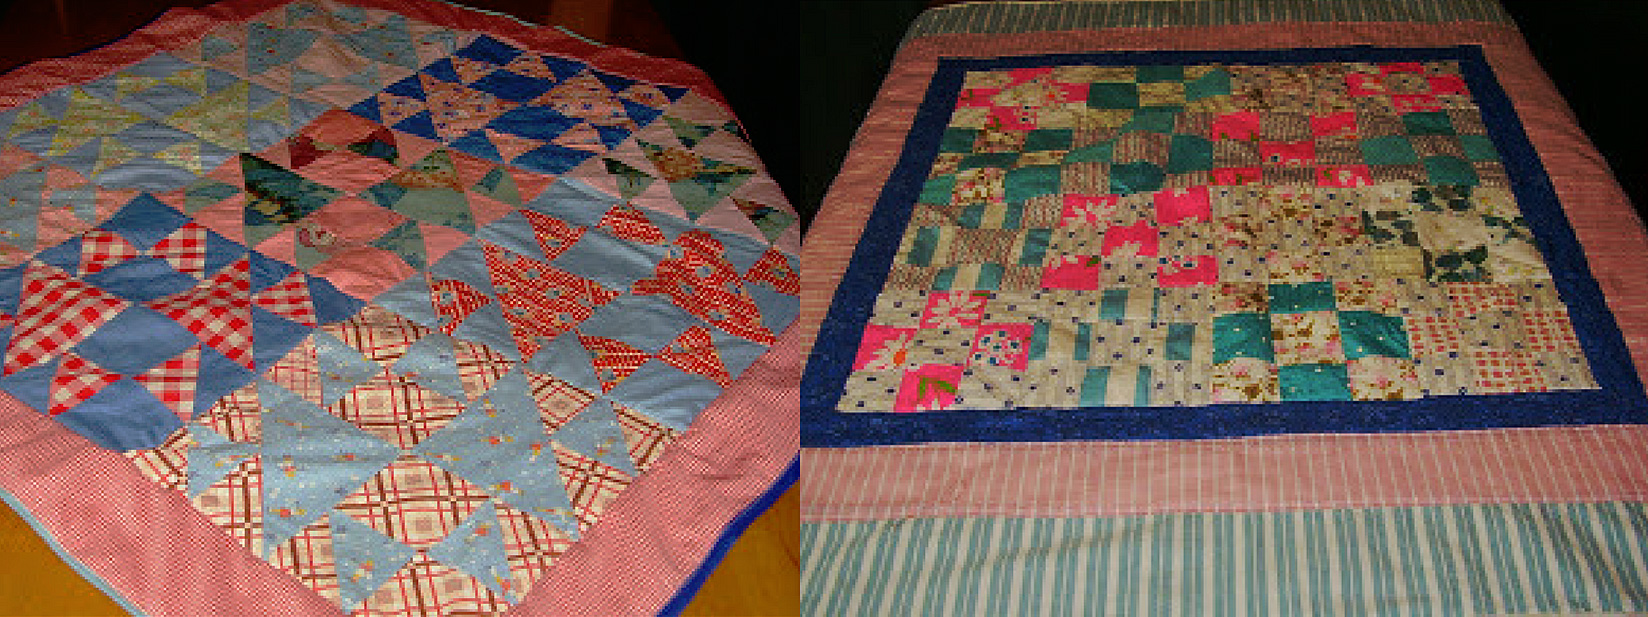
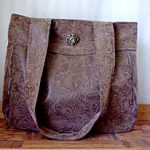
While some sewing projects can take a long time to make, other projects can be done in a day or less — and these are great prospects at this point for celebrating National Sewing Month before it ends. This concept can vary depending on how fast you are with sewing. For instance, something like a quilt might be a project that one person can finish in a week while another person requires longer. A guiding factor for this possibility then is your own ability and time frame. If you can manage a bigger project, go for it! But if you feel more comfortable with something smaller, like a fabric coaster or throw pillow, choose one of those options. As long as you have enough time to wrap up the loose ends before October 1st, you’re in good shape!

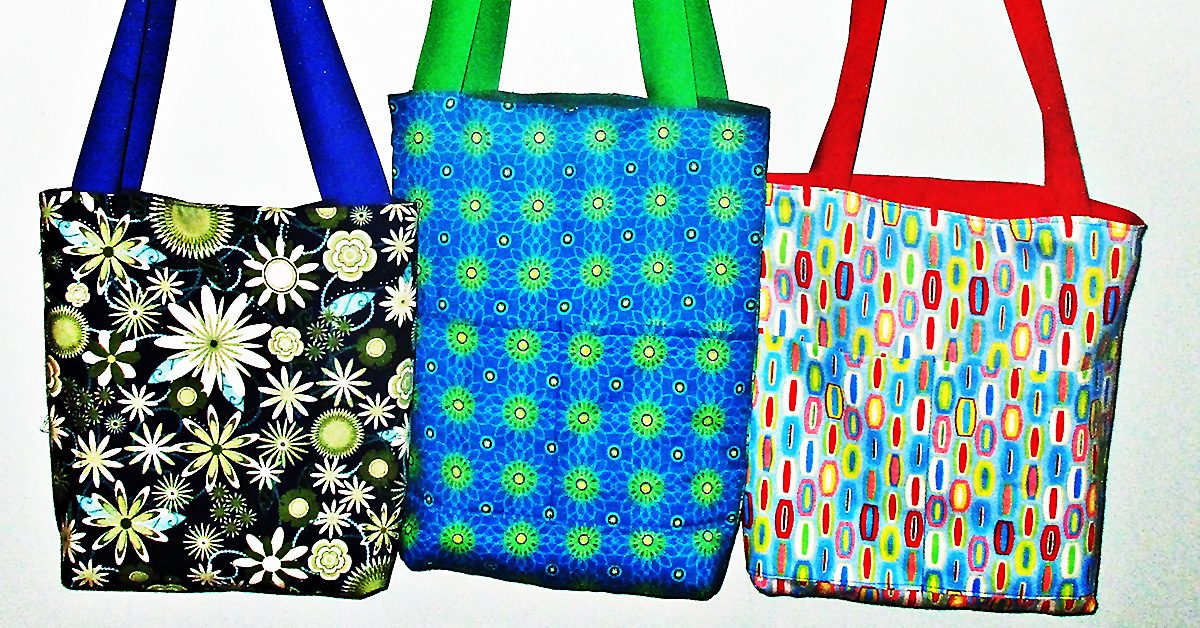
A great idea for this project would be to work on a homemade gift that you can give someone later in the year for a Christmas present. This can give you space to craft that gift and an excuse to revel in a month dedicated to sewing. Win/win, right? If you’re looking for sewing projects, Sewing Machines Plus has free project ideas available here that you can browse through to find a National Sewing Month project.leaf-flower-petal-celebration-heart-food-1250761-pxhere.com

Take a sewing class

Sure, a number of programs that you can take have specific start and end times, and you can’t just decide for those options that you’re going to start a class right now. For other possibilities though, there’s room to maneuver, particularly if you take a class you can finish in a virtual setting with timed videos. Craftsy, for instance, has classes with videos of certain lengths, and if you schedule your time effectively, you can finish one of them by the end of the month.hand-needle-girl-woman-vintage-tool-706616-pxhere.com

One other option would be to start a program this month even though you know it’ll extend farther than the beginning of October. Penn Foster programs, as an example, can allow you that kind of freedom to simply decide to register for a class today and work your way through at a personal pace. It’ll extend beyond September, but September can still be the month that led to you making the choice to enroll.

Buy a new piece of equipment

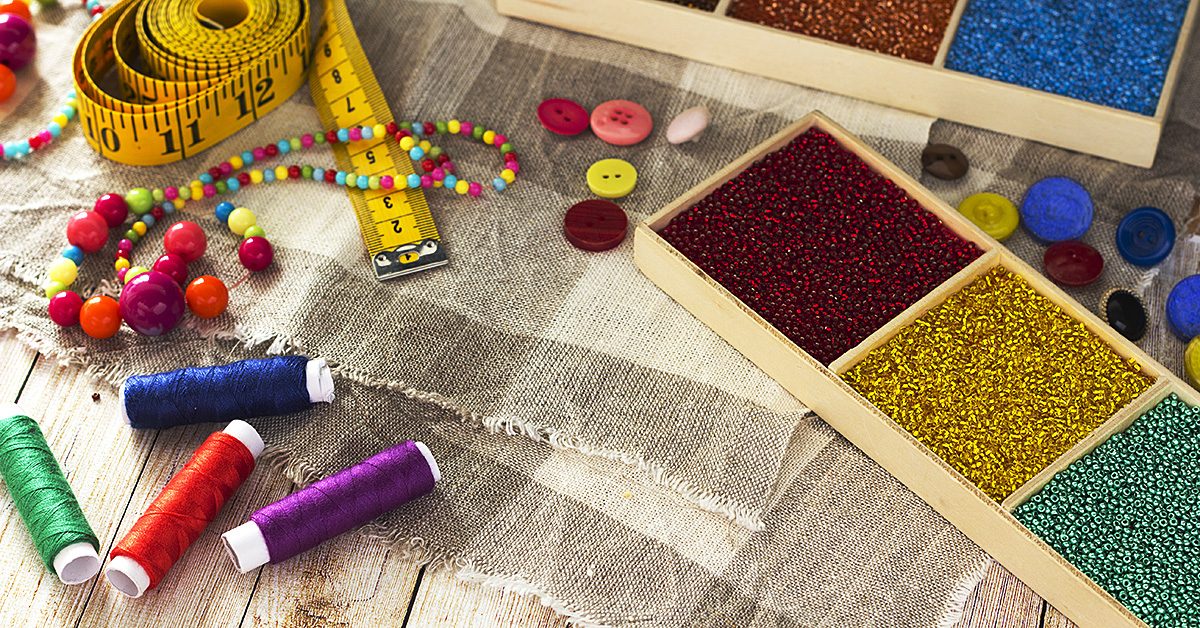
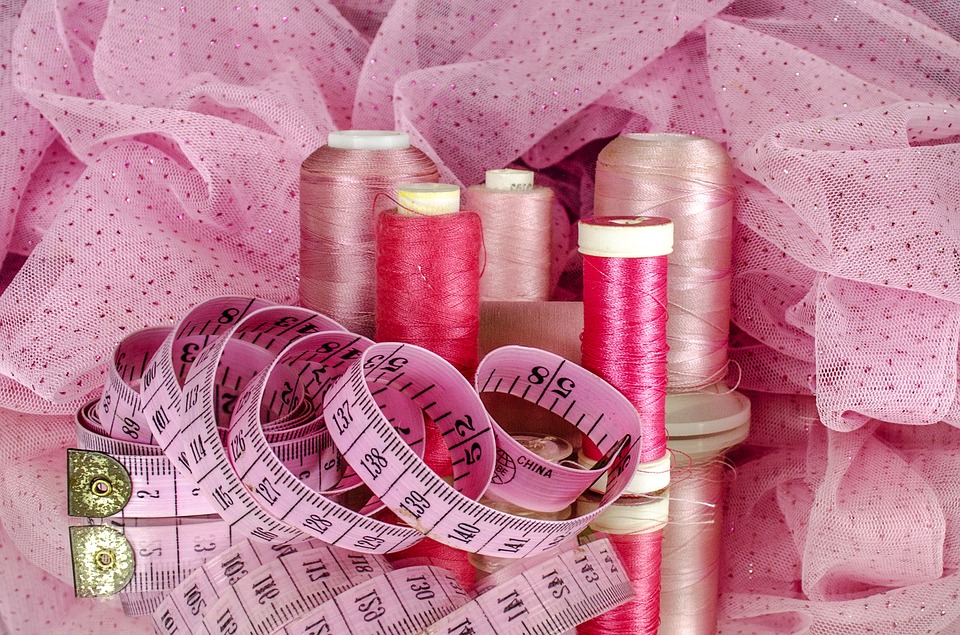
If you want to treat this month as something worth celebrating, why not go all out and buy yourself a gift for the prospect? You could even extend the prospect outward by buying small sewing supplies for friends and family who enjoy sewing as much as you do, like new thread or fun pattern kits. This way, you can spread the enjoyment of National Sewing Month beyond your own personal collection.hand-sewing-sewing-machine-art-design-handicraft-759263-pxhere.com

That doesn’t mean you should feel bad about adding to your own sewing stash though, and there are plenty of ways to build your supplies in honor of the month. If you need a new sewing machine and can splurge just a bit, celebrate Sewing Month by bringing your dream sewing machine home. Check out Sewing Machine Plus’s site for possibilities on the matter!

Smaller details, like a new sewing kit or interesting fabric, can also be ways to celebrate the month if your budget won’t allow for a new sewing machine, and a few extra dollars can lead to a tiny contribution to your sewing supplies in honor of the month. If you can work even a new pack of straight pins into your budget, it’s a method of celebration!

In any event…

I feel a bit of camaraderie with my fellow sewing fans this month, given our shared interest that was valid enough for a president to declare a month for it.

So to these fellow craftsmen, happy National Sewing Month!

Sewing for a Living

Sewing for a Living

For the lucky people who discover early on what they want to do for a living, picking a career can be as easy as following interests. But sometimes, knowing your primary interest isn’t enough to form a decision on a career since you don’t know what in the world you could do in the field that would actually make you money. I mean, come on. I could love collecting quarter-machine stickers, but unless at least one of them become a collector’s item, what exactly am I going to do career-wise with that interest?Sewing1

You might have a similar struggle with sewing since it’s often treated as a hobby or a practical exercise, but as hesitant as you might be to try your hand at it for a living, you can absolutely earn money working in the sewing world. In fact, Sewing Machines Plus is currently hiring salespeople. Just sayin’.

If you’re looking for something a little different than a salesperson though, here are six career options that you can explore to make cash with your interest in sewing.

1. Be a seamstress. This might be the most obvious choice, so let’s go ahead and cover it! As a seamstress, you’ll have the opportunity to be the community go-to for sewing repairs, which works out well since certain people aren’t interested in making those repairs themselves! You can use your interest to earn money while helping out people with their clothing needs. Sound good?

2. Make clothes. On the same train of thought, you can make clothes to sell for people who don’t have the interest or skill to make these projects themselves. If you can construct something fancy, like a prom dress, you might find that you can make real money for weddings and dances by allowing people to have more input in their clothes designs than they can get by shopping retail. It might take time to prepare yourself for these kinds of tasks, but talk about the creativity involved with this one!Sewing5

3. Write. If you have interests in sewing and writing, this is a good fit! You might not find that perfect writing opportunity as soon as you start looking for it, but trust me when I say that a consistent effort in looking for freelance writing jobs can lead to some possibilities that are in line with non-writing interests. Fitness, education, and traveling are varied topics that you could find freelance offers for, and they’ll hopefully give you an idea of how assorted freelance subjects can be. It’s reasonable then to believe that someday a sewing-related possibility could come your way if you keep searching for it! You might even end up with a career writing regularly for a famous magazine that deals with sewing.

4. Own a shop. There’s variety in this option because your shop could be for a number of things. Maybe it’s exclusively to sell the clothes you make, or it might be a collection of community sewing projects all sold under one roof. Maybe you’re only interested in selling quilts, or baby supplies, or handmade home décor… Whatever your niche and however far your reach for merchandise, if you have the knack for running a business, this might be the career for you!Sewing2

5. Teach. If you search online *right now,* you could find job listings for tutors or teachers in the field of sewing. This makes sense since sewing beginners might breathe a little easier with someone there to guide them in their early projects and learning experiences. You might not even have to look online to get a chance at this type of job if you happen to know someone who wants to learn to sew. Then maybe one student leads to another, and perhaps one day you can have a full class of people waiting to learn about sewing. As a side note, if you’re technologically inclined, you might think of filming classes, making them look professional, and selling them as DVD’s through vendors. It might take a while for this to really take off, but that doesn’t mean it can’t happen!

6. Make Patterns. It’s entirely possible that you adore sewing, but you’re not overly interested in teaching the practice. Maybe your appreciation of the sewing process is primarily in the most technical aspects—like building patterns. If so, be aware that a pattern maker is a job possibility! You could land a job as a pattern maker for a designer or company to put ideas to paper, but honestly, what’s to stop you from creating your own designs, mapping out the patterns, presenting them in a professional manner, and selling them? In fact, this would be an interesting detail to add to that shop that was mentioned earlier! Either way, it’s possible to make money by making patterns!

And there you have it—six ways you could earn money by putting your love of sewing into a career choice. Some of these might be easier to attain, like a seamstress, but even the more obscure options can be done part-time to boost your income. Basically, you can make a living on your sewing!

Sewing Buddies

Sewing Buddies

Among my group of friends, I’m the only one that sews. We all figure it’s a skill that they’ll all turn to me for after the Zombie Apocalypse. Kidding! I am the only one who sews and it is a valuable skill, but since I don’t have a group of friends to sew with, I’ve made my own sewing buddies. Really, they’re just stuffed animals I’ve made, but they sit in my swing area and keep me company when the cats take off at the sound of the sewing machine. If you need some sewing buddies too, check out these cute stuffed animal patterns and make some for yourself.

soft-toy-2186249_1280

Stuffed Fox Sewing Pattern

Made from fleece, these little guys work up quickly and are loved by kids and adults. When finished, they’re about 15” tall and have the sweetest faces. I used buttons for the eyes and nose, since there aren’t young children playing with them in my house, but the applique idea is great for homes with kids. Make a girl one and a boy one so they can keep each other company.

Sock Monkey Pattern

I’m not sure why, but people seem to give me wild sox for birthday or Christmas gifts. I don’t wear crazy socks, never have. I re-gift them when I can, but that’s not always possible. So, this sock monkey sewing pattern is the perfect way to use those crazy socks and get myself a sewing buddy. Make two and they can cuddle with intertwined arms. Add some Velcro to their hands to keep the cuddle pose in place.

Fat Quarter Bunnies

I love these! So often when I’m at the fabric store, I see fat quarters and want to buy them, but typically, they’ll wind up sitting in my fabric stash, never used. These sweet bunnies are the perfect use for those fat quarters and they’re so cute in my sewing area.

Sock Dragon Sewing Pattern

Yet another awesome use for all those crazy socks I seem to get. The sock dragon is a bit more challenging than his cousin sock monkey, but it also uses an additional pair of socks! I love dragons, so having one, or several, in my sewing space is great company.

If you’re looking for some sewing buddies, these stuffed animal patterns are a great way to make some company for yourself. Try them and let me know what you think!

Flat Patterning: Nothing to Fear

Flat Patterning: Nothing to Fear

I spent part of last week flat patterning a period vest and coat for a ten year old actor for a new Amazon series based on the book Dangerous Book For Boys by Conn and Hal Iggulden.

Let’s get technical

Flat patterning is one of my most favorite things to do. It’s very mathematical & systematic.

Flat patterning is one of my most favorite things to do. It’s very mathematical & systematic.

Flat patterning is one of my most favorite things to do. It’s very mathematical and systematic. I find it strangely soothing. Many people are intimidated by flat patterning and don’t think it’s something they would ever be able to do themselves. But, the thing about flat patterning is, if you’re good at following directions, anyone can do it.

Have you ever seen the opening sequence for the movie Tailor of Panama? In it, you see a hand drawing in chalk on a piece of fabric. The hand presumably belongs to the tailor who appears to be free handing the outline of a suit jacket front. Now, that’s something you probably won’t be able to do until you’ve drafted some thousands of suit jacket fronts but, flat patterning onto a piece of brown paper by following the instructions in a flat patterning system book is something you can do.

Take a look – it’s in a book

Every person who starts out flat patterning is following someone else’s directions on how to do so.

Every person who starts out flat patterning is following someone else’s directions on how to do so.

Every person who starts out flat patterning is following someone else’s directions on how to do so. If you take a flat patterning class you’ll work from whatever book the instructor likes. A flat patterning book provides step by step instructions for drawing specific pieces of clothing – things like draw a line equal to back neck to waist and square off from both ends (a and b).

What this means is you need to know the measurement from the neck to the waist of the person you’re drafting for. You can also use standardized measurement charts (which is how commercial patterns are made). Most flat patterning books include such charts, or you can do a search online for them. The instructions for drawing the pattern will continue with the labeling of points by letters using measurements. Directions will say things like: connect e and f with a curved line or mark a point 3/8″ from g and square out.

The right pattern book for the right job

Each flat patterning will produce slightly different results as they are each based on a system developed by the author. Some systems factor in more ease than others, depending on what period the clothing is. For instance, a book on flat patterning a man’s suit jacket from the 1880s will produce a garment different than one written for patterning contemporary men’s suit jackets.

You can also use standardized measurement charts (which is how commercial patterns are made).

You can also use standardized measurement charts (which is how commercial patterns are made).

So, how do you know which book to work from? It honestly doesn’t matter all that much when you’re first starting out. But as you get more comfortable with it, you can try different books to see what end results you like better.

One of my most favorite patterning books is Dress Design: Draping and Flat Patterning Method by Hillhouse and Mansfield. The book, written in 1948, gives instructions for a variety of really cool 1940s dresses and suits. It’s not always useful if I’m making something that isn’t a 1940s garment but it’s a wonderful book to study and try out different techniques.

Some other excellent patterning books that are used often in colleges are Norma R. Hollin’s Pattern Making by the Flat Pattern Method and Designing Apparel through the Flat Pattern by Rolfo, Kopp, Gross, and Zelin.

I also like Metric Pattern Cutting books by Winifred Aldrich, though these do require being able to convert your measurements into the metric system. Some pattern makers believe that the metric system allows for increased accuracy when patterning.

Pattern Making by Tomoko Nakamichi is a creative non-traditional approach to patterning and gives instructions for unique geometric Japanese garments.

Tools

A few other tools that are handy to have when you’re flat patterning are a clear see-through ruler, a curved ruler, & an L-shaped ruler.

A few other tools that are handy to have when you’re flat patterning are a clear see-through ruler, a curved ruler, & an L-shaped ruler.

A few other tools that are handy to have when you’re flat patterning are a clear see-through ruler, a curved ruler, and an L-shaped ruler.

Most pattern makers use a regular old pencil to draft the initial pattern. If they need to go back and make corrections, they’ll often use a red or blue pencil so they’ll know which line is the new line. I, personally, am a fan of the red pencil for corrections as it’s easier to see than a blue one.

If you’ve been wanting to try your hand at flat patterning but didn’t know where to start now’s the time to get yourself a book and start learning! If you don’t want to purchase a book (some of them can be quite expensive), check out your local library. You can, also, of course find used pattern books on Ebay – just don’t get too caught up in auction frenzy and pay too much.

Happy patterning!

Picking the Right Sundress Pattern

Picking the Right Sundress Pattern

Picking the Right Sundress Pattern

The hot weather means flowing, loose clothes that keep you cool while flattering your body. For me, it also means it’s time to sew! Sundresses are some of my favorite things to make. I’ve lost count of how many I’ve made over the years – most of them I still wear! The key to success with making a sundress is choosing the right pattern. The right sundress pattern will flatter your body.

Think About What You Want to Accentuate

We all have things about our bodies we like…and things we don’t. Start by thinking about the things you like about your body. Great legs? Go with a shorter length dress. Love your flat stomach? Make sure the dress is fitted at the waist. Adore your curves? Don’t be afraid to show them off with some well-placed darts. Keep all of these things in mind as you search for your sundress pattern. It’s easy to get pulled into a pattern that looks great on the package or model, but by keeping in mind what flatters YOUR body, you’ll be able to set aside any that won’t work.

Figure Out What You Want to Cover Up

Now, think about those parts of your body you want to cover up. Tummy not as flat as it used to be? Try an empire waist to accentuate other curves and avoid the cling around your stomach. Wish you were a little less curvy? Try something loose and flowy with material to match. Wish your legs were longer or skinnier? Go with a long sundress.

Pro tip: If you don’t like your arms, add a sheer shawl to the ensemble. Some patterns even come with the shawl included.

Match Your Skill Level

Picking the Right Sundress Pattern

When you’ve determined the style of sundress you want to make based on your body and what you like and dislike about it, look at patterns that match your sewing skill level. You’ll find that using these three factors it’s easy to narrow down your sundress pattern options to a manageable number. Then, pick the one you like best and hit the fabric aisles!

Every sundress I’ve made from a pattern chosen this way is one I still wear. Sundresses where I picked the pattern simply because I liked it and didn’t think about my body or my abilities were worn once, at best, and discarded. No one wants to see that happen after the effort of making a sundress. Instead, make a sundress you’ll love to wear using these simple steps to pick your pattern.

The Basics of Cathedral Window Quilts

The Basics of Cathedral Window Quilts

The time has come to explore yet another quilt type, and this one seems a bit less known than your standard patchworks and rag quilts. In fact, until I was doing brainstorm-browsing for this post, I don’t recall having ever heard of this kind of quilt, but the style is noteworthy enough to merit looking into. Through repetition, pattern, and color, quilts of this variety can have an interesting look to them that makes them stand out in similar fashion to the architectural designs of their namesakes.

The type of quilt I’m referring to is a cathedral window quilt.

The type of quilt I’m referring to is a cathedral window quilt.

The type of quilt I’m referring to is a cathedral window quilt, and as distinctive as cathedrals themselves could prove, these sewing products can be straightforwardly identifiable once you know the traits to search for. Those traits, as with the artistic and structural wonder of cathedrals themselves, can catch the eye with their composition and beauty like few other quilt styles — in my opinion — are capable of doing. In this post, we’ll go through a list of typical characteristics that you can spot in a cathedral window quilt that provide evidence of its type so you can more easily identify one in a crowd of variously styled quilts. In particular, we’ll focus on four distinctive features of cathedral window quilts, starting with their…

These quilts are not necessarily known for bright coloring.

These quilts are not necessarily known for bright coloring.

Bold colors

These quilts are not necessarily known for bright coloring, but a good percentage of the fabric used in creating a work of this category could be very bold, like dark blues, greens, and reds that give their sections a real pop. Even with the cathedral window quilts that use more pastel-based colors, those color options are still varied and strong, and they could build centralized sparks of color in certain patterns. If you’re going to make a cathedral window quilt, be sure to include some very dynamic colors to give these defined and robust splashes of color throughout the product. These bits of color, to construct the right design, “are folded precisely and sewn with curves to create small windows,” and “folded blocks are added together until the quilt is the desired size.” This sounds very direct and uncomplicated, but what are those bold-colored fabric pieces added to? That would be…

The overall point though is that the juxtaposition of light & dark make each section stand out.

The overall point though is that the juxtaposition of light & dark make each section stand out.

White fabric

Along with varied colors, it’s also a good idea to snatch up some white fabric if you intend to make a cathedral window quilt. That white fabric added in contrast to the bold colors already mentioned helps to cement the notion of having stand-out sections of color on your quilt. Typically, the white fabric can completely surround portions of bold-colored fabric, but the reverse can be true as well if bold colors appear to surround the white fabric. The overall point though is that the juxtaposition of light and dark make each section stand out — the bold colors and the white sections — to result in a quilt that doesn’t necessarily have a single piece of it that isn’t remarkable and noteworthy.  The consequence is a repetitious design that follows a…

These quilts can employ very specific shapes in their overall design—ones that can be mimicked in pillows.

These quilts can employ very specific shapes in their overall design—ones that can be mimicked in pillows.

Definite pattern

Often, these quilts can employ very specific shapes in their overall design — ones that can be mimicked in pillows. Specifically, the bold colors are often in the shape of near-diamonds, but those diamonds’ sides invert inward to create a swooping motion along all four sides. That diamond-esque shape is surrounded by a circle — one that can be ringed — and those circles can overlap throughout the entirety of the project. Is this the only way that a cathedral window quilt can take shape? Well, it’s not set in concrete! But if you see this general pattern, you have very real evidence that you’re looking at a cathedral window quilt since the pattern is so common for the style. Another trademark is that it has…

If you neglect a layer of quilt, that’s a layer of quilt that isn’t available to strategically cover mistakes & such, so the work could feel more vulnerable.

If you neglect a layer of quilt, that’s a layer of quilt that isn’t available to strategically cover mistakes & such, so the work could feel more vulnerable.

No backing

That’s right! With this quilt variety, you can forego the backing detail since the “quilt blocks… stand alone as is” without that extra detail. Does that factor make for an easier project? Maybe not! If you neglect a layer of quilt, that’s a layer of quilt that isn’t available to strategically cover mistakes and such, so the work could feel more vulnerable. Once you get the hang of the process though and make the adjustment, it might actually lead to an easier quilting experience because “you simply iron down your edges and sew.” Considering the level of beauty that these quilts can achieve, it seems like a sensible prospect to push through the confusion of learning to construct a quilt without a backing in order to eventually fashion such a lovely and reportedly easy project.

With these guidelines in mind, you could be able to spot a standard cathedral window quilt among other quilt options with scarce effort. In fact, coming to that conclusion of quilt style could become almost instinct where you look at a product and say, “Yeah! That’s a cathedral window quilt!” since the appearance is so very individual — and lovely!

DIY: Reversible Tote Bag Tutorial

DIY: Reversible Tote Bag Tutorial

It is easy to sew a reversible tote bag; even beginners can make this project.

It is easy to sew a reversible tote bag; even beginners can make this project.

It is easy to sew a reversible tote bag; even beginners can make this project.

You can make these in any size. My three examples are each sized slightly differently.

To make one reversible tote bag, you need 2 different bag fabrics. Depending on the sturdiness of your fabrics, you may also need medium weight interfacing or fusible fleece. You can make your bag handles from long rectangles of one or both of these fabrics, or you can use grosgrain ribbon, as I have here.

Reversible tote bag step one: cut bag pieces

Measure & mark 1.5” from both sides of the bottom corners & cut these little squares out.

Measure & mark 1.5” from both sides of the bottom corners & cut these little squares out.

Cut two squares or rectangles of each fabric to your preferred dimensions. I made these using 13” x 14”, 14” x 15” and 13” x 17” rectangles, and I have made them both much smaller and much larger.  The 13” x 17” is big enough for my laptop. But ribbon handles aren’t a good idea for a laptop bag; follow the directions for making stronger fabric handles if you plan to carry your computer.

Then measure and mark 1.5” from both sides of the bottom corners and cut these little squares out. Do this for all four pieces of your bag fabric.

Step two, optional: interfacing

If you choose to make your reversible tote bag from home decor fabric and/or canvas, you won’t need to use interfacing.

If you are using quilter’s cottons or similar lightweight fabrics, cut fusible fleece or interfacing to fit two of the bag pieces. Follow package directions to fuse fleece or interfacing to the wrong side of both pieces of one bag fabric.

Step three, optional: pockets

You can make pockets on one or both sides of your reversible tote. The easiest way to make pockets is to start with a rectangle, fold it right sides together, and sew all around, leaving an opening for turning. First topstitch the opening closed, then pin and sew the bottom and sides of the pocket to the bag.

You can make a long rectangular pocket that stretches the full width of your bag, or make square patch pockets and sew them in the middle of one or more of the bag pieces.

Step four: sew two bag bodies

Take both pieces of one of the bag fabrics and sew along the bottom and side seams with right sides together. Press seams open. Now, miter the corners by lining up the side and bottom seams you just sewed at the middle of the new seam you will form from the square cut out. Sew these seams.

Repeat with the pieces of the second bag fabric.

Step five: handles

Use a soft measuring tape or even a string hung over your shoulder to determine how long you want your straps to be. I like long shoulder straps, so I usually cut mine about 30 inches long. If you prefer to carry your tote on your arm, cut yours shorter. You need two.

I saved time making these bags by using grosgrain ribbons to make easy straps. To do this, just cut two pieces of ribbon to your desired length.

To make fabric handles, cut two long rectangles to your desired length measurement by twice your desired strap width. Apply interfacing to the wrong side of your fabric if you like.  Fold lengthwise right sides together and press. Sew along the long open edge, then turn. Press again.  Now top-stitch along both long sides.

There is no need to finish the short ends as these will be concealed between the two sections of the bag.

Step six: assembly

They are handy for carrying books, notebooks, your computer, clothes for overnight or the gym.

They are handy for carrying books, notebooks, your computer, clothes for overnight or the gym.

Insert one bag into the other, with right sides together. If your placed pockets on one side of each bag body, insert them together so that the pockets are on opposite sides. Push down the corners to make sure both bag pieces are lined up well at the bottom. Then line up the side seams from both pieces and pin these together.

Take one strap and hold one end in each hand so that the loop hangs down. Be sure it isn’t twisted and insert it between the two bag parts on one side. Measure in from the pinned side seams on each side to be sure the straps are centered. About three inches in is a good guideline, but eyeball your bag to decide on exact strap placement. Just measure the distance between strap and side seam on both sides to be sure they are even. Pin, then repeat on the other side with the other strap.

Now sew together along the top edge.  You will have to leave an opening big enough for turning; I sew across all the straps and leave the opening on one side.  Turn everything right sides out. Both sides of the reversible tote will be pointing out.

Stick your hand into the opening and poke all the corners out from the inside. Then push one bag body into the other so that it becomes a bag with handles at the top. Return to your ironing board and press. Pay attention to the edges still open from turning; you want to press the raw edges inward and neatly align for top-stitching this opening closed.

Now stitch all the way around the top of the bag and you’re done.

Make more!

Reversible tote bags are easy to sew in a hurry & the possible variations are endless.

Reversible tote bags are easy to sew in a hurry & the possible variations are endless.

Reversible tote bags are easy to sew in a hurry and the possible variations are endless. Make them in different sizes and try different fabrics and trims. Use tie-dye, quilting, appliqué, fabric paints, or any other embellishment you like.

They are handy for carrying books, notebooks, your computer, clothes for overnight or the gym. You can use them as a shopping bag, your purse, or for handmade gift giving. Pick out some pretty fabrics and make a bunch. Happy sewing!

Gifts to Sew for Mom

Gifts to Sew for Mom

Are you looking for ideas to sew for Mom?

Moms come in all types. But most appreciate handmade gifts, especially the ones you make. Whether your mom is glitzy or sporty, a homebody or a world traveler, we’ve got you covered.

For Mother’s Day, her birthday, holiday gifts, or just because you love her, here are lots of fun project ideas you can sew for mom.

Zip bags

There are so many uses for these that zippered cases are always a good gift idea. She can use one for a cosmetics bag for her purse or travel, to hold pencils or art supplies, or anything else. I once made a matching set of these in several sizes for a gift for my mom.

She can use these to hold anything.

She can use these to hold anything.

Quilt

Whether she likes to get comfy in her favorite chair or she babysits grand-babies, a lap quilt is a perfect choice to sew for mom. Make one in her favorite colors, to match her décor, or choose a special pattern.

The blocks in these quilts were pieced by my mother's and my husband's grandmothers. I found them in their sewing boxes & put them together with borders to make these lap quilts for our moms to share with their grand babies.

The blocks in these quilts were pieced by my mother’s and my husband’s grandmothers. I found them in their sewing boxes & put them together with borders to make these lap quilts for our moms to share with their grand babies.

And speaking of grand kids and special quilt patterns, you could get the kids involved and make a handprint quilt for their grandmother.  You can make a handprint quilt using washable fabric paint and the kids’ hands as stamps. Or you can have them trace and then cut out their hands and use these as appliqué patterns.

Handbag

Most ladies will appreciate a beautiful new handbag. Depending on your mom’s style, you could make her a clutch, a wristlet, a structured bag, or a casual cross-body purse or messenger bag.

The possibilities are endless here. Choose suede, an elegant stamped faux leather or other fancy fabric, a distinctive or wildly patterned print, or build her a bag based on a small piece of patchwork created just for her.

Totes

She can’t have too many tote bags since these are endlessly useful.

She can’t have too many tote bags since these are endlessly useful.

She can’t have too many tote bags since these are endlessly useful. Make her a stylish and sturdy tote bag for her library books, groceries, or other shopping and she will appreciate it endlessly.

Make a gorgeous XL tote in a special fabric and she will be thrilled to use it as a stylish everyday bag. Especially if you add in ample pockets and/or smaller zip bags for organizing contents.

You can make a reversible tote bag in any size and give her two bags in one.  Make a canvas tote with ample pockets inside and out to create a custom beach bag she will love. Or make her a few of these cute shopping bags that collapse into their own pocket.

And consider smaller totes, too. Here is one as pretty as a purse meant for toting her tablet.

Pillowcases

You can’t buy pillowcases as pretty as the ones you can sew. Make her a luxe pair trimmed in vintage lace. Choose a colorful patterned fabric to dress up her bed or a special motif she adores. Whether she loves owls,  Star Trek, or her favorite sports team, you can make her a pillowcase from a yard of any novelty print.

You could make a pillowcase covered in hearts to remind her how much she is loved.

You could make a pillowcase covered in hearts to remind her how much she is loved.

Sew a bouquet

A bouquet of flowers is a standard Mother’s day gift. You can sew her a bouquet of flowers that will never wilt and fade away.

Here are a lot of different ways to make fabric flowers.

Rice Pack

Whether she suffers from pains in the neck, back, tummy, or general monthly pains, an oversized microwavable rice pack heating pad will be a welcomed gift of comfort.

Slippers

There are lots of ways to sew slippers, here are some slipper sewing tutorials to choose from.

Pajamas

You can sew cozy pajamas from silk, cotton, flannel, or fleece. Make them ultra feminine with batiste and lace, or pure fun in a funky print. Start with an easy pattern from Simplicity, McCall’s, or Butterick, or use one of these tutorials.

Easy robe

Like pajamas, you can sew a robe from a lightweight or dressy fabric or from something heavier and more cozy. Robes are easy to sew. You can buy an easy robe sewing pattern or here’s a great tutorial showing how to make your own pattern using rectangles.

Apron

There are so many ways to sew aprons.  You can make her a pretty half apron from just a fat quarter of fabric plus trim, a full coverage bbq style apron from a yard, a reversible apron, or a garden or craft apron.

  • Oven mitts/ pot holders
  • Table runner
  • Placemats
  • Napkins

Travel bags

If your mom travels a lot, there are a lot of great gifts you could sew to help her

Project link at Positively Splendid.

Project link at Positively Splendid.

Pareu

I got this idea from the book Travel Gear and Gifts to Make, by Mary Mulari. She says that a pareu (pa-ray’-oo) is actually a colorful Polynesian wrap skirt. But it can also be used as a shawl, head cover, scarf, swimsuit cover up, light blanket, picnic blanket, or even a knapsack for carrying stuff.

This is probably the most used and loved gift I have ever made for my mom, and it is also the simplest. She travels a lot as a car passenger, and she likes to nap with a light blanket while riding.

A pretty pareau works perfectly for that plus more.

To make one, you just hem a square or rectangle. You can make one from a 44″ or a 60″ square. Since I knew she would use it as a blanket, I made my mom’s in the larger size. And I sewed a small matching tote with a strap, for storing the pareau rolled up while not in use. I bet it has been over ten years since I made it for her, and she still raves about and uses this gift all the time.

Needlebook

If your mom sews a lot or even just a little, she will certainly treasure a needle book you make with love just for her. You can make a simple one from felt or create a patchwork cover and include a zippered “page” for holding small scissors and other supplies.

I like to make needle books with a zippered page inside.

I like to make needle books with a zippered page inside.

Fabric necklace or bracelets

Jewelry is another go-to gift for moms, but have you ever sewn jewelry? Here are some ideas you could try:

I hope this list gave you some good ideas. What will you sew for mom?

Somewhere in the Desert

Somewhere in the Desert

Camel fashion in Petra.

Camel fashion in Petra.

I just spent a week cycling from the Dead Sea in northern Jordan to the Red Sea in the south – spectacular views and a whole bunch of those ‘once in a lifetime’ experiences. Among other things, I spent a day wandering around The Lost City of Petra and a night in the desert in a Bedouin camp. The Bedouin are Arabic speaking nomadic people of the Middle Eastern deserts.

One of the most interesting things I noticed were the beautiful and unique fashion styling the Jordanian men displayed, especially in Petra. In the depths of that city, amongst all the rocks and caves and roman ruins, I saw where Johnny Depp’s Pirates of Penzance look was born.

Many of the young men lined their eyes with a dark substance made from the ash of a burnt tree and mixed with olive oil. As well as having a soothing humidifying affect, the mixture protects the eyes from the sun. It’s really a brilliant concoction. And it makes the lashes look especially luxurious. The camels, as well, were decked out in beautifully colored tapestries. The whole city of Petra was simply stupendous.

Desert fashion

As most cultures who live in a desert climate, Jordanian’s dress in clothing that covers most of the skin. The young men were most often in skinny pants of some kind and flowing tops, sometimes in layers. But the most fascinating and beautiful component of their attire were the creative and intricate ways they wrapped their head scarves – many of them were truly works of art.

Young men in Petra.

Young men in Petra.

I watched one gentlemen as he wrapped his, twisting and turning and tucking it in a series of complicated moves I couldn’t even hope to follow. When done, the scarf was piled high on his head in twists with two twirling pointed ends hanging down to his shoulders on either side. Some men implemented designs with one cascading side corner, others in the more traditional technique of shielding the back of the neck.

The scarves, or keffiyeh as they are called in the Arab world, were in various colors, though the most prevalent were the ones us westerners are used to seeing – the back and white checkered and red and white checkered varieties. This pattern is thought to have originated from an ancient Mesopotamian representation of fishing nets or ears of grain.

In Jordan, the red and white keffiyeh, also know as a shemagh mhadab, is associated with the country and its heritage. They have decorative cotton or wool tassels on the edges – the bigger the tassels, the greater the garment’s value and the status of it’s wearer.

My cycling guide, Anas, wore a black and white one that he told me was representative of his Arabic heritage. I asked him where to buy a traditional good quality authentic scarf, not one from tourist shop. He told me that downtown Amman was the place to buy them and that they would be cheaper there than in the stores catering to tourists. A scarf like his, with smaller tassels and no border, would cost anywhere from 5.00JD to 10.00JD. A fancier one with a border all around could cost up to 20.00JD. He also told me that men tied the shemagh in different ways for no other reason than how they were feeling that day. I love that.

(Just a note on currency: the Jordanian dinar is a pretty strong currency: 1.00 JD equals about 1.40USD.)

Making friends around the world

Me with a one of the Beduoin people.

Me with a one of the Beduoin people.

I also loved the long garments worn by the Bedouin. They were most often dressed in light colored pants and a long matching light colored tunic (down to mid calf) with button closures on the front. They all looked extremely well put together. The long dress like tunic is called a thoab and is made of lightweight fabric. Under the thoab, the men normally wear a t-shirt and the long wide leg trousers called a serwal. I love how, though they all basically wear the same garments, there was still so much individual style and personality conveyed through their clothing. I think one of the most fascinating things about fashion is individual expression and how people are able to wear something in a way that allows their personality shine through.

I absolutely loved my time in Jordan. Everyone was extremely welcoming and hospital. Everywhere I went, I was greeted with, “You are welcome in Jordan.” What a truly wonderful thing.

I’m in Egypt now, writing this as I look out over the Red Sea in Dahab (I need a day of relaxing after cycling through Jordan). I know I promised to write about Egyptian textiles and the markets and I will. I’ll be in Cairo tomorrow trying out my bartering skills and will provide a full report next week.

Until then, take care and don’t forget to let your own personal style show through in whatever manner you desire.
Ma’is salama.

A Little Bit of History from the Desert

A Little Bit of History from the Desert

Here's a picture from my balcony in Madaba, Jordan. I hope to find some interesting textiles in the bazaars as I travel through the country.

Here’s a picture from my balcony in Madaba, Jordan. I hope to find some interesting textiles in the bazaars as I travel through the country.

I’m in Jordan today. Yes, the Jordan in the Middle East, northeast of Egypt and Israel. I woke up in Madaba to a beautiful sunrise and rose blooms over the desert. I’m here on holiday, to ride my bike and spend the later afternoons looking for textiles in the bazaars.

The Middle East has always been a nexus of textile production. Trade routes commonly known as the Silk Road terminated on their western end in the eastern Mediterranean ports. As a result, these markets were also the centers of textile production.

Textiles of the Middle East during the Middle Ages were highly prized goods. I’d venture to say they still are. Many of the words we use to describe textiles in the English language are derived from Persian, Arabic, and Turkish – terms like damask, taffeta, cotton, muslin, seersucker, and mohair.

Historical value

Long ago, textiles in this region were also often accepted as payment of taxes or other moneys owed. Visiting officials and ambassadors were given gifts of cloth or garments. In a part of the world where much of the population was once primarily nomadic, interiors were furnished with textiles used to cover floors, walls, cushions, and to create beds and storage of all kinds.

Traditionally, gifts of any kind were also presented in a textile wrapper. The more elaborate the wrapper the greater honor was intended. Textiles were thought to be able to hold powers of protection or harm, depending on the symbols and inscriptions incorporated into them.

After the death of Muhammad, representation of living creatures was banned in most cultures of the region. As a result, Islamic design developed a beautiful metaphorical language all its own, utilizing geometry, calligraphy, vegetal, and architectural forms (though in many Persian & Central Asian silks and carpets, human and animal figures do appear).

Silk

Elaborately patterned silks were produced throughout the Middle East in all sorts of complex weaves – such as twills, lampas, and brocades. Silks of a more simple nature, tafta and satin weaves, were also quite numerous. A cloth made from a silk warp and a cotton weft, known as alaca, produced a more “economical” textile.

Tiraz textiles are a silk fabric, particularly important from the tenth to the fourteenth centuries, embellished with a border containing inscriptions of religious quotations and often woven in gold thread. Baghdad was the best known source of tiraz but it was produced in many other Middle Eastern locations. The borders appear most commonly on upper sleeve bands. They are were also found on burial shrouds and ceremonial textiles.

Cotton and linen

Both cotton and linen, ranging more heavy canvas to lightweight gauze, were widely produced in the Middle East. Textile printing also existed and, by the sixteenth century, a printing industry existed in Syria, later expanding into Anatolia.

Mohair and wool

Mohair, camel hair, and goat hair – referred to as cashmere or pashima, is used to weave soft and beautifully patterned shawls throughout the region. These shawls became very popular in the west during the nineteenth century.

The patterns, woven in twill tapestry or other complex compound weaves, featured colorful and elaborate designs. One such design was a complex vegetal one known as boteh. In the west this design became to be known as the paisley motif, named after Paisley, Scotland where textile mills produced copies of the design in the latter nineteenth century.

The best known wool textiles of the region are the pile and flat cloths made as rugs, bags, wall coverings, and the like. The oldest surviving example of Islamic carpet weaving is the “Fostat” fragment from the ninth century found in Cairo.

Carpet design can be divided into 3 categories

  1. Tribal carpets, produced by nomadic or village households for their own use, tend to be geometric in design and reflect regional affiliations.
  2. Court carpets, created by the finest artists of the day, are usually the most intricate and finely knotted.
  3. Urban manufactured carpets are the third category. These are often technically fine but most often have less intricate designs.

Adventure time!

I’m excited to see what kinds of things I’ll be able to unearth over the next week as I wander about Jordan. Hopefully, I’ll have some interesting finds to share with you!

Textiles, especially those that are handmade, have such a deep history. I love learning about a design or technique that is unique or specific to a certain village or area. I also enjoy meeting local artisans who still produce works of art in the same way their ancestors always have.

This all ties into one of my previous posts about passing on skilled expertise to younger generations. Its a tradition pretty much as old as human civilization and one very much worth sustaining.

I wish you all a week of amazing discoveries (whether they be ancient or not). Next week I’ll be posting from Cairo. Arak qaribanaan.