The Basics of Cathedral Window Quilts

The Basics of Cathedral Window Quilts

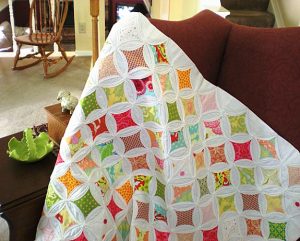
The time has come to explore yet another quilt type, and this one seems a bit less known than your standard patchworks and rag quilts. In fact, until I was doing brainstorm-browsing for this post, I don’t recall having ever heard of this kind of quilt, but the style is noteworthy enough to merit looking into. Through repetition, pattern, and color, quilts of this variety can have an interesting look to them that makes them stand out in similar fashion to the architectural designs of their namesakes.

The type of quilt I’m referring to is a cathedral window quilt.

The type of quilt I’m referring to is a cathedral window quilt.

The type of quilt I’m referring to is a cathedral window quilt, and as distinctive as cathedrals themselves could prove, these sewing products can be straightforwardly identifiable once you know the traits to search for. Those traits, as with the artistic and structural wonder of cathedrals themselves, can catch the eye with their composition and beauty like few other quilt styles — in my opinion — are capable of doing. In this post, we’ll go through a list of typical characteristics that you can spot in a cathedral window quilt that provide evidence of its type so you can more easily identify one in a crowd of variously styled quilts. In particular, we’ll focus on four distinctive features of cathedral window quilts, starting with their…

These quilts are not necessarily known for bright coloring.

These quilts are not necessarily known for bright coloring.

Bold colors

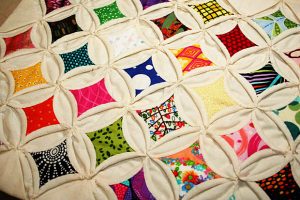
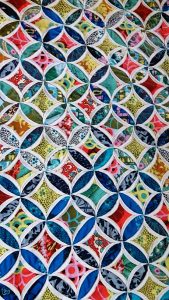
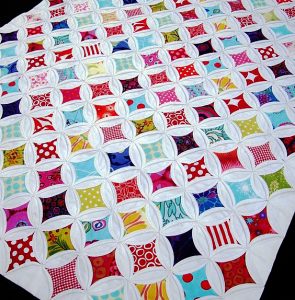
These quilts are not necessarily known for bright coloring, but a good percentage of the fabric used in creating a work of this category could be very bold, like dark blues, greens, and reds that give their sections a real pop. Even with the cathedral window quilts that use more pastel-based colors, those color options are still varied and strong, and they could build centralized sparks of color in certain patterns. If you’re going to make a cathedral window quilt, be sure to include some very dynamic colors to give these defined and robust splashes of color throughout the product. These bits of color, to construct the right design, “are folded precisely and sewn with curves to create small windows,” and “folded blocks are added together until the quilt is the desired size.” This sounds very direct and uncomplicated, but what are those bold-colored fabric pieces added to? That would be…

The overall point though is that the juxtaposition of light & dark make each section stand out.

The overall point though is that the juxtaposition of light & dark make each section stand out.

White fabric

Along with varied colors, it’s also a good idea to snatch up some white fabric if you intend to make a cathedral window quilt. That white fabric added in contrast to the bold colors already mentioned helps to cement the notion of having stand-out sections of color on your quilt. Typically, the white fabric can completely surround portions of bold-colored fabric, but the reverse can be true as well if bold colors appear to surround the white fabric. The overall point though is that the juxtaposition of light and dark make each section stand out — the bold colors and the white sections — to result in a quilt that doesn’t necessarily have a single piece of it that isn’t remarkable and noteworthy.  The consequence is a repetitious design that follows a…
These quilts can employ very specific shapes in their overall design—ones that can be mimicked in pillows.

These quilts can employ very specific shapes in their overall design—ones that can be mimicked in pillows.

Definite pattern

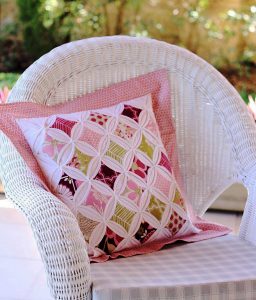
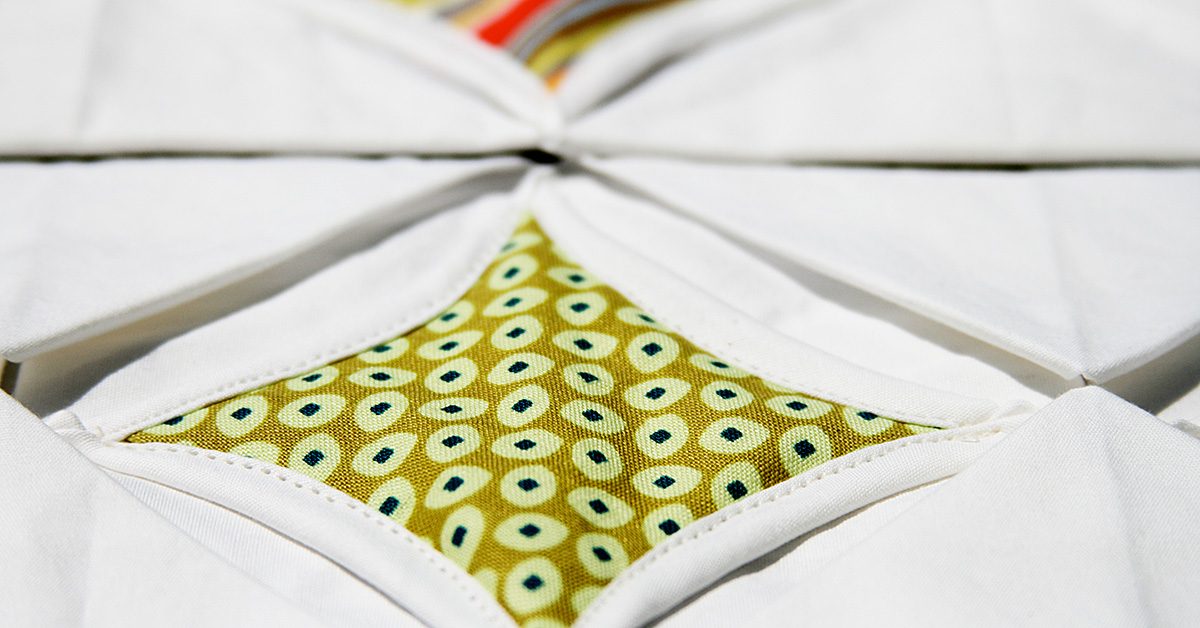
Often, these quilts can employ very specific shapes in their overall design — ones that can be mimicked in pillows. Specifically, the bold colors are often in the shape of near-diamonds, but those diamonds’ sides invert inward to create a swooping motion along all four sides. That diamond-esque shape is surrounded by a circle — one that can be ringed — and those circles can overlap throughout the entirety of the project. Is this the only way that a cathedral window quilt can take shape? Well, it’s not set in concrete! But if you see this general pattern, you have very real evidence that you’re looking at a cathedral window quilt since the pattern is so common for the style. Another trademark is that it has…
If you neglect a layer of quilt, that’s a layer of quilt that isn’t available to strategically cover mistakes & such, so the work could feel more vulnerable.

If you neglect a layer of quilt, that’s a layer of quilt that isn’t available to strategically cover mistakes & such, so the work could feel more vulnerable.

No backing

That’s right! With this quilt variety, you can forego the backing detail since the “quilt blocks… stand alone as is” without that extra detail. Does that factor make for an easier project? Maybe not! If you neglect a layer of quilt, that’s a layer of quilt that isn’t available to strategically cover mistakes and such, so the work could feel more vulnerable. Once you get the hang of the process though and make the adjustment, it might actually lead to an easier quilting experience because “you simply iron down your edges and sew.” Considering the level of beauty that these quilts can achieve, it seems like a sensible prospect to push through the confusion of learning to construct a quilt without a backing in order to eventually fashion such a lovely and reportedly easy project.

With these guidelines in mind, you could be able to spot a standard cathedral window quilt among other quilt options with scarce effort. In fact, coming to that conclusion of quilt style could become almost instinct where you look at a product and say, “Yeah! That’s a cathedral window quilt!” since the appearance is so very individual — and lovely!

Raggedy Coasters

Raggedy Coasters

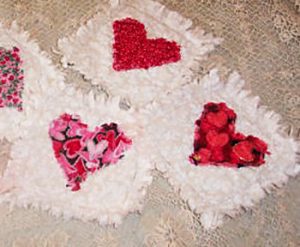
Valentine’s Day is around the corner, and as you might know from previous posts, I’m a holiday fan! In fact, I spent time researching Valentine’s Day projects for a post, and I chose one specific sewing craft that I thought was a cute idea. That concept is a raggedy coaster with a heart in the middle, which seemed simple and pretty. It was also useful since I have a Valentine’s Day party coming up with my nieces and nephew. I have plenty of leftover fabric from my latest quilt, so using it for homemade décor for the party sounded like a good notion!

That concept is a raggedy coaster with a heart in the middle, which seemed simple & pretty.

That concept is a raggedy coaster with a heart in the middle, which seemed simple & pretty.

Unfortunately though, one detail of the project did get derailed because I decided I didn’t like the Cupid cutout that I had planned to use in the center of my coaster. It looked amateur and out of place, so I made the executive decision not to use it. That meant that the coaster wasn’t very Valentine’s Day-ish since the top portion is a general floral pattern, but I was still interested to see how things would play out. And, as I’d been wanting to try a rag quilt for a while, this was a good time to test the waters. If I didn’t like the process of making one rag coaster, an entire rag quilt might not be something I wanted to dive into!

Stock up

The needed supplies are fairly minimal. All you really need are the bare essentials of a sewing project, like a needle, thread, fabric, pins, and scissors. Once you have those, you’re ready to start work on your coaster!

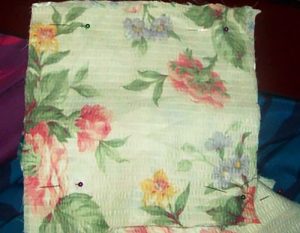
First, pick out the material you’ll use. Ideally, you would have batting in between the top and bottom layers because this raggedy craft can be, in truth, a miniature quilt sandwich. For me though, I didn’t have any batting available, so I decided to layer four pieces of fabric together. That way, there’s more thickness than what I would’ve gotten from just three pieces of thin fabric.

Let’s get started

Once you choose your material, make sure the pieces are cut into similar-sized bits that are more or less quadrilaterals. This is actually one benefit of a rag coaster or quilt. You’ll be shredding the ends anyway, so it doesn’t matter if they’re the exact same length at every point. Just make sure they’re close enough that, with the raggedy edges, they’ll look the same!

You’ll need to allow extra space beyond where you sew the pieces together for your ragged edges.

You’ll need to allow extra space beyond where you sew the pieces together for your ragged edges.

From there, you layer those fabric/batting pieces in the correct order and pin them together — but not necessarily right at the ends of the material. You’ll need to allow extra space beyond where you sew the pieces together for your ragged edges. Also, if you find after pinning that you have a bit of extra material that’s going to really stick out once your coaster has been shredded, feel free to trim off those ends.

Feel free to trim off those ends.

Feel free to trim off those ends.

Time to sew

Then you can start sewing! Remember to try for a box shape within your block of fabric, and to keep that space away from the edges. After you’ve sewn all the way around to finish that box shape, cut off the excess thread and get ready to do some shredding!

Be careful to give a decent number of cuts as you go around the fabric because the more you cut, the more thorough your raggedy quality could be!

Be careful to give a decent number of cuts as you go around the fabric because the more you cut, the more thorough your raggedy quality could be!

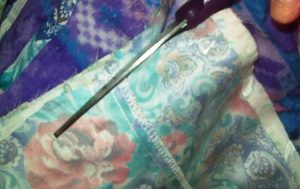
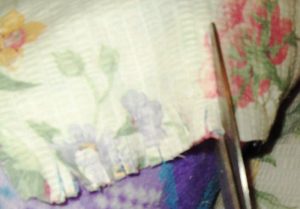
Now, shredding happens to be a bit more time consuming than I expected, but it’s a simple process! All you do is take your scissors and cut from the edges of the fabric inward, but never so far that you cut your stitches since that can seriously damage your final product! Also, be careful to give a decent number of cuts as you go around the fabric because the more you cut, the more thorough your raggedy quality could be!

Common mistake

Another tip on shredding is to make sure that you’re cutting through all layers of your coaster or quilt. I noticed a time or two that I’d left the bottom layer uncut for some of my shreds, so missing a space here or there is an easy thing to do! For a thorough job, check your results as you go along!

Once the shreds are finished, you’re ready to throw your product in the washing machine! Believe it or not, the washing and drying process makes those simple cuts attain that raggedy appearance!

What I learned from this experience is that making a rag quilt is going to be more complex than I expected. I’ll need to cut fabric, layer it, sew it, then shred it, and shredding is pretty tedious! I honestly wasn’t mentally prepared for what awaited me, and I think I have a better idea now. Although it’s different than the quilts/blankets I’ve made before, I’m still interested in making one. So, basically, the hunt for a Valentine’s Day project worked out differently than I thought — but still well!

The Final Touches (And Reinforced Lessons)

The Final Touches (And Reinforced Lessons)

Remember on my last blog post when I proclaimed that sewing isn’t baking? In the latest stages of my quilt, I’ve once again found myself facing similar details and thoughts as the ones I experienced earlier. Why? Because — as I said before — guesstimations and “until-it-looks-right” attitudes don’t necessarily spill over from the kitchen to the sewing area.

My homemade backing.

My homemade backing.

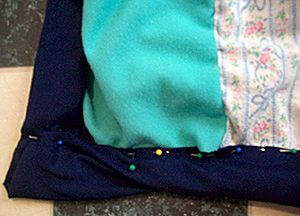
You see, I completed all the main lines of a nearly-finished quilt. What that meant, to me, was that it was time to sew on some kind of backing. My tactic for doing so? Getting a flat sheet, cutting it *very* generically around the exterior of the quilt, and trying to fold the excess material down in an appealing manner for the outer edges of the quilt. I ended up with a mess that looked something like this:

Not good, right? And I couldn’t seem to fix the issue with the backing/quilt this way. Whenever I would try to re-pin something so that the massive/slanted corner was more size-and-style-similar to the line leading up to it, the material would twist unpleasantly (like you can see). This blatant issue led me to undoing most of my pin-and-sew work connecting the backing to the actual quilt, in hopes that the lines and corners would better match up.

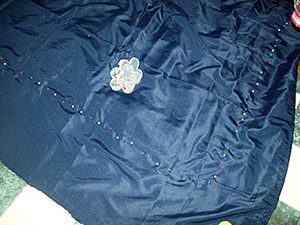
The process this go-round was a bit more precise, in that the original wrinkles in the sheet had fallen out, and the overall quilt was more carefully positioned under the sheet for more accurate results. That’s right. Under the sheet. Rather than focusing on exactly where the backing would overlap on the front, I concerned myself with making sure that the back portion was somewhat smooth against the quilt blocks. My rationale was that if I could get that territory as it should be, I could flip it over and fold over the ends with more confidence that what I couldn’t see on the back was proficient enough to allow my focus to safely fall on what I could see. Basically, if the backing was smooth, I could do things, like better decide how much material needed to be beyond the quilt blocks to fold over and work with, without worrying so much that the material on the underside was bunched or wrong in some way:

Pins, pins and more pins!

Pins, pins and more pins!

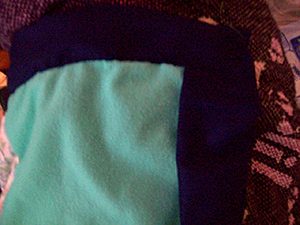
Once I flipped it over, I cut off a bit of the backing material, and I took out the pins from one side (and admittedly—accidentally—a number more!). Some of the quilt had already been sewn (I’m currently thinking of redoing that section, by the way), but beyond that stopping point, I could fold over the excess material, tuck it under itself, and pin it back down so it would create a more pleasing line and corner:

Progress is progress for an early quilter, right?

Progress is progress for an early quilter, right?

Perfect? Eh. But progress is progress for an early quilter, right? And, perfect or not, this strategy seems to have helped.

Still, knowing if the strategy will prove effective throughout the rest of the process might be something I judge later. After all, I’m less than one line into it, and there are over three sides to go (not to mention inner attachments).

In any event, this particular dilemma has led me to another tactic in learning to quilt better, and that’s to look for answers online. I’ve looked at a quilting video before, but a number of things that I’ve attempted to do are details I could’ve found assistance for online. There are charts, for instance, about how big to cut blocks, or how large a certain size of quilt should be. I might’ve literally been the girl who measured a bed with measuring tape (not sewing tape!) to see how big I should make a quilt, which I wouldn’t have had to do if I’d looked at a chart! I wouldn’t be too surprised if I took more of my sewing/quilting concerns online to try and find answers for them in the future!

Hopefully, this quilt will be finished soon, and I’ll be able to move on to another project with the skills and lessons I’ve learned up to this point. And maybe one day, I can become the quilter I want to be!