Confetti Quilt-Art for Your Walls

Confetti Quilt-Art for Your Walls

Speaking of fall projects, I’ve recently come across a quilting technique that would be fantastic for creating a beautiful piece of autumn to use for wall décor. The problem, though, is that the technique used to build this work is a bit advanced, so it’s something I’m going to have to put on the back-burner for a bit until I potentially get the hang of more intricate workings of specific sewing processes.

The overall idea is out of my comfort zone right now, but it’s still something that seems like a great enough idea to share with those reading this blog post. Maybe you’re more advanced than I am in the sewing world, and this would be a simple project to you to bring fall coloring to your home’s interior. If so, gather your fabric and tulle, and get to working!


Project: Confetti-Quilted Wall Hanging


Tools and Supplies:

Sewing machine, scissors or rotary cutter, fabric (some for shredding purposes), tulle, and straight pins

The Idea:

Creating a work of art from bits of fabric
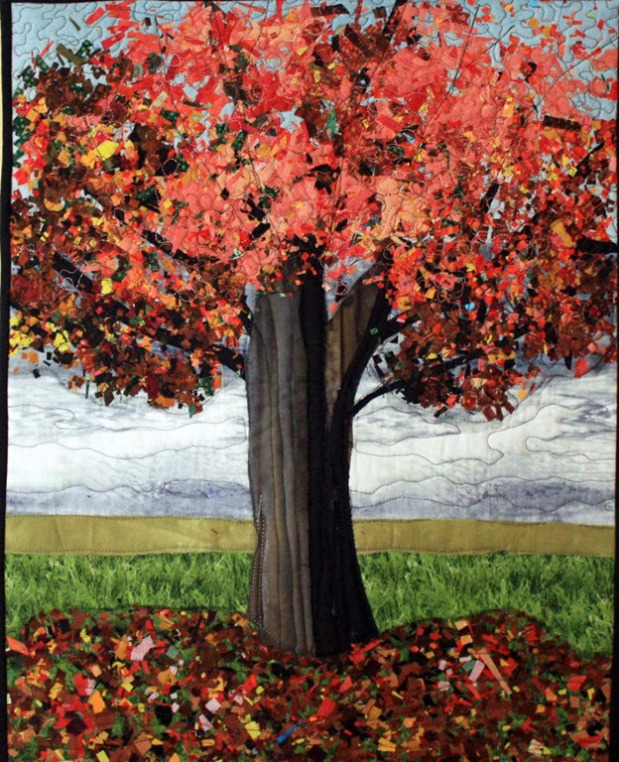
Mulberry Patch Quilts

See all of these leaves? Those are tiny bits of fabric placed on the piece, or confetti fabric!

It would be easy to label this a mosaic-type project, and in a way it is because it’s a bigger picture that’s being constructed by smaller pieces. But the incredibly small sizes of these pieces are tiny enough to compare to confetti being tossed in the air, so the confetti name is actually more fitting than the mosaic title—especially since the confetti can bunch up and overlap on your design in contrast to the side-by-side nature of a mosaic piece.

This is an idea that can be put in practice to make a full quilt, but the number of times you’d have to go through the process to create enough blocks for a quilt sincerely escalates the amount of time you spend on a project. Considering fall is so close, using the one-block notion for a wall hanging is more reasonable—and it’ll create a one-of-a kind piece to show off to your home’s guests.

The advantage of confetti

The beauties here are that you can pick the size of the confetti art work, you can choose the image you want to depict, and you can even use scrap material from other projects that have little to no value for other concepts. These confetti dots are tiny, so it doesn’t take extended amounts of fabric to create them. You might want to keep that in mind as you trim up your fabric for other projects and stash away the scraps and remainders in some kind of a confetti-quilt container. That way, you can build your supply for a confetti project that pops in your head, giving you the ability to start constructing immediately rather than having to search for fabric bits.

plant-leaf-flower-petal-decoration-red-830896-pxhere.com

For a fall project, this is a good option because autumn comes with a great deal of outdoor imagery, like trees filled with colorful leaves or pumpkins placed in front of haystacks. Through the outdoor elements comes the prospect of movement and wind, so having the confetti scraps present to drizzle across your project can give the viewer that sense of movement in a display that’s random enough to highlight the notion.

Working with layers

You can layer the colors and fabrics to boost that realism until you have a strong tree covered in a series of leaves that are dropping to the ground and flying away, a pumpkin patch with dust and leaves blowing past it, a scarecrow that’s caught up in seeds that are breaking away from crops and sailing by… Lots of ways exist to put this idea into practice, and each has a look of intricate realism that’s sparked from the confetti approach.

tree-light-bench-night-photography-sunlight-1234-pxhere.com

The process to perform this task seems basic, if intricate, and so long as you keep the confetti pieces in their places with straight pins, tulle, and early sewing, you can make sure everything stays close enough to the arranged order to highlight the scene as you intended it above your mantle or over your couch—or wherever you choose to place the finished work!

Inspiration is key

If you want to find inspiration for what to depict in your confetti project, try going for a nature walk to look for signs of autumn’s approach, and when something particularly seasonal catches your eye, freeze that memory in your mind (or snap a photo) to remember it. As the month rolls on, nature itself can give you plenty of sights to choose from to be the main scene of your confetti project!

hand-screen-man-person-technology-camera-948351-pxhere.com

So, if your skills allow you to handle this intricate of a project, start looking for that autumn image to commit to a wall hanging!

The Basics Photo Quilts

Once again, we come to the point on this blog where it’s reasonable to look into a new quilt type. The reason for this specific interest for this post is because I happened to figure out that making a certain type of quilt is a lot less difficult than I expected. In fact, I’m toying with the option of making one of these for a Christmas present this year.

But I’m getting ahead of myself. First, let’s look at the quilt type I’m referring to, and then we’ll go into the ease and benefits of making one.

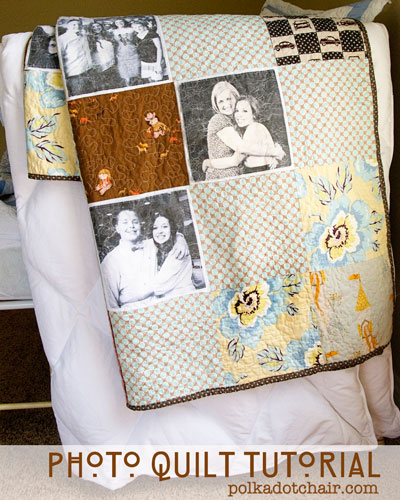
The type of quilt in question is a photo quilt, and it gets its name in the way you might expect—it includes photographs in its design. Now, you can order a printed throw like this through a store, but if you’re going to own or gift something that’s as sentimental as a series of personal photographs, it makes sense to add in that additional personal touch of sewing it yourself.Picture 1

Up until recently, I never realized how simple this prospect could be because I couldn’t grasp how printed photographs made their way to a quilt—unless, of course, you bought the quilt that way. As it turns out, the process is actually simple. You can treat it like a general patchwork quilt—so long as you have printable fabric at your fingertips.

With that one addition to your sewing supplies, you can browse through your pictures to find the perfect ones for your project.Picture 3

If you’re going to create a photo quilt for a wedding gift, for instance, concentrate on images of the right couple together. Once you find enough fitting photographs for the prospect, scan them if you only have print copies and get to printing on that fabric! From there, you’ll need to rinse it and iron it to keep the ink from ruining in the wash or bleeding where you don’t want it to go. You can find those details here.

You can pick and choose other fabrics that complement the theme and look of the images to build the rest of the quilt, and you can tend to the trimming and sizing of the photo blocks in the same manner that you would any other fabric style. Essentially, you’re doing nothing differently expect printing and preparing some of your fabric rather than purchasing all of the fabrics already printed.Picture 1

This is a simple prospect, but it’s a wonderful idea to add personalization to quilts for your own home, for a nursery, for a gift… The process shows care because you searched for the right pictures and because you took the time to piece everything together yourself rather than run to a store to have it printed for you. In a world so technologically advanced, this is one of the ways to use technology to bring a personal quality to something homemade.

Remember that the fabric you pair your photographs with can add value to your work in that they can carry out a particular theme that you’re going for. If you’re creating a graduation quilt (like in the link provided) and you want to showcase all of the graduate’s high school friends for a keepsake to take to collage, choosing fabrics that represent their school’s colors or mascot would be useful, as would ones that reflect typical graduation items—like caps or diplomas.Picture 1

For a Mother’s Day present, you could consider what your mom’s favorite colors and items are and use them for inspiration in regard to other fabric choices. If she adores light blue and lilac, pairing the photographs with those hues can add a level of care to the overall product since it’s another bit of evidence that you know the recipient well enough to pattern the design for them.

You could also use these for your own purposes as well, such as printing off photographs from your trip to Rome or Venice for a European-themed work that showcases the pictures you took during your stay. Even a moment that might seem trivial could be represented through one of these quilts, like the first time you baked with your children. Just take enough photographs to commemorate the experience, then pair your printed photographs with colors that reflect the baked goods you created together. It’s a big way to remember in detail such a small moment.Picture 1

Overall, I’m very much interested in trying my hand at this quilt type, and you can expect updates as I go through the process of trying to construct one. It’s so personal, and I look forward to testing the waters on the matter—especially to see how well the ink stays in place through my own personal experience.

Have any of you ever tried a photo quilt? Suggestions? Let me know!

Picasso Products for Sewing

Picasso Products for Sewing

Sewing can be a precise art of measurements and strategies. But at times, it’s kind of fun to loosen the standards and try for something less typical—and the results can be quirky and intriguing! This is what I like to refer to as Picasso Sewing. The title is a bit misleading since there’s structure and definition to Picasso’s works, but the idea of odd elements that don’t necessarily fit together is a fair representation of what you could create if you try for a more lenient method of making your next sewing project.

For example, a Picasso throw pillow, which I recently did!

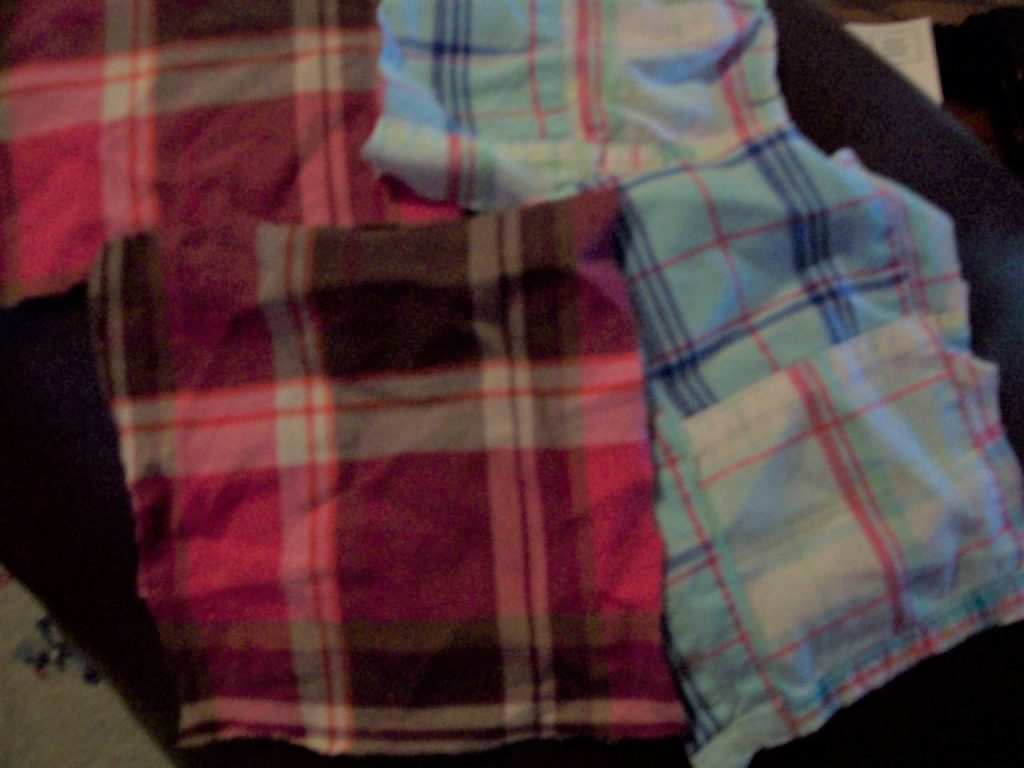
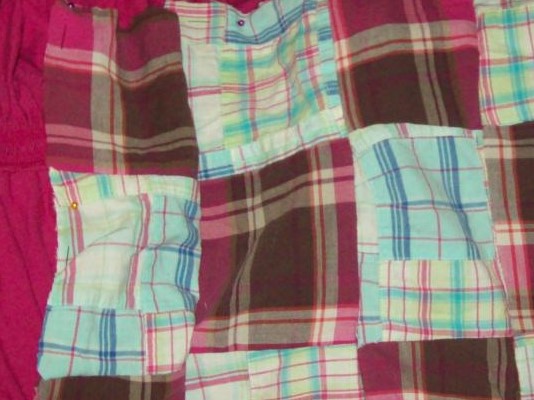
First, I chose fabrics that fit together without matching in the most conventional sense—two patterns that are both based on geometric shapes and lines of color.

Picture 1

The primary colors stand out from one another, but the blue fabric includes a similar pink shade to what’s on the pink. The most distinctive difference between these two fabrics though could be the pieced-together look of the blue fabric. Whereas the pink blocks are solid pieces, the blue ones were already a patchwork design since multiple geometric shapes form the overall design. The fabric choices essentially match in a shared pink color and a general foundation in geometry, but they’re different enough to create a mismatched look.

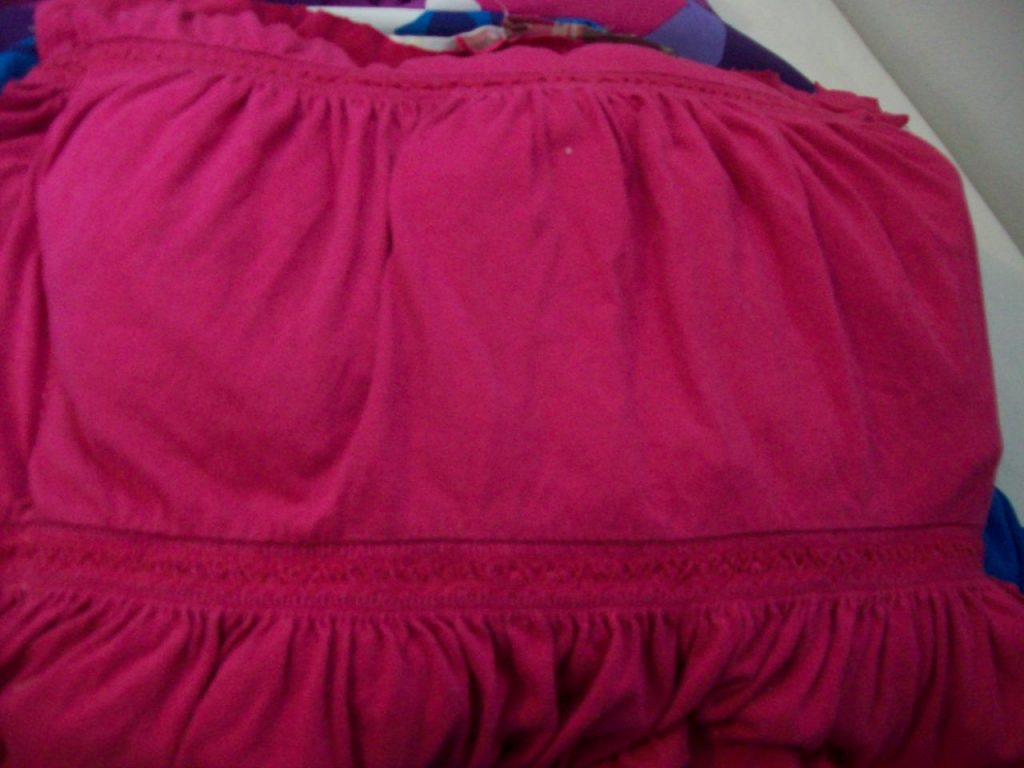
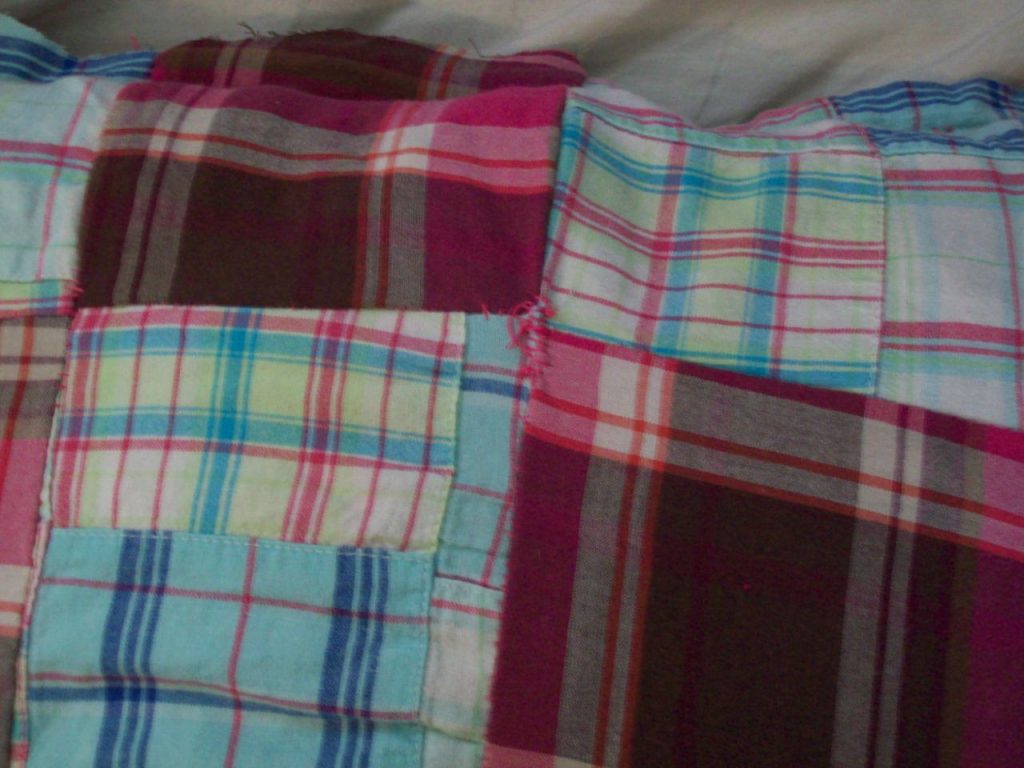
For the backing, I chose a different pink fabric that comes with elastic-esque lines of fabric.

Picture 2That elastic quality made this fabric a gamble since I didn’t know how the bunched areas would work when the front and back were sewn together, but remember that I was taking risks with this one!

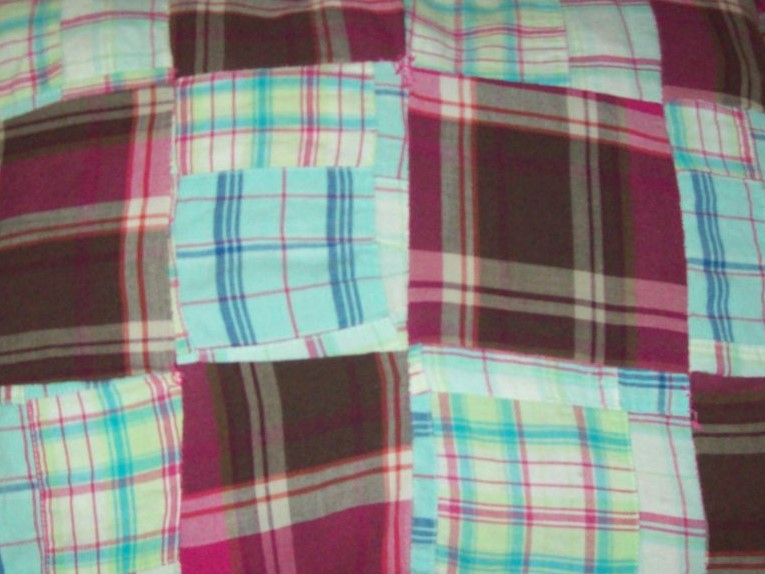
Once I had my out-of-the-fox fabric selected, it was time to start piecing together the front part of my pillow. I chose to go with a patchwork design, but I was lenient with how I put the patches together—and even how I cut them. Basically, I cut out a piece of one fabric, then cut other fabric shapes that were similar, but not necessarily exact, in size. Once I had pieces that looked (to my eye) sensible for a patchwork project—an estimation of approximately 2-3 inches in either direction—I decided on the pattern those pieces would take and started sewing the blocks together.

This is another step where basic sewing strategy was put on a shelf to create something more Picasso than an average throw pillow. I didn’t pin the individual blocks together, and I tugged them so that they fit alongside their neighboring pieces essentially on whims. I just tried to get a good amount of space for each block of fabric, and I didn’t worry too much about making everything exact and organized.

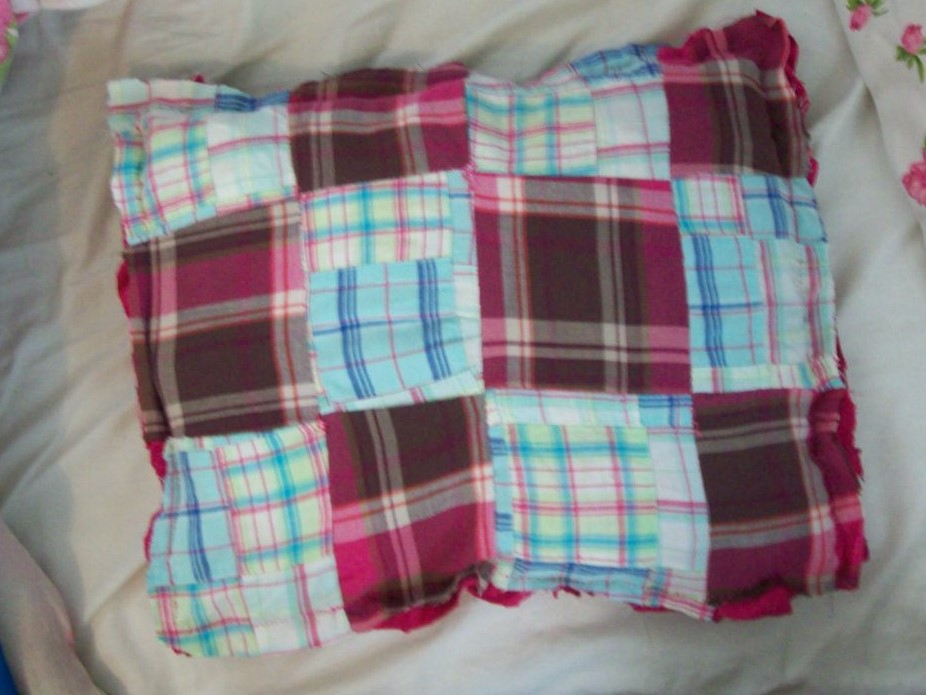
The result was an interesting setup where the blocks were tilted and varied in size, and I love it!Picture 3

I did give a bit more thought to piecing the lines of blocks together by using a handful of straight pins, but the messy appearance still exists in this pillow!

I ended up adding a fourth row of blocks to get the pillow a little bigger (I seriously eye-balled and compared fabric blocks to get every measurement here), but after that, it was time to apply the backing. To do that, I was again unorganized in my methodology. I laid the top layer of the throw pillow on the backing material, then pinched the backing fabric enough to where there would be extra space between the layers for filling.

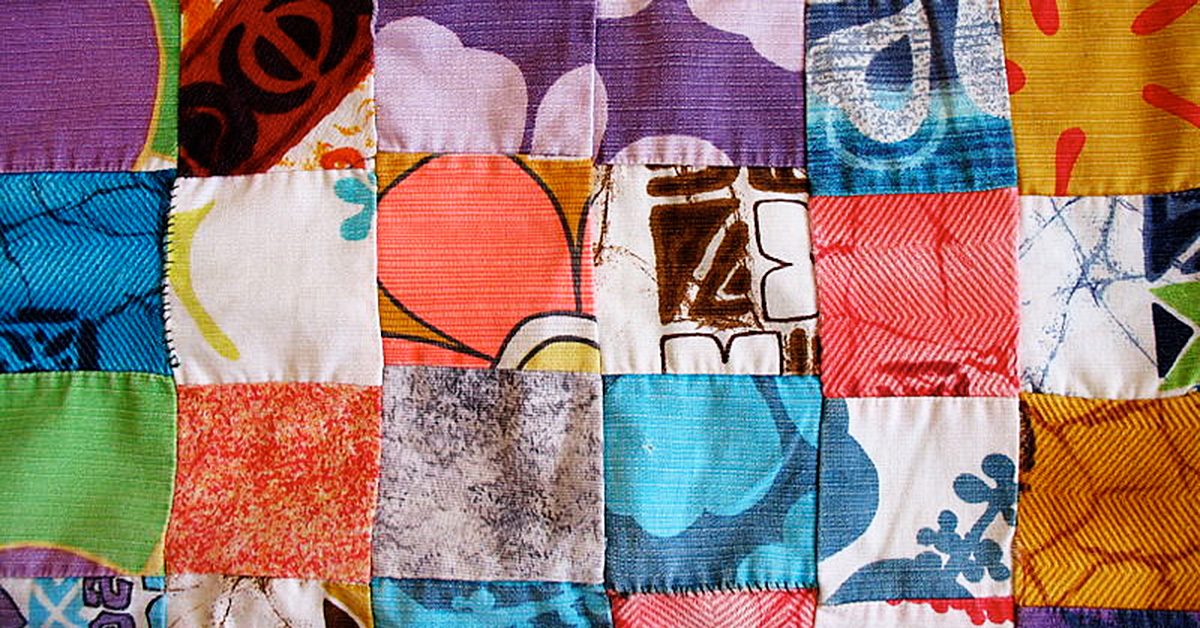
I only used less than a dozen straight pins to keep the layers of fabric in place as I sewed far enough from the edges of the top layer’s fabric to allow excess material on all sides.Picture 4Next, I sewed along all of those sides until there was one patch of open space left to insert the filling, then finished sewing the rest once the filling was inside. Since I had the elastic element to consider for the backing, at times, I had to allow bumps between stitches to make up for the excess fabric for all of this sewing detail.

After that, I’d intended to shred the edges to make this a raggedy throw pillow, but once I cut off the larger portions of the backing fabric, I found I already liked the raggedy look that the unclean edges brought to the product. So rather than rocking the boat by shredding the ends, I just cut off pieces that *needed* trimming—like excess thread or very shredded parts of the fabric.

There are two details about my process that I’ll mention in addition to this basic strategy. The first is what I used for filling. This is a creation that’s not intended to look or be sophisticated, so I used a series of old shirts to stuff into the pillow. If you’re going for something that’s more concerned with comfort, you might want to try for a more standard filling.

The other detail is that this process, since it ends with a ragged final product, can be forgiving for mistakes because it’s understood to look a little worn. For me, that came in handy because I didn’t leave enough fabric to completely link the patches in at least one spot, causing a gap. Since it’s okay for this pillow to look imperfect, I was able to sew up that spot without worrying that the thread would be seen, then add that thread-repair-look at a couple of other spots that didn’t need it.Picture 5The result seemed like a structural decision to bring that ragged quality to life rather an error in strategy.

The final product is a pillow that’s Picasso-like in its leaning and varied-sized blocks, and so very raggedy with its frayed ends and fake repairs. Had I gone strictly by the books, I might not have come up with something so imperfect looking—and I really would be missing out because I adore this pillow! Picture 6The moral of the story? Don’t be afraid to bring a little imprecision and a lot of Picasso to your sewing to create unique products! Sure, strategy is great, but loosening the guidelines in sewing can be awesome, too!

Strip Piecing for a Postage Stamp Quilt

Strip Piecing for a Postage Stamp Quilt

It seems the more I dig into the world of quilting, the more things I find that I never knew about it in the first place. The brand of creativity is like a well of opportunities, or a garden that you can browse until you find the right flower to plant in your yard. Each project and possibility is its own type of craft, and the quilter has to figure out which of them is intriguing enough to try a hand at.

This idea is essentially what I’m doing for this blog when I explore new quilt types. I look at new possibilities, and when one catches my interest, I dig deeper!

For this blog post, that’s exactly what I’ll do for what’s known as a postage stamp quilt.

Postage stamp quilt

A postage stamp quilt.

A postage stamp quilt.

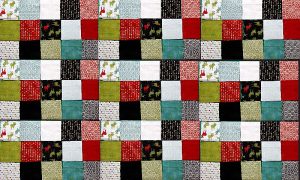
If you’re wondering what a postage stamp quilt is, it’s actually not that complicated of a style to explain! Think of a roll of postage stamps waiting to be applied to envelopes, and you’ll have a good grasp on what they can look like. It’s one small block of fabric after another, like the patchwork quilt I invested time in, but with much smaller pieces. In fact, that seems to be the main difference in the top layer of a postage stamp quilt and one for a general patchwork quilt if they’re both basic block formats. For the stamp quilt, the blocks are smaller—potentially only a couple of inches!

When I was first introduced to this concept, I was a little intimidated. The reason for that intimidation was that I know by experience how much time can be spent assembling the outer layer of a larger-block quilt (something closer to ten inches), so the idea of putting together pieces that are this small felt overwhelming. Taking the process one piece at a time would require a long, long time for me, and the strategy would be so focused on such a smaller area that it would almost have to be tedious. As intrigued as I was, I figured it would be a frustrating task!

Strip piecing

Then I did a bit more research, and I realized you don’t have to sew these pieces one at a time. Another strategy is to strip piece them together.

All strip piecing means is that, rather than focusing on one square block of fabric, you’re using longer sections to sew together  — rectangles in place of squares.

All strip piecing means is that, rather than focusing on one square block of fabric, you’re using longer sections to sew together
— rectangles in place of squares.

All strip piecing means is that, rather than focusing on one square block of fabric, you’re using longer sections to sew together—rectangles in place of squares. For example, if you choose to use two-inch blocks of fabric for your stamp blocks, make sure the width of each strip of fabric is two inches, but don’t worry about creating the two-inch length yet. Rather, keep those strips longer!

As one source pointed out, how long the strips are can depend on you, what you’re able to handle, and how long you can keep cutting in a straight line (Quilt Videos, 2016). If you can go from the top to the bottom of three feet of fabric, you can have three-foot strips of fabric to work with. But if you find that you tend to get shaky or swerve-prone with extended cutting, you might want to keep those strips smaller. For me, I probably wouldn’t go beyond ten or twelve inches, but if you’re a more advanced quilter, you can try for more.

Time to put these pieces together

Once you have your strips, line them up side-by-side and sew them together in a chain fashion, two strips at a time.

Once you have your strips, line them up side-by-side and sew them together in a chain fashion, two strips at a time.

Once you have your strips, line them up side-by-side and sew them together in a chain fashion, two strips at a time. Begin with your first two strips, sewing them along their long sides so that they’re linked with both of their primary images being showcased, and then do the same with one of those linked pieces and a new strip. Once you finish, you should have a series of fabrics connected in long strips that are small enough, width-wise, to embrace the postage stamp quality in a quilt.

Once you finish, you will have a series of fabrics connected in long strips.

Once you finish, you will have a series of fabrics connected in long strips.

From strips to squares

After you’ve sewn a number of strips together—again, it can depend on how much you’re comfortable with working on at a time—it’s time to make those rectangles into squares! If your fabric strips were two inches in width, measure and cut across your connected fabric strips at every two-inch interval from top to bottom, length-wise. At that point, you should have a series of new strips, though these will be made of a series of smaller blocks of fabric—as many blocks as fabric types that you used.

If your fabric strips were two inches in width, measure & cut across your connected fabric strips at every two-inch interval from top to bottom, length-wise.

If your fabric strips were two inches in width, measure & cut across your connected fabric strips at every two-inch interval from top to bottom, length-wise.

You should repeat this process through all of the fabric you plan to use for your quilt until all of it has been transformed into these multi-fabric strips. From there, it’s time to start piecing them together into the top layer of your quilt. All you need to do is arrange them together in a way that looks appealing to you until you reach the width and depth you were looking to achieve in your quilt.

All you need to do is arrange them together in a way that looks appealing.

All you need to do is arrange them together in a way that looks appealing.

The process might sound a bit complicated, but once you get the hang of it, you might be surprised at how quickly your stamp quilt comes together!


References
Quilt Videos. (2016, March 24). Quilt Monkey – Episode 301 – Easy, Strip Pieced Postage Stamp Quilt Block [Video File]. Retrieved from https://www.youtube.com/watch?v=j3N7al2V8C8
Witherby, S. (2011, October 27). Dead Simple Christmas Quilt mock up [Electronic Image]. Retrieved from https://www.flickr.com/photos/inkyswot/6285898784
Fabric for Filling Empty Wall Spaces

Fabric for Filling Empty Wall Spaces

Not so long ago, I had a series of plaques that I’d earned hanging on my wall above my bookshelf. Since then, the bookshelf was moved for the sake of rearranging my bedroom, and those same plaques were then hanging to the right side of my bed with a big space of emptiness below them. Now, because I had a concern about those plaques falling off the wall and onto the bed during the calm of a night’s sleep, I took them off of the wall altogether. And now?

Now, I have an even bigger empty space—one that exists from the ceiling to my bed.

Now, I have an even bigger empty space—one that exists from the ceiling to my bed.

Now, I have an even bigger empty space—one that exists from the ceiling to my bed.

Yawn

That’s boring. Very, very boring. It’s like my bedroom is incomplete, and I will potentially feel frustration over this until it’s covered and decorated as fully as the rest of the area is. So because I have such a distaste for the blankness of the wall, my mind has been perusing the possibilities as to what specifically could go on this space to fix the issue and therefore give me a more relaxed mentality in regard to this wall that’s so close to the right side of my bed.

My original idea for fixing my wall-is-too-empty issue was to hang a Marvel poster beside my bed, even though I know by experience that having a poster fall on you in the middle of the night can be a frightening experience. Why? Well, call me a child, but I still appreciate a good poster (and certain Marvel movies). It’s an easy fix that won’t give me a concussion if it falls at night, and it’s a cheap one if I buy the right poster. But then I got to thinking…

You see, I recently cleared out some clothes from the dresser, and if you’ve learned one thing about me through reading my posts on this blog, it could be that I’m cheap and like to make use of what I already have for fabric. So since I did that dresser-clearing, I have material right in my bedroom that can be used to create something to go on this too-empty wall to my right.

So since I did that dresser-clearing, I have material right in my bedroom that can be used to create something

So since I did that dresser-clearing, I have material right in my bedroom that can be used to create something

But what would that something be? That became the question, and through internet browsing, I’ve come up with two options I’d like to share with you.

Let’s brainstorm

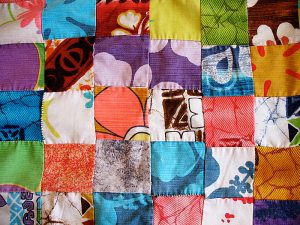
The first of these possibilities is to create a wall quilt to hang there, one that’s a combination of the pieces of fabric that were banished from the dresser. Since I adore patchwork quilts, this option could be accomplished by the simple process of using similarly sized pieces of fabric for each block to compose something that’s bright and vivid—and an interesting touch to my wall décor. As I’ve covered patchwork quilts a number of times already on the blog, I won’t go into too much detail about how to make one. Just know that it’s a prospect, and time and effort could lead to a one-of-kind wall hanging to fix my problem through this method.

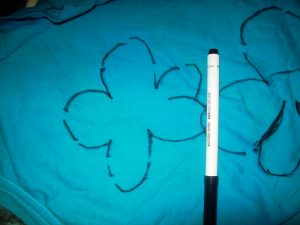
Beyond that though, I noticed a particular quilt idea that sparked an idea that moves away from the actual quilt theme. It was from a quilt that depicted a flower garden, and it occurred to me that the overall scene could be applied away from the quilt setting. How? You’d just need to assemble the pieces of the quilt project in separate formations and hang them on your wall instead of sewing them to the quilt. For instance, you could take a marker (use a fabric-friendly writing utensil!) and trace the patterns of flowers, butterflies, clouds, the sun, a house… Whatever you feel is appropriate for the scene you’re trying to showcase. Simple rectangles could be used to create a fence, or a combination of fabric types could come together to create something as intricate as a rosebush. Just imagine a hole fabric-created garden scene placed right on your wall!

Take a marker (use a fabric-friendly writing utensil!) & trace the patterns of flowers, butterflies, clouds, the sun, a house…

Take a marker (use a fabric-friendly writing utensil!) & trace the patterns of flowers, butterflies, clouds, the sun, a house…

In fact, this idea could be embraced for more than just using your fabric to cover up an empty space on your wall. You could use your old fabric to create holiday scenes, for example, for a sentimental touch to your decorations. If you only have red and white, you could make candy canes. Only blue? How about snowflakes?! A series of fabrics? Get to work on a gingerbread house! These individual pieces could be tiny projects that of themselves are beautiful and worth showing off, but when you bring them together, their appeal increases—a lot!
Fabric for Filling Empty Wall Spaces

Don’t overlook the prospect of constructing these tiny projects that come together for a bigger work of art! It’s like a quilt, but without the actual quilt part—which is a pretty interesting twist to me!

Getting Through a Sewing Lull

Getting Through a Sewing Lull

Tell me if this sounds familiar. You’re a little bored. You’d love to work on a sewing project, but you’re also in between projects. You don’t have any events coming up and you don’t have the urge to create something new for your wardrobe, or anyone else’s. I call this a sewing lull. In my freelance writing and book writing careers, I sometimes experience the same thing. Over the years, I’ve found some techniques to get through those lull periods without going stir crazy from boredom.

Go Back to Your Joy

Go Back to Your Joy

Why did you start sewing in the first place? Was it to make something specific or was it simply because it was a skill you wanted to learn? Think about what gives you the most joy when you sew. For me, it’s one of two things: either wearing something I’ve made and getting complimented on it or giving something I made to someone and seeing their joy. Tap into what you love about sewing. Then…

Expand Your Repertoire

If you’re like me, you usually have a few favorite things to make. Use your sewing lull to expand your repertoire. If you usually make clothes, try making a stuff toy or blanket. Maybe go really big and learn a completely different sewing skill, like quilting or embroidery. As long as it taps into the reason(s) you started sewing, love sewing, in the first place, you’ll have a winner.

Run with Scissors

Okay, don’t really run with scissors. It’s dangerous.

Okay, don’t really run with scissors. It’s dangerous.

Okay, don’t really do this. It’s dangerous. What I mean is step outside your comfort zone, disregard what usually holds you back and leap into a new sewing skill, project or technique without taking time to talk yourself out of it. Maybe there’s something you’ve been wanting to try for years, but your pragmatic side has been holding you back. This sewing lull is the perfect time to throw caution to the wind and give it a shot.

I find these three things get me through any lull, sewing or writing, and I learn some new things along the way. At the same time, it also helps me reconnect with why I love what I do – we all need that reminder sometimes, right.

Professional Quilt Pieces by AccuQuilt

Professional Quilt Pieces by AccuQuilt

'Winging it.'

‘Winging it.’

Good morning My Sewing Friends,

I appreciate all the comments I received from my last blog. I feel the need to preface this one with the explanation that I always try to do the best I can about measuring and sewing seams straight and accurately. I felt a little guilty telling you that I kind of “winged” it in the blog time before last about the scrap quilt made from pieces that were matched not measured in size. I just want to say that I firmly believe anything you attempt to do, do it well, or do it again to make it better. Perfection with sewing comes with practice, but don’t be hard on yourself if it doesn’t turn out the first time. Your time is valuable and the reward of doing something that looks great takes work and focus. But please, enjoy it along the way!

Angela jumps down now!

Angela jumps down now!

Today I want to do a product review that saves a lot of time and makes great sense to do when you are planning a quilt. So many ideas are available through quilt patterns and packaged quilt kits. Online stores have a multitude of pattern quilts and instructions.

Those are great for ideas, but to me, a quilt designed by the person sewing it, is much more rewarding and showcases your personal style.

Fly into the comfort zone

Come out of your comfort zone and design your own patterns using different textures, shapes and colors. Look through quilting magazines for inspiration, Pinterest or other sewing books. Most quilts are made by geometric square, triangles, parallelograms, and blocks of different sizes. Sewn together or apart, so many options are available, but make it your own with your favorite elements.

Make a design board of your favorite shapes and colors, then decide which type of fabric designs that you enjoy looking at, and the colors that would blend in your home or those you may make for donations or gifts. All fabric fits into design groups. Learn about which are modern, traditional, tribal, and vintage. Look at the different patterns and discover that most are blocks and triangles, strips and even other cut pieces that when cut from different pieces can form a very sweet quilt made like a picture.

So, let me introduce to you to the product regarding these concepts to build the precisely cut quilt pieces that would you would love making and know that you have the only one like it. The products are the AccuQuilt GO Cutter Line of fabric cutters.

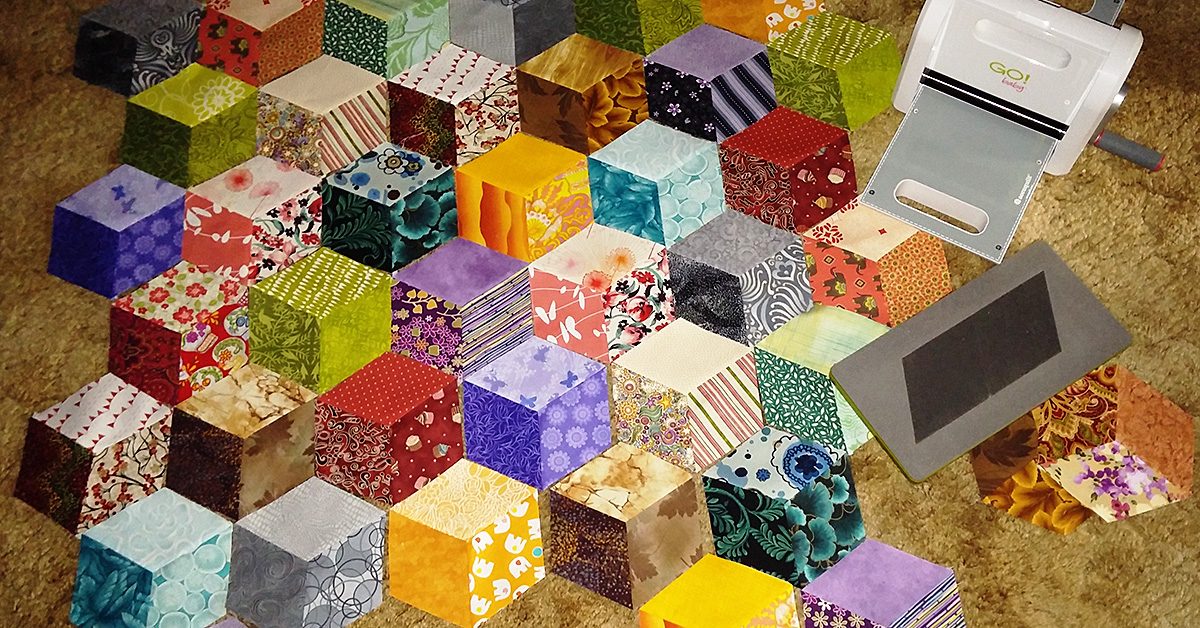
SewingMachinesPlus.com has these products that fit any budget. You can quickly cut accurate blocks, triangles and many other shapes with these fabric cutters. The idea is that a die is in the machine and up to six layers of cotton can be placed on a cutting mat and be cut all at once. What a time saver! No turning the fabric on the mat and measuring again and again and cutting with your rotary cutter. The best part is they have a wide assortment of strip dies, alphabet, parallelogram, rectangles and blocks as well as other small shapes for baby appliques and seasonal shapes.

You can have all your shapes and strips cut to be able to sew a quilt in record time.

AccuQuilt Go includes

In summary, the AccuQuilt Go line of Fabric Cutters have the following to promote beautiful sewing projects.

  1. Faster than rotary cutters or scissors
  2. Safe to use
  3. Portable and lightweight ( See the “Go Baby” and the “Go” Cutter (Great for sewing class or retreats and smaller projects)
  4. Includes die and cutting mat that last for many die cut pieces
  5. Additional dies of many types are available for designing patterns besides
    blocks and triangles
  6. AccuQuilt “GO BIG” Electric Cutter for larger projects and more die choices
  7. Ask about financing – you will save so you can purchase the fabric you love (love this one!)
  8. Ask about Limited Warranty on the machines when you order
  9. Still can be used when following patterns and with ready made design kits if you are not ready to “plunge in the fabric pool” and design your own patterns

There you have it! Order online from SewingMachinesPlus.com or call them and ask for help to decide which cutter best suits your needs. Then send me a picture in the comments space below of your beautiful personally designed item. I would love to see it. Start small and you will finish projects and love the results!

Ready? One, two, three, AccuQuilt GO!

By the way, tell SewingMachinesPlus.com that Angela sent you!

Have a happy sunny day, and Keep Calm, Keep Sewing!

**Above images from Accu-Quilt Website
The Basics of Cathedral Window Quilts

The Basics of Cathedral Window Quilts

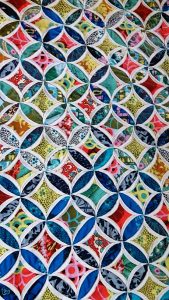
The time has come to explore yet another quilt type, and this one seems a bit less known than your standard patchworks and rag quilts. In fact, until I was doing brainstorm-browsing for this post, I don’t recall having ever heard of this kind of quilt, but the style is noteworthy enough to merit looking into. Through repetition, pattern, and color, quilts of this variety can have an interesting look to them that makes them stand out in similar fashion to the architectural designs of their namesakes.

The type of quilt I’m referring to is a cathedral window quilt.

The type of quilt I’m referring to is a cathedral window quilt.

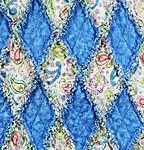
The type of quilt I’m referring to is a cathedral window quilt, and as distinctive as cathedrals themselves could prove, these sewing products can be straightforwardly identifiable once you know the traits to search for. Those traits, as with the artistic and structural wonder of cathedrals themselves, can catch the eye with their composition and beauty like few other quilt styles — in my opinion — are capable of doing. In this post, we’ll go through a list of typical characteristics that you can spot in a cathedral window quilt that provide evidence of its type so you can more easily identify one in a crowd of variously styled quilts. In particular, we’ll focus on four distinctive features of cathedral window quilts, starting with their…

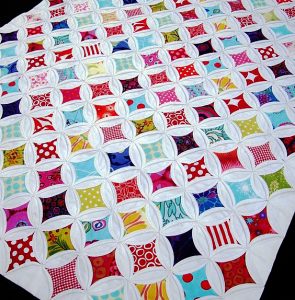
These quilts are not necessarily known for bright coloring.

These quilts are not necessarily known for bright coloring.

Bold colors

These quilts are not necessarily known for bright coloring, but a good percentage of the fabric used in creating a work of this category could be very bold, like dark blues, greens, and reds that give their sections a real pop. Even with the cathedral window quilts that use more pastel-based colors, those color options are still varied and strong, and they could build centralized sparks of color in certain patterns. If you’re going to make a cathedral window quilt, be sure to include some very dynamic colors to give these defined and robust splashes of color throughout the product. These bits of color, to construct the right design, “are folded precisely and sewn with curves to create small windows,” and “folded blocks are added together until the quilt is the desired size.” This sounds very direct and uncomplicated, but what are those bold-colored fabric pieces added to? That would be…

The overall point though is that the juxtaposition of light & dark make each section stand out.

The overall point though is that the juxtaposition of light & dark make each section stand out.

White fabric

Along with varied colors, it’s also a good idea to snatch up some white fabric if you intend to make a cathedral window quilt. That white fabric added in contrast to the bold colors already mentioned helps to cement the notion of having stand-out sections of color on your quilt. Typically, the white fabric can completely surround portions of bold-colored fabric, but the reverse can be true as well if bold colors appear to surround the white fabric. The overall point though is that the juxtaposition of light and dark make each section stand out — the bold colors and the white sections — to result in a quilt that doesn’t necessarily have a single piece of it that isn’t remarkable and noteworthy.  The consequence is a repetitious design that follows a…

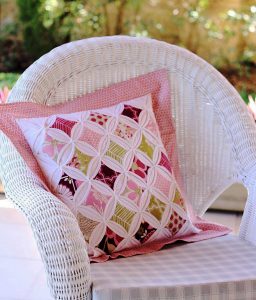
These quilts can employ very specific shapes in their overall design—ones that can be mimicked in pillows.

These quilts can employ very specific shapes in their overall design—ones that can be mimicked in pillows.

Definite pattern

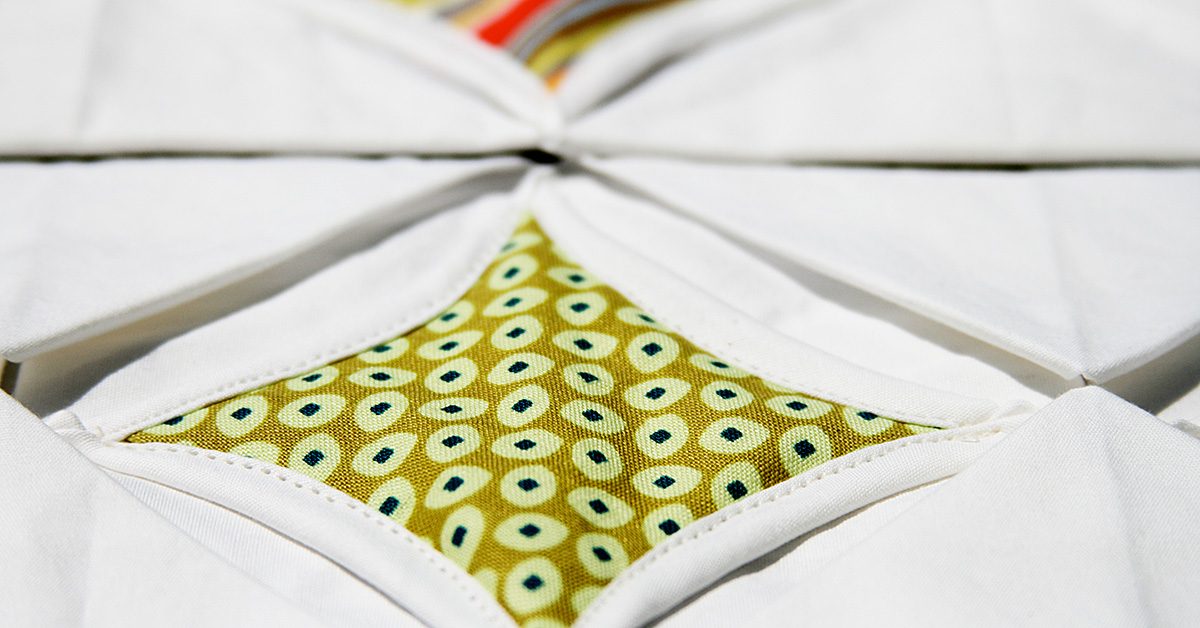
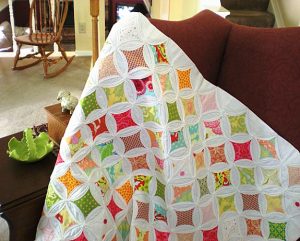
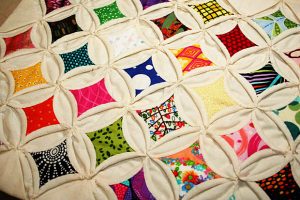
Often, these quilts can employ very specific shapes in their overall design — ones that can be mimicked in pillows. Specifically, the bold colors are often in the shape of near-diamonds, but those diamonds’ sides invert inward to create a swooping motion along all four sides. That diamond-esque shape is surrounded by a circle — one that can be ringed — and those circles can overlap throughout the entirety of the project. Is this the only way that a cathedral window quilt can take shape? Well, it’s not set in concrete! But if you see this general pattern, you have very real evidence that you’re looking at a cathedral window quilt since the pattern is so common for the style. Another trademark is that it has…

If you neglect a layer of quilt, that’s a layer of quilt that isn’t available to strategically cover mistakes & such, so the work could feel more vulnerable.

If you neglect a layer of quilt, that’s a layer of quilt that isn’t available to strategically cover mistakes & such, so the work could feel more vulnerable.

No backing

That’s right! With this quilt variety, you can forego the backing detail since the “quilt blocks… stand alone as is” without that extra detail. Does that factor make for an easier project? Maybe not! If you neglect a layer of quilt, that’s a layer of quilt that isn’t available to strategically cover mistakes and such, so the work could feel more vulnerable. Once you get the hang of the process though and make the adjustment, it might actually lead to an easier quilting experience because “you simply iron down your edges and sew.” Considering the level of beauty that these quilts can achieve, it seems like a sensible prospect to push through the confusion of learning to construct a quilt without a backing in order to eventually fashion such a lovely and reportedly easy project.

With these guidelines in mind, you could be able to spot a standard cathedral window quilt among other quilt options with scarce effort. In fact, coming to that conclusion of quilt style could become almost instinct where you look at a product and say, “Yeah! That’s a cathedral window quilt!” since the appearance is so very individual — and lovely!

How to Hang a Quilt

How to Hang a Quilt

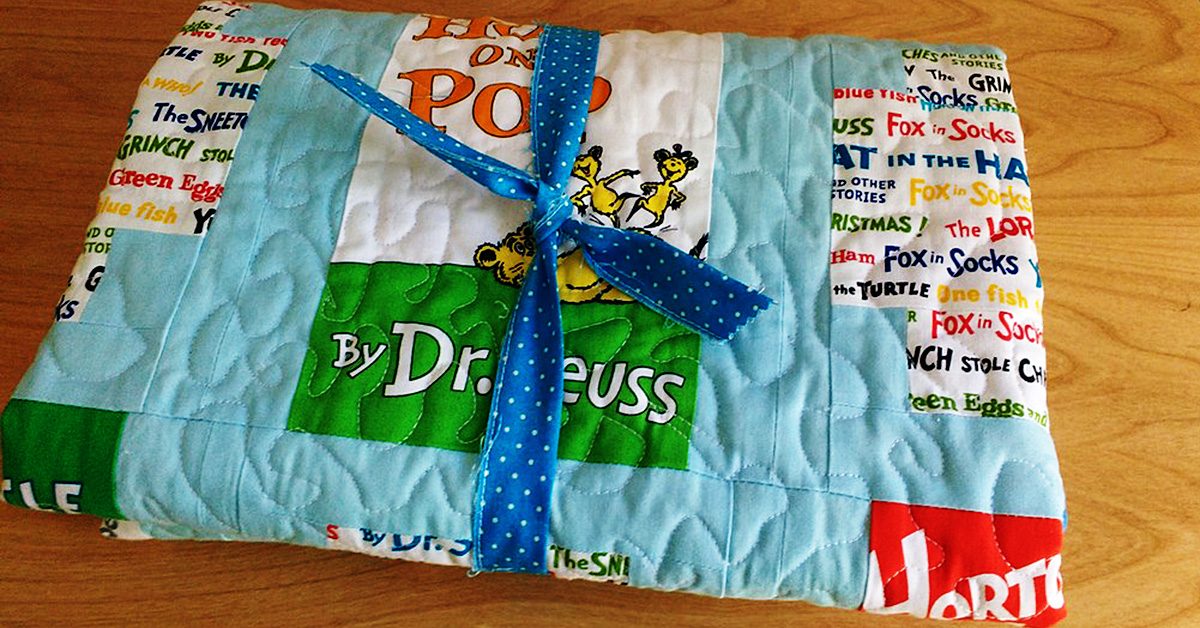
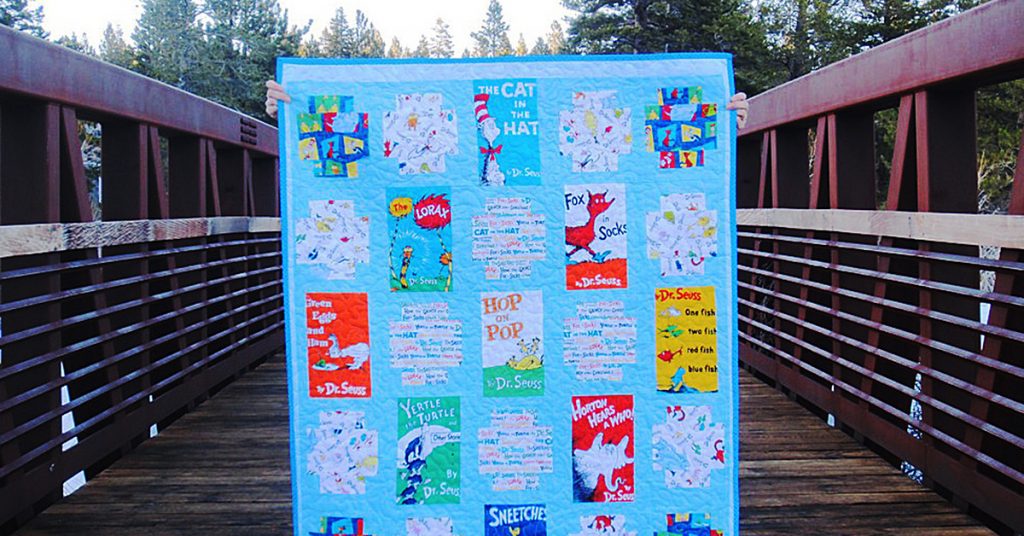
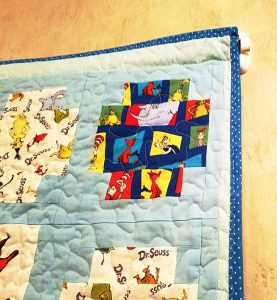
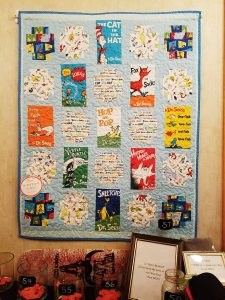
I recently wrote about this Dr. Seuss Quilt I made to donate to our local elementary school’s annual gala. Most of my donations have been made online so I hadn’t thought in advance about hanging or displaying the quilt at an event.


Dr. Seuss Quilt

Dr. Seuss Quilt

I poked around the internet and looked at the best way to consider hanging a quilt after it had been made. Many showed how to sew triangle pouches or hanging sheaths during the process of adding on the back of the quilt but not many talked about what to do after the fact. Here is what I decided on.

Let’s get started

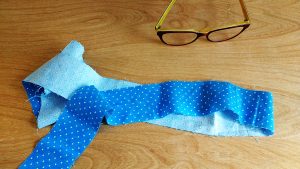
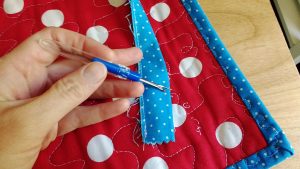
There were still a few strips of my binding fabric on hand because I always tend to make too much.

There were still a few strips of my binding fabric on hand because I always tend to make too much.

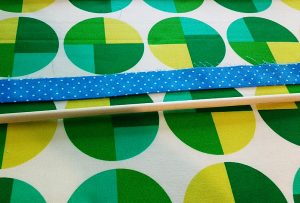
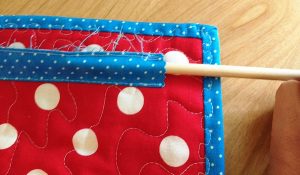
I headed to our local hardware store and bought a small dowel. I was pretty sure that if I doubled over the binding strip, the dowel would slip in perfectly to the tube I created.

I was pretty sure that if I doubled over the binding strip, the dowel would slip in perfectly to the tube I created.

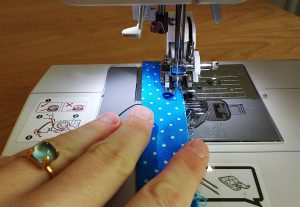
I sewed the top of the tube in advance of sewing it onto the quilt.

I sewed the top of the tube in advance of sewing it onto the quilt.

OK, easy part is over…

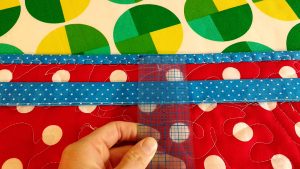
This part was the trickiest. I really didn’t want a super visible stitch on the quilt’s front so I measured front and back to align the fabric tube as perfectly as I could with a main seam on the front.

This part was the trickiest.

This part was the trickiest.

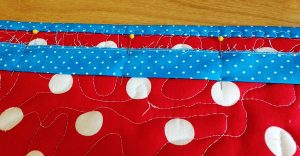
I pinned it and double checked on the front to see if I had gotten it right.

I pinned it and double checked on the front to see if I had gotten it right.

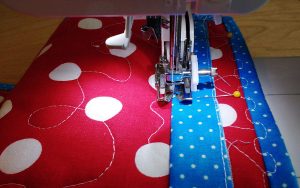
Then I used a basting stitch and sewed the bottom of the tube to the back of the quilt.

Then I used a basting stitch & sewed the bottom of the tube to the back of the quilt.

Nicely done

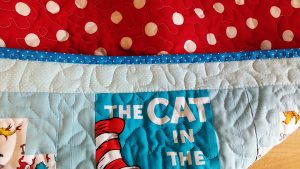
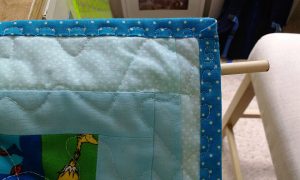
Moment of truth! And I nailed it almost perfectly. The seam is pretty invisible on the front.

The seam is pretty invisible on the front.

The seam is pretty invisible on the front.

Next up I slid the dowel into the fabric tube and voilà, it fit in just right.

Next up I slid the dowel into the fabric tube & voilà, it fit in just right.

Here’s how it looked from the front.

Here’s how it looked from the front.

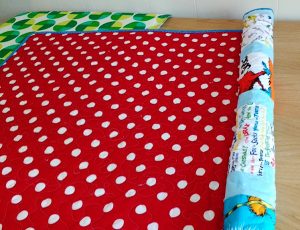
With the dowel in place, I could roll the quilt for easy transportation.

With the dowel in place, I could roll the quilt for easy transportation.

Showtime

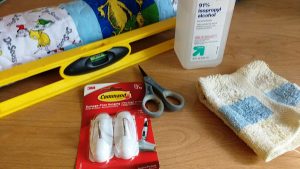
I contacted the hotel where the event would be happening and went in advance to see where exactly I could hang the quilt. The management let me know I could use Command Hooks on the wall so I brought the hooks, some rubbing alcohol and a cloth wipe (to clean where I’d be placing the hooks), a level to make sure I hung them evenly, the quilt, and some scissors to trim any stray threads.

I contacted the hotel where the event would be happening & went in advance to see where exactly I could hang the quilt.

The hooks needed an hour after being hung to attain their full strength so I brought the quilt back home until the actual event.

The hooks needed an hour after being hung to attain their full strength so I brought the quilt back home until the actual event.

And here is the finished product hanging at the gala that night. Lovely, no?

Here is the finished product hanging at the gala that night.

After the gala I brought the quilt back home to remove the fabric tube on the back. The basting stitch I had used made it quick work to take off.

The basting stitch I had used made it quick work to take off.

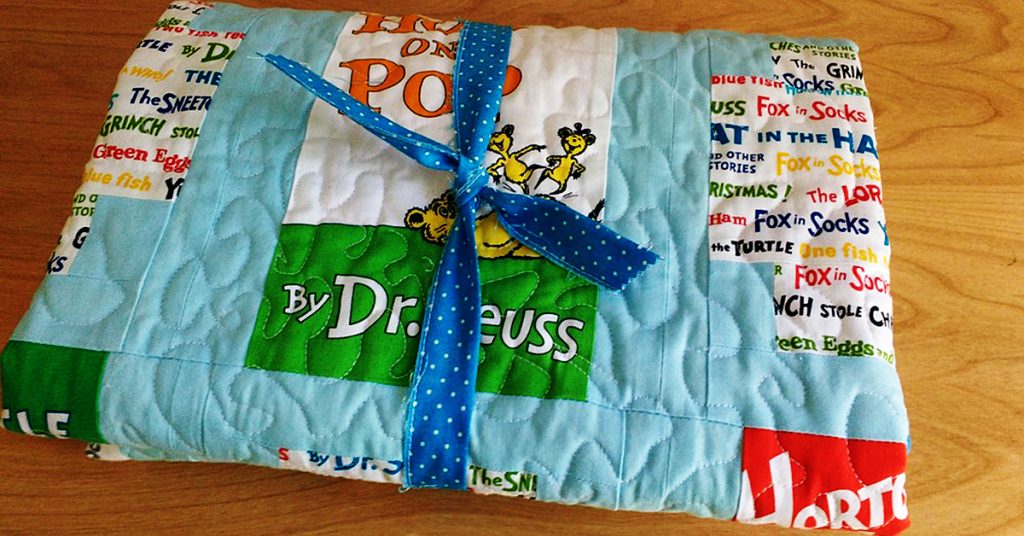
I then recycled the tube of fabric and used to wrap up the quilt for gifting.

How to Hang a Quilt

Have you ever donated something you’ve sewn to benefit an organization you cared about? Let us know in comments!

———————————————————————————–
Charlotte Kaufman is a writer and sewist in Mammoth Lakes, California. She specializes in marine and home interiors and continues to fall more and more in love with quilting. You can follow her at charlottekaufman.com.
May the 4th Be with Your Sewing Projects

May the 4th Be with Your Sewing Projects

Not every holiday has to be one that leaves the shelves of stores stocked with accessories and baking supplies that are that-holiday-themed. Some of them can pass by with a lot less glitz and glamour, with only those people who are interested and aware of said holiday embracing it on their own terms. National Talk Like a Pirate Day, anyone?

Pirate talk included, one of my absolute favorite holidays of that category is one that embraces a very real part of my nerdy heart: Star Wars Day.

That’s right. May the 4th is a good day for me! In fact, for this Star Wars Day, I’m planning on trying to introduce my youngest niece to the first movie of the original trilogy. Here’s hoping she loves Chewbacca as much as her Aunt Connie does!

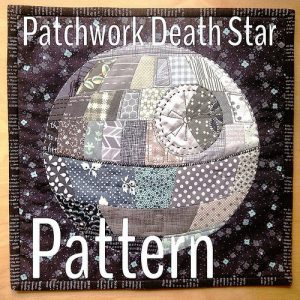
There are a number of options for this kind of product, but one that really stuck out to me was this Death Star quilt.

There are a number of options for this kind of product, but one that really stuck out to me was this Death Star quilt.

And there are plenty of sewing projects that are fitting for the day. Of course, it’s a little late in the game to make these for this Star Wars Day, but they’re ideas to keep in your head for 2018!

For instance, you could make a Star Wars blanket or quilt. There are a number of options for this kind of product, but one that really stuck out to me was this Death Star quilt. I absolutely love the collage element that makes up the Death Star in this project, and the galaxy-esque material it’s on is a perfect fit for the theme. It’s dark and looming, just like the Death Star should be! I, personally, would be proud to be the maker of such an interesting take on the empire’s weapon!

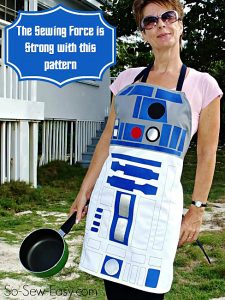
For a person — like me — who adores baking, making a character-inspired apron like this one feels like a wonderful option!

For a person — like me — who adores baking, making a character-inspired apron like this one feels like a wonderful option!

But if you’re feeling a little more Jedi/Rebel Alliance-inclined, maybe you’d rather embrace a concept from their side of things — like R2-D2. For a person — like me — who adores baking, making a character-inspired apron like this one feels like a wonderful option! Since I may or may not have a series of Star Wars kitchen supplies on an Amazon wish list, this would be a wonderful addition to the mix. I could totally see myself wearing an R2-D2 apron and oven mitts while my R2-D2 oven timer buzzes…

Oh, & remember how I said I loved Chewbacca? Imagine your little one decked out in this Chewbacca costume!

Oh, & remember how I said I loved Chewbacca? Imagine your little one decked out in this Chewbacca costume!

Oh, and remember how I said I loved Chewbacca? Imagine your little one decked out in this Chewbacca costume! This one could double as a Star Wars Day project and a Halloween one since this would make an adorable costume for trick-or-treating time! It would include a number of pieces — like ammo belt details — so you might want to make sure you start early enough to tend to all of these aspects!

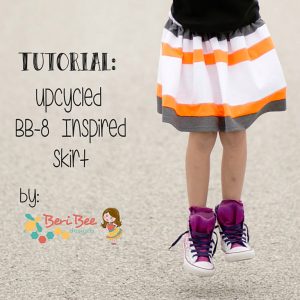
Another Star Wars project that you could make for your little one is this BB-8 skirt.

Another Star Wars project that you could make for your little one is this BB-8 skirt.

Another Star Wars project that you could make for your little one is this BB-8 skirt. It’s a nod to the more recent Star Wars movies with one of the two awesome droids that have come to the surface through them. Seriously! I adore BB-8, and K-2 is so awesome! This skirt would be something that could be worn any other day of the year as well since while it’s a nod to BB-8, it’s basic enough that it doesn’t necessarily have to be a skirt that’s Star Wars themed. It could easily just be a skirt with stripes, which isn’t day-specific! Essentially, with this product, you could have a perfect piece of clothing to wear through the day that’s general enough to wear again and again, regardless of the day.

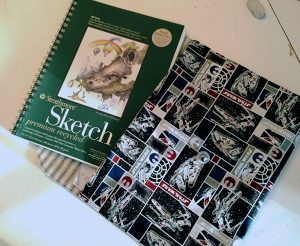
One last project applies to anyone in need of carrying around documents & such — whether that something to carry is the sketch pad shown or a stack of papers that you, as a teacher, graded!

One last project applies to anyone in need of carrying around documents & such — whether that something to carry is the sketch pad shown or a stack of papers that you, as a teacher, graded!

One last project applies to anyone in need of carrying around documents and such — whether that something to carry is the sketch pad shown or a stack of papers that you, as a teacher, graded! Now, obviously, you might want to make sure that this project is okay with your employer before you carry it into a formal meeting, but if you get a thumbs-up, there’s something awesome to me about the idea of carrying a Star Wars case into said meeting with your company-important documents. This could also be used for things around the house, like keeping your receipts or pictures in, and it’s a small enough project to easily manage between today and May 4, 2018!

This is the perfect day, in my opinion, to embrace your inner nerd and run with your sewing projects! It’s for what could be labeled the epitome of Sci Fi/Fantasy movies, and there’s plenty of room to work these mentioned projects into your May the 4th schedule. Need proof? Here you go: You could grab that Star Wars quilt and the baked goods you made while wearing your apron, toss that quilt over you and your kids in the Chewy costume and BB-8 skirt, put your distractions in your carrying case, and watch some Han Solo!