SewingMachinesPlus.com Feedback

SewingMachinesPlus.com Feedback

Just wanted to send my compliments to SewingMachinesPlus.com for their excellent customer service. I discovered last week that are selling fabric in their brick and mortar store. I previewed some it in my last blog, and ordered some for my own use. The results were perfect.

I placed my order, was contacted by them for confirmation, and I received my fabric in very good time. I am happy to be their advocate by blogging as well as a purchasing experience from them online. The process was very professional.

They marketed by email for my future interests, giving nice discounts and sometimes free shipping. I feel very confident in purchasing from them again.

There are many things going on at SewingMachinesPlus.com to help you not only with sewing but other products you need.

Each of us has their own experiences in sewing. Each of us learns in different ways. Blogging is like teaching and sharing knowledge. Being an active on-hands sewer while blogging has been very rewarding to me.

I am thankful that I have had the opportunity to be a part of this company’s program. I have had a great time with SewingMachinesPlus.com.

Make them “your go to” with your sewing machine, fabric, and household equipment. You will be happy you did.

Fabric Inspiration Autumn

Fabric Inspiration Autumn

September is almost over. I always say, “When the kids go back to school, it is almost Christmas!” Time just flies the last quarter of the year. Holiday planning starts now! It is time to design and find fabric for our holiday projects for our homes and thoughtful gifts for others during the last months of 2017.

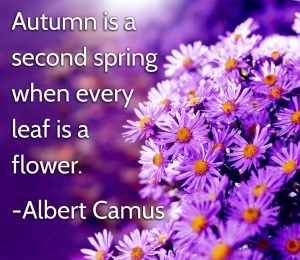
Autumn is a second spring when every leaf is a flower. - Albert Camus

Autumn is a second spring when every leaf is a flower.
– Albert Camus

Personally, the earlier I order fabric for holiday projects, the more I enjoy doing them. Holiday sewing is a great way to show your creative side and the options are so many. Fond memories of handmade things are always fun. Someday all the decorations at my house will be hand made.

Fall brings cooler weather, sweaters, handmade comfy scarves and jackets and an occasional whiff of burning wood from neighboring houses (hopefully my own).

I love fall. I love warm, dark colors and a soft quilt or blanket to cuddle up in while watching those great football games. Especially if I can sit in the stadium! Cool weather and cinnamon colors beckons me to sew cozy things! How about you?

Today, I am offering inspiration for you to follow my passion for fabric. Its great news!! Trust me!

SewingMachinesPlus.com has begun providing fabric online and in their brick and mortar store in California. If you haven’t yet looked on their website, you need to!

Let’s get going!

First visit www.sewingmachinesplus.com & on the Search Bar at the top, enter “fabric”. You can also visit the fabric page here.

Since I enjoy shopping for sewing, my desire is to fly to California and visit this mega-store in person, to see their highly rated products and experience their friendly employees and customer service, but for now, I want to preview a few things with you that I really like! Hopefully, you will be inspired to place an order for sewing products for your stash or to get a head start on the season of giving!

The first fabric I saw, and promptly ordered was:

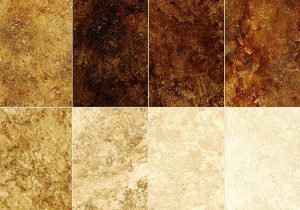
Stonehenge Gradations Chips – The color is Bright Iron Ore. A quality fabric made by Northcutt and has colorations like stone.

A beautiful package of (forty two) 10 x 10 inch precut squares in Browns, Golds, Cream and gradient neutral colors which look like different pieces of colored stone.

A beautiful package of (forty two) 10 x 10 inch precut squares in Browns, Golds, Cream and gradient neutral colors which look like different pieces of colored stone.

A beautiful package of (forty two) 10 x 10 inch precut squares in Browns, Golds, Cream and gradient neutral colors which look like different pieces of colored stone. This was a perfect choice for me as I have designed our new home in neutral browns, cream and beiges. This reminds of of swirling marble or granite and a harmonious accent to neutral décor.

I am thinking about a table runner or napkins for our dining room table right in time for autumn dinner guests or anytime of the year paired with the appropriate colors for that season.

Burgundy shades with the creams for late winter events.

Burgundy shades with the creams for late winter events.

Or pair with the same brand in Burgundy shades with the creams for late winter events. Drumroll! Picture please!

There are (forty two) five inch squares in this package. I suggest perhaps 2 or more packages depending on the size of the project. Look for the Brights- Amethyst and Lagoon Colors as well. Fabuloso!! Rich looking colors!

Precuts are done in different sizes by the manufacturer and sometimes the shop and work great in many applications. Since they are already cut, it helps considerably when putting together projects.

For a larger taste of these pre- cuts that can go together in perfect harmony, go ahead and visit the website. Take note of all the various cuts that are available in other fabric designs. Pick the ones you love! Ask the experts about yardage on the ones you really like (I have to ask that question myself). And then, comment on my blog and tell me what appeals to you. Make the project and send us a picture. We would love to see what you make!

I’m going full circle for a while. I have ordered the fabric, started designing and will hopefully share with you what turns out to be a great addition to my handmade collection! Dream, design, shop and create!

Having a creative life is: sew good!!

Speaking of tastes, I just received a call from my husband *who is upstairs organizing his man cave*. It’s the usual question at 5:00 p.m Friday night, i.e. what’s for dinner!

Take care dears. See you again soon!

Sewing for Harvey and Irma

September has REALLY been a month for Texas and Florida so far! Mother Nature has once again chosen to fill the lakes and streams, and even the streets and houses with her life sustaining water, wind and rain. Unfortunately, it has left many, many thousands of people stranded without power, water, food and many families with lost animals and family and worse than that, the roof over their heads is gone.

Such devastation is certainly overwhelming even to those with a strong purpose to ride out the storm. My prayers go out to all affected.

image1

Andrew

I was living in Florida through Hurricane Andrew, and it had to be was one of the most stressful events in my life. I was about 90 miles from Homestead, but the weather forecaster reports were very certain it would make landfall on my community. It did not, however, but the fear was still strong.

Also, in many areas of California, from time to time, dry land and fires ravish the wonderful trees and expensive homes. It simply occurs out of our control. We have to survive and rebuild.

As the reality of these catastrophes hit our homes, and friends and families, my heart hurts to see people’s possessions on the curbs of streets, ruined and wet and unsalvageable. But, there has been an awesome power of giving and helping and a true blessing to my fellow Texans and those in Florida.

How to help

So, to make this article a positive one, rather than a stark reality check, I have been brainstorming ways that one can make a difference to help these people in distress.

Of course, there are agencies that help people with the general necessities, such as water, and food, and shelter in these areas.

But.. most want donors to send cash. But with short notice to evacuate, many people with small children have little chance to gather baby things and comfort items for themselves and even their pets. They won’t have transportation to go shopping either in many cases until the water lowers enough to leave shelters.

I was happy to hear that pets were included in the evacuations; however, some were transported to separate shelters with other displaced pets. I hope their families will be able to retrieve them once they are able to return home or find a new home. But they need comfort too! After all, they are our families.

Anyway, I am researching companies that will take handmade clothes, blankets, hats, burp cloths and other things that I have made for my online shop. I have discovered several charitable agencies and particularly church groups, classes at schools, some women’s shelters, hospitals, even families of our neighbors who may be located in the Houston or Florida area. Check online for these groups. If there is not one, form one from your sewing circles and sewing class students!  Form a group and make small packages together. Include paper diapers, and other essentials, and a handmade toy perhaps.  Sew small things, make sweet surprises and you will make a huge difference for a family and their children.

“It takes a whole village to raise a child” – H.R. Clinton

Here are some suggestions that came to mind:

  • Small blankets
  • Bib cloths
  • Bibs
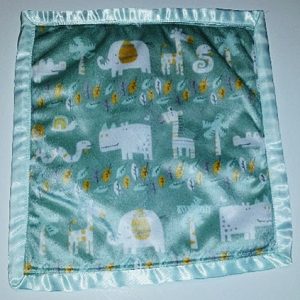
  • Snuggle blankets (small blankets with satin edging) or Minky fabric
  • Swaddles
  • Diapers
  • Dog mats and blankets – don’t leave them out! (Dallas Animal Shelter is temporarily boarding Houston animals)
  • Soft towels, perhaps small ones, sewn together
  • Soft flannel sheets for the crib
  • Sewn hats or capes
  • Small toys for babies (or dogs) made of soft, safe materials

Use fabric you find on sale, and then you can use other leftover scraps from previous projects (SewingMachinePlus.com now sells fabric in their brick and mortar store. One day, I hope to shop there).

Building Creative Confidence

Building Creative Confidence

Building Confidence

I have been away for awhile packing and moving into our new home. Unable to do any sewing with so many other things taking priority, I have missed my time with you.

The first thing I did is set up my office, so I can begin to feel productive again. Although I cannot offer an alternative method to sew a project this week, I want to create awareness of something we may take for granted. Its still about sewing, but sewing psychology!

I have gained a whole new respect for people who use their talents to produce window coverings. It is labor intensive and costly for the buyer. Naturally, today’s modern new builds will be designed differently than the earlier built homes. I always think of the difference between mid-century designs and what is popular today. Things you have to consider now are tall and narrow windows. Half arch windows above doors, double and triple wide windows in family rooms and bedrooms. I see French doors instead of sliding glass patio doors, and particularly windows to the floor versus horizontal windows high on the wall.

Times change

Times have changed and the fabric design and methods of making draperies have given us so many wonderful options. The awesome part is you can find companies that have talented people machine stitch and finish them by hand, stitching the hems and tacking the pleats, grommets, tabs, or other headers. Can you even comprehend what a huge job that is?

Shoot for the sun, the moon, and the stars, and then we will go from there.
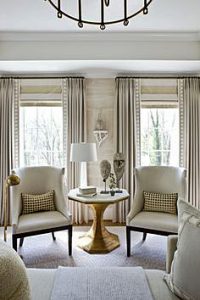
1 panel 40” wide by 108” long, cutting the fabric perfectly straight and carefully sewing the seams by machine and stitching the header and hem by hand. I understand why it takes six weeks for the completed project.

1 panel 40” wide by 108” long, cutting the fabric perfectly straight and carefully sewing the seams by machine and stitching the header and hem by hand. I understand why it takes six weeks for the completed project.

Secondly, if you have been following my blog, you already know how much I love fabric. We have only been here a week, and my sewing studio is not operative yet, but I have been basking in my product samples from a few different shade and drapery companies. I thought, new home, new life, so I will make it exquisite by professionally made drapes and roller shades. A few weeks ago, I began order sample swatches to see quality and color to design a cohesive, interesting theme.

Overload

Overwhelm Overload!!

Overwhelm Overload!! I wasn’t even in the house yet and I was stressed about the overall look I wanted to achieve. I just knew I loved every color and sample I received. Does this sound like anyone else you know? I feel this same emotion when looking for fabric for sewing and quilting as well. (I imagine others do too.)

Similar to how I have described “improvisational” sewing in the past, you have to start somewhere to “dress” several windows in a newly built house. You just have jump in and play with the samples, and the colors, and find your taste. Take a break for awhile, read design magazines, think about how you live and what makes you happy. You are a designer, its your choice!

Okay, we are here, moved in and windows bare! Its decision time. Because I wanted our window treatments professionally measured and hung, I invited a design consultant who was very experienced and had exceptional reviews on her work. She only does window coverings and I had many options to consider. Even though I had a good idea what I wanted to accomplish, her comments and mostly her product knowledge opened new doors for an even greater creative experience.

She had very good advice when we started the process.

She said, “Shoot for the sun, the moon, and the stars, and then we will go from there.”

She said, “Shoot for the sun, the moon, and the stars, and then we will go from there.”

She said, “Shoot for the sun, the moon, and the stars, and then we will go from there.” Basically, she meant what is your ultimate vision of your home to suit the needs of your family? (That was an open door to all the ideas I had thought about all these months.) Of course, some ideas I knew were not obtainable, but also, the hope of a future goal was there. So, we went over the design, the samples, rods and finials. The roller shades, the Roman blinds, and the solars. But she reminded me, “Its about you not what others think you should do”.

Yes, I was almost to the moon when I saw the value of my dreams. Needless to say, with my financial advisor’s advice, (aka hubby), we came down to earth and comprised on a plan with the promise of continuing our dreams down the road. However, now, I have a vision of making panels myself for one or two of the smaller size windows. I know I can do it! My ulterior motive is to save that money for that crystal chandelier I have been admiring!

The moral of this story is not about sewing techniques, it is about the pleasure you get from coming out of your comfort zone, finding yourself and your tastes, and being courageous enough to feel confident in moving forward in your goals. Sewing is being creative!

Sewing is about making beautiful things, like silk draperies, and Roman blinds. Sewing and fabric in today’s world is earthy and organic. Sewing is also for fashion, and quilted blankets, warmth, and clothing. It is my therapy. It makes me happy!

SewingmachinesPlus.com has what you need to get started with your creations! Tell them your dream! They will help you get started.

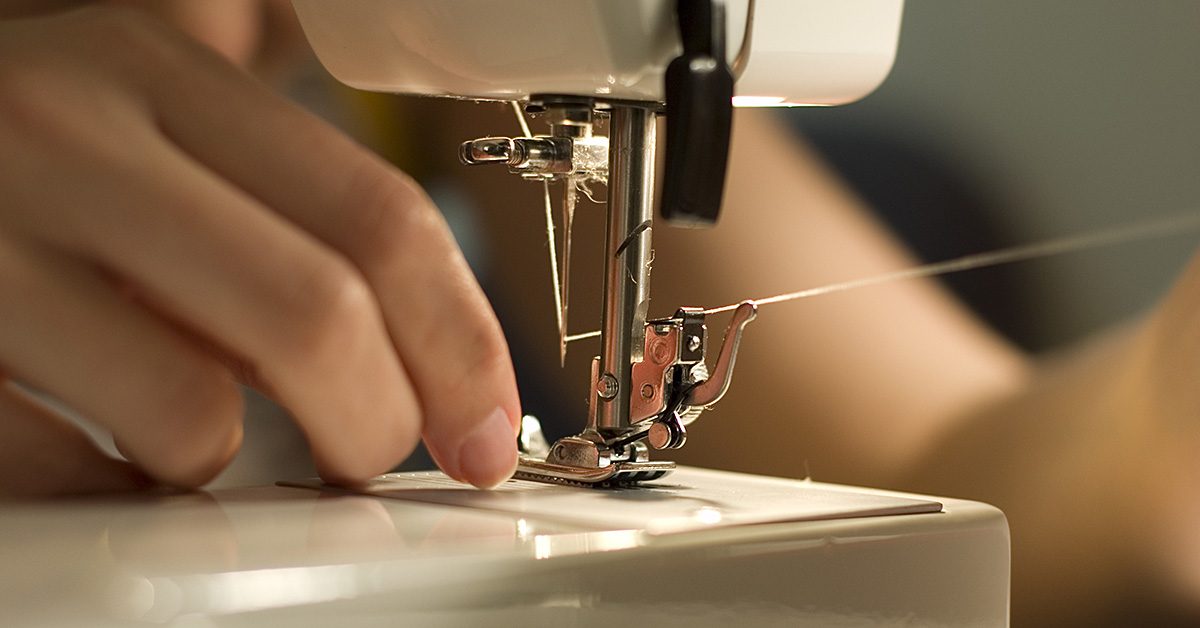
Creating with Batik Fabric

Creating with Batik Fabric

Hi Ya’ll, good to see you!

I hope you are well and staying out of the heat! It is definitely summer in Texas today!

The last time I wrote I hoped to inspire you to take a step or two out of your comfort zone and try some applique projects with a great tool called the AccuQuilt GO Fabric Cutter. I hope you checked them out here at SewingMachinesPlus.com for the one that would suit you the best.

Let us talk about my fabric obsession today. It is called Batik!

Let us talk about my fabric obsession today. It is called Batik!

The reason for my suggestion of trying “improvisational” quilting or one that you create yourself, is that it brings much satisfaction knowing that no one else has put together the fabric combinations that you love. the best.

Let us talk about my fabric obsession today!! It is called Batik!

What is Batik?

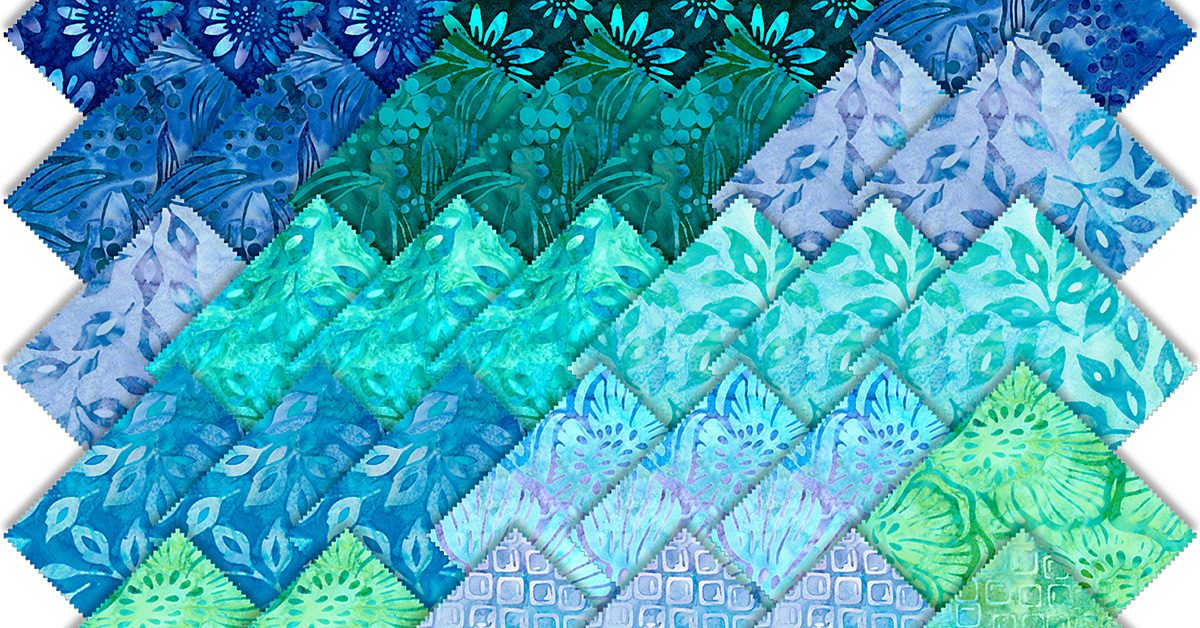
It is a hand dyed textile that is made using a wax resist technique to cover some parts of the fabric so they are not dyed with the color. Selected areas of the cloth are blocked out by drawing or brushing wax over them and the cloth then several colors are used to dye the fabric.*

Contemporary batik, may have etching, stencils and different tools for waxing and dying and use things such as leather, paper, wood, silk or cotton to use in techniques to make the most expressive and subtle of wax resist projects. Note from the pictures above, some look like the fabrics tie dyed and others have small details. Using various amounts of colors, the textile looks printed, but in fact it is hand drawn places of wax resist, it becomes a unique piece of art.*

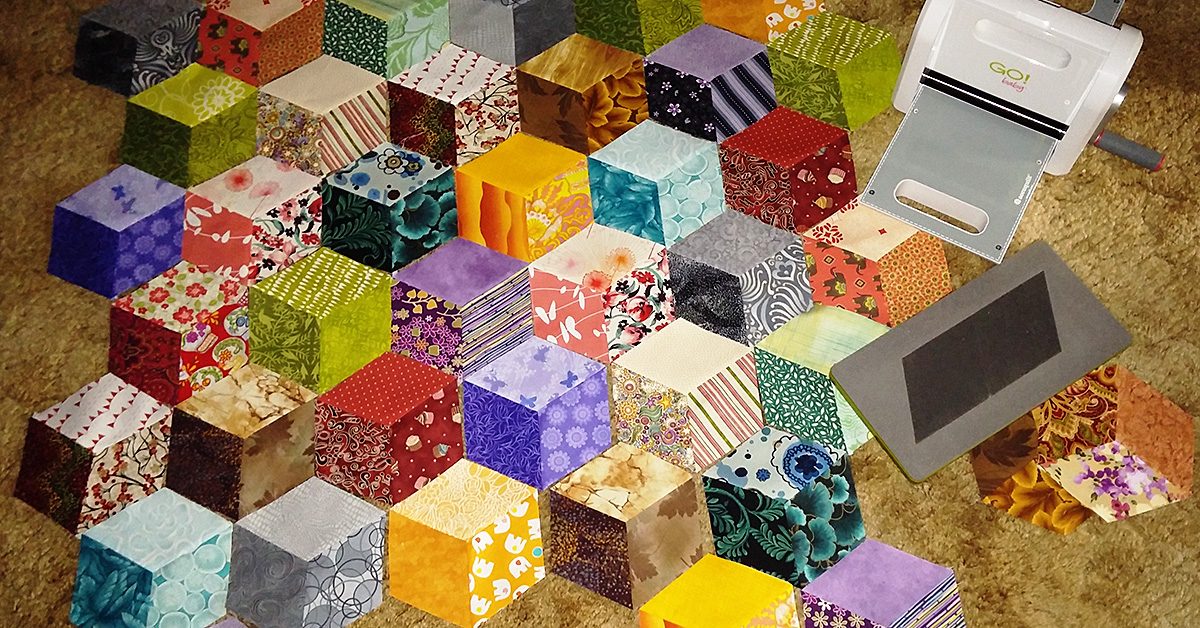
Today, keeping in line with those thoughts, I want to share with you some beautiful fabric that would be a great choice for these fabric cuts to design a beautiful quilt, utilizing the shapes you can make with the AccuQuilt Fabric Cutter. To keep it simple at first, just blocks or basic shapes or strips can be easy to cut and sew in patterns that you can replicate for your own taste.

Let’s go through the design stages. That’s the most fun!

  1. Check out the internet for new ideas about quilts
  2. Purchase magazines on quilting at the bookstores or online
  3. Many of the patterns look complicated, however don’t get discouraged. They are only for inspiration right now
  4. Depending on your quilting experience, play with paper and pencil and come up with a simple pattern using a few different basic shapes. Perhaps blocks and triangles or perhaps all strips
  5. Perhaps all squares or rectangles, it’s all your design
  6. Study the batik fabrics available in online fabric stores and curate your own choices on a design board. It is good to make notes on the particular fabrics so you can go back and order the ones you really like. Depending on where you live, you may be able to find fabric you love in the local fabric stores (I personally have purchased many yards of fabric and precuts online with no problems. It is like Christmas every time I order. Sometimes I get surprises!)
  7. Then play with how these colors look good together. There is no right or wrong. It is your creation, your taste
  8. Leave the palette alone and come back to it to see if your color choices still suit you. If not, play some more
  9. Cut out color combinations from magazines that you admire. Once you are happy with your plan, look for fabric, order online or purchase
Start a small project, a table runner, a pillow, a tote bag or go for a quilt.

Start a small project, a table runner, a pillow, a tote bag or go for a quilt.

Start a small project, a table runner, a pillow, a tote bag or go for a quilt. Any of things will be something beautiful using Batik.

Now would be a great time to check your sewing supplies!

Take a look at your rulers, scissors, pins, rotary cutter blades, and other tools you frequently use. SewingMachinesplus.com has everything you need to make your next project look precise and professional. Besides the AccuQuilt Go, I value my collection of acrylic rulers and cutters for time saving cutting and more time for designing and sewing. Having the necessary tools makes the project more enjoyable as well!

As I said last time, I believe that if I strive to keep an attitude of “I am proud to use this, because I made it with my own design and it shows a part of me”, my positive attitude brings positive results. Find your Happy Place in sewing!

Until next time, discover Batik fabric and let me know what you think! Would I ever love to try making my own Batik fabric and using them in sewing!

Professional Quilt Pieces by AccuQuilt

Professional Quilt Pieces by AccuQuilt

'Winging it.'

‘Winging it.’

Good morning My Sewing Friends,

I appreciate all the comments I received from my last blog. I feel the need to preface this one with the explanation that I always try to do the best I can about measuring and sewing seams straight and accurately. I felt a little guilty telling you that I kind of “winged” it in the blog time before last about the scrap quilt made from pieces that were matched not measured in size. I just want to say that I firmly believe anything you attempt to do, do it well, or do it again to make it better. Perfection with sewing comes with practice, but don’t be hard on yourself if it doesn’t turn out the first time. Your time is valuable and the reward of doing something that looks great takes work and focus. But please, enjoy it along the way!

Angela jumps down now!

Angela jumps down now!

Today I want to do a product review that saves a lot of time and makes great sense to do when you are planning a quilt. So many ideas are available through quilt patterns and packaged quilt kits. Online stores have a multitude of pattern quilts and instructions.

Those are great for ideas, but to me, a quilt designed by the person sewing it, is much more rewarding and showcases your personal style.

Fly into the comfort zone

Come out of your comfort zone and design your own patterns using different textures, shapes and colors. Look through quilting magazines for inspiration, Pinterest or other sewing books. Most quilts are made by geometric square, triangles, parallelograms, and blocks of different sizes. Sewn together or apart, so many options are available, but make it your own with your favorite elements.

Make a design board of your favorite shapes and colors, then decide which type of fabric designs that you enjoy looking at, and the colors that would blend in your home or those you may make for donations or gifts. All fabric fits into design groups. Learn about which are modern, traditional, tribal, and vintage. Look at the different patterns and discover that most are blocks and triangles, strips and even other cut pieces that when cut from different pieces can form a very sweet quilt made like a picture.

So, let me introduce to you to the product regarding these concepts to build the precisely cut quilt pieces that would you would love making and know that you have the only one like it. The products are the AccuQuilt GO Cutter Line of fabric cutters.

SewingMachinesPlus.com has these products that fit any budget. You can quickly cut accurate blocks, triangles and many other shapes with these fabric cutters. The idea is that a die is in the machine and up to six layers of cotton can be placed on a cutting mat and be cut all at once. What a time saver! No turning the fabric on the mat and measuring again and again and cutting with your rotary cutter. The best part is they have a wide assortment of strip dies, alphabet, parallelogram, rectangles and blocks as well as other small shapes for baby appliques and seasonal shapes.

You can have all your shapes and strips cut to be able to sew a quilt in record time.

AccuQuilt Go includes

In summary, the AccuQuilt Go line of Fabric Cutters have the following to promote beautiful sewing projects.

  1. Faster than rotary cutters or scissors
  2. Safe to use
  3. Portable and lightweight ( See the “Go Baby” and the “Go” Cutter (Great for sewing class or retreats and smaller projects)
  4. Includes die and cutting mat that last for many die cut pieces
  5. Additional dies of many types are available for designing patterns besides
    blocks and triangles
  6. AccuQuilt “GO BIG” Electric Cutter for larger projects and more die choices
  7. Ask about financing – you will save so you can purchase the fabric you love (love this one!)
  8. Ask about Limited Warranty on the machines when you order
  9. Still can be used when following patterns and with ready made design kits if you are not ready to “plunge in the fabric pool” and design your own patterns

There you have it! Order online from SewingMachinesPlus.com or call them and ask for help to decide which cutter best suits your needs. Then send me a picture in the comments space below of your beautiful personally designed item. I would love to see it. Start small and you will finish projects and love the results!

Ready? One, two, three, AccuQuilt GO!

By the way, tell SewingMachinesPlus.com that Angela sent you!

Have a happy sunny day, and Keep Calm, Keep Sewing!

**Above images from Accu-Quilt Website
Mending Mabel

Mending Mabel

Hi! Good to see you. Hope you are having warm weather like here in Texas!

Today, I want to just give you a quick lesson for mending project.

My current task is to shorten a pair of my hubby’s leisure pants. They are a pair of soft flannel pants that he bought a while back, and they (uhhh) kind of surfaced as I was packing my sewing studio to move. I secretly panicked when he reminded me, he hasn’t seen them in a while! I sweetly said, “Oh yes, dear, I have them. They are on the mending list.”

That’s a call to action for me! So he went out to do his errands, and I scrambled in to find the buried pants.

So as quickly as possible, I found my also found a few necessary tools to accomplish this goal, hopefully in the time he was gone.

I assembled:

  1. Pins
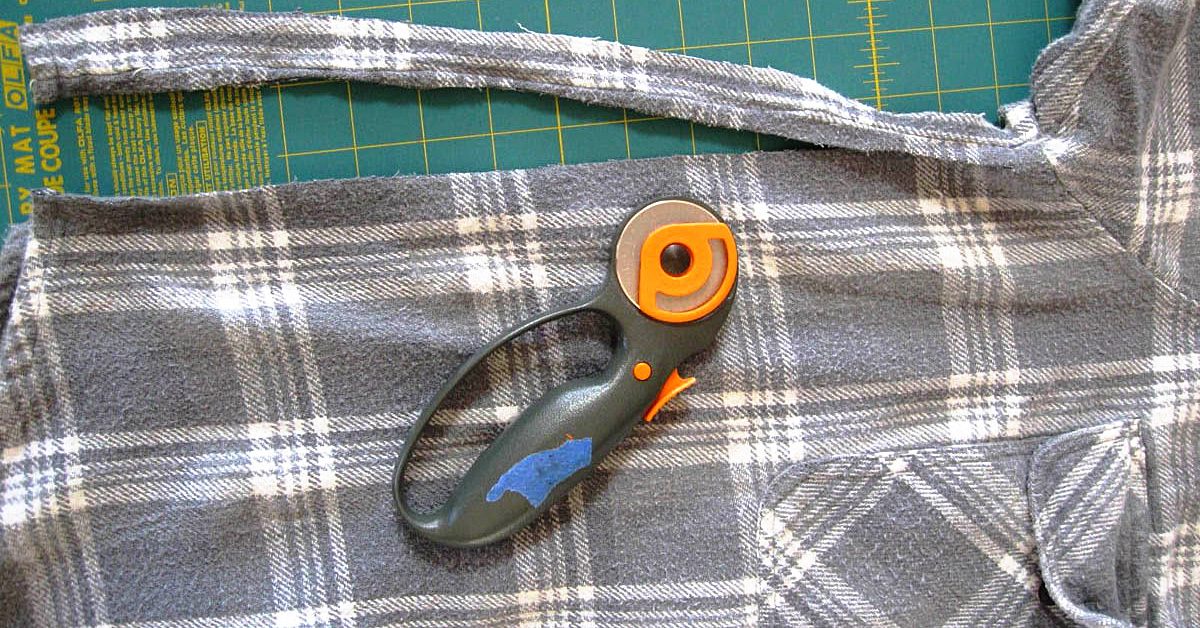
  2. Olfa 45 mm Rotary Cutting mat, the one which is 18″ x 24″
  3. Rotary Cutter
  4. Acrylic Ruler (these packages at SewingMachinesPlus.com come with everything you need all together – great deal!!)

I also keep on hand a few smaller rulers, such as the June Taylor Shape Cut/Sprint as well as the Handi Quilter Mini Ruler for smaller projects. SewingMacinesPlus.com has a great selection of rulers and other supplies for your sewing needs.

Back to the project, now

  1. The first step was shortening the pants which were about 4 inches too long. I turned the pants inside out so they were ready to measure and sew. I measured and cut the 4 inches off both legs.
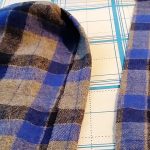
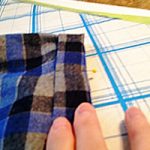
  2. Turning the edge toward the top of the pants about ¼ inch, I pressed with my iron. They can be pinned first if you want to be precise, however, actually I just winged it, but hey, I was in a hurry.
  3. Then turning again approximately an inch, (actually two finger widths) I measured a press a crease again.
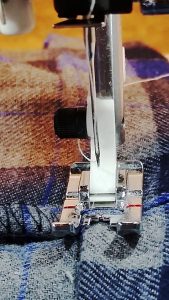
  4. I changed my bobbin thread to black since it would show on the right side, and carefully stitched a new hem very close to the fold.

Ta da!

Last, stitch very close to folded edge on both legs, press the hem flat & you are done!

Last, stitch very close to folded edge on both legs, press the hem flat & you are done!

Last, stitch very close to folded edge on both legs, press the hem flat, and you are done! Or you can also blind-hem stitch by hand. I find that hand-stitching is very relaxing and gratifying when the stitches come out nice and neat.

So, what kinds of project do you have waiting to be mended? It’s a rewarding thing to do when you compare the cost of new clothes to some time devoted to thinking through the best way to refurbish something that takes just a few minutes to fix. Please be assured, measurements with rulers are better than measuring with fingers, and results are more professional. Rushing never works for me without tearing out something.

Back to packing and discovering other projects waiting for me. Nope, maybe tomorrow. Hubby is home!

Happy Sewing until next time.

Repurposing Flannel Baby Wipes to A Snuggle Blanket

Repurposing Flannel Baby Wipes to A Snuggle Blanket

Hello there! I’ve been playing with something I would like to share with you.

Stitch the right sides together on all 4 sides, leaving a small space open on the last side.

Stitch the right sides together on all 4 sides, leaving a small space open on the last side.

Let me warn you, it is rather novel, as I haven’t seen this done before in sewing blogs or other instructions, but it works pretty well I think.

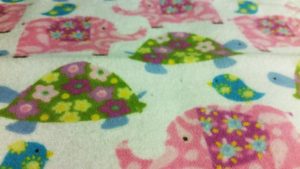
Recently, I several kinds of small baby wipes made from soft, warm flannel. Rather than 1 layer of flannel, and just a simple serger stitch, I designed them to be thicker and have no fraying edges when washed. Each square is approximately 9″ x 9″ finished as below.

So, I used 2 pieces of the fabric, and I stitched the right sides together on all four sides, leaving a small space open on the last side to place my hand inside and pull the fabric’s right sides to the outside. What? (I heard you thinking there!)

Think of throwing a pillow case in the dryer with the inside seams showing. When dried in the dryer and smelling like Snuggle, you put your arms inside, find both far corners of the pillow case, and pull them forward to you drawing the right sides of the pillowcase to the outside or the top side. So then, I carefully ironed the edges down so I could put top-stitching about one-quarter inch from the edge of the wipe. Finished product soft, bright, cuddly wipe.

BUT WAIT! There’s more

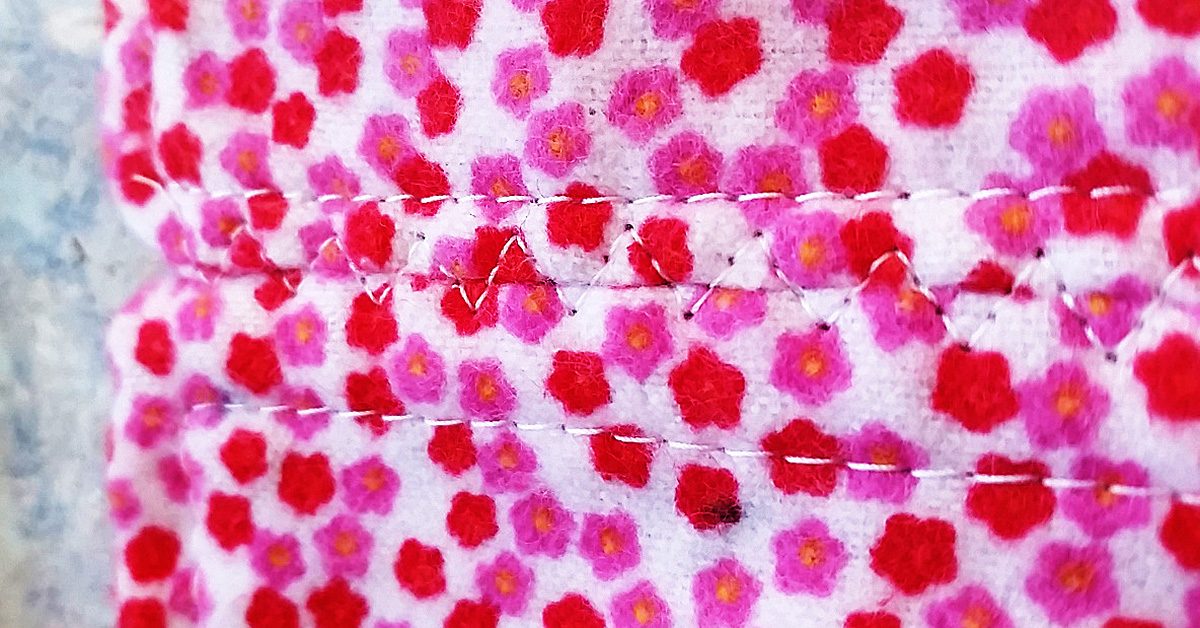
This shows how the seam was done, & it is sturdy like seam made in the traditional way.

This shows how the seam was done, & it is sturdy like seam made in the traditional way.

I thought why can’t I repurpose these cloths into something larger. It’s a small baby print, and with soft flannel on both sides, I brainstormed about how I can piece the two squares together without having to take the stitching apart of one side of each square to join them. That would involve doing all the squares accordingly, and would destroy my top-stitching.

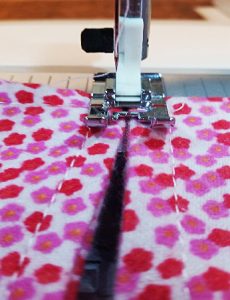
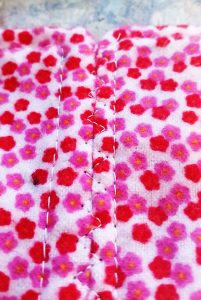
This shows how the seam was done, and it is sturdy like seam made in the traditional way. This finished end to end seam reminds me of flat feld seams as used in my Pojagi pieces, although not quite. It also could be an alternate seam method for quilts without using a backing. A piece of batting could be added to each square to give a more padded feel to this alternate way of quilting, (like rag quilts but no raw edges or fringe.)

I hope you enjoyed my blog today, and I hope to see you again soon. I always welcome your experiences in sewing. After all, what would we do if we didn’t sew?

Take care for now.

Happy Spring! The Joy of Warmer Weather and Beautiful Flowers

Happy Spring! The Joy of Warmer Weather and Beautiful Flowers

Hi! Good to see you again!

Hi! Good to see you again!

Today, I wanted to share what I have been doing these days. It know it has been awhile since I wrote, however, I have been away from my favorite past time for other “pressing matters” (i.e. ironing hubby’s shirts, not quilt squares) and other important tasks!

Scrappy leftovers

I have an enormous collection of scraps in my sewing studio. Since I have been reorganizing in preparation to move our home, I have to make a strong effort to release some things I have collected to make packing a little easier. Well, packing is never easy, but psychologically, it forces you to consider the value of all the things you think you absolutely needed to have, right? And also, without saying, it alerts you to some of the things you want to make this hobby more efficient. No wonder it takes forever to pack and with sewing, I always think if I throw it away, I will want it later. Tough decisions, aren’t they?

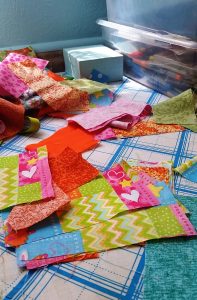
So, I started with a pile of disorganized scraps, which I have previously cut for something else, some time ago. I don’t even remember what I had in mind at the time, but I need to throw them away or use them. This is just part of the large amount of fabric and bright colors I have to work with.

This is just part of the large amount of fabric & bright colors I have to work with.

This is just part of the large amount of fabric & bright colors I have to work with.

Improv isn’t only for comedians

Recently, I have been learning about “improvisational” sewing. It is interesting to me because I like doing things that are unique to my creativity. However, it takes you out of your comfort zone. The experts say, it reveals your creative side by working with no specific pattern, no color guidelines, no measurements, just picking up random pieces of fabric, basically scraps, and sewing them together without a pattern. It reminds me of the dreaded “improvisational” speeches required in college speech classes.

I know there are many patterns and helpful information about quilting that give exact instructions and even kits that you can complete. So, this is an adventure to test your creativity for sure.

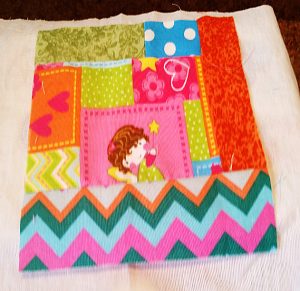
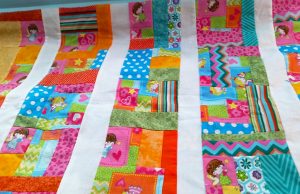
So, now I have my scraps and the easiest way to explain how this came together is: I took a medium sized scrap, and added to others to make an approximate square about 7 x 6 inches. I didn’t measure at all, just found several squares which had in this case, a little girl with a magic wand. I used the “fairy girl” as my focal fabric.

It was not too difficult because the pattern of the fabric was already woven like patchwork.

It was not too difficult because the pattern of the fabric was already woven like patchwork.

It was not too difficult because the pattern of the fabric was already woven like patchwork.

So, I just added like-colored fabric to make an extension of the pattern. No true measurements, pieces were just trimmed to fit inside the square, and the princess would appear somewhere on each one. I used the square as a template and compared the rest to the template, and then trimmed them to be the same size as close as possible. NOW… Comes my favorite friend in the WORLD while quilting! My IRON! And I need a NEW ONE at that (please refer to great wishlist choices from SewingMachinesPlus.com).

Finishing touches

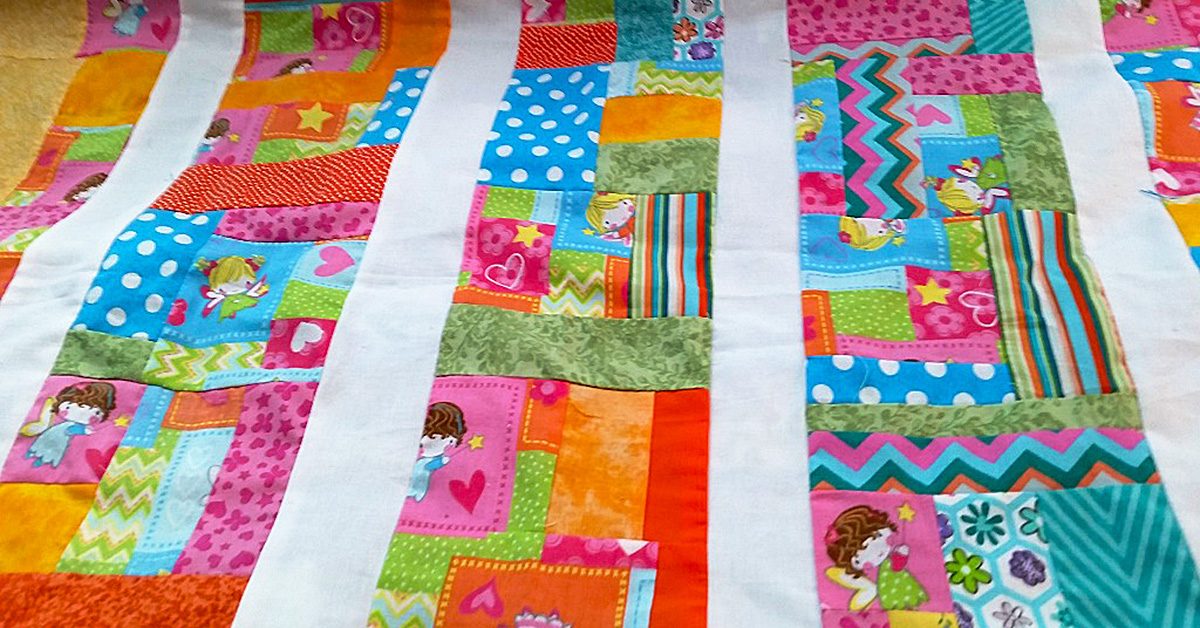
So finally, I was feeling pretty good about how my unplanned, off the top of my head, quilt top was coming along. So I sewed the pieces together in 5 rows and 5 squares each. Then added white jelly roll strips between each row of 5. I had to trim it only a little to make it a true measurement all around.

“Improvise” a cheerful quilt or smaller project & smell the beauty of your creation this spring.

“Improvise” a cheerful quilt or smaller project & smell the beauty of your creation this spring.

I still need to finish the border, batting and binding, but here’s what it looks like now. It was really fun to do, because I didn’t know how it would turn out. I should say I learned that I need solid color between busy patterns to give a quilt top a cohesive, unified look so each quilt patch is recognizable from the next. Do you mix plain fabric among many different prints?

I think you would enjoy this truly personal form of expression with fabric.

“Improvise” a cheerful quilt or smaller project and smell the beauty of your creation this spring.

Better yet, know that even without a plan, or a pattern, you can turn scraps into something as personal as you are! Then, please reply to this blog with pictures. I would love to see them. Until next time, when I will tell you about how I am repurposing handmade flannel wash clothes into a sweet little blanket and stitched without a seam. Carpe diem!

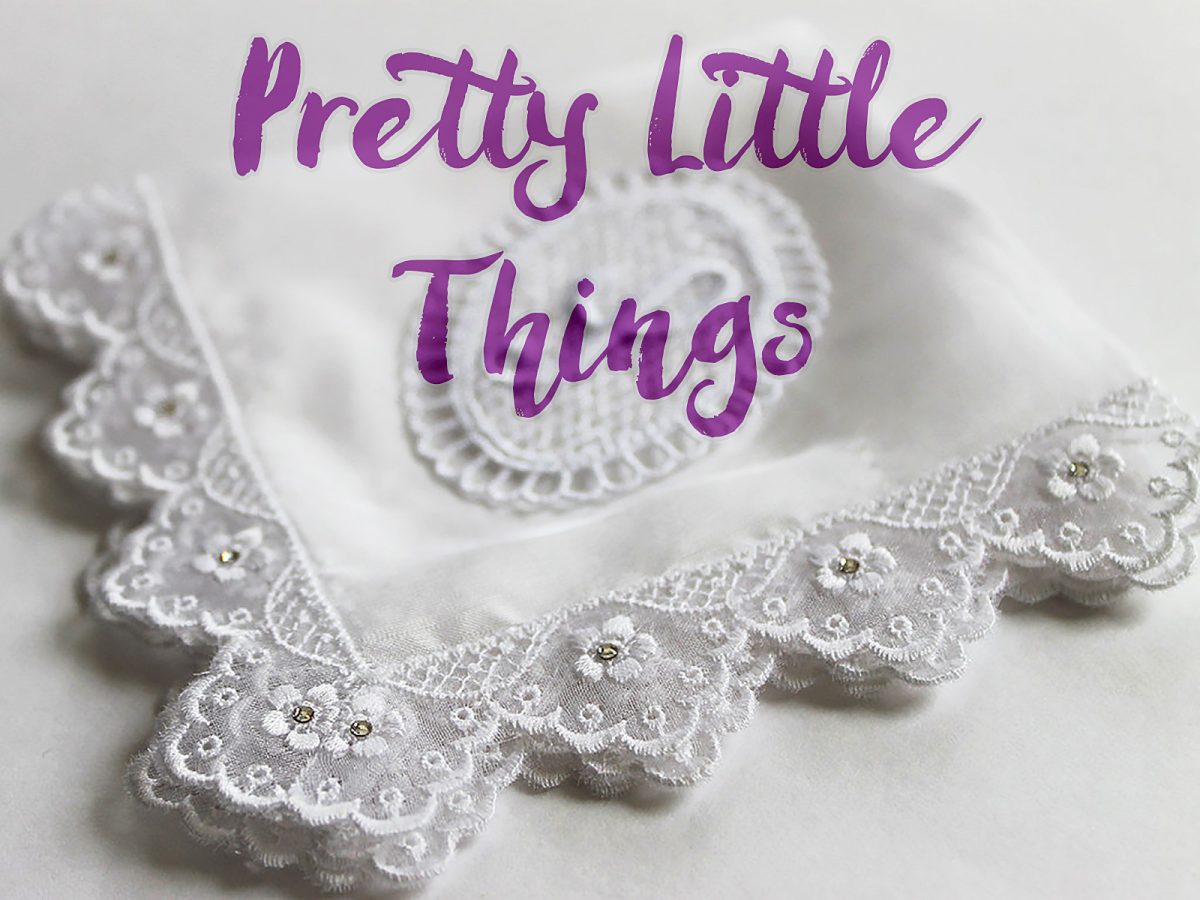
Pretty Little Things

Pretty Little Things

I was thinking about all the things you can make with fabric. Depending on your sewing skills and your motivation, you could make just about anything your heart desires.

Let’s see. My first sewn article was a red twill skirt in high school. My efforts had very good intentions, but I remember getting frustrated when I could never use the “best” sewing machine in the classroom. I had to rush to finish it so the teacher gave me a “C” grade on it. I couldn’t believe I put the zipper in the back just perfectly. (I’m still scared of zippers, by the way). But the hem of the skirt was about 3 inches in the back and maybe and 1 inch in the front, and very irregular. That was long before the days of the high-low hem which arrived on the scene by stylish fashion designers in the twenty-first century. Oh my, I’m dating myself now.

I learned it from watching you

I watched my Mom sew clothes for me as child, so when I got off on my own, I asked my Dad for a sewing machine. I picked one out from Sears, a basic machine with a couple of stitches. I made a knit T shirt out of multi-striped material and fell in love with stretch fabrics.

My dad called it my “$150.00 T-shirt.” I knew he was thinking I would be done with sewing after finishing that comfy, wearable T-shirt. I proved him wrong.

I went on to make dresses, suits with vests, skirts with zippers, a strapless bathing suit, and other clothes that were worn with pride when I thought, “I did this- I made this jacket”.

So fast forward today, after several years of non-sewing, I have found my passion again with other types of articles. The last couple years, I have made quilts, bed runners, napkins, baby articles and even Korean Quilting called “Pojagi”.

And now for something completely different

Today, I want to share with you my latest project. First off, I love the Victorian Era.

Laces, satins, silks and velvet. I have accumulated many boxes of vintage lace, ribbons, and trims and struggle to find ways to use them. So, I am trying to bring back something that were used by ladies of old. It is something that is considered vintage, or antique, but I still feel the idea is a good one. Many stores carry things similar like paper envelopes filled with lavender seeds, or other dried herbs, but I wanted to design something that was original to appeal to women who love frilly little things like me.

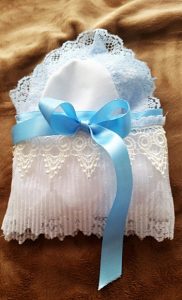
When I made these, I thought the Mother of the Bride & Groom may need the hankies to wipe away their tears during the wedding ceremony!

When I made these, I thought the Mother of the Bride & Groom may need the hankies to wipe away their tears during the wedding ceremony!

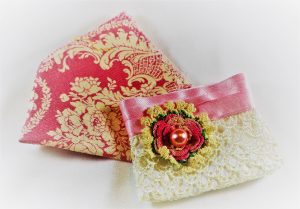
So, I designed a Handkerchief Sachet. The idea is to spray the handmade handkerchief with your favorite cologne or perfume, or fragrance oils. Place it in dresser drawers, on the bath counter top, or even your handbag, so you can enjoy your favorite scent as aromatherapy.

I thought these could be used as a keepsake bag for a special piece of jewelry, a lock of baby’s first haircut, or just a place for a tube of lipstick in your handbag. Just a little frill to enjoy & remember a special time or event.

I thought these could be used as a keepsake bag for a special piece of jewelry, a lock of baby’s first haircut, or just a place for a tube of lipstick in your handbag. Just a little frill to enjoy & remember a special time or event.

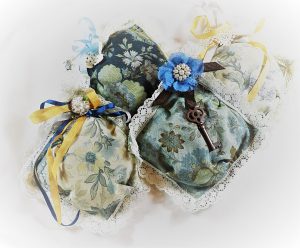
The last picture is the third set of sachets I made with 5” squares, lace, silk ribbon, and some metal vintage ornaments. These are stuffed with eco-friendly snow filling and will absorb your desired scent. Just respray when the scent fades and enjoy!

The last picture is the third set of sachets I made with 5” squares, lace, silk ribbon, & some metal vintage ornaments.

The last picture is the third set of sachets I made with 5” squares, lace, silk ribbon, & some metal vintage ornaments.

Whereas, the handkerchief can be washed if necessary if a change of scent is desired, these can also be utilized as a pin cushion in your sewing room. Who knows, you may fall in love with Victorian Vintage as I did.

All seams were sewn by machine except for adding flowers and ribbon, these items can be found at NaturaDomani on Etsy.