French Alterations and a Wee Rant

French Alterations and a Wee Rant

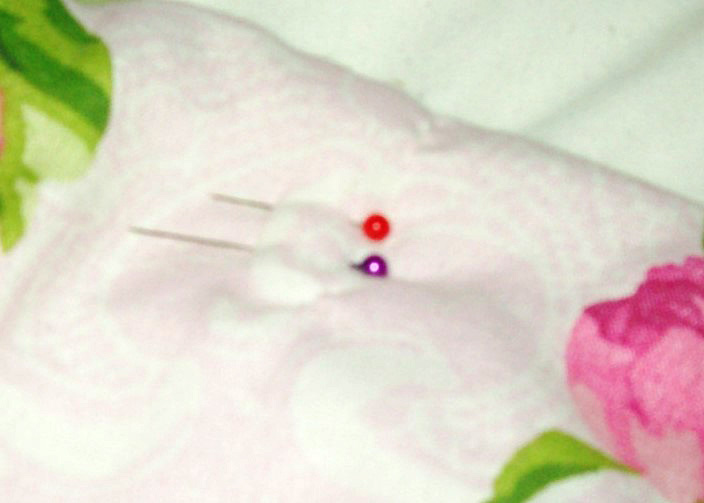
French Alteration: Pinning a garment with a note about something you never intend to actually do – and no one ever knows or realizes!

At this point in my tailoring and patternmaking career, I tend to work with the same five or six designers. Mainly, because I enjoy working with them and our fitting styles and fitting room etiquette mesh.

“Fitting styles and fitting room etiquette?” you might ask, “I didn’t know that was a thing.”

Well, when it comes to TV and film fitting rooms, it is definitely a thing. I prefer to work with designers I know and respect because they, in turn, know and respect me. And, most importantly, they let me do my job. Which is to fit a garment on a specific person’s body.

Take it in

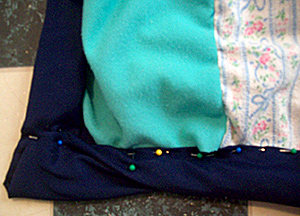
My fitting style is to survey the situation for a few minutes, to let the clothing settle on a person so I can see what it’s doing or what it wants to do. Then I go in and start pinning if I need to. Sometimes, I don’t need to, sometimes I can tell what needs to happen just by looking at it.

On the rare occasions these days when I work with someone who doesn’t know me very well, they often want me to rush right in and start pinning away before I’ve had a chance to actually look at things. Or, one of my big annoyances, they yank in the center back waist of a thing so the side seams are pulled all wonky and tell me I need to “take it in”.

Well, yes, it does need to be taken in, but not like that.

Fit preference

Sometimes they’ll even do this to a jacket without buttoning the front buttons, which means if I did take it in the amount they’ve grabbed, the jacket would never, ever, in a million years, be able to close.

I try to be as nice as possible and say, yes, I see that. Now, can you please let go so I can see what’s going on?

Costume Designers definitely have their own preferences when it comes to fit and hem lengths and stuff. I’m completely ok with that and will fit things how they like them fit but I’m not going to do something that will end up looking bad in the end (and for which, I’ll be the one who is blamed because, as in most things, people tend to blame the last person who touched a thing if something is wrong with said thing).

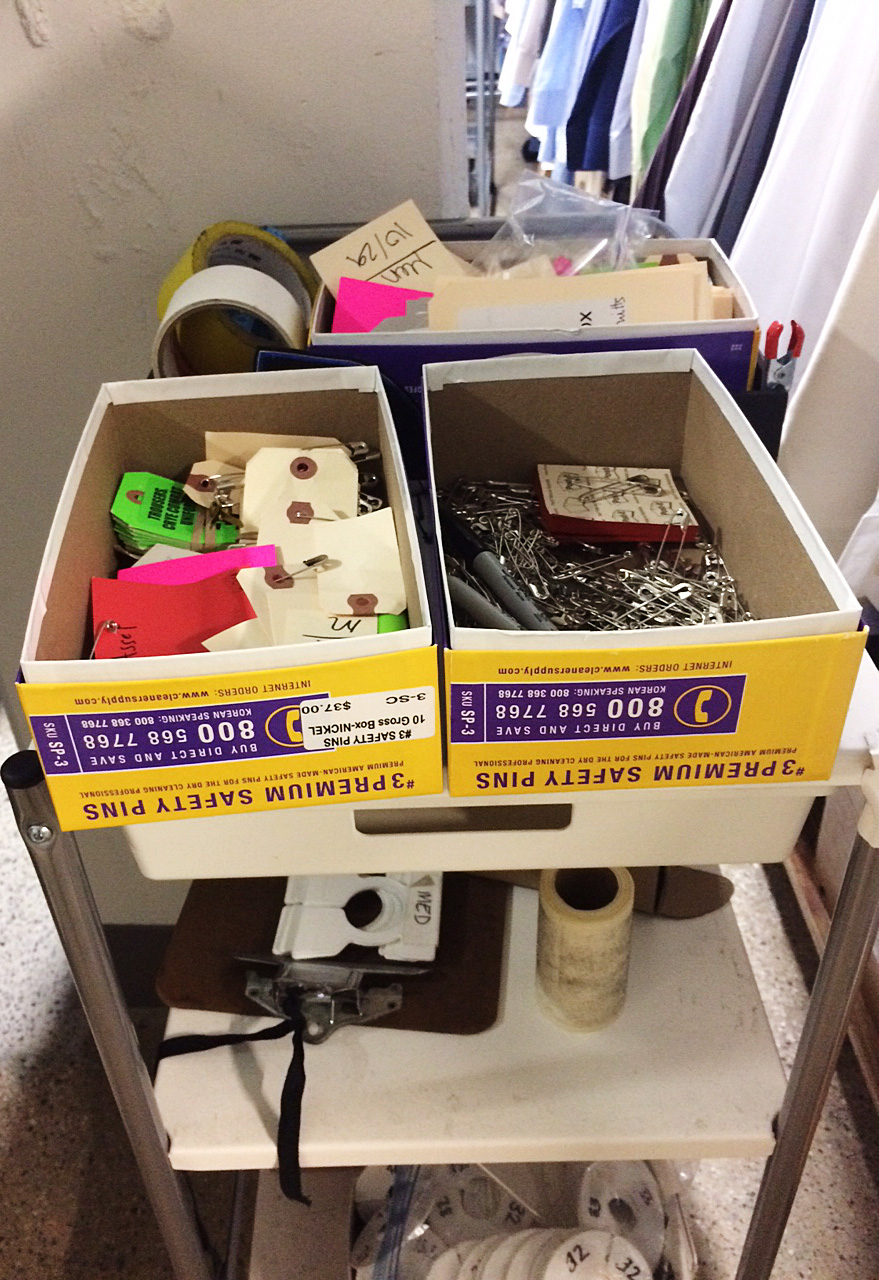
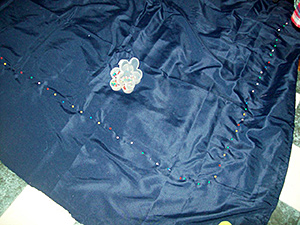
We tailors have this little term we use called a French Alteration. It’s when you pin something or write a note about something as if you’re going to do it but never actually do and no one ever knows or realizes.

Anyway, so back to fitting room etiquette. If there’s a designer in the room, I let them do all the talking and or schmoozing about how good something looks on someone. I just like to concentrate and do my job. Some tailors like to chat (which is perfectly cool if that’s your thing) but I like to listen to what the clothes are trying to tell me.

Brand fitting

One thing I’ve noticed about some designers is that they don’t always seem to understand that brands are cut differently and certain labels look better on certain people. Sometimes, you need to go through a whole slew of suit jackets to find the one that fits a specific body type the best. I can do pretty much any alteration but after a point its sort of foolish to spend a crazy amount of time altering a thing when you could possibly find a cut of jacket that works with minimal alterations. Like, if you need to shorten the body of a suit jacket, maybe you should buy a short (as in a 40short or something). Men’s suit jackets come in longs, regulars, and shorts for a reason. Use them.

I know I’ve mentioned this before but, one of my favorite designers to work for is Frank Fleming who, among all sorts of other things, is the Costume Designer for the show Power. Frank is the master at finding which suit brand and cut fits best on which actor. He can even usually tell which one is going to be best by just looking at an actor. I love that, ‘cause as much as I enjoy taking a suit jacket sleeve out, re-cutting the back and or shoulders and resetting the sleeve (not really), why not just start with a suit jacket that works on a specific body type and not do that?

I never went to school for costume design so I don’t know if they teach this little idea but, they should. It’s a huge time saver. And it really just makes sense.

Creating with Batik Fabric

Creating with Batik Fabric

Hi Ya’ll, good to see you!

I hope you are well and staying out of the heat! It is definitely summer in Texas today!

The last time I wrote I hoped to inspire you to take a step or two out of your comfort zone and try some applique projects with a great tool called the AccuQuilt GO Fabric Cutter. I hope you checked them out here at SewingMachinesPlus.com for the one that would suit you the best.

Let us talk about my fabric obsession today. It is called Batik!

Let us talk about my fabric obsession today. It is called Batik!

The reason for my suggestion of trying “improvisational” quilting or one that you create yourself, is that it brings much satisfaction knowing that no one else has put together the fabric combinations that you love. the best.

Let us talk about my fabric obsession today!! It is called Batik!

What is Batik?

It is a hand dyed textile that is made using a wax resist technique to cover some parts of the fabric so they are not dyed with the color. Selected areas of the cloth are blocked out by drawing or brushing wax over them and the cloth then several colors are used to dye the fabric.*

Contemporary batik, may have etching, stencils and different tools for waxing and dying and use things such as leather, paper, wood, silk or cotton to use in techniques to make the most expressive and subtle of wax resist projects. Note from the pictures above, some look like the fabrics tie dyed and others have small details. Using various amounts of colors, the textile looks printed, but in fact it is hand drawn places of wax resist, it becomes a unique piece of art.*

Today, keeping in line with those thoughts, I want to share with you some beautiful fabric that would be a great choice for these fabric cuts to design a beautiful quilt, utilizing the shapes you can make with the AccuQuilt Fabric Cutter. To keep it simple at first, just blocks or basic shapes or strips can be easy to cut and sew in patterns that you can replicate for your own taste.

Let’s go through the design stages. That’s the most fun!

  1. Check out the internet for new ideas about quilts
  2. Purchase magazines on quilting at the bookstores or online
  3. Many of the patterns look complicated, however don’t get discouraged. They are only for inspiration right now
  4. Depending on your quilting experience, play with paper and pencil and come up with a simple pattern using a few different basic shapes. Perhaps blocks and triangles or perhaps all strips
  5. Perhaps all squares or rectangles, it’s all your design
  6. Study the batik fabrics available in online fabric stores and curate your own choices on a design board. It is good to make notes on the particular fabrics so you can go back and order the ones you really like. Depending on where you live, you may be able to find fabric you love in the local fabric stores (I personally have purchased many yards of fabric and precuts online with no problems. It is like Christmas every time I order. Sometimes I get surprises!)
  7. Then play with how these colors look good together. There is no right or wrong. It is your creation, your taste
  8. Leave the palette alone and come back to it to see if your color choices still suit you. If not, play some more
  9. Cut out color combinations from magazines that you admire. Once you are happy with your plan, look for fabric, order online or purchase
Start a small project, a table runner, a pillow, a tote bag or go for a quilt.

Start a small project, a table runner, a pillow, a tote bag or go for a quilt.

Start a small project, a table runner, a pillow, a tote bag or go for a quilt. Any of things will be something beautiful using Batik.

Now would be a great time to check your sewing supplies!

Take a look at your rulers, scissors, pins, rotary cutter blades, and other tools you frequently use. SewingMachinesplus.com has everything you need to make your next project look precise and professional. Besides the AccuQuilt Go, I value my collection of acrylic rulers and cutters for time saving cutting and more time for designing and sewing. Having the necessary tools makes the project more enjoyable as well!

As I said last time, I believe that if I strive to keep an attitude of “I am proud to use this, because I made it with my own design and it shows a part of me”, my positive attitude brings positive results. Find your Happy Place in sewing!

Until next time, discover Batik fabric and let me know what you think! Would I ever love to try making my own Batik fabric and using them in sewing!

The Lost Straight Pin Dilemma

The Lost Straight Pin Dilemma

Let’s be honest. Sewing isn’t the most dangerous hobby. I’m not driving a Nascar race, flipping in the air off of a dirt bike, or taming poisonous reptiles. Overall, it’s a safe assumption that I’m not chancing my life by trying to finish a sewing project! But that doesn’t mean that there isn’t room for smaller injuries in the world of sewing, and one of those possibilities has surfaced a number of times on this blog: Accidentally sticking yourself with a straight pin.

Ouch!

Don't misplace your straight pin container!

Don’t misplace your straight pin container!

Sure, it’s a minor injury. There’s no need to rush to the hospital, and you probably won’t break out a Tylenol bottle to help with the pain. Regardless, it is a discomfort, and the possibility of enduring that discomfort extends beyond your sewing session if you do what I’ve found to be one of the easiest missteps in sewing, which is losing your straight pins. I don’t mean misplacing your straight pin container either! I mean that once you put away your sewing materials and supplies, you find that there is at least one straight pin lingering in or around your sewing area.  Each of those straight pins could be a future discomfort waiting to happen, and every one could also bring you one step closer to buying more straight pins.

But it’s sooo easy to lose these things! How can a person keep from having it happen?

Like with thread and material, the type of straight pin you get can matter, so be sure you’re making a good choice!

Like with thread and material, the type of straight pin you get can matter, so be sure you’re making a good choice!

Sometimes it’s unavoidable…

For me, personally, I’m leaning toward the idea that I can’t completely prevent it. In fact, my leaving straight pins behind is kind of a running joke in my house. Other than using a pin cushion, the only advice I have to offer on that detail is to make the right choice when buying your pins. Like with thread and material, the type of straight pin you get can matter, so be sure you’re making a good choice! In my experience, ones with a bit more length to them seem to hold their places better than the shorter ones, and I think logic backs that up. The longer the pin, the more space you have to lock it in place in your fabric. If it’s locked in place, there’s less risk of it working its way back out of the material, which lessens the risk of a loose straight pin.

If it’s locked in place, there’s less risk of it working its way back out of the material, which lessens the risk of a loose straight pin.

If it’s locked in place, there’s less risk of it working its way back out of the material, which lessens the risk of a loose straight pin.

Even with those longer pins and pin cushion though, pins still might end up scattered around your work area. So when nothing you’ve done keeps your straight pins from falling to the floor, seat, etc., how do you find them to put them away and prevent someone from accidentally coming across one in a not-so-pleasant fashion? Here are some ideas!

Your own senses

This one is obvious, so let’s begin with it. Sometimes, just looking around your sewing area can let you find loose straight pins, and gently patting your hand (not pressing too hard since pins are, indeed, sharp) could help you detect them as well. I honestly don’t know how many pins I’ve found with these tactics, and I didn’t have to buy anything for them!

Found ya!

Found ya!

Shine a flashlight

Objects that are the color and/or texture of a straight pin reflect light, so if you shine a flashlight, you might get a glimmer in response that will lead you to a loose straight pin. Take your time as you do this so that you don’t look right over the pin! A few extra seconds for a better-done job could save you hassle and, as I mentioned, discomfort, in the future!

Use a vacuum cleaner

Okay, clearly, you might not want to vacuum up a straight pin for the sake of your vacuum cleaner! But as the link says, if you use an extension hose from your vacuum, you just need to put some kind of barrier over it to keep the pin out. A piece of cloth would work, and using the vacuum in this fashion would pull the straight pin out of whatever hiding place it’s in to a very obvious spot without damaging your vacuum cleaner. Simple, right?

Use a magnet

This method is plain, but effective! Just move a magnet around your work area, and any metal pin that’s close enough should be drawn to it. The strategy comes with very little hassle, and very little room for error unless your magnet is too far away from the pin. But so long as you’re thorough with covering the area, this is — in my opinion — the best tactic of the listed ones. It’s not as iffy as missing a flashlight glimmer, as unsure as eyeballing the area, or as cumbersome as breaking out (and readying) your vacuum cleaner. It’s so low-tech, most people can use it easily, and it’s cheap! What more could you ask for?

With these methods at your disposal, hopefully most of your loose straight pins can be found and preserved for future use instead of laying around for future injury!

Do you have a preference among them or know any other strategies for locating loose straight pins? If so, share your thoughts!

Basting Your Quilt: Sprays and Pins

Basting Your Quilt: Sprays and Pins

Last week’s post was on batting, but as I freely admitted within that post, there’s more to finishing up a quilt than deciding on that detail. As the time approaches to dive into those final stages for this quilt, I’d say it’s a logical decision to explore those other topics.

Basting Your Quilt: Sprays and Pins

This week’s subject of interest: basting.

Coming off of the holidays, it might be easy to think of basting a turkey, but baking isn’t the only realm that has a form of basting! For quilting, this is the stage where you’re preparing to sew your quilt sandwich together. All of the layers are ready to be connected, and basting allows you to make sure those layers are level and even for sewing. You smooth them out, line them up, and do something to make sure they stay in line as you join the layers together through whatever method you choose.

It’s a simple idea, but there’s more than one way to keep those layers in line. For this particular post, two of those possibilities are the focus as I weigh the pros and cons of each to decide which option to use for my quilt. Those possibilities are straight pins and spray basting.

Straight pins:

I would think that straight pins would be the more recognizable and common of the two approaches. In fact, according to one source, straights pins (in some form) date all the way back to Ancient Egypt.

Straight pins are the more recognizable & common of the two approaches.

Straight pins are the more recognizable & common of the two approaches.

The benefits:

1) They’re financially friendly! You can pick up a pack of these for a small amount of money, which is wonderful for me since I am, like I’ve mentioned before, cheap.

2) They’re reusable! Unless you damage or lose the straight pin, you can pull it from the fabric when you no longer need it for a project, then you use it again and again for endeavors to come. So long as it’s in good shape, it doesn’t need to be replaced.

3) They’re common! Because of this trait, they’re easy to find at a store, meaning you might not have to go too far out of your way to pick up a set.

4) They’re easy to store! They’re small, after all, so you can keep them comfortably in your sewing kit.

Problems:

1) They’re easy to lose! I don’t know how many times I’ve spotted straight pins that have fallen around my sewing area when I’m finished working on a project for the day. Not only is this bad because losing them can lead to replacing them, but these pins are sharp! Losing them could equal pain if you accidentally find one in a not-good way!

2) They’re sharp! Yes, I stated this in the last detail, but it’s worth noting as its own issue. Just like your needle can cause pain if you let it slip, straight pins can do some finger-damage. Using a thimble might help, but I guess I’m a rebel since I don’t usually use one!

3) Quality varies! This is something I learned from my own experience. I have two different sizes of straight pins, and I’ve come to the conclusion that the tiny ones are lacking in comparison to the others. They potentially fall out more easily than the larger ones, which could leave extra spaces of fabric that are unpinned and straight pins that are lost in my workspace. Neither of those things are necessarily good!

My two different sizes of straight pins.

My two different sizes of straight pins.

Spray Basting:

This is a method I haven’t tried, but I’ve done some research on it. I first became aware of it through a Craftsy.com class, and it intrigues/puzzles me. A spray that holds your quilt together? For some reason, that seems bizarre to me! Still, there are supporters for the spray basting method, so who am I to toss the possibility aside without considering it?

A spray that holds your quilt together.

A spray that holds your quilt together.

Benefits:

1) You won’t poke yourself with a straight pin! With how many times I’ve accidentally stabbed myself with a pin or needle, this is promising to me!

2) It’s less time consuming! You don’t have to go through the entire quilt to place pins all over it. You just have to even it out, spray sections at a time and smooth it back out. How easy is that?

3) The effect doesn’t seem to be permanent! Instead, it apparently washes out of your quilt, so its effects are temporary.

You just have to even it out, spray sections at a time and smooth it back out.

You just have to even it out, spray sections at a time and smooth it back out.

Problems:

1) It’s more expensive! A can of basting spray can cost more than a pack of straight pins. Remember how I’m cheap? Yeah…

2) It’s not reusable! Unlike pins, you can only use this product once. Sure, you might be able to space it out to use for more than one project, but once your can is empty, you have to replenish your supply (if you want to keep using this method).

3) It’s messy! As with any spray product, there’s no guarantee that you’ll never get said product on things surrounding what you intended to spray. For this reason, you might have to do some cleaning once you finish your basting.

4) It’s dangerous to your lungs! The fumes can be hazardous, so it’s recommended that you only use this method in a well-ventilated space — like outside.

For me, I’m torn between wanting to dive into the ease of spray basting, but I can’t see myself being okay with hauling my quilt outside to spray it down. Sure, I might be able to find a suitable place indoors. I might even decide that working outside isn’t a big deal. For now though, I think the fume concern is significant enough to keep me unintentionally jabbing myself with straight pins! That’s not to say the day won’t come when I leap into the world of spray basting. It’s just a current decision to keep things a bit more tried, true, and non-toxic!

The Safety Pin

The Safety Pin

I try to collect them all in one drawer, but they escaping & disburse themselves all about the apartment.

I try to collect them all in one drawer, but they escaping & disburse themselves all about the apartment.

Almost every pocket in every article of clothing I own, there are a couple of safety pins. I can also usually find at least three of four of the little buggers on the bedroom floor. Sometimes they end up outside my apartment door because I reached for my keys and pulled out a fistful of safety pins instead. I try to collect them all together in one drawer but seem intent on escaping and disbursing themselves all about the apartment.

I use safety pins for fitting clothing, for hanging patterns, to attaching notes to things. Of course, there are different sizes and flavors of safety pins.

Size matters

I use the tiny gold ones when I’m fitting something very delicate like silk or gauze so that they don’t make an unsightly pin hole.

I use the tiny gold ones when I’m fitting something very delicate like silk or gauze so that they don’t make an unsightly pin hole.

I use the tiny gold ones when I’m fitting something very delicate like silk or gauze so that they don’t make an unsightly pin hole. For some reason, someone thought that gold pins without the end spiral were good idea. I suspect because sometimes things snag on the little coil but, without that coil, the pin is free to slide about so it’s hard to know exactly where/what the mark is.

I use the big number 3s for the majority of my fitting needs. And the number 2s if I need a thinner pin.

History Hunt

Walter Hunt invented the safety pin in 1849. He was the first one to create a pin with the coiled spring on one end and the clasp or catch on the other end to keep the pointy bit safe from tender fingers. Hunt sold his idea outright for $400.00 so never collected any royalties or anything from it. Legend has it that he needed to pay off a debt and thus invented the safety pin and sold the rights within a few hours.

I use safety pins for fitting clothing, for hanging patterns, to attaching notes to things.

I use safety pins for fitting clothing, for hanging patterns, to attaching notes to things.

Selling his safety pin idea wasn’t Hunt’s only unfortunate business decision though. He was also the first one to invent many of the significant parts of the sewing machine, including a curved needle and a shuttle. Hunt created the first sewing machine prototype in wood, which didn’t work all that well so he ended up selling his idea to Elias Howe and Isaac Singer.

Hunt invented a plethora of other things including a streetcar bell, a knife sharpener, paper collars, and an antipodean walking device – or suction cup shoes!

Alas, Hunt didn’t seem to have much business savvy or any true idea of what his inventions could be worth, and just how wide spread and common place they would become.

A modern twist

The safety pin has found its way onto the catwalk and into high fashion with decorated, embellished safety pin broaches and large dangling safety pin earrings.

The safety pin returns as punk becomes more relevant than ever – via Independent.

The humble safety pin also has a rich symbolic history and significance. Punk culture has long used the safety pin as an expression of individual freedom and DIY culture. In the wake of the UK’s Brexit and the US presidential election it has come to symbolize tolerance and unity with all people.

Wonder what Walter Hunt would have sold his idea for back in 1849 if he had been able to foresee even a small fraction of what his pin would become.

Birthday Present Ideas for Sewers

Birthday Present Ideas for Sewers

Birthday Present Ideas for SewersI’m lucky enough to have an October birthday, which is the inspiration for this post. But whether you or the sewer in your life has an October birthday or any of the other 11 months of the year, they’ll love these birthday gifts and use them all year long.

Sewing Machine Needles

If you happen to know the particular brand of machine, or can lay your hands on universal needles, these make a great gift. Get a variety of sizes suitable for many fabric types. Sewers know that machine needles break and get dull, so a package or two of machine needles to replace the ones they’ve gone through will be greatly appreciated.

Dress Form

If the sewer you’re buying a gift for makes a lot of clothes a dress form will be a gift straight from heaven. These aren’t inexpensive so most casual sewers don’t invest in them, but they make the process of sewing a dress much easier and help make sure they’re sized correctly and will fit as expected. Look for one close to the sewer’s size. They’re adjustable, but only to a point.

Self-Healing Cutting Mat

The larger the better. These mats are amazing! If the sewer in your life uses a rotary cutter, a self-healing mat protects the table, floor or other surfaces. Quilters use these a lot and may need to put several together to make a mat the size of the finished quilt. Get a few so they can make whatever size they need.

Straight Pins

Straight pins are essential for every sewer. They hold the sides or pieces of fabric together while they sew over them with the machine. Sometimes, the pins get bent in the process. They also get dull over time. A package of these is inexpensive and will be greatly appreciated by the sewer in your life.

Supply Boxes

Your sewer likely has numerous spools of thread, bobbins, buttons and innumerable other supplies. A set of clear plastic boxes in various sizes will help her organize them while keeping her supplies visible and easily accessible.

Sewing Books

There’s a huge variety of sewing books available. You can get a collection of patterns, tips on fitting, advanced fabric guides or a variety of other sewing related books. Depending on what interests your sewer has, you can find a book, or books, to suit.

Gift Certificate

What sewer doesn’t love a craft or fabric store shopping spree? If you’re not sure what to get the sewer in your life, gift certificates to the local craft or fabric store will be greatly appreciated. They can revel in fabrics, poke through threads and notions, and flip through patterns to their heart’s content.

Sewing Class

If the sewer in your life is dreaming about learning a particular technique, sign them up for a class. They’ll love the chance to learn something new and appreciate the thought you put into the gift. And who knows, maybe they’ll make you something to boot!

What other gift ideas do you have?

Quilt A String-Pieced Scrap Quilt For Baby

Quilt A String-Pieced Scrap Quilt For Baby

Here is an easy scrap quilt idea that is great fun to make.Here is an easy scrap quilt idea that is great fun to make.

You could clear out your scrap stash to make this gorgeous gift.

Blue is my favorite color, so I had heaps of blue scraps. That is what gave me the idea to make this crib sized quilt for a special new baby boy. You could choose a different color of scraps for this, or you could choose to not restrict your palette and clear out a random colorful scrap pile instead.

You will need:

  • A variety of cotton scraps
  • 48 5-inch cotton muslin squares
  • 12 2.5 inch muslin squares
  • 1 yard border fabric
  • Crib size batting
  • 1.5 yard backing fabric
  • Quilt binding or fabric to make binding

To make the patchwork squares:

Press and cut your colorful scraps into approximately 1 inch wide strips. You will trim strips to the desired length as you construct the squares.

Take a muslin square and angle the first scrap strip diagonally, from the bottom left corner to the top right corner of the square. You can create a sort of uniformity in your blocks and allow for the Xs and squares effect achieved in this quilt by choosing one color scrap to use as this center piece in every square. In this case, I chose navy. All squares are made with navy as the longest, first piece in this quilt.

Next, choose another strip and place it right side down atop the first strip, then sew along one side using a quarter inch seam. Flip the second strip down to face up, then press.

Once you've added the last little strip to cover the corner, you can turn and repeat the process to fill in the other side of your square.

Once you’ve added the last little strip to cover the corner, you can turn and repeat the process to fill in the other side of your square.

Then add another strip, placing the third right side down atop the second, and sew using a quarter inch seam, then flip with right side up, and press.

Please do not skip the step of pressing each strip neatly down after sewing. Careful pressing makes the difference between neat and well made quilts and something that is more of a mess!

Repeat the process, using shorter strips and smaller scraps as you get close to the edges of the square. Once you’ve added the last little strip to cover the corner, you can turn and repeat the process to fill in the other side of your square.

Now you have your first completed square.

You have your first completed square.

Place the square right side down and trim excess strip ends from the muslin square. This is most easily accomplished using a rotary cutter, or you can trim the excess with scissors instead.

Now make 47 more.

Now make 47 more.

Now you have your first completed square.

Make 47 more.

Assembling the quilt top:

Once you have completed all your patchwork squares, sew them together into rows.

Different looks can be achieved by varying the placement of the squares. You could turn them all in the same direction or assemble them where they form the X’s and O’s pattern pictured here. This is one of the things that makes quilting so much fun, that the same simple block can be turned different ways to vary the look of the completed top.

When joining the squares, take extra care for the tiny corner triangles, as it can be easy to make a careless mistake and miss joining these “ears” properly. This is easy to avoid by being careful in joining the squares and avoiding rush.

You also have options in this design: once you have completed the joining of the strip patchwork, you could call the quilt top done. Or choose to border the patchwork with a solid fabric. You could make borders of equal widths, or you could choose to add an additional embellishment, as I have here, with smaller blocks set off with borders. I did mine this way to indicate the top of the quilt and bring the design to the right dimensions for a crib sized quilt..

To make this quilt as pictured, sew 3.5 inch border strips around all sides of the patchwork design.

Prepare the three smaller blocks in the same way as the larger ones, using 2.5 inch muslin squares for the base.

Join these into a row by alternating the small patchwork blocks with 4 4.5 inch squares of the border fabric.

Sew this strip to the top edge, and finish the top by adding one more 3.5 inch strip above this.

To make the “quilt sandwich”:

  1. Cut your backing fabric 3 inches bigger all around than the top, press well, and place it right side down on your table or workspace.
  2. Carefully smooth the batting atop the wrong side of the backing layer.
  3. Press the top and seams one more time, taking extra care, then layer it wrong side down on top of the batting layer. Smooth nicely.
  4. Then baste all three layers together, using either long running stitches or quilters safety pins.

Quilting:

Meandering stipple stitch.

Meandering stipple stitch.

You can quilt this using the quick and easy route: the “stitch in the ditch” method of quilting over the seams that joined the individual blocks, or drop your feed dogs and use a meandering stipple stitch in one long line that (ideally) never crosses itself, guiding the quilt using your hands, working in sections until you have covered the entire quilt.  I quilted this pretty closely, like this:

Trim:

Trim the excess batting and backing, using your scissors or more quickly with your serger.

Bind:

Use prepackaged quilt binding or make your own. Sew binding strips together and then sew to quilt top, beginning along one side. Leave approximately an inch free at the beginning of this seam to join the binding ends once you have sewn it down all around. Join them, then fold over and sew the binding down on the back of the quilt using invisible whip stitches sewn by hand or using your machine if preferred.

Now you have made a beautiful heirloom gift that will be treasured forever!

The Final Touches (And Reinforced Lessons)

The Final Touches (And Reinforced Lessons)

Remember on my last blog post when I proclaimed that sewing isn’t baking? In the latest stages of my quilt, I’ve once again found myself facing similar details and thoughts as the ones I experienced earlier. Why? Because — as I said before — guesstimations and “until-it-looks-right” attitudes don’t necessarily spill over from the kitchen to the sewing area.

My homemade backing.

My homemade backing.

You see, I completed all the main lines of a nearly-finished quilt. What that meant, to me, was that it was time to sew on some kind of backing. My tactic for doing so? Getting a flat sheet, cutting it *very* generically around the exterior of the quilt, and trying to fold the excess material down in an appealing manner for the outer edges of the quilt. I ended up with a mess that looked something like this:

Not good, right? And I couldn’t seem to fix the issue with the backing/quilt this way. Whenever I would try to re-pin something so that the massive/slanted corner was more size-and-style-similar to the line leading up to it, the material would twist unpleasantly (like you can see). This blatant issue led me to undoing most of my pin-and-sew work connecting the backing to the actual quilt, in hopes that the lines and corners would better match up.

The process this go-round was a bit more precise, in that the original wrinkles in the sheet had fallen out, and the overall quilt was more carefully positioned under the sheet for more accurate results. That’s right. Under the sheet. Rather than focusing on exactly where the backing would overlap on the front, I concerned myself with making sure that the back portion was somewhat smooth against the quilt blocks. My rationale was that if I could get that territory as it should be, I could flip it over and fold over the ends with more confidence that what I couldn’t see on the back was proficient enough to allow my focus to safely fall on what I could see. Basically, if the backing was smooth, I could do things, like better decide how much material needed to be beyond the quilt blocks to fold over and work with, without worrying so much that the material on the underside was bunched or wrong in some way:

Pins, pins and more pins!

Pins, pins and more pins!

Once I flipped it over, I cut off a bit of the backing material, and I took out the pins from one side (and admittedly—accidentally—a number more!). Some of the quilt had already been sewn (I’m currently thinking of redoing that section, by the way), but beyond that stopping point, I could fold over the excess material, tuck it under itself, and pin it back down so it would create a more pleasing line and corner:

Progress is progress for an early quilter, right?

Progress is progress for an early quilter, right?

Perfect? Eh. But progress is progress for an early quilter, right? And, perfect or not, this strategy seems to have helped.

Still, knowing if the strategy will prove effective throughout the rest of the process might be something I judge later. After all, I’m less than one line into it, and there are over three sides to go (not to mention inner attachments).

In any event, this particular dilemma has led me to another tactic in learning to quilt better, and that’s to look for answers online. I’ve looked at a quilting video before, but a number of things that I’ve attempted to do are details I could’ve found assistance for online. There are charts, for instance, about how big to cut blocks, or how large a certain size of quilt should be. I might’ve literally been the girl who measured a bed with measuring tape (not sewing tape!) to see how big I should make a quilt, which I wouldn’t have had to do if I’d looked at a chart! I wouldn’t be too surprised if I took more of my sewing/quilting concerns online to try and find answers for them in the future!

Hopefully, this quilt will be finished soon, and I’ll be able to move on to another project with the skills and lessons I’ve learned up to this point. And maybe one day, I can become the quilter I want to be!

“Pin”ny Time Savers

All you need are clothes hangers, clothespins, and a marker or pen (not pictured).

All you need are clothes hangers, clothespins, and a marker or pen (not pictured).

Whether you are new to sewing and quilting or just love to follow commercial patterns, you quickly find out that once you cut out your pattern pieces, they are EVERYWHERE. Along your pattern cutting journey, you may get a little lost, especially trying to keep track of “which piece goes where” and “what label is this piece?” After all your cutting is done and it is time to reach for your cut pattern pieces to begin sewing or quilting, you find you find yourself spending even more time figuring out which one is “A, B, C” or “1, 2, 3”. Here is a handy solution to help you organize your fabric pattern pieces with items you probably already have at home.

First, use a marker or pen to label the clothespins based on the labels found on the pattern pieces or the pattern guide.

First, use a marker or pen to label the clothespins based on the labels found on the pattern pieces or the pattern guide.

All you need are clothes hangers, clothespins, and a marker or pen (not pictured). First, use a marker or pen to label the clothespins based on the labels found on the pattern pieces or the pattern guide. Using a permanent marker may make it easier to write on the clothespin, especially if it is made out of plastic. When choosing the marker and pen, make sure that you choose an ink that will be very easy and quick to see on the clothespin. (The goal is to make find your pattern pieces easier.)

Second, once you have labeled the clothespins, clip them on the hanger. To make finding the pins easier, place the labeled clothespin in alphabetical and numerical order. Continue clipping the pins onto the hanger until you have all your pins in a row. If you run out of space, use additional hangers until you have all of our labeled clothespins on a hanger.

Once you have labeled the clothespins, clip them on the hanger. Finally, attach the cut fabric pieces to their corresponding labeled clothespin by clipping the fabric to the hanger.

Once you have labeled the clothespins, clip them on the hanger. Finally, attach the cut fabric pieces to their corresponding labeled clothespin by clipping the fabric to the hanger.

Finally, attach the cut fabric pieces to their corresponding labeled clothespin by clipping the fabric to the hanger. For quilting patterns, there may be many pieces that same labels (for example, a repeating quilting pattern). In those cases, clip several pieces with the same label on the same pin. If there are a large amount of pieces with the same label and the clothespin get too bulky, create several clothespins with the same label. Organize the clothespins with identical labels next to each other for convenient and quick access.

Now you can hang the hanger on a door handle, a rod, or a rack. Place your fabric pattern hanger in a location this close to your project a quick reach to start your sewing and quilting. This idea not only helps to organize your pattern pieces, but it also helps to organize your sewing process. It can be such a distraction to have pattern pieces scattered all over your sewing and quilting workspace. A great sewing and quilting project takes focus and time. Organization around you in the workshop help you focus on project and saves you the time of having to search for your pattern pieces and figure out which piece it is.

The beauty of sewing and quilting is its creativity, attention to detail, and precision. Let this handy solution give you the freedom to put all of your time and energy into those things. So check out your closets or laundry rooms for the clothespins and hangers that will save you sewing and quilting time. But, just in case you want to go a purchase new one just for your sewing and quilting space, have fun with colors, prints, textiles, and more. From hardware stores to houseware stores, the possibilities are endless. Spruce up your creative environment with fashionable hangers and fancy clothespins to create a simple gadget that will help to make your sewing and quilting experience less frustrating and more exciting.