Where I live, it’s unseasonably warm at the moment, but we all know winter is on the way. Yes, first we’ll experience the glory and brilliant colors of fall, but those crisp days will quickly give way to cold, snowy winters. Now is the time when I and my neighbors begin to prepare for the near-hibernation that will get us through the winter. Much of this involves prepping our homes to retain the heat. There are several sewing projects that help with this task – and make it more fun!
Draft dodgers
When the cool weather arrives, it’s easy to feel the drafts underneath doors. Even with weather stripping, not all doors form a tight seal against the elements. Sewing a draft dodger is easy and keeps the cold weather out of the house. I use my scrap pile to find a long enough piece of fabric and sew it in a long tube that will be high enough to cover the base of the door. Then stuff it with polyfill or beads. You can even add some ambiance by adding pine, lavender, or other aromatics before sewing it closed. If you’re feeling silly, create a cat, puppy or other furry friend face to attach to the outside.
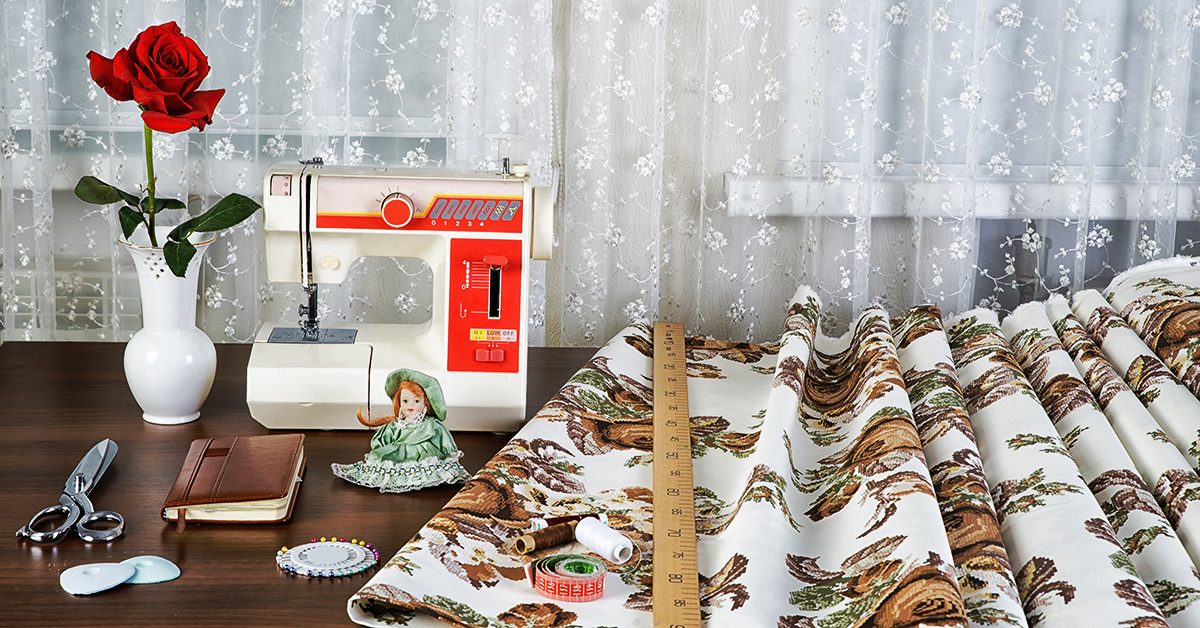
Thick curtains
It’s common in this area for people to hang quilts over their windows to keep the heat in and the cold air out. While I understand the logic, I dislike blocking the natural light. Winter is dark enough without blocking windows. Instead, sew some thick curtains that can be tacked or pinned around the window sill and frame. This will still keep the drafts out, but will also allow light in. Burlap or linen backing on a material that matches your décor, perhaps with quilting in between, can work quite well.
Bedding
Personally, I love curling up under blankets in the winter so creating a fabulous, thick blanket for my bed is incredibly fun. I’m not a quilter, though if you are, making one that’s extra warm for winter would be immensely fun. Since I’m not, I have a great time finding fun fleece fabrics that coordinate with the rest of my bed linens and adding edging to them.
With these sewing projects, I know I’ll be warm and cozy this winter. If you’re in a cold area also, try them out and see how much warmer your home is this year.
You can sew a rice pack heating pad to any size at all.
The first one I ever made was a rectangle maybe about four by six inches. Okay, maybe it was a little bigger than that, but in use, it turned out to be silly small and I wanted a larger one.
I have made smaller rice packs that serve a neat purpose, though.
These make sweet pocket warmers when stuffed with rice.
For a heating pad, bigger is better. So I made a large one with a folded kitchen towel and a big bag of rice, and this was a helpful friend for some time.
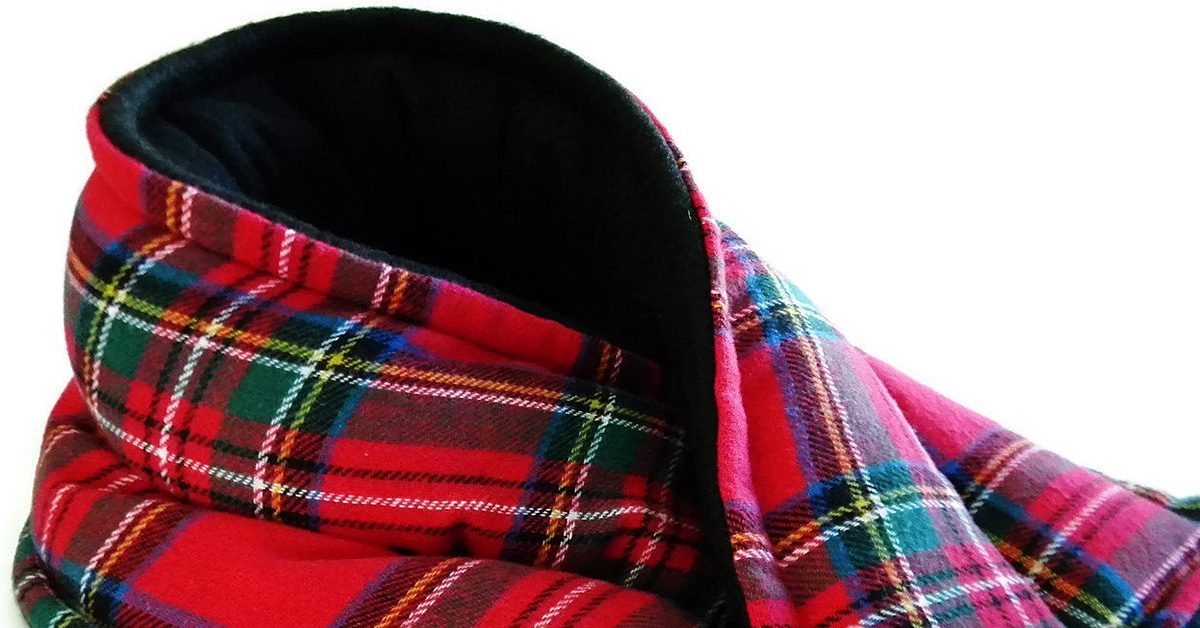
But have you ever wanted a full body hugging heating pad? I have, every month for some time now. I have wanted one to wrap around my tummy, and my dear and I have both wished for something bigger for pains in the neck and shoulders, too.
So I bought a huge bag of rice in bulk and decided to finally sew a rice pack heating pad big enough to wrap around.
So I bought a huge bag of rice in bulk & decided to finally sew a rice pack heating pad big enough to wrap around.
Here’s how I made it:
Materials
2/3 yd sturdy fabric
20 cups rice
Of course you need a sewing machine, thread, scissors and/or a rotary cutter and mat.
Step one
Fold the fabric for your heating pad in half so that it makes a long rectangle approximately 44 inches (it will likely be shorter than 44 inches after pre-washing your fabric) by 12 inches, and press.
Then, make a narrow hem along both of the long (~44”) edges. Or you can serge along these edges with your serger.
Step two
Now fold it again, with right sides together. Sew along both short edges. Leave the long end open.
Of course you can serge these seams, too.
Clip the corners, and turn right sides out.
Step three
Now you are going to measure and then sew four lines of stitching to section the rectangle into five sections. These lines will run parallel to the end seams you just sewed.
I found the middle, then measured four inches out from there on either side, and marked my first two lines to create the middle section. Then I measured eight inches out from each of these to create the other sections.
Sew these lines from the bottom but end them approximately 3/4 inch before you reach the top.
Step four
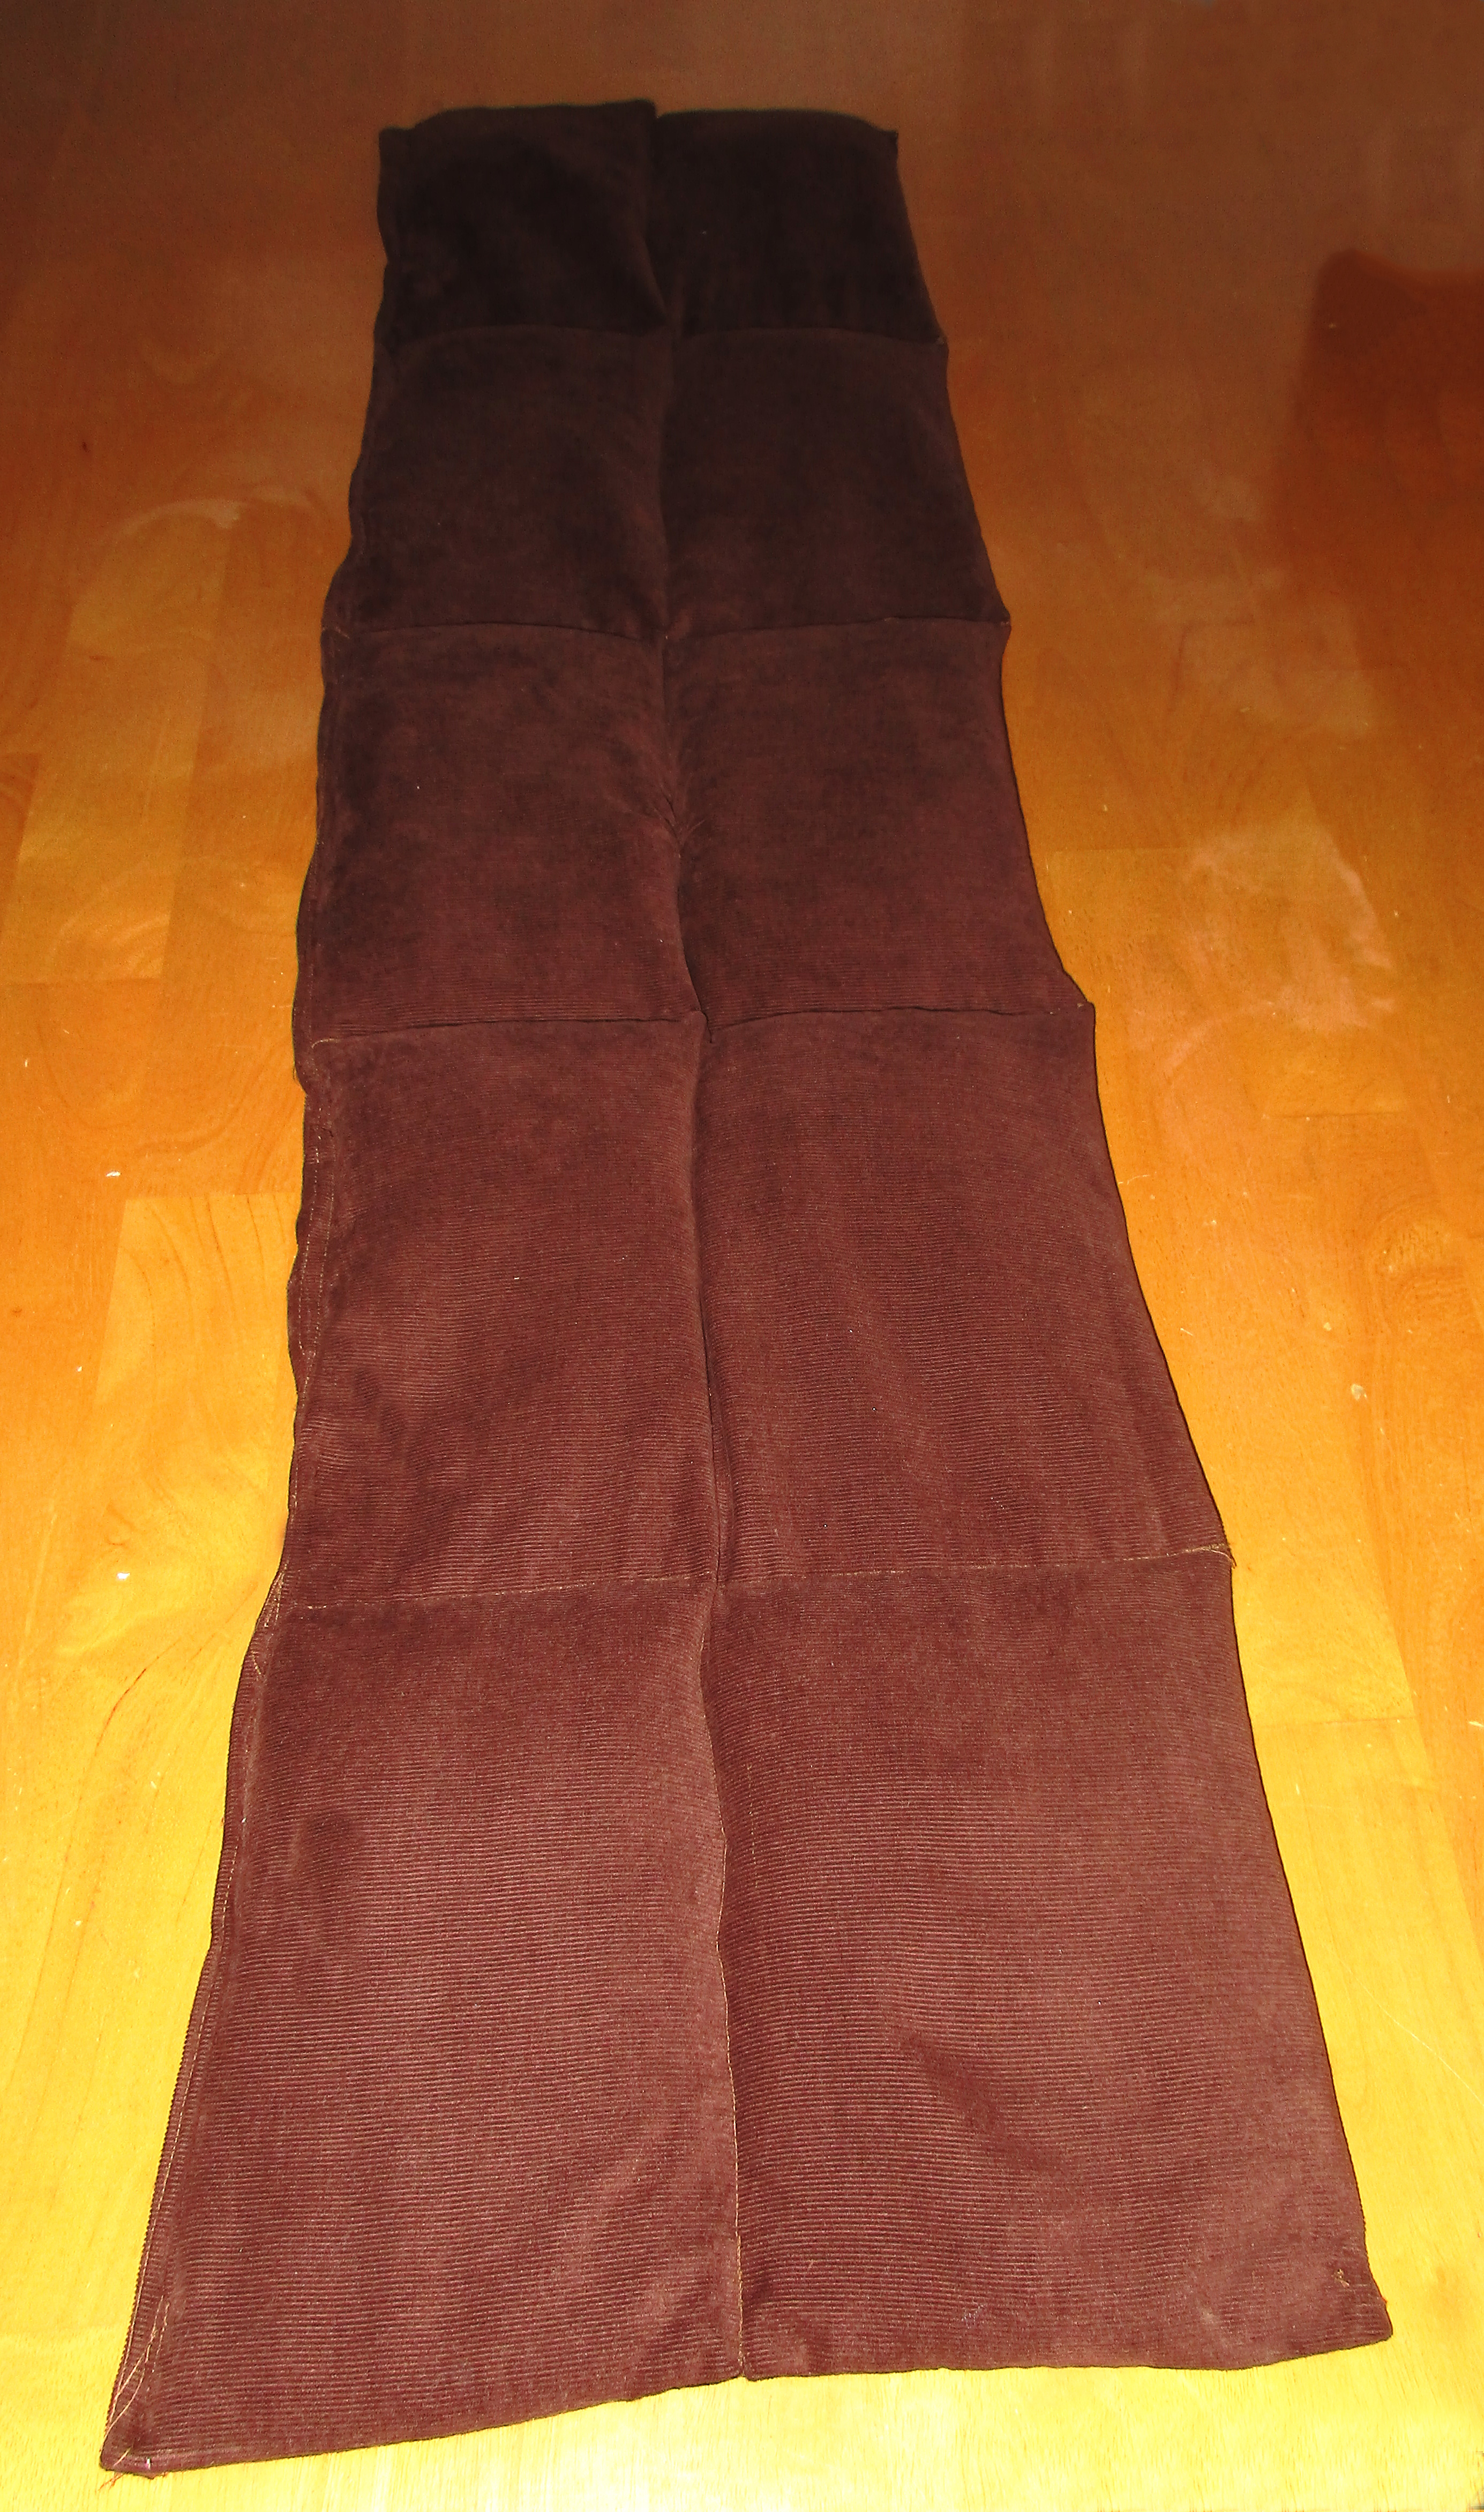
And there is your whole body heating pad, which will wrap all around like a warm & heavy hug when you need it.
Scoop two cups of rice into each opening. Hold the bag and be sure all the rice flows to the very bottom of the pockets.
Now, sew a long line, parallel to the open edges, to bisect the five sections into ten.
Step five
Scoop two more cups of rice into each of the remaining five sections.
Then you can sew the long opening closed. I turned this over and sewed it down again to make this seam stronger, too.
If you want to be extra careful to prevent the rice from spilling out while you sew, then take the extra time to baste the long opening closed with quilter’s safety pins.
And there is your whole body heating pad, which will wrap all around like a warm and heavy hug when you need it.
To use:
Microwave the heat pad to warm. Microwave ovens vary a lot, so you will have to determine for yourself how long you should heat yours. Five minutes seems about right for mine, but be careful not to burn yourself.
Remove the pad from the microwave, shake it up a bit and evenly distribute the heat. Wrap it around your tummy, your shoulders, even your legs. Or lie down and use the whole length along your back from top to bottom. And feel better soon!
Hello there! I’ve been playing with something I would like to share with you.
Stitch the right sides together on all 4 sides, leaving a small space open on the last side.
Let me warn you, it is rather novel, as I haven’t seen this done before in sewing blogs or other instructions, but it works pretty well I think.
Recently, I several kinds of small baby wipes made from soft, warm flannel. Rather than 1 layer of flannel, and just a simple serger stitch, I designed them to be thicker and have no fraying edges when washed. Each square is approximately 9″ x 9″ finished as below.
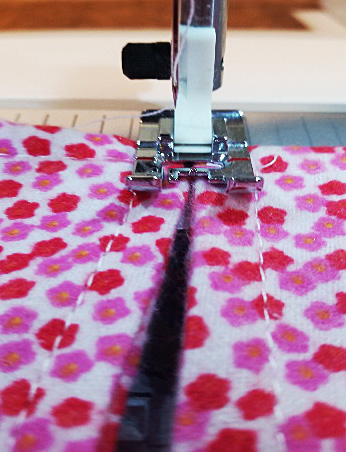
So, I used 2 pieces of the fabric, and I stitched the right sides together on all four sides, leaving a small space open on the last side to place my hand inside and pull the fabric’s right sides to the outside. What? (I heard you thinking there!)
Think of throwing a pillow case in the dryer with the inside seams showing. When dried in the dryer and smelling like Snuggle, you put your arms inside, find both far corners of the pillow case, and pull them forward to you drawing the right sides of the pillowcase to the outside or the top side. So then, I carefully ironed the edges down so I could put top-stitching about one-quarter inch from the edge of the wipe. Finished product soft, bright, cuddly wipe.
BUT WAIT! There’s more
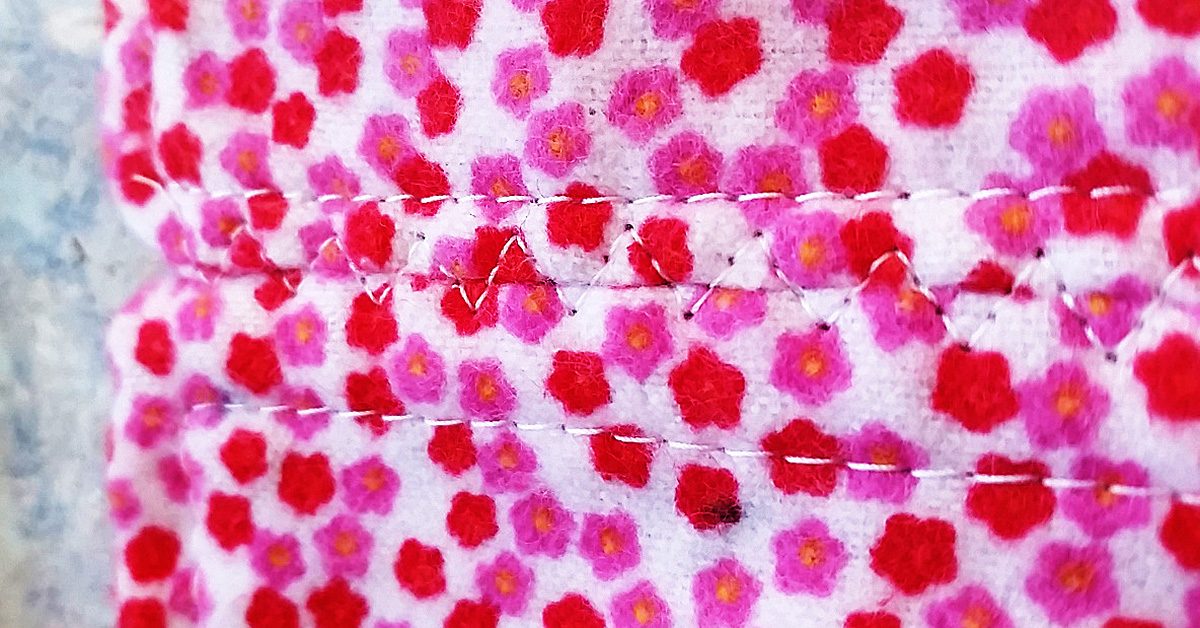
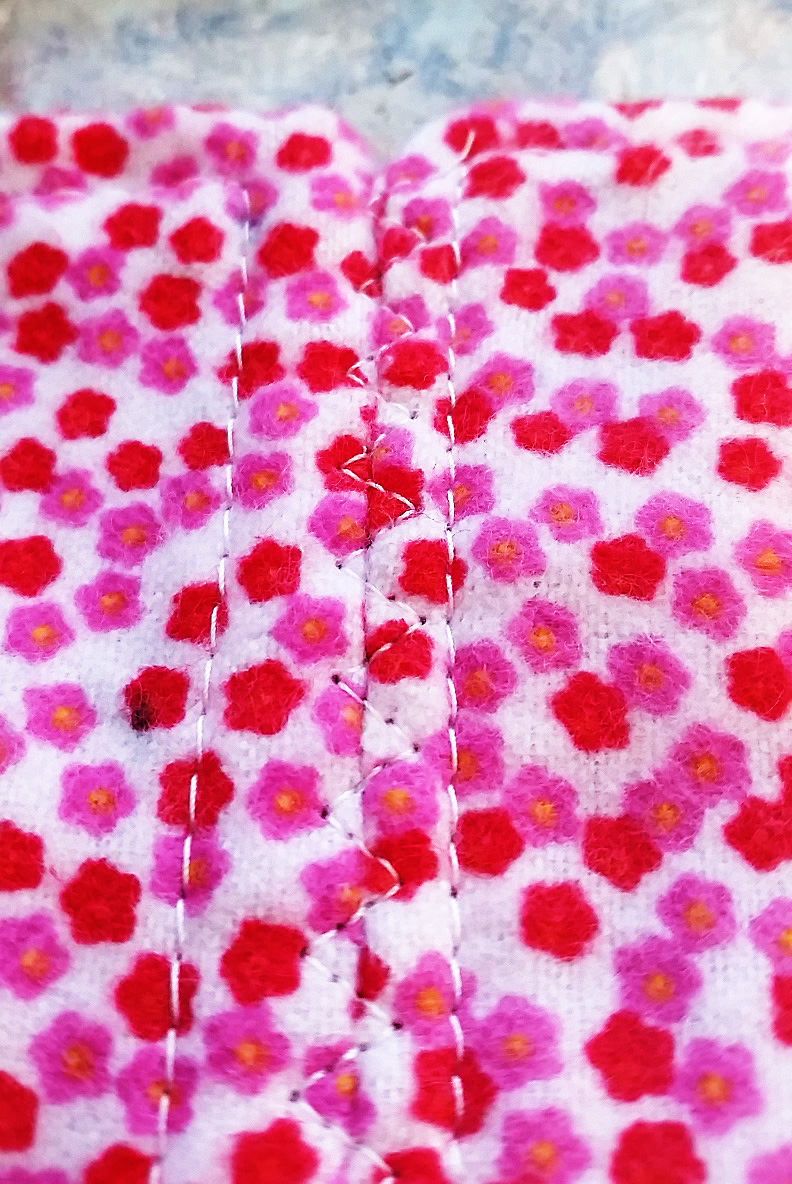
This shows how the seam was done, & it is sturdy like seam made in the traditional way.
I thought why can’t I repurpose these cloths into something larger. It’s a small baby print, and with soft flannel on both sides, I brainstormed about how I can piece the two squares together without having to take the stitching apart of one side of each square to join them. That would involve doing all the squares accordingly, and would destroy my top-stitching.
This shows how the seam was done, and it is sturdy like seam made in the traditional way. This finished end to end seam reminds me of flat feld seams as used in my Pojagi pieces, although not quite. It also could be an alternate seam method for quilts without using a backing. A piece of batting could be added to each square to give a more padded feel to this alternate way of quilting, (like rag quilts but no raw edges or fringe.)
I hope you enjoyed my blog today, and I hope to see you again soon. I always welcome your experiences in sewing. After all, what would we do if we didn’t sew?
Today, I wanted to share what I have been doing these days. It know it has been awhile since I wrote, however, I have been away from my favorite past time for other “pressing matters” (i.e. ironing hubby’s shirts, not quilt squares) and other important tasks!
Scrappy leftovers
I have an enormous collection of scraps in my sewing studio. Since I have been reorganizing in preparation to move our home, I have to make a strong effort to release some things I have collected to make packing a little easier. Well, packing is never easy, but psychologically, it forces you to consider the value of all the things you think you absolutely needed to have, right? And also, without saying, it alerts you to some of the things you want to make this hobby more efficient. No wonder it takes forever to pack and with sewing, I always think if I throw it away, I will want it later. Tough decisions, aren’t they?
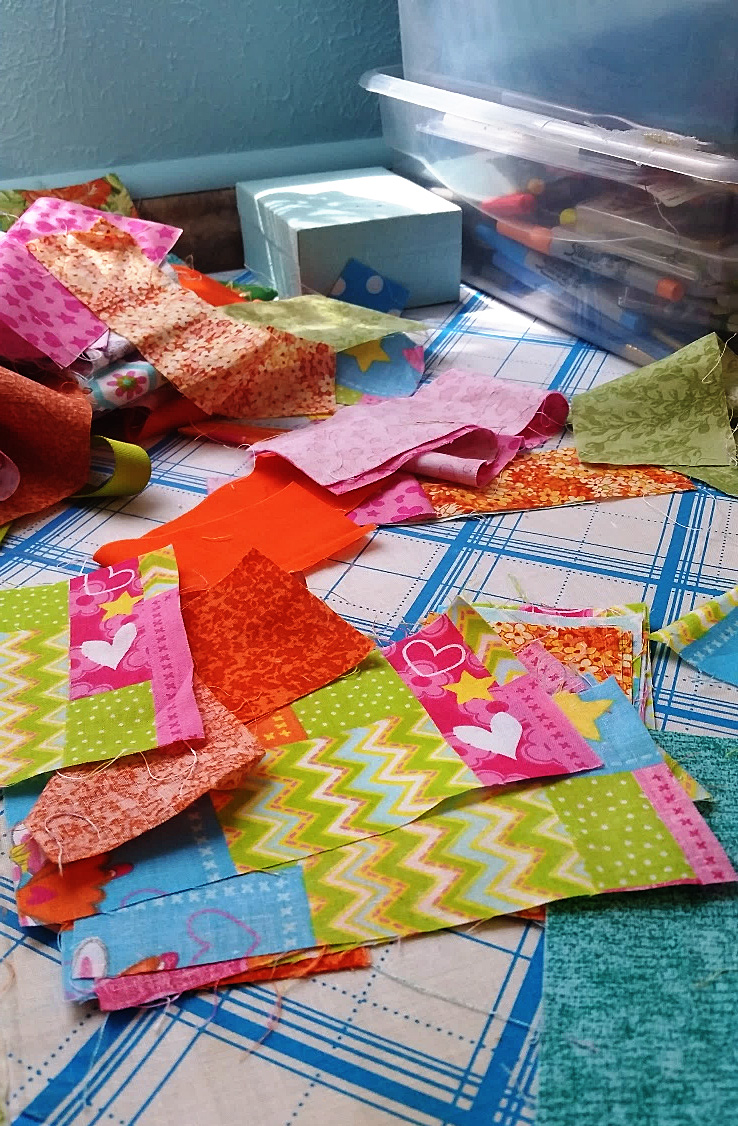
So, I started with a pile of disorganized scraps, which I have previously cut for something else, some time ago. I don’t even remember what I had in mind at the time, but I need to throw them away or use them. This is just part of the large amount of fabric and bright colors I have to work with.
This is just part of the large amount of fabric & bright colors I have to work with.
Improv isn’t only for comedians
Recently, I have been learning about “improvisational” sewing. It is interesting to me because I like doing things that are unique to my creativity. However, it takes you out of your comfort zone. The experts say, it reveals your creative side by working with no specific pattern, no color guidelines, no measurements, just picking up random pieces of fabric, basically scraps, and sewing them together without a pattern. It reminds me of the dreaded “improvisational” speeches required in college speech classes.
I know there are many patterns and helpful information about quilting that give exact instructions and even kits that you can complete. So, this is an adventure to test your creativity for sure.
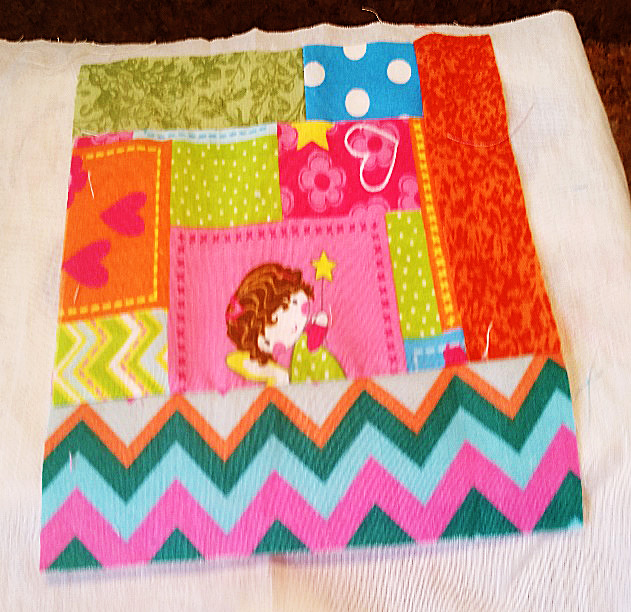
So, now I have my scraps and the easiest way to explain how this came together is: I took a medium sized scrap, and added to others to make an approximate square about 7 x 6 inches. I didn’t measure at all, just found several squares which had in this case, a little girl with a magic wand. I used the “fairy girl” as my focal fabric.
It was not too difficult because the pattern of the fabric was already woven like patchwork.
It was not too difficult because the pattern of the fabric was already woven like patchwork.
So, I just added like-colored fabric to make an extension of the pattern. No true measurements, pieces were just trimmed to fit inside the square, and the princess would appear somewhere on each one. I used the square as a template and compared the rest to the template, and then trimmed them to be the same size as close as possible. NOW… Comes my favorite friend in the WORLD while quilting! My IRON! And I need a NEW ONE at that (please refer to great wishlist choices from SewingMachinesPlus.com).
Finishing touches
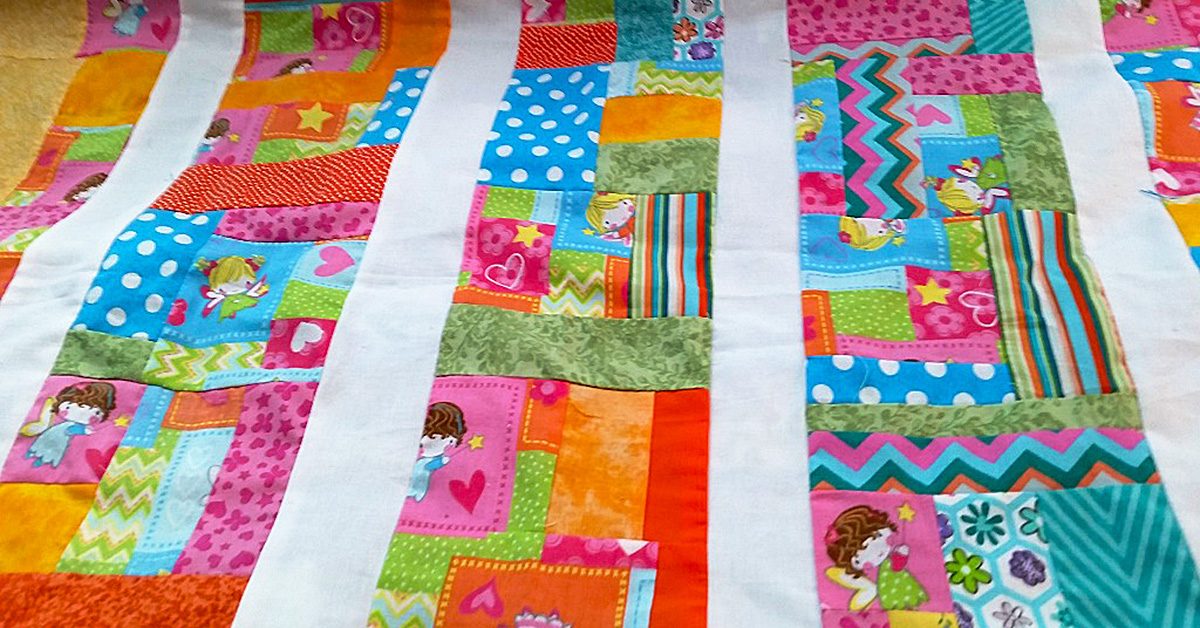
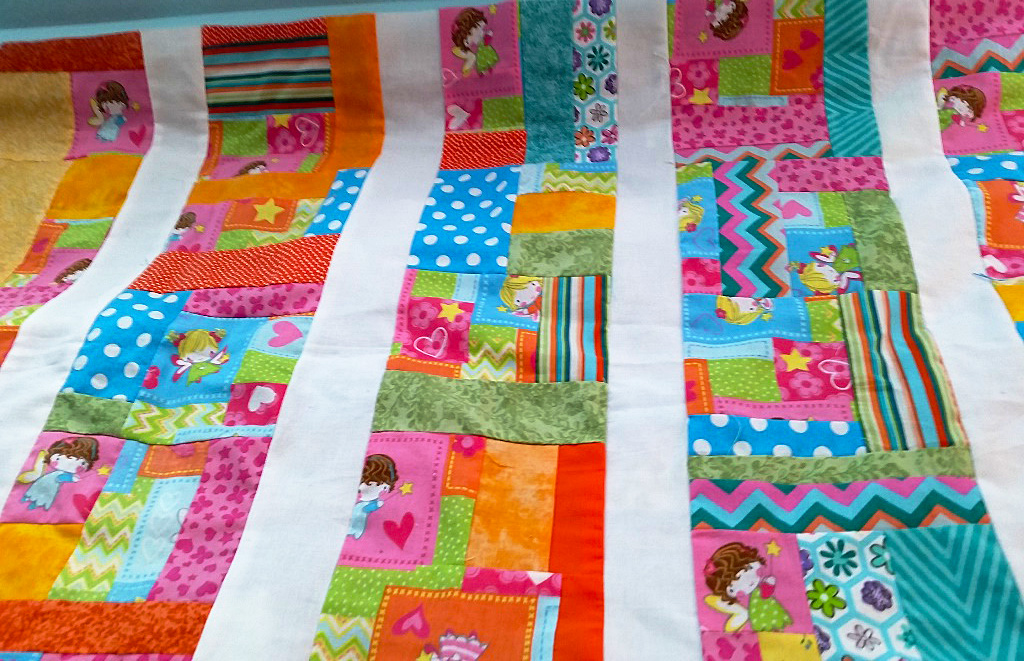
So finally, I was feeling pretty good about how my unplanned, off the top of my head, quilt top was coming along. So I sewed the pieces together in 5 rows and 5 squares each. Then added white jelly roll strips between each row of 5. I had to trim it only a little to make it a true measurement all around.
“Improvise” a cheerful quilt or smaller project & smell the beauty of your creation this spring.
I still need to finish the border, batting and binding, but here’s what it looks like now. It was really fun to do, because I didn’t know how it would turn out. I should say I learned that I need solid color between busy patterns to give a quilt top a cohesive, unified look so each quilt patch is recognizable from the next. Do you mix plain fabric among many different prints?
I think you would enjoy this truly personal form of expression with fabric.
“Improvise” a cheerful quilt or smaller project and smell the beauty of your creation this spring.
Better yet, know that even without a plan, or a pattern, you can turn scraps into something as personal as you are! Then, please reply to this blog with pictures. I would love to see them. Until next time, when I will tell you about how I am repurposing handmade flannel wash clothes into a sweet little blanket and stitched without a seam. Carpe diem!
Color theory and scheme play an essential part in any design, and color choices are most important in planning any quilt. Choosing a color scheme that works for your quilt prevents muddy color or boring results from your hours of work. You want quilts that both stand out and fit in, and the key to this is using color theory to your advantage. Using colors that work together as a quilting team in your design can enable you to do any or all of the following:
Achieve harmonious results using a wide array of many fabrics
Make some colors pop and others recede, to emphasize or unify block patterns
Design quilts to complement interiors without any clash, and without being boring
Have backgrounds that work well, rather than as competition to spoil design effects
Balance any design and make all your quilts sing
Add extra Oomph and Wow Factor, for perfect success
Different color choices…
Enable different results.
You can do all this with ease when you understand color theory and recognize the logical choices available. We don’t have to reinvent the wheel, and so we can choose from a preselected menu of color scheme styles, or teams, that we know will always work wonderfully together.
Color theory and schemes
What are some of these tried-and-true color teams? Let’s look at them all:
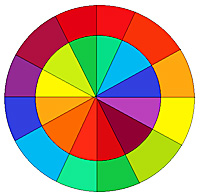
Monochromatic
A monochromatic color scheme uses only one color, choosing from all shades and tones of that color. How many greens are in the garden, and all of nature? It feels like shades of blue are unlimited when you think of the many colors for sky and sea. The brown palette includes all colors of dirt and soil layers, skin tones, fur shades, tree barks, and more. You could use hundreds of different fabrics in one quilt and stick to one color. Or limit yourself to less, if you like, but know that a monochromatic quilt is a viable option in any color. You can also use a monochromatic palette as an element of your quilt, rather than the whole thing. This trick will enable you to paint with your fabric and achieve dramatic landscapes or picturesque quilts.
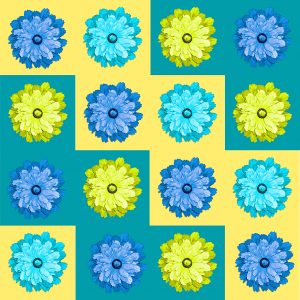
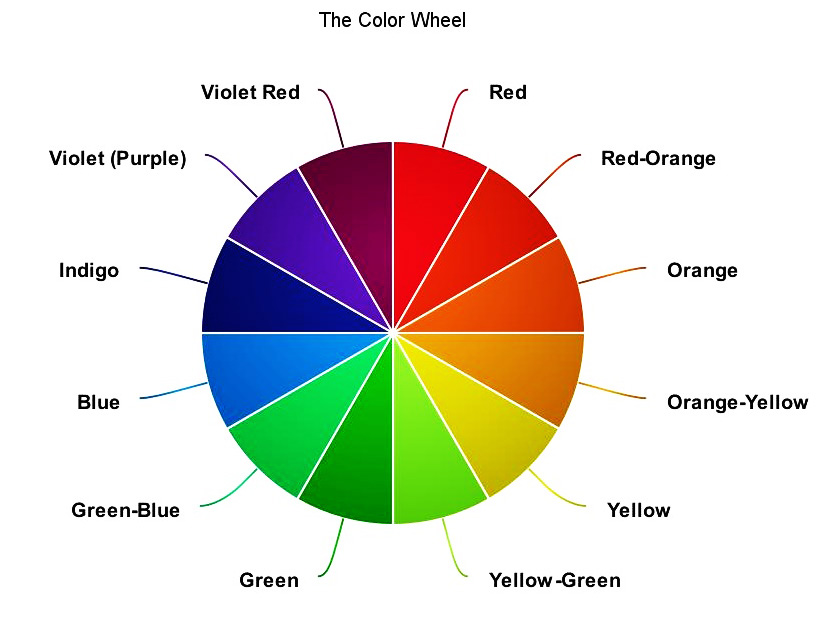
Analogous
Analogous colors are next to each other in the color wheel. You can choose a narrow or a wide analogous scheme. You could choose to use all shades of just red, orange, and what is between them, or include all the way to yellow for more contrast. Choose from the other side of the wheel using blues and indigos, or including violets. Or go with yellow, green, and blue, including everything in between them, or blue, purple, and red with shades in between these. There are a lot of options for analogous quilts. I made one using blues and indigo, I showed how to make it on this blog a while ago.
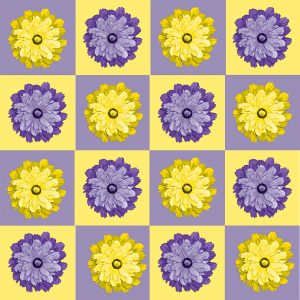
Complementary
Complementary colors really set each other off.
Complementary colors are opposites on the color wheel. They go well together as natural pairs and seem to reflect their differences pleasingly. Complementary pairs are: red and green, blue and orange, yellow and purple, and more. Indigo is between blue and purple, so its opposite shade is between yellow and orange. You could also choose two analogous colors and also use both color’s complementary colors. For example, I have never used indigo and violet with yellow and orange yellow as a color scheme, but I know that it would work well.
Triadic – primary, secondary and tertiary
The familiar primary color scheme of red, yellow, and blue is triadic. Triadic colors are evenly balanced and play well together without competition. The secondary triadic trio includes green, purple, and orange. Tertiary triads include indigo, red-orange, and yellow-green together, or yellow-orange, blue-green, and violet red. Remember that you can choose from different shades of each color. For example, the familiar pastel trio of pink, pale yellow, and light blue used so often for babies, is a just a lightened up version of the primary color triad.
I used a Rainbow color scheme for the cover of this baby color book.
Rainbow
The rainbow color scheme includes, you guessed it, every color of the rainbow. Don’t leave any out; a rainbow palette must include red, orange, yellow, green, blue, indigo, and purple. You can decide for yourself whether to include the tertiary colors that fall between these or not. A rainbow scheme will work with or without these colors. A rainbow scheme always results in a vibrant quilt.
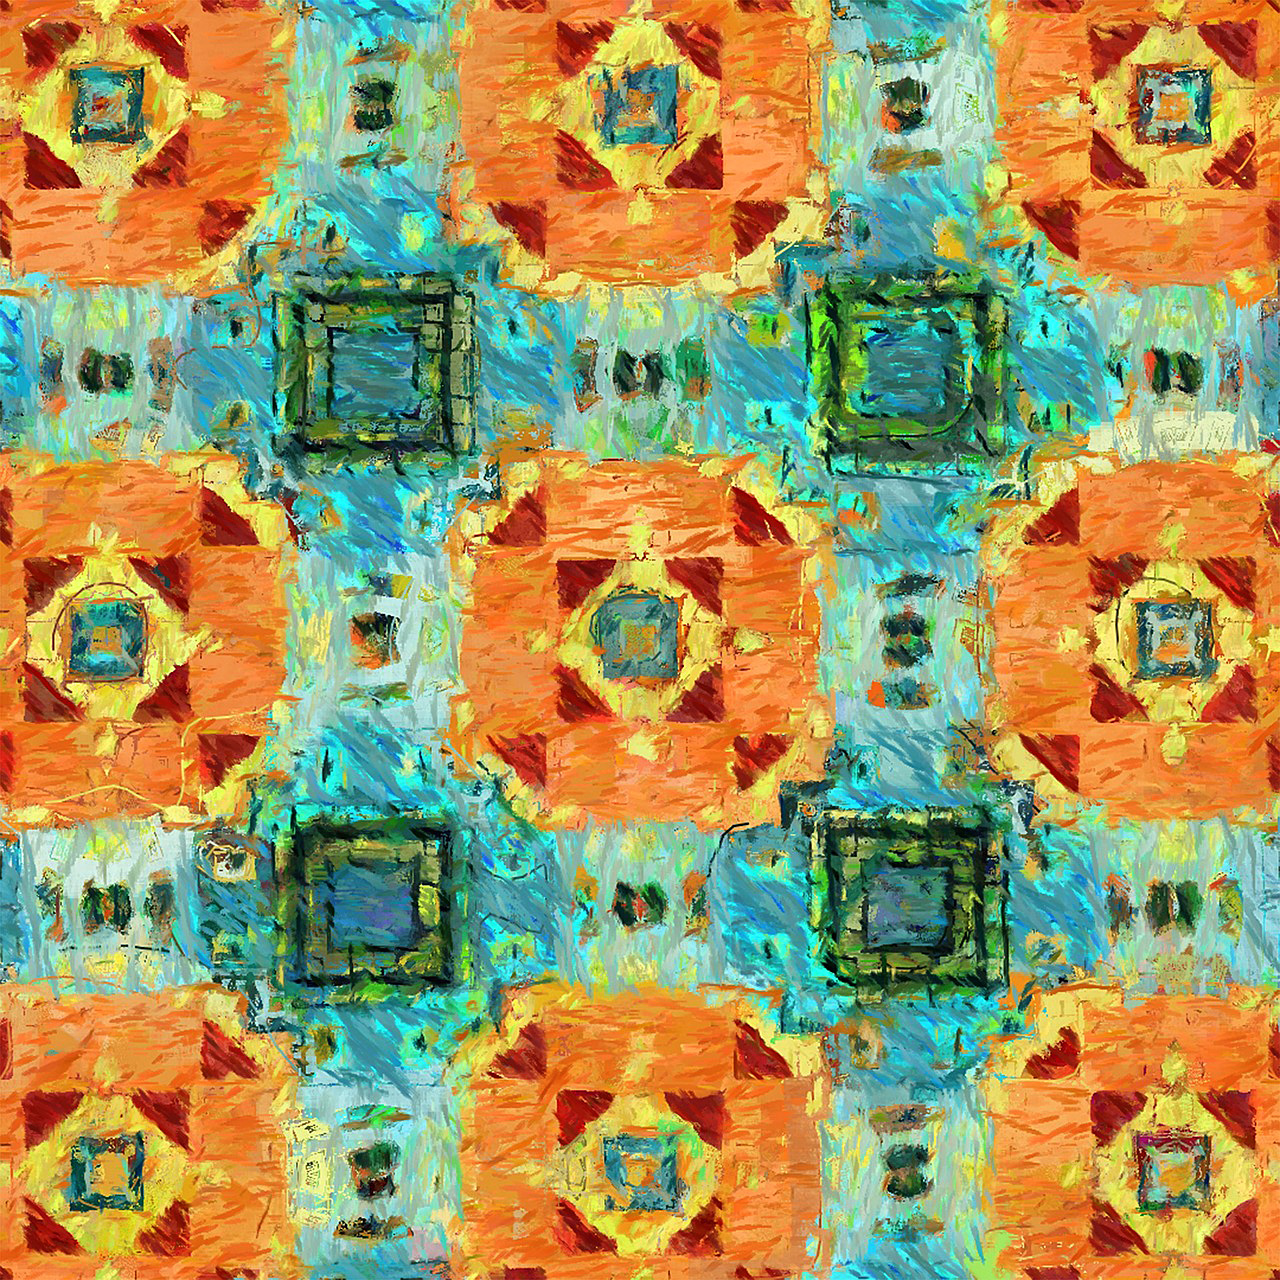
Warm and cool
Warm and Cool.
Warm colors range from red to yellow, like the colors of the sun. Browns and sands are included in this group, too. Cool colors go from blue-green to purple, like the seas and the skies, including at night. Warm colors advance; cool colors retreat. Cool colors separate and warm colors unify. Stars pieced from warm colors really pop against a cool background. Pairing warm and cool colors differently can make dramatic differences in blocks, and changing this up may provide a lot of interest in repeating motifs.
Light and dark
This is the ultimate contrast, like black and white. Shapes are emphasized and the look is simple and uncluttered. Use your choice of colors for the light and dark pairing. You could choose light and dark shades of the same color or a complementary pair to contrast between light and dark, for example. While black and white can be starkly dramatic, this can also be downplayed in a light/dark combo by choosing a mix of lights and darks and gradating the tone.
Neutral
Natural colors: the seashore and shells; barks and stems; wood; dried grasses; crinkly leaves; skin-tones; rocks and soil. Grays like the sky sometimes and clouds, or concrete, and silvery steel. Creams, ivories, bone, and every shade of brown are all neutral colors. Neutrals can be light or dark. They are non-competitive, and help other colors. This is why they work so well as backgrounds. Neutrals are peaceful and offer support, so in general they are always welcome.
Traditional
A traditional quilt color scheme depends less on color than value. It is traditional to choose three colors for quilting: one that is dominant, one that is subordinate, and one as an accent. The dominant and subordinate colors play off each other, and the accent provides a pop. The red squares traditionally used as the centers of Log Cabin blocks both provide pop and serve to unify and define this classic design. You can use your dominant color to emphasize a repeating motif and the subordinate color as the background, sprinkling the accent color about to add sparkle and interest.
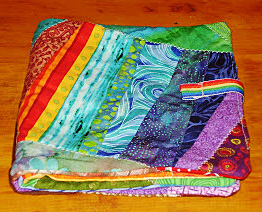
Scrap bag
It is a valid choice to use no color scheme at all and choose indiscriminately from among a plethora of colorful scraps. Scrap quilts, with their confetti of riotous colors, are endlessly pleasing, both to make and to look at. You can piece together a pleasing string or strip patchwork quilt by choosing blindly from an abundant scrap pile.
Choose a variety of fabrics
You can use a favorite fabric as a starting point to choose your scheme around, or you can begin choosing fabrics according to a predetermined scheme. The unlimited choices available to quilters are a big part of what makes quilt-making fun. You can increase your enjoyment in making any quilt by widening your variety of fabric choices. If you choose a triadic color scheme, for example, but then choose only one fabric of each color to complete your quilt, you may be bored by the lack of variety. Choose several fabrics in each color to increase interest instead.
Don’t be daunted by color choices. Choose any one of these color schemes and your quilt is sure to be a success. I hope that you understand color theory now and that this has helped you.