Happy Spring! The Joy of Warmer Weather and Beautiful Flowers

Happy Spring! The Joy of Warmer Weather and Beautiful Flowers

Hi! Good to see you again!

Hi! Good to see you again!

Today, I wanted to share what I have been doing these days. It know it has been awhile since I wrote, however, I have been away from my favorite past time for other “pressing matters” (i.e. ironing hubby’s shirts, not quilt squares) and other important tasks!

Scrappy leftovers

I have an enormous collection of scraps in my sewing studio. Since I have been reorganizing in preparation to move our home, I have to make a strong effort to release some things I have collected to make packing a little easier. Well, packing is never easy, but psychologically, it forces you to consider the value of all the things you think you absolutely needed to have, right? And also, without saying, it alerts you to some of the things you want to make this hobby more efficient. No wonder it takes forever to pack and with sewing, I always think if I throw it away, I will want it later. Tough decisions, aren’t they?

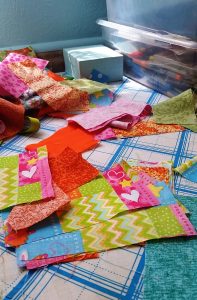
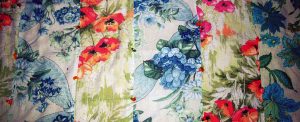
So, I started with a pile of disorganized scraps, which I have previously cut for something else, some time ago. I don’t even remember what I had in mind at the time, but I need to throw them away or use them. This is just part of the large amount of fabric and bright colors I have to work with.

This is just part of the large amount of fabric & bright colors I have to work with.

This is just part of the large amount of fabric & bright colors I have to work with.

Improv isn’t only for comedians

Recently, I have been learning about “improvisational” sewing. It is interesting to me because I like doing things that are unique to my creativity. However, it takes you out of your comfort zone. The experts say, it reveals your creative side by working with no specific pattern, no color guidelines, no measurements, just picking up random pieces of fabric, basically scraps, and sewing them together without a pattern. It reminds me of the dreaded “improvisational” speeches required in college speech classes.

I know there are many patterns and helpful information about quilting that give exact instructions and even kits that you can complete. So, this is an adventure to test your creativity for sure.

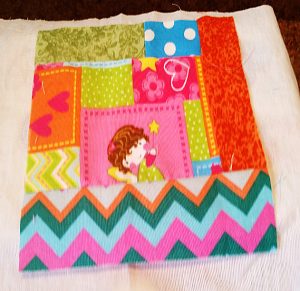
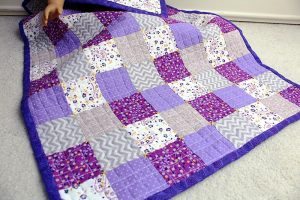
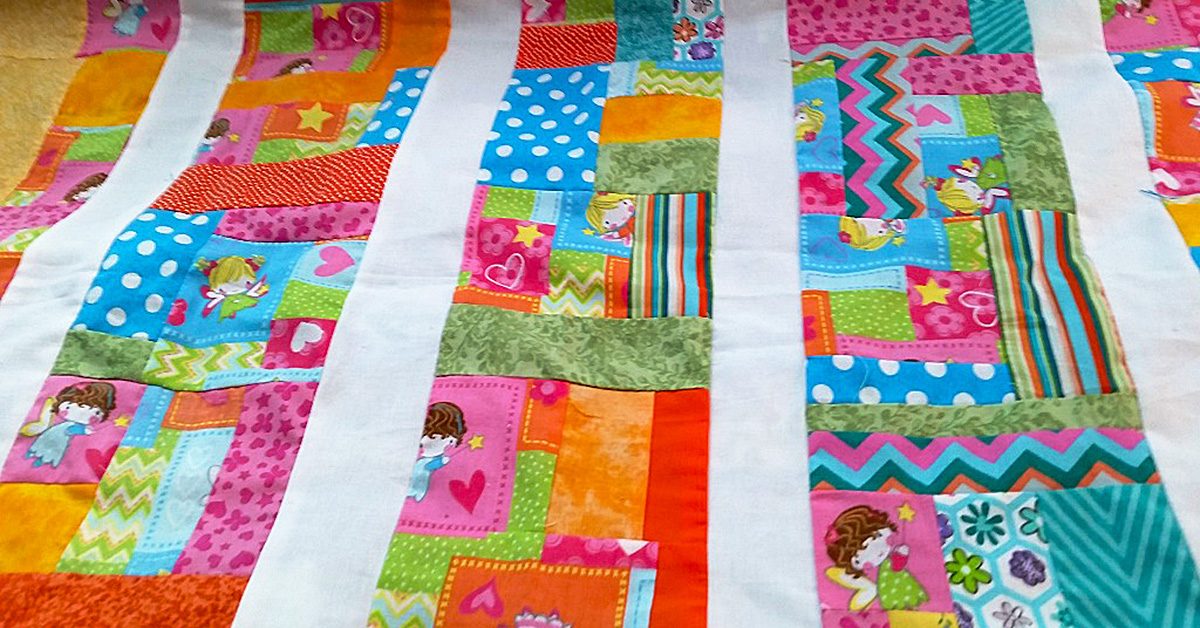
So, now I have my scraps and the easiest way to explain how this came together is: I took a medium sized scrap, and added to others to make an approximate square about 7 x 6 inches. I didn’t measure at all, just found several squares which had in this case, a little girl with a magic wand. I used the “fairy girl” as my focal fabric.

It was not too difficult because the pattern of the fabric was already woven like patchwork.

It was not too difficult because the pattern of the fabric was already woven like patchwork.

It was not too difficult because the pattern of the fabric was already woven like patchwork.

So, I just added like-colored fabric to make an extension of the pattern. No true measurements, pieces were just trimmed to fit inside the square, and the princess would appear somewhere on each one. I used the square as a template and compared the rest to the template, and then trimmed them to be the same size as close as possible. NOW… Comes my favorite friend in the WORLD while quilting! My IRON! And I need a NEW ONE at that (please refer to great wishlist choices from SewingMachinesPlus.com).

Finishing touches

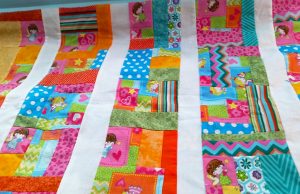
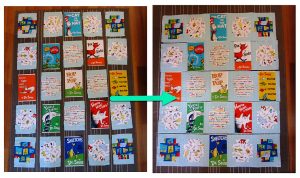
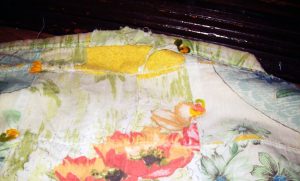
So finally, I was feeling pretty good about how my unplanned, off the top of my head, quilt top was coming along. So I sewed the pieces together in 5 rows and 5 squares each. Then added white jelly roll strips between each row of 5. I had to trim it only a little to make it a true measurement all around.

“Improvise” a cheerful quilt or smaller project & smell the beauty of your creation this spring.

“Improvise” a cheerful quilt or smaller project & smell the beauty of your creation this spring.

I still need to finish the border, batting and binding, but here’s what it looks like now. It was really fun to do, because I didn’t know how it would turn out. I should say I learned that I need solid color between busy patterns to give a quilt top a cohesive, unified look so each quilt patch is recognizable from the next. Do you mix plain fabric among many different prints?

I think you would enjoy this truly personal form of expression with fabric.

“Improvise” a cheerful quilt or smaller project and smell the beauty of your creation this spring.

Better yet, know that even without a plan, or a pattern, you can turn scraps into something as personal as you are! Then, please reply to this blog with pictures. I would love to see them. Until next time, when I will tell you about how I am repurposing handmade flannel wash clothes into a sweet little blanket and stitched without a seam. Carpe diem!

Tell-Tale Traits of a Primitive Quilt

Tell-Tale Traits of a Primitive Quilt

As I step further into the world of sewing, I find that there’s plenty of information out there that I didn’t even know to look for. My primary focus in sewing has been patchwork designs, and I definitely continue to hold a passion in regard to that style of work. I’d love to have a patchwork purse, patchwork clothing, patchwork pillows…

My primary focus in sewing has been patchwork designs, & I definitely continue to hold a passion in regard to that style of work.

My primary focus in sewing has been patchwork designs, & I definitely continue to hold a passion in regard to that style of work.

But I’m not sure I fully realized how many other avenues there are to plan out a quilt before I started looking, and those are details that can be interesting finds! Some of them, though, require a bit of an explanation to truly understand what a quilt of that nature is, and this post will explore one of those types in particular.
Once upon a time

I was in a social media marketing program where, for two of the classes, I had to keep a blog for a business. For one course, I used my author career as the business. For the other, I created a could-someday-be-real quilt company. It was fine, by the way, for the company to not actually be real in the current world!

The idea was that we were to explore marketing concepts through the blog and end up with a marketing plan — at least generally — by the end of the semester. During that quilt-company semester, I came across the idea of a primitive quilt, which was a fairly new phrase to me. At the time, I focused mostly on the social media presence of one particular company, but I find myself now thinking on what exactly a primitive quilt is.

During that quilt-company semester, I came across the idea of a primitive quilt, which was a fairly new phrase to me.

During that quilt-company semester, I came across the idea of a primitive quilt, which was a fairly new phrase to me.

If I claim to be quilter, after all, it might help to know the basic terminology!

After research and consideration of a number of quilts with the label of “primitive,” I offer you a number of details that help to make a primitive quilt… Well, primitive! Note: These are commonalities — not necessarily requirements through and through!

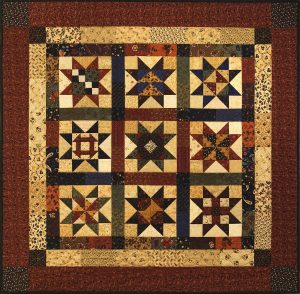
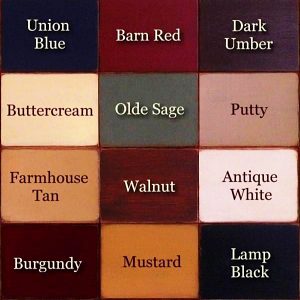
A primitive quilt will make use of neutral colors, though things like dark red & dark blue can make appearances.

A primitive quilt will make use of neutral colors, though things like dark red & dark blue can make appearances.

Basic Coloring

By this, I don’t mean a color-equivalent to no-artificial-flavoring! I mean that the colors are typically more straightforward than neon oranges and vivid pinks. Instead, a primitive quilt will make use of neutral colors, though things like dark red and dark blue can make appearances. These quilts often employ the colors that you might think of when words like “rustic” come to mind — which rationalizes why red and blue are used in regard to red barns and blue skies. In the end, if you plan on making a primitive quilt, you might want to keep the lime green fabric stored away for another project!

Simple Fabric Patterns

Like the coloring, the fabrics, too, are less elaborate than what might be common for a more vividly styled work. Typically, patterns — rather than fabrics — steal the focus in primitive quilts, so no fabric should be so busy or stand-out that it takes attention above and beyond the level of the quilt pattern as a whole. For this, solid colors or very simple patterns on your fabric are your best bet for forming your primitive quilt.

Basic Shapes

Don’t fancy it up!

Don’t fancy it up!

While the overall quilt might have a remarkably interesting visual in regard to its structure, the pieces of fabric that make up that visual are often based on the simplest of designs, like triangles, squares, and rectangles. This doesn’t mean that only geometric shapes can be used for your quilt though! Other shapes can come into play, but make sure to keep them simple to provide that outdated appearance that’s so synonymous with the rustic, primitive design. Think to yourself what the simplest method of delivering an object or shape is — don’t fancy it up!—and you could have the right look!

Empty space

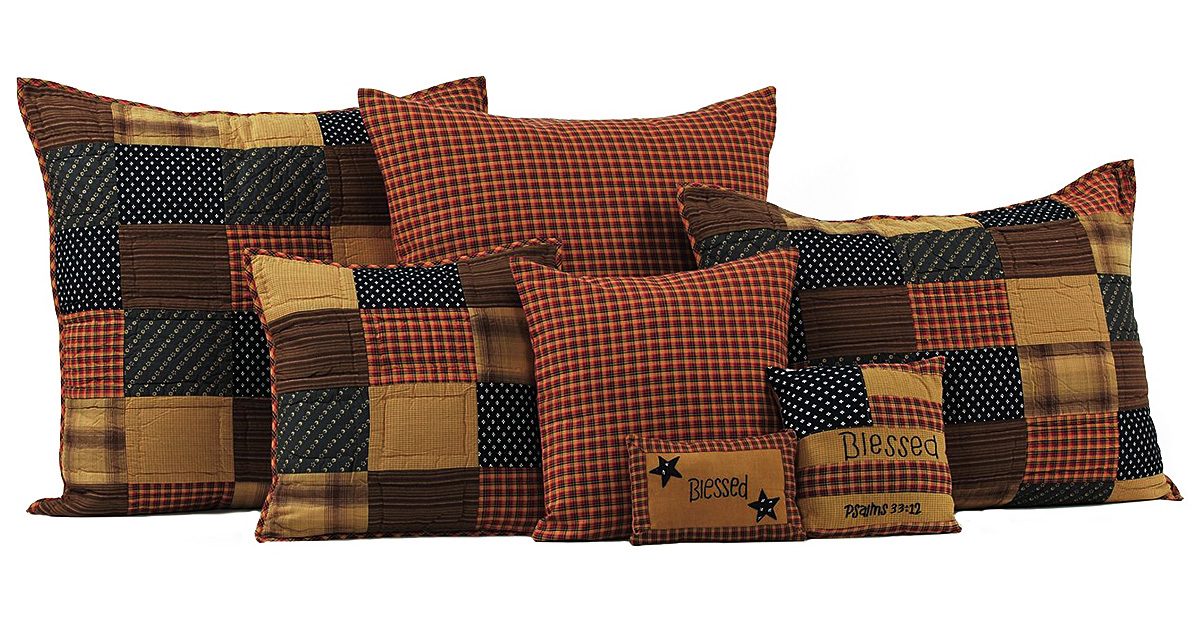
The patterns for primitive quilts are structured, but those empty spaces between the distinct pattern formations can be just as organized. Now, this isn’t necessarily the case for every quilt! It’s not unheard of though for darker, geometric patterns of multiple fabrics to be separated by pieces of lighter fabric that are larger than any individual dark piece. It creates an overall repetition to the quilt, and the result is an almost soothing effect in that the contrast softens the appearance to something calming and steady. As I said, this tactic might be more pronounced in some primitive quilts than others, but don’t be shocked if you notice it fairly often for quilts of this style.

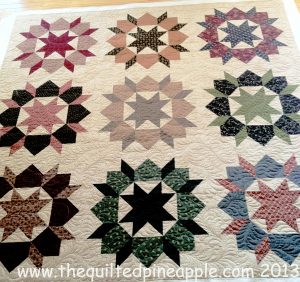
Geometric patterns of multiple fabrics to be separated by pieces of lighter fabric that are larger than any individual dark piece.

Geometric patterns of multiple fabrics to be separated by pieces of lighter fabric that are larger than any individual dark piece.

If you keep these things in mind, you’re on your way to planning a primitive quilt!


References:
Alcorn, J. (2014, September 10). What Is Primitive Home Decor? Retrieved from: https://www.primitivestarquiltshop.com/blogs/quilt-shop-gathering-place/24406593-what-is-primitive-home-decor
Craftsy. (2017, April 24). Can You Spot a Primitive Quilt? Retrieved from https://www.craftsy.com/blog/2017/04/primitive-fabric/
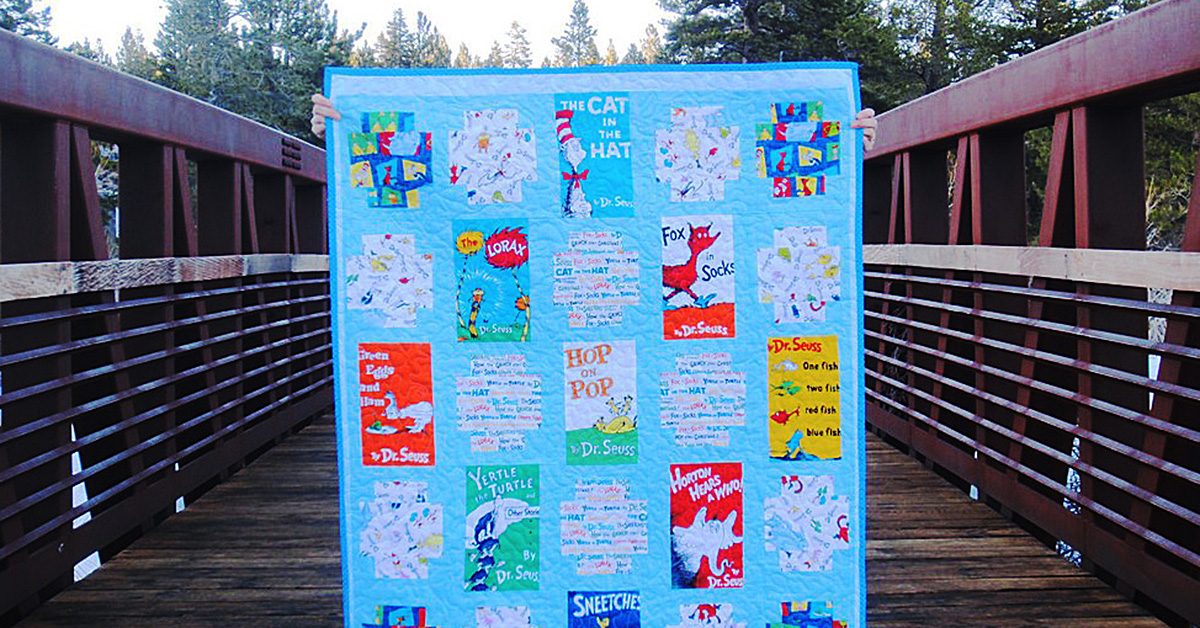
Dr. Seuss Quilt

Dr. Seuss Quilt

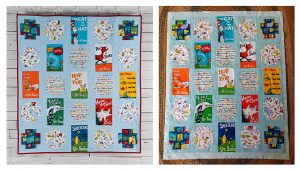
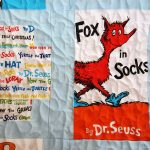
Have you ever bought a quilt kit? I buy them sometimes when the inspiration strikes, or when I’m looking for the convenience of having all the fabric I need for a pattern already provided for me. This kit came out in 2015 and is called Celebrate Seuss by Robert Kaufman Fabrics.

This kit came out in 2015 & is called Celebrate Seuss by Robert Kaufman Fabrics.

This kit came out in 2015 & is called Celebrate Seuss by Robert Kaufman Fabrics.

Start Cutting

Quilt kits do NOT mean that the fabric is precut into the shapes you need. Nope. They’ll send the amount of fabric you need but you will need to cut everything to size before you start sewing.

Quilt kits do NOT mean that the fabric is precut into the shapes you need.

Quilt kits do NOT mean that the fabric is precut into the shapes you need.

I actually started this kit last spring in San Diego. First I got all the individual blocks set up and then put them into rows. Once the rows were sewn into a full panel, I packed this project away. It wasn’t until almost 12 months later that I was ready to finish it.

Once the rows were sewn into a full panel, I packed this project away.

Once the rows were sewn into a full panel, I packed this project away.

Make your Project Your Own

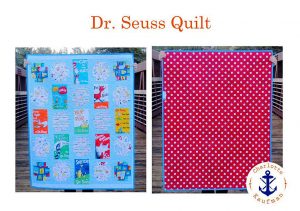
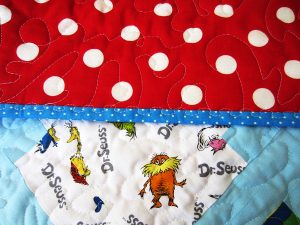
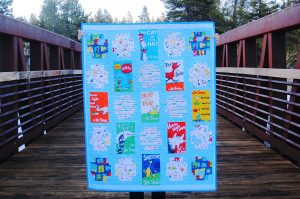
On the left you’ll see the finished photo advertised in the kit. Do you notice how the top and bottom center column run directly into the binding? That drove me crazy, so I amended the pattern. I added a 2” strip of blue polka dot fabric to the top and bottom and a 1” strip of the same fabric to the left and right.

See the right photo? Much better, no? I feel like the whole quilt is better framed.

Lesson learned

It’s okay to deviate from a pattern and a kit. Make your project your own.

Make your project your own.

Make your project your own.

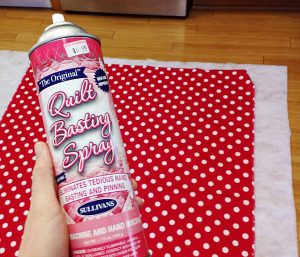
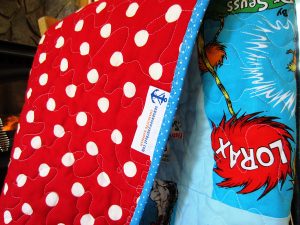
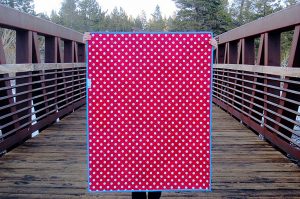
For the back fabric I went with a classic, large white polka dot on red that was very much in keeping with Dr. Seuss’ style.

For the back fabric I went with a classic, large white polka dot on red.

For the back fabric I went with a classic, large white polka dot on red.

Method of Quilting

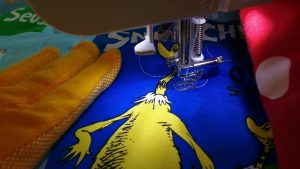
I’m extremely proud of the free motion quilting (FMQ) I did on this quilt. After years of being afraid to try FMQ, I’ve finally embraced the methodology. It took watching a lot of YouTube video tutorials and a lot of practice, but I’m very happy with the results. I used a relaxed, free-motion, jigsaw pattern for this quilt.

After years of being afraid to try FMQ, I’ve finally embraced the methodology.

After years of being afraid to try FMQ, I’ve finally embraced the methodology.

Binding Your Quilt

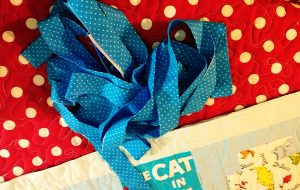
Another way I deviated from the kit was in choosing a different fabric for the binding then what they provided. The true-red colored fabric they sent clashed with the classic orange-red Dr. Seuss colors in the front panel. Instead I chose a cornflower blue and white polka dot fabric.

I chose a cornflower blue & white polka dot fabric.

I chose a cornflower blue & white polka dot fabric.

There a numerous ways to bind a quilt. I would suggest learning several methods. I made a 2.75” strip of fabric and then ironed that strip in half and sewed the binding onto the back of the quilt first. I pressed it away from the seam (towards the outside of the quilt) and then pressed it around over the front of the quilt. My 4 year old handed me my favorite red Wonderclips as I clipped the binding in place around the front.

https://www.sewingmachinesplus.com/brew-cl3156.php

I used a decorative stitch to sew the binding to the front.

I used a decorative stitch to sew the binding to the front.

I used a decorative stitch to sew the binding to the front. Machine sewing your binding is faster and more secure than hand sewing and I recommend it if you know the quilt will get heavy use and washes or be used by children.

When adding your binding, don’t forget to sew in your quilt tag if you have one.

Don’t forget to sew in your quilt tag if you have one.

Don’t forget to sew in your quilt tag if you have one.


All in the Details

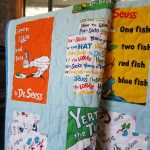
Here are close ups of the finished quilt and my free motion stitching. SewingMachinesPlus.com has an amazing assortment of sewing machines that do free motion quilting. Check out their machines here:

https://www.sewingmachinesplus.com/domestic-sewing-machines.php


Grand Finale

Taking some final pictures of your finished quilts is worth your effort. Think of how much time you put into each quilt and then grant yourself enough time to wait for the right, natural lighting and find a beautiful location to memorialize your quilts.

A Good Cause

Although it will be hard to part ways, this quilt is being donated to a fundraiser for our local elementary school. Have you ever donated your work to a good cause?

This kit came out in 2015 & is called Celebrate Seuss by Robert Kaufman Fabrics.

Have you ever donated your work to a good cause?

———————————————————————————–
Charlotte Kaufman is a writer and sewist in Mammoth Lakes, California. She specializes in marine and home interiors and continues to fall more and more in love with quilting. You can follow her at charlottekaufman.com.
Crazy Patch Butterfly Applique Blocks

Crazy Patch Butterfly Applique Blocks

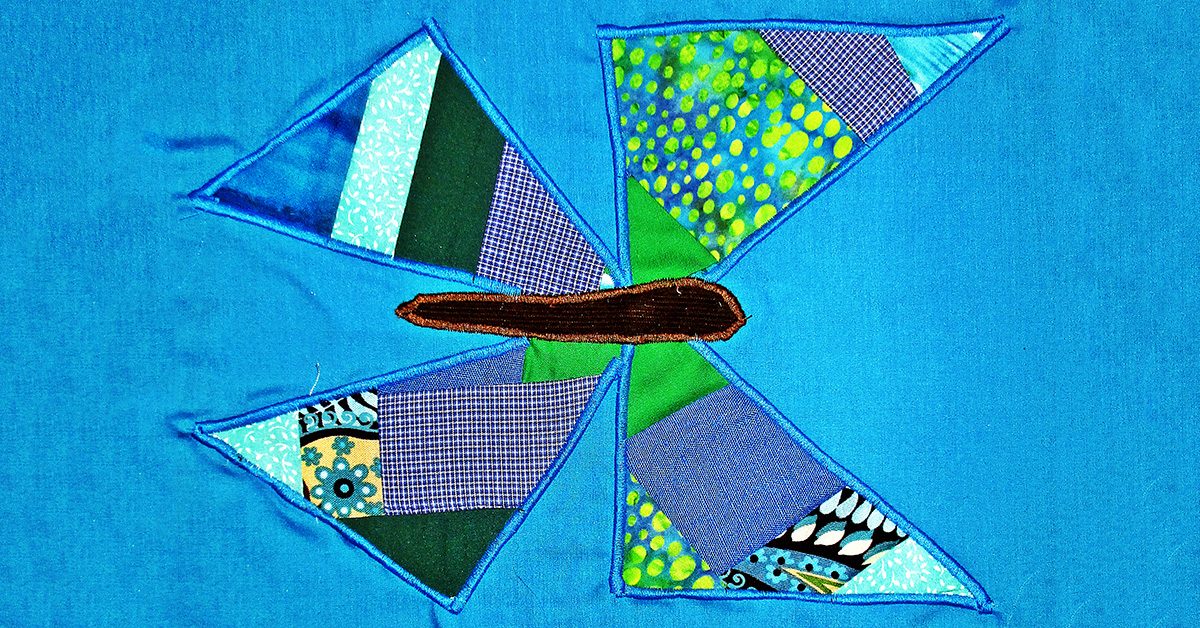
These crazy patch butterfly blocks happened by accident.

These crazy patch butterfly blocks happened by accident.

These crazy patch butterfly blocks happened by accident.

The last time I made a crazy patch quilt, I wound up with two extra blocks. I have no intention of collecting UFO blocks, but I’m not inclined to throw my handiwork away. So I stared at them a while, trying to think of something to make from these extra blocks.

Something told me to cut them into triangles, so I did, still not knowing what I’d do with them. I played with the triangle pieces for a few minutes, and this design idea came to me. I think it’s a good one.

You could make a bunch of these for a quilt, a few for a table or bed runner, feature one in a sampler quilt, or just make one for a small project.

I plan to use one of these to make an oversized pocket on a skirt. And I’ll show you what I’m going to do with the other one next week, so stay tuned.

Here are the steps to make these:

Crazy Patch Butterfly Blocks

For each block, you will need:

  • Background rectangle or square
  • Muslin square
  • Assorted small scraps

Step one: make the crazy patchwork

You could make these crazy patch butterfly blocks any size, but my examples started with a six inch square. Take your muslin square and arrange a several sided scrap somewhere near the middle of the square.  Choose another scrap with one side at least as long as one side of the first fabric, and place it right side down atop the first.  Sew along this seam, flip the second fabric down where the right side faces up, then press.  Repeat this process, gradually adding scraps, until the square is fully covered by your assorted scraps.

Then, place the block right side down on your cutting mat and use your rotary cutter and ruler to trim the fabric scrap from the edges of the muslin square.

I made one on video so you can see exactly how to do this step:

I should mention that traditional crazy patchwork also incorporates embroidery stitches over the seam lines. If you have a machine that does decorative stitching, then you can sew a line of decorative stitches along the seam after you add each new scrap to your crazy square. You don’t want to wait until the end, since these scraps go every which way.

Step two: cut triangles

Now lay the crazy patchwork square right side up on your cutting board. Use your ruler and rotary cutter to cut it in half diagonally, then move your ruler and cut diagonally the other way, to end up with four quarter square triangles. You could use scissors if you don’t have a rotary cutter, but if you want to make patchwork, you really want to get a rotary cutter and cutting mat.

Step three: appliqué

Here’s how to arrange the triangles to construct these crazy patch butterfly blocks. Place the top pair of wings with points together and the ninety degree angles at the outside bottom corners. Then angle the bottom wing pieces with the longest edges on the inside and the ninety degree angles pointing out.

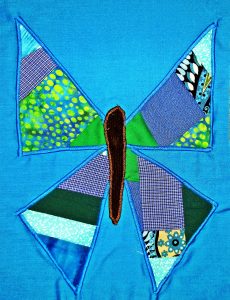
Crazy patch butterfly block.

Crazy patch butterfly block.

Pin these to your backing square and appliqué using a satin stitch. I made these using a rectangular backing cut at nine and a quarter by eleven and a half inches.

If you will be using these for a small project rather than a quilt, there is an alternative way to hold your pieces in place rather than using pins. You could use double-sided fusible web. You would affix this to the back of your appliqué pieces and then remove the paper backing and affix the other side to the backing rectangle.

This makes appliqué really easy, but I don’t recommend using it for quilts, because it will be crinkly inside the appliqué. If you are making a wall quilt or other small decorative project, it is an easy choice.

Bust out the scraps

After you appliqué the crazy patch butterfly wings, then use corduroy or another scrap fabric to cut a long, tapered oval for the caterpillar body. Applique this in the middle, to cover the intersecting wings.

My son just pointed out that I forgot to add antennae to mine. If you’d like to add antennae, you can do this using hand or machine embroidery. Or you can use Debbie Mumm’s easy idea that she calls pen-stitch embroidery. That is, you can draw them with a fine tipped Sharpie or other permanent pen.

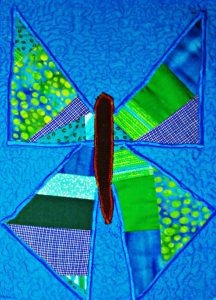
Here is one that I quilted the background using using tight free-motion quilting.

Crazy patch butterfly block quilted.

Crazy patch butterfly block quilted.

As you can see, these crazy patch butterfly blocks are super easy to make. They’d be cute on a baby, wall, or bed quilt. Or you could feature just one on an apron or skirt.

What will you make with these crazy patch butterfly blocks?

Basics of Quilt Maintenance

Maintenance. It can be a big deal in home, car and… quilt upkeep. That’s right. Just like letting your car go well beyond its oil change moment can snowball into a vehicle that isn’t budging without a major repair bill, not maintaining a quilt in the proper way could result in a sentimental treasure that’s good for little else than — maybe — scrap material. Sure, your quilt might not cost as much as, say, an engine to replace, but there’s more value in something handmade than a dollar sign. Maybe it was a wedding gift from a relative or a crib accessory that your mother started making before you slept your first night in said crib. Those types of belongings can have a lot of worth, so preserving them might be a big deal.

Wear, tear & time

Don’t break your own heart by letting this kind of damage happen to something close to it!

Don’t break your own heart by letting this kind of damage happen to something close to it!

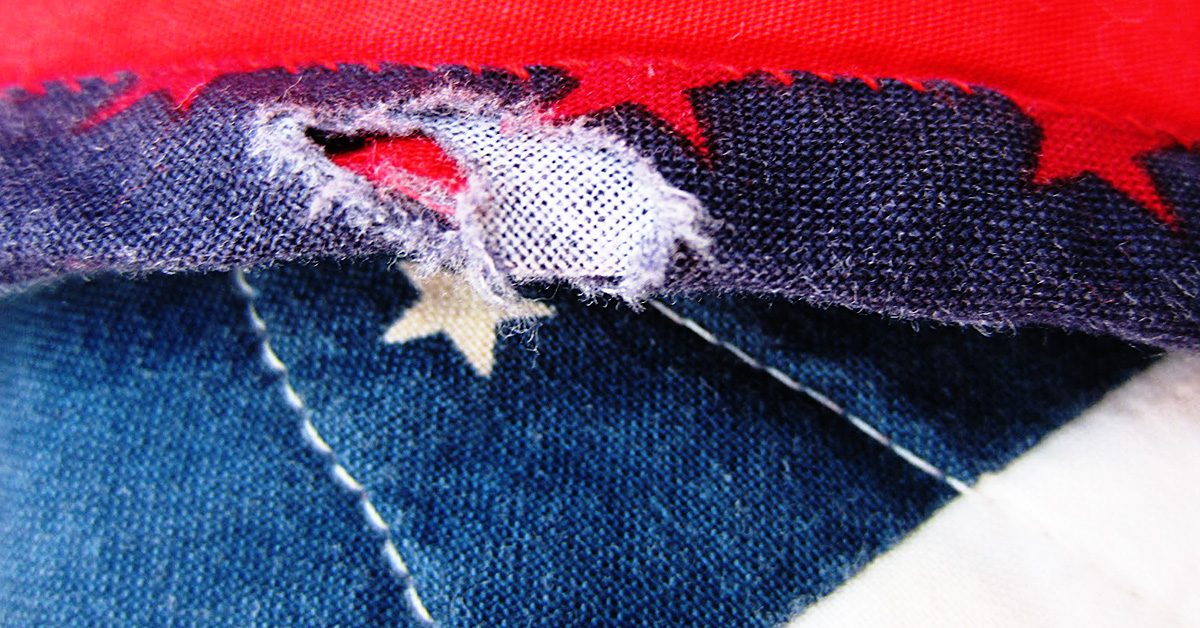
One of the most important details about this preservation is to keep an eye on the products on a regular basis since smaller complications that come from wear, tear and time could be much easier to repair than those that have been expanding for some time. Other important details are to know how to fix the damage and determining if the damage is even fixable. As an example for these aspects, I’ll use a quilt that has some sentimental value to me, but a lack of maintenance has taken its toll. Don’t break your own heart by letting this kind of damage happen to something close to it!

Damage control

Let’s examine this first spot of damage, shall we?

Let’s examine this first spot of damage, shall we?

Let’s examine this first spot of damage, shall we? It looks fairly simple with just two simple holes in the top layer of fabric, so if I begin this examination with the basic question of whether or not it’s fixable, the answer would be yes! The smaller sizes here would allow a little bit of embellishment — maybe a patch — to be placed directly over the damaged area. Since this is a quilt that has a floral design, I could add something like a butterfly there so that it looks like it’s landing on the flower. Sure, it changes the design a bit, but it fits and is corrective. This issue, it seems, was detected in time!

Do away with the fray

The material is showing wear & tear around the seams and that’s not very surprising!

The material is showing wear & tear around the seams and that’s not very surprising!

Now, let’s try this one. The material is showing wear and tear around the seams and that’s not very surprising! The damage does extend a bit beyond the immediate area surrounding the seam, but it still seems to stem from that one line where the thread is running through. So, is it fixable? Yes! All I would need to do is add a border around the block to cover the issue, and if I did that for every block, the strategy would be replicated throughout so that this block wouldn’t look out of place. Again, it would change the design of the quilt, but not in a way that would necessarily make it look odd. I could match the border to the colors already present, and the addition could actually create a popping look for each block.

To fix or not to fix

This one is shredded, & the top layer isn’t covering as much material as it did in the prior pictures. But is it fixable? Believe it or not, yes!

This one is shredded, & the top layer isn’t covering as much material as it did in the prior pictures. But is it fixable? Believe it or not, yes!

How about this one? Well, the damage here is much more drastic than a simple tearing from stitching or tiny holes in the fabric. Instead, this looks more shredded, and the top layer isn’t covering as much material as it did in the prior pictures. But is it fixable? Believe it or not, yes! Since this area is at the end of the quilt, changing the size of the quilt could work. I would need to cut off enough material on this side of the quilt so that the damaged territory is done away with and redo the border work. It’s not as easy of a fix as sewing on a butterfly embellishment, and the appearance of the quilt would definitely be altered by the smaller territory. But, if pressed, this would be a fix!

Too far gone?

The fabric became too worn, whether from use, washing, time, or some other variable, & without the proper methods to fix the problem, it spread.

The fabric became too worn, whether from use, washing, time, or some other variable, & without the proper methods to fix the problem, it spread.

Now, we get to this one. Here, this looks as if the fabric became too worn, whether from use, washing, time, or some other variable, and without the proper methods to fix the problem, it spread. Of course, there could be another explanation for it. Perhaps someone ripped it, and the damage grew. Whatever the reason, the faulted block is in the midst of the quilt, and this fabric probably won’t go together at this point. This one, dear readers, doesn’t seem to be strategically fixable. In my defense, this damage could have happened before I got into sewing, but if I’d paid attention and caught a small hole in the fabric, I could have embellished it. If there was a tiny rip, I could’ve stitched it. As it stands though, the only ways I can see to fix this would be to add on an embellishment that would be too large to look natural or change the entire block — which would throw off the pattern of the quilt. This one, it seems, has gone too far.

And this is precisely why you should keep an eye out for damage! If you catch the smaller problems, you can fix them. If you let them escalate, you could be looking at a ruined quilt. So to preserve your works, keep tabs on them and — through borders, embellishments, and adjustments — tend to those issues as they show up!

Different Types of Thread and When to Use Them

Different Types of Thread and When to Use Them

Have you ever gone to the fabric store and been overwhelmed looking at the vast assortment of thread for sale? If so, then fear not, for I will help to break down the mystery of thread and how to use it in all its various types.

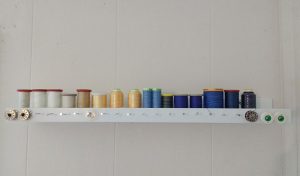
To start, consider where you are going to store your thread. I’m a highly visual person and I like to see what I have on hand. I also find looking at thread to sometimes motivate me or inspires me to begin on new projects. I created this thread display in my sewing room using Ikea picture frame shelves (Ikea Ribba) and I added small nails to hang my bobbins by the corresponding color of thread.

I added small nails to hang my bobbins by the corresponding color of thread.

I added small nails to hang my bobbins by the corresponding color of thread.

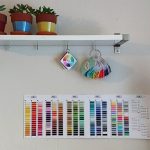
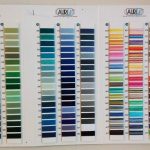
I live in a rural area, three hours from the nearest Joann Fabrics. Because of that I keep an Aurifil Thread Color Card so I can easily order the exact shade of thread I need. It also looks beautiful too, no?

Thread Weight

When choosing thread, consider the thread weight. A quick breakdown of Aurifil’s brand thread weights (and their many great brands of thread, including Guterman and Coats & Clark) looks like this:

12wt: Use it for sashiko & red work stitchery. This is the thickest thread in the Mako’ range.

28wt: It is strong enough to withstand the stress of hand quilting without needing to be glazed or waxed.

40wt: Favorite thread for machine quilting and all-purpose sewing. A little heavier to show off the quilting stitches.

50wt: Quilters love it for its piecing and quilting. A staple for every sewing studio.

80wt: This is the finest Egyptian cotton, for use by hand or machine. Your new ‘go to’ thread for applique and much more.

~ Thread descriptions from Hawthorne Threads

Buying at a fabric store is actually a little easier than sussing things out online because they divide thread into sections so you can quickly scan for ‘quilting’ or ‘embroidery’ or ‘heavy duty/jeans.’

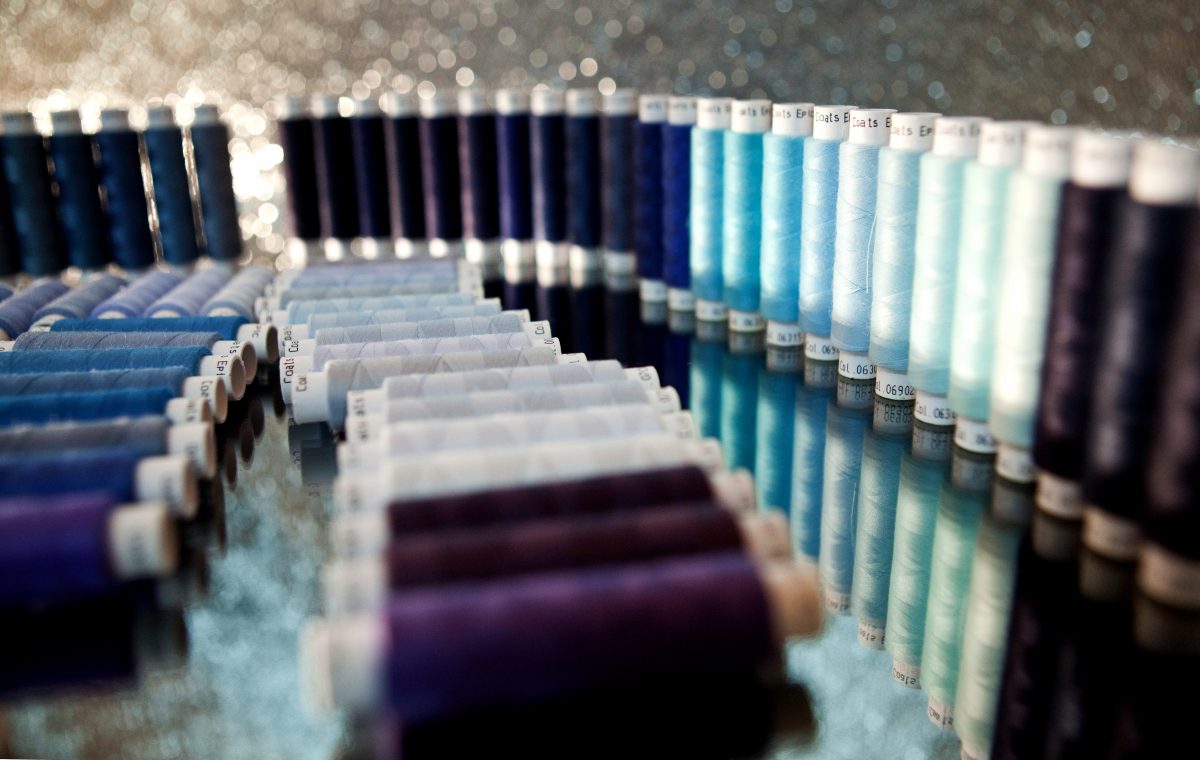
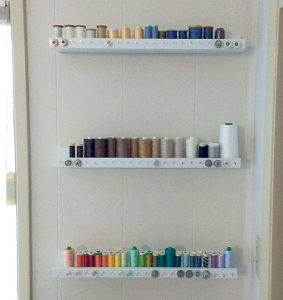
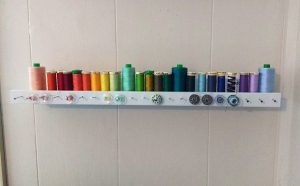
I keep my standard, quilting cotton weight threads organized by ROYGBIV (red, orange, yellow, green, blue, indigo, violet).

I keep my standard, quilting cotton weight threads organized by ROYGBIV (red, orange, yellow, green, blue, indigo, violet).

ROYGBIV: red, orange, yellow, green, blue, indigo, violet.

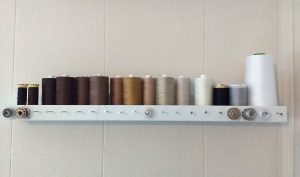
I also keep my neutrals and browns organized by gradient.

I keep my neutrals & browns organized by gradient.

I keep my neutrals & browns organized by gradient.

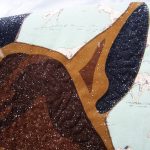
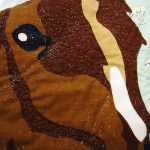
Buying a lot of shades of one color can greatly help when working on projects with a ton of variation in the same tone, like in this quilt I recently finished. I used five different shades of brown and black to finish the horse.


Utility/Novelty Threads

These are threads you reach for when you need to pull out the big guns or you are just doing something different. I use some of these heavy weight threads for upholstery, corduroy, vinyl, or very thick or unique fabrics.

I use some of these heavy weight threads for upholstery, corduroy, vinyl, or very thick or unique fabrics.

I use some of these heavy weight threads for upholstery, corduroy, vinyl, or very thick or unique fabrics.

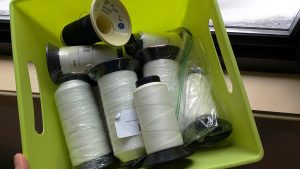
This is my tub of very heavy duty threads. I use them on marine projects and with my industrial sewing machine.

This is my tub of very heavy duty threads.

This is my tub of very heavy duty threads.

Variegated Thread

I saved these threads for last because they are my favorite. If you haven’t tried sewing with them yet, I encourage you to start today. The richness of their color variation is an absolute delight to the eye and often can take your projects to a whole other level.

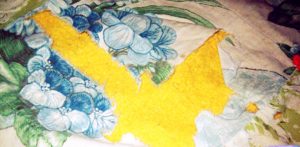
I used two spools of variegated thread on this quilt. The blue/rainbow you can see here.

The blue/rainbow you can see here.

The blue/rainbow you can see here.

And the gorgeous bright yellow here.

You can see the gorgeous bright yellow here.

You can see the gorgeous bright yellow here.

Of course, with different threads you will need different needles, but I’ll save the topic of needles sizes and shapes for another post. What are your favorite types of threads? Let us know in comments!

—————————–
Charlotte Kaufman is a writer and sewist in Mammoth Lakes, California. She specializes in marine and home interiors and continues to fall more and more in love with quilting. You can follow her at charlottekaufman.com.
New Year, New Challenges: The Psychology of Sewing

New Year, New Challenges: The Psychology of Sewing

How many times do we seriously plan things, and within days or hours, our plans change. I used to think I prefer knowing what will happen ahead of time so I can grasp the idea, plan it to my specifications, and control the outcome. Not very many things happen that way.

So last time I wrote, I had a nice New Year’s Resolution list made up for myself. I was ready to learn new things, implement new creative expressions, and sew a rug made of scraps. That was a few days before New Year’s Day.

Now, the middle of January, about 2 days ago, I was able to sit and sew a project I have been thinking about. Sewing is so therapeutic, you forget where you are and the daily chores of life. But now, my Resolutions have been pretty much scrapped. Time changes things so quickly.

Turn that frown upside down

Now, I’m finding myself in a position to decide how to decorate a new home we are building. “Wonderful, you say! Congratulations!” Blushing but thankful, I tell you, “Thank you, but the downside is I’m losing my room for sewing.” For now, I have a countertop that wraps around half the room where I can cut, sew, press, lay out patterns, and holds my computer. Plus tons of shelves for fabric, ribbon, thread, and many other non-sewing related supplies. What will I do?

We determined that I will use the large guest room upstairs for my sewing projects, but it will be deemed a guest bedroom as well. So, gone are the days, of leaving my projects in different stages, and not worrying about things left out. I have to be neat and organized ie. (no thread on the floor) so if we should get company, (my daughter visits frequently) that room will be presentable. OMG, such pressure! I’m already stressed. I can’t even get away and be creative because my room has to be in picture perfect order and stay that way (much like the rest of the house by the way, as my in-laws will be living with us).

So, I need your help! I will explain later. I’m making a checklist of some things, I need to purchase if I am going to continue my psychological sewing retreat. At least I have until late July to decide.

Making a list – checking it twice

First is a desk. I like this one. Nice and neat!

See it here:

Fashion Sewing Cabinets of America 8300 Cloud 9

Or:

Sylvia Design Model 1520 Quilters Work Station

Then a rolling bag to store the sewing machine out of sight while my guest suite is being occupied.

Bluefig TB 23Travel Bag 23″ Julie

Also a box of Aerofil Incredible Threadable Quilt Box Maderia Thread so I can keep the thread bobbins and thread and neatly put away.

Then there’s the fabric and trims, buttons and numerous other collections. That worries me most. I would love to hear your suggestions on how to scale back and organize and still have the ability to retreat to my passion in my changing lifestyle. I hope all will not be lost even with a more spacious house and elder care ahead. One never knows! As for you, my advice is:

Keep sewing, it’s good for the soul! Until next time.

Basting Your Quilt: Sprays and Pins

Basting Your Quilt: Sprays and Pins

Last week’s post was on batting, but as I freely admitted within that post, there’s more to finishing up a quilt than deciding on that detail. As the time approaches to dive into those final stages for this quilt, I’d say it’s a logical decision to explore those other topics.

Basting Your Quilt: Sprays and Pins

This week’s subject of interest: basting.

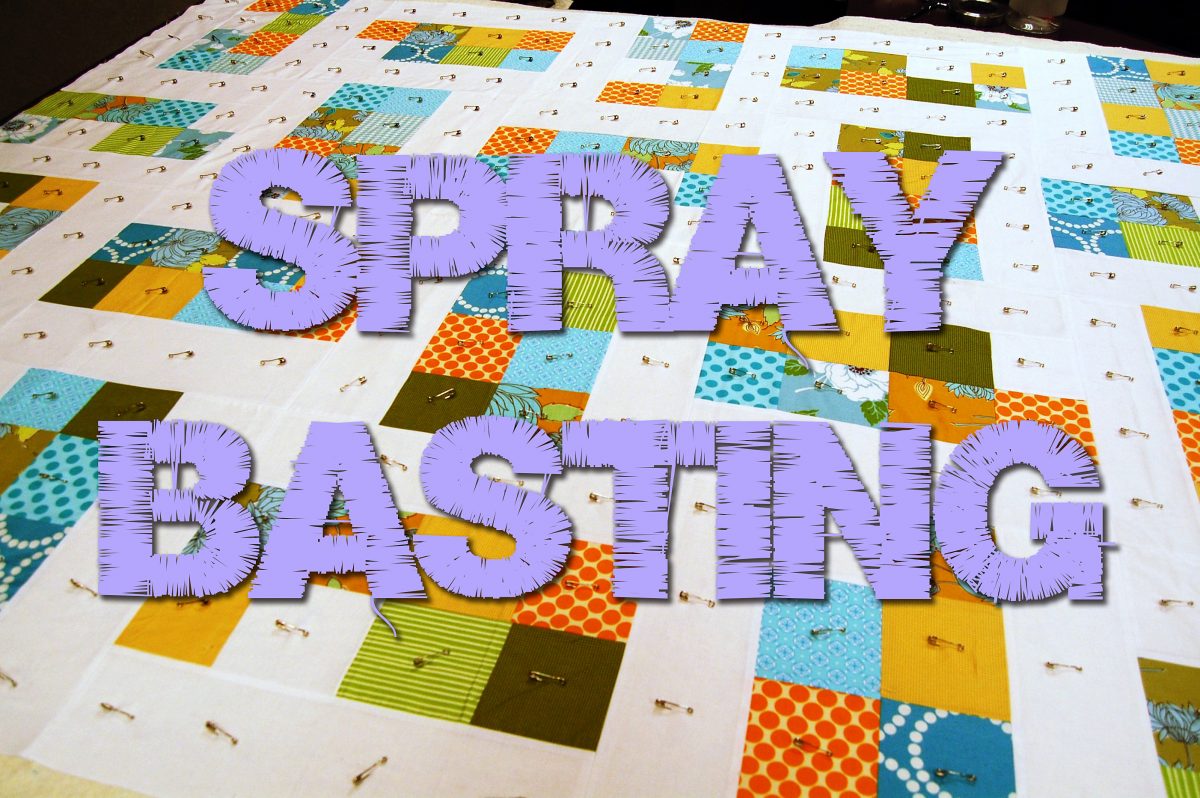
Coming off of the holidays, it might be easy to think of basting a turkey, but baking isn’t the only realm that has a form of basting! For quilting, this is the stage where you’re preparing to sew your quilt sandwich together. All of the layers are ready to be connected, and basting allows you to make sure those layers are level and even for sewing. You smooth them out, line them up, and do something to make sure they stay in line as you join the layers together through whatever method you choose.

It’s a simple idea, but there’s more than one way to keep those layers in line. For this particular post, two of those possibilities are the focus as I weigh the pros and cons of each to decide which option to use for my quilt. Those possibilities are straight pins and spray basting.

Straight pins:

I would think that straight pins would be the more recognizable and common of the two approaches. In fact, according to one source, straights pins (in some form) date all the way back to Ancient Egypt.

Straight pins are the more recognizable & common of the two approaches.

Straight pins are the more recognizable & common of the two approaches.

The benefits:

1) They’re financially friendly! You can pick up a pack of these for a small amount of money, which is wonderful for me since I am, like I’ve mentioned before, cheap.

2) They’re reusable! Unless you damage or lose the straight pin, you can pull it from the fabric when you no longer need it for a project, then you use it again and again for endeavors to come. So long as it’s in good shape, it doesn’t need to be replaced.

3) They’re common! Because of this trait, they’re easy to find at a store, meaning you might not have to go too far out of your way to pick up a set.

4) They’re easy to store! They’re small, after all, so you can keep them comfortably in your sewing kit.

Problems:

1) They’re easy to lose! I don’t know how many times I’ve spotted straight pins that have fallen around my sewing area when I’m finished working on a project for the day. Not only is this bad because losing them can lead to replacing them, but these pins are sharp! Losing them could equal pain if you accidentally find one in a not-good way!

2) They’re sharp! Yes, I stated this in the last detail, but it’s worth noting as its own issue. Just like your needle can cause pain if you let it slip, straight pins can do some finger-damage. Using a thimble might help, but I guess I’m a rebel since I don’t usually use one!

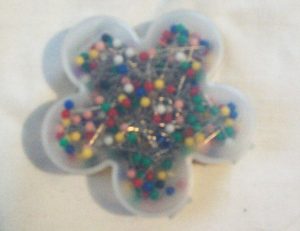
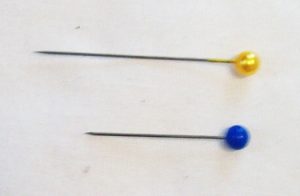
3) Quality varies! This is something I learned from my own experience. I have two different sizes of straight pins, and I’ve come to the conclusion that the tiny ones are lacking in comparison to the others. They potentially fall out more easily than the larger ones, which could leave extra spaces of fabric that are unpinned and straight pins that are lost in my workspace. Neither of those things are necessarily good!

My two different sizes of straight pins.

My two different sizes of straight pins.

Spray Basting:

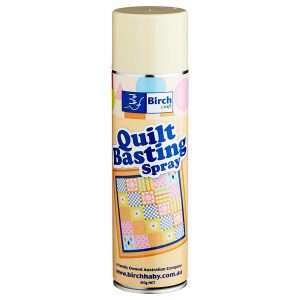
This is a method I haven’t tried, but I’ve done some research on it. I first became aware of it through a Craftsy.com class, and it intrigues/puzzles me. A spray that holds your quilt together? For some reason, that seems bizarre to me! Still, there are supporters for the spray basting method, so who am I to toss the possibility aside without considering it?

A spray that holds your quilt together.

A spray that holds your quilt together.

Benefits:

1) You won’t poke yourself with a straight pin! With how many times I’ve accidentally stabbed myself with a pin or needle, this is promising to me!

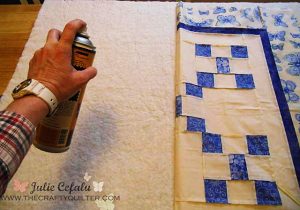
2) It’s less time consuming! You don’t have to go through the entire quilt to place pins all over it. You just have to even it out, spray sections at a time and smooth it back out. How easy is that?

3) The effect doesn’t seem to be permanent! Instead, it apparently washes out of your quilt, so its effects are temporary.

You just have to even it out, spray sections at a time and smooth it back out.

You just have to even it out, spray sections at a time and smooth it back out.

Problems:

1) It’s more expensive! A can of basting spray can cost more than a pack of straight pins. Remember how I’m cheap? Yeah…

2) It’s not reusable! Unlike pins, you can only use this product once. Sure, you might be able to space it out to use for more than one project, but once your can is empty, you have to replenish your supply (if you want to keep using this method).

3) It’s messy! As with any spray product, there’s no guarantee that you’ll never get said product on things surrounding what you intended to spray. For this reason, you might have to do some cleaning once you finish your basting.

4) It’s dangerous to your lungs! The fumes can be hazardous, so it’s recommended that you only use this method in a well-ventilated space — like outside.

For me, I’m torn between wanting to dive into the ease of spray basting, but I can’t see myself being okay with hauling my quilt outside to spray it down. Sure, I might be able to find a suitable place indoors. I might even decide that working outside isn’t a big deal. For now though, I think the fume concern is significant enough to keep me unintentionally jabbing myself with straight pins! That’s not to say the day won’t come when I leap into the world of spray basting. It’s just a current decision to keep things a bit more tried, true, and non-toxic!

Quilt Museums and Goals

Quilt Museums and Goals

Once upon a time, I was a student tunneling through a graduate program in English and Creative Writing. Before you get too carried away thinking that I know all kinds of things about Chaucer and such, let me admit that there are plenty of literary classics that I haven’t read, and I only used one Shakespeare play (that I recall) during my time in the program. I did, however, write a detailed paper on Dr. Seuss. Because I’m awesome like that.

Quilt nation

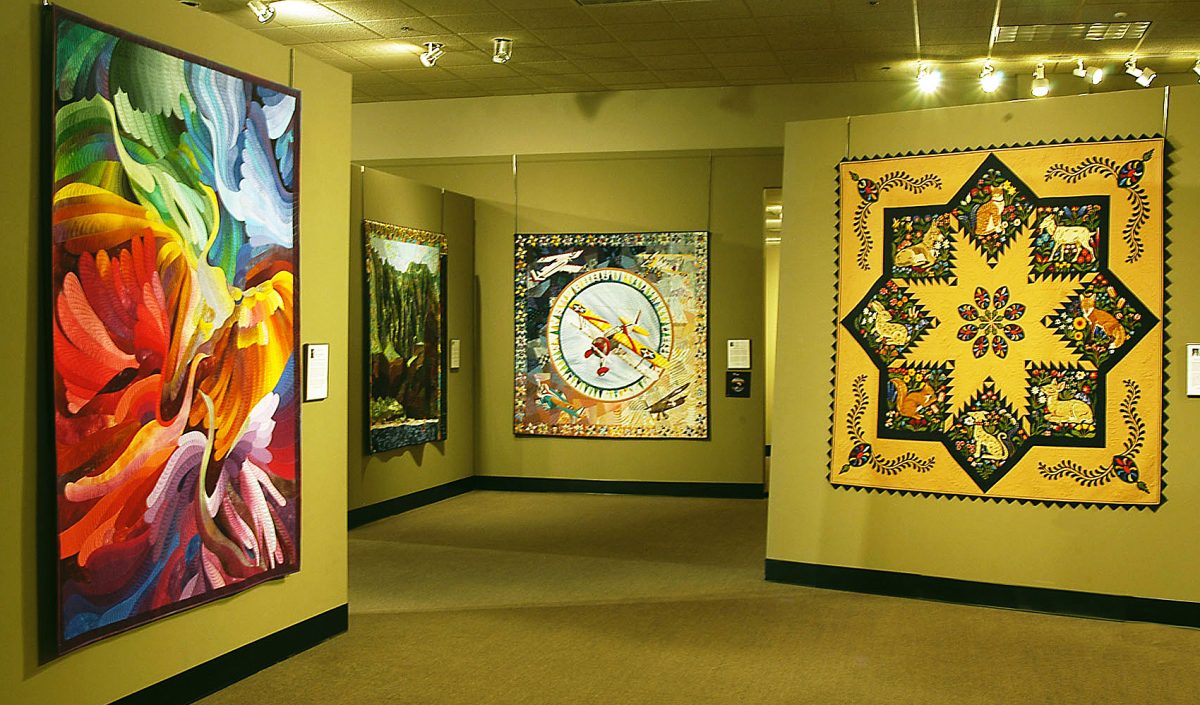
Kentucky has a quilt museum.

Anyway, while I was working on that MA in English, I learned that Kentucky (my state) has a quilt museum. Weird place to discover this detail? Maybe! But I believe it was my professor who provided me that fact through a discussion board post. I guess I mentioned where I live, as well as quilting, and she was kind enough to inform me that a quilt museum is in my home state. I had no clue, but I did a bit of Google searching about it. What I discovered was that not only is there a quilt museum in Kentucky, but that quilt museums are things in more areas than just the bluegrass state. In fact, a person could find one in Virginia, Texas, Wisconsin…

So, I guess shame on me for assuming that quilting was such an unappreciated pastime? Who knew that there were places like this available where you can go and appreciate someone else’s craft? Okay, maybe you knew, but I didn’t! It was an interesting thing to discover, and it was a nice side-benefit to earning my MA! I got an education, and a piece of quilt-culture tossed my way!

This is intriguing not only because it provides me a possible place to visit to see a collection of quilts, but also because the existence of these places offers solid evidence for the argument that quilting is an art form. If someone claims it isn’t, you can come back with, “Really? They have museums for it.” That alone, I think, makes these museums worth knowing about!

No time like the present

Despite my appreciation of the possibility of going to a quilt museum though, I haven’t actually made it to one. Shame on me again? Maybe! But if you recall, I had this plan of having a list of goals for 2017, and it’s occurred to me that this failure to see a quilt museum can be something to correct during that year-long goal-reaching endeavor.

So, here you go — a new goal for the list, and that’s to see an exhibit at the quilt museum. In fact, I’ve taken the time narrow it down further to choose which exhibit I want to see. The final version of said goal, then, would read something like this:

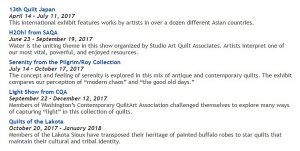
Go to see the “Quilts of the Lakota” exhibit at the National Quilt Museum in Paducah, Kentucky.

Go to see the “Quilts of the Lakota” exhibit at the National Quilt Museum in Paducah, Kentucky.

This taps into my interest in quilts, and my interest in history (Did I mention I have my BA in History? If not, yeah, that appeals to me, too!), so it’s a wonderful combination for me. In addition, the exhibit is scheduled to happen between October 2017 and January 2018, so there’s plenty of time to pick a date for my own viewing! Should that happen, you might want to keep an eye out for pictures and a post from the event. You might find it interesting, and I might want to prove that I did, in truth, accomplish this goal!

Become a part of history

Other additional and awesome things about this museum, by the way, are that you can apply to have your own exhibit displayed there (a long-term goal?), and they offer workshops for quilting (another year-goal?). This little gem of a museum has been around for twenty-five years, and I was clueless!

And since I happen to live near Virginia, maybe I’ll make a trip over there as well to see that museum.

And since I happen to live near Virginia, maybe I’ll make a trip over there as well to see that museum.

And since I happen to live near Virginia, maybe I’ll make a trip over there as well to see that museum. They have a “Treasures from the Vault: Crazy Quilts” going on right now that could’ve been fun to see and a “Treasures From the Vault: Wool for Winter” option that’s coming up next year. Maybe I can make this a decade-long goal of seeing every quilt museum in the country. It’s a bit more long-term than I was looking for, but how interesting could it be to see all of these museums? It could be fun, inspiring, encouraging…

They have a “Treasures from the Vault: Crazy Quilts” going on right now that could’ve been fun to see and a "Treasures From the Vault: Wool for Winter" option that’s coming up next year.

They have a “Treasures from the Vault: Crazy Quilts” going on right now that could’ve been fun to see and a “Treasures From the Vault: Wool for Winter” option that’s coming up next year.

It’s a possibility, but at least my one quilt-museum goal for 2017 is cemented 🙂

Have any of you ever checked out one of these museums? If so, details in the comments!

Book Promoting for the Crafty Author

Book Promoting for the Crafty Author

I have a number of creative outlets, guys. I like to sew, quilt, bake, design floral arrangements…

I’ve of fallen in love with the idea of freelance writing.

I’ve of fallen in love with the idea of freelance writing.

But my number one creative outlet is writing. That’s one of the reasons why having this blog opportunity fits so well with my personality and interests. I get to dabble in one category of creative endeavor and learn about it while exercising my number-one creative passion by writing about it. It’s a pretty awesome system, honestly, and I’ve kind of fallen in love with the idea of freelance writing because of it.

What would be awesome though is if I could make a living as an author, which is something that I’ve been putting efforts toward. I’ve been working on and publishing books since at least 2013, and I’ve learned a thing or two about what to do in regards to marketing and such. Not enough to make me a best seller, mind you, but I’ve learned enough to be in better shape than I was when my first book was released in 2013!

I’ve learned enough to be in better shape than I was when my first book was released in 2013!

I’ve learned enough to be in better shape than I was when my first book was released in 2013!

In the Beginning…

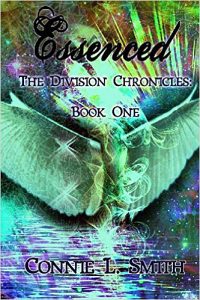
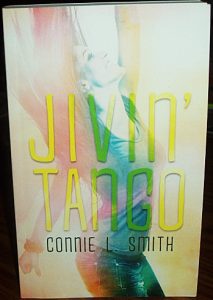
That first book is being re-released by a publisher, and I want to do things right this time around by applying what I know. What I *do* know is that there are steps in marketing that can attract an audience, and giveaways happen to be one of those options. In fact, I recently finished a giveaway on Goodreads for this very copy of one book I wrote. Maybe you’ve heard of it? Jivin’ Tango? Oh well… 🙂

Importance of Planning

I recently finished a giveaway on Goodreads for this very copy of one book I wrote, Jivin' Tango.

I recently finished a giveaway on Goodreads for this very copy of one book I wrote, Jivin’ Tango.

The point—and this is what brings us to the theme of this blog—is that I’ve been trying to think outside of the box for things that I could create for the upcoming book releases that would make for awesome giveaway items. And I think I might actually have come up with some ideas for the process! You see, this upcoming re-released trilogy is a fantasy series that includes essences of a number of mythical creatures—fairies, dragons, vampires, mermaids, werewolves, genies, etc.—and that leaves a whole lot of territory to dive into for the world of sewing and quilting. Why? Because fantasy is a big deal these days, and it isn’t hard to come up with fabric to fit the category!


I figure though that one detail that I should consider is pacing and speed. It would be crazy-awesome to make a crazy-awesome quilt and give it away, but I need to consider other factors. For instance, in order to have these books available for sale next year, there’s more editing I need to go through for each and forms to finish/start filling out, not to mention other why-am-I-an-adult tasks I need to address for life in general. To put that detail plainly, I just might not have the time (or the skill at this point) to make that crazy-awesome quilt by a January release date, which I think is when the first book is scheduled to come out.

Giveaways Galore

So what are some things I would have time for before that first book’s release? Well, there are the obvious options, like totes and wall hangings that would allow for simple makes (I hope!). I could also make a set of throw pillows, scarves, place mats, table runners, oven mitts, purses, bookmarks… Thank you, Google and sites I found via Google, for the ideas!

Of all of these possibilities, for whatever reason, throw pillows and totes seem like the most intriguing options. So, I’m thinking that these could be my primary targets for the first two book releases. For the third, most delayed option, I’m thinking either a quilt or a wall hanging might suffice. If that’s the case, here’s my schedule:

January—Within the Essence (The Division: Book One)—Throw Pillows

February—Through the Ashes (The Division: Book Two)—Tote

March—Beyond the Hope (The Division: Book Three)—Quilt/Wall Hanging

It’s worth noting that I haven’t tried to make a pillow since childhood, and I’ve never done a tote before. With those things in mind, there might be some complications and project switching since I have a limited time frame to work with. If I can’t make one work, something might need to be changed!

Theme is Key

The most connected detail though is to make sure there’s that fantasy link. Otherwise, my theme is gone, and I might as well be sending out paper plate bunnies or something, no matter how impressive the final products are. For that quality, I’m thinking I’ll select three of the mythical creatures that are connected to this trilogy—one for each project. Personally, I’d love to make a quilt out of this material (I love fairies!), and I think throw pillows out of material that’s something like this could be awesome. Beyond the fairy and dragon, I could go with a mermaid concept for the tote, using scaled fabric and charms. The potential problem though would be that, if these were successful, at least two of out three of them I might want to keep!

Honestly, I’ve been looking for ways to blend in these hobbies so that I can have some crossover details, and this feels like a great opportunity! I can improve my sewing and expand my experience in the field while promoting my number-one creative endeavor of writing. How isn’t that a win-win?

I’d be interested in any tips for projects I could do for one of these book releases, if you have a different idea than what I posted! Feedback, guys!