Traditional vs. Modern Quilts - What’s the Difference?

Traditional vs. Modern Quilts – What’s the Difference?

Do you understand the differences between traditional and modern quilts?

Let’s look and see just what sets these different styles apart.

Traditional quilts

Traditional quilts are tried and true. Folks have been piecing and quilting these familiar designs for hundreds of years. Traditional patchwork designs have names: Log Cabin, Courthouse Steps, Nine-Patch, Dresden Plate.  There are thousands of these traditional patterns, and these are based on blocks and a grid.

Traditional vs Modern Quilts-What's the Difference?

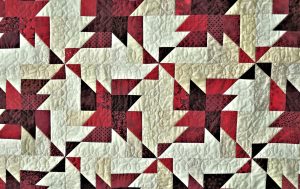
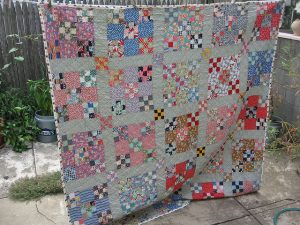
Traditional quilts use regularly repeating shapes and blocks, based on a grid.

Traditional patchwork can be simple or complex, but it is usually made up of many repetitions of the same block and orderly rows. These are frequently combined with uniform sashing between individual blocks and/or borders all around. They rely heavily on symmetry in both the patchwork and the quilting.

Traditional quilt patterns are still made and loved today, but we can say that these are our grandmothers’ quilts—and their grandmothers before them.

Traditional vs Modern Quilts- What's the Difference?

Modern quilts

As the name implies, modern quilts are something new. They are more experimental and rely less on rules and order.  Modern quilt designs began popping up in the last half of the twentieth century. But they really hit their stride just before the new millennium.

Modern quilts differ from traditional quilts in many ways. Traditional quilts rely on a grid of regularly repeating designs, symmetry, sashing, borders, often complicated patchwork, and simple quilting. In contrast, modern quilts go off the grid and use asymmetry, less fuss, minimalist designs, and a more improvisational style with unusual arrangements of blocks and settings.

Traditional vs Modern Qults- What's the Difference?

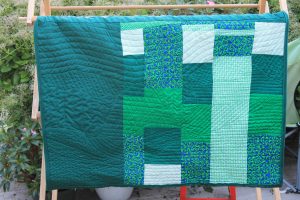
While there is a definite list of characteristics that categorize the modern quilt style, these are not rules. Most modern quilts will fulfill at least one but not usually all of them.  In general, modern quilt characteristics include a minimalist style; they emphasize negative space rather than intricate patchwork. They may feature bold colors and graphic designs that give high-contrast pop. And modern quilts often feature asymmetry and use unusual block placement and off-center motifs.

Traditional vs Modern Quilts- What's the Difference?

photo courtesy redheadwiththread

Modern colors and fabrics

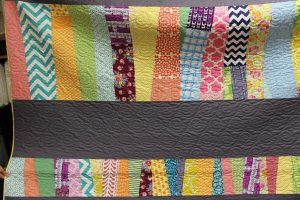
Colors in modern quilts tend to be bold. High contrast graphic designs are created with brightly colored solid fabrics and striking modern prints. These are used more sparingly than in the more familiar repeating patterns which march across so many traditional quilts.  The focus is on the bold modern fabrics, rather than fussy technique.

Traditional vs Modern Quilts- What's the Difference?

Bold colors make modern quilts pop

Negative space and dense, innovative quilting

Negative space features heavily in modern quilts.  In traditional quilting, the repeating patchwork is meant to stand out. So traditional quilters most often construct backgrounds from neutral, receding colors. But backgrounds in modern quilts are brighter and more expansive. Whites and grays are popular choices to bring these negative spaces forward.

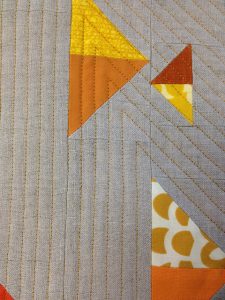
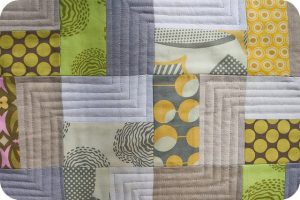
All this negative space highlights asymmetrical, alternate grid, or graphic modern quilting.  Simple piecing contrasts with dense quilting in innovative designs. Whereas patchwork commands attention in traditional quilts; on modern quilts, the quilting more often stands out.

Traditional vs Modern Quilts- What's the Difference?

Zig-zag modern quilting

No rules quilting

Traditional quilting stitches may be straight and simple lines, such as with “stitch in the ditch” lines that follow piecing seams. Or they can be elaborate curliques and designs which are deliberately and symmetrically placed to line up with wide borders. They may even meander as free-motion stipples, but these must follow rules, and not cross each other.

Modern quilters are free to abandon all these rules. Modern quilting lines may cross to form geometric patterns, irregular curlicues, or any other design an imaginative quilter can dream up. Quilters can even combine many varied stitches and feature each separately to break up a large expanse of negative space into different sections, for example.

Traditional vs Modern Quilts- What's the Difference?

Another quilt by Columbus Modern Quilt Guild member DanaK

Free-motion quilting is one way to let loose and experiment with fun and free modern quilting. To quilt in the free motion style, use your darning foot. You can either lower your feed dogs to guide your fabric by hand, or you can leave your feed dogs up and just set your stitch length to zero. Either way works!

Leah Day, who teaches free-motion quilting online, challenged herself to create a new filler design every day for a year. And her Free-Motion Quilting Project blog is an excellent resource and inspiration.

Off the grid layout

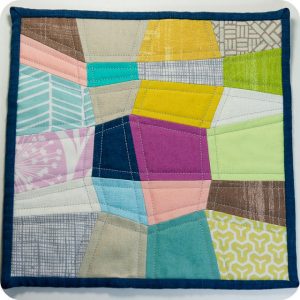
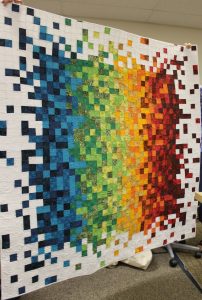
Patchwork in modern quilts can include off center or tessellated designs.  Modern quilts differ with much less reliance on uniform blocks and borders than is traditional and may feature irregular rows. Lack of borders and offset blocks create designs that continue beyond the quilt’s edge.  In general, both the patchwork and the quilting on modern quilts tends not to rely on a grid.

Traditional vs Modern Quilts- What's the Difference?

Example from Flickr user Gabrielle shows a modern, off-the-grid design

Modern quilts may make use of technology, such as computers for visualizing designs, and tools such as cutting machines or tessellating or other specialty rulers, to assist with cutting and design.

Traditional vs Modern Quils- What's the Difference?

This quilt by Columbus Modern Quilt Guild member shows a fun take on pixelation.

Hybrid design: modern traditionalism

You don’t have to choose between these two styles, however! Modern traditionalism is a hybrid of both. These quilts marry the improvisational freedom in design, piecing, and quilting of modern quilts with the traditional patchwork designs that connect us to the many generations of quilters before us.

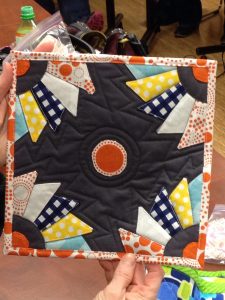
A modern traditional quilt may shrink a traditional pattern and sprinkle these sparsely as isolated individuals amongst a wide expanse of negative space. Other modern treatments of traditional patchwork include combining patterns or enlarging blocks to a single design. A quilter may then feature such blocks this off center, for example.
Traditional vs Modern Quilts- What's the Difference?

Modern traditionalism features new settings for traditional blocks. Photo courtesy of Trillium Designs

Which style do you prefer? I love them all!

For more modern and modern traditional inspiration, check out the gallery at the Modern Quilt Guild.
Flickr images licensed under Collective Commons.
How to Sew Pocket Organizers

How to Sew Pocket Organizers

Sew pocket organizers to hold all your stuff!

Pockets are not only for clothes and bags.  You can sew pocket organizers for:

  • Shoes
  • Jewelry
  • Sewing supplies
  • Knitting or crochet supplies
  • Art supplies
  • Any other kind of supplies
  • Baby gear
  • Guitar gear
  • Other kinds of gear
  • Remotes
  • Cords or cables
  • Tools
  • Toiletries
  • First aid kit
  • Other kits
  • Frequently used pattern pieces
  • Bills or mail
  • Money
  • Magazines
  • Papers
  • Games
  • Toys

Those are just quick ideas off the top of my head; the possibilities are endless.

How to sew a single hanging pocket

Anyone can sew a pocket organizer, even absolute beginner sewists.  A basic hanging pocket is just two finished  squares or rectangles, one sewn down on three sides on top of the other.

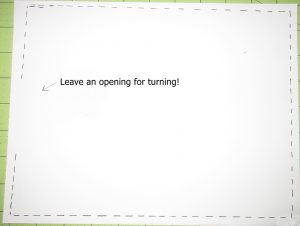
To finish the squares, you cut two identical layers and sew them around all four corners and sides with right sides together, leaving an opening for turning.

I drew this because the ink shows up better than my stitching in the photo.

I drew this because the ink shows up better than my stitching in the photo.

Clip the corners and turn right sides out. You can stick something inside to push the corners out.

Then stitch the opening closed. I usually just topstitch along that entire side. Sometimes I topstitch around all four sides.

Fold the top down an inch and a half or more towards the back and sew the edge down to form a casing for hanging. Then make a smaller finished square or rectangle pocket piece using the same directions as above.

Topstitch the pocket onto the larger panel along the sides and bottom. Don’t sew the top of the pocket closed!

I made this pocket from my leftover butterfly block to hold mail, which used to pile up in my entryway.

I made this pocket from my leftover butterfly block to hold mail, which used to pile up in my entryway.

Or cheat and use jean pockets

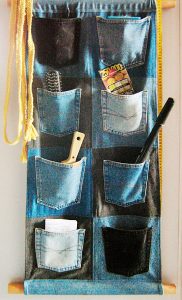
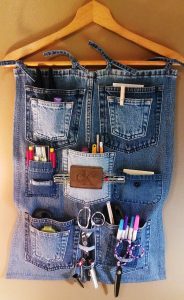
I did some searching to find some cute projects to recommend for you.  And I found some examples of organizers that were made by reusing jeans pockets. These save a step and so you can make these with super speed. Just be sure to use a jeans needle.

I think this one is a great idea for a closet organizer.

I think this one is a great idea for a closet organizer.

I will like to make a long double sided one of these to hang in the middle of a closet that’s shared by two boys at my house. This will solve a couple of different organizational challenges in that small closet nicely.

Here is one on a hanger that is being used for sewing supplies storage.

Here is one on a hanger that is being used for sewing supplies storage.

How to sew pocket organizers with multiple pockets

To start, make a backing panel. Cut two square or rectangular pieces to the desired size of your organizer pocket panel. Press interfacing to the wrong side of one of the two square or rectangular pieces. Then layer the two pieces right sides together and sew around, leaving an opening for turning.  Turn right side out, push the corners out well from the inside, press, and then sew closed.

To allow for hanging, you can simply fold over at the top and sew a casing, or you can make hanging loops and attach these by tucking between the two pieces when you sew them together in the steps above.

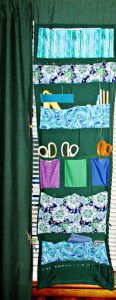
My sewing room curtain organizer panels use all of the above kinds of pockets.

My sewing room curtain organizer panels use all of the above kinds of pockets.

For the pockets, you could make several or many individual pockets in the same way as the larger backing piece and topstitch each pocket onto the backing panel separately. Or you could make long pockets the width of the backing panel. You can then topstitch to divide these long pockets into shorter sections.  You can also make your pockets slightly wider than your backing panel.  Then pleat them at the bottom and add elastic casings along the top edges, to build roomier pockets with more holding power.

My sewing room curtain organizer panels use all of the above kinds of pockets. I also stuffed a long one and sewed it closed around all sides to make a pin cushion way up high and out of the reach of grabby kids.

You can customize your pocket panels to suit your organizational challenges, no matter what they are.

Sew a money bag pocket

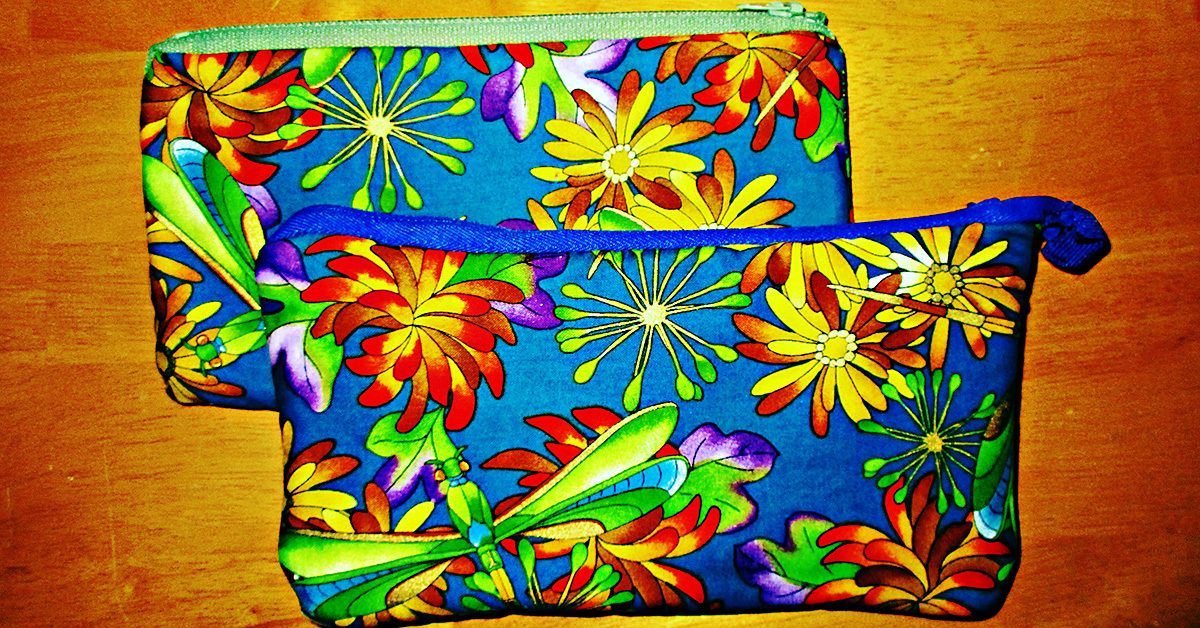
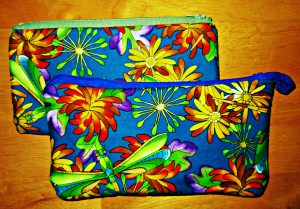
Maybe you’d call it a bag, but this project is simply a big pocket with a zipper at the top. You could use these as bank bags for deposits or otherwise holding cash. I made them big enough to hold multiple envelopes for monthly budgeting.

For stashing cash or other goodies.

For stashing cash or other goodies.

Or you could make these zippered pockets to hold your pencils or some other small collection.  I’m using one of mine for stashing my jewelry pliers set where no kids can reach them. Keeping my things out of the reach of children seems to be the major part of my own organizational challenges!

Favorite pocket organizers from around the web

If I haven’t given you enough inspiration to sew pocket organizers yet, check out these other ideas and tutorials that I found and collected from around the web. I will make the handy ironing board pockets right away, I can’t believe I have never thought of this simple solution before. And I think the pocketed towel will make a great gift for a sunbather I know and love.

Are the gears in your brain turning now? What problems could you solve if you sew pocket organizers to keep things in place?

Crazy Patch Butterfly Applique Blocks

Crazy Patch Butterfly Applique Blocks

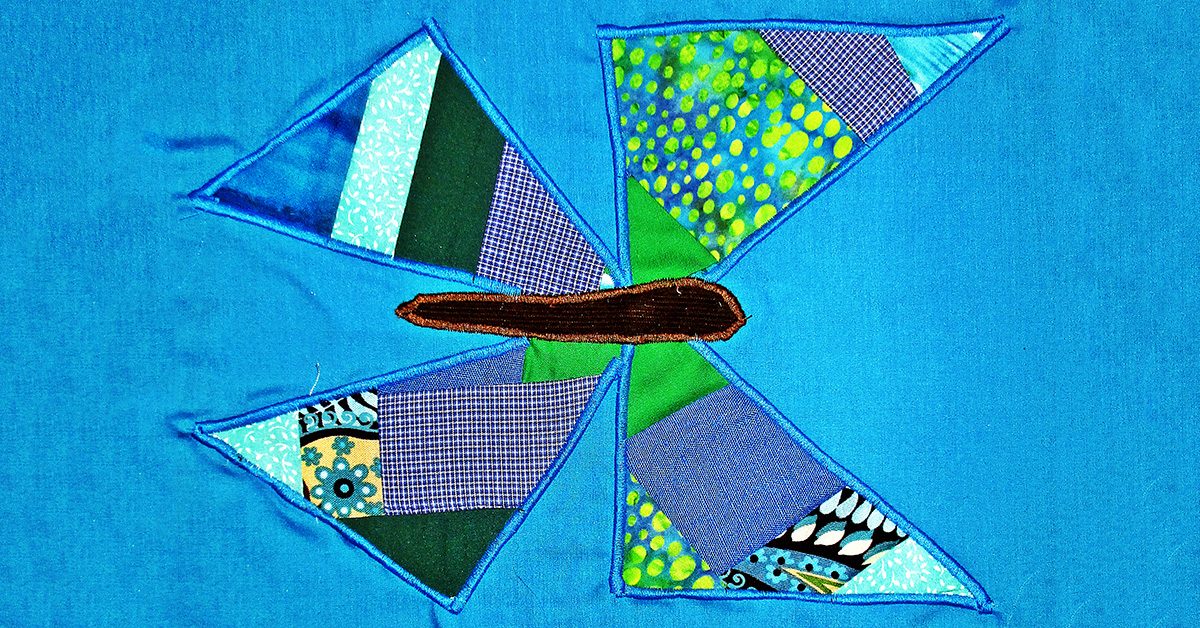
These crazy patch butterfly blocks happened by accident.

These crazy patch butterfly blocks happened by accident.

These crazy patch butterfly blocks happened by accident.

The last time I made a crazy patch quilt, I wound up with two extra blocks. I have no intention of collecting UFO blocks, but I’m not inclined to throw my handiwork away. So I stared at them a while, trying to think of something to make from these extra blocks.

Something told me to cut them into triangles, so I did, still not knowing what I’d do with them. I played with the triangle pieces for a few minutes, and this design idea came to me. I think it’s a good one.

You could make a bunch of these for a quilt, a few for a table or bed runner, feature one in a sampler quilt, or just make one for a small project.

I plan to use one of these to make an oversized pocket on a skirt. And I’ll show you what I’m going to do with the other one next week, so stay tuned.

Here are the steps to make these:

Crazy Patch Butterfly Blocks

For each block, you will need:

  • Background rectangle or square
  • Muslin square
  • Assorted small scraps

Step one: make the crazy patchwork

You could make these crazy patch butterfly blocks any size, but my examples started with a six inch square. Take your muslin square and arrange a several sided scrap somewhere near the middle of the square.  Choose another scrap with one side at least as long as one side of the first fabric, and place it right side down atop the first.  Sew along this seam, flip the second fabric down where the right side faces up, then press.  Repeat this process, gradually adding scraps, until the square is fully covered by your assorted scraps.

Then, place the block right side down on your cutting mat and use your rotary cutter and ruler to trim the fabric scrap from the edges of the muslin square.

I made one on video so you can see exactly how to do this step:

I should mention that traditional crazy patchwork also incorporates embroidery stitches over the seam lines. If you have a machine that does decorative stitching, then you can sew a line of decorative stitches along the seam after you add each new scrap to your crazy square. You don’t want to wait until the end, since these scraps go every which way.

Step two: cut triangles

Now lay the crazy patchwork square right side up on your cutting board. Use your ruler and rotary cutter to cut it in half diagonally, then move your ruler and cut diagonally the other way, to end up with four quarter square triangles. You could use scissors if you don’t have a rotary cutter, but if you want to make patchwork, you really want to get a rotary cutter and cutting mat.

Step three: appliqué

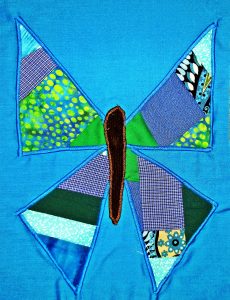
Here’s how to arrange the triangles to construct these crazy patch butterfly blocks. Place the top pair of wings with points together and the ninety degree angles at the outside bottom corners. Then angle the bottom wing pieces with the longest edges on the inside and the ninety degree angles pointing out.

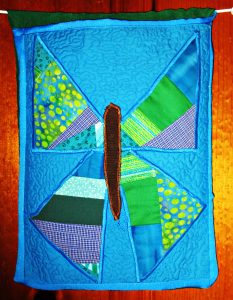
Crazy patch butterfly block.

Crazy patch butterfly block.

Pin these to your backing square and appliqué using a satin stitch. I made these using a rectangular backing cut at nine and a quarter by eleven and a half inches.

If you will be using these for a small project rather than a quilt, there is an alternative way to hold your pieces in place rather than using pins. You could use double-sided fusible web. You would affix this to the back of your appliqué pieces and then remove the paper backing and affix the other side to the backing rectangle.

This makes appliqué really easy, but I don’t recommend using it for quilts, because it will be crinkly inside the appliqué. If you are making a wall quilt or other small decorative project, it is an easy choice.

Bust out the scraps

After you appliqué the crazy patch butterfly wings, then use corduroy or another scrap fabric to cut a long, tapered oval for the caterpillar body. Applique this in the middle, to cover the intersecting wings.

My son just pointed out that I forgot to add antennae to mine. If you’d like to add antennae, you can do this using hand or machine embroidery. Or you can use Debbie Mumm’s easy idea that she calls pen-stitch embroidery. That is, you can draw them with a fine tipped Sharpie or other permanent pen.

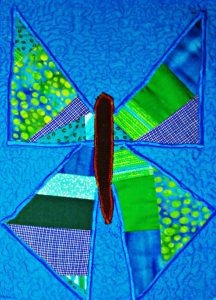
Here is one that I quilted the background using using tight free-motion quilting.

Crazy patch butterfly block quilted.

Crazy patch butterfly block quilted.

As you can see, these crazy patch butterfly blocks are super easy to make. They’d be cute on a baby, wall, or bed quilt. Or you could feature just one on an apron or skirt.

What will you make with these crazy patch butterfly blocks?