How to Sew a Zippered Outdoor Pillow Cover with Sunbrella

How to Sew a Zippered Outdoor Pillow Cover with Sunbrella

I made those pillows with an envelope-style close on the back.

I made those pillows with an envelope-style close on the back.

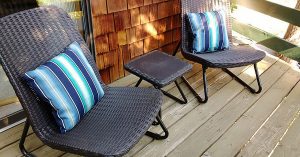
Last week I shared how I made outdoor pillows out of Sunbrella fabric for my front porch chairs. I made those pillows with an envelope-style close on the back. The pillows on the front porch do not get as much direct sun exposure as the chairs on the back deck. For those chairs I wanted to use the same fabric, but to make pillows with a zippered close so I could flip the pillows between the front and the back to evenly distribute sun exposure over time to the fabric.

For pillows with a zipper close you will cut out the same size of front & back panels.

For pillows with a zipper close you will cut out the same size of front & back panels.

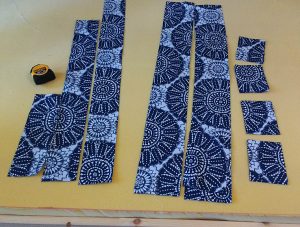
For pillows with a zipper close you will cut out the same size of front and back panels. I was making two pillows for 18” x 18” pillow forms so I needed four 17” x 17” panels. With ½” seams, the finished covers would be 16” x 16”, perfect for stuffing a slightly larger pillow in to make the pillow case fluff up and fill out nicely.

Pro Tip: plan ahead when working with stripes or patterns and cut out your panels to match on all sides (if this is important to you).

Plan ahead when working with stripes or patterns & cut out your panels to match on all sides.

Plan ahead when working with stripes or patterns & cut out your panels to match on all sides.

Like a hot knife through butter

Sunbrella is perfect for cutting with a hot knife. It seals the edges for you. Just watch out as the edges can be sharp.

Sunbrella is perfect for cutting with a hot knife.

Sunbrella is perfect for cutting with a hot knife.

Sunbrella outdoor fabric has no right or wrong side. I clipped two panels together and the other two panels together using my Wonder Clips. They are available at SewingMachinesPlus.com and I love them!\

Pro Tip: if you are working with stripes or a pattern, make sure you place the panels together correctly to match the stripes or pattern.

Round off your corners. I talk about the importance of rounding your corners in this post. Not everyone does it but I think it makes for a more beautiful pillow. On dark fabrics, I use my Clover Chaco Liner pen.

Round off your corners.

Round off your corners.

Zippers!

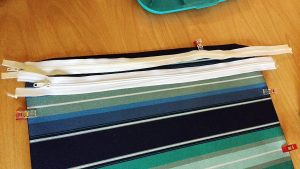
I’m using two different zippers from my stash. They are both long enough to fit the 18”x18” pillows and that’s all that matters.

I’m using two different zippers from my stash.

I’m using two different zippers from my stash.

Determine what side is the bottom of your pillow. This might depend on how you want your stripes to run or your pattern to be displayed. I’m working with ½” seams all around the pillow. On the side where you will place the pattern, mark about 2” in on both sides and sew and back-tack on both ends along that 2” line.

Determine what side is the bottom of your pillow.

Determine what side is the bottom of your pillow.

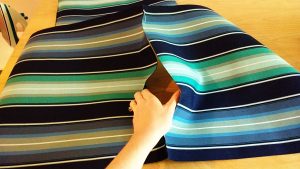
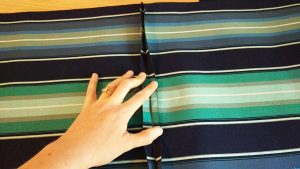
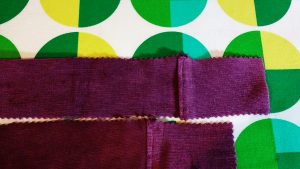
Now your seam will look like this, with an opening in the middle.

Now your seam will look like this, with an opening in the middle.

Now your seam will look like this, with an opening in the middle.

Sunbrella is perfect for finger creasing. Crease down both seams. Here you could stick the seam down with basting tape if you didn’t feel super confident going forward to the next step.

Sunbrella is perfect for finger creasing.

Sunbrella is perfect for finger creasing.

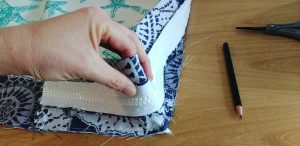
With my Clover Chaco Liner pen, I mark on both sides of the seam where the stitching ends. This will show me where I’m going to start and stop my zipper (just past that stitching on either end).

Pro Tip: make sure you place your zipper with the zipper pull facing down so it can be accessed from the right side of the pillow.

You zipper is marked up – so let’s sew it on!

I mark on both sides of the seam where the stitching ends.

I mark on both sides of the seam where the stitching ends.

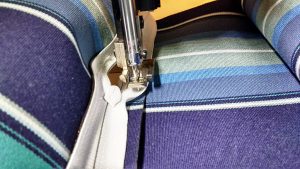
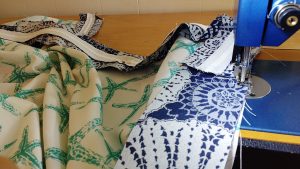
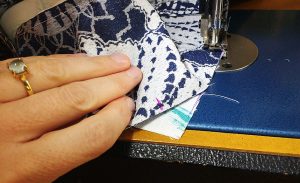
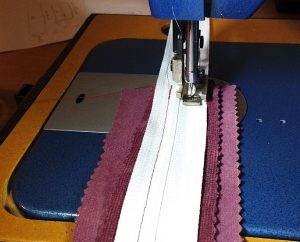
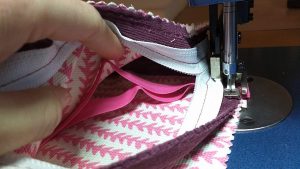
I started at the bottom of the zipper and sewed it down just past the yellow mark I’d made. Then I roll up both sides of the fabric and use Wonder Clips to hold the fabric in place so I don’t have fabric all over the place as I’m sewing in the zipper.

I started at the bottom of the zipper & sewed it down just past the yellow mark I’d made.

I started at the bottom of the zipper & sewed it down just past the yellow mark I’d made.

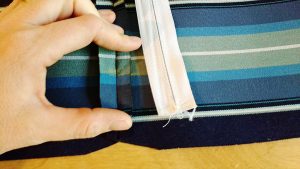
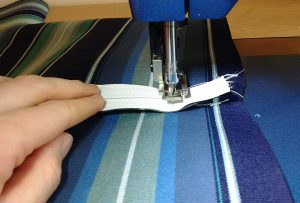
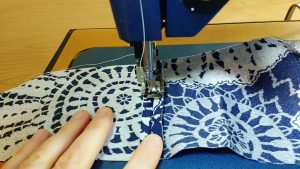
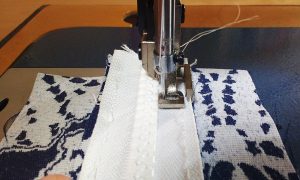
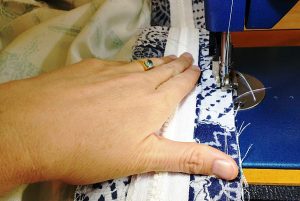
Next I carefully sewed the zipper to either side of the folded seams. When you get to the zipper pull, leave your needle down and lift up the foot, then slide the pull past and away from where you’re sewing. Back tack thoroughly at the top and bottom of the zipper.

I carefully sewed the zipper to either side of the folded seams.

I carefully sewed the zipper to either side of the folded seams.

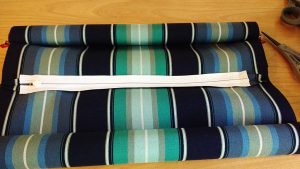
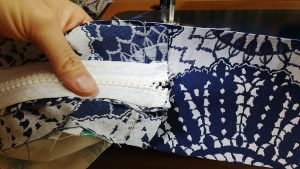
Now the two pieces are fully joined with the zipper in the middle.

Now the two pieces are fully joined with the zipper in the middle.

Now the two pieces are fully joined with the zipper in the middle.

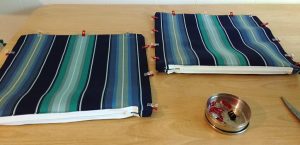
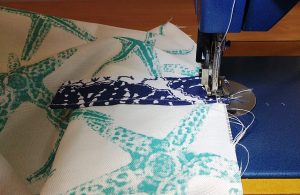
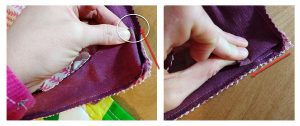
Next, unroll your fabric and clip the panels right-sides together. Sew all around the other three sides.

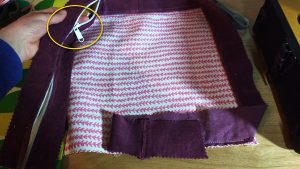
Pro Tip: unzip your zippers enough to be able to fully unzip them once you’ve sewn the other seams shut.

Unroll your fabric and clip the panels right-sides together.

Unroll your fabric and clip the panels right-sides together.

Before you turn your pillows right sides out, always, always, always check your work. Go over all the sewn seams and corners to make sure you didn’t miss anything.

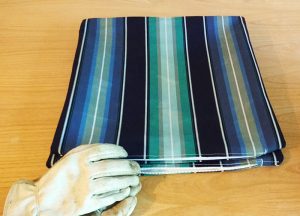
Then turn! Watch out because Sunbrella cut with a hot knife can be a bit sharp. I use my leather garden gloves to turn them right sides out.

Watch out because Sunbrella cut with a hot knife can be a bit sharp.

Watch out because Sunbrella cut with a hot knife can be a bit sharp.

Use something sharp but not too sharp, like a Sharpie marker with the lid on to poke and fully round the edges of your pillow. Now you have a Sunbrella pillow case with a zippered close!

Now you have a Sunbrella pillow case with a zippered close!

Now you have a Sunbrella pillow case with a zippered close!

Walk it in

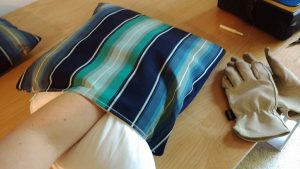
Add your pillow form. Remember, your pillow is bigger than your pillow case. You need to move the pillow in gently but firmly. You are in charge! I call this action ‘walking it in.’ Just keep moving it until it’s fully in the case. Then grab each corner and really match it corner to corner.

You need to move the pillow in gently but firmly.

You need to move the pillow in gently but firmly.

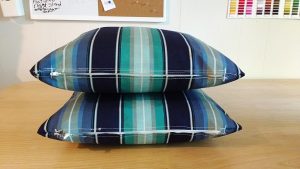
And there you have it. Two puffy pillow cases with zippered closes that are the same front and back. Perfect for distributing sun exposure on a deck.

Two puffy pillow cases with zippered closes that are the same front & back.

Two puffy pillow cases with zippered closes that are the same front & back.

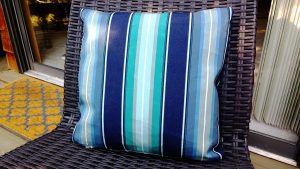
Ready for its close up!

Ready for its close up!

Ready for its close up!

Do you have any tips for working with Sunbrella? Tell us about them in comments!

Do you have any tips for working with Sunbrella? Tell us about them in comments!

Do you have any tips for working with Sunbrella? Tell us about them in comments!

———————————————————————————–
Charlotte Kaufman is a writer and sewist in Mammoth Lakes, California. She specializes in marine and home interiors and continues to fall more and more in love with quilting. You can follow her at charlottekaufman.com.

How to Sew a DIY Mattress Cover

How to Sew a DIY Mattress Cover

My husband and I sleep on a full-sized bed on 4” of high density foam that we bought from Keyston Brothers, a store that specializes in auto and marine foam and fabric (We use density type Q41 for anyone interested in doing the same). We find the foam lasts about five years before we need to replace it and for a full-sized mattress’ worth, it costs about $250. That is loads cheaper than a fancy mattress and we sleep like babies.

Sweet dreams!

Sweet dreams!

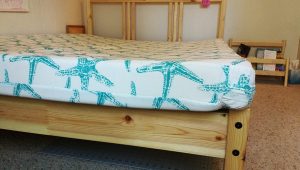
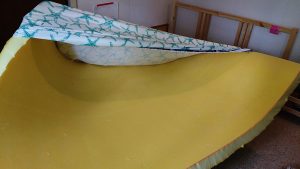
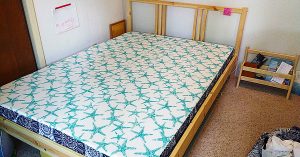
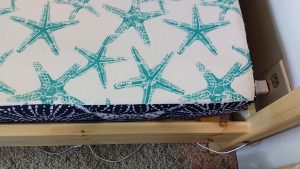
We discovered this foam when we were replacing the cushions in the v-berth of our sailboat. We lived aboard for almost eight years and slept amazingly. When we moved on land we decided to cut costs and stick with the foam. I made a custom cover for it but this frame we recently got from Ikea is smaller than the foam. See how it curves down into the bed and up and over the edges? My husband and I were getting rolled into each other at night so I knew I was going to have to take matters into my own hands.

See how it curves down into the bed and up and over the edges?

See how it curves down into the bed and up and over the edges?

Let’s get started

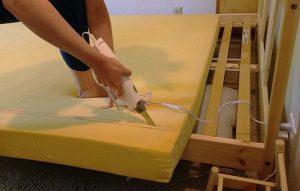
I took off the cover I had made and measured the foam to a size that would fit in the frame. Then I got out my $20 electric cutting knife from Walmart and got to slicing.

Take a deep breath. We're about to slice into our bed. Ready? Let's go!

Take a deep breath. We’re about to slice into our bed. Ready? Let’s go!

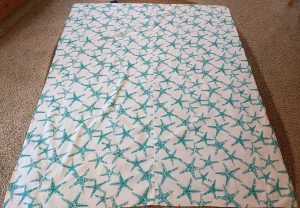
Upstairs, I cut the side piece (zipper piece) off of the top and bottom of the cover. Here are the two main panels laid out.

Here are the two main panels laid out.

Here are the two main panels laid out.

Zipper time!

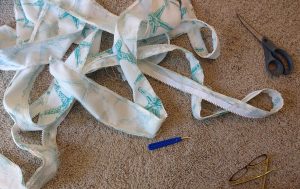
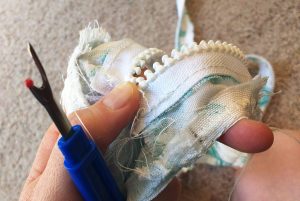
I had finished all my seams with zigzag stitches and there was no way I wanted to take out all those stitches. Instead I saved the zipper by just taking out the straight stitches holding it to the cover.

I saved the zipper by just taking out the straight stitches holding it to the cover.

I saved the zipper by just taking out the straight stitches holding it to the cover.

Zipper saved! Now I didn’t have to buy another one for the smaller sized cover.

Zipper saved!

Zipper saved!

Let’s sketch this out…

Math time! Here I had to work out the new size of the zipper plaque and the rest of the side facing. Plus I wanted to add handles this time so I measured out those too. I also cut the top and back panels to the same size as the foam that now fit in the bed frame.

Math time!

Math time!

I was all out of the original fabric I had used to make the mattress cover so I used some leftover Sunbrella scraps I had from another project. Here are the parts I’ll need to piece together for the zipper plaque, the rest of the sides and the handles.

Here are the parts I’ll need to piece together for the zipper plaque, the rest of the sides, & the handles.

Here are the parts I’ll need to piece together for the zipper plaque, the rest of the sides, & the handles.

I made quick work of the four handles and top stitched them for strength. The ends are unfinished as they’ll be sewn inside the cover.

I made quick work of the four handles & top stitched them for strength.

I made quick work of the four handles & top stitched them for strength.

Next I sewed the zipper plaque and side pieces together. I also made sure to zig zag stitch each join to prevent the fabric unraveling.

Next I sewed the zipper plaque & side pieces together.

Next I sewed the zipper plaque & side pieces together.

Making the zipper plaque is my favorite part. It means I’m getting close to being done. Here I’ve switched to a zipper foot so I can get super close to the zipper.

Making the zipper plaque is my favorite part.

Making the zipper plaque is my favorite part.

Next I sewed on the handles to one of the large panels.

Next I sewed on the handles to one of the large panels.

Next I sewed on the handles to one of the large panels.

Side facing

Now it was time to add on the side facing. Yes! I joined one end of the side panel to the zipper plaque and started sewing on the zipper plaque portion first. Then I just transitioned to the side piece and kept going all the way around.

Now it was time to add on the side facing.

Now it was time to add on the side facing.

I stopped several inches before I got back around to the beginning and joined the two ends. Then I trimmed off the excess, zig zag stitched the join, and then sewed that piece onto the bottom panel completely.

I stopped several inches before I got back around to the beginning & joined the two ends.

I stopped several inches before I got back around to the beginning & joined the two ends.

Pro tip: make sure you open up your zipper enough right now that you can get your hand through it to open it completely when turn this right sides out in a few more steps.

You are so close now!!!

You are so close now!!!

You are so close now!!!

Before you begin sewing on the top panel there are still two important things you need to do.

Create match up marks.

Create match up marks.

  1. Create match up marks. When you are working with large pieces of fabric, things have a tendency to shift. These marks will let you know you are joining the two pieces together where you should. If you look carefully you will see pink marks on either side of the fabric at the 19” mark. I marked the side pieces and then the top piece so everything should match up when I sew.
  2. Do your corners!!! This is crucial. Go to each corner and fold it down and back until you are sure the piece is square with each side. Then mark that spot so you know you’re at the actual corner when you get there.
Do your corners!!!

Do your corners!!!

Begin sewing your final panel to the cover. I like to put the panel that is being sewn on the bottom. Here you can see I’ve matched my corners perfectly.

Here you can see I’ve matched my corners perfectly.

Here you can see I’ve matched my corners perfectly.

When you’ve sewn all the way around you are ALMOST done but not quite. There are two things to be done first.

  1. Take the time to carefully inspect ALL seams, fronts and backs. Sew anything you might need to.
  2. Then you need to zigzag stitch both seams in order prevent the fabric from unraveling.
You may think you have finished the hardest part, but the worst is yet to come.

You may think you have finished the hardest part, but the worst is yet to come.

Pat yourself on the back

You may think you have finished the hardest part, but the worst is yet to come. It’s time for cushion Olympics. Yes, wrangling foam into cushions should be an Olympic sport.

Here’s what you need to know:

  1. Go slowly. Do not pull the fabric or you will rip your seams and pop your zippers.
  2. Rather, walk the foam into the cover. I like to fold it on the ends and walk it a little sideways.
  3. Patience, patience, patience. Fit your foam into the pattern just the way you designed it. It you did your math right, it WILL fit.
Go slowly.

Go slowly.

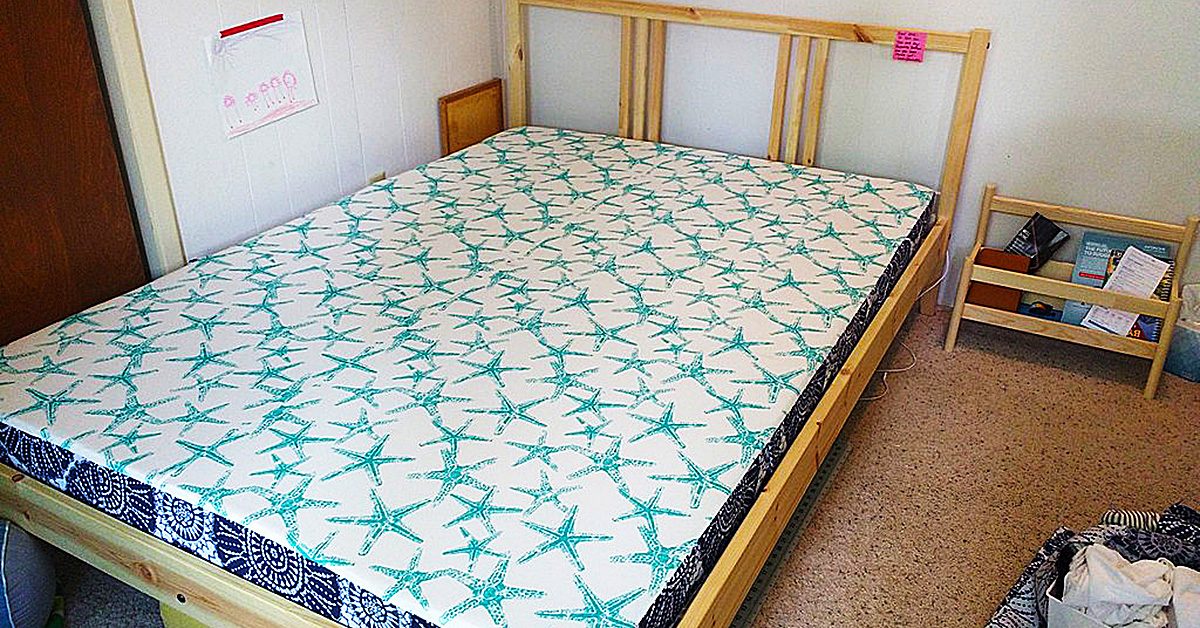
After burning some calories (always a good thing), you will have your new mattress with custom fitting mattress cover that actually fits into your bed frame. Now you may rejoice.

Now you may rejoice.

Now you may rejoice.

Look at those clean lines!

Look at those clean lines!

Look at those clean lines!

Do you make your own bedding, including mattresses? We’d love to hear about your work.

———————————————————————————–
Charlotte Kaufman is a writer and sewist in Mammoth Lakes, California. She specializes in marine and home interiors and continues to fall more and more in love with quilting. You can follow her at charlottekaufman.com.
How to Sew Pocket Organizers

How to Sew Pocket Organizers

Sew pocket organizers to hold all your stuff!

Pockets are not only for clothes and bags.  You can sew pocket organizers for:

  • Shoes
  • Jewelry
  • Sewing supplies
  • Knitting or crochet supplies
  • Art supplies
  • Any other kind of supplies
  • Baby gear
  • Guitar gear
  • Other kinds of gear
  • Remotes
  • Cords or cables
  • Tools
  • Toiletries
  • First aid kit
  • Other kits
  • Frequently used pattern pieces
  • Bills or mail
  • Money
  • Magazines
  • Papers
  • Games
  • Toys

Those are just quick ideas off the top of my head; the possibilities are endless.

How to sew a single hanging pocket

Anyone can sew a pocket organizer, even absolute beginner sewists.  A basic hanging pocket is just two finished  squares or rectangles, one sewn down on three sides on top of the other.

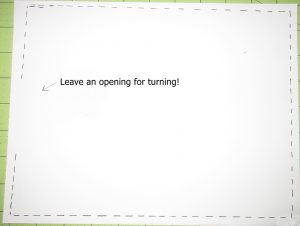
To finish the squares, you cut two identical layers and sew them around all four corners and sides with right sides together, leaving an opening for turning.

I drew this because the ink shows up better than my stitching in the photo.

I drew this because the ink shows up better than my stitching in the photo.

Clip the corners and turn right sides out. You can stick something inside to push the corners out.

Then stitch the opening closed. I usually just topstitch along that entire side. Sometimes I topstitch around all four sides.

Fold the top down an inch and a half or more towards the back and sew the edge down to form a casing for hanging. Then make a smaller finished square or rectangle pocket piece using the same directions as above.

Topstitch the pocket onto the larger panel along the sides and bottom. Don’t sew the top of the pocket closed!

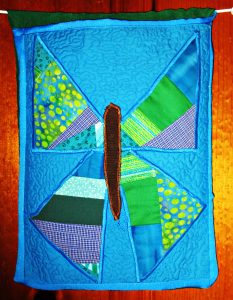
I made this pocket from my leftover butterfly block to hold mail, which used to pile up in my entryway.

I made this pocket from my leftover butterfly block to hold mail, which used to pile up in my entryway.

Or cheat and use jean pockets

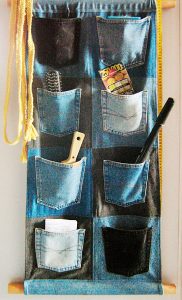
I did some searching to find some cute projects to recommend for you.  And I found some examples of organizers that were made by reusing jeans pockets. These save a step and so you can make these with super speed. Just be sure to use a jeans needle.

I think this one is a great idea for a closet organizer.

I think this one is a great idea for a closet organizer.

I will like to make a long double sided one of these to hang in the middle of a closet that’s shared by two boys at my house. This will solve a couple of different organizational challenges in that small closet nicely.

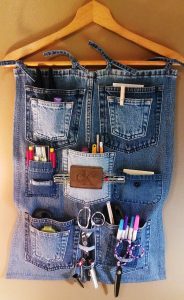
Here is one on a hanger that is being used for sewing supplies storage.

Here is one on a hanger that is being used for sewing supplies storage.

How to sew pocket organizers with multiple pockets

To start, make a backing panel. Cut two square or rectangular pieces to the desired size of your organizer pocket panel. Press interfacing to the wrong side of one of the two square or rectangular pieces. Then layer the two pieces right sides together and sew around, leaving an opening for turning.  Turn right side out, push the corners out well from the inside, press, and then sew closed.

To allow for hanging, you can simply fold over at the top and sew a casing, or you can make hanging loops and attach these by tucking between the two pieces when you sew them together in the steps above.

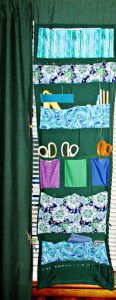
My sewing room curtain organizer panels use all of the above kinds of pockets.

My sewing room curtain organizer panels use all of the above kinds of pockets.

For the pockets, you could make several or many individual pockets in the same way as the larger backing piece and topstitch each pocket onto the backing panel separately. Or you could make long pockets the width of the backing panel. You can then topstitch to divide these long pockets into shorter sections.  You can also make your pockets slightly wider than your backing panel.  Then pleat them at the bottom and add elastic casings along the top edges, to build roomier pockets with more holding power.

My sewing room curtain organizer panels use all of the above kinds of pockets. I also stuffed a long one and sewed it closed around all sides to make a pin cushion way up high and out of the reach of grabby kids.

You can customize your pocket panels to suit your organizational challenges, no matter what they are.

Sew a money bag pocket

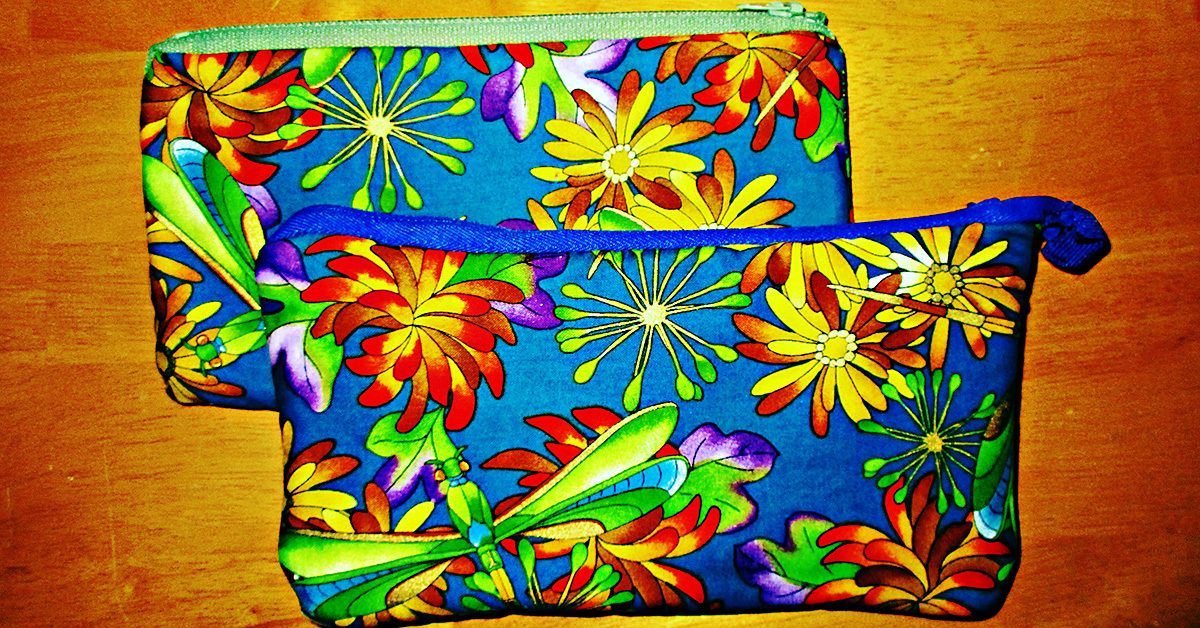
Maybe you’d call it a bag, but this project is simply a big pocket with a zipper at the top. You could use these as bank bags for deposits or otherwise holding cash. I made them big enough to hold multiple envelopes for monthly budgeting.

For stashing cash or other goodies.

For stashing cash or other goodies.

Or you could make these zippered pockets to hold your pencils or some other small collection.  I’m using one of mine for stashing my jewelry pliers set where no kids can reach them. Keeping my things out of the reach of children seems to be the major part of my own organizational challenges!

Favorite pocket organizers from around the web

If I haven’t given you enough inspiration to sew pocket organizers yet, check out these other ideas and tutorials that I found and collected from around the web. I will make the handy ironing board pockets right away, I can’t believe I have never thought of this simple solution before. And I think the pocketed towel will make a great gift for a sunbather I know and love.

Are the gears in your brain turning now? What problems could you solve if you sew pocket organizers to keep things in place?

DIY Chair Cushions for Kids

DIY Chair Cushions for Kids

DIY Chair Cushions for Kids

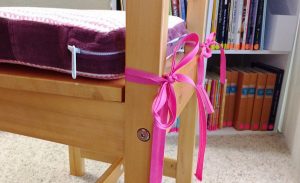
DIY chair cushions for kids.

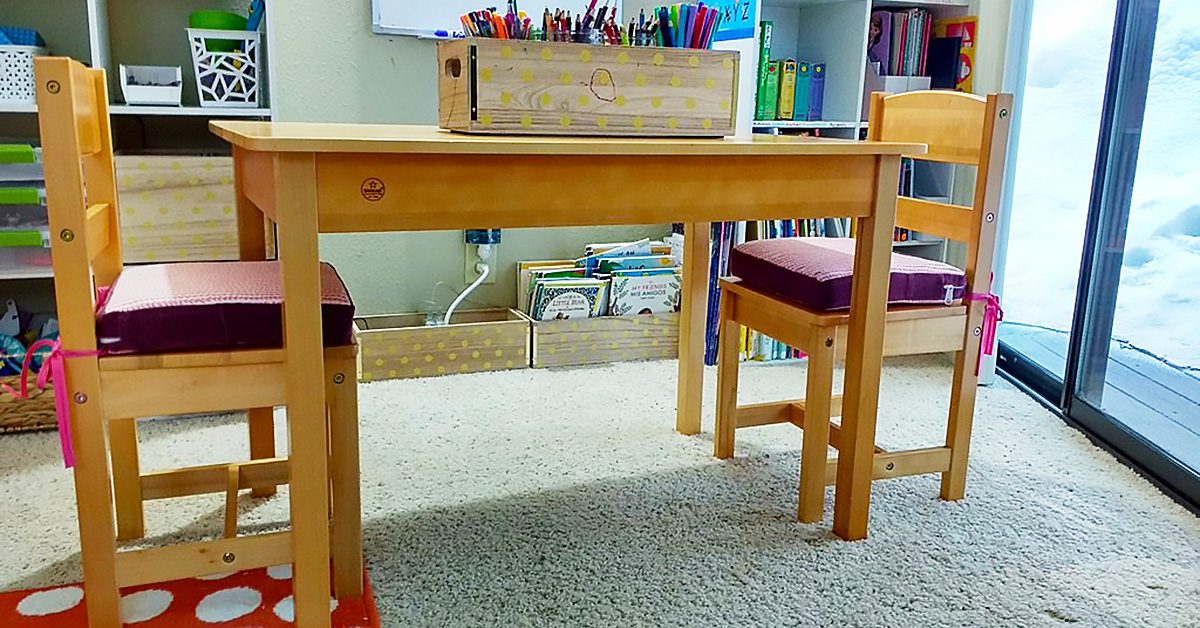
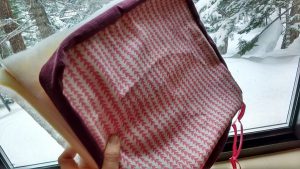
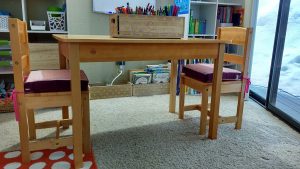
I’ve been wanting to make cushions for the art table chairs in our girls’ room for a while and I finally made it down to a craft store that sold foam this week to get started on the project.

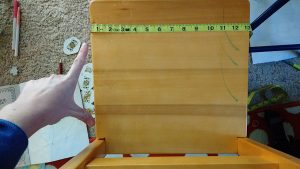
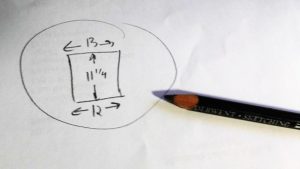
The first step in making custom cushions is accurate measurements. Notice how the chairs are not true squares? The front measurement was 13” and the back 12”. The distance between the front and back was 11 ¼”.

The first step in making custom cushions is accurate measurements.

The first step in making custom cushions is accurate measurements.

Want to know a trick with cushions? Cut your fabric to the exact size of the foam. I know this sounds counter-intuitive. ‘But what about seam allowance?’ you’re thinking. The thing is, foam compresses. If you cut your fabric to the size of the foam, and then sew ¼” seams (or ½” if using heavier duty fabric), the compression of the foam once it is in the cushion cover will more than cover the seam allowance you are used to providing on other sewing projects.

Want to know a trick with cushions? Cut your fabric to the exact size of the foam.

Want to know a trick with cushions? Cut your fabric to the exact size of the foam.

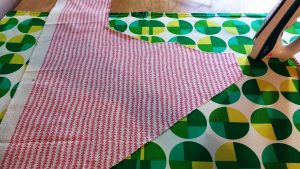
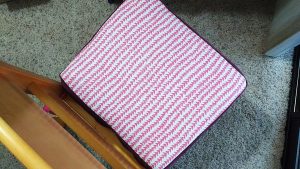
I’m trying to use up my fabric scraps this year, so I pulled out a few larger, odd-shaped scraps I had from this fabric and was able to cut out four top and bottom panels for the two chairs.

I’m trying to use up my fabric scraps this year, so I pulled out a few larger, odd-shaped scraps.

I’m trying to use up my fabric scraps this year, so I pulled out a few larger, odd-shaped scraps.

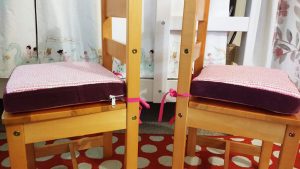
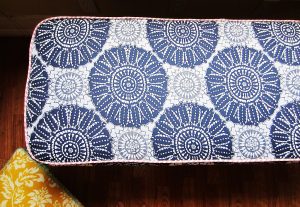
I used this fabric to make custom piping for a bench seat for the girls’ godmother. I like that they’ll have a small piece of the project I made for her in their own room. See the pink trim on the cushion below? That’s the same fabric.

See the pink trim on this cushion? That’s the same fabric.

See the pink trim on this cushion? That’s the same fabric.

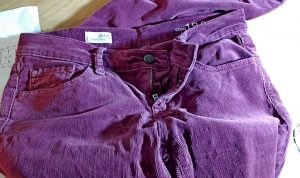
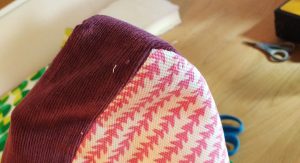
For the side panels I decided to use corduroy from an old pair of pants I’d been saving for just this kind of project. They’d developed holes along the belt loops so I had held onto them just for the pretty fabric.

For the side panels I decided to use corduroy from an old pair of pants I’d been saving for just this kind of project.

For the side panels I decided to use corduroy from an old pair of pants I’d been saving for just this kind of project.

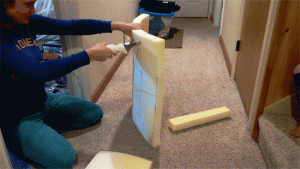
After marking the measurements with a Sharpie, I used an electric bread knife to cut the foam. It cuts through that stuff like butter. Here’s a gif as proof.

My electric bread knife cuts through the foam like butter.

My electric bread knife cuts through the foam like butter.

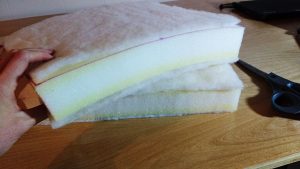
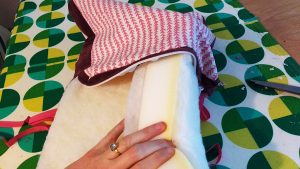
Another make-your-cushions-super-great secret is to use batting!! Wrapping them in batting or putting a layer on the top and bottom will improve how the puff up in your cushion covers. I used an adhesive spray to affix the batting to the top and bottom of each one.

I used an adhesive spray to affix the batting to the top and bottom of each one.

I used an adhesive spray to affix the batting to the top and bottom of each one.

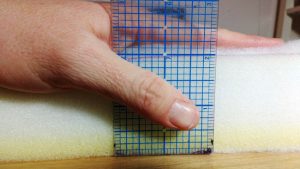
Don’t measure the height of your sides until you’ve added batting. While the foam is 2”, adding the batting made the total measurement just under 2 ¼” (I should know what that measurement is, but I don’t. I just mark to the line under that ¼”).

While the foam is 2”, adding the batting made the total measurement just under 2 ¼”.

While the foam is 2”, adding the batting made the total measurement just under 2 ¼”.

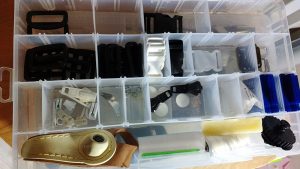
Grab your zippers and zipper pulls, or, if you aren’t like me with spares on hand, plan ahead and order them before you begin.

Grab your zippers and zipper pulls!

Grab your zippers and zipper pulls!

I like to sew the zipper plaques first. Use whichever technique you like. I generally use the first method shown in this video by Sailrite.

I like to sew the zipper plaques first.

I like to sew the zipper plaques first.

If you need to attach extra fabric to the side panels, consider adding it to the ends in small amounts so the joins don’t show on the front of the cushion.

If you need to attach extra fabric to the side panels, consider adding it to the ends in small amounts.

If you need to attach extra fabric to the side panels, consider adding it to the ends in small amounts.

Attach the zipper plaque to the side fabric and then sew onto the bottom fabric piece.

Before you begin sewing the top piece on, make sure to mark your corners accurately. Fold them to each seam to make sure they match (the yellow mark in the photo below is my matching point.)

Fold the corners to each seam to make sure they match (the yellow mark in the photo below is my matching point).

Fold the corners to each seam to make sure they match (the yellow mark in the photo below is my matching point).

Next, make sure to slide on the zipper pulls BEFORE you sew the top piece onto the final assembly or you’ll be sad.

Next, make sure to slide on the zipper pulls BEFORE you sew the top piece onto the final assembly or you’ll be sad.

Next, make sure to slide on the zipper pulls BEFORE you sew the top piece onto the final assembly or you’ll be sad.

And finally, do not forget to sew your tie backs in between the seams as you go.

Do not forget to sew your tie backs in between the seams as you go.

Do not forget to sew your tie backs in between the seams as you go.

Whoohoo, you’re done! But, before you start celebrating, go over every seam to make sure they are secure.

Whoohoo, you’re done! Now, go over every seam to make sure they are secure.

Whoohoo, you’re done! Now, go over every seam to make sure they are secure.

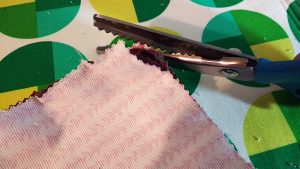
Then take your scissors and round the corners so they turn prettier. I used pinking shears on the fabrics in this project. Check out my post from January to learn about their benefits, along with other important cutting tools for your sewing room.

Take your scissors and round the corners so they turn prettier.

Take your scissors and round the corners so they turn prettier.

When you turn the covers right-sides out, use your fingers to pop out each corner.

When you turn the covers right-sides out, use your fingers to pop out each corner.

When you turn the covers right-sides out, use your fingers to pop out each corner.

If you’ve done this right, your finished cover is going to look smaller than your foam; that’s because it is! Now is the time to put the cover on the cushion and here is where you’ll see how foam compresses to fit your new cover.

Now is the time to put the cover on the cushion & here is where you’ll see how foam compresses to fit your new cover.

Now is the time to put the cover on the cushion & here is where you’ll see how foam compresses to fit your new cover.

I’m going to use caps lock here to get across how important this next step is: DO NOT TUG OR PULL ON YOUR FABRIC TO GET IT ONTO YOUR CUSHION. I promise you, if you do that, your seams will pop. Instead, fold the cushion to slide it into the cover, and then slowly work the foam into the fabric, NOT the other way around. Just keep thinking ‘move the foam, not the fabric.’ Don’t be afraid to really get your hands deep into the cover and use them to maneuver the foam in place. Adjust, adjust, and adjust, until the cushion sits perfectly in the cover, with the lines of the foam matching the lines of the cover.

DO NOT TUG OR PULL ON YOUR FABRIC TO GET IT ONTO YOUR CUSHION!!!

DO NOT TUG OR PULL ON YOUR FABRIC TO GET IT ONTO YOUR CUSHION!!!

Ta-da!!!

Ta-da!

Ta-da!

This project turned out just darling. The corduroy almost looks like velvet and I love the effeminate touch it brings to the room.

The corduroy almost looks like velvet and I love the effeminate touch it brings to the room.

The corduroy almost looks like velvet and I love the effeminate touch it brings to the room.

These cushions will inevitably get marks on them. That’s okay, they have zippers so they can be washed, AND, they are reversible. I can just flip them over if I need to.

I can just flip them over if I need to.

I can just flip them over if I need to.

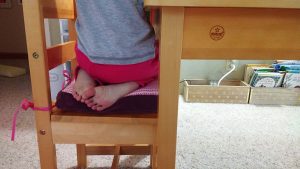
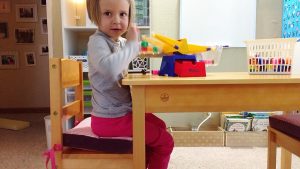
My daughters loved these and immediately hopped on and got cozy.

My daughters loved these and immediately hopped on and got cozy.

My daughters loved these and immediately hopped on and got cozy.

What DIY projects have you made for your home lately? Let us know in comments!

What DIY projects have you made for your home lately? Let us know in comments!

What DIY projects have you made for your home lately? Let us know in comments!

———————————————————————————–
Charlotte Kaufman is a writer and sewist in Mammoth Lakes, California. She specializes in marine and home interiors and continues to fall more and more in love with quilting. You can follow her at charlottekaufman.com.
How to See in the Dark

How to See in the Dark

During the course of my career, I’ve had the good fortune to work on quite a few large film productions with some highly recognizable actors and actresses. Film-making is exciting and tedious all at once, both exhilarating and debilitating. It’s not a life choice to venture into lightly – at least not if you require a steady, dependable job and paycheck.

You’ll never work again…

In movie making, and even more so in television, nothing is ever a sure thing. Shows get cancelled or pushed (postponed), people get let go for various, and sometimes odd, political (company) and personal reasons. I, personally, never believe a gig is going to happen until I’m actually there on the first day, filling out the inevitable novel of start paperwork you must complete at the commencement of every single job.

I’ve worked like this for twenty-five years now and I can say only two things for sure. One, explaining to people not in the business, be it your family, friends, or the bank you want a mortgage from, what you do and how you are hired, is never an easy thing. And two, that weird space you enter when you’re between jobs and the phone isn’t ringing and the little voice inside your head whispers you’ll never work again, never gets easier, not really. It doesn’t matter that history has always proven that you will indeed work again; you simply believe, irrationally, that this time is different.

At least that’s how it usually is for me. Yet, at the same time, I can’t imagine doing anything else. I can’t fathom going to the same office every day for thirty years or more and doing the same thing over and over. It’s just not how I’m made. So I take the uncertainty and the freelance roller coaster ride in exchange for getting to do something that, most days, I love.

If you’re thinking of a freelance career in film, television and the theatre, you need to be really honest about whether or not you’re able to live with a heightened amount of insecurity.

I fought, bit, screamed, clawed and scratched my way in. There was no way I was giving up.

Here are a few of the things that I’ve found invaluable and helpful in surviving the freelance life.

1. Tenacity

Be determined. Wholly and truly give it your all. Remain persistent. Things don’t necessarily come easily. I remember a conversation I had long ago with a friend and colleague. We were talking about ‘breaking in’ to the movie business and how we landed our first job on a major film.
“I fought, bit, screamed, clawed and scratched my way in,” my friend said, “There was no way I was giving up.”

2. Resilience
It’s easy to believe in yourself and your talents when other people do. The true feat, though, is to believe in yourself and your abilities when no one else seems to. There will be failures and missteps and things that you wished had turned out differently. That’s all part of the whole thing.

There will, of course, always be that odd, seemingly infinitely lucky individual, who coasts, completely upright, into a successful freelance career with out skinning even one knee. But that’s the exception.

Most of us arrive a bit battered and disheveled with grass stains on our knees and twigs in our hair.

3. Vision

As the extremely successful celebrity stylist (and all around nice guy), Derek Roche has said, Build your own dreams or someone will hire you to build theirs.

 4. Learn how to see in the dark

When the darkness comes (and it will) you have to be able to navigate your way out and through it…

Some of my first theatre jobs were as a backstage dresser during live performances. This involved laundry and maintaining the costumes, as well as, helping the actors get dressed if needed (period things like corsets and garments with multiple back closures) and doing quick changes backstage in the dark.

Many backstage dressers use small bite lights to help them see while performing fast costume changes. I never really did. If you spend enough time in the wings in the dark, you eventually are able to see. I have no idea if this is a scientific fact; I only know that it was true for me. I have no problem finding zipper ends, or a slew of hooks or snaps in the dark.

Darkness, of course, can come in different forms – it can be literal like working backstage or it can be figurative like not being certain what your next move should be or being unable to see the path in front of you. When the darkness comes (and it will) you have to be able to navigate your way out and through it, you have to reach for that zipper and be able to insert one end into the other by feel.

Seeing in the dark is a tricky thing to master. It involves taking all your tenacity, resilience and vision at once and stepping forward, all the while trusting that the ground is indeed beneath your feet – just as it should be.