Getting Through a Sewing Lull

Getting Through a Sewing Lull

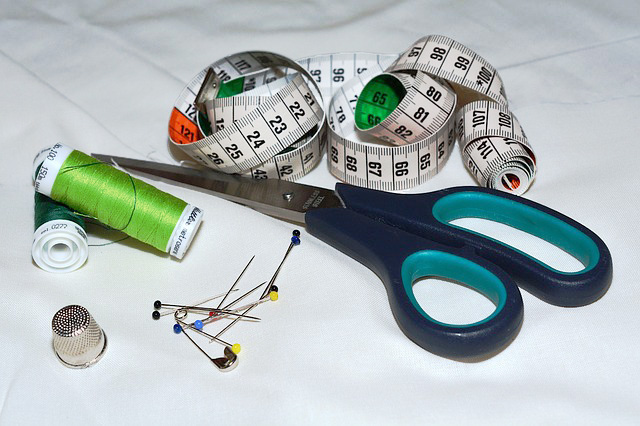
Tell me if this sounds familiar. You’re a little bored. You’d love to work on a sewing project, but you’re also in between projects. You don’t have any events coming up and you don’t have the urge to create something new for your wardrobe, or anyone else’s. I call this a sewing lull. In my freelance writing and book writing careers, I sometimes experience the same thing. Over the years, I’ve found some techniques to get through those lull periods without going stir crazy from boredom.

Go Back to Your Joy

Go Back to Your Joy

Why did you start sewing in the first place? Was it to make something specific or was it simply because it was a skill you wanted to learn? Think about what gives you the most joy when you sew. For me, it’s one of two things: either wearing something I’ve made and getting complimented on it or giving something I made to someone and seeing their joy. Tap into what you love about sewing. Then…

Expand Your Repertoire

If you’re like me, you usually have a few favorite things to make. Use your sewing lull to expand your repertoire. If you usually make clothes, try making a stuff toy or blanket. Maybe go really big and learn a completely different sewing skill, like quilting or embroidery. As long as it taps into the reason(s) you started sewing, love sewing, in the first place, you’ll have a winner.
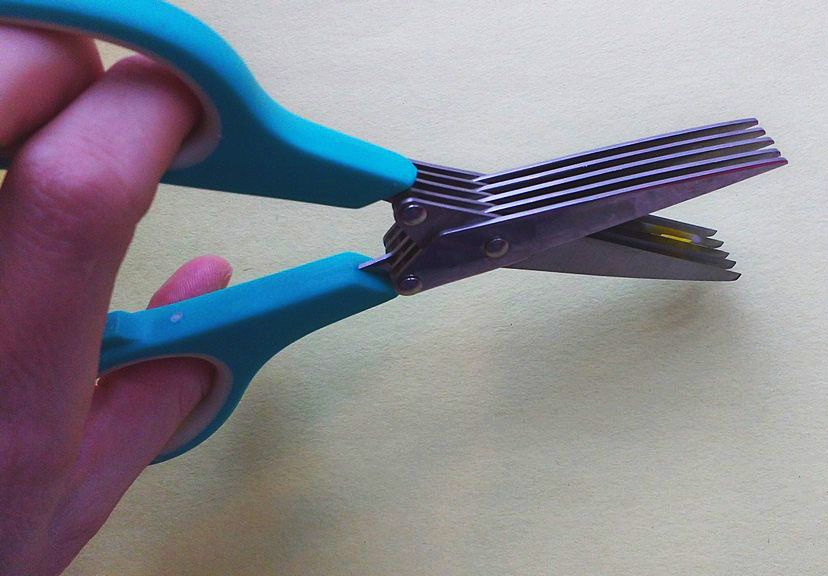
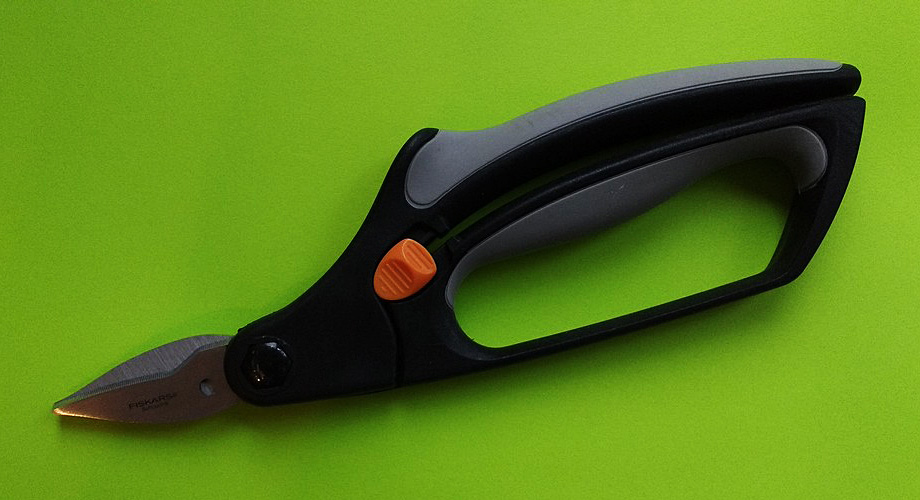
Run with Scissors

Okay, don’t really run with scissors. It’s dangerous.

Okay, don’t really run with scissors. It’s dangerous.

Okay, don’t really do this. It’s dangerous. What I mean is step outside your comfort zone, disregard what usually holds you back and leap into a new sewing skill, project or technique without taking time to talk yourself out of it. Maybe there’s something you’ve been wanting to try for years, but your pragmatic side has been holding you back. This sewing lull is the perfect time to throw caution to the wind and give it a shot.

I find these three things get me through any lull, sewing or writing, and I learn some new things along the way. At the same time, it also helps me reconnect with why I love what I do – we all need that reminder sometimes, right.

Sewing with Carpal Tunnel Syndrome

Carpal Tunnel Syndrome (CTS) is a repetitive motion injury in the wrist.

Carpal Tunnel Syndrome (CTS) is a repetitive motion injury in the wrist.

Carpal Tunnel Syndrome (CTS) is a repetitive motion injury in the wrist. Typing, hammering, sewing and other actions can be the cause. Those some actions can cause an existing injury in to flare up. The numbing, tingling, pain and stiffness CTS causes can make it all but impossible to sew. As someone who writes for a living, CTS is pretty much a given. I don’t want to give up my livelihood or my hobbies over it. So, I’ve learned to modify. Sewing with CTS was a challenge at first, but if I can do it, so can you!

Wear a Brace

My CTS started back in highschool when I worked in an ice cream shop. Back then, we called it scooper’s wrist. I bought a cheap brace from the drug store up the street from the ice cream parlor and managed to keep going. The next time it flared up was college – as an English major I did A LOT of typing. A sturdier, more expensive brace helped with that. The things to consider are how immobile the brace keeps your wrist and comfort. Don’t be afraid to try on several at the store to check for fit and comfort.

Use the Other Hand

I’m a bit naturally ambidextrous, so this wasn’t too hard for me, but if you’re not, it could be a little harder. Gripping tiny pins is much too painful for me to do with my right hand. The CTS makes it nearly impossible. Instead, I taught myself to pin with my left hand. This wasn’t easy since it also meant holding the fabric differently. Be patient with yourself and with the process. It will come with time and practice.

Get Lefty Scissors

Just like pinning with my right hand is nearly impossible, cutting can be equally as challenging. If you’ve ever tried to use your regular scissors in your left hand, you know it’s pretty difficult. The blades are one directional. Instead, invest in a pair of lefty scissors. You’ll find that cutting with your left hand is pretty simple after that. You may need to make other modifications to the layout of your cutting surface, etc. to accommodate using the opposite hand.

Don’t let carpal tunnel syndrome take away your sewing time. Instead, try out these modifications and keep doing your favorite hobby. And don’t forget to talk to your doctor – they may have treatment options that can help long-term.

The Traveling Tailor

The Traveling Tailor

Sewing machines and supplies aren’t exactly the most portable things. Sometimes, when I’m not working fulltime on a show, I’ll get a one or two day job that requires me to schlep a machine and supplies to a work space. These are my least favorite kind of jobs – for no other reason than I have to transport my machine and a small kit of sewing supplies somewhere.

I live in New York City. I haven’t owned a car in over ten years.

What’s the big deal, you may ask, just throw it all in your car and go. Well, that’s the thing: I live in New York City. I haven’t owned a car in over ten years. The last time I drove was about two years ago. And I’m not a huge fan of Uber or even good old-fashioned yellow cabs. Cars are just not the most efficient way to get around the city. So, I’m usually dragging a sewing machine up and down the subway stairs to get to where I need to go.

On the go

I know I’ve recommended these machines before, but Brother makes some incredibly good and lightweight machines. I have two SC9500s. They are so lightweight that I carry them in a tote bag on my shoulder. I then use a backpack to carry my supplies: scissors, threads, rulers, chalk, a small collection of notions.

Other Brother machines that are very light weight are the CS5055 and the ES2000.

I also bike a lot, which is always the most efficient way to get around the city, and have been known to strap a machine (in a box) to the rear rack on my bicycle.

When going to a job that is only one or two days, sometimes it’s hard to figure out what to bring, especially if you’re trying to not lug your entire shop down the length of Manhattan and across the bridge to Brooklyn.

Here’s a list of what I usually bring to a short one-day job:

  • 1 pair of tailor’s points or small scissors
  • 1 pair of medium sized shears
  • 1 pair of pinking shears (because I’m certainly not bringing a serger along to finish seams.)
  • 1 gallon sized Ziploc of thread. Must have colors include black, grey, white, tan, a greeny-brown, nude, and a yellow-orange for topstitching on jeans.
  • 12” see through 2” wide ruler
  • 1 soft tape measure
  • Tailor’s chalk, red marking pencil, pencil, black disappearing ink pen
  • Seam ripper
  • Metal hem gauge ruler
  • Small container of straight pins
  • Extra bobbins for machine
  • Small collection of hand and machine needles (I always bring some leather needles and double needles, just in case.)
  • 1 gallon sized Ziploc of bias tape (black and white), elastics, twill tape, and hem tape.
  • Small containers of snaps and hook & eyes.
  • Muslin pressing cloth
  • Small collection of nude spandex and netting scraps and interfacings

Lighting is key

Sometimes it’s nice to bring along a small light of some kind. I often find myself sewing in inadequately lighted spaces. I tend not to bring a lamp because, well, the subway. I always make sure the light in the machine is working. And the flashlight on an iphone can be extremely helpful in especially dark circumstances.

Gear up

I’m not very high tech with my carrying cases but there are lots of really lovely ones out there if you’re not into backpacks and tote bags.

https://www.sewingmachinesplus.com/sewing-accessories-cases.php

The key is to keep everything super organized. And don’t worry about not having all the thread. Unless you’re topstitching, most things can be sewn with black, white, or tan. I know some tailors that only use those colors of thread. It really is ok if your thread doesn’t match exactly. And sometimes you just have to use what you have, especially if you are a traveling tailor.

Must Have Sewing Notions and Supplies

Must Have Sewing Notions and Supplies

Last week, I told you about my dream sewing room furniture. This week, I want to share with you my must have sewing supplies. And no, I don’t actually own all of them since I don’t yet have that dream sewing room. Call this my dream sewing supplies list, I guess.

Must Have Sewing Notions and Supplies

Dress Form

I adore making cute summer sundresses. Right now, I measure myself, cut along what I hope are the right lines in the pattern and hem it by hanging the dress on closet hanger. Not ideal, but so far at least, they’ve all come out fine. I’d love a dress form though so I could check the fit and make minor tweaks and modifications as I go. I’m kind of between dress form sizes right now, so I’d have to make a call on which size to get – or if money was really no object, just get both!

Amazing Sewing Scissors

Alright, so I do have a pair of fabric scissors. I couldn’t consider myself a sewer if I didn’t. But I don’t love them. The handles are hard plastic and someone (not naming any names) used them to cut paper at some point, which kind of screwed up the cutting surface. I’d really love a pair of fabric scissors with a softer handle, especially since breaking my right hand last year. Even better, the ones I linked to have a purple handle! That’s my favorite color. Definitely on my sewing supplies wish list.

How about you?

Long Ruler

I don’t necessarily need to cut long, straight lines making sundresses, but I do need to measure long stretches of fabric to line up pattern pieces. Right now, I use a soft measuring tape. I pin it down on one side and pull it taut to measure. It’s not ideal, but it gets the job done. A yard stick or long ruler would go a long way towards making measuring easier.

What’s on your sewing supplies wish list? Sewing Machines Plus probably has it! Check out the website and let yourself dream.

9 Cutting Tools for your Sewing Room

9 Cutting Tools for your Sewing Room

Do you know the difference between scissors and shears? I didn’t so I looked it up and now I can edify us all. Scissors usually have equal-sized finger holes and are under 6″ in length. Shears have one hole that is bigger than the other and their blade lengths are normally longer than 6″. The terms scissors and shears are often used interchangeably and for the purposes of this article, I flip back and forth between them.

Fabric scissors

These are the scissors you hide. Or keep locked away. Or you write in Sharpie on them. DO NOT USE. CLOTH ONLY. MOVE AWAY FROM MY SCISSORS. If you haven’t convinced your family to stay away from your fabric scissors, then move to the second pair below.

These are the scissors you hide.

These are the scissors you hide.

All purpose scissors

THESE are the pair you hand people who want to use your fabric scissors. Keep them sharp so no one is ever tempted to grab the pair you keep for working on your stash.

THESE are the pair you hand people who want to use your fabric scissors.

THESE are the pair you hand people who want to use your fabric scissors.

Heavy duty shears

When your regular fabric scissors won’t cut it. I’ve used these to cut canvas, Sunbrella, and leather. Don’t let your friends or family use these for everyday use. They’re heavy duty. Emphasize that by saying it in a low voice, “Sorry, these are heavy duty.”

Don't let your friends or family use these for everyday use.

Don’t let your friends or family use these for everyday use.

Snipping scissors

Snipping scissors, or scissors with very short, sharp blades are genius for cutting threads as you sew.

Snipping scissors, or scissors with very short, sharp blades are genius for cutting threads as you sew.

Snipping scissors, or scissors with very short, sharp blades are genius for cutting threads as you sew.

Pinking shears

Pinking shears are what you need if you are working with fabric that ravels or if you plan to leave a cut edge exposed. Pinking shears do what zig zag stitching or serging does, they stop fabric from unraveling. They are genius. You should get a pair.

You should get a pair.

You should get a pair.

Herb cutters, fringe scissors

Yes, bring the kitchen into the sewing workshop. These scissors are frequently used to quickly chop up herbs, but in the sewing room they create fringe.

Bring the kitchen into the sewing workshop.

Bring the kitchen into the sewing workshop.

Perhaps you want to make some fringe-cut garland? These would be your tool. They work best when you put the fabric back towards the center of the scissors and stop cutting before you reach the tips. If you have a LOT of tiny snips like this to make, however, you’ll want to see the next pair of scissors.

If you have a LOT of tiny snips like this to make you'll want to see the next pair of scissors.

If you have a LOT of tiny snips like this to make you’ll want to see the next pair of scissors.

Rag quilt scissors

For when you aren’t messing around. Rag quilt scissors have short, sharp blades that let you snip through chunks of fabric to create the famous look of rag quilts.

For when you aren't messing around.

For when you aren’t messing around.

Pro Tip: If you get a pair, make sure to get them spring loaded. Your hands will thank you!

My oldest made this rag quilt with and I snipped it right up with rag quilt scissors. Just put on a TV show you can zone out to and start clipping.

My oldest made this rag quilt with and I snipped it right up with rag quilt scissors.

My oldest made this rag quilt with and I snipped it right up with rag quilt scissors.

Rotary cutter

Rotary cutters are becoming more and more popular. Once you learn how to cut fabric with them, your fabric scissors may start to see a lot less use.

Goodbye fabric scissors!

Goodbye fabric scissors!

Ye olde kitchen drawer scissors

Also known as ‘household scissors’ or ‘the scissors you can do just about anything with and mom won’t get mad.’ They are the unsung hero of your scissors quiver because they keep the rest of your tools safe.

The scissors you can do just about anything with and mom won't get mad.

The scissors you can do just about anything with and mom won’t get mad.

What types of cutting tools do you use in your sewing room? Let us know in comments!

—————————–
Charlotte Kaufman is a writer and sewist in Mammoth Lakes, California. She specializes in marine and home interiors and continues to fall more and more in love with quilting. You can follow her at charlottekaufman.com.
Scissors, scissors, scissors

Scissors, scissors, scissors

Partial scissor collection.I have a bit of a scissor problem, as in, I have a lot of them. I’m not always good about getting them sharpened, or sharpening them myself and often will just order a new pair – which isn’t necessarily very economical but, often, much more fun. This photo is of the scissors that are currently in my shop at Blindspot. It doesn’t include the scissors I have at home or the scissors that are in my sewing kit on the wardrobe truck or the scissors I probably forgot about that are at the bottom of a bag somewhere in a closet.

In New York City, you can have someone come to your shop and sharpen all your scissors with an electric grinder. There’s also a scissor and knife sharpening truck that still trolls the streets of Brooklyn (like the Mr. Softee ice cream truck). I never have any scissors on me when I see the truck though I always want to flag it down. You can, of course, sharpen your own scissors using a sharpening stone but I never seem to get around to doing that.

Most tailors have a favorite pair or a preferred model that they own more than one of.

My absolute best loved are Gingher’s original 5” tailor points, the ones that are actually pointy on the end. For some reason, when Fiskar acquired the Gingher brand, they altered the 5” tailor points. Now they have more rounded blades and a blunter end and are often called ‘craft’ scissors. The pair on the left in the following photo is the oldest pair. See how much narrower and pointier the blades are?

Evolution of Gingher’s 5” tailor points.

Evolution of Gingher’s 5” tailor points.

I do quite a bit of cutting. I never really took to the mat and rotary blade camp though I can understand how it can be an efficient and accurate way to cut. Probably because I started my whole tailoring/pattern making career before cutting mats and rotary blades were prevalent. Or maybe I’m just old. At any rate, my favorite scissors to cut with are Gingher 11” knife edge shears.

Cutting shears.

Cutting shears.

Other scissors that I use on a daily basis are:

Gingher 8” straight blade shears

– For trimming seam allowances, though you can cut with them. I just like a longer blade.

Gingher 7 ½” pinking shears

– I usually pink the hems in men’s suit pants as opposed to serging, mainly because a serged hem will leave a ridge if someone (drycleaner or otherwise) gets over zealous with the hem pressing.

Gingher 6” applique scissors

– I use these when I need to trim something very close the edge, or when I’m cutting around an applique (obvi.)

Gingher 7” straight blade scissors

– I use a pair of these as my paper scissors when patterning.

One of the sacred sewing laws is to never use someone’s fabric scissors to cut anything but fabric. Ever.

One of the sacred sewing laws is to never use someone’s fabric scissors to cut anything but fabric. Ever.

Excuse me… What are you cutting?!

Speaking of paper scissors. One of the sacred sewing laws is to never use someone’s fabric scissors to cut anything but fabric. Ever. The standard response from someone who sews to the question, “Can I borrow your scissors?” is “What are you cutting?”

The reason why is fairly simple: try cutting fabric with a pair of craft or paper scissors and you’ll find your edge looks as if it were chewed off by some sort of extremely hungry wild animal.

Wiss pinking shears.

Wiss pinking shears.

A few years ago, I acquired some old scissors for a mens’ tailor in the city who was retiring. I love this pair of old Wiss pinking shears. Despite the knicks and scratches on the exterior, they still cut very well.

What’s your favorite pair?

Sew Calm

Like many hobbies, sewing can help you relax and put aside the stress of daily life. Depending on the hobby, there can be many reasons for this. For me, sewing is relaxing because it requires intense concentration, which means there’s no room left in my brain for worrying about life stressors. And then there’s the rhythms – they call to something deeper much the way drum beats do in Native American rituals.

Snip Snip Snip

Next time you’re sitting down to cut some fabric really listen.

Next time you’re sitting down to cut some fabric really listen.

Have you ever noticed the sound scissors make when cutting fabric? There’s something almost melodic about it. Try it out next time you’re sitting down to cut some fabric really listen. If you can safely close your eyes for a moment to tune into the sound, do so. The crunch, snip, clip is mesmerizing. I allow it to become like a mantra – if there’s something I’m working through, the rhythm of the scissors can help me hone my focus and energy. Try it – you’ll see.

Whirr Whirr Whirr

I don’t have a lot of experience with modern machines; I’m still using the old Singer my mom taught me on, so I’m not sure if newer machines have the same wonderful whirring sound. When doing a long straight row of stitches and keeping steady pressure on the pedal, that whirr is as rhythmic as train speeding down the tracks. The whirring helps organize my thoughts and creates a space where my only focus is the machine, the fabric, and the whirr. As my problems and stressors take a back seat, they also subconsciously begin to resolve.

As with the snip and whirr sounds, my anxious thoughts fall away and my focus hones in on the task at hand.

Motions

Sewing also has a lot of repetitive, and thus soothing, motions. The body and brain disconnect during these moments and the subconscious takes over. Just as our brains are able to work out problems as we sleep, so too can they work out problems while our conscious brain is disconnected during waking hours.

Pin and Unpin

The motion and concentration needed to properly pin a sewing project are often all consuming. I find this quite soothing. As with the snip and whirr sounds, my anxious thoughts fall away and my focus hones in on the task at hand. When I’m done, the thoughts and anxieties plaguing me don’t seem so all-encompassing.

Joy of Completion

I’m sure you know the feeling. That moment of elation when the hours of snipping, pinning, and sewing come to fruition with the final product. For me, the only thing that tops it is when I’m wearing something I made and someone compliments it, giving me the opportunity to say that I made it. Oh man! Is there anything else like that? I don’t think so.

How about you? What part of sewing speaks to your inner being and helps you relax and release the stressors of daily life?

Sharpen Your Scissors and Rotary Cutters

Sharpen Your Scissors and Rotary Cutters

I keep my blades wicked sharp with my favorite technique: cutting aluminum foil.

I keep my blades wicked sharp with my favorite technique: cutting aluminum foil.

There is a man who comes to my local grocery store once a month and offers his services to sharpen your scissors and kitchen knives. I have never managed to make it to the store when he is there. When I kept missing his dates, I looked up ways to sharpen scissors myself. There are some surprising methods that are quite easy to do at home. Maybe one day I’ll get a professional to get these babies sharpened but until I do, I keep my blades wicked sharp with my favorite technique: cutting aluminum foil.

All you need is a piece of aluminum (tin) foil.

All you need is a piece of aluminum (tin) foil.

Cutting Aluminum Foil

Cut thin strips with the scissors, making sure to cut from the tip of the blade all the way to the pivot points.

Cut thin strips with the scissors.

All you need is a piece of aluminum (tin) foil. Fold the foil up into 8 layers for heavy duty tin foil and 16 layers if you have regular weight.

Next, cut thin strips with the scissors, making sure to cut from the tip of the blade all the way to the pivot points. Use nice, open, broad cuts. This method also works for rotary cutters. Just run the blades over folded tin foil.

When you’ve finished cutting the tin foil, open your scissors all the way and then swiftly snap them shut.

When you’ve finished, open your scissors all the way and then swiftly snap them shut.

When you’ve finished cutting the tin foil, open your scissors all the way and then swiftly snap them shut. This will help to smooth out any tiny burs. I’ve been using the tin foil method for years now and my scissors are razor sharp after I do this.Keep your precious fabric scissors far away from children and partners who don’t understand how serious you are about your scissors.

Pro Tip: Always keep one pair of scissors reserved for paper only (so your fabric scissors don’t go dull too quickly.) Second pro tip: Keep your precious fabric scissors far away from children and partners who don’t understand how serious you are about your scissors.

Roll the foil into a ball and you now have a perfect scrubber for pots and pans.

Roll the foil into a ball and you now have a perfect scrubber for pots and pans.

Waste Not, Want Not: What to do with the tin foil you have just chopped into strips? Roll it up into a ball and you now have a perfect scrubber for pots and pans (not your non-stick, of course). You can also bring these along on camping trips for scouring out cast iron or other camping dishes.

Alternate Methods

Have a different method of scissor sharpening? Let us know your techniques.

Have a different method of scissor sharpening? Let us know!

Out of tin foil but still need to sharpen your scissors? You can use the same method with sand paper (the finer the grit, the smoother the blades). Or, you can cut up steel wool, though it will be considerably messier than the tin foil or sand paper methods.

Do you have a different method of scissor sharpening? Let us know your techniques in the comments below.

Charlotte Kaufman is a writer and sewist in San Diego, California. She specializes in marine and home interiors and continues to fall more and more in love with quilting. You can follow her at charlottekaufman.com