DIY pillowcase for Sea to Summit Aeros Ultralight Pillow

Hero Sea To Summit Pillowcase

This past weekend my family went on an overnight backpacking trip near our home in the Eastern Sierra. When you are carrying all of your gear on your back you want your items to be as light as possible so I picked up this inflatable Sea To Summit Aeros Ultralight Pillow.

1

Of course I’ve never met a pillow that didn’t deserve a handmade pillowcase, so I set to work making one for this uniquely shaped fellow.

2

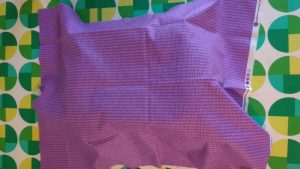
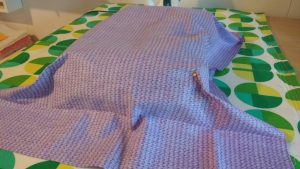
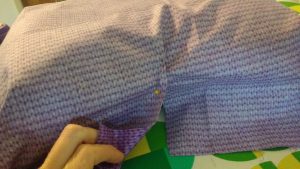
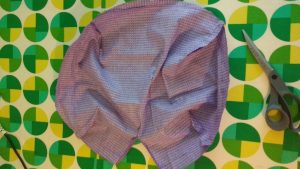
Fully inflated the pillow is approximately 16″ x 12″ x 4″ with an interior curve on the neck side and an exterior curve on the opposite side. The top and bottom edges are all rounded as well. I used matching fabric from the DIY bandana I sewed in this post and draped it over the pillow to see if it would fit.

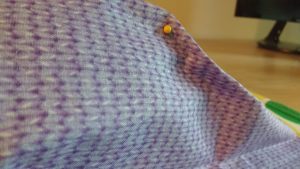
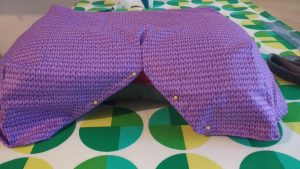
Once I knew the fabric would fit, I turned the fabric wrong sides up and used pins to mark the four curved corners. Be careful, you don’t want to puncture your brand new backpacking pillow!

3

4

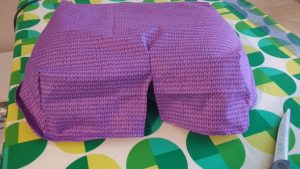
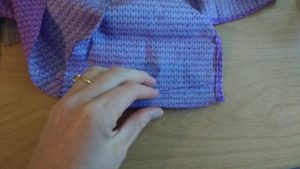
On the interior curve, I found the approximate center and cut the fabric up a ways.

5

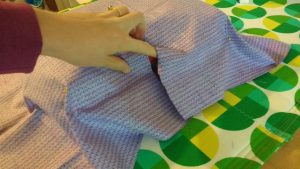
Then I used pins to tighten up the fabric around the top of the curve.

6

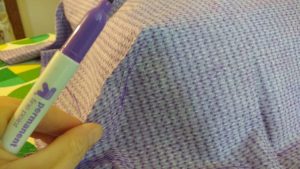
Once everything looked right, I used a marker (but you could use a pencil if a marker would show through your fabric choice) and marked the corner seams and the portion of the interior curve I had pinned.

7

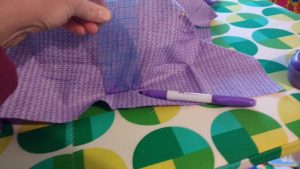
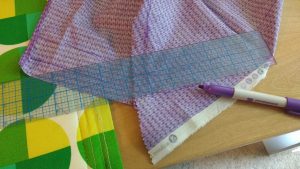
Then I used a sturdy ruler and placed it against the sides of the pillow, marking the approximate edge all the way around.

8

Carefully, I slipped the case off of the pillow, making sure not to disturb any of my pins. I only removed the pins corner by corner as I sewed following my marks.

9

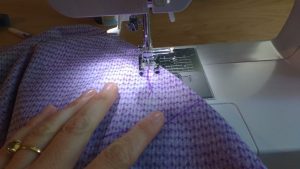
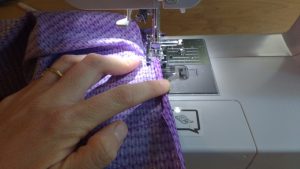
For the interior curve, I sewed the small section I had pinned to cinch the fabric around the corner, then finger pressed the raw edges of both sides of cut fabric over twice and sewed a hem.

10

Here I took a moment to turn the pillowcase right side out and placed it over the pillow, just to double check my sizing. I would be adding elastic to bring the loose fabric under the case, but this was good to see before cutting the excess fabric off of the corners.

11

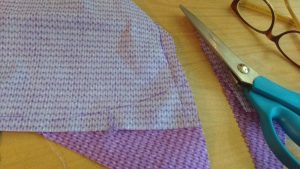
Once I knew it was correctly sized, I turned the pillow case wrong side out and trimmed off the excess fabric on the sewn corners.

12

Then I marked a 1″ hem all around the case using the line I’d created earlier as a guide.

13

At this moment I realized I didn’t have enough fabric on the side opposite where the neck would lie. I took a spare piece and sewed it onto that side, pressed the seam down, and then continued drawing my 1″ hem.

14

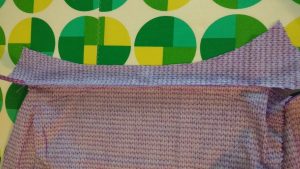
Once the 1″ hem was drawn I cut out the fabric. Now you could really see the shape of the case coming together.

15

I finger pressed the hem over ½” and then another ½” and sewed my hem as I folded and pressed.

16

Then it was time to finish the interior curve. I fit the pillow case on right side out and pinned each flap from the center so the fabric hugged each curve. I sewed the flaps.

17

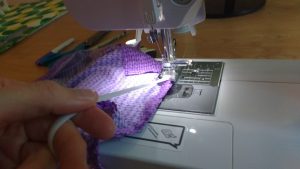
Now it was time to add elastic. I used ¼” elastic.

18

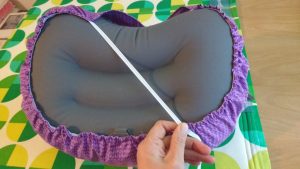
When I had fully sewn around the hem, I drew the elastic across to a point on the opposite side of the pillow and sewed the elastic in place.

19

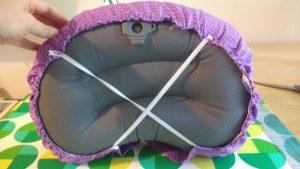
I then repeated on the opposite side with a separate piece of elastic, creating a crisscross pattern on the bottom of the pillow.

20

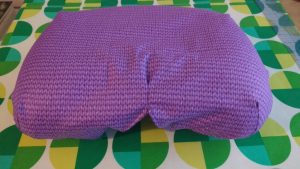
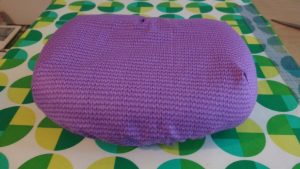
As long as you don’t sew the elastic too taught, you can absolutely slip the inflated pillow into the case. Take a few moments to work the case into the shape you’ve sewn and then flip it over to enjoy your handiwork.

21

For backpackers who weigh everything that goes in their pack, this pillowcase weighs 1.4 oz. Happy backpacking!

22

———————————————————————————–
Charlotte Kaufman is a writer and sewist in Mammoth Lakes, California. She specializes in marine and home interiors and continues to fall more and more in love with quilting. You can follow her at charlottekaufman.com.

Sewing on Trucks, Cycling with Sewing Machines

This past week, I got a call to tailor and do some fittings for my friend Matthew, who is the Costume Designer for TBS’s Search Party. I love working for Matthew. He’s sweet and fun and his design choices are quirky, a lovely mix of vintage and high end with a bit of funk blended in.

Search Party doesn’t have the budget for a full time tailor, so Matthew only calls me in for days when he’s doing a lot of fittings or he has a pile of alterations that he needs completed for the next couple weeks of filming.

Day playing

Day playing, which is what we in the film business call working for a day or two on a show when extra help is needed, can be an enjoyable experience (it can also be annoying but I try my best to avoid those types of day playing gigs). Search Party is pretty much always a positive experience, mainly because of Matthew and the people he has working for him.

So, I was happy to get the call, even though it involved going all the way to Red Hook (a neighborhood in Brooklyn sadly lacking in convenient public transportation access) and sewing on a cramped Wardrobe Truck.

The inadequate subway connection was easily solvable: I’d ride my bike just as I do most places in the city, except that I needed to bring a sewing machine and basic sewing supplies with me. Tailor day playing assignments almost always involve dragging your machine and kit through the streets, and usually not on a bicycle.

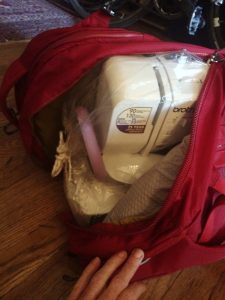
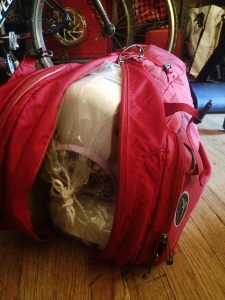
I discovered that my favorite freakishly lightweight Brother sewing machine fit perfectly into the backpack.

I discovered that my favorite freakishly lightweight Brother sewing machine fit perfectly into the backpack.

But, a few months ago, I received an unexpected gift from REI. I’d ordered a tent for some planned bike packing adventures but, instead, received a backpack (definitely not a tent). REI costumer service was very helpful when I called, said they’d send the tent straight away and would email me a pre-paid return label to ship the backpack back (back…). About twenty minutes after I hung up, they called back to say never mind, keep the backpack for free.

I don’t know what made me try it, but a couple weeks after that, I discovered that my favorite freakishly lightweight Brother sewing machine fit perfectly into the backpack. Brilliant! Here are some photos. If you’re interested in which backpack it is, it’s the Osprey Comet.

If you’re interested in which backpack it is, it’s the Osprey Comet.

If you’re interested in which backpack it is, it’s the Osprey Comet.

I packed a few other things in the backpack with the machine (there was still more space!) – shoulder pads, interfacing, and lining scraps, a bag of thread, and some other not very heavy notions. The rest of my supplies, the scissors and more threads and gallon bag of elastics and tapes, I packed into my Revelate Seat Bag that I purchased from my favorite local bike shop. And I was good to go, albeit not very quickly (cause all that gear was a bit heavy)…

The lion, the witch and the Wardrobe truck

Sewing in small spaces on a Wardrobe truck where a whole crew of other people are also trying to do their jobs presents its own set of challenges. Working on the Search Party truck even more so as they use the dreaded split Wardrobe/Hair/Makeup style of 18-wheeler film truck. Most productions have separate trucks for Wardrobe and Hair/Makeup and twice as much space but smaller productions who are trying to save money go with the split trucks. What this means is that there is even less space than normal.

I set up my machine on the front corner, the sink and washer/dryer on my right and the busy Wardrobe Supervisor and her computer on my left. A few feet away, one of the customers steamed and ironed the clothes for the next day and, in the back of the truck Matthew and his assistant did fittings with various cast members. Occasionally, the set costumer was also on the truck gathering things for the next scene, as well as the shopper dropping off or picking up items.

High chair

I had a chair that was too high for the counter. I’d have to crouch in order to sew while sitting in it. Below the counter were drawers so there was no convenient place to put the foot pedal. I ended up standing up to sew, my leg turned out to the right to operate the pedal from a side-saddle angle. The foot kept getting stuck under the lip of the bottom drawer so that the machine would continue to sew even after I’d taken my foot off. I had about two inches of empty space to the left of my machine before the supervisor’s notebooks and computer and the cord from the iron kept falling (along with a bunch of my pins) into the sink to my right. I had to shift position slightly every time someone needed to fill or empty the washer and dryer.

But, it was still a wonderfully pleasant work-day. Because we were all in good spirits and we all worked together, happily jockeying for space, seamlessly adapting to each other’s needs, laughing when we all seemed to need to occupy the same twelve inches of space at the same time, all of us just getting our jobs done.

Things don’t always work this well on a crowded wardrobe truck. Sometimes people forget that everyone’s jobs are important and necessary to the project. Sometimes people are cranky because of lack of sleep, or stress, or just because it’s their nature. But it doesn’t have to be that way and, if you ask me, it shouldn’t. Making TV does not, after all, have anything to do with curing cancer or launching rocket ships (sometimes people forget that!).

One of the most wonderful things is a group of people working together to achieve a common goal. Its also a pretty good way of getting things done! I highly recommend it. 🙂

Skip Hop Children’s Backpack Hack

Have you seen these adorable little children’s backpacks that look like animals? They’re made by Skip Hop and retail for around $20. The only problem with them is that, like many children’s backpacks, they don’t come with a chest clip. Kids’ shoulders are tiny and their frames are narrow. This means they usually can’t keep backpack straps on when there is any weight added to their bags. For the most part I see Skip Hop backpacks slung over a parent’s shoulder, carrying the bag for their children.

Have you seen these adorable little children’s backpacks that look like animals?

Have you seen these adorable little children’s backpacks that look like animals?

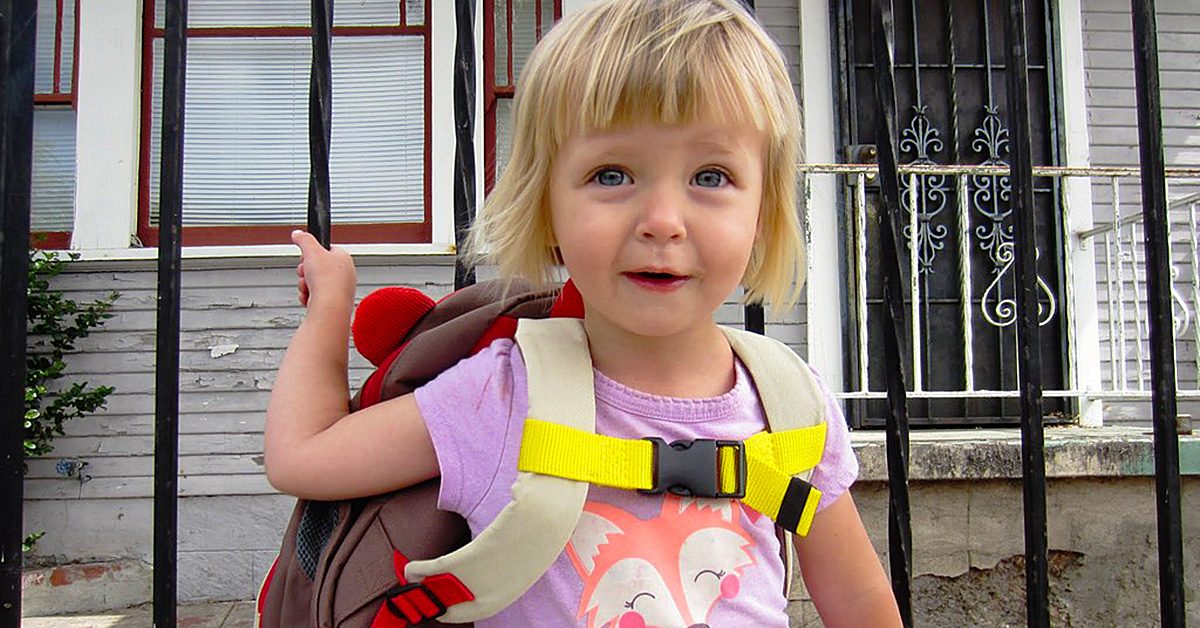
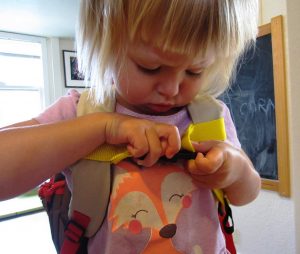
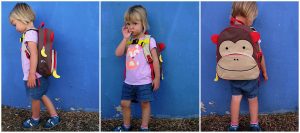
I decided to make my own chest clips for these puppies and for my friends who have the bags too. The result is a backpack that children can truly wear on their own.

A backpack that children can truly wear on their own.

A backpack that children can truly wear on their own.

To make your own, you’ll need to unthread the backpack straps from the base of the bag.

To make your own, you’ll need to unthread the backpack straps from the base of the bag.

To make your own, you’ll need to unthread the backpack straps from the base of the bag.

Once you’ve unthreaded the straps, you can sew a webbing piece for the right and the left strap that holds each end of your clasp. I used 1″ webbing and 1″ clasps. I got all of my supplies from StrapWorks.com.

I used 1" webbing & 1" clasps.

I used 1″ webbing & 1″ clasps.

I sewed a small loop of 3/8″ black elastic on the end of the webbing so I could roll up the extra webbing and tuck it neatly into the loop. These are examples of clips I made for friends.

These are examples of clips I made for friends.

These are examples of clips I made for friends.

If your child is really little, they may not be able to manage the clasp on their own.

If your child is really little, they may not be able to manage the clasp on their own.

If your child is really little, they may not be able to manage the clasp on their own.

If you give them enough time to work at it though, they’ll eventually get it. It gives them a great sense of independence and freedom.


And really, how adorable is this bag with the added chest clip?

And really, how adorable is this bag with the added chest clip?

And really, how adorable is this bag with the added chest clip?

What type of sewing hacks have you done to children’s products in your life?

What type of sewing hacks have you done to children’s products in your life?

What type of sewing hacks have you done to children’s products in your life?

———————————————————————————–
Charlotte Kaufman is a writer and sewist in Mammoth Lakes, California. She specializes in marine and home interiors and continues to fall more and more in love with quilting. You can follow her at charlottekaufman.com.
DIY Home Sewing Projects

DIY Home Sewing Projects

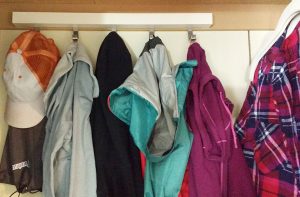
Is it just me, or do an awful lot of jackets and sweaters come without a loop or tag to hang them with? I get it that many have hoods, and you could hang them from the hood, or even the back neck of the jacket, but there is nothing like a solid loop to quickly hang your jacket up.

Another problem is that many hooks are sharp or pointy and if you hang a jacket from the neckline or hood you end up with a bump in the fabric from the imprint of the hook. This is no bueno when you’ve spent good money on the jacket in the first place.

I like to add jacket loops using double fold binding I have on hand.

I like to add jacket loops using double fold binding I have on hand.

Let’s Sew!

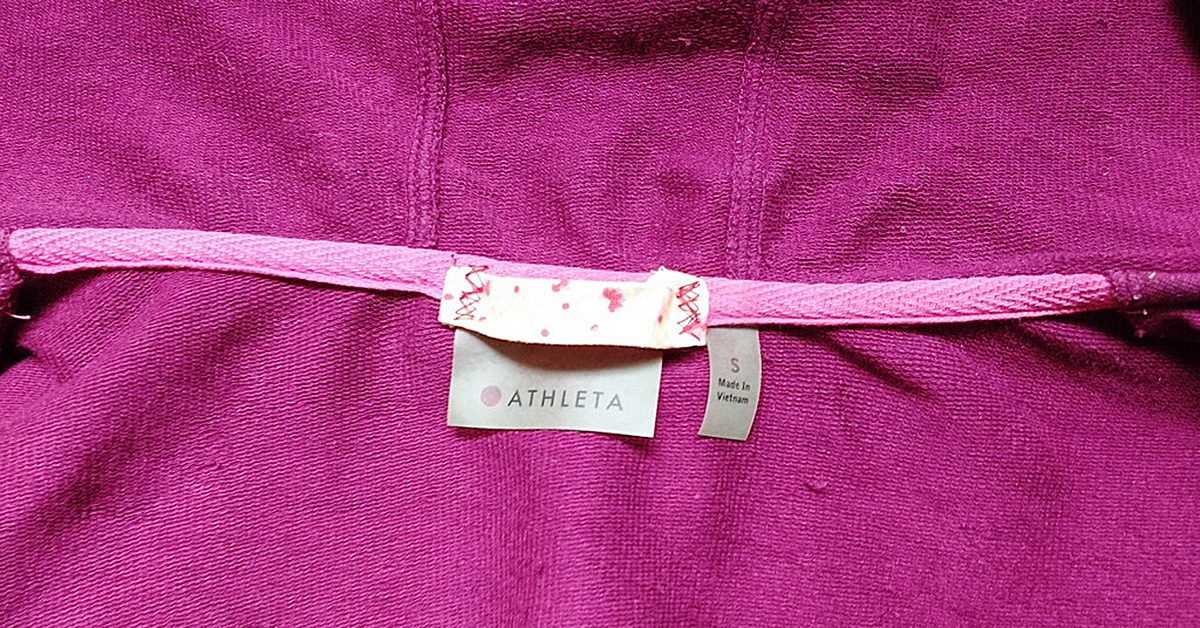
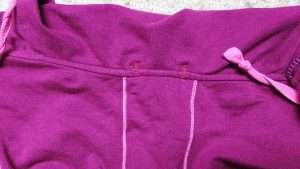
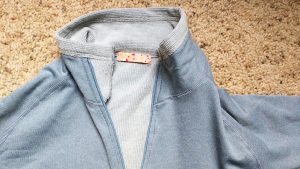
It’s times like these when you need to put your sewing skills to use. I like to add jacket loops using double fold binding I have on hand. I sew it on with a zig zag stitch and I find the stitching to be very inconspicuous on the exterior neckline (and it’s often hidden by the hood anyway.)

I find the stitching to be very inconspicuous on the exterior neckline (often hidden by the hood).

I find the stitching to be very inconspicuous on the exterior neckline (often hidden by the hood).

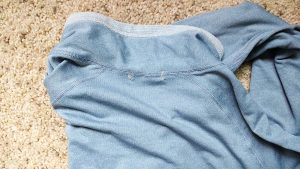
I used the same binding on this gray pullover. I love the pop of color it gives the jacket.

I used the same binding on this gray pullover.

I used the same binding on this gray pullover.

The zig zag stitching is barely noticeable from the back view. Perfect.

The zig zag stitching is barely noticeable from the back view.

The zig zag stitching is barely noticeable from the back view.

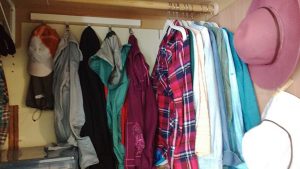
Now I can hang both jackets without the metal hooks on that hanger digging into the fabric of either jacket.

Now I can hang both jackets without the metal hooks on that hanger digging into the fabric of either jacket.

Now I can hang both jackets without the metal hooks on that hanger digging into the fabric of either jacket.

The gray hoodie is on the left and the maroon jacket is on the right. I love organization and I love that I made it happen with my sewing skills!

The gray hoodie is on the left & the maroon jacket is on the right.

The gray hoodie is on the left & the maroon jacket is on the right.

Handy dandy skills

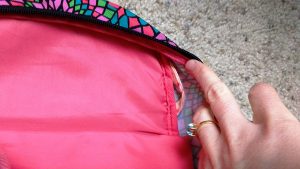
Here’s something else I fixed by knowing how to sew. My daughter’s backpack had no loop on the interior of the backpack for carrying a house key. There was a loop on the exterior, but that’s not very safety conscious, is it?

I took matters into my own hands and modded out the backpack by sewing in my own loop (again with that pretty flowered binding in the photos above). Now she can securely carry a house key tucked safely inside her backpack.

I took matters into my own hands & modded out the backpack by sewing in my own loop (again with that pretty flowered binding in the photos above).

I took matters into my own hands & modded out the backpack by sewing in my own loop (again with that pretty flowered binding in the photos above).

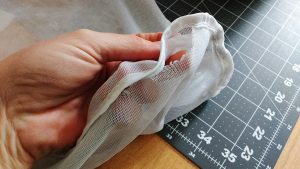
I bought two lingerie bags at Target a while ago and one has started to fray at the seam. While lingerie bags are fairly inexpensive, I knew I could save this one by flipping over the seam and sewing a zig zag stitch.

I bought two lingerie bags at Target a while ago & one has started to fray at the seam.

I bought two lingerie bags at Target a while ago & one has started to fray at the seam.

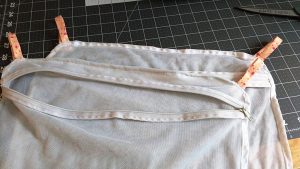
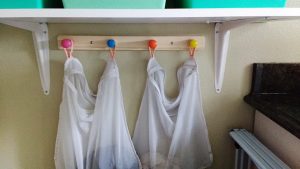
I also added hanging hooks on each side of the bags. I again used that pretty pink binding and now I have no more. At least it will live on in infamy in all of these great home DIY projects I’m showing you.

I also added hanging hooks on each side of the bags.

I also added hanging hooks on each side of the bags.

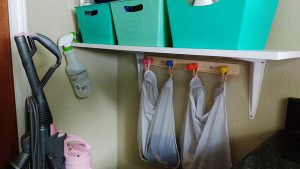
I installed these hooks by our laundry and cleaning station and hung the lingerie bags there.

I installed these hooks by our laundry & cleaning station and hung the lingerie bags there.

I installed these hooks by our laundry & cleaning station and hung the lingerie bags there.

This easy access makes it a breeze for my small kids to put things like their tights and other delicates right into the bags so I have everything ready for laundry day.

This easy access makes it a breeze for my small kids to put things like their tights and other delicates right into the bags so I have everything ready for laundry day.

This easy access makes it a breeze for my small kids to put things like their tights and other delicates right into the bags so I have everything ready for laundry day.

What kind of modifications have you made to home items with your sewing skills? Let us know in comments!

———————————————————————————–
Charlotte Kaufman is a writer and sewist in Mammoth Lakes, California. She specializes in marine and home interiors and continues to fall more and more in love with quilting. You can follow her at charlottekaufman.com.
The Traveling Tailor

The Traveling Tailor

Sewing machines and supplies aren’t exactly the most portable things. Sometimes, when I’m not working fulltime on a show, I’ll get a one or two day job that requires me to schlep a machine and supplies to a work space. These are my least favorite kind of jobs – for no other reason than I have to transport my machine and a small kit of sewing supplies somewhere.

I live in New York City. I haven’t owned a car in over ten years.

What’s the big deal, you may ask, just throw it all in your car and go. Well, that’s the thing: I live in New York City. I haven’t owned a car in over ten years. The last time I drove was about two years ago. And I’m not a huge fan of Uber or even good old-fashioned yellow cabs. Cars are just not the most efficient way to get around the city. So, I’m usually dragging a sewing machine up and down the subway stairs to get to where I need to go.

On the go

I know I’ve recommended these machines before, but Brother makes some incredibly good and lightweight machines. I have two SC9500s. They are so lightweight that I carry them in a tote bag on my shoulder. I then use a backpack to carry my supplies: scissors, threads, rulers, chalk, a small collection of notions.

Other Brother machines that are very light weight are the CS5055 and the ES2000.

I also bike a lot, which is always the most efficient way to get around the city, and have been known to strap a machine (in a box) to the rear rack on my bicycle.

When going to a job that is only one or two days, sometimes it’s hard to figure out what to bring, especially if you’re trying to not lug your entire shop down the length of Manhattan and across the bridge to Brooklyn.

Here’s a list of what I usually bring to a short one-day job:

  • 1 pair of tailor’s points or small scissors
  • 1 pair of medium sized shears
  • 1 pair of pinking shears (because I’m certainly not bringing a serger along to finish seams.)
  • 1 gallon sized Ziploc of thread. Must have colors include black, grey, white, tan, a greeny-brown, nude, and a yellow-orange for topstitching on jeans.
  • 12” see through 2” wide ruler
  • 1 soft tape measure
  • Tailor’s chalk, red marking pencil, pencil, black disappearing ink pen
  • Seam ripper
  • Metal hem gauge ruler
  • Small container of straight pins
  • Extra bobbins for machine
  • Small collection of hand and machine needles (I always bring some leather needles and double needles, just in case.)
  • 1 gallon sized Ziploc of bias tape (black and white), elastics, twill tape, and hem tape.
  • Small containers of snaps and hook & eyes.
  • Muslin pressing cloth
  • Small collection of nude spandex and netting scraps and interfacings

Lighting is key

Sometimes it’s nice to bring along a small light of some kind. I often find myself sewing in inadequately lighted spaces. I tend not to bring a lamp because, well, the subway. I always make sure the light in the machine is working. And the flashlight on an iphone can be extremely helpful in especially dark circumstances.

Gear up

I’m not very high tech with my carrying cases but there are lots of really lovely ones out there if you’re not into backpacks and tote bags.

https://www.sewingmachinesplus.com/sewing-accessories-cases.php

The key is to keep everything super organized. And don’t worry about not having all the thread. Unless you’re topstitching, most things can be sewn with black, white, or tan. I know some tailors that only use those colors of thread. It really is ok if your thread doesn’t match exactly. And sometimes you just have to use what you have, especially if you are a traveling tailor.