Christmas Tree Turtlenecks

Christmas Tree Turtlenecks

Its finally autumn in New York City. The temperature dropped this past week and people broke out their jackets and sweaters and knit caps. The kids are back to school and if you’re out and about around three or four in the afternoon, you’ll likely encounter gaggles of uniform clad youngsters walking home from school and stopping into the corner bodegas for gum, nail polish, or comic books.

I was one of those super nerdy kids who always liked going back to school. I especially enjoyed getting new clothes for the occasion. When I was of elementary school age, my mom still made a lot of my clothing (and that of my three brothers). We were those kids who had matching plaid pants and skirts because Mom would buy a couple or three yards of a fabric and use it to make something for each of us. I didn’t mind so much. I thought my two little brothers were super annoying but, my big brother, who is 18 months older than me; well, I thought he was the best. I didn’t care that my red and white plaid skirt was made from the same fabric as his pants. It showed we were related and I was ok with that.

matching shorts and jumper for my birthday

matching shorts and jumper for my birthday

Mother knows best

Mom also went through this phase of embroidering designs on the fronts of plain cotton long sleeve turtlenecks for me. I have no idea where she found the time to do this. I remember having a red one with a Christmas tree on it and a brown one with flowers. I was a true child of the 70s and my Mom, always hip, dressed me like one, even when she couldn’t afford to buy me brand new clothes.

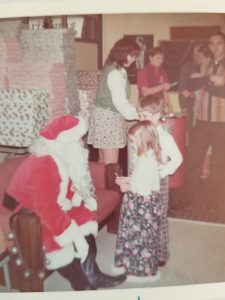
Mom made long skirt and plaid pants for Santa visit. My brother and I were very stylish.

Mom made long skirt and plaid pants for Santa visit. My brother and I were very stylish.

I also remember the huge JC Penny, Sears, and Montgomery Ward fall and Christmas catalogues. I would spend hours going through them, turning down the corners of the pages with items I hoped maybe Mom could buy for me. My parents were pretty good budget makers and keepers and somehow managed, even with four kids on a high school principal’s salary, to still be able to buy all of us some new clothes for the every year for back to school.

To Black Friday or to not Black Friday

We never actually ordered from the catalogues. I’d pick out what I wanted and then we’d all pile into Mom’s van and head to the mall where the JC Penny store was. Then, I’d spend hours searching the store for the pieces I’d ear marked in the catalogue. I thought that whole thing incredibly fun – which is rather ironic because nowadays I abhor shopping in actual stores for clothes and, on the rare occasions that I purchase new wardrobe items, buy most everything online.

Somehow, in my old(er) age, I’ve grown to dislike mass produced apparel of any kind, and shopping in general.

Unless, that is, I’m buying something cycling related. I go hang out in my preferred local bike shop even when I don’t necessarily need something. I’ve spent time thinking about the why of this and have come to the (fairly obvious) conclusion that the reason I’ll go to the bike shop in person and am completely fine with paying a bit more for things I could get at a slightly discounted rate at an online super store, is for the free, excellent cycling (and local food and bar) advice and recommendations from the bike shop owner and employees.

No flavor to savor

Everything in the stores these days looks the same to me and nothing looks like me anymore. Perhaps this is just a common occurrence, or realization, that manifests as you get older. I never wanted to look like everyone else, not even way back when I picked outfits from the JC Penny catalogue. Before everyone could buy anything they wanted from anywhere online, I used to beg Mom to take us to the mall the next county over because the stores carried different things than the stores in our local county mall. Then I was able to get things that no one else at school would have.

I think that’s probably why I loved those embroidered turtlenecks my Mom used to make me so much. Nobody else at school had a shirt just like mine. And I could even claim to have helped pick out the design. Guess I was indeed destined to end up sewing and creating for a living.
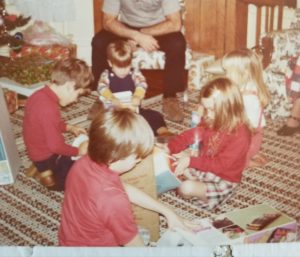
The Christmas Tree Turtleneck. Not a great photo of it but the only one I could find. Note that my brother (sitting across from me) is wearing a turtleneck in the same color.

The Christmas Tree Turtleneck. Not a great photo of it but the only one I could find. Note that my brother (sitting across from me) is wearing a turtleneck in the same color.

Be true to yourself

In this world of factory mass-produced disposable goods, individual style is truly a wondrous thing to have. So cultivate yours and that of others as much as you can. Make something for a child in your life, even if its as simple as embroidering a cheesy design on a cotton turtleneck.

You can find some great embroidery designs right here at Sewing Machines Plus to get you started:

DIY Home Sewing Projects

DIY Home Sewing Projects

Is it just me, or do an awful lot of jackets and sweaters come without a loop or tag to hang them with? I get it that many have hoods, and you could hang them from the hood, or even the back neck of the jacket, but there is nothing like a solid loop to quickly hang your jacket up.

Another problem is that many hooks are sharp or pointy and if you hang a jacket from the neckline or hood you end up with a bump in the fabric from the imprint of the hook. This is no bueno when you’ve spent good money on the jacket in the first place.

I like to add jacket loops using double fold binding I have on hand.

I like to add jacket loops using double fold binding I have on hand.

Let’s Sew!

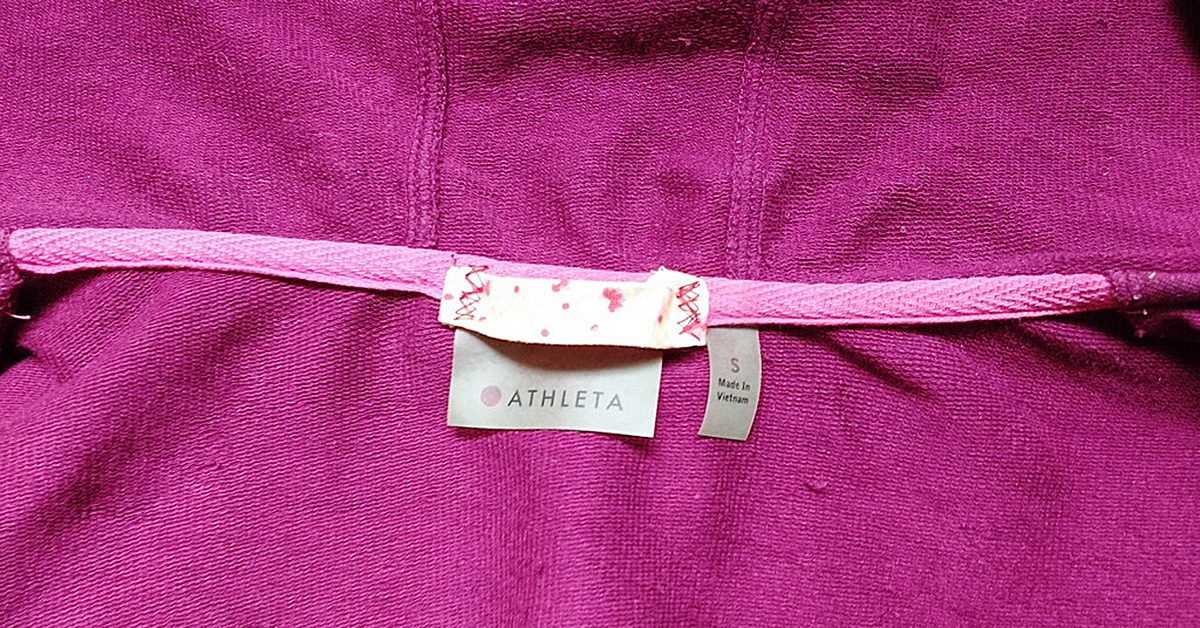
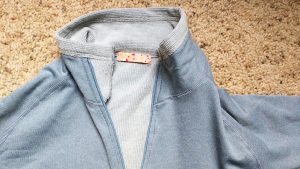
It’s times like these when you need to put your sewing skills to use. I like to add jacket loops using double fold binding I have on hand. I sew it on with a zig zag stitch and I find the stitching to be very inconspicuous on the exterior neckline (and it’s often hidden by the hood anyway.)

I find the stitching to be very inconspicuous on the exterior neckline (often hidden by the hood).

I find the stitching to be very inconspicuous on the exterior neckline (often hidden by the hood).

I used the same binding on this gray pullover. I love the pop of color it gives the jacket.

I used the same binding on this gray pullover.

I used the same binding on this gray pullover.

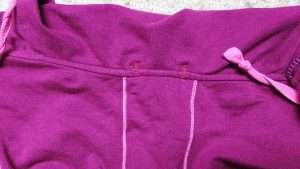
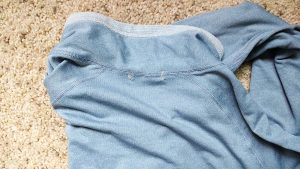
The zig zag stitching is barely noticeable from the back view. Perfect.

The zig zag stitching is barely noticeable from the back view.

The zig zag stitching is barely noticeable from the back view.

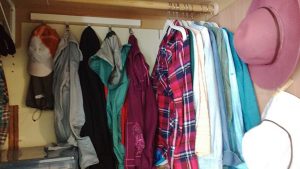
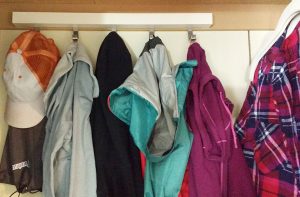
Now I can hang both jackets without the metal hooks on that hanger digging into the fabric of either jacket.

Now I can hang both jackets without the metal hooks on that hanger digging into the fabric of either jacket.

Now I can hang both jackets without the metal hooks on that hanger digging into the fabric of either jacket.

The gray hoodie is on the left and the maroon jacket is on the right. I love organization and I love that I made it happen with my sewing skills!

The gray hoodie is on the left & the maroon jacket is on the right.

The gray hoodie is on the left & the maroon jacket is on the right.

Handy dandy skills

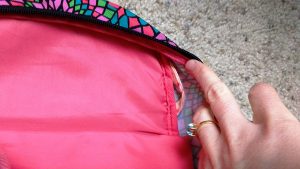
Here’s something else I fixed by knowing how to sew. My daughter’s backpack had no loop on the interior of the backpack for carrying a house key. There was a loop on the exterior, but that’s not very safety conscious, is it?

I took matters into my own hands and modded out the backpack by sewing in my own loop (again with that pretty flowered binding in the photos above). Now she can securely carry a house key tucked safely inside her backpack.

I took matters into my own hands & modded out the backpack by sewing in my own loop (again with that pretty flowered binding in the photos above).

I took matters into my own hands & modded out the backpack by sewing in my own loop (again with that pretty flowered binding in the photos above).

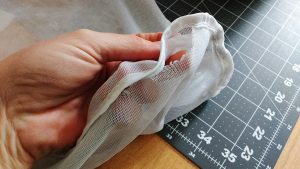
I bought two lingerie bags at Target a while ago and one has started to fray at the seam. While lingerie bags are fairly inexpensive, I knew I could save this one by flipping over the seam and sewing a zig zag stitch.

I bought two lingerie bags at Target a while ago & one has started to fray at the seam.

I bought two lingerie bags at Target a while ago & one has started to fray at the seam.

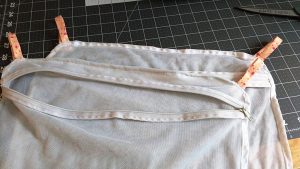
I also added hanging hooks on each side of the bags. I again used that pretty pink binding and now I have no more. At least it will live on in infamy in all of these great home DIY projects I’m showing you.

I also added hanging hooks on each side of the bags.

I also added hanging hooks on each side of the bags.

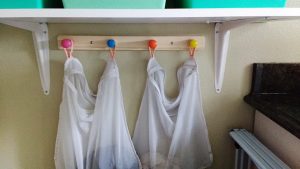
I installed these hooks by our laundry and cleaning station and hung the lingerie bags there.

I installed these hooks by our laundry & cleaning station and hung the lingerie bags there.

I installed these hooks by our laundry & cleaning station and hung the lingerie bags there.

This easy access makes it a breeze for my small kids to put things like their tights and other delicates right into the bags so I have everything ready for laundry day.

This easy access makes it a breeze for my small kids to put things like their tights and other delicates right into the bags so I have everything ready for laundry day.

This easy access makes it a breeze for my small kids to put things like their tights and other delicates right into the bags so I have everything ready for laundry day.

What kind of modifications have you made to home items with your sewing skills? Let us know in comments!

———————————————————————————–
Charlotte Kaufman is a writer and sewist in Mammoth Lakes, California. She specializes in marine and home interiors and continues to fall more and more in love with quilting. You can follow her at charlottekaufman.com.
Keep Warm with These Fleece Projects

Keep Warm with These Fleece Projects

These Fleece projects will keep you cozy and warm

I don’t know about you, but if you ask me, this Winter can’t end soon enough. I’m dreaming of warm weather and beach trips, but the reality is that it is cold outside. On cold winter days, there is nothing cozier than fleece. So I’ve scoured the net to round up some fun fleece projects for you to sew.

Tips for Sewing with Fleece

Fleece projects are generally easy to sew, but only if you know some tricks for working with this unique fabric:

Needles – Some folks prefer to use a universal point needle when working with fleece. If you choose this type of needle, be aware that fleece will dull these quickly and you will need to change needles often. I find a stretch or ball point needle works better and use these instead for sewing fleece projects. Regardless of needle type, I use use size 14 for fleece.

Foot selection – A roller foot or an even-feed foot (also known as a walking foot) will be most helpful. Reduce presser foot pressure to allow for the extra bulk.

Stitching – I prefer to sew with a stretch stitch for fleece. If your machine does not have a stretch stitch, you can use a narrow zig-zag stitch instead. For straight stitching, use a slightly longer stitch length, about 3.5mm, to prevent skipping.

Thread – Fleece is not only tough on needles; it can also be tough on thread. Don’t try sewing fleece projects with cotton or cotton/poly thread, as this may ravel or break. To prevent breakage, use 100% polyester thread.

Other tips 

  • Don’t use an iron on fleece, as it has a very low melting point.
  • To know which side is which, pull the selvedge taut; fleece will roll slightly on the wrong side.
  • It is difficult to undo stitches from fleece, so work slowly and carefully to avoid mistakes.
  • Clean your machine frequently when working with fleece, as it has a tendency to shed fibers.

And now, for my favorite fleece projects:

Fleece Projects: Hats and Headbands

A U.S. Army survival manual from 1957 claimed we lose 40-45 percent of heat from our heads. There is some controversy about this figure, and this may be overestimated. Regardless, you lose less heat from your head when it is covered!  There are many cute ways to cover heads with fleece, here are just a few.

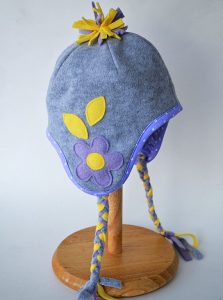
Delia shows how to embellish a simple ear warmer headband with a huge fleece flower.

Delia shows how to embellish a simple ear warmer headband with a huge fleece flower.

Fleece Projects: Scarves

A fleece scarf can help keep you warm and fashionable, too. You can make one in mere minutes.

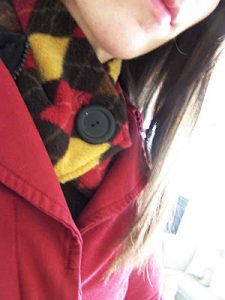
Scarflette, courtesy of Leafy Treetop.

Scarflette, courtesy of Leafy Treetop.

Fleece Projects: Mittens and Gloves

  • Make It and Love It shows how to make a pattern for adjustable mittens to fit anyone.
  • These fleece mittens are even easier to make and feature two layers for extra warmth.
  • Here’s how to make fleece gloves with gussets.
  • Ruffled fingerless gloves couldn’t be cuter. These only look complicated; they are actually easy to sew.

Fleece Projects: Footwear

  • This instructable shows how to make fleece socks from a blanket. If you’d rather not cut up a blanket, you could use fleece yardage instead.
  • Here’s a video tutorial for making dainty, ladylike slippers from fleece.
  • These fleece slippers will keep your ankles warm, too.

Fleece Projects: Pants

Nothing is more comfy and cozy than fleece pajama pants. Simply Modern Mom shows to make them using your favorite pants as a pattern. The tutorial is for child’s pants, but you can use this method to make them in any size. If you don’t have a favorite pair to use for making your pattern, of course you can make fleece pajama pants using most any pajama pattern in your stash.

Fleece Projects: Sweater

Here is a tutorial for making a lovely cowl-necked sweater from fleece that is as impressive as it is comfortable. The cowl neck is quite versatile. This can be worn in different ways, depending on the temperature outside.

Fleece Project: Caftan

When it’s really cold and all you want to do is stay cozy indoors, you’ll appreciate this easy fleece caftan. This is even better than the popular snuggies, as it covers both your front and your back sides.

Fleece Projects: Coats and Capes

Fleece outerwear is great because it’s warm, comfortable, and even repels water on wet and drizzly days. You can choose something easy and unstructured, such as a poncho or cape, or go with something more detailed, like a jacket or coat.

  • This instructable shows how to make an easy poncho that’s also pretty.
  • Here are several ways to make a beautiful long cape, with hood or without.
  • This little girl’s cape includes a collar and dressier design details.
  • Craftsy has collected 6 different jacket patterns. This link has something for everyone.
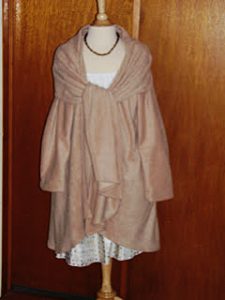
My personal favorite fleece coat is McCall’s pattern 5987. This coat includes a built-in scarf that can be styled several different ways.

My personal favorite fleece coat is McCall’s pattern 5987. This coat includes a built-in scarf that can be styled several different ways.

My personal favorite fleece coat is McCall’s pattern 5987. This coat includes a built-in scarf that can be styled several different ways.  It has an attractive rounded hem that looks great with both skirts and pants. I have made this coat in camel, in charcoal, in navy, and one in red as a gift for my mother. I get lots of compliments on these coats every time I wear them. While they are fashionable outerwear, they are also so cozy that I wear them as an extra layer in the house all the time. Maybe I should make a fleece robe, because I don’t have any robe that feels near as nice over my nightgown as these coats do.

Fleece Projects are Fun

Don’t be afraid of fleece. It is different than other fabrics, but nothing compares to the comfort fleece offers. I also think of this fabric as being more environmentally friendly than many others, since it is often made from recycled plastic bottles. Sewing on fleece is easy if you know the tips and tricks shared here. I hope you will try some of these fleece projects this season and enjoy them for many winters to come.

What I Do at Work All Day (Part 2)

What I Do at Work All Day (Part 2)

(As promised) The Dart and Drop

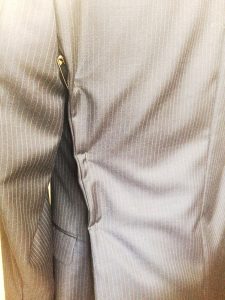
Pinned side back seam.

Pinned side back seam.

I do a lot of suit alterations. Sometimes I alter up to eight suits in a single day.

Often, suit jackets fit well in the shoulders but are a bit too roomy in the body. Because of the inner canvas and the inevitable front pocket, you can’t really successfully alter the front of a suit jacket. You need to take in at the center back or side back seams. While pinning, you’ll usually notice that you need to take in the side back seam all the way into the armseye.

This presents the conundrum of:

  1. Should I also take in the sleeve so it will still fit?
  2. Do I need to get into that seam at all?
  3. Do I really need to take the sleeve out?

The answers are no, yes and yes. Do not take in the sleeve. Do take the bottom part of the sleeve out.

Men’s suit jackets are traditionally cut without an actual side seam. The place where you really want/need to take a jacket in, though, is often in that invisible side seam. The way to accomplish this is by using the dart and drop method.

The Dart

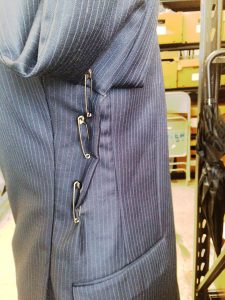
Dart pinned into side seam.

Dart pinned into side seam.

Take the lining out and the underarm sleeve apart from the side back seam to a few inches in the front of the side seam. There should be a notch in the jacket to indicate where the side seam would be if there were one. If no notch is present, lay the jacket flat on a table, buttoned up. Where the jacket naturally folds will indicate basically where that side seam is. Mark with chalk on the wrong side of the fabric in the coat body and in the sleeve.

Next, from the wrong side of the fabric, fold on the notch. At the top, measure in the amount you need to take in (as you determined by pinning your side back seam). Then draw a dart from that point down about 3 or 4 inches (or until you run into the top of the pocket). Sew the dart. You can put the same dart in the lining or you can simply do a tuck. Either is fine.

The Drop

The next step is to redraw your underarm seam. The armseye should remain the same size as it originally was. To do this, drop the underarm seam. I suspect there may be some actual formula for this but I’m more of an intuitive sewer. Dropping an inch is usually a good place to start. Use a curved ruler

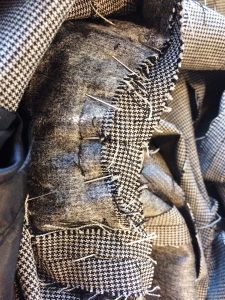
to draw the new line making sure the connections are smooth. Pin your sleeve at your new side seam an inch below the original seam line. Then pin the rest. You might have to undo more of the original seam if the sleeve isn’t fitting. Do this in the back until you can easily fit the sleeve back in without any excessive easing.

Don’t Worry

Pinned underarm seam.

Pinned underarm seam.

If you end up having to undo part of the shoulder pad and sleeve header, that’s fine. Just reattach them once you have put your sleeve back in.

You can apply the same principle to jackets (or really anything) that have side seams. Unless you want to narrow the sleeve, dropping the armseye is a more accurate way to accomplish this alteration.

At this point I also want to add a little something about the idea of ‘a right way’ to do something. I don’t believe there is only one right way to do things.

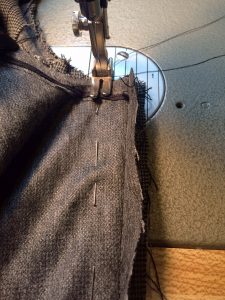
Sewing jacket with side seam.

Sewing jacket with side seam.

I ran the costume building shop for Boardwalk Empire for four years. It was a shop full of talented tailors from all sorts of backgrounds and places (Russia, Uzbekistan, Turkey, Tunisia & various U.S. states). We had a running joke about people who insist that their way of doing things is the only way (We even had a little song called, “There’s only one right way to do things. The other ways are wrong…”).

Walk Your Own Path

You need to figure out the way of doing things that works best for you while accomplishing the desired result. Sometimes someone can show you a whole new way of doing something that makes it easier for you. Sometimes not.

The tips and tricks I write about are the things I’ve learned work best for me over the years. Hopefully they will prove to be useful to someone else as well.

Missed Part 1? Check it out here!