Sewing With Voices

As is my custom, this weekend, I was out with the guys riding bikes up mountains and we got to talking about podcasts and television shows and books and stuff. One of them said he didn’t really ever have time to listen to podcasts and was surprised I had time to do so.

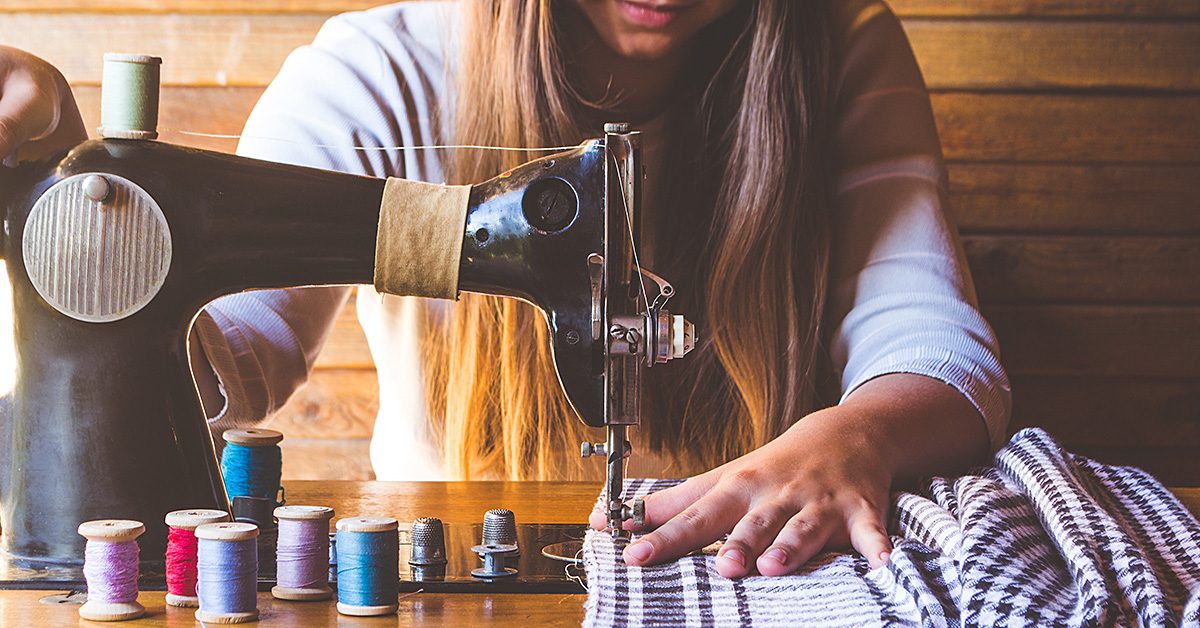
“I listen while I sew at work,” I said.

“Really? You can pay attention to both of those things at once?” he asked.

“Yes, I really can,” I answered. And I can.

Listen while you work

I hadn’t ever really thought about it before, though. I’ve always been able to listen to radio shows or audiobooks or podcasts while sewing. I’ve even been known to watch Netflix if I’m not in a super time crunch. By “watch”, I really mean listen to a show I’ve already seen and don’t have to pay that close attention to. Or something like Law and Order that you don’t need to see the whole thing to get the gist of. Or something really cheesy like The Ghost Whisperer that only requires half your brain, at best.

Long ago, when I worked at The Alley Theatre in Houston, TX, we’d listen to audio books on the shop stereo in the afternoon. It was actually a really cool way to “read” a book. Then we’d get into lengthy debates and discussions about whatever we were listening to. We had our own sewing book club down there in the costume shop.

Hammer time

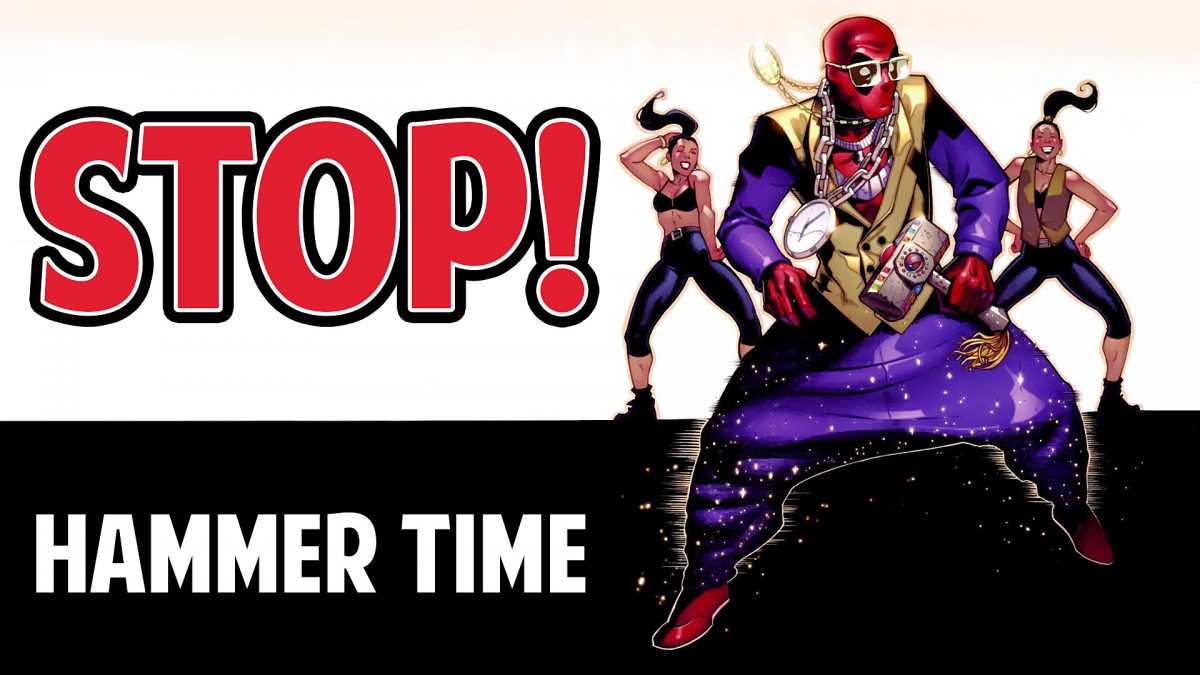
My friend Kassandra and I used to watch the morning talk shows while we made costumes for the VH1 special on MC Hammer. And these days, if I’m at work and not in a fitting, I’m listening to something like This American Life, StarTalk , Stuff You Should Know, Undisclosed, Radiolab, Ear Hustle – my list goes on and on.

Every once in awhile I come across an article that claims that humans are, in general, unable to do more than one thing at once and anyone who says they are a multi-tasker is not being completely truthful. Usually, the author will then go on to explain that people can’t really concentrate on more than one thing at once, that its scientifically impossible.

Neil deGrasse Tyson

Neil deGrasse Tyson.

But I just don’t think that’s true. I can listen to Neil Degrasse Tyson talk about black holes and the speed of light and measure, cut, pin, and sew at the same time. I can even pattern or drape while listening to something. I guess because, at this point, a lot of what I do sewing-wise I’ve done countless times before so its kind of second nature and I don’t need my full concentration to do it correctly.

In contrast, though, I can’t talk on the phone while sewing and if someone has questions or needs to have a conversation with me, I have to stop what I’m doing (and its not just because I think its rude to not look someone in the eye when conversing). I have worked with people though, who seem to be able to video chat or skype while sewing. One of the ladies who worked for me on Boardwalk Empire was always skyping Russia.

Which reminds me of one particular day during Boardwalk. It was the afternoon and we were super busy. There was music on the background. We always had music on, just some Pandora station that we’d take turns choosing. Everyone was working away steadily on different projects, immersed in their own little worlds. I was patterning something, I don’t remember what, when I paused for a minute to look up and listen to the conversations going on in the shop.

There was one in Russian, another in Turkish, still another in French, a couple in English (obviously), one in Spanish and one in Arabic. It was all quite wonderful and made me really proud of the amazing diverse shop full of talented people I had around me.

And speaking of languages; that’s another thing you can do while sewing. You can listen to a language learning app or book.

I love that I can learn something new or get lost in someone else’s story while still creating something with my hands. I think it’s a wonderful ability to have, a gift even.

I think most of us who sew are true multi-taskers. (We’re pretty cool like that). I’d love to know what other people listen to or watch while working on projects.

I’m also in search of any new and interesting podcasts to listen to if you have any suggestions.

Happy sewing! (and listening).

Grain Line? What Grain Line?

Grain Line? What Grain Line?

Last week, I spent a couple days making six silk dresses for a freelance client. I did the work at home, in my fifth floor walkup apartment in New York City. I only mention this because the dresses were made from silk charmeuse and I don’t, interestingly enough, have a proper cutting table at home. This really isn’t so much interesting as it is unfortunate and slightly annoying. Because, as anyone who has ever cut silk charmeuse knows, it’s a slippery sliding thing.

I cut the first dress out on the floor. Not ideal but it does work, as long as you use enough weights to keep it from shifting around. I usually cut things on the double with the fabric folded, selvedge edge to selvedge edge, which is how most consumer patterns instruct you to cut. Silk charmeuse can be a bit woodgy (yes, that’s a technical term) but the weave tends to be tight enough that you can confidently cut on the fold.

Some fabrics with an especially loose weave where it’s hard to keep the lengthwise grain line (and cross grain) straight are best cut in a single layer.

Shall we

Grain Line? What Grain Line?

To begin cutting, I tear a straight cross grain so I have a right angle to work from. Almost all fabric can be torn in this way. The cross grain of a fabric is made from the yarns woven over and under the lengthwise fabric grain at a 90 degree angle. The over under weaving provides less tension so crosswise grains have a tiny bit more stretch than the lengthwise grain. They normally run around a person’s body.

The lengthwise grain is the one that runs parallel to the selvedge edge and is the grain marked by the arrow on every pattern piece.

After tearing the the cross grain so I have a straight line, I fold my fabric in half right sides together, selvedge to selvedge. Once I have the fabric relatively flat and smooth on my cutting surface, I place a long metal ruler about an inch or two from my torn crosswise edge. I use a metal ruler because they’re heavy enough to act like a weight.

I line up the edge of the ruler perpendicular to the selvedge edge and across the full width of both layers of fabric. Then I make sure that the edge of the fabric that extends past the ruler is even. I do this to ensure that my cross grain is lined up correctly and not sloping down or up in relation to the selvedge.

I cut the next five dresses out on my old wood dining room table. It has leaves that fold up to make it almost six feet wide. At about 39” high, my cutting tables at work are higher than a standard dining room table. This height means I don’t have to bend so far over a table when cutting and, ultimately saves my back from hurting. If you don’t spend entire days cutting out garments, a dining room table usually works just as well.

You can also buy one of the cool folding style cutting tables available.

Grain line

So, what about grain line? Do you need to always pay attention to it?

That depends. At Boardwalk Empire, we would sometimes jest (when we didn’t have enough fabric and had to get creative with our cutting layouts), “Grain lines are for suckers.”

What we really meant, though, was “As long as you know what you’re doing, you can manipulate and vary the placement of your pattern pieces.”

If you happen to have a striped fabric, playing with the grain line can be fun. Thomas Pink, who makes high end men’s dress shirts will sometimes cut one side of the front on the lengthwise grain and the other on the cross for a quirky asymmetrical look.

Striped fabrics will also naturally chevron at the side seams if you match them up correctly when cutting and sewing.

You can also turn collars, cuff pieces, and/or pockets of striped fabrics on a different grain to add an interesting design effect.

All of these things are most easily done with a fabric that doesn’t have a lot of give, like a tightly woven cotton.

Measure up

If you’re interested in getting a little creative with your next project, you may want to invest in a quilter’s ruler. These rulers have 45 and 30-degree angles marked which is helpful when adjusting grain lines.

If you’re matching stripes or other patterns, you’ll find it much easier to cut in a single layer so you see everything clearly.

This may seem obvious, but if you’re experimenting, it’s always good practice to test things out first. If you have plenty of fabric, you can use some of it to do a little practice run. If not, you can use muslin or something similar to try out your idea. If you’re using a striped fabric, you can mark lines on your muslin before cutting to show you how everything will line up.

Bias

Bias is the diagonal angle across your fabric. The bias grain has quite a bit of stretch. A dress that clings to the body closely without having multiple seams is very likely cut on the bias. When you’re making a bias garment, especially a dress or slip, you’ll want to let the bias hang out for a while if possible as it will stretch out. You’ll notice that the bottom edge of your pieces will end up uneven if you do this, which is exactly what you want. You’ll need to remark your hemline after you’ve put together the garment.

I usually stay stitch my arm and neck holes, then pin my cut pieces on a form and, if time permits, let them hang over night. It’s also beneficial to then pin the seams together while they are hanging on a form to help alleviate any puckering.

Once you have a good understanding of grain lines, there’s no reason why you can’t try different things. Get creative (just remember that bias does stretch a lot more than something on the straight so you may need to stabilize with a lightweight fusible interfacing).

The Soul of Things: Or should I buy that old metal sewing machine?

A friend told me the other day she was going to start collecting sewing machines. I found this a bit odd, mainly because, though she can sew, she doesn’t on any sort of regular basis. She said she was cleaning her apartment and came across her sewing machine shoved way up on the top shelf of her closet and then, for some reason, had the thought she should start collecting them.

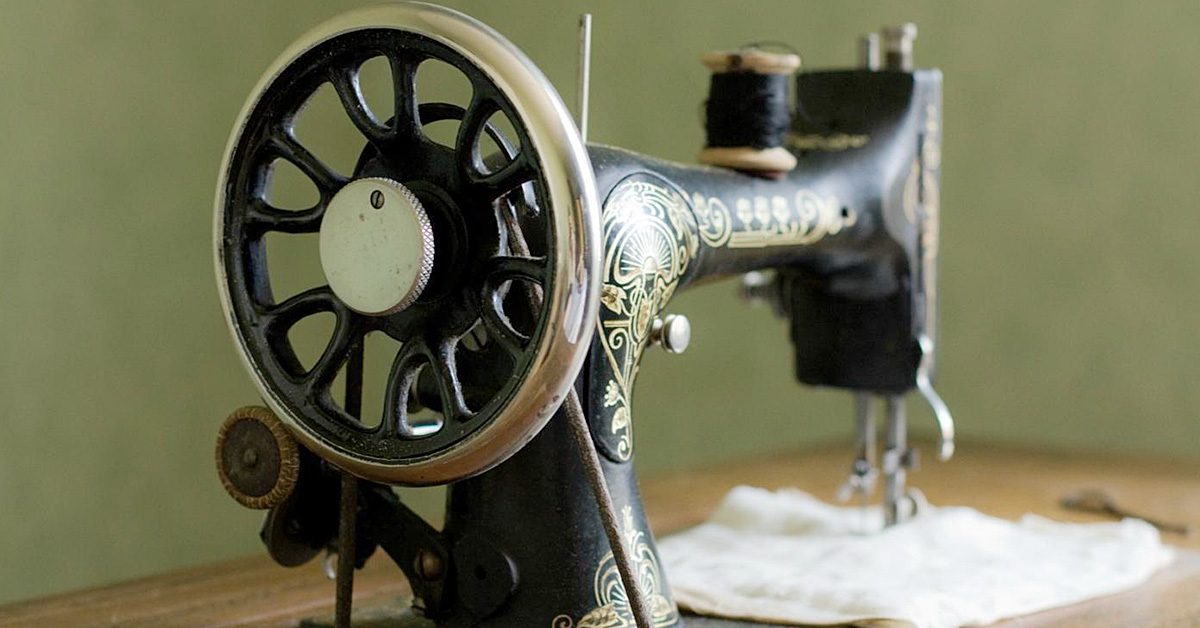
Old sewing machines, especially the really old ones, look quite interesting & cool.

Old sewing machines, especially the really old ones, look quite interesting & cool.

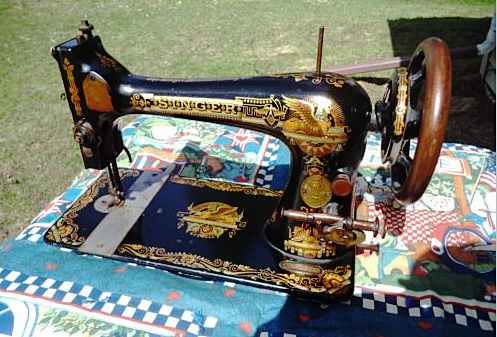
I get it; old sewing machines, especially the really old ones, look quite interesting and cool. They often have intricate decals and ornate brand badges. Most of them still work – mainly because they’re all metal and have less parts to break.

Oldie but a goodie

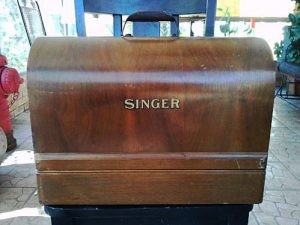
I used to have an old black iron Singer with a knee pedal. I don’t remember the model number but it was one of the first ‘portable’ models Singer made. The machine did run on electricity and came in a beautiful wood dome shaped case. In reality, it was actually a bit too heavy to be considered portable. I think I found it in the depths of some storage room in an old school building somewhere in Syracuse, NY. I was working for a costume designer, I think, for the opera. (Does Syracuse still have an opera? I can’t remember – it’s been so long).

We had been given the storage room as a work space and told we could have and/or use whatever was in it. I remember sitting in a corner, shelves and tables around me piled high with fabrics and boxes and just stuff, sewing tucks into big white cotton petticoats. I remember the machine being very fast. Unlike a lot of models today who have multiple speed settings, machines back then only had one: fast.

I honestly am not sure what happened to that machine. I know it made the move to Texas but it didn’t make the move to NYC, so it’s been gone from my life for almost fifteen years. I suspect I sold it at a garage sale for $20.00 or something. Or even gave it away to someone who would use it – which is sort of how I think antique sewing machines should navigate through life.

Value: only in the eye of the beholder

I know there are some ‘rare’ models that are perhaps ‘worth’ a lot of money but, all in all, I think people tend to pay entirely too much for used machines. Online auction sites such as Ebay certainly contribute to that. I suppose it’s nice that people can get some money for the old machine that’s been sitting in their basement or garage but, I also think those Ebay auctions get a bit out of hand. And they also trend, often for no discernable reason.

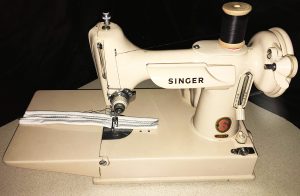
Featherweights are always a popular machine and sell routinely for over $500.00. I found one, which is rarer than the black ones, but it is currently listed on Ebay at $1280.00.

Featherweights are always a popular machine and sell routinely for over $500.00. I found one, which is rarer than the black ones, but it is currently listed on Ebay at $1280.00.

Featherweights are always a popular machine and sell routinely for over $500.00. I found one, which is rarer than the black ones, but it is currently listed on Ebay at $1280.00.

It’s a beautiful machine and comes with the carrying case but no accessories. I honestly think it’s priced too high but perhaps someone will buy it. The value of things is, of course, ultimately measured by what people will pay for that thing (just look at real estate prices in NYC).

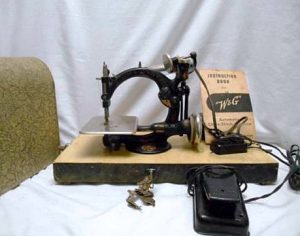
The case is a nice touch, since that is all you will likely get with these older machines. Through the passage of time, included accessories & attachments become rare finds.

The case is a nice touch, since that is all you will likely get with these older machines. Through the passage of time, included accessories & attachments become rare finds.

What now?

So, what should you do if you really want to collect old machines but don’t want to spend all of your extra money on it?

Go to garage sales (or stoop sales if you live in the city). When I lived in Texas, I used to frequent yard and garage sales all the time. I almost always found at least one machine at each sale. Some of them I bought but they were never for more than $30.00 or $40.00. If you are buying a machine at sale, ask if you can plug it in to see if it works. Check to see if you can turn the wheel freely and, even if the belt happens to be cracked or broken (they often are as the belts are usually rubber) make sure the light comes on when plugged in.

So, what should you do if you really want to collect old machines but don’t want to spend all of your extra money on it?

So, what should you do if you really want to collect old machines but don’t want to spend all of your extra money on it?

The needle won’t go up and down if the belt is missing or damaged but belts are not an expensive or difficult thing to fix. Check for rust too. Machines that have been stored in a garage or barn often have too much rust damage to ever run well again.

I’ve gotten out of the buy old sewing machines game (I live in a 5th floor walkup in NYC after all), especially on online auction sites. Although many of those machines are cosmetically extraordinary, they lack a “soul”. The only ‘antique’ machines I have now are my Nana’s old Singer 401K and a Singer hemstitcher we purchased for Boardwalk Empire. I’ll never get rid of Nana’s machine. Its sentimental value is immeasurable (even if it didn’t work though it does).

And that’s when things truly become priceless: when they somehow hold a collection of memories related to a person or time.

It Takes a Village

It Takes a Village

I was thinking about writing a post this week about some of the favorite things that I’ve made throughout the years. But, once I really started trying to decide, I realized I had way too many ‘favorites’ to put in just one post, mainly because I’ve made a ridiculous amount of stuff. Truth be told, I can’t remember a lot of it.

Also, ‘favorite’, is a bit of a shifty word. I have favorites for all kinds of reasons: favorite fabric, favorite pattern, favorite last minute construction miracle, favorite vintage piece, favorite thing made without a pattern, favorite complicated pattern, favorite funky design detail, favorite sewing technique.

So, I decided instead to write a little about some of the most memorable things I’ve made. Most (perhaps all) of them listed here were for HBO’s Boardwalk Empire, designed by John Dunn and Lisa Padovani.

And speaking of designers…

I just want to clarify that every show and movie has a Costume Designer. Sometimes, on low budget and indie or college productions, the costume designer is the same person who also makes and shops the clothes. This is not the case on any mid to high budget shows. It takes a village to create the finished product. I didn’t design anything for Boardwalk Empire or any of the other major television shows and movies I’ve worked on as a tailor and pattern maker. I just make what is in the designer’s head.

How do I know what’s in the designer’s head?

Sometimes I get a sketch, sometimes pictures and photos from magazines and catalogues, sometimes vintage garments to use as a starting point, and sometimes it’s just a conversation with a scribbled line drawing on a manila oak tag.

And one other thing about the village: I made the patterns for all of the pieces to follow but, most times, I had the help of very talented tailors in the construction of the finished product.

A (partial) list of most memorables:

Outfit from an existing vintage pattern.

Outfit from an existing vintage pattern.

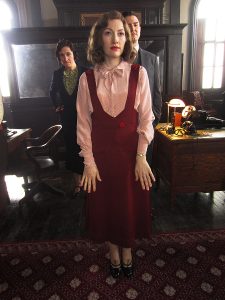
I used an existing 1930s vintage pattern for this ensemble. I altered the pattern slightly for fit. It’s a bit hard to see in the photo, but the jumper has an asymmetrical over lap opening in the front (that button is functional.) If I recall correctly, I did put together the blouse but I know that the jumper was constructed by one of the tailors in the shop, Amy.

Showgirl ensemble:

Showgirl ensemble.

Showgirl ensemble.

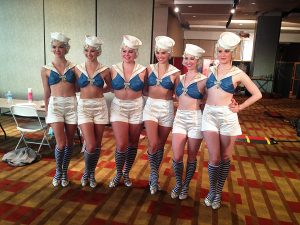
We made quite a few showgirl ensembles for Boardwalk but the sailor girls were my favorite. The trickiest part of any of the showgirl things was always the time constraints. We routinely had a week (at most) to construct the outfits, and this was on top of all the other things we were making and altering. Thankfully, the actresses playing the showgirls remained the same throughout the season so once I had their measurements I was able to pattern (relatively) efficiently and go straight to fabric without doing any sort of mock up. Any showgirl extravaganza was always a true group effort, as in the day before the costumes were needed, almost every single person in the shop was working on them.

Costume involving fish:

Costume involving fish.

Costume involving fish.

We made two of these for the final season of Boardwalk Empire. The fish have batting and wire in them to make them slightly three dimensional, and there are two more on the back. These took an especially long time as all the pearl trim had to sewn on by hand.

Complete outfit in shortest amount of time:

Complete outfit in shortest amount of time.

Complete outfit in shortest amount of time.

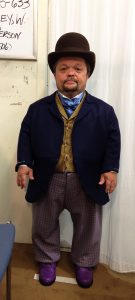
I will always remember this one. I had literally two days to get this done. On the morning of the first day, the actor came in for measurements. I started patterning as soon as he walked out the door. John (designer) found fabric he wanted to use that we already had in house so I was able to cut as soon as my patterning was done. I handed off the jacket pieces to one person and the pants to another and I put together the vest. The very next afternoon, I did the fitting. As you can see from the photo, the only changes needed were a sleeve and pant hem. This illustrates the importance of proper (and extensive) measurements.

Strangest costume:

One of the oddest costumes I’ve made were these lobsters, again for Boardwalk.

One of the oddest costumes I’ve made were these lobsters, again for Boardwalk.

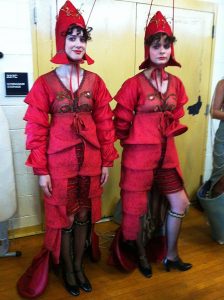
One of the oddest costumes I’ve made were these lobsters, again for Boardwalk. I think the over bodice and sleeves were attached to the tail bit and it was put on like a coat, snapping and tying center front. I do remember the use of quite a large amount of wire.

Most adorable:

Most adorable.

Most adorable.

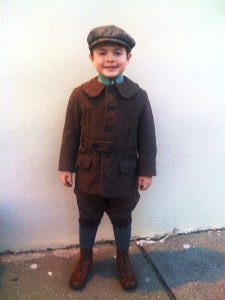
I patterned all of the boys’ things for Boardwalk. The principal men’s suits were made by Greenfield’s in Brooklyn but the in house shop that I ran always did the suits and jackets for the younger boys.

So that’s a short list of some of my most memorable projects. There are definitely many more though. One of the best things about my job is that there is always something new to make.

Getting In

Getting In

Whenever I tell people what I do for a living (Tailor and Pattern Maker for film and television) they inevitably say one of two things.

“Wow. How did you get into that?” or “What a cool job!” Sometimes acquaintances will ask me if I can talk to their niece or son or daughter’s friend or cousin or something and give them advice on how to ‘break into’ the business.

I’m never entirely sure what sort of advice to give. As Hunter S. Thompson said (or maybe didn’t say depending on who you ask),

The TV business is a cruel and shallow money trench, a long plastic hallway where thieves and pimps run free, and good men die like dogs. There is also a negative side.

There is some truth in that Hunter quote. Especially now when the major networks are increasingly concerned with cost and ratings and everyone wants to do more (and more) with less money. Period television is quite popular right now. The only problem with that is that period television is hard, perhaps the hardest genre.

“But, why?” you may ask, “It looks like so much fun!”

The Devil is in the details

Here’s the thing: period TV is expensive. You have to dress every single background actor and actress as well as the principals. On shows such as Law and Order, often the background (BG) performers are wearing something selected from their own personal closet. What generally happens is that the BG will come to work with a few clothing options. An assistant designer will usually pick which of these options is best and that’s what the actor will wear. Most people don’t have closets full of 1920s or 1880s clothing so, on a period show, the entire costume is provided, fit, and altered. This takes more time and manpower which, in turn, takes more money.
TV is also fast – faster than filming a movie. Most shows shoot an episode in 8 to 10 days, with at least a day or two when they are shooting two episodes at once. (We call those tandem days.) Because of this, you never really get any down time. On a movie, there is most always a point where you’re over the hump – you’ve established all the costumes needed. Or you’re working on something where all the action takes place on the same day and no one changes their clothes. Then, all you need to worry about is multiples and the rest of the work is up to the set costume crew who keep track of continuity and make sure everyone looks how they should in front of camera.

Do your thing & do it GREAT

I guess if I were to give one piece of advice I would say to become really good at the thing you want to do. Then, figure out how to do it very quickly if needed. I may have said this before (I say it a lot) but there are lots of good tailors and pattern makers out there. What there isn’t a lot of are exceptional tailors and pattern makers who can also work really fast. If you want to work in TV and film that will definitely give you an advantage.

As far as finding TV and film jobs, talk to people, contact your city’s (or state’s) film commission. Word of mouth is still the best way to find a job in this business.

Mind your manners

And be nice to everyone, even if you think they have no ‘influence’ or are looking for the same kind of job as you are. You never know who knows who and you never know when someone might need help because they have more work than they can handle on their own.

Oh, and that “What a cool job!” comment… Some days it is and some days it isn’t. I can assure you there is nothing glamorous about it but, at the same time, it is also rarely boring.


As Pinned: Sewing Alterations in the Film Biz

As Pinned: Sewing Alterations in the Film Biz

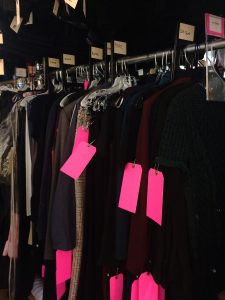
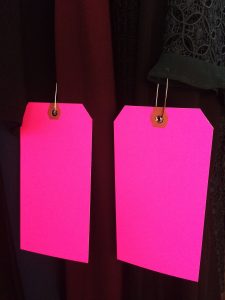
Most film and television costume departments in New York City use bright pink oak tags to identify a garment as needing an alteration.

Most film and television costume departments in New York City use bright pink oak tags to identify a garment as needing an alteration.

Most film and television costume departments in New York City use bright pink oak tags to identify a garment as needing an alteration. Larger (and usually period) shows, like Boardwalk Empire, The Deuce, The Get Down, have two or three Costume Fitters who run the fittings for the background actors. They keep everything organized in the fitting rooms, take measurements and photos, assist the designers, do a lot of the pinning (unless something really wacky is going on, then they’ll usually call the Head Tailor in to check it out), and write the alteration notes on the tag.

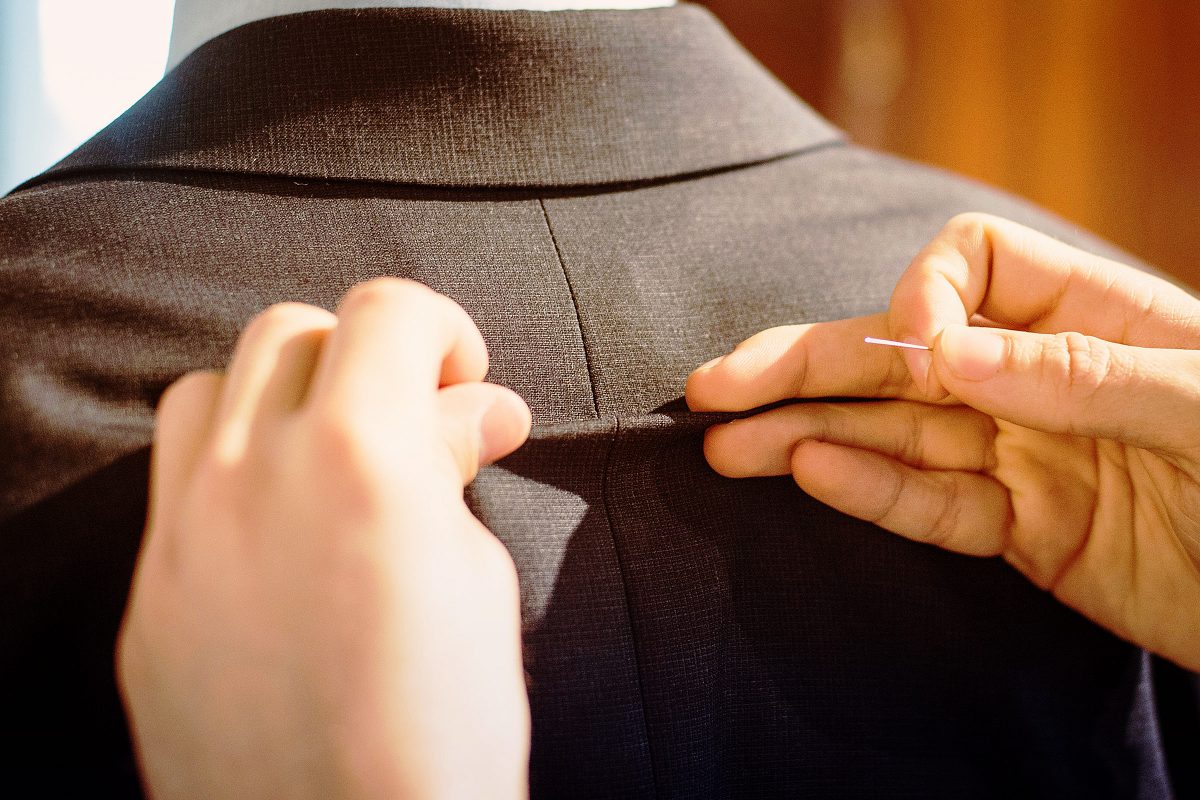
Inevitably, a high percentage of alteration notes will read something like: “Take in as pinned” or “CB as pinned”. ‘CB’ means center back if you didn’t know. And ‘AP’ is the abbreviation for ‘as pinned’.

So, anyway: “Take in as pinned.”

Measure twice, cut once.

Take in as pinned

Here’s the thing, even if I pinned the alteration myself in the fitting room, ‘take in as pinned’ shouldn’t necessarily be followed literally. Seriously. It is indeed true that humans in general are not always symmetrical but it’s rare that you honestly need to take in one side more than the other. I also cannot tell you how many times an initial, “he has one arm longer than the other” turned out to be a jacket not sitting evenly upon the shoulders.

The garment can, of course, be lopsided to begin with – always a possibility if you’re dealing with vintage clothing. Measuring is always a good idea. As my Dad always says, “Measure twice, cut once.” He was talking about lumber and carpentry but the same advice applies to sewing as well.

I usually mark (or just measure) the pinned out alteration with chalk or wax on the wrong side of the garment. Then I take the pins out and assess the situation. If two side back seams were pinned in and one is considerably larger than the other, even them out. Do the same thing on both sides.

This is actually one of the top five laws of sewing – if there are laws of sewing.

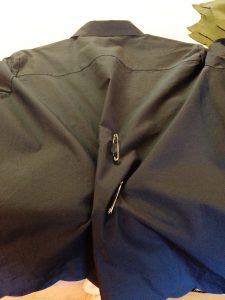
I just pin everything out in through the center back then figure out later the best place to take it out.

I just pin everything out in through the center back then figure out later the best place to take it out.

I often only pin one side of a thing. More often, I just pin everything out in through the center back then figure out later the best place to take it out. A large amount will look better if you distribute it through more than one seam.

For example, if you pinned out 5 inches at the center back waist of a shirt or jacket, split the amount up between the center back, side back and side seams. The end result will look much better.

An alteration I do a lot is taking in the backs of men’s button front dress shirts. Unless it’s a slim cut John Varvatos, most men’s dress shirts are excessively roomy in the back. The quick and easy solution to this is to add side back darts.

If I have time, and the shirt has back pleats going into the yoke, I’ll take the whole back off and take out the pleats – re-cutting the bottom part of the armseye and the side seams. This can take quite a bit longer, especially if you are dealing with a shirt by Brooks Brothers, who insist on gluing their side seams as well as sewing them.

Take in as pinned.

Take in as pinned.

Speaking the same language

At Blindspot, since I’m the Head and only tailor, we just put blank pink tags on the garments as indications that they need altering. If I pinned it, I don’t need any notes. The Costume Designer for the show is also an excellent tailor (which is rare) so if I wasn’t in a fitting for some reason, he can easily tell me what needs to happen – often without pinning.

He’ll come to me and say, “I threw this on so and so, it just needs to be taken in about this much in the back.” Then he’ll show me by pinching an amount out with his fingers.

Tailoring and patterning is indeed a language all its own and it’s a beautiful thing when you work with someone who speaks it as well as you do.

The Pressing Matter of Irons

The Pressing Matter of Irons

There is something sort of Zen and comforting about it for me.

There is something sort of Zen and comforting about it for me.

I actually kind of like ironing. There is something sort of Zen and comforting about it for me.

One of my first jobs in a professional theatre setting was as a dresser at the Alley Theatre in Houston, TX. Being a backstage dresser means helping actors get dressed (obviously), laundering actors’ costumes, assisting actors in changing their clothing really quickly, seeing in the dark, and a whole lot of steaming and pressing. The Alley does an annual production of A Christmas Carol every holiday season. Almost every main male character in the production wore a white cotton shirt that needed to be ironed before every show. One of my responsibilities was to iron the pile of white cotton shirts every day. Anyone who has ever spent a significant amount

I pretty much always use a sleeve board.

I pretty much always use a sleeve board.

of time ironing shirts has developed their own little system, order.

I do yoke, front, back, sleeves (no creases), collar. I pretty much always use a sleeve board. And a proper iron makes all the difference – whether you are simply ironing to get the creases out or sewing. Everything looks better with a good press.

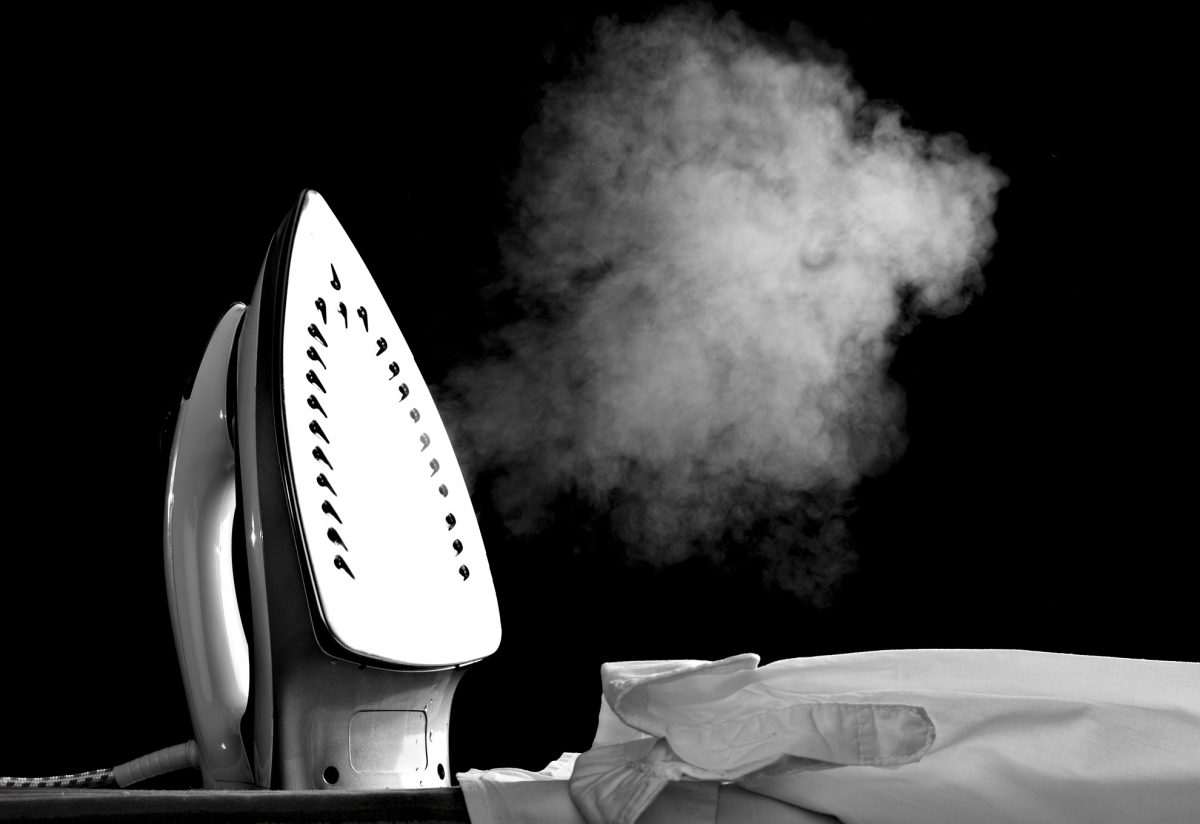
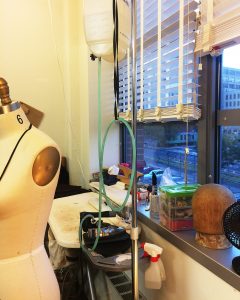
A gravity feed iron is the one with the plastic water bottle you suspend from above to feed water into to iron that heats it and converts it to steam. I’ve worked places that had nice custom wood ironing tables complete with a wood arm/pole on one corner to hang the water bottle from but an IV stand works just as well.

Reliable

Reliable makes a system of steam irons and ironing boards with reservoirs and poles attached that I’ve heard are very good though I’ve never used them.

Gravity feed irons are heavier than other irons and made from actual metal. And they produce lots of steam. (I’m a big fan of steam).

Goldstar

makes an excellent, very reasonably priced, and durable iron. The thing about industrial irons is that they don’t have that annoying automatic shut off feature and are made to remain on for a full day. They tend to last for a long time (like 20-30 years) though you may have to replace the water tube that extends from the bottle to the iron (a $5.00 or so repair).

Pacific also makes a nice model.

The first professional shop I ever worked in had two gravity feed steam irons and, to this day, they are still my favorite iron.

The first professional shop I ever worked in had two gravity feed steam irons and, to this day, they are still my favorite iron.

Gravity feed irons usually come with blue de-mineralizing crystals that you put in the bottom of the water bottle. You can forgo the crystals though and simply use distilled water. I wouldn’t necessarily recommend using tap water but I will say that I’ve been putting New York City tap water through my industrial irons for years without issue.

The crystals, on the other hand, have been known to occasionally work themselves into the water feed tube and cause havoc. Just saying.

So what if you want a good steam iron but don’t have room, or the means, to hang a water bottle? The prevailing iron of choice on most wardrobe trucks I’ve worked on is the Rowenta Professional Steam iron.

It provides a strong burst of steam without the assistance of gravity: the iron rest and water reservoir are all in one. It does, though, have the automatic shut off feature which can be annoying when you have an ironing emergency (don’t laugh, it happens!) and you run to the iron only to find it cold as ice.

The Rowenta is also self-cleaning and flushes minerals and the like out so you can use tap water without thinking twice.

The Rowenta is a fairly durable iron but they do wear out if you use them ten hours a day every day for months and months on end. We may have killed about four of them the first season of Boardwalk Empire until we finally bought gravity feed ones.

As for portable, domestic irons, I have an old Rowenta of some kind that I dropped once and inadvertently broke the automatic shut off. It’s the one I drag along with me if I’m just doing a short one or two day job.

What’s your favorite iron?

Costume Shops I Have Known

Costume Shops I Have Known

I’ve worked in a variety of costume and tailor shops over the past twenty-five years – some of them very permanent spaces, others makeshift and temporary. Some of them have been hellholes, some of them heavenly, and most of them somewhere in between.

One of the worst “shops” I’ve worked in actually happened this past summer. I was working on a new period Netflix show that was going to be filming for a few weeks in Savannah, GA. Now, Savannah itself is a very lovely city with a beautiful historical district, a properly chilling Ghost Tour and interesting & welcoming people. Sadly though, the space that I was told was mine to work in was an inner room of a sprawling low industrial type building. There were no windows, the air conditioning vents in the room didn’t work (think Georgia summer humidity), and none of the overhead lighting was functional. The room was essentially a hallway, providing the only path between the front and back of the building.

You Can’t Touch This

Long ago, in Houston, TX, I worked on a VH1 movie about MC Hammer (Yes, we made many pairs of Hammer pants). The Costume Shop was housed in a vault (as in a bank vault). We had so many lights rigged up in the space that I was sure one day we were going to start an electrical fire. That never happened but Tropical Storm Allison did. The Friday when the storm began, we were doing iron on letter transfers on t-shirts and sweatshirts – the kind where you peel off the backs and then stick the letters to the fabric. The Monday after the storm we opened the vault door to find about a foot of water and all the letter backs floating around like some giant pot of alphabet soup.

I spent most of my twenties at The Alley Theatre in Houston, TX. The original Costume Shop there was deep in the basement. As far as underground shops went, it was actually a very nice one with adequate lighting, three huge cutting tables, and lots of floor space. Sadly, that shop didn’t fare so well during Allison as the entire basement floors of the Alley filled with water when some underground bayou retaining walls broke.

All Washed Up

The only real ‘good’ thing about Tropical Storm Allison is that it hit late on a Friday night so most of downtown Houston was empty of people. The Alley was dark that night (meaning no show was scheduled). A few of the actors had been out and decided to stop in to The Alley on their way home. They were the first to discover that something had gone horribly awry in the underground tunnel system of Houston. Water was almost to the top of the steps and ramps that led down to the tunnel and shops. They immediately called the Production Manager who was sound asleep and had no idea yet what was going on. Her response, which since then has been immortalized in a very exclusive, limited run t-shirt, was, “Just put some towels down.”

It took a few years but, after the storm, The Alley built one of the best Costume Shops I’ve seen in my life. My friend Alice, who ran the shop for many years, called it “The Costume Shop in The Sky.” The shop (along with the rest of production) is up on one of the two top floors of the parking garage attached the theatre. There are huge windows and tons of space. It is truly a spectacular thing.

Another exemplary shop is the one at Troublemaker Studios (Robert Rodriguez’s studio) in Austin, TX. Again, it has large windows all along one wall. The windows are especially cool because they are the kind that, although the people inside can see out, folks outside can’t see in (perfect spy conditions).

Boardwalk Empire Refugee Camp

The Boardwalk Empire Shop was in a quanset hut – one of those dome shaped metal buildings – and essentially (no matter how hard we tried) always looked like a refugee camp. It was in the back of the ‘hut’ near a big rolling metal garage door. In an effort to provide sunlight and some sort of energy efficiency, the set construction guys made us wooden frames stretched with plexiglass that we set up in the doorway. We’d raise the rolling garage door to just above our “windows”. I saw lots of beautiful sunsets over the East River from those rickety plexiglass windows.

Brooklyn Blindspot

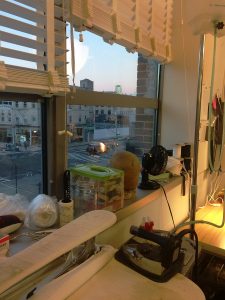
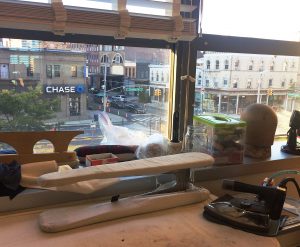
One of my favorite shops is the one I have now at Blindspot, mainly because of the big windows that look out over a busy Brooklyn intersection. For me, natural light and windows are one of the key things that make a good shop. If I have that, I can usually make the space work. The second thing would be proper electricity/power. I like to be able to plug all the things in at the same time without blowing a breaker.

What is the one essential thing for your dream shop?

A Few of My Favorite Things

A Few of My Favorite Things

I’m a bit of a dorky geek when it comes to sewing and pattern making (I’m actually probably a dorky geek when it comes to a lot of things). Here are a few of my favorite sewing related things.

The Double Needle

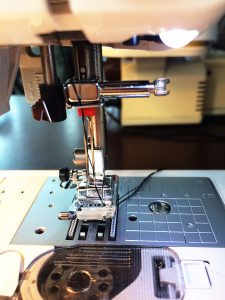
Twin needle in machine.

Twin needle in machine.

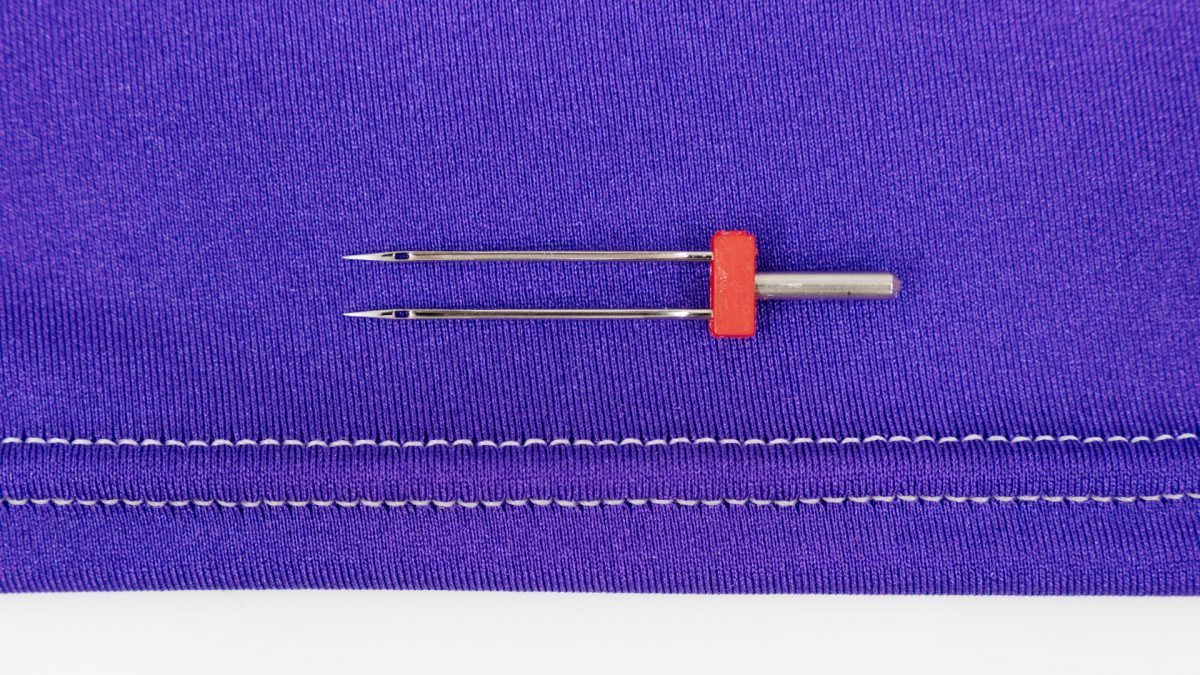
One of my favorite sewing related things is the Zwillings Nadel – or, if you prefer, the double needle. (Zwillings nadel is German for double needle.) A double needle is the perfect solution to hemming anything knit (or with any amount of stretch) if you don’t happen to own a machine that can do a cover stitch. I use them all the time to hem t-shirts, ribbed knit shirts, sweatshirts, sweaters, even jeans with an excessive amount of spandex.

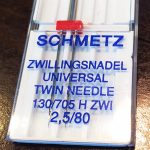
Zwillings Nadel.

Zwillings Nadel.

Any domestic machine can use a double needle. How they work is with two top threads and one bottom thread. This creates a zig-zag in the bottom thread that allows for stretch. I often use a double needle and a stretch stitch at the same time. I find the stretch stitch produces a result with minimal puckering.

My trick for hemming most anything, but especially things that require a double needle, is to cut after I sew.

First, mark a nice clear line for your hem on the right side of your garment using wax or some kind of marking pen that will disappear when heat is applied. Press the hem along the line you have marked. Do not trim any excess away. Next, using a double needle, stitch up an inch from your pressed line, or whatever is your desired hem depth. Once you have sewn, trim the excess fabric away. Try to trim as close to your zig zag bobbin line as you can. The ziz zag will keep anything from raveling and fraying if that is a concern though many tightly knit fabrics won’t really fray (Sweaters and some loosely woven ribbed t-shirt knit will of course). I press the hem at this point as well to get rid of any puckering. If the hem is still a bit wavy, try spritzing with water and pressing dry with a press cloth.

Zwillings Nadels

come in varying widths, meaning the two needles can be further or closer together. I keep a variety of widths around. They are also sized like regular needles, 12/80, 14/90, etc.

Bias Tape Makers

Bias tape makers are one of the most brilliant inventions in ‘modern’ sewing. If you don’t own any, buy a set now. They are these cool little devices that you feed a strip of fabric into on one end and get a beautifully uniformly pressed bias tape out the other end. They come in varying sizes – ¼” ½” 3/8”, and on. I use bias to bind necklines and armholes. Pretty much every single slip we made on Boardwalk Empire has a bias bond neck and armhole.

Loop Turner

Ever tried to turn a very thin spaghetti strap? It can seem virtually impossible. Unless, you have this really cool thin metal rod with a hook on one end. Insert the loop turner all the way through your strap and hook the little crochet hook into the seam allowance at the very end of your strap. Then pull gently from the other side, turning the strap inside itself. Once you are able to pull the hook through the other end, you can hand turn the remaining part of the strap.

Wooden Dowel

A simple, 1/8” or ¼” round wooden dowel is very useful for pressing belts, straps, and ties that you are bagging out. Put the dowel inside your strap or tie before you have flipped it so you can press open your seam allowances from the wrong side. This will give you much nicer and crisper finished edge when you turn them right side out.

These simple, inexpensive tools will not only help you achieve cleaner more professional looking results, but will also (I think, anyway) make your sewing life a little easier.

Do you have a simple, favorite tool you think others would benefit from knowing about? Write about in the comments section.

What I Do at Work All Day (Part 2)

What I Do at Work All Day (Part 2)

(As promised) The Dart and Drop

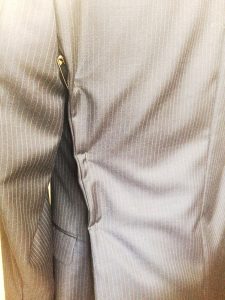
Pinned side back seam.

Pinned side back seam.

I do a lot of suit alterations. Sometimes I alter up to eight suits in a single day.
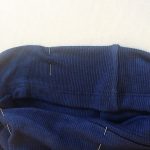
Often, suit jackets fit well in the shoulders but are a bit too roomy in the body. Because of the inner canvas and the inevitable front pocket, you can’t really successfully alter the front of a suit jacket. You need to take in at the center back or side back seams. While pinning, you’ll usually notice that you need to take in the side back seam all the way into the armseye.

This presents the conundrum of:

  1. Should I also take in the sleeve so it will still fit?
  2. Do I need to get into that seam at all?
  3. Do I really need to take the sleeve out?

The answers are no, yes and yes. Do not take in the sleeve. Do take the bottom part of the sleeve out.

Men’s suit jackets are traditionally cut without an actual side seam. The place where you really want/need to take a jacket in, though, is often in that invisible side seam. The way to accomplish this is by using the dart and drop method.

The Dart

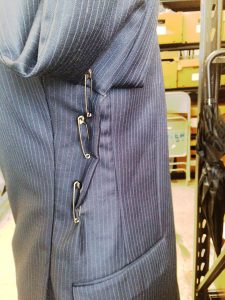
Dart pinned into side seam.

Dart pinned into side seam.

Take the lining out and the underarm sleeve apart from the side back seam to a few inches in the front of the side seam. There should be a notch in the jacket to indicate where the side seam would be if there were one. If no notch is present, lay the jacket flat on a table, buttoned up. Where the jacket naturally folds will indicate basically where that side seam is. Mark with chalk on the wrong side of the fabric in the coat body and in the sleeve.

Next, from the wrong side of the fabric, fold on the notch. At the top, measure in the amount you need to take in (as you determined by pinning your side back seam). Then draw a dart from that point down about 3 or 4 inches (or until you run into the top of the pocket). Sew the dart. You can put the same dart in the lining or you can simply do a tuck. Either is fine.

The Drop

The next step is to redraw your underarm seam. The armseye should remain the same size as it originally was. To do this, drop the underarm seam. I suspect there may be some actual formula for this but I’m more of an intuitive sewer. Dropping an inch is usually a good place to start. Use a curved ruler

to draw the new line making sure the connections are smooth. Pin your sleeve at your new side seam an inch below the original seam line. Then pin the rest. You might have to undo more of the original seam if the sleeve isn’t fitting. Do this in the back until you can easily fit the sleeve back in without any excessive easing.

Don’t Worry

Pinned underarm seam.

Pinned underarm seam.

If you end up having to undo part of the shoulder pad and sleeve header, that’s fine. Just reattach them once you have put your sleeve back in.

You can apply the same principle to jackets (or really anything) that have side seams. Unless you want to narrow the sleeve, dropping the armseye is a more accurate way to accomplish this alteration.

At this point I also want to add a little something about the idea of ‘a right way’ to do something. I don’t believe there is only one right way to do things.

Sewing jacket with side seam.

Sewing jacket with side seam.

I ran the costume building shop for Boardwalk Empire for four years. It was a shop full of talented tailors from all sorts of backgrounds and places (Russia, Uzbekistan, Turkey, Tunisia & various U.S. states). We had a running joke about people who insist that their way of doing things is the only way (We even had a little song called, “There’s only one right way to do things. The other ways are wrong…”).

Walk Your Own Path

You need to figure out the way of doing things that works best for you while accomplishing the desired result. Sometimes someone can show you a whole new way of doing something that makes it easier for you. Sometimes not.

The tips and tricks I write about are the things I’ve learned work best for me over the years. Hopefully they will prove to be useful to someone else as well.

Missed Part 1? Check it out here!