Five Sewing Tools that will take your Sewing to the Next Level

Five Sewing Tools that will take your Sewing to the Next Level

I love the feeling of getting sewing packages in the mail, don’t you? This particular box included a new tool that I’ve been excited to try. It is part of my top five sewing tools that will take your sewing to the next level, or at the very least, make your sewing more efficient and enjoyable.

I love the feeling of getting sewing packages in the mail, don’t you?

I love the feeling of getting sewing packages in the mail, don’t you?

1. A sewing mini iron

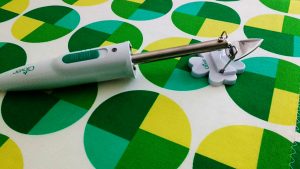
This is the Clover Mini-Iron. Isn’t it precious? I ordered it from SewingMachinesPlus.com and it is more than just an adorable accessory to your ironing board. A mini iron lets you iron hard-to-get-to seams or helps iron tiny seams on things like mini quilts.

It even comes with a little stand. Awwww.

It even comes with a little stand. Awwww.

It even comes with a little stand. Awwww.

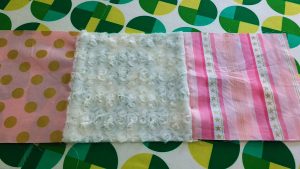
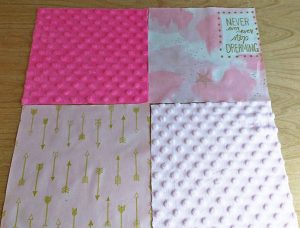
While I know I’ll have many opportunities to use this, I specifically bought it for this current project. My girls and I are working on BFF (best friends forever) quilts and the squares alternate with minky fabric.

My girls & I are working on BFF quilts with alternating minky blocks.

My girls & I are working on BFF quilts with alternating minky blocks.

Using a regular iron to iron over the seams would be a challenge. Hot irons can melt or destroy minky fabric. (For more on how to sew with minky, check out my post here).

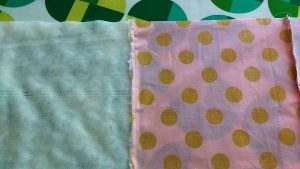
Here I folded the cotton fabric seam over the minky fabric and then placed a scrap of fabric over both. Then I ironed the seam down.

That’s what I’m talking about! This mini-iron is worth its weight in gold.

This mini-iron is worth its weight in gold.

This mini-iron is worth its weight in gold.

For fans of mini-quilts, or anyone who wants to iron their seams open, the mini-iron makes short work of it.
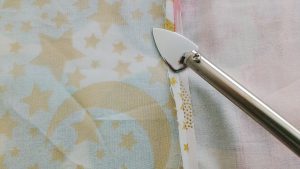
For fans of mini-quilts, or anyone who wants to iron their seams open, the mini-iron makes short work of it.

For fans of mini-quilts, or anyone who wants to iron their seams open, the mini-iron makes short work of it.

2. A rotating (rotary) cutting mat

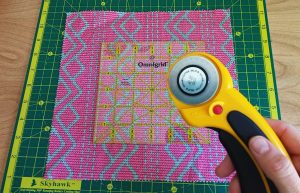
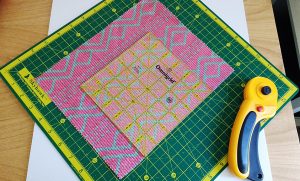
Yep, you heard me correctly. This is a cutting board that rotates on its base. If you’ve ever had a pile of HSTs (half-square triangles) or any other type of project that involved a lot of trimming, you will never look back from making this purchase. SewingMachinesPlus.com sells several different sizes.

This is a cutting board that rotates on its base.

This is a cutting board that rotates on its base.

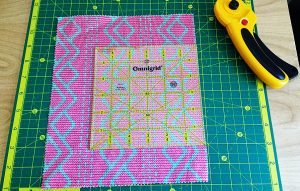
Here you can see I’ve cut one side of the fabric square. Prior to owning a rotary mat I would have had to move my body or the fabric and the ruler to make the subsequent cuts.

Here you can see I’ve cut one side of the fabric square.

Here you can see I’ve cut one side of the fabric square.

Not anymore. Look how it spins!! The base stays put while the cutting board goes for a walk.

The base stays put while the cutting board goes for a walk.

The base stays put while the cutting board goes for a walk.

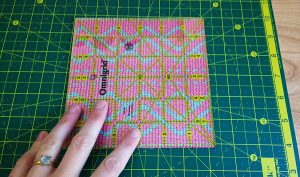
Here is my square fully cut. It’s a thing of beauty, no?

Here is my square fully cut.

Here is my square fully cut.

3. Rulers and grids

This is my assortment of rulers and grids. There is nothing like having the right tools for the job. The two square grids were purchases for projects whose final size HSTs needed to be trimmed exactly to the size of the grid.

The large grid on the bottom is 24” long and my primary ruler for measuring and cutting out my fabric. The 2” ruler is my workhorse, everyday ruler.

Lastly, I had to include a classic measuring tape. I have about seven floating around the house and in my backpack and car. You never know when you might need to measure something!

The small, black and silver ruler below the measuring tape is a seam gauge. It helps you mark precise seams at a variety of lengths.

SewingMachinesPlus.com has a wide assortment of rulers and grids: https://www.sewingmachinesplus.com/searchresults.php?search_field=omnigrid

SewingMachinesPlus.com has a wide assortment of rulers & grids.

SewingMachinesPlus.com has a wide assortment of rulers & grids.

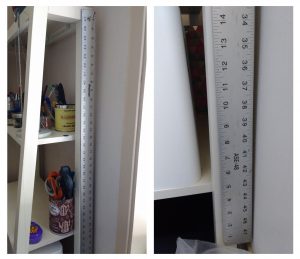
I also have this heavy, metal, 48” ruler that I use for canvas and large home interior projects, or when cutting very large lengths of fabric.

I also have this heavy, metal, 48” ruler.

I also have this heavy, metal, 48” ruler.

4. A walking foot

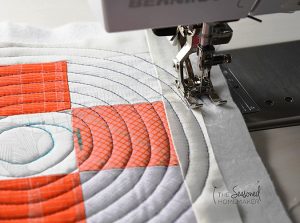
I mention my walking foot a lot in my posts here and that’s because I use it a lot. In fact as a rule, I have it installed as my go-to sewing foot and only switch out to other feet as needed. Your machine probably came with one and you tucked it away not knowing what the strange, Star Wars-like contraption was.

Get it out of the box and learn to use it! If you quilt or work with thicker fabric, your walking foot will be your best friend.

Get it out of the box & learn to use it!

Get it out of the box & learn to use it!

If your machine didn’t come with one, I guarantee the maker of your machine sells one as an accessory. Check out all the options available on SewingMachinesPlus.com here.

Image via The Seasoned Homemaker.

Image via The Seasoned Homemaker.

5. A bias tape maker

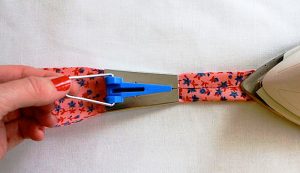
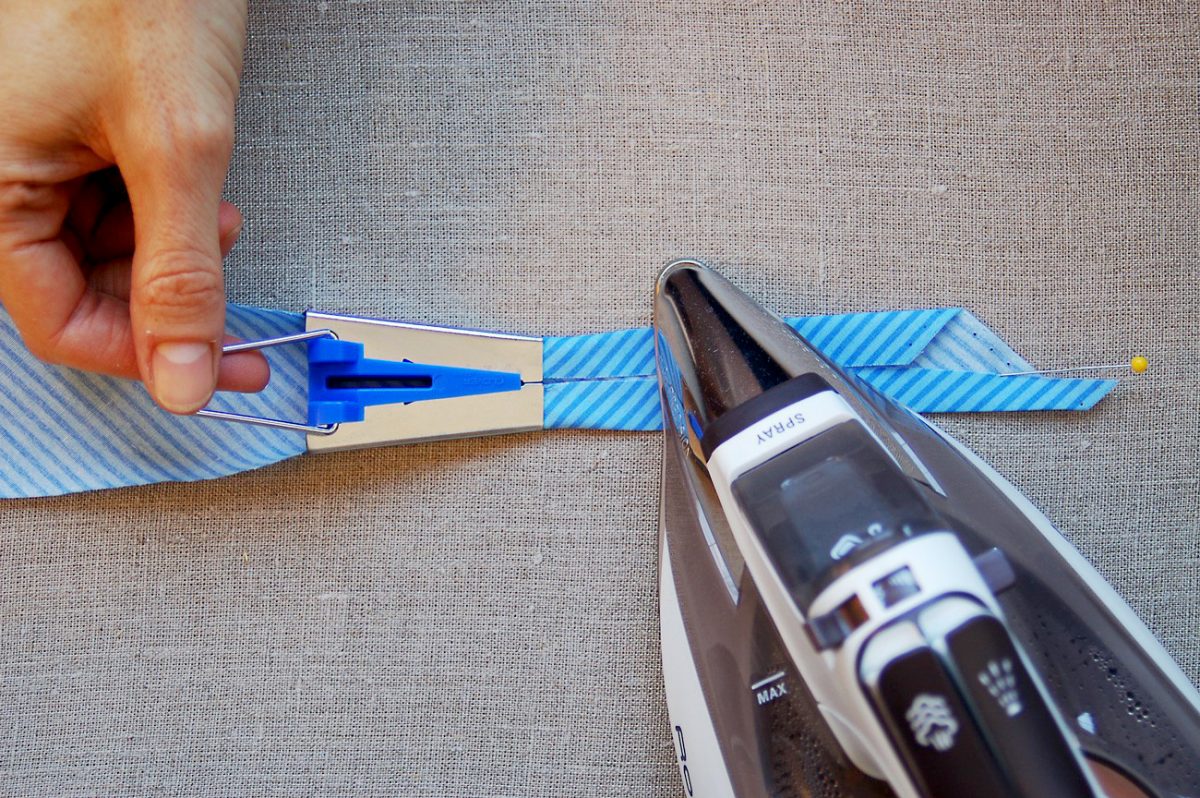
There will come a point in your sewing career when the pre-made bias tape available in stores and online just doesn’t meet your needs. When you get to that point, grab a bias tape maker, in fact, grab a few (they make different sizes of tape). With one of these humble tools you can make both single and double-fold bias tape and the sky is pretty much the limit as far as your creativity goes.

When you get to that point, grab a bias tape maker, in fact, grab a few (they make different sizes of tape).

When you get to that point, grab a bias tape maker, in fact, grab a few (they make different sizes of tape).

You can make coordinating, contrasting, or complimenting colors of bias tape to match your projects and the process is extremely quick. It won’t be as fast as using premade, but I promise it will be worth it.

Image via Made Everyday with Dana.

Image via Made Everyday with Dana.

Do you use any of these tools already in your sewing projects? What other tools would you add to a list like this? Let us know in comments!

———————————————————————————–
Charlotte Kaufman is a writer and sewist in Mammoth Lakes, California. She specializes in marine and home interiors and continues to fall more and more in love with quilting. You can follow her at charlottekaufman.com.
Ironing out the Ironing Details

Ironing out the Ironing Details

Random fact: My family does not like ironing.

We’re the type of people who, if something is wrinkled, minutes in the dryer are the way to work on the issue.

We’re the type of people who, if something is wrinkled, minutes in the dryer are the way to work on the issue.

Seriously. We’re the type of people who, if something is wrinkled, minutes in the dryer are the way to work on the issue. That being said, my hobby/profession of sewing is a bit contradictory for such an I-don’t-love-irons approach because an iron can be such a significant part of the sewing process.

Pressing seams, for instance, could add to the professional look of your project, and ironing your fabric before you sew can help to create more equal blocks and pieces. All in all, if you don’t iron, your product might look less impressive than you want it to, and with all the work you invest, taking the small steps to create a wonderful product could be worth the effort!

I come from an anti-iron family.

I come from an anti-iron family.

But given that I come from an anti-iron family, the idea of embracing the step can be daunting. Even picking an iron could pose a problem because there’s such a range of options. When you literally have thousands of options to choose from, selecting that right one could be a complex process. Do I get the pretty blue one, or should I pay the extra $50 for that name-brand one? What kind of features do I need, and what ones will I never use? Is this iron going to break in a month, or will it last me for years? These are the kinds of things worth considering should you choose to buy a new — and fitting — iron for your sewing.

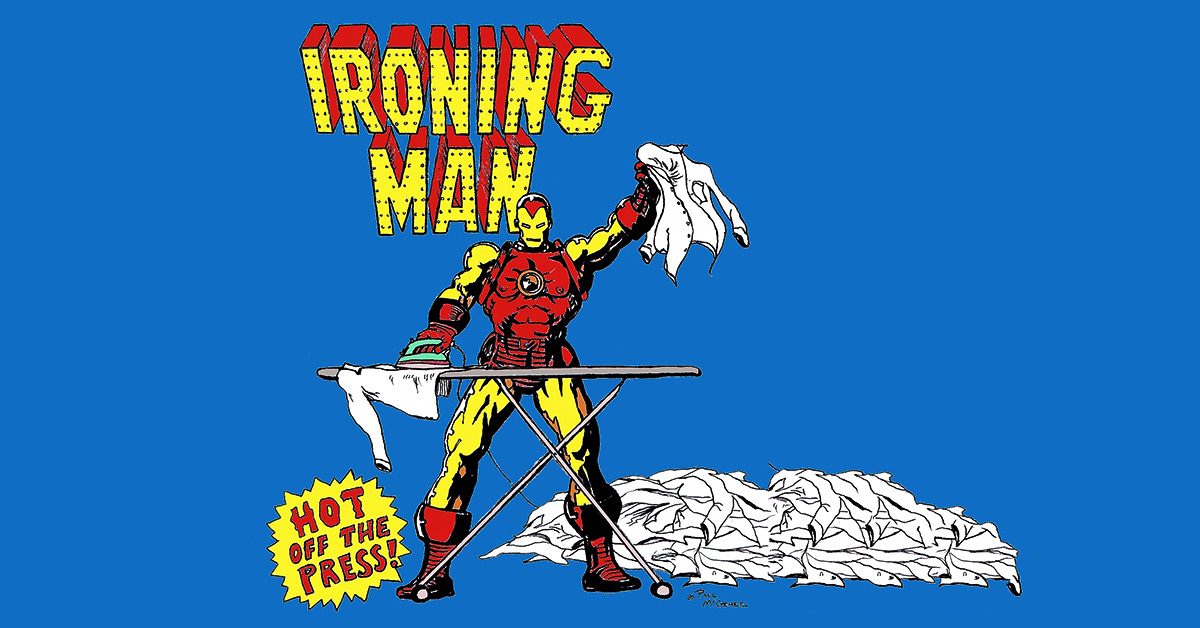
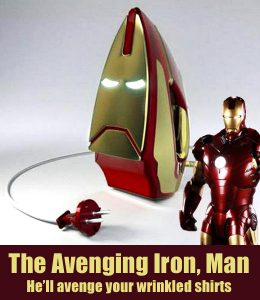
Note: With my nerd interests, all of this anti-iron business could potentially be overlooked if I owned an Iron Man iron like the one seen here.

Note: With my nerd interests, all of this anti-iron business could potentially be overlooked if I owned an Iron Man iron like the one seen here.

Anyway. I did some research this week on iron-related topics, and I came up with a list of what I felt were the most important qualifications for an iron and the preferred method of selecting that sewing tool.

Price

Hey, remember me? I’m the cheapskate who blogs about saving money on sewing projects! Of course — of course — cheaper isn’t always the overriding criterion for an iron because sometimes things are cheaper for a reason. Maybe the $10 iron has no special functions to help you. Maybe it’s made of bad materials and will leave an imprint on your fabric. Maybe it’ll fall apart in five minutes. The point is that this is NOT the only detail worth considering, but if you can find an iron that suits your purposes for $30, why pay hundreds?

Functions

As I said, price can be overshadowed by functions that your iron can bring to the ironing board. For sewing, I don’t know that there’s a more important function than releasing steam to better tackle wrinkles in fabric. Basically, if you see an iron that doesn’t release steam, you might want to keep looking! Another detail you might want to think about is if your iron automatically shuts itself off after a span of time. While this might be an aspect that doesn’t concern you in the least because you’re so careful with your iron, if there’s a chance you’ll forget and leave your iron going, I would recommend trying for an iron that’ll automatically shut off. That choice could prevent a fire, after all!

Build

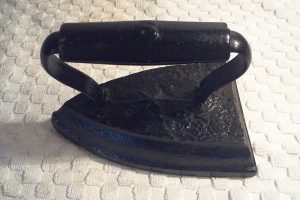
More than one source that I found mentioned older irons — “vintage” or “antique.”

More than one source that I found mentioned older irons — “vintage” or “antique.”

In a world where smaller technological devices can steal the spotlight, believe it or not, heavier can be a good thing for an iron when it comes to pressing seams! More than one source that I found mentioned older irons — “vintage” or “antique.” And it makes sense because that extra weight could make it easier to smooth out your seams with a smaller amount of effort. So should you completely fall back on your grandma’s iron from the 1800s? Not necessarily! Remember what I said about steam? But that doesn’t mean that a secondary iron for this purpose can’t benefit you, especially since you can buy used ones for such small prices (like, less than $10). For a brand new iron though, thinking about that extra weight could lead you to the right iron, as could other details like whether or not it uses a cord. As a person who can forget something is plugged up and trip over a cord fairly easily, I think cordless might be a good option for me!

And, now that we’ve labeled some of the most important traits for an iron, the situation comes down to how you can find that perfect iron even after you narrow down your options by price, function, and build. My main recommendation for this step would be to read customer reviews and try for something that received a high average rating. You might also want to look at how many reviews the product has since a 4.5 rating over 5000 reviews provides more credible feedback than a 3.0 rating out of 2 reviews. Why? As an example, a 5.0 rating could’ve been lowered by a 1.0 rating from someone who was criticizing the seller rather than the product.

Look for irons that have a lot of reviews, read through them for details that fit your needs, and pay very real attention to the average ratings. If you do, you could have the right information to find the perfect iron for your products.

How to Sew Faster

How to Sew Faster

My job as a tailor on a television show often requires me to complete an alteration in a seemingly impossible amount of time. Not to be overly cocky or self-congratulating but, I can be pretty fast when needed. People frequently ask me how I’m able to do something so quickly.

Don’t hesitate. Just, do.

Honestly, I don’t think so much about it anymore: its pretty much second nature at this point. But, I suppose if I were to break it down, the process would go something like this:

First, don’t panic. Whatever you do, don’t panic. If you do, you could find that suddenly you’re unable to thread a needle, or your needle breaks, or the thread tangles.

Second, don’t hesitate. Just, do.

As you’re working, think about the next step. Plan ahead.

Concentrate fully on what you’re doing. Don’t listen to the conversations going on around you. Pay no mind to whatever random chaos might be happening in another part of the room. Just focus your full attention on the one thing you are doing. That is all that is important.

Whatever you do, don’t thread mark. I know that’s what they teach in sewing school but there is no reason to have to thread mark a pant hem.

A few tips on how to sew faster:

Do as much as you can without stopping to iron.

If I’m really pressed for time, I tend to leave all the ironing until the very end (pun intended).

Learn how to eyeball measurements. Think about it, if you’ve been sewing long enough, you know what a ½” looks like. You honestly do not need to mark every single little line. If you want to measure, go ahead, put use your pins to mark the line. I often work with a metal seam gauge but rarely actually draw a new stitching line. One exception is if I’m re-mitering a suit jacket sleeve corner though I know lots of tailors that do not need to draw that line either.

Whatever you do, don’t thread mark. I know that’s what they teach in sewing school but there is no reason to have to thread mark a pant hem. I once had an additional tailor helping me on a show who insisted on thread marking the fold line on hems for cop pants. Buy some tailor’s chalk and use that to mark your hemline. It’ll disappear when ironed.

Unless you’re topstitching, you really don’t have to have your thread match exactly. Believe me. Whatever thread is in your machine is just fine. I cannot begin to tell you how many black garments I’ve altered quickly with red or yellow or whatever happened to be in the machine colored thread.

Learn how to undo a chain stitch. A lot of manufacturers use chain stitches in clothing construction. This makes it super easy to take them apart when needed. You can only unravel a chain stitch in one direction, the direction it was sewn in. Most of the time, all you need to do is insert a seam ripper and pull in that direction and all the stitching will come undone. The center back seam of men’s pants, often will have two rows of stitching so you’ll need to pull each row separately.

A couple other seam deconstruction tips:

To take apart a serged seam, use a nice sharp seam ripper and run it through the threads that wraps around the edge of a seam. After you do this, the rest of the threads will usually come apart rather quickly. Some serged seams are on a chain as well and you can undo them by pulling the thread on the straight stitch.

One of the fastest ways of taking apart a seam is to, again, use an extremely sharp seam ripper and insert it into the seam from the right side and just pull upwards through the seam. This technique takes a bit of practice (and bravery) though as the potential to accidentally slice through the fabric is ever present. There’s a knack to getting the angle of the seam ripper just right though and once you figure that out, you’re golden.

In the end, the one sure way of becoming a faster tailor is by practice. The more often you repeat the same task, the more efficient at it you become.

As you do an alteration, try to think of ways you could save time: do you really need to flip everything back right side out then inside out then right side out again? Probably not. If you sew this first, will it make it easier to sew this? Or visa versa? Experiment and try things multiple ways until you’ve figured out the quickest sequence of steps for yourself.

I love discovering a new, faster way of doing something I’ve done a million times. Sewing is kind of cool like that: there’s always something more to learn and fresh tactics to uncover.

Do NOT iron minky directly!

Tips for Sewing with Minky Fabric (Cuddle or Plush Fabric)

Tips for Sewing with Minky Fabric (Cuddle or Plush Fabric)

I know a lot of people that shy away from sewing or quilting with minky but I’m here to tell you that minky is not the bogey-woman some people make it out to be, as long as you follow some important tips to make your sewing with it a success.

1. Pre-washing is not needed. Well, at least for the minky that is. Plush fabrics are made from polyester so they don’t shrink. If you’ll be pairing with fabrics that do shrink, then pre-wash the other fabrics in advance.

Minky bumps

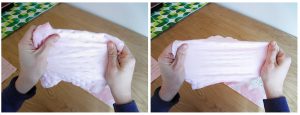
2. Nap! Minky has a nap. Nap is the raised or fuzzy/bumpy parts you find on certain fabric (think velvet). If you brush your hand one way on minky, it will be soft, if you brush it the other way, it will be rougher. Take the direction of the nap into the consideration when cutting out your project.

Take the direction of the nap into the consideration when cutting out your project.

Take the direction of the nap into the consideration when cutting out your project.

3. Minky can STRETCH! But only from one direction. Take a piece of the fabric you are working with and stretch it one direction and then the other. You’ll find the stretchy side very quickly. I make sure to not ever leave my hole for turning on the super stretchy side.

Minky can STRETCH! But only from one direction.

Minky can STRETCH! But only from one direction.

4. Use the right needle and correct sewing foot. A lot of guides will recommend a universal needle size of 12. I prefer size 14, but find what works for you. Additionally, if you have a walking foot, use it! If you are too lazy to use your walking foot (or don’t have one), I find minky sews better when you place it on the bottom and the regular fabric on the top.

Use a walking foot. I find minky sews better when you place it on the bottom and the regular fabric on the top.

Use a walking foot. I find minky sews better when you place it on the bottom and the regular fabric on the top.

5. Seam allowance and stitch length – I tend to give myself more room with minky and usually use a 1/2” seam allowance. I also use a longer stitch length, around 4.

6. DO NOT IRON MINKY DIRECTLY. It will melt. I promise you. You need to even be careful ironing with another fabric placed on top as pressing too hard or with too much heat will ruin the nap or little bumps of the minky underneath.

7. Pins, clips and washable basting spray or this Wash-A-Way Wonder Tape are your friends with minky. Use them excessively and you’ll get much better results.

https://www.sewingmachinesplus.com/tacony-BT14.php

Pins, clips and washable basting spray or this Wash-A-Way Wonder Tape are your friends with minky.

Pins, clips and washable basting spray or this Wash-A-Way Wonder Tape are your friends with minky.

8. Top stitch!! Top stitching minky will really help to remove bulk, keep the seams in line and make your project look more professional.

Top stitching minky will really help to remove bulk, keep the seams in line and make your project look more professional.

Top stitching minky will really help to remove bulk, keep the seams in line and make your project look more professional.

9. Use a rotary cutter and a vacuum. Rotary cutters help make very exact cuts with minky. I also suggest having your vacuum nearby to clean up after cutting and to clean out your machine as you sew. SewingMachinesPlus.com has a variety of vacuum cleaners for your sewing room.

https://www.sewingmachinesplus.com/tacony-fb-gim.php

10. Practice! You’ll get better the more you use it. Soon, you’ll be wondering what all the fuss is about when others say they shy away from sewing with plush fabrics.

Do you have any tips for making sewing with cuddle fabrics a success? Let us know what works for you in comments!
———————————————————————————–
Charlotte Kaufman is a writer and sewist in Mammoth Lakes, California. She specializes in marine and home interiors and continues to fall more and more in love with quilting. You can follow her at charlottekaufman.com.

DIY Ironing Board Ideas

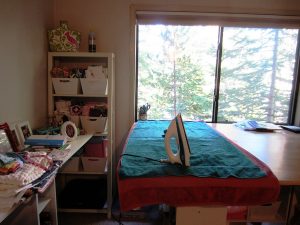
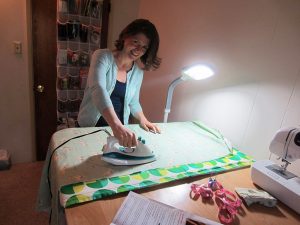
I recently decided to upgrade my ironing station from two towels placed on top of my new DIY work station to something fancier. I went from this:

I recently decided to upgrade my ironing station from two towels placed on top of my new DIY work station to something fancier.

DIY work station.

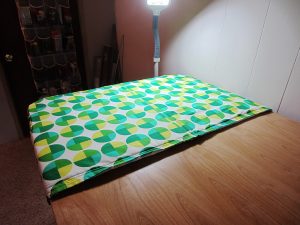
To this:

Fancy, right?

Fancy, right?

Fancy, right? Before I made my own ironing station I did a little research. Here’s what I learned.

Be Creative

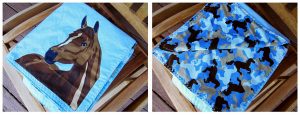
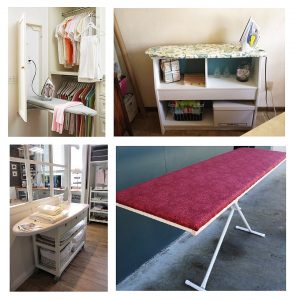
Images from left to right: BH&G, Hometalk, Crazy Mary Revista, Sew We Quilt.

Images from left to right: BH&G, Hometalk, Crazy Mary Revista, Sew We Quilt.

Images from left to right: BH&G, Hometalk, Crazy Mary Revista, Sew We Quilt

The sky is really the limit when planning where you want to iron. Do you want to be able to iron a lot of fabric at a time? Go big. Do you want to save space? Go between the studs or hang from the wall. Almost anything with a flat top can be converted into an ironing board.

Thing Long Term

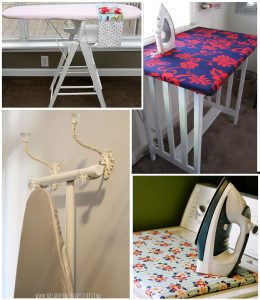
Images from left to right: Flaming Toes, Stitchery Dickery Dock, A Diamond in the Stuff, A Crafty Fox.

Images from left to right: Flaming Toes, Stitchery Dickery Dock, A Diamond in the Stuff, A Crafty Fox.

Images from left to right: Flaming Toes, Stitchery Dickery Dock, A Diamond in the Stuff, A Crafty Fox

Will you want your ironing board to always be on display? Consider the fabric you choose and if it coordinates or clashes with the space you’ll be ironing in.

Consider the fabric you choose and if it coordinates or clashes with the space you’ll be ironing in.

Consider the fabric you choose and if it coordinates or clashes with the space you’ll be ironing in.

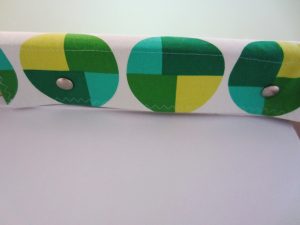
I made my cover removable. It snaps firmly into place on my work station, but I can slip it off in a moment if I want the whole space.

Be Resourceful

Want to save money? You can line your ironing board cover with many things. Try using old wool blankets, receiving blankets, towels, or the innards of your former ironing board covers. Layers of batting work as well. If you want to use Insul-Bright, make sure to include a layer of batting to absorb extra moisture.

Go Vintage

Images from left to right: Simply Pallets, Recyclart.org, The Rustic Pig.

Images from left to right: Simply Pallets, Recyclart.org, The Rustic Pig.

Images from left to right: Simply Pallets, Recyclart.org, The Rustic Pig

If you are retiring a vintage ironing board for a newer one, don’t let the old board go to waste.
Use it as a wine station, to store your thread, or for holiday decorations.

Have Fun!
Have you ever made a DIY ironing station? Tell us about it!

Have you ever made a DIY ironing station? Tell us about it!

Have you ever made a DIY ironing station? Tell us about it!

—————————–
Charlotte Kaufman is a writer and sewist in Mammoth Lakes, California. She specializes in marine and home interiors and continues to fall more and more in love with quilting. You can follow her at charlottekaufman.com.
The Pressing Matter of Irons

The Pressing Matter of Irons

There is something sort of Zen and comforting about it for me.

There is something sort of Zen and comforting about it for me.

I actually kind of like ironing. There is something sort of Zen and comforting about it for me.

One of my first jobs in a professional theatre setting was as a dresser at the Alley Theatre in Houston, TX. Being a backstage dresser means helping actors get dressed (obviously), laundering actors’ costumes, assisting actors in changing their clothing really quickly, seeing in the dark, and a whole lot of steaming and pressing. The Alley does an annual production of A Christmas Carol every holiday season. Almost every main male character in the production wore a white cotton shirt that needed to be ironed before every show. One of my responsibilities was to iron the pile of white cotton shirts every day. Anyone who has ever spent a significant amount

I pretty much always use a sleeve board.

I pretty much always use a sleeve board.

of time ironing shirts has developed their own little system, order.

I do yoke, front, back, sleeves (no creases), collar. I pretty much always use a sleeve board. And a proper iron makes all the difference – whether you are simply ironing to get the creases out or sewing. Everything looks better with a good press.

A gravity feed iron is the one with the plastic water bottle you suspend from above to feed water into to iron that heats it and converts it to steam. I’ve worked places that had nice custom wood ironing tables complete with a wood arm/pole on one corner to hang the water bottle from but an IV stand works just as well.

Reliable

Reliable makes a system of steam irons and ironing boards with reservoirs and poles attached that I’ve heard are very good though I’ve never used them.

Gravity feed irons are heavier than other irons and made from actual metal. And they produce lots of steam. (I’m a big fan of steam).

Goldstar

makes an excellent, very reasonably priced, and durable iron. The thing about industrial irons is that they don’t have that annoying automatic shut off feature and are made to remain on for a full day. They tend to last for a long time (like 20-30 years) though you may have to replace the water tube that extends from the bottle to the iron (a $5.00 or so repair).

Pacific also makes a nice model.

The first professional shop I ever worked in had two gravity feed steam irons and, to this day, they are still my favorite iron.

The first professional shop I ever worked in had two gravity feed steam irons and, to this day, they are still my favorite iron.

Gravity feed irons usually come with blue de-mineralizing crystals that you put in the bottom of the water bottle. You can forgo the crystals though and simply use distilled water. I wouldn’t necessarily recommend using tap water but I will say that I’ve been putting New York City tap water through my industrial irons for years without issue.

The crystals, on the other hand, have been known to occasionally work themselves into the water feed tube and cause havoc. Just saying.

So what if you want a good steam iron but don’t have room, or the means, to hang a water bottle? The prevailing iron of choice on most wardrobe trucks I’ve worked on is the Rowenta Professional Steam iron.

It provides a strong burst of steam without the assistance of gravity: the iron rest and water reservoir are all in one. It does, though, have the automatic shut off feature which can be annoying when you have an ironing emergency (don’t laugh, it happens!) and you run to the iron only to find it cold as ice.

The Rowenta is also self-cleaning and flushes minerals and the like out so you can use tap water without thinking twice.

The Rowenta is a fairly durable iron but they do wear out if you use them ten hours a day every day for months and months on end. We may have killed about four of them the first season of Boardwalk Empire until we finally bought gravity feed ones.

As for portable, domestic irons, I have an old Rowenta of some kind that I dropped once and inadvertently broke the automatic shut off. It’s the one I drag along with me if I’m just doing a short one or two day job.

What’s your favorite iron?

Pressing Forward – A New Idea

Pressing Forward – A New Idea

As I was organizing my new sewing room, I thought about what components I could use to make sewing organized and efficient. Sewing is my favorite part but keeping things in order can become a challenge.

Sewing is my favorite part but keeping things in order can become a challenge.

Sewing is my favorite part but keeping things in order can become a challenge.

Of course, quilting takes a few more supplies that some hobbies, but I was thinking specifically about how I can make the pressing of quilt squares and fabric as part of my desk area rather than an ironing board and standing each time I had to press.

I made an ironing table on my counter top which has an insulated pad so I could sew and turn my chair to iron. It works fairly well but needs to be adjusted at times, as the pad wriggles around, and I thought there has to be something better.

I have to say that ironing is NOT my favorite past time with all the laundry we have, but somehow when I am making quilt squares, it is not too cumbersome. I use a fabric stabilizer when I iron that smells nice when it is heated so it, it gives me ambition to sew my squares and press them neatly to look professional as I go along. I have been thinking that an investment in a Home Pressing system will be beneficial.

Thinking back, actually, when I was a little girl, my Mom had what she called a “Mangle” Iron. I have not seen those again until recently in this website. I always wanted to help her press the sheets and pillow cases and my Dad’s handkerchiefs when she set up the what seemed to be an “ancient” machine. In fact, this type of machine was first used to wring out clothes by washer women beginning in 1843. Mom had hers in the late 1950’s, and used it often.

Sheets, tea towels, table cloths and fabric scraps would be so easy to run through the iron and save time to enable more sewing.

So, with that in mind, I have been researching Pressing Systems. I have come across some great reviews on the Magic Steam Press ESP2 Electronic Iron, and the Miele B990E Rotary Ironing Board. Check out the other brands here as well. The first is a small table model and the second is a rotary iron on a stand capable of ironing most everything. This is easy to use by sitting and makes ironing a breeze! Just be careful about the buttons and zippers, please!

I think these models would be particular good for bonding interfacings and stabilizers to fabric and to make quilt squares, totes, curtain panels and much more. Sheets, tea towels, table cloths and fabric scraps would be so easy to run through the iron and save time to enable more sewing.

Check out the irons on this website, and consider using a Pressing System for your sewing and ironing needs.

The reviews are helpful to see how valuable and what a time saver these systems are.

My next purchase will be to order for one of these products. With time saved and beautifully pressed quilts and clothes, it is an investment well worth the money with energy to spare! Press forward, and enjoy ironing! See you next time!

DIY - Bias Tape with a Bias Tape Maker Tool

10 Steps to Making & Sewing Bias Tape

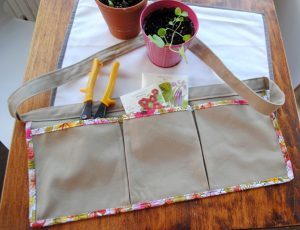
Gardening Apron, pattern from “Sewing for All Seasons” by Susan Beal.

Gardening Apron, pattern from “Sewing for All Seasons” by Susan Beal.

You might appreciate a well-stocked sewing shop, but don’t you get bored with the limited choices for bias and binding tape? The standard spectrum of hues leaves little room for imaginative and interesting ideas.

If you’re sure the best binding for your project isn’t on the notions shelf, consider making it yourself. Although it’s possible to create tape with only an iron and your fingers, the process will go more smoothly and be more fun with a special tool called a bias tape maker. These little aluminum color-coded gadgets are sold at most sewing shops, including Sewingmachinesplus.com. They come in widths ranging from two inches all the way down to one-quarter inch and can be purchased individually or as a set. Save the instructions that come with the tool—you’ll need its measurement guide when cutting strips.

With a small tool that costs under $10, you can conquer the bias tape bores.

My curiosity about homemade tape led me to Susan Beal’s book “Sewing for All Seasons,” where I found a pattern for a canvas gardening apron made with DIY binding tape. My tape edging was folded from a poplin just slighter lighter than the canvas used for the apron body. I used a three-quarter-inch bias tape maker by Clover, and I even have some tape left over for a matching hat.

When making your own projects with DIY tape,
follow these 10 steps:

  1. Select similar fabrics. Cut swatches from your stash and consider how each would work as either the tape or the body fabric. As a general rule, your tape should be the same weight or just slightly lighter than the body fabric. Avoid using silky fabrics because you’ll have trouble keeping the tape in place when sewing. Also avoid transparent or translucent material that will show seams and frayed edges.
  2. Determine measurements. Refer to your pattern’s specifications – what size bias or binding is required? Use the guide that comes with your tool to determine how wide your strips should be in order to achieve the proper finished size. For example, if you need three-quarter-inch binding, your strip width (for medium weight fabric) would be one and three-eights. Make sure you have the right size bias-making tool for the size you need.
  3. Measure and cut your strips. If your tape will be sewn around curved edges, such as with a circle-shaped potholder or Christmas tree skirt, your strips should be cut on the bias (at a 45-degree angle against the fabric grain). If your project is made of only straight lines like the gardening apron in the photos, you can cut strips horizontally from selvage to selvage.
  4. Prepare the strips. If your pattern requires many yards of tape, you can sew long strips together with a three-quarter-inch seam allowance. Open and gently press the seam before using the tool.

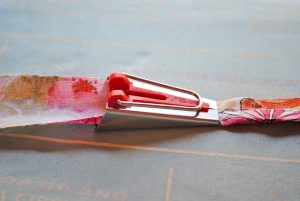
    Run the strips through the tool to create perfectly folded tape.

    Run the strips through the tool to create perfectly folded tape.

  5. Press perfectly. Use an iron at the appropriate setting for your fabric to flatten the tape as you pull it though the tool. Take your time and use your fingers to hold the tape in position before applying steam. Store the finished tape so it doesn’t lose shape when you’re working on other aspects of the project.
  6. Check your machine’s needle and thread. You’ll be sewing through many layers, so make sure your needle is up to the challenge. Likewise, consider your thread color. A thread that looks good with the body fabric might not look as good when sewn into your bias tape.
  7. Pin the tape into position. Use plenty of pins with the head accessible in the direction you plan to sew. Use small pins that won’t distort the shape of your project. The flatter, the better. In some cases, you might want to baste the tape into place.

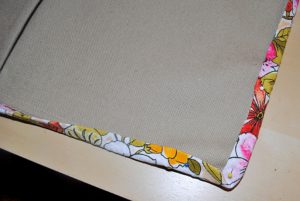
    Create a folded angle at corners.

    Create a folded angle at corners.

  8. Be careful at corners. Fold the tape at an angle, making sure it doesn’t slip. When sewing on the machine, sew one half of the corner and stop to pivot the project to the other direction before beginning again. Do not rush—take your time and concentrate on keeping the tape in place.
  9. Cut with caution. If your pattern asks you to cut the tape at particular points, don’t cut exactly flush to the body fabric. Leave a millimeter or two in case the next part of the process pulls your tape more taut than expected.
  10. Press gently. Resist the temptation to vigorously iron the tape after it’s sewn on. Give the project some time to settle into its seams, then use light steam to gently coax out lumps and wrinkles.

With a small tool that costs under $10, you can conquer the bias tape bores. New doors open with tape made from abstract prints, solids, florals, and plaids. A fancy or patterned bias edge against a plain fabric is a fun and interesting take on cosmetic bags, T-shirts, placemats, table runners or blanket edges. Make your own tape and take your project from OK to extraordinary.