The Basics of Cathedral Window Quilts

The Basics of Cathedral Window Quilts

The time has come to explore yet another quilt type, and this one seems a bit less known than your standard patchworks and rag quilts. In fact, until I was doing brainstorm-browsing for this post, I don’t recall having ever heard of this kind of quilt, but the style is noteworthy enough to merit looking into. Through repetition, pattern, and color, quilts of this variety can have an interesting look to them that makes them stand out in similar fashion to the architectural designs of their namesakes.

The type of quilt I’m referring to is a cathedral window quilt.

The type of quilt I’m referring to is a cathedral window quilt.

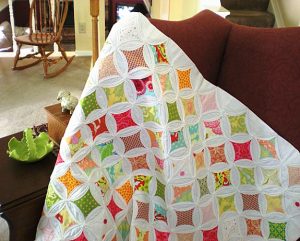
The type of quilt I’m referring to is a cathedral window quilt, and as distinctive as cathedrals themselves could prove, these sewing products can be straightforwardly identifiable once you know the traits to search for. Those traits, as with the artistic and structural wonder of cathedrals themselves, can catch the eye with their composition and beauty like few other quilt styles — in my opinion — are capable of doing. In this post, we’ll go through a list of typical characteristics that you can spot in a cathedral window quilt that provide evidence of its type so you can more easily identify one in a crowd of variously styled quilts. In particular, we’ll focus on four distinctive features of cathedral window quilts, starting with their…

These quilts are not necessarily known for bright coloring.

These quilts are not necessarily known for bright coloring.

Bold colors

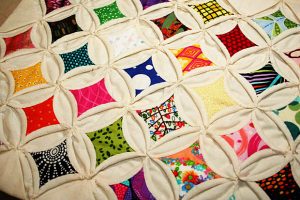
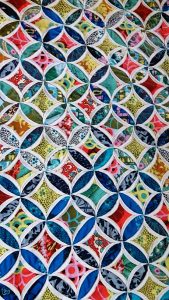
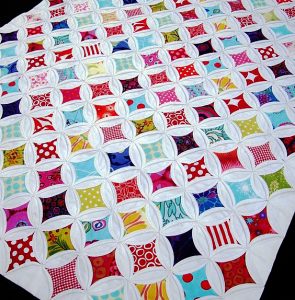
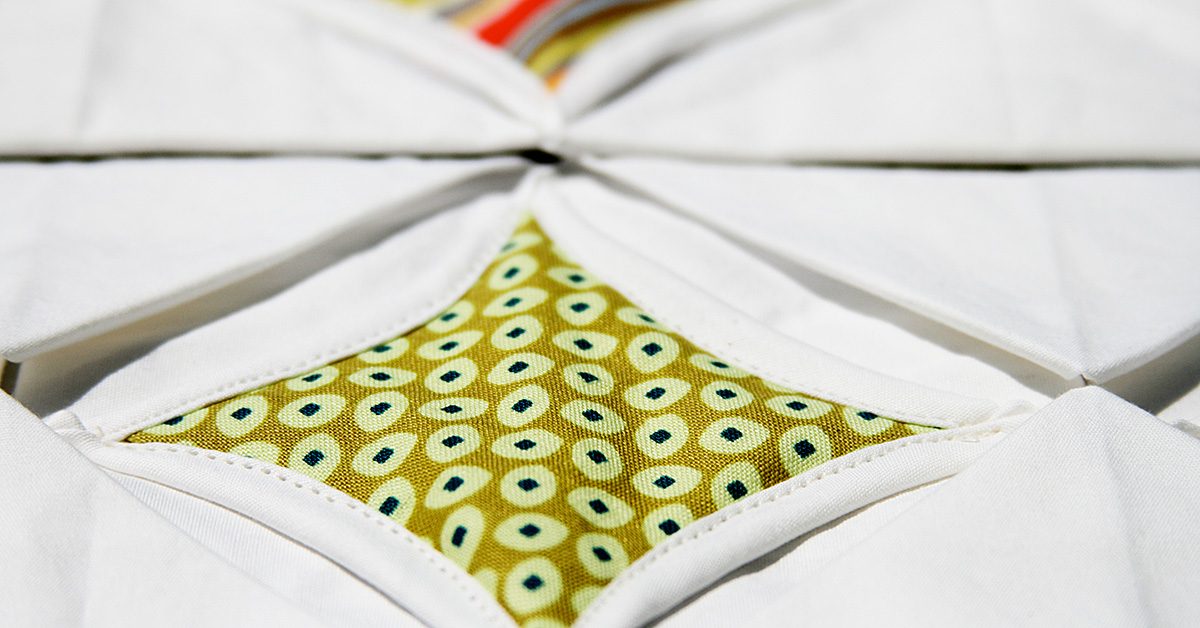
These quilts are not necessarily known for bright coloring, but a good percentage of the fabric used in creating a work of this category could be very bold, like dark blues, greens, and reds that give their sections a real pop. Even with the cathedral window quilts that use more pastel-based colors, those color options are still varied and strong, and they could build centralized sparks of color in certain patterns. If you’re going to make a cathedral window quilt, be sure to include some very dynamic colors to give these defined and robust splashes of color throughout the product. These bits of color, to construct the right design, “are folded precisely and sewn with curves to create small windows,” and “folded blocks are added together until the quilt is the desired size.” This sounds very direct and uncomplicated, but what are those bold-colored fabric pieces added to? That would be…

The overall point though is that the juxtaposition of light & dark make each section stand out.

The overall point though is that the juxtaposition of light & dark make each section stand out.

White fabric

Along with varied colors, it’s also a good idea to snatch up some white fabric if you intend to make a cathedral window quilt. That white fabric added in contrast to the bold colors already mentioned helps to cement the notion of having stand-out sections of color on your quilt. Typically, the white fabric can completely surround portions of bold-colored fabric, but the reverse can be true as well if bold colors appear to surround the white fabric. The overall point though is that the juxtaposition of light and dark make each section stand out — the bold colors and the white sections — to result in a quilt that doesn’t necessarily have a single piece of it that isn’t remarkable and noteworthy.  The consequence is a repetitious design that follows a…
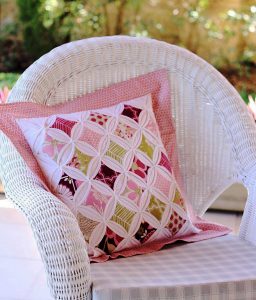
These quilts can employ very specific shapes in their overall design—ones that can be mimicked in pillows.

These quilts can employ very specific shapes in their overall design—ones that can be mimicked in pillows.

Definite pattern

Often, these quilts can employ very specific shapes in their overall design — ones that can be mimicked in pillows. Specifically, the bold colors are often in the shape of near-diamonds, but those diamonds’ sides invert inward to create a swooping motion along all four sides. That diamond-esque shape is surrounded by a circle — one that can be ringed — and those circles can overlap throughout the entirety of the project. Is this the only way that a cathedral window quilt can take shape? Well, it’s not set in concrete! But if you see this general pattern, you have very real evidence that you’re looking at a cathedral window quilt since the pattern is so common for the style. Another trademark is that it has…
If you neglect a layer of quilt, that’s a layer of quilt that isn’t available to strategically cover mistakes & such, so the work could feel more vulnerable.

If you neglect a layer of quilt, that’s a layer of quilt that isn’t available to strategically cover mistakes & such, so the work could feel more vulnerable.

No backing

That’s right! With this quilt variety, you can forego the backing detail since the “quilt blocks… stand alone as is” without that extra detail. Does that factor make for an easier project? Maybe not! If you neglect a layer of quilt, that’s a layer of quilt that isn’t available to strategically cover mistakes and such, so the work could feel more vulnerable. Once you get the hang of the process though and make the adjustment, it might actually lead to an easier quilting experience because “you simply iron down your edges and sew.” Considering the level of beauty that these quilts can achieve, it seems like a sensible prospect to push through the confusion of learning to construct a quilt without a backing in order to eventually fashion such a lovely and reportedly easy project.

With these guidelines in mind, you could be able to spot a standard cathedral window quilt among other quilt options with scarce effort. In fact, coming to that conclusion of quilt style could become almost instinct where you look at a product and say, “Yeah! That’s a cathedral window quilt!” since the appearance is so very individual — and lovely!

Planning Your Pieces

Planning Your Pieces

One of the most important things you can do when beginning a quilt is to plan out your pattern. By this idea, I don’t just mean picking what pattern you want to buy in a store, but also planning out how the pieces of your project will fit together. That kind of pre-thought can make a difference in the appearance of a final product!

Let’s say, for instance, you decided to make a blue-based quilt, and you have a number of types of fabric to use for the product. If you don’t plan out how the pieces will go, you could end up running out of one particular style before the end, so the final portion is suddenly void of that one fabric. If you, like me, want a quilt that looks more balanced than that, then planning ahead can give you that quality.

Let’s think about where this is going…

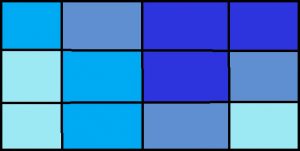
Beyond that point, making these decisions beforehand can also ensure that you don’t pile a series of similar fabric all in one area. Otherwise, your product could look like this not-so-beautiful piece of artwork I created with my not-so-wonderful skills at Paint.

Otherwise, your product could look like this not-so-beautiful piece of artwork I created with my not-so-wonderful skills at Paint.

Otherwise, your product could look like this not-so-beautiful piece of artwork I created with my not-so-wonderful skills at Paint.

See how the same shades of blue are really close together? Now, imagine, what it would look like had I just mixed the fabrics in a more thorough way. The overall result could’ve been much more balanced, which to me, is a better strategy! And that’s the beauty of planning: No matter what your preference is, you can make sure you end up with a quilt that reflects it!

Lay out your quilt pieces on the floor & continue to adjust them until you come to a pattern you decide is right.

Lay out your quilt pieces on the floor & continue to adjust them until you come to a pattern you decide is right.

Options

So the question arises about how to plan out those details. There are a couple of options available that you can use right in your own home! The easiest and least-costly method between the two I’ll cover is to lay out your quilt pieces on the floor and continue to adjust them until you come to a pattern you decide is right. You don’t need any extra materials for this stage at all, and so long as you have the free floor space, you have this opportunity right at your fingertips!

A quilt design area on your wall.

A quilt design area on your wall.

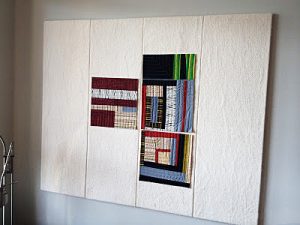
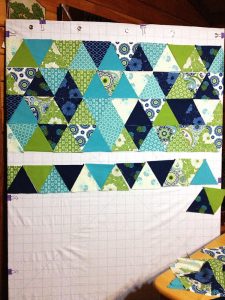
The other option is a quilt design area on your wall. This one might cost you a bit of money since you have to buy the supplies for it (though those supplies can be as simple as clips!), and you might find that you have to rearrange your wall décor to make room for it. Still, it’s a better candidate than the floor method if you want to eliminate the possibility of having your quilt-in-progress trampled by feet or if you just don’t have the right amount of space available for a clear plan-out area. Once you construct the design wall, you can start pinning and planning, shifting around your fabric blocks until everything fits in a way you’re comfortable with!

Start pinning & planning, shifting around your fabric blocks until everything fits in a way you’re comfortable with!

Start pinning & planning, shifting around your fabric blocks until everything fits in a way you’re comfortable with!

From that point, there are a number of ways to remember the quilt structure that you’ve planned out. Sure, if you’re using a quilt design wall, you could take it a bit at a time over to your sewing machine and just leave the extra pieces in place on the wall until the time comes to use them. But if you want a method that doesn’t involve leaving your pieces there — or if you’re using the floor method — you might want to think about alternative tactics!

One idea is to take a picture of what you come up with. If you do that, you can use it as a point of reference as you go through piecing your quilt together. By following the design you created, your quilt can turn out just as beautiful as you meant for it to!

Collate your blocks

Another option would be to keep your pieces in the order that you’re going to use them. As you take them up from the floor or off the wall, make sure you’re doing so in the exact order they’ll appear. You could start from the top or the bottom corner and progressively layer your quilt pieces on top of one another as you go. With this strategy, your blocks are in the order you wanted them, so you can just go through your stack one piece at a time to recreate your pattern!

But whatever your planning and preserving methods are, the important thing is to be thorough with them. Take your time, both in pinning or sorting those pieces, and in keeping them in sequence, so that errors are less likely to happen. When you have a well-balanced and well-considered quilt as the reward for your efforts, you’ll be glad you did!

Sew It Straight and Square

Sew It Straight and Square

I wanted to take an opportunity to tell you about something I learned very early in my sewing experience. Hopefully, it will help when you have to square off fabric for blocks or other things.

When I resumed by sewing hobby after being away for several years, I found many things have changed. Well, me for one, because I started out thinking I would make a few things, have a sewing machine available for mending, and leave it at that. I wanted to make a shirt or two.

But, never, in my wildest dreams, I thought I would have an interest in quilting. Being able to buy many different fabrics, mix them up, find harmony between them, and create an awesome piece of art was exciting!

So my first fabric obsession started with “fat quarters”. You know, they are bundles of one designer’s collection, or curated by someone else mostly sold in online fabric stores offering 10, 15, 20 or more pieces that have the same colors or coordinating fabrics! Oh… shopping online!! A whole other obsession!! Sorry. I got distracted!

But, I knew right off, I couldn’t cut them with fabric shears or pinking shears. It would take years off my life.

So, today I want to share how I learned to share how to cut “ fat quarters” for multiple precise pieces all at once.

Three tools necessary for straight and square pieces:

  1. Rotary cutter
  2. Acrylic ruler – my favorite 24 x 6 inches, but I also love 14 x 8 inches. Another handy one is 12 x 6 inches. I use them all.
  3. A self-healing cutting mat, measured in centimeters and inches. One with measurements is the KEY here.

Most Important!

RULE #1 – Never Cut Toward Yourself or Sideways with a Rotary Cutter – Always Away from Your Body

RULE #2 – Measure Twice and Cut Once

  1. Open 21 x 18 inch piece. Press with iron flattening fold creases. It makes a difference, you will see!
  2. Cut away selvage edge. You will have the longest part on the mat. Do not double the fabric and trim as close to the edge of the selvage as possible.
  3. Refold the length piece in half by taking the left side and match the edges on the right side where the selvage was.
  4. Square right hand edge with ruler and mat. Take off just a little sliver. Then trim the opposite side for threads. Not much to do there if it is square.
    • Now, the left has a fold, the top is folded two times giving you 4 layers of fabric. The top folded pieces have to be shaved too and the left side so you will still have exactly 9 inches on those two sides if you are careful.
    • Are you still here? Almost done!
  5. Line up the longer piece with the ruler, and trim off the small 2 inch piece to have 4 perfectly squared 9 x 9 pieces. The best part is you only lose about 1 ½” of the fabric by cutting it this way.

However, if you are feeling bold… and you put:

Beautiful 8 x 8 inch napkins ready for your next meal or party.

Beautiful 8 x 8 inch napkins ready for your next meal or party.

Right sides together, sew up the sides at ¼ inch leaving an inch or two (somewhere close to the end but not the corner) to turn them to their right sides, press seams, pin opening closed and top-stitch around all sides.

Then you have:

Beautiful 8 x 8 inch napkins ready for your next meal or party.

I would love to hear your comments or questions. Stop by and see me again soon!

Fabric Guidelines and Tips!

I’ve written tips on this blog, and I’ve written about fabrics. Truthfully though, some of the most sensible pieces of advice I think you can give a person just diving into the world of sewing are about fabric. While it might be easy to fall into the mindset of simply looking for patterns and colors, there’s more to consider in regards to your fabric choices—particularly for those of us with potential baby-steps skills with sewing. Those details, as it were, can have severe impacts on the ease or difficulty of putting together your first quilt, pillow, shirt, etc. For this particular post, I’ll focus on one specific kind of project: Patchwork Quilts.

Running the risk of making this read like a high-school, three-point essay, I’ll still stick to my idea here in saying that there are at least three fabric details worth considering before beginning your first patchwork quilt: Type, stretchiness and size.

1) Type:

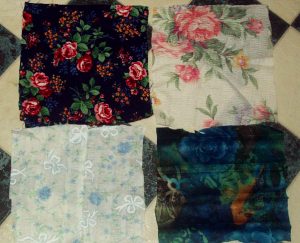
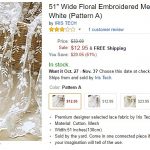
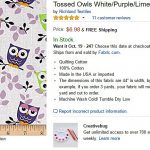
Can words honestly express how big of a deal the type of fabric you pick can be? Well, let’s look at it logically. Through Amazon, you can buy these pieces of material:

Which one, just by looks, seems to be the most agreeable to work with? If you chose the owl-including Door #2, you would be correct!

Of course, that was an easy example since lace just looks like it would be a pain, but even choosing silk or satin as your first fabrics could prove a regretted decision. They’re slick, and that easy-to-slide quality could lead to stitching that is too wavy to be precise.

A good first-fabric, in my opinion, is cotton. It’s simple, but it stays where you put it more than silk or satin, which could lead to more accurate stitching with less hassle. A better product that’s simpler to come by could be in your hands and on your sewing-resume just by picking the right fabric!

Another detail worth considering in type is *you* personally. Example: I have potential issues with polyester—like sneezing—so that’s probably not the way I should go!

Some fabrics have more give than others seem to have.

Some fabrics have more give than others seem to have.

2) Stretchiness:

Some fabrics have more give than others seem to have. That doesn’t mean you should necessarily rule out every piece of material for the rest of your life that has a stretchy quality, but it’s something worth noting as you pick out fabrics. If you’re making a quilt, a stretchy piece of material that’s beneath a non-stretchy one could be an issue.

Example: If Block A is non-stretchy and is above stretchy Block B, the end result could be that Block B *has* to be stretched out to match Block A’s size. Say you measured Block B’s fabric by *having* it stretched out. That decision, if your blocks are the same size, would lead to the need to keep Block B’s fabric stretched for it to reach the same end-line as Block A. That, in turn, could lead to a scrunchy detail for your quilt that you don’t care for because the material condensed back into its original form.

Trust me! Few things are as disappointing on a quilt you made as seeing lines that are obviously not straight and blocks that are clearly mismatched in size! Speaking of size…

3) Size:

Last but not least, the size of your material matters, and I’m not talking about how much you get from your fabric store. I’m talking about block sizes. It really pays to think about where you want your overall product to go, and in two particular ways for this idea: How complex you want your product to appear, and how difficult you want your journey toward a final product to be. Once you find the answers to those questions, you might be closer to deciding on a block size for your patchwork quilt.

For instance, if you want something that looks really complex, smaller pieces of material might be your friend. Think of it like a puzzle. If your puzzle has one hundred pieces, you might have an easier, quicker time finishing it than a puzzle with fifteen hundred pieces, but the fifteen-hundred-piece product might look more impressive to someone who notices it. It’s the same principle with patchwork quilts. Even though tiny squares can look impressive, there’s more time that goes into making smaller squares into that large final product. It might look better if you get it right, but be ready for some effort!

If you want something that’s easier, you might think of having larger squares—like ten inches. The final product could look particularly amateurish though *because* the quilt squares are so large. Without some kind of embellishment for the patches, the simplicity might make your product seem less impressive.

For those reasons, you might want to decide on a combination of impressiveness and ease for your first quilt—maybe 8 inches. They’re large enough blocks to be easy to work with, but with the material that would be taken up while sewing the patches together, the final product might look more professional. Sounds like a potential win/win!

One final tip about size: Once you select one, you might think of buying pre-cut fabric squares in that size for your quilt. It’ll ease up your first-quilt process, and maybe you can get enough confidence with their help to give you fuel to keep going in your quilting journey!

Methods to Conquer Half-Square Triangles (HSTs)

Methods to Conquer Half-Square Triangles (HSTs)

If you plan on diving into the world of quilting, you will soon run head first into half-square triangles, or HSTs in common quilting parlance.

These deceptively simple looking squares can be arranged innumerable ways to make an unending canvas of lovely. When you decide to tackle HSTs you are going to need figure out the best method for you. The most important thing to understand about HSTs is the math behind the size you want. This post does not cover that math. There are many, many charts available online to help you figure out what size triangles & squares to cut and sew in order to get the finished size you want.

Once you know your math, you’ll need to figure out your method. Here are a few to consider:

1. Tried and true

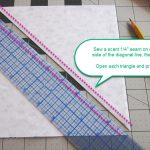
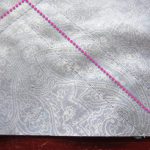
The most basic way for creating a HST is taking two squares of fabric, placing them right-sides-together (RST), drawing a line down the diagonal, and then sewing a scant ¼” on either side of the link. Cut the fabric along the center diagonal line, open and press.

Square that puppy up and before you know it…

…voilà, lovely HSTs, just for you.

Works best: when you need to only do a few HSTs or when each HST you need to do is unique.

2. Make the Magic 8

When I sewed these together both squares were evenly on top of each other.

When I sewed these together both squares were evenly on top of each other.

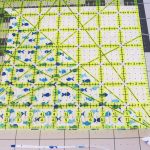
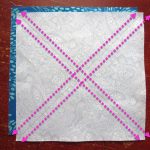
As soon as you see the visual on this you’ll get why they call it magic. Take two large squares, right sides together and draw lines down each diagonal. Sew a scant ¼” on both sides of each line for a total of 4 seams.

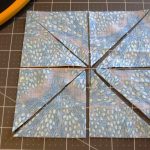
Start by cutting first along the two diagonal lines.

Start by cutting first along the two diagonal lines.

(For this tutorial I placed the two squares off center to show you the two fabrics. When I sewed these together both squares were evenly on top of each other.)

Carefully start cutting. Start by cutting first along the two diagonal lines.

Next cut down the center line of each side of the square.

Next cut down the center line of each side of the square.

Next cut down the center line of each side of the square. This will give you your magic 8!

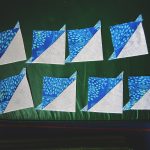
8 lovely matching HSTs

8 lovely matching HSTs

You’ll need to open, press, and square them up, but in no time flat you’ll have 8 lovely matching HSTs.

Works best: when you need more than a few. Some people can really churn out a lot of HSTs this way. If you have a bunch you need to make with the same fabrics, try this method.

3. Tube Method (Tube Quilting)

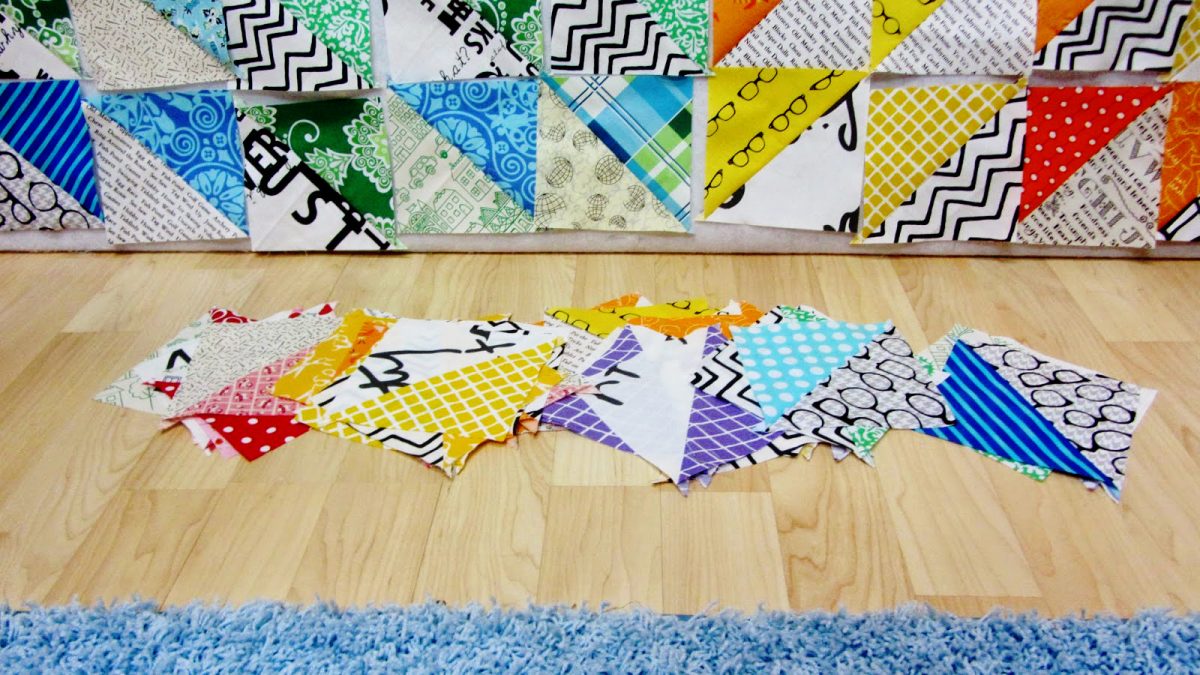
Use your ruler to cut out the size triangle you need.

Use your ruler to cut out the size triangle you need.

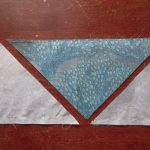
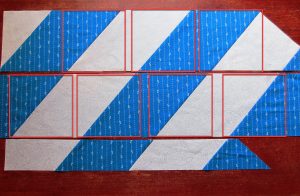
Sew two long strips together on the top and bottom edges. Then use your ruler to cut out the size triangle you need. Here I’ve shown you the tube I sewed and the triangles I cut (I flipped the top triangles over to show you the contrasting fabric).

Works best: when you need multiples of the same type of HST, this method is a production machine!
Note: it really helps to have the exact sized ruler you’ll need for cutting out the triangles.

4. Sewn Strips (Bias Strips)

Create a massive amount of HSTs in a short time!

Create a massive amount of HSTs in a short time!

I found this the most challenging of all the techniques I’ve tried, but I’ve never been pro at cutting on the bias. There is incredible potential here, however, to create a massive amount of HSTs in a short time so I’m keeping this method tucked away for the next time I want to attempt it.

The concept is simple: take two large pieces of fabric and place them RST. Cut the fabric into bias strips (in the correct size you’ll need) and then sew the alternating colors together to create two pieces of fabric with bias strips in the colors you need.

If you did your math right, you can then cut strips of fabric that will have the HSTs already sewn together. As you can see above, I completely botched the math on this, but you live and you learn and like I said, POTENTIAL. This method has so much potential if I can just get right next time.

Works Best: when you need to make HSTs on a massive scale.
Note: take your time to get the measurements just right. If not, you’ll have a whole lot of messed up fabric on your hands. Additionally, there is fabric waste as you cut out the squares. Make sure to account for that when you buy the amount you may need.

Sew the Square

Sew the Square

5. Jenny Doan Method (Sew the Square)

I’m not sure if this method has an official name but I know it has become popularized by Jenny Doan of the Missouri Quilt Company. I consider this a cousin to the Magic 8 method. Perhaps we could even call it the Magic 4.

The Magic 4!

The Magic 4!

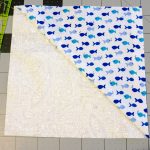
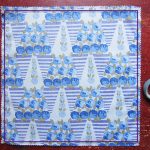
Take two pieces of fabric RST and sew a scant ¼” hem all the way around.

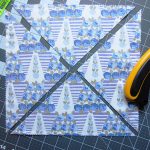
Carefully cut down the diagonals of the square and you’ll get four perfect HSTs.

You get four perfect HSTs.

You get four perfect HSTs.

Works best: this is a quick and easy method that could be easily mass produced especially when using pre-cuts.
Note: some don’t like this method means you are working on the bias. I haven’t found this to be a problem. Press carefully when you iron sew your HSTs together, without unnecessary stress or tugging, and you’ll be fine.

I hope you’ve found these methods useful. How about you? Do you use one of these methods already or do you have a different technique you prefer? Let us know in the comments!

Charlotte Kaufman is a writer and sewist in San Diego, California. She specializes in marine and home interiors and continues to fall more and more in love with quilting. You can follow her at charlottekaufman.com
Pressing Forward – A New Idea

Pressing Forward – A New Idea

As I was organizing my new sewing room, I thought about what components I could use to make sewing organized and efficient. Sewing is my favorite part but keeping things in order can become a challenge.

Sewing is my favorite part but keeping things in order can become a challenge.

Sewing is my favorite part but keeping things in order can become a challenge.

Of course, quilting takes a few more supplies that some hobbies, but I was thinking specifically about how I can make the pressing of quilt squares and fabric as part of my desk area rather than an ironing board and standing each time I had to press.

I made an ironing table on my counter top which has an insulated pad so I could sew and turn my chair to iron. It works fairly well but needs to be adjusted at times, as the pad wriggles around, and I thought there has to be something better.

I have to say that ironing is NOT my favorite past time with all the laundry we have, but somehow when I am making quilt squares, it is not too cumbersome. I use a fabric stabilizer when I iron that smells nice when it is heated so it, it gives me ambition to sew my squares and press them neatly to look professional as I go along. I have been thinking that an investment in a Home Pressing system will be beneficial.

Thinking back, actually, when I was a little girl, my Mom had what she called a “Mangle” Iron. I have not seen those again until recently in this website. I always wanted to help her press the sheets and pillow cases and my Dad’s handkerchiefs when she set up the what seemed to be an “ancient” machine. In fact, this type of machine was first used to wring out clothes by washer women beginning in 1843. Mom had hers in the late 1950’s, and used it often.

Sheets, tea towels, table cloths and fabric scraps would be so easy to run through the iron and save time to enable more sewing.

So, with that in mind, I have been researching Pressing Systems. I have come across some great reviews on the Magic Steam Press ESP2 Electronic Iron, and the Miele B990E Rotary Ironing Board. Check out the other brands here as well. The first is a small table model and the second is a rotary iron on a stand capable of ironing most everything. This is easy to use by sitting and makes ironing a breeze! Just be careful about the buttons and zippers, please!

I think these models would be particular good for bonding interfacings and stabilizers to fabric and to make quilt squares, totes, curtain panels and much more. Sheets, tea towels, table cloths and fabric scraps would be so easy to run through the iron and save time to enable more sewing.

Check out the irons on this website, and consider using a Pressing System for your sewing and ironing needs.

The reviews are helpful to see how valuable and what a time saver these systems are.

My next purchase will be to order for one of these products. With time saved and beautifully pressed quilts and clothes, it is an investment well worth the money with energy to spare! Press forward, and enjoy ironing! See you next time!