I wanted to take an opportunity to tell you about something I learned very early in my sewing experience. Hopefully, it will help when you have to square off fabric for blocks or other things.
When I resumed by sewing hobby after being away for several years, I found many things have changed. Well, me for one, because I started out thinking I would make a few things, have a sewing machine available for mending, and leave it at that. I wanted to make a shirt or two.
But, never, in my wildest dreams, I thought I would have an interest in quilting. Being able to buy many different fabrics, mix them up, find harmony between them, and create an awesome piece of art was exciting!
So my first fabric obsession started with “fat quarters”. You know, they are bundles of one designer’s collection, or curated by someone else mostly sold in online fabric stores offering 10, 15, 20 or more pieces that have the same colors or coordinating fabrics! Oh… shopping online!! A whole other obsession!! Sorry. I got distracted!
But, I knew right off, I couldn’t cut them with fabric shears or pinking shears. It would take years off my life.
So, today I want to share how I learned to share how to cut “ fat quarters” for multiple precise pieces all at once.
Three tools necessary for straight and square pieces:
- Rotary cutter
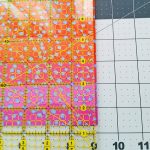
- Acrylic ruler – my favorite 24 x 6 inches, but I also love 14 x 8 inches. Another handy one is 12 x 6 inches. I use them all.
- A self-healing cutting mat, measured in centimeters and inches. One with measurements is the KEY here.
Most Important!
RULE #1 – Never Cut Toward Yourself or Sideways with a Rotary Cutter – Always Away from Your Body
RULE #2 – Measure Twice and Cut Once
- Open 21 x 18 inch piece. Press with iron flattening fold creases. It makes a difference, you will see!
- Cut away selvage edge. You will have the longest part on the mat. Do not double the fabric and trim as close to the edge of the selvage as possible.
- Refold the length piece in half by taking the left side and match the edges on the right side where the selvage was.
- Square right hand edge with ruler and mat. Take off just a little sliver. Then trim the opposite side for threads. Not much to do there if it is square.
- Now, the left has a fold, the top is folded two times giving you 4 layers of fabric. The top folded pieces have to be shaved too and the left side so you will still have exactly 9 inches on those two sides if you are careful.
- Are you still here? Almost done!
- Line up the longer piece with the ruler, and trim off the small 2 inch piece to have 4 perfectly squared 9 x 9 pieces. The best part is you only lose about 1 ½” of the fabric by cutting it this way.
However, if you are feeling bold… and you put:
Right sides together, sew up the sides at ¼ inch leaving an inch or two (somewhere close to the end but not the corner) to turn them to their right sides, press seams, pin opening closed and top-stitch around all sides.
Then you have:
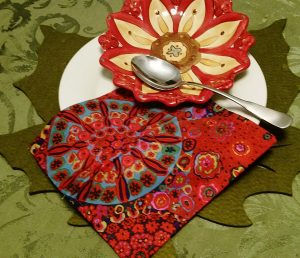
Beautiful 8 x 8 inch napkins ready for your next meal or party.


