The Problem with Over Fitting

The Problem with Over Fitting

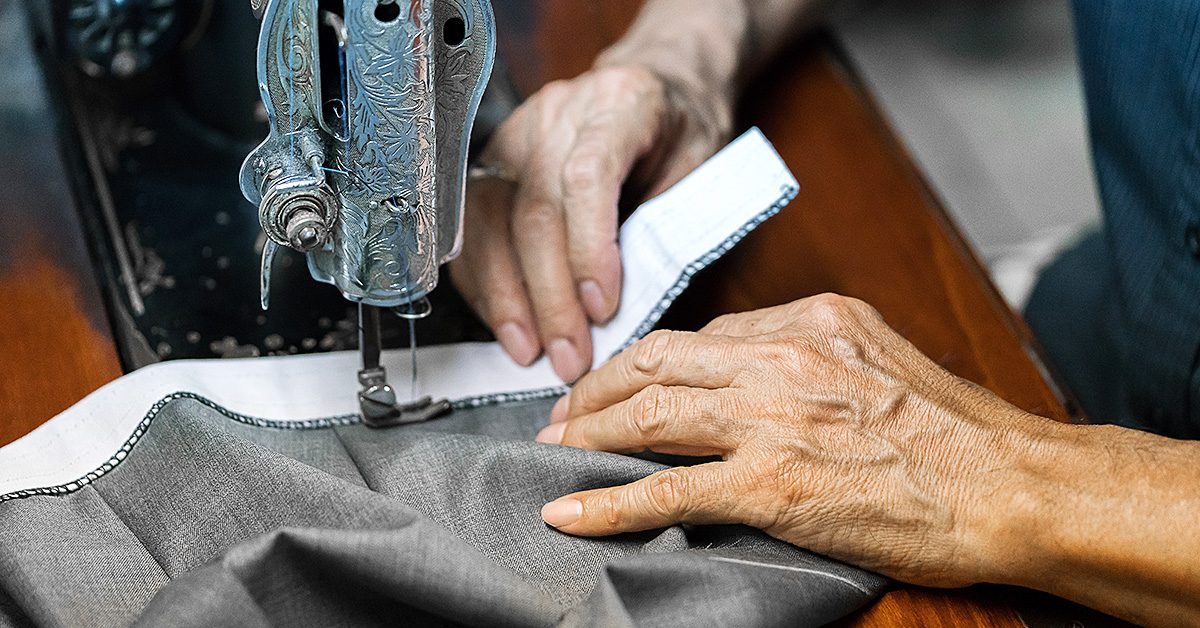
In my almost 30 years in the film and television business, I’ve worked with a lot of different designers. Every designer has a specific way they like things to fit, at least in the film and television world. Tailors at men’s suit stores like Brooks Brothers, or department stores like Nordstroms, have standard fit and length parameters they follow.

They’ll tell you that a suit jacket hem must end at a certain point on the wrist and the proper length of the jacket is determined by whether or not you can curl your hand around the hem in a certain way. They’ll also tell you that a pant hem needs to have a specific amount of break over the front of the shoe (the amount the hem buckles in when you’re standing straight up).

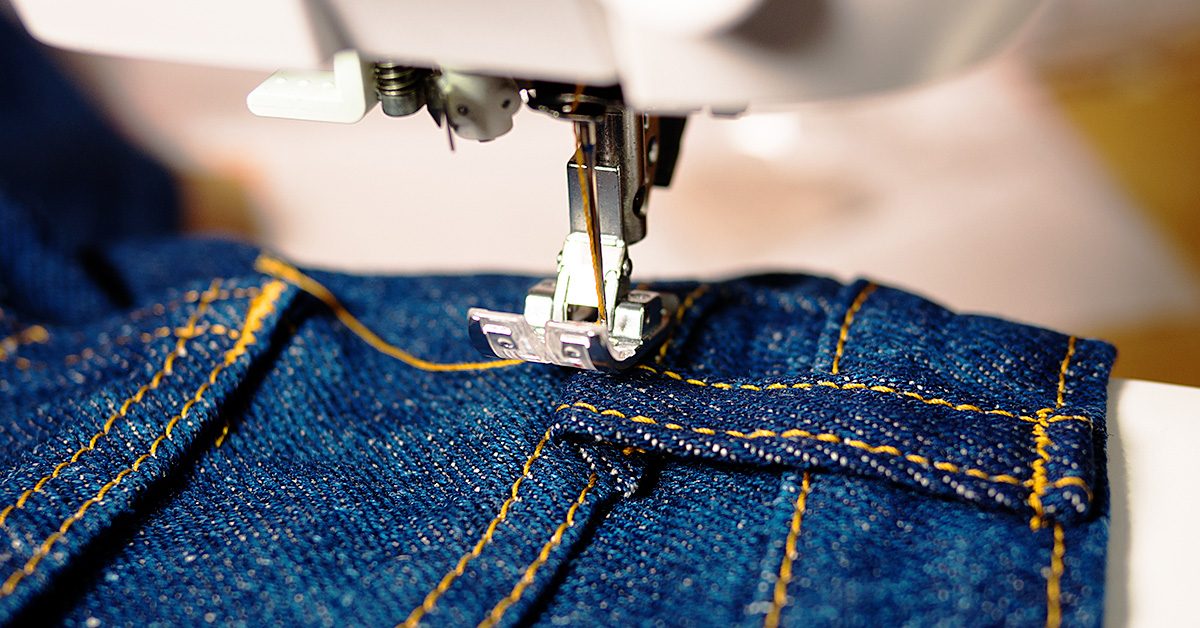
In television and film, these things can vary depending on what designer you’re working with. I have five or six different designers I work with fairly regularly and they all have specific ways they want things to fit. I’ve worked with them enough to know what each of them like. One of them likes suit pant hems on the short side but lots and lots of ‘stack’ when it comes to jean hems. Another always wants a rake in the hem because they hate to see an actor’s socks showing in the back when he walks. One likes the shirt sleeves to show a ¼” below the suit jacket. Another tends to want things very slim fitted.

One size fits all

As a tailor, one of the most annoying fit attributes is when a designer wants you to, essentially, over fit something (none of the designers I work with regularly do this). By over fitting I mean, they want me to fit something so tightly that there are absolutely no wrinkles present anywhere at anytime. The main problem with this is that it’s only achievable if the actor or actress happens to be a non-moving, stationary dress form or mannequin. And, as I’m sure you know, most are not.

Actors move, clothing wrinkles. If you fit a dress too tightly, it’s going to ride up at the slightest provocation. If you fit a man’s suit jacket within an inch of its life, the actor won’t be able to lift his arms.

There are a lot of wrinkles I can fix, but I can’t get rid of them all. An over fitted garment looks just as bad on camera as one that isn’t fitted enough. Unless you start putting all kinds of extra seams into a thing, you’ll never be able to get something that isn’t spandex, completely wrinkle free all the time. Wrinkle free-ness is only completely achievable when the actor stands in one specific way and doesn’t move at all, ever.

Oxygen is overrated

I can’t tell you how many times a designer has insisted I take something in so tightly that after it’s done, the actor complains about not being able to breathe. I usually don’t take anything in as much as I pinned in a fitting if I’m working with a designer like this. I honestly find it ridiculous that there are costume designers who don’t understand that when humans move, the clothes they are wearing also move. Sometimes there are wrinkles, and this does not mean that the garment is not fitted correctly.

Stylists who dress people for print or short shoots like commercials tend to fit things more tightly because they’re not used to dressing people for realistic scenarios and situations that involve actual movement.

Stylists who dress people for print or short shoots like commercials tend to fit things more tightly because they’re not used to dressing people for realistic scenarios and situations that involve actual movement.

Stylists who dress people for print or short shoots like commercials tend to fit things more tightly because they’re not used to dressing people for realistic scenarios and situations that involve actual movement. In a photo shoot for print, there is no movement so you can over fit to your heart’s content. That’s why clothing never fits you like it does the model in the catalogue or on the website. And this is not a bad thing.

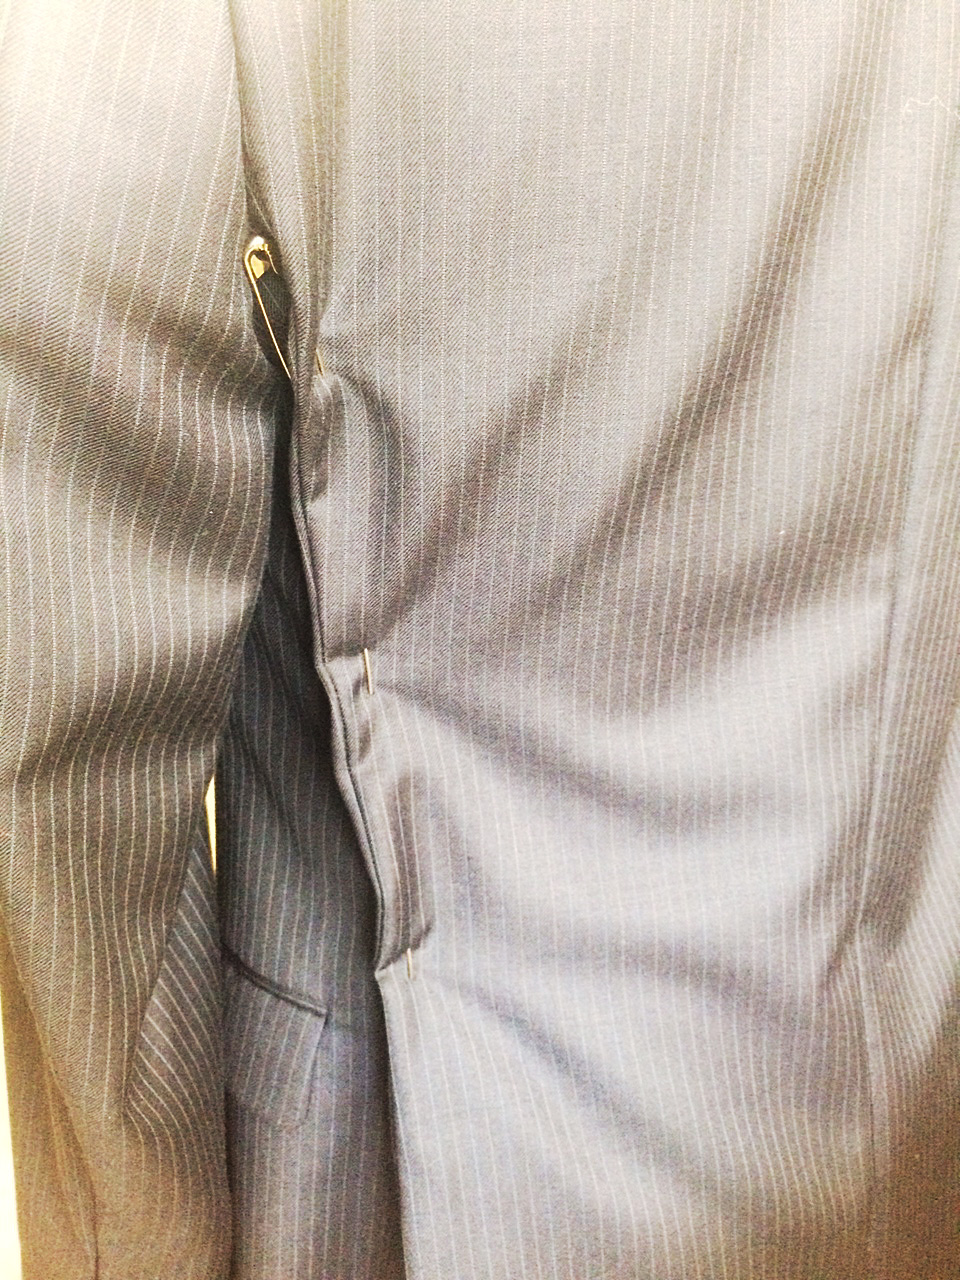
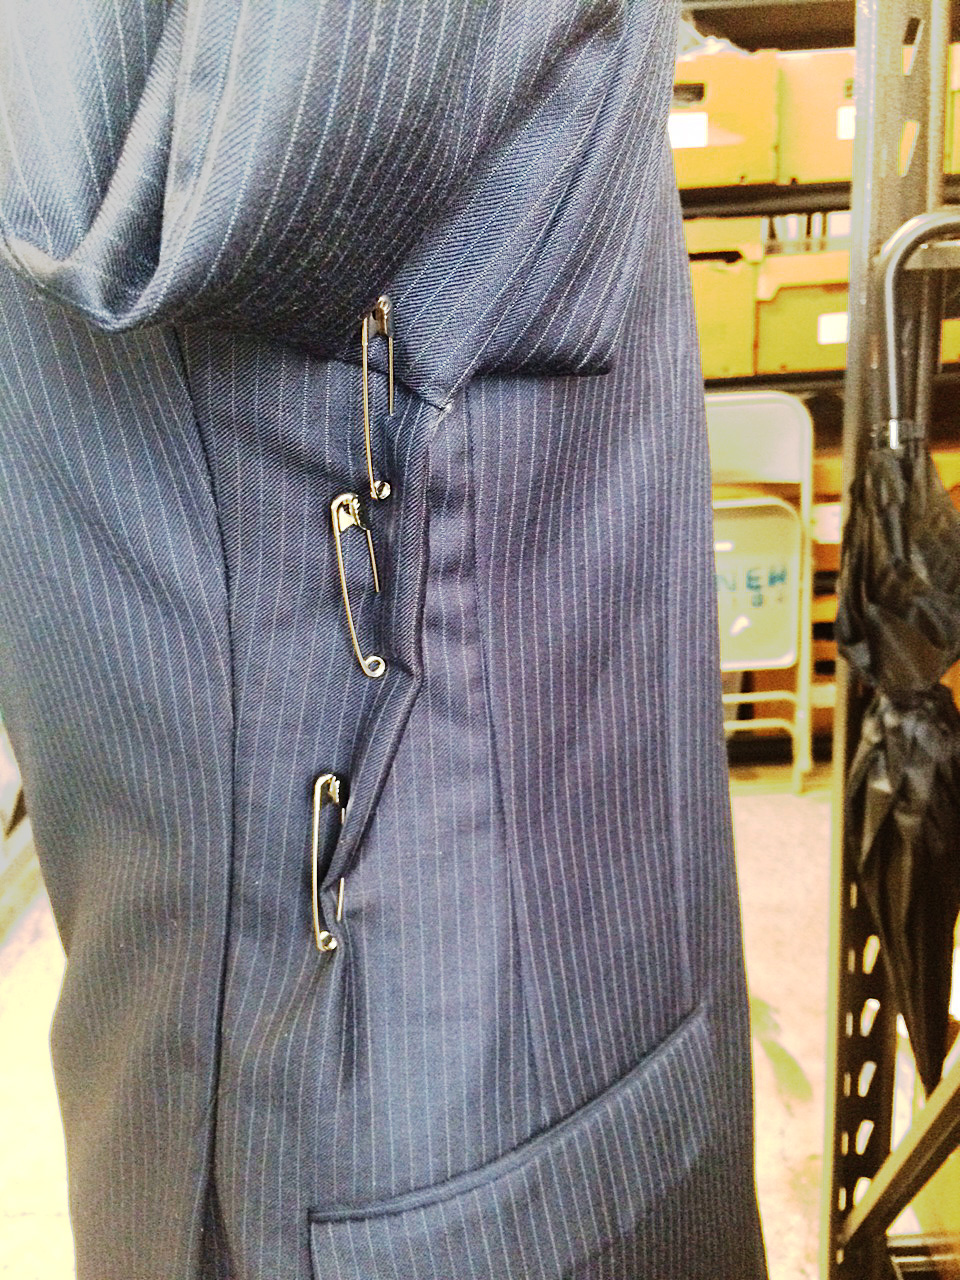
I’ve also worked with designers who do this thing where they grab a whole wad of fabric center back to demonstrate how something should be taken in. Well, first, when you do that, you’re pulling the side seams into a weird place that they shouldn’t be. Unless its men’s pants, I rarely take something in just from the center back, especially if it’s a wad-full of fabric. One reason is that I like to avoid having to reset the zipper if possible and secondly, it probably needs to come in from the side seams and the side back seams anyway. Or, if it’s four to six inches, it might make sense to purchase the garment in a smaller size. If I were building the garment from scratch, I’d want to recut it if possible.

Stress fractures & signs you are doing it wrong

I don’t know if other people notice this but when I see a dress with side seams that swing backward instead of hanging straight, I think that someone who didn’t really know what they were doing did that alteration. Costume Designers don’t necessarily need to know all the nuances of fit and balance but they should know enough to trust a good tailor when they have one.

Sadly, it normally doesn’t do any good to try and explain yourself to a designer who tends toward over fitting. They’ll just assume you don’t know what you’re talking about.

When I find myself in a situation with a center-back-wad-pulling designer, I just nod and pin it, then alter it in the way I think is best.

Because, as any tailor who’s been in the television and film business for awhile knows, “alter as pinned” is simply a suggestion (and a way to appease an over zealous fitting designer).

The Mysterious Shrinking Pants

The Mysterious Shrinking Pants

My weight tends to go up and down, often in connection with my relationship status. I wouldn’t say I struggle with it the way that my mother does, though as I’m approaching 40, it’s getting tougher to shed the extra pounds. The first time I lost a ton of weight, I spend days, maybe weeks, altering all my favorite clothes so I could still wear them in a my new, much smaller, size. I stayed at that weight, my ideal weight, for a long time.

belly-2354_640

And then one day it happened, the mysterious shrinking pants showed up! I don’t know where they came from, but my pants started to get tighter and my shirts and undergarments weren’t far behind.

Has this happened to any of you? Sound familiar? So, I had a choice – spend crazy amounts of time putting my clothes back to bigger sizes, lose the weight, or accept it and buy new clothes. Of course, I chose to lose the weight and keep squeezing myself into shrunken pants…I’m cheap and I don’t like gaining weight!

Let me tell you, it’s been tough this time around. I’m eating great since I’m not eating out on a regular basis anymore, drinking far less (cause I’m not stressed and upset), and working out more (cause I don’t feel responsible for taking care of anyone else’s demands). Yet, the weight just doesn’t want to go. Don’t get me wrong. I’m just over halfway to my goal. It’s happening. Just more slowly than I thought it would and my tight clothes are starting to feel a little silly.

Still…I don’t want to alter them. I want my pants to mysteriously expand the same way they mysteriously shrank! That would be far less time consuming and much more fun. At least I think so… My jeans could use some patching in the seams – I like to do this with fun fabric scraps to add a little flair. Plus, then it makes it look like I did it on purpose, not that I’m too cheap to buy new ones!

I’m not ready to replace them yet, but when I do, I need to make sure I don’t buy pants that mysteriously shrink!

Fix Your Own Pants

Fix Your Own Pants

As many of you probably know, I work as a tailor and pattern maker for film and television in New York City. I don’t always work on the same show or at the same studio. I’m also, now that I’m old(er) a bit more particular about what projects I say yes to and who I work with.

I’ve got a few fitting related pet peeves like, for instance, when a dress comes back from the fitting room with a note that simply reads: Drop in a Lining or the ever infamous and popular: Take in as pinned (if I didn’t pin it myself). These are just minor annoyances though, compared to the phenomenon of people from other departments (accounting, grip, director, props, whatever) showing up in my sewing space – without ever having met me before – and asking if I can just fix their pants or take in this skirt.

Frustration

First of all, no. I can’t just anything because (1) I’m actually working on something for the show we’re both doing and (2) I don’t want to. Especially if your pants fix involves a worn out crotch (and even if it doesn’t). I don’t randomly show up in the accounting office and ask someone to add my receipts together when they get a chance, or ask one of the props people to rewire an old lamp I bought at the last set dressing sale, or ask the director of photography to take some pictures of me for my tinder profile or something because I’m just not talented enough to take my own. (I’m kidding about the tinder profile thing). And I certainly don’t throw in some disclaimer like I always wished I learned how to take a proper photo.

You’ve got to know when its time to let a thing go.

Sometimes the person will preface their ask with so and so (insert the name of someone else in my department) told me I should ask you. This is even more perturbing if that someone else hasn’t actually sent a text or something asking me if it’s ok to send that person over to me to ask a favor.

It’s not me – it’s you

Fix Your Own Pants

It’s not that I mind doing favors. I really don’t. I do favors for people I like and know all the time. I’ll even do favors for people who I don’t know if they ask nicely and genuinely – and especially if they offer to compensate me in some way (beer!). But if you show up with some blue cotton harem pants with a thread bare bottom that you want repaired when I’m in the middle of cutting down the neckline of a velvet top that is needed on set in about twenty minutes and the first thing out of your mouth is X told me I could have you to do this I’m never going to do it. Your sad pair of pants is going to hang on my work rack until this show wraps.

Why? Because you, whoever you are, you didn’t tell me your name or what you do on this little show of ours, and I’m quite certain that the only person who can have me do anything is the Costume Designer. So, there’s that. Second, if the back of your pants is worn out in the butt area, it might just be time to buy a new pair of pants. You’ve got to know when its time to let a thing go. Seriously, why would you think that someone you don’t even know would want to be that up close and personal with that particular area of your clothing?? I don’t care if they’re clean and, yes, I’ve taken in a countless number of center backs for actors but I’m getting paid to do that. The crotch of your pants? Um, no.

A healthy dose of humility

I personally would be embarrassed to take my worn threadbare butt pants to someone I didn’t know to fix. I honestly don’t understand it. Maybe someone could shed some light on this for me?

I think what upsets me the most about this type of favor-asking is the assumption that I’m not busy doing something else that is important for the show. It’s as if people think I’m just hanging round twiddling my thumbs just waiting for someone to turn up with their personal alteration request so I can sew something.

Anyway. Rant over. I’m going to go upstairs now and see if the accounting department can get an early start on my taxes for next year. I’m sure they’re not doing anything else of importance.

What’s your big sewing related rant?

Fast and Easy Way to Hem Pants

Fast and Easy Way to Hem Pants

My fast and easy way to hem jeans & pants.

My fast and easy way to hem jeans & pants.

I’m barely over 5’ tall. It used to be that clothing companies made pants in “short” lengths to accommodate people of my stature. More and more often now, though, I’m finding that clothing companies, particularly jeans producers, make pants in “regular” and “tall.” I’m not sure why they think all the short (or as I prefer to call it, concentrated awesome) people no longer need pants, but there you have it. As you can imagine, this leaves me with the choice of either patching jeans and pants until there’s nothing left to them, or buying clothes that are too long and hemming them. Hemming something I’ve paid money for ticks me off, so I want to get it done and over with quickly. I developed a fast and easy way to hem jeans and pants.

First

Find a pair of pants that are a length you like. These will act as your template or guide. Lay them flat and smooth. If possible, I suggest pinning them down to keep them flat. Next, turn the pair of pants you’re going to hem inside out. Lay them on top of the pants that are the correct length.

Let’s begin

Choose a place on the leg of the pants where you’ll be okay with seeing a line. I often opt for the upper thigh. In that spot, pull the leg of the pants that are too long up, gathering the extra fabric in a straight fold that goes around the entire leg as you go. When the pants are the right length, pin this fold so that it comes directly out from the leg itself. Do this on both legs.

Almost done…

Sew around the fold to create your shortened pants, then cut off the extra fabric. Whip stitch around the cut edge for extra strength in the seam and reassurance that it won’t split apart while you’re wearing your new pants. Again, do the same thing on both legs.

Viola!

Hemmed pants, perfect for your height – no measuring or marking required. This is one of my favorite “sewing cheats” because it’s so quick and helps me buy pants and jeans affordably, even clothing companies no longer feel the need to cater to people my size. Give it a try next time you need to hem pants and let me know what you think!

Sewing Super Power: Stereoscopic Vision

Sewing Super Power: Stereoscopic Vision

Are you one of those people who knows what an inch looks like without measuring?

I am. I also know what a ½ inch looks like and two inches and, well, honestly, most units of measurement from an 1/8 of an inch to about eight or ten feet.

I can also look at a photo of someone and determine how many inches shorter (or longer) his or her pant, shirt, jacket, or dress hem needs to be. And I can take a picture or drawing of a garment and recreate it with only that image as a reference.

I bet a lot of people reading this blog can do these things too.

I never thought too much about the why. It was just something I was always good at.

3D vision – no Oculus Rift needed

3D vision - no Oculus Rift needed

3D vision – no Oculus Rift needed

Well, this past week, a new scientific study was published at the University of California at Berkeley about how dressmakers were found to have “needle sharp” 3D vision.

3D vision is also referred to as stereoscopic vision, which is the ability of the brain to take 2D information and translate it into 3D. Depth perception is part of this equation, meaning stereoscopic vision is what allows us to thread needles, catch balls, and park cars (among a myriad of other things.)

It also means that some of us, those with especially keen stereoscopic vision abilities, are able to look at the distance between things and immediately calculate a correct (and often freakishly accurate) measurement.

There have been countless occasions when I’ve looked at a fitting photo of an actor with a hem pinned up and said, “Oh, I need to shorten that an inch and ½,” (or whatever) and someone else has said, “Let’s measure to make sure.”

And so we do. And I’m always exactly right.

In the same way, I can often walk into a fitting room – or even just watch someone wander by – and say, “That needs to be lengthened ¾” and the waist taken in an inch.”

And then I do the alterations without pinning and its correct.

Batman’s got nothing on me

Batman's got nothing on me.

Batman’s got nothing on me.

I’ve always just thought of it as one of my super powers. I believe everyone has a couple or three superpowers. The trick, sometimes, though, is figuring out what they are.

Adrien Chopin, the neuroscience researcher who conducted the 3D vision study, says that they’re still trying to figure out if tailoring and sewing sharpens stereoscopic vision or, if tailors and the like are drawn to the profession because of their enhanced “stereo-acuity”.

I’m definitely not a scientific researcher but I think it’s both of these things. My brain has always been adept at moving between the 2 dimensional and 3 dimensional worlds. I just never knew it had a specific name. And because I use this ability many times a day, I’ve become better and better at it to the point where my accuracy percentage is probably 99.9999999%.

Or something like that

I can also go from 3D to 2D quite easily, meaning I can look at a 3 dimensional object, like a garment (on or off a person) and know what shape it would be as a flat 2 dimensional pattern.

Chopin’s study goes on to say that people like surgeons and dentists have normally been assumed to have superior stereovision but that dressmakers and tailors in general had even more precise 3D vision abilities that those in the medical fields.

Kind of crazy, huh?

Take care to use your powers for good.

Take care to use your powers for good.

Chopin intends to study more extensively the stereoscopic superpowers of dressmakers. He says that a better understanding of the ability will help in efforts to train those with visual impairments like “lazy eye” to strengthen their 3D vision. He also believes that improved stereoscopic vision could be tantamount in training people in occupations that require precise hand-eye coordination like military fighters or athletes.

On the other end of the spectrum, some vision scientists think that painters often have poorer stereovision which is what gives them an advantage when working in a 2 dimensional world. Rembrandt, the 17th century Dutch painter, is thought to have suffered from stereo blindness.

I find all this quite fascinating. If you do to and want to read more in depth information about the study, you can see the whole report here.

And don’t forget to spend some time celebrating your own super powers, which, if you’re a tailor or seamstress, very likely include stereoscopic vision. Yay us!

How to Sew a Fitted Sheet

DIY: Sew a Fitted Sheet (from a flat sheet)

My daughters have bunk beds and I like them to have at least two sets of sheets (per bed) in the event of accidents, sickness, or just in general because kids get dirty.

Our family doesn’t use flat sheets. I always feel claustrophobic when I sleep with one and I end up pulling the sheet out of the bottom of the bed and using it more like a blanket. It’s also a pain to remake the bed every morning. Instead, we used fitted sheets and loose blankets and we wash them all frequently.

Because of this, I can buy one set of sheets, a fitted one and a flat one, and turn the flat sheet into another fitted sheet. That gives me two matching fitted sheets which is perfect for when you have bunk beds.

Measure twice, cut once

To make your own fitted sheet you need to measure the length and the wide of the top of the mattress you are using. You’ll also need to measure the sides.

This mattress is 38” x 75” and the sides are 7”.

To make your own fitted sheet, first measure the sides, length & width of the top of the mattress you are using.

To make your own fitted sheet, first measure the sides, length & width of the top of the mattress you are using.

To determine the rest, you need to add enough fabric to wrap around under the mattress plus seam allowance. I like anywhere between 3-4” for the bottom fabric (it may depend on the size of flat sheet you are working with) and I allow 1” on all sides for seam allowance. I fold the fabric over ½” and then again another ½”.

Your final equation to determine the size of rectangle you’ll need is:

Seam allowance + bottom fabric + length of side + width (or length) of top of mattress + length of other side + bottom fabric on other side + seam allowance on other side.

Repeat the same process for the length if you started with the width.

I had to take out the top folded seam in order to have a large enough rectangle to meet my measurement requirements.

I had to take out the top folded seam in order to have a large enough rectangle to meet my measurement requirements.

For this flat sheet, I had to take out the top folded seam in order to have a large enough rectangle to meet my measurement requirements. After I took out that seam, I ironed (after having prewashed before I got started).

I had to take out the top folded seam in order to have a large enough rectangle.

I had to take out the top folded seam in order to have a large enough rectangle.

I love it when a plan comes together

Sometimes I love how the universe works. The particular measurements on this flat sheet made it so I didn’t need to calculate seam allowance, other than for the one side I had to take the seam out of. I used all the pre-sewn hems and the measurements worked out perfectly.

I used all the pre-sewn hems & the measurements worked out perfectly.

I used all the pre-sewn hems & the measurements worked out perfectly.

The one part that people might find tricky is cutting out the corners. Here you are going the exact measurement of where the fabric would rest on the top of the mattress, so you take into account: seam allowance + fabric on the bottom + fabric on the sides, on each corner of the square. Make the squares on all corners of your fabric and then cut.

Make the squares on all corners of your fabric & then cut.

Make the squares on all corners of your fabric & then cut.

The red box shows you the exact measurements of the top of the mattress.

The red box shows you the exact measurements of the top of the mattress.

The red box shows you the exact measurements of the top of the mattress.

On your mark.. Get set.. SEW!

Now it’s time to sew! If it’s easier for you to pin the corners, go for it. This isn’t my first rodeo, so I just sew and go.

If it’s easier for you, just pin the corners.

If it’s easier for you, just pin the corners.

These corner seams ARE unfinished, so make sure you finish each of the four corners with a zigzag stitch to prevent unraveling.

Finish each corner with a zigzag stitch to prevent unraveling.

Finish each corner with a zigzag stitch to prevent unraveling.

The next step would be to create a hem all along the sheet. I’m skipping this part because I’m using the pre-sewn ones from the flat sheet. Normally I would finger fold the fabric over a ½”, and then another ½”, and sew all around the sheet.

After you have a hem, it’s time to add elastic. Some tutorials have you create a casing when you sew the hem and then you feed the elastic through. This method has never spoken to me. I just sew my hem and then sew the elastic directly on.

Making it stretch

If I had enough elastic I would sew it on the entire hem, all the way around. I didn’t in this case so I measured out 16” from each corner and sewed my elastic around each corner.

I measured out 16” from each corner & sewed elastic around each.

I measured out 16” from each corner & sewed elastic around each.

Be careful not to pull your elastic too taught. You want it to have enough give that you can get it over the corners of your mattress without snapping any of your threads.

Be careful not to pull your elastic too taught.

Be careful not to pull your elastic too taught.

Looking good.

Looking good.

Looking good.

You’ve made your bed – now sleep on it

Moment of truth. Here it is on the top bunk. It looks great!

Here it is on the top bunk.

Here it is on the top bunk.

It even looks good from the bottom bunk looking up at the bottom of the mattress.

It even looks good from the bottom bunk looking up.

It even looks good from the bottom bunk looking up.

Added value

The best part is that these two fitted sheets are now interchangeable between the bottom and top bunk and I only had to buy one set of sheets to get matching bedding!

The best part is that these two fitted sheets are now interchangeable.

The best part is that these two fitted sheets are now interchangeable.

Do you make your own fitted sheets? What is your favorite method?

———————————————————————————–
Charlotte Kaufman is a writer and sewist in Mammoth Lakes, California. She specializes in marine and home interiors and continues to fall more and more in love with quilting. You can follow her at charlottekaufman.com.
What I Do at Work All Day (Part 2)

What I Do at Work All Day (Part 2)

(As promised) The Dart and Drop

Pinned side back seam.

Pinned side back seam.

I do a lot of suit alterations. Sometimes I alter up to eight suits in a single day.

Often, suit jackets fit well in the shoulders but are a bit too roomy in the body. Because of the inner canvas and the inevitable front pocket, you can’t really successfully alter the front of a suit jacket. You need to take in at the center back or side back seams. While pinning, you’ll usually notice that you need to take in the side back seam all the way into the armseye.

This presents the conundrum of:

  1. Should I also take in the sleeve so it will still fit?
  2. Do I need to get into that seam at all?
  3. Do I really need to take the sleeve out?

The answers are no, yes and yes. Do not take in the sleeve. Do take the bottom part of the sleeve out.

Men’s suit jackets are traditionally cut without an actual side seam. The place where you really want/need to take a jacket in, though, is often in that invisible side seam. The way to accomplish this is by using the dart and drop method.

The Dart

Dart pinned into side seam.

Dart pinned into side seam.

Take the lining out and the underarm sleeve apart from the side back seam to a few inches in the front of the side seam. There should be a notch in the jacket to indicate where the side seam would be if there were one. If no notch is present, lay the jacket flat on a table, buttoned up. Where the jacket naturally folds will indicate basically where that side seam is. Mark with chalk on the wrong side of the fabric in the coat body and in the sleeve.

Next, from the wrong side of the fabric, fold on the notch. At the top, measure in the amount you need to take in (as you determined by pinning your side back seam). Then draw a dart from that point down about 3 or 4 inches (or until you run into the top of the pocket). Sew the dart. You can put the same dart in the lining or you can simply do a tuck. Either is fine.

The Drop

The next step is to redraw your underarm seam. The armseye should remain the same size as it originally was. To do this, drop the underarm seam. I suspect there may be some actual formula for this but I’m more of an intuitive sewer. Dropping an inch is usually a good place to start. Use a curved ruler

to draw the new line making sure the connections are smooth. Pin your sleeve at your new side seam an inch below the original seam line. Then pin the rest. You might have to undo more of the original seam if the sleeve isn’t fitting. Do this in the back until you can easily fit the sleeve back in without any excessive easing.

Don’t Worry

Pinned underarm seam.

Pinned underarm seam.

If you end up having to undo part of the shoulder pad and sleeve header, that’s fine. Just reattach them once you have put your sleeve back in.

You can apply the same principle to jackets (or really anything) that have side seams. Unless you want to narrow the sleeve, dropping the armseye is a more accurate way to accomplish this alteration.

At this point I also want to add a little something about the idea of ‘a right way’ to do something. I don’t believe there is only one right way to do things.

Sewing jacket with side seam.

Sewing jacket with side seam.

I ran the costume building shop for Boardwalk Empire for four years. It was a shop full of talented tailors from all sorts of backgrounds and places (Russia, Uzbekistan, Turkey, Tunisia & various U.S. states). We had a running joke about people who insist that their way of doing things is the only way (We even had a little song called, “There’s only one right way to do things. The other ways are wrong…”).

Walk Your Own Path

You need to figure out the way of doing things that works best for you while accomplishing the desired result. Sometimes someone can show you a whole new way of doing something that makes it easier for you. Sometimes not.

The tips and tricks I write about are the things I’ve learned work best for me over the years. Hopefully they will prove to be useful to someone else as well.

Missed Part 1? Check it out here!

Sew Fine Dress Making

Sew Fine

Need the perfect dress for an upcoming special event? Instead of perusing rack after rack of unimaginative, pricey finery consider making it yourself. Not only will you get exactly what you’re looking for, it’s a sure thing that no one else will be wearing the same dress as you.

Points for Originality

Even if you’re not a someone who designs her own patterns, making and wearing your own dress will definitely get you noticed. You’ll look stunning and you’ll be wearing something completely unique. In this day and age when everyone wants to be recognized for their personality and individual contributions, you’ll certainly earn points for wearing something stunning that you made yourself.

Your Choice

Rather than trying to find something that shows off your style, fits your budget and looks great on you from the limited selections in department store – making a dress yourself means you’ll be able to choose the style, fit and fabric that’s best for you. Show off your natural beauty with a dress that accents your coloring and body type.

Works for Formal Functions Too

Formal events like galas or weddings may not seem like that best opportunity to make your own dress, but it’s actually a great time to do so. Making a more formal dress may take a bit longer, but the results will amaze everyone. If you’ve never taken on something like this, trust me, it’s not as hard as you think!

There are some extra steps like creating the tulle under layer(s), feeding the whale bone (plastic) bodice pieces and/or adding lace or other details. Although these seem intimidating, anyone with basic sewing skills can do them – you just have to be willing to try.

Show It Off

Show It OffAfter all the hard work you put in to making your amazing dress, show it off at the big event. Get up, dance, strut your stuff to and from the buffet table, and when people start complimenting you on your attire, don’t be afraid to say you made it. Although you don’t want to overshadow the guest of honor (unless it’s you, of course) there’s nothing wrong with showing off your finery.

If you can, add some handmade accessories to complete the look. Items like hand made, one-of-a-kind jewelry, scarves or shawls will give your dress the final splash and pizazz it needs. If you don’t make any of these items yourself, maybe you’ve got some crafty friends who do and would like to contribute to your amazing look.

Remember

A few points to remember:

  1. Hem with shoes in mind. If you’re wearing heals to the big event, make sure you have those shoes on when determining hem length so the dress will fall correctly.
  2. Event location. If the event is going to be indoors or outdoors, you may need incorporate layers or a cover up depending on the time of year and your sensitivity to cold/heat.
  3. Make a muslin first. If you’re at all unsure about the dress you’re going to make – how well it’ll fit or will look on you – take the time to make a muslin demo piece first. It does extend the length of time it takes you to arrive at the finished product, but it can also mean the difference between a project you love and one you don’t.