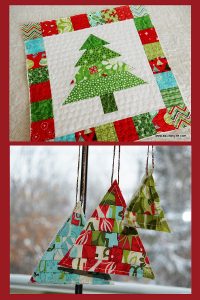
Christmas Tree Turtlenecks

Christmas Tree Turtlenecks

Its finally autumn in New York City. The temperature dropped this past week and people broke out their jackets and sweaters and knit caps. The kids are back to school and if you’re out and about around three or four in the afternoon, you’ll likely encounter gaggles of uniform clad youngsters walking home from school and stopping into the corner bodegas for gum, nail polish, or comic books.

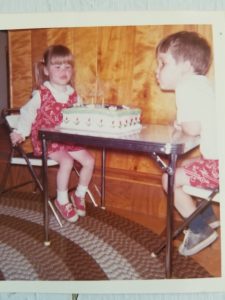
I was one of those super nerdy kids who always liked going back to school. I especially enjoyed getting new clothes for the occasion. When I was of elementary school age, my mom still made a lot of my clothing (and that of my three brothers). We were those kids who had matching plaid pants and skirts because Mom would buy a couple or three yards of a fabric and use it to make something for each of us. I didn’t mind so much. I thought my two little brothers were super annoying but, my big brother, who is 18 months older than me; well, I thought he was the best. I didn’t care that my red and white plaid skirt was made from the same fabric as his pants. It showed we were related and I was ok with that.

matching shorts and jumper for my birthday

matching shorts and jumper for my birthday

Mother knows best

Mom also went through this phase of embroidering designs on the fronts of plain cotton long sleeve turtlenecks for me. I have no idea where she found the time to do this. I remember having a red one with a Christmas tree on it and a brown one with flowers. I was a true child of the 70s and my Mom, always hip, dressed me like one, even when she couldn’t afford to buy me brand new clothes.

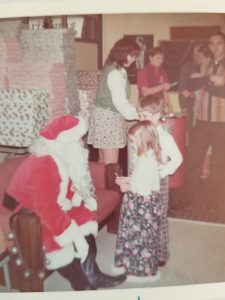
Mom made long skirt and plaid pants for Santa visit. My brother and I were very stylish.

Mom made long skirt and plaid pants for Santa visit. My brother and I were very stylish.

I also remember the huge JC Penny, Sears, and Montgomery Ward fall and Christmas catalogues. I would spend hours going through them, turning down the corners of the pages with items I hoped maybe Mom could buy for me. My parents were pretty good budget makers and keepers and somehow managed, even with four kids on a high school principal’s salary, to still be able to buy all of us some new clothes for the every year for back to school.

To Black Friday or to not Black Friday

We never actually ordered from the catalogues. I’d pick out what I wanted and then we’d all pile into Mom’s van and head to the mall where the JC Penny store was. Then, I’d spend hours searching the store for the pieces I’d ear marked in the catalogue. I thought that whole thing incredibly fun – which is rather ironic because nowadays I abhor shopping in actual stores for clothes and, on the rare occasions that I purchase new wardrobe items, buy most everything online.

Somehow, in my old(er) age, I’ve grown to dislike mass produced apparel of any kind, and shopping in general.

Unless, that is, I’m buying something cycling related. I go hang out in my preferred local bike shop even when I don’t necessarily need something. I’ve spent time thinking about the why of this and have come to the (fairly obvious) conclusion that the reason I’ll go to the bike shop in person and am completely fine with paying a bit more for things I could get at a slightly discounted rate at an online super store, is for the free, excellent cycling (and local food and bar) advice and recommendations from the bike shop owner and employees.

No flavor to savor

Everything in the stores these days looks the same to me and nothing looks like me anymore. Perhaps this is just a common occurrence, or realization, that manifests as you get older. I never wanted to look like everyone else, not even way back when I picked outfits from the JC Penny catalogue. Before everyone could buy anything they wanted from anywhere online, I used to beg Mom to take us to the mall the next county over because the stores carried different things than the stores in our local county mall. Then I was able to get things that no one else at school would have.

I think that’s probably why I loved those embroidered turtlenecks my Mom used to make me so much. Nobody else at school had a shirt just like mine. And I could even claim to have helped pick out the design. Guess I was indeed destined to end up sewing and creating for a living.
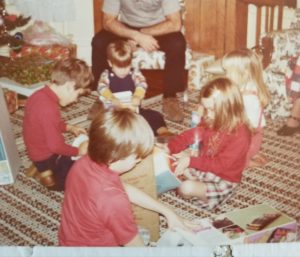
The Christmas Tree Turtleneck. Not a great photo of it but the only one I could find. Note that my brother (sitting across from me) is wearing a turtleneck in the same color.

The Christmas Tree Turtleneck. Not a great photo of it but the only one I could find. Note that my brother (sitting across from me) is wearing a turtleneck in the same color.

Be true to yourself

In this world of factory mass-produced disposable goods, individual style is truly a wondrous thing to have. So cultivate yours and that of others as much as you can. Make something for a child in your life, even if its as simple as embroidering a cheesy design on a cotton turtleneck.

You can find some great embroidery designs right here at Sewing Machines Plus to get you started:

Printed Fabric Project Panels and Ideas

Printed Fabric Project Panels and Ideas

Have you looked into the world of printed fabric panels yet? If you are someone who wants to sew, but doesn’t want to take the time to do detailed, intricate work, a printed fabric project might be more your speed. With pre-printed fabric you can easily sew up gifts for babies and new mothers, teacher and holiday gifts, and so much more.

Kids and New Moms

Making a gift for an expectant mother or little kid in your life? Now you can piece together quiet books, soft books, plushies, play cubes, and toys by buying fabric panels, cutting out the patterns, stuffing, and sewing. Here are a few darling examples.

Tara Lilly’s Whimsical Storybook, Sea Urchin Studio’s Forest Fellows 2, Ed Emberley’s Happy Drawing, and Dr. Seuss Enterprises’ What Pet Should I Get?

Tara Lilly’s Whimsical Storybook, Sea Urchin Studio’s Forest Fellows 2, Ed Emberley’s Happy Drawing, and Dr. Seuss Enterprises’ What Pet Should I Get?

Housewarming and Hostess Gifts

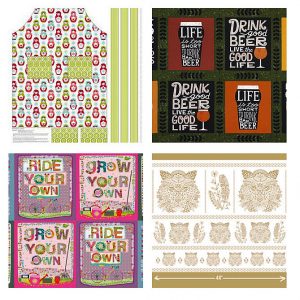
The next time I sew an apron, I’m going to buy a pre-printed fabric panel and just cut and sew. Likewise, there are fabric panels available out there for every type of friend and host or hostess gift you may need. I especially like the two highlighted below for beer lovers and DIYers.

Carly Griffith’s Merry Matryoshka, Robert Kaufman’s Cheers, Maia Ferrell’s Home Grown, Hawthorn Thread’s Bengal Panel.

Carly Griffith’s Merry Matryoshka, Robert Kaufman’s Cheers, Maia Ferrell’s Home Grown, Hawthorn Thread’s Bengal Panel.

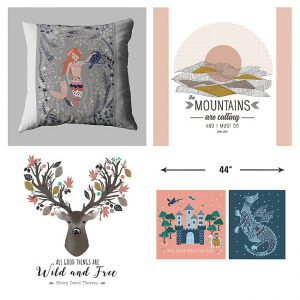
Make Your Own Pillows

Never buy store bought decorative pillows again. Now you can cut out and sew any size panel with an endless array of patterns, designs, and quotes by inspirational people. I’ve got the John Muir quote one in my shopping cart.

Hawthorne Thread’s Calypso in Aegean, Redwood Panel with John Muir quote, Autumn Fawn with Henry David Thoreau quote, and their Brave Panel in Valor.

Hawthorne Thread’s Calypso in Aegean, Redwood Panel with John Muir quote, Autumn Fawn with Henry David Thoreau quote, and their Brave Panel in Valor.

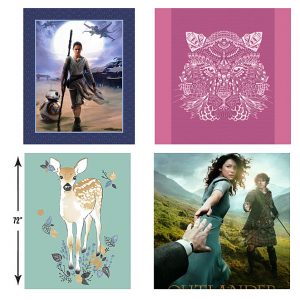
Full-sized Quilt Panels

That’s right. Now you can buy an entire fabric panel ready to quilt. You don’t have to piece these beauties together. Just add batting and a backing and start quilting. For my Star Wars and Outlander fan friends, yes, you can now get your favorite heroines in full-sized quilts!

Camelot Cotton’s Rey and BB8, Hawthorne Thread’s Bengal Quilt Panel, and their Fawn Quilt Panel in Aspen, and Kathy Hall’s Outlander Panel.

Camelot Cotton’s Rey and BB8, Hawthorne Thread’s Bengal Quilt Panel, and their Fawn Quilt Panel in Aspen, and Kathy Hall’s Outlander Panel.

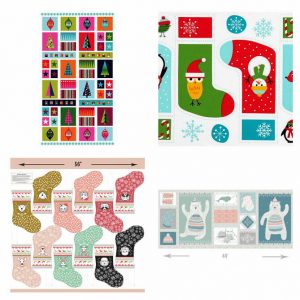
Season’s Greetings

Holiday decorating and seasonal teacher and co-worker gifts are much easier now that fabric comes in these printed panel projects. Make a stocking for everyone in your kids’ class or just make them all for you and deck the walls at home.

Makower UK’s Wrap it Up Hanging Panel, Ann Kelle’s Jingle 4 Stockings, and Hawthorne Thread’s Oh What Fun Stockings cut outs, and Hawthorne Thread’s Fairisle Panel in Multi.

Makower UK’s Wrap it Up Hanging Panel, Ann Kelle’s Jingle 4 Stockings, and Hawthorne Thread’s Oh What Fun Stockings cut outs, and Hawthorne Thread’s Fairisle Panel in Multi.

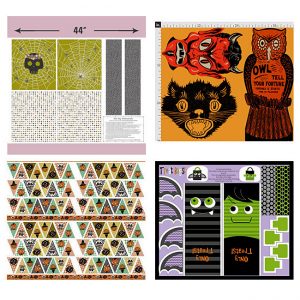
This is Halloween

I had to spotlight Halloween printed fabric panels because I know a lot of my friends struggle to find Halloween crafts. No more! Make your own trick or treat or gift bags and spooky buntings and pillows.

Hawthorne Thread’s Nocturne Trick or Treat Bag panel, Halloween Pillows, Halloween Bunting, and Halloween Treat Bags by Heidi Kennedy on Spoonflower.

Hawthorne Thread’s Nocturne Trick or Treat Bag panel, Halloween Pillows, Halloween Bunting, and Halloween Treat Bags by Heidi Kennedy on Spoonflower.

What a Doll

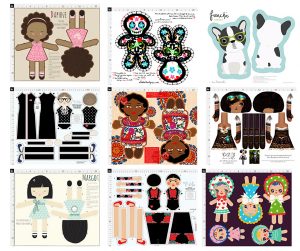
Full fabric quilt panels and doll patterns are where I think preprinted fabric panels really shine. Both categories are a lot of work when you make everything from scratch. These cut-out-and-sew doll patterns will have you finished in no time, and the gift recipients are guaranteed to love what you make.

Daphne by stacyiesthsu, Cute Dia de Los Muertos Doll by elladorine, Frenche by ewa_brzozowska, Ruth Bader Ginsburg by nicoleporter, Angelina Cut N Sew Doll by tiffanyhoward, Cut and Sew Doll Pattern Steampunk Princess by selinafenech, Margo by stacyiesthsu, Frida Kahlo by nicoleporter, and Cut N Sew Bunka Dolls by heidikennedy.

Daphne by stacyiesthsu, Cute Dia de Los Muertos Doll by elladorine, Frenche by ewa_brzozowska, Ruth Bader Ginsburg by nicoleporter, Angelina Cut N Sew Doll by tiffanyhoward, Cut and Sew Doll Pattern Steampunk Princess by selinafenech, Margo by stacyiesthsu, Frida Kahlo by nicoleporter, and Cut N Sew Bunka Dolls by heidikennedy.

Do you use preprinted fabric panels? What are your favorite projects to make from them?

———————————————————————————–
Charlotte Kaufman is a writer and sewist in Mammoth Lakes, California. She specializes in marine and home interiors and continues to fall more and more in love with quilting. You can follow her at charlottekaufman.com.
The Scraps of Christmas

The Scraps of Christmas

It’s officially Christmas week, guys! The day is just around the corner, and soon we’ll be heading into a less twinkle-lit world. Until then though, there’s still time to revel in the holiday for one more blog post! For this particular one, how about we go with a nice wrap-up idea?

You see, I’ve covered a tree skirt, ornaments, and homemade gifts, but if you chose to go all of those routes, you potentially would have collected a series of Christmas fabrics. Each project could have its own material, so there might be quite the variety. Another decent assumption would be that you didn’t have just enough material for all projects, so you could easily have scraps of Christmas fabric left over from your handmade-Christmas-extravaganza.

The Scraps of Christmas

Sure, you could stash it away for future use, but if you keep every scrap of material you ever come across, you’re treading on fabric-hoarder territory! There’s nothing wrong with keeping the pieces that would reasonably be user-friendly in the future, but I’m talking about the small bits that won’t be much use without other smaller parts to make something happen, or for a small enough project.

So, maybe this post will help keep that fabric stash a little smaller and farther from hoarder territory by answering one simple question: What projects can you do with those small parts of leftover Christmas fabric?

Answer: Plenty, and I plan to take you through a number of those options!

Possibility #1: Make a banner

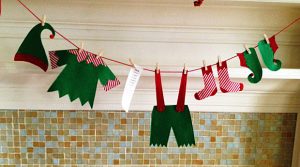
This is such a simple option, but it can add a classy touch to your Christmas decorations. All you need to do is pick a shape for your fabric, cut the scraps in that shape, make sure those hems are smooth, and link them together—maybe with some ribbon or yarn. If you’re feeling particular, you can make sure that each of those shapes is two-sided by sewing two pieces together—maybe spice things up by using more than one fabric for the cause. With that method, you could have (as an example) a bell-shaped addition to your banner that has Rudolph on one side and Frosty on the other! If you’re good at embroidery, use enough shapes to embroider a message across. You could even do this laundry-line idea if you had the right fabric! The options on this idea alone are numerous!

The options on this idea alone are numerous!

The options on this idea alone are numerous!

Possibility #2: Make fabric garland

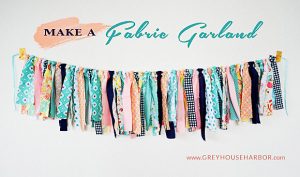
This is like the banner, but requires strips of fabric tied instead of differently shaped pieces embellished and sewn. I mean, sure, you could add gems and such, but the draping quality of the fabric is kind of its distinctive factor, which doesn’t leave a whole lot of room for the Merry Christmas message! Still, this is a simple, elegant idea that could add a touch of holiday cheer to your house by hanging from your mantel. And, as is the main idea of the post, it’s a great way to use that extra Christmas fabric you might have once you finish your holiday sewing projects!

This is like the banner, but requires strips of fabric tied instead of differently shaped pieces embellished and sewn.

This is like the banner, but requires strips of fabric tied instead of differently shaped pieces embellished and sewn.

Possibility #3: Make a Christmas tote

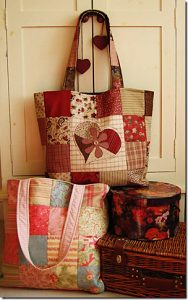
While you might not have enough material to make the entire tote in one style (then again, maybe you will!), you could create a patchwork look for a homemade Christmas tote! You can find patterns for totes here, and Sewing Machines Plus offers free patterns for bags as well. Can you imagine a patched-up Christmas tote in this design! I would definitely carry one of those!

I would definitely carry one of those!

I would definitely carry one of those!

Possibility #4: Make fabric bookmarks

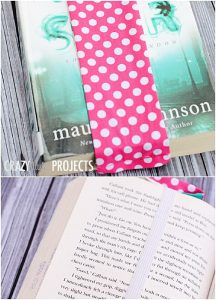
Call me a literature nerd, but how awesome would it be to give someone a copy of A Christmas Carol with a hand-sewn bookmark to go along with it? In fact, this could be a thing you do next year — give out holiday classics with hand-sewn bookmarks in Christmas fabrics! These projects are small, and who knows how many you could make in one day? And they require little fabric, which is the theme of this post! Whether it’s to hold your place for your own holiday reading or for small gift-gestures to let someone know you’re thinking of them, these creations could bring a festive touch to a book-and-hot-chocolate December time!

Call me a literature nerd, but how awesome would it be to give someone a copy of A Christmas Carol with a hand-sewn bookmark to go along with it?

Call me a literature nerd, but how awesome would it be to give someone a copy of A Christmas Carol with a hand-sewn bookmark to go along with it?

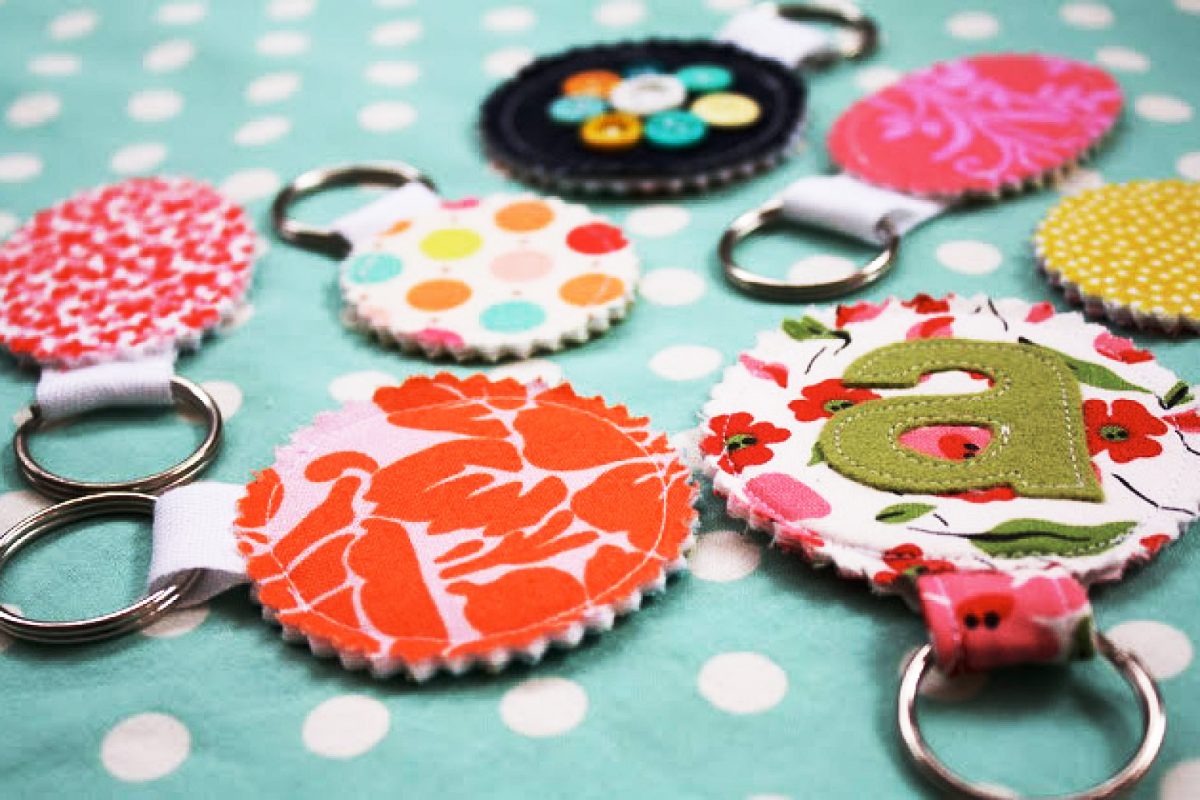
Possibility #5: Make a keychain

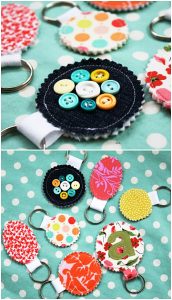
Since childhood, I’ve had an interest in keychains. I don’t know why, but it’s true just the same. So, why not take a bit of that excess material and make a one-of-a-kind keychain? Keyrings don’t have to be expensive, and it’s possible that everything else you’d need you could find around your house—maybe even down to buttons like what you see in the picture. Given the teeny-tiny-ness of keychains, this craft would be a good way to use some of that excess fabric! You can find this possibility (and #5) here!

Given the teeny-tiny-ness of keychains, this craft would be a good way to use some of that excess fabric!

Given the teeny-tiny-ness of keychains, this craft would be a good way to use some of that excess fabric!

So, the moral of the story is that you don’t have to be a Christmas-fabric hoarder after your holiday sewing! There are plenty of avenues to expend some of that scrap material!

DIY Fabric Gift Bags instead of Wrapping Paper

DIY Fabric Gift Bags instead of Wrapping Paper

DIY Fabric Gift Bags instead of Wrapping Paper

Ready for a DIY project that will last for years and is good for the environment (and your pocket book?) This year, instead of wrapping your gifts in holiday paper that will be thrown away after the presents are opened, consider making fabric gift bags instead. I made five different sized bags in under 20 minutes. Here is how.

Assemble your fabric.

Get all of the holiday-themed fabric scraps you’ve been hoarding. The sky is the limit on the sizes you can make as presents come in all manner of shapes, sizes and weights/heights.

DIY Fabric Gift Bags instead of Wrapping Paper

To keep this project FAST, you aren’t going to finish any of the seams, which means you need to use pinking shears, a serger or a zig zag stitch to finish your raw edges.

DIY Fabric Gift Bags instead of Wrapping Paper

Great deals on sergers here

If you’ve been thinking about getting a serger, SewingMachinesPlus.com has them on sale right now, right in time for the holidays. This Juki Garnet Serger is the one I’ve been looking at. I love that it comes with bonus feet and additional thread cones.

Square up your fabric, fold over, pin, and then sew a straight stitch around all three sides. Leaving the tops of the fabric gift bags exposed (but pinked) will give them a whimsical, handmade feel.

DIY Fabric Gift Bags instead of Wrapping Paper

Nice little folds

For this fabric, I decided to create box corners (think like a brown paper lunch bag).

DIY Fabric Gift Bags instead of Wrapping Paper

I also wanted to add a casual drawstring. To do this without creating a casing, I marked every 1.5″ and then snipped the openings. I love these Clover Chalk-Liner pens. They are an essential part of my sewing tool kit. They mark precisely and I can just sweep off the chalk when I’m done.

Ribbon feeding trick

I used a safety pin attached to the end of some twill tape to feed the twill through the holes I’d clipped to create the drawstring for this bag.

DIY Fabric Gift Bags instead of Wrapping Paper

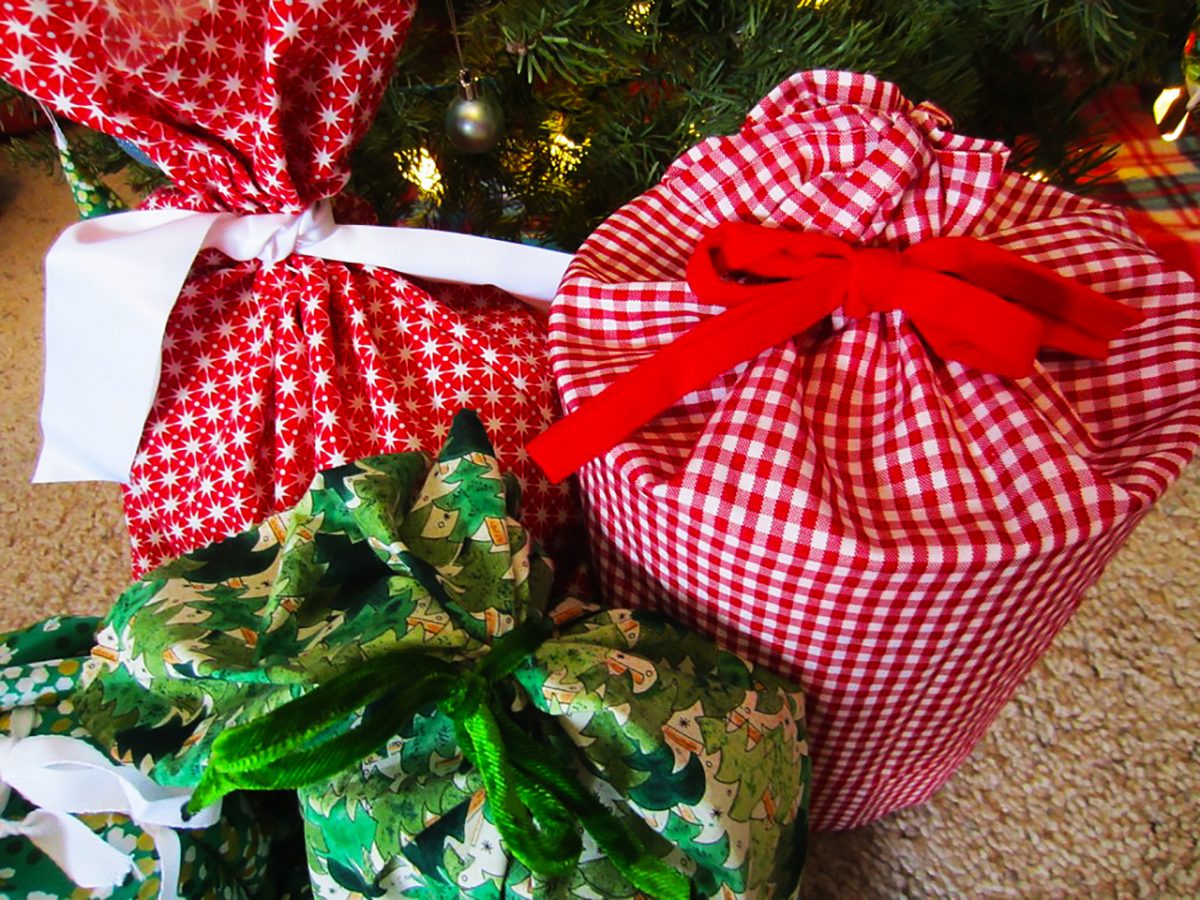
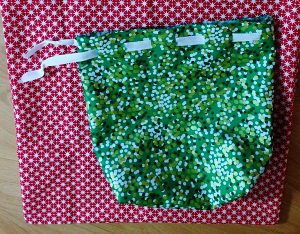
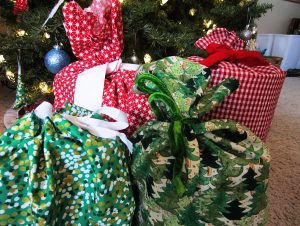
The green bag has box corners and will stand up easily once filled. The larger red bag behind it resembles a pillow case in shape and will be perfect for larger, bulkier gifts.

DIY Fabric Gift Bags instead of Wrapping Paper

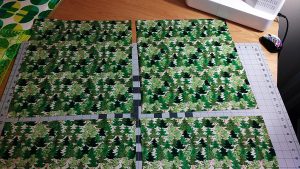
I had the most of this pine tree fabric. Because of the orientation of the trees, I couldn’t fold the double the fabric over to quickly create rectangular bags (if I did that, one side of the bags would have upside down trees). Instead, I cut four even pieces and then placed the pieces on top of each other (2 bags total), right sides together. Then I pinned, pinked and sewed them together.

DIY Fabric Gift Bags instead of Wrapping Paper

Last but not least

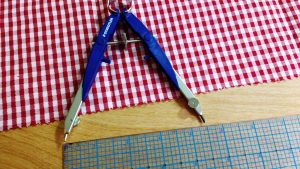
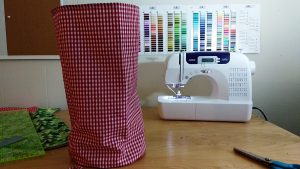
My final piece of fabric was a large, gingham napkin that I’d been holding onto. For this, I thought it’d be fun to create a barrel shape with a circular end. I dug out my compass to make the circle. I knew the circumference of the finished bag would be 25″ so I used the formula d = C/π. I then added .5″ on either side for seams and my diameter was just under 9″.

DIY Fabric Gift Bags instead of Wrapping Paper

Isn’t it darling? Now it was time to wrap some gifts (This was sooooo easy. So much easier than using traditional wrapping paper, scissors and tape).

DIY Fabric Gift Bags instead of Wrapping Paper

I used some trims I had on hand, a velvet green ribbon, a red fleece ribbon and some white satin binding to close everything up.

DIY Fabric Gift Bags instead of Wrapping Paper

I love that I can re-use these year after year and they are reminiscent of Santa’s bag of gifts too.

DIY Fabric Gift Bags instead of Wrapping Paper

Happy Holidays!

—————————–
Charlotte Kaufman is a writer and sewist in Mammoth Lakes, California. She specializes in marine and home interiors and continues to fall more and more in love with quilting. You can follow her at charlottekaufman.com.
A Christmas Carol

A Christmas Carol

LET ME SEW!! LET ME SEW! LET ME SEW!!

LET ME SEW!! LET ME SEW! LET ME SEW!!

The Holiday Season is here. Traffic is fearful! The malls are busy. The wine I just drank is making me dizzy. I’m stressing about the time, it is getting too near. What on earth can I give to my “people” this year?

The house is a mess with all the sewing I’ve done, scraps and pins on the floor, dozens of threads on the chairs. It is too overwhelming, sometimes I want to run!

The tree is not up, the cookies not done. I’m afraid this Christmas will not be any FUN!

The “walking” foot broke, and I cried, “OH GREAT”! Now, I have to be careful to sew these dang top-stitches super, super straight. It HAD to break now, it was truly my fate!

A little more Vin Brulee, and I start reviewing my stash. I got to find some things I can take to this family Christmas bash!

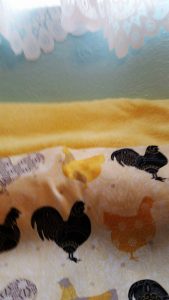
Gina wants napkins, roosters and hens, I have to make 4 more, and I’ll be finished with them.

Gina wants napkins, Roosters and hens, I have to make 4 more, And I’ll be finished with them.

UNPAPER TOWELS SEEM TO BE A BIG HIT!

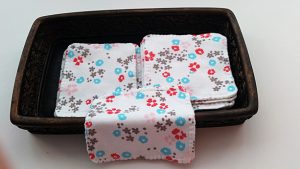
These Cotton Organic Tiny Towels would be a great fit, for the all the girls in the family, for make up and noses, especially for Robyn, when her man proposes!

These Cotton Organic Tiny Towels would be a great fit, for the all the girls in the family, for make up and noses, especially for Robyn, when her man proposes!

Now, I hear a baby crying. I think its next door. This young girl had twins, I hope there won’t be more.

Great! I found some wipes for the GUYS. Soft Organic cotton jersey as well, so very well made, for noses, and devices, I’ll give them a pair, to carry in their pocket for even their sunwear!

Great! I found some wipes for the GUYS. Soft Organic cotton jersey as well, so very well made, for noses, and devices, I’ll give them a pair, to carry in their pocket for even their sunwear!

I am sure by now, she is needing a break. So what do I have here that she would gladly take? Not just a blanket, or a quilt that she would put away. Something useful, and helpful and durable too.

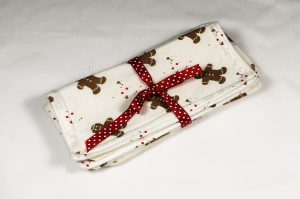
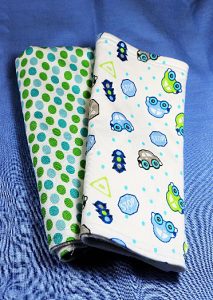
Cute little gingerbread wipes for  tiny, tiny fingers, and nice thirsty burp cloths to pat out the bubbles, if the milk still lingers!

I still have more presents to make, so, let me bid you adieu.

My very best wishes and the Merriest of Holidays from my house to you!

The Art of Christmas Ornaments

The Art of Christmas Ornaments

We’re getting closer to that Christmas mark! I actually have a Netflix Christmas movie playing while I write out this post, so clearly I’m in holiday mode! Now, if I only had some hot chocolate…

As has been the case with my last couple of posts, I’m sticking to the holiday theme for this week as well. This is an easy thing to do, by the way, because there are so many options for Christmas projects that require a needle and thread. Honestly, a person could come up with months’ worth of topics just from this category!

So, with a variety of things to choose from, I’ve decided to focus on Christmas ornaments for this post. Obviously, you can go out to your local department store and buy ornaments — you can even shop online to find them — but there’s something satisfying about looking at a tree and knowing you made something that’s on there.

Let’s decorate!

And since this is a sewing blog, let’s focus on sewn ornaments, shall we? These are wonderful things to successfully complete for more than one reason. First, as I said, it’s satisfying to see something you crafted on the tree! They’re also potentially simple patterns, and you could finish a number of these in a small amount of time. That simplicity leads to plenty of ornaments for just a percentage of your day because the technique can be so basic! You cut the fabric pieces, you sew the fabric pieces, you tend to final/additional touches, and you attach ribbon/yard/etc. to hang it from the tree. Who can’t do that?!

Possibly the most fantastic element of this idea is that these ornaments can be so cheap to make. If you recall, I can be a frugal person, so I adore this detail! If you think about the process itself, you might see how wallet-friendly it can be. What do you need besides a needle, thread, fabric and ribbon (or yarn, etc.) to hang it from your tree? There might be additional details for each individual type of ornament, but you could easily pick something that’s limited enough in those additional supplies to be within your budget. And think about that fabric and ribbon. If you just have one yard of fabric and one roll of ribbon, consider how many three-inch ornaments you can make out of that!

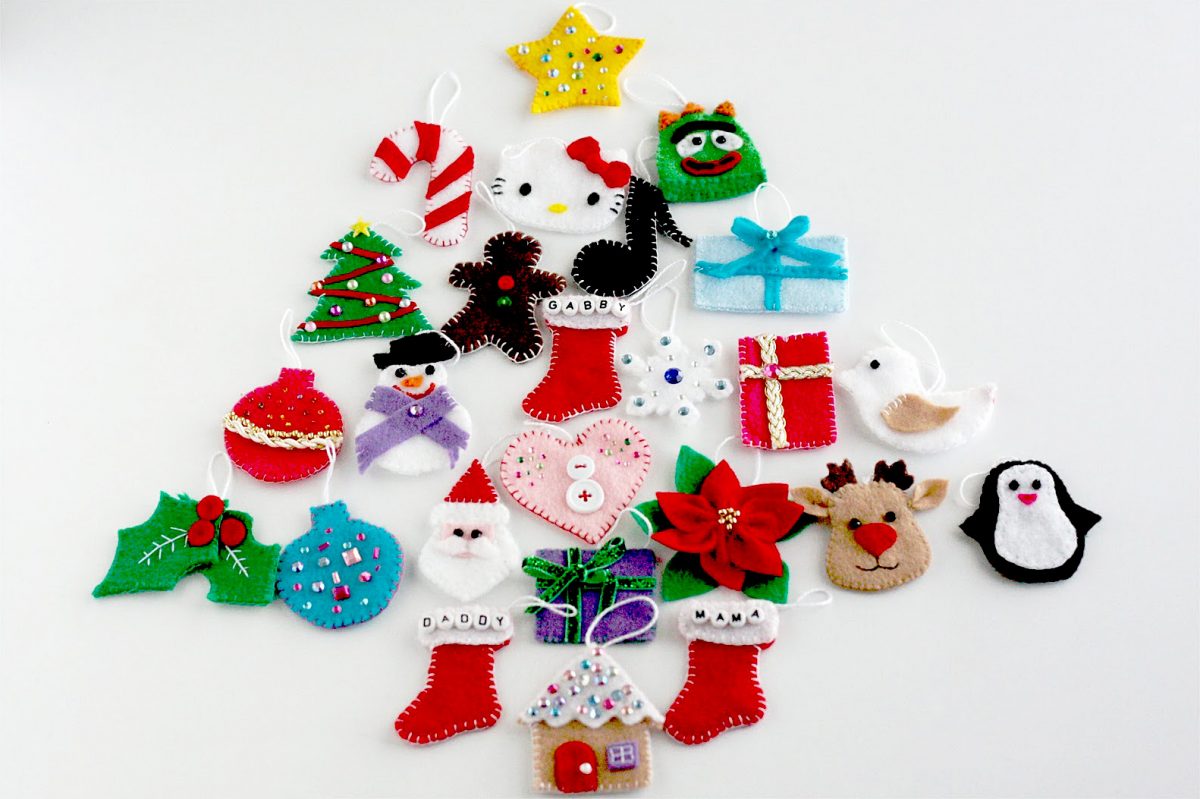
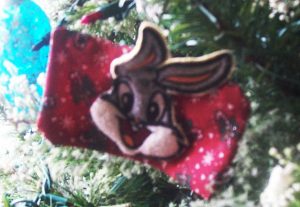
Honestly, I can’t endorse this concept enough because it’s fantastic on so many sides. It’s easy enough for a beginner to try, it’s cheap enough for someone on a budget, and it’s sentimental enough to have personal meaning as it hangs from the tree. You can even make these ornaments more heartfelt by using material connected to someone close to you, like a child. One old outfit that your child has outgrown can be cut into a desired shape and design, like the Bugs Bunny ornament shown.

Bugs Bunny ornament.

Bugs Bunny ornament.

Fabric ornaments

While it might be too late this year to hand-sew a collection of ornaments, you could invest in some Christmas fabric and such this season to make some of these for next year’s festivities.

So what are some good ideas for sewn Christmas ornaments? There are plenty out there that you can find with a little Google time, but I’ll share some of my favorites that I found.

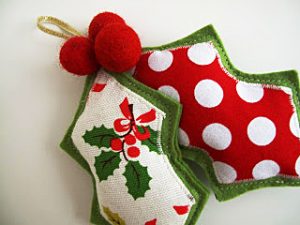
Fabric holly be for your tree.

Fabric holly be for your tree.

1. Holly: There simply aren’t words for how adorable I find this ornament, and it looks relatively simple — stitch, cut, sew, applique, stuff… This doesn’t look as complex as, say, making your own outfit, so it might be worth trying! Besides, how unique would fabric holly be for your tree?!

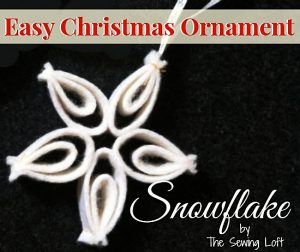
This one requires a bit of glue and folding, but look how pretty it is!

This one requires a bit of glue and folding, but look how pretty it is!

2. Snowflake: This one requires a bit of glue and folding, but look how pretty it is! I can even see adding some glitter and a bit of coloring to give it a two-tone look! Even if this one is a bit more tedious than some of the simpler options, the final product could be wonderful enough to make the effort worth it!

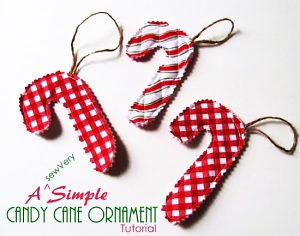
Candy canes themselves are kind of a Christmas classic, so why not have some homemade ones hanging on your tree?

Candy canes themselves are kind of a Christmas classic, so why not have some homemade ones hanging on your tree?

3. Candy canes: Candy canes themselves are kind of a Christmas classic, so why not have some homemade ones hanging on your tree? And if you wanted to branch out from the standard look of a standard candy cane, you could use more general Christmas fabric — like material covered in poinsettias or bells to cut in candy-cane shapes. The options are so vast, and the technique is very simple!

These are just a few possibilities, but there are plenty more on this site alone! You can tailor them to your wants and work on them at your convenience, so why not give it a try?

DIY Plaid Christmas Tree Skirt with Satin Binding

DIY Plaid Christmas Tree Skirt with Satin Binding

DIY Plaid Christmas Tree Skirt with Satin Binding

I’ve always adored the classic look of plaids during the holidays. And plaid combined with satin is just lovely. We recently moved to a new house and I’ve been doing Christmas on a budget this year. I knew I wanted a plaid Christmas tree skirt but also knew I needed to be frugal. Here’s how I accomplished both.

Fabric first!

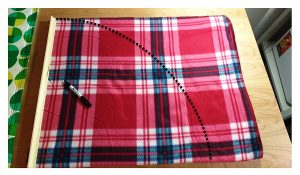
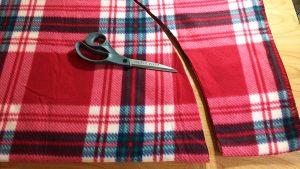
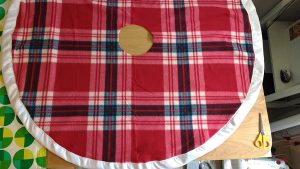
I picked up this plaid fleece throw blanket at K-Mart for $1.99. To create a perfect circle, I folded the blanket into quarters and then measured the shorter height of the rectangle it formed. On this blanket, that was 28″. I, randomly, had a stick that measured exactly 28″. You could do this with a long ruler, or just measure out the length you need on any stick or piece of wood and do the same.

DIY Plaid Christmas Tree Skirt with Satin Binding

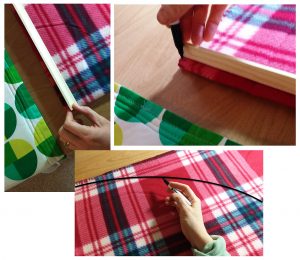
Once you’ve marked the length on both sides of the rectangle, hold the stick at the corner of the folded blanket, and then draw an arc from point to point, moving only the top of the stick.

Making the cut

DIY Plaid Christmas Tree Skirt with Satin Binding

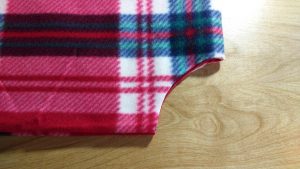
Now cut out that lovely quarter circle. Before you unfold the blanket, cut out the interior circle (the part that will wrap around the trunk of the tree.) To do this, determine your desired circumference, which will allow you to find the diameter, and thus the radius. If you need the formulas, they are: d = C/π and r = D/2

DIY Plaid Christmas Tree Skirt Satin Binding

Once you know your radius, do the same thing you did to mark out the larger arc but this time at the corner where the blanket is folded into quarters.

DIY Plaid Christmas Tree Skirt Satin Binding

Wash away those wrinkles

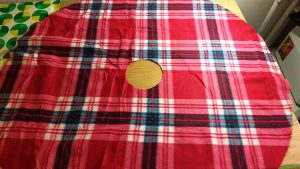
At this point I unfolded everything but the fleece was far too wrinkly. One of the great things about fleece is that it doesn’t fray, so I took the opportunity to wash a few of my daughters’ blankets and threw them, and this tree skirt, into the wash on the cold, delicate cycle. I added white vinegar as fabric softener, and then dried on low. It significantly reduced the wrinkles of the fleece.

DIY Plaid Christmas Tree Skirt Satin Binding

Binding it all together

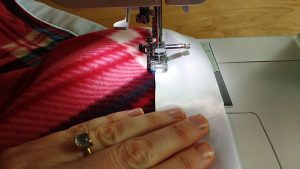
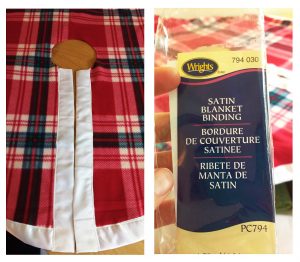
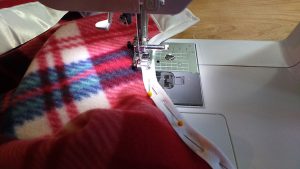
For a tree skirt that is 56″ wide like mine, you will need two packages of satin binding. I used a satin applique stitch and worked my way around the skirt. Pre-packaged satin blanket binding is NOT cut on the bias, so you will need to pay careful attention as you go around the curve of the skirt.

DIY Plaid Christmas Tree Skirt Satin Binding

Some skirt tutorials will tell you to cut a line up to the interior circle before you add binding; I like to cut my line afterwards.

DIY Plaid Christmas Tree Skirt Satin Binding

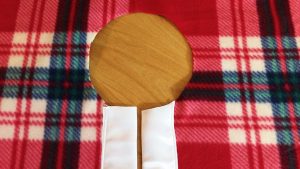
Looking at the fabric, I followed the lines of the plaid to cut a straight line from the outside of the skirt to the inside and then used more of the satin binding to trim each edge.

DIY Plaid Christmas Tree Skirt Satin Binding

Welcome to the inner circle

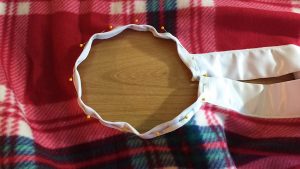
When it comes time to bind the interior circle, do yourself a huge favor and switch to binding that is cut on the bias. When fabric is cut on the bias it is much easier to curve it, which makes binding circles, especially interior circles tremendously easier.

DIY Plaid Christmas Tree Skirt Satin Binding

Here I switched to prepackaged white bias binding and though pinning is not my favorite, thing, for this project I pinned everything carefully in place.

DIY Plaid Christmas Tree Skirt Satin Binding

Pro tip: think ahead before you pin and place your pins in the direction that you sew. This will it easier to pull them out as you go around the circle.

DIY Plaid Christmas Tree Skirt Satin Binding

Tie it off

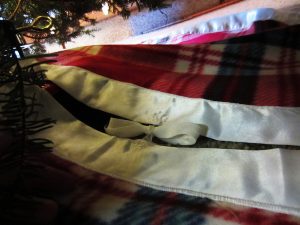
Lastly, don’t forget the ties! I used four pieces of the binding tape that I used on the interior circle to create ties, two at the top of the circle, and two 12 inches down the cut edges.

DIY Plaid Christmas Tree Skirt Satin Binding

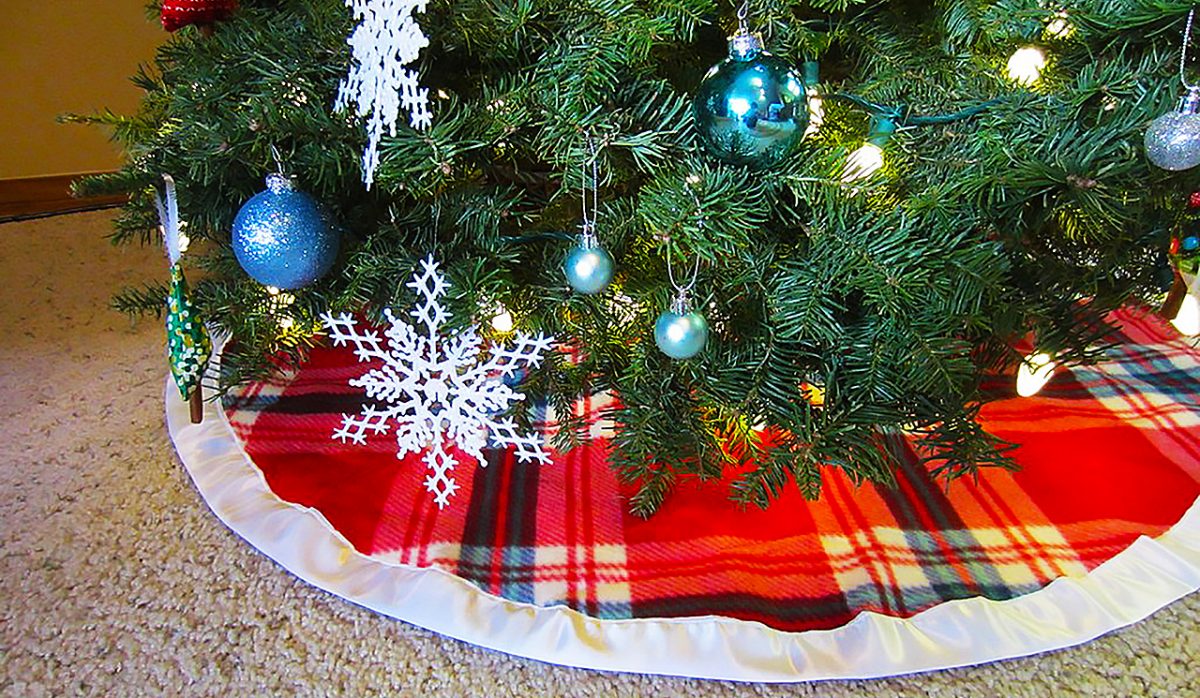
Here is my tree before the plaid tree skirt.

DIY Plaid Christmas Tree Skirt Satin Binding

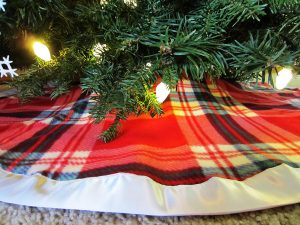
And voilà, the finished product!

DIY Plaid Christmas Tree Skirt Satin Binding

The combo of fleece, plaid, and satin just warms my heart.

DIY Plaid Christmas Tree Skirt Satin Binding

What are you DIYing this holiday season? Let us know and happy sewing!

—————————–
Charlotte Kaufman is a writer and sewist in Mammoth Lakes, California. She specializes in marine and home interiors and continues to fall more and more in love with quilting. You can follow her at charlottekaufman.com.
Tree Skirts and Fabric Blocks

Tree Skirts and Fabric Blocks

I’ve had planned indoor picnics with my nieces for the sake of Valentine’s Day and Halloween.

I’ve had planned indoor picnics with my nieces for the sake of Valentine’s Day and Halloween.

Christmas is even closer than it was when my last blog about homemade, sewn gifts was posted, so it seems fitting to keep with the holiday vibe! Whether or not I mentioned this earlier, I’m a fan of holidays to the point that I’ve had planned indoor picnics with my nieces for the sake of Valentine’s Day and Halloween, so don’t be too surprised if you see a good number of holiday topics when the big ones roll around!

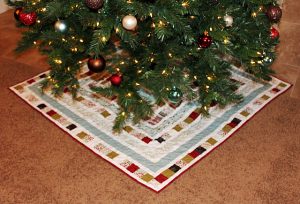
I’ve been browsing online to try and find an interesting Christmas project to check out, and I came across a concept that is really fitting this season: a tree skirt. You see, we have one, but we changed Christmas stockings this year. The new ones aren’t the best of matches to the old tree skirt, so we’re currently going tree-skirt-less for the sake of coordination. Basically, the idea of constructing a tree skirt is a logical notion for a Christmas project this year!

Let’s decorate!

I just use pieces of material one piece per section.

I’ve come across more than one option including a fancy scalloped one that caught my eye, but being the patchwork girl that I am, I was more drawn to a patchwork-looking design. As easy as the overall pattern might seem to some, the idea of creating my own blocks with multiple patterns is a bit daunting to me. Usually, I just use pieces of material—one piece per section—and I don’t know that I’ve ever tried to piece together my own block. For that reason, it seems reasonable to do some research before potentially diving into the process. As I’ve said before, doing research can make a sewing process smoother, and should I try this, I want it to go smoothly!
And maybe certain readers are in the same boat with me on this one—interested in moving into elaborate blocks, but unskilled in the technique. If so, keep reading! I’m going to hand over some general ideas that I’ve found that could help with the process!

Where to start…

Tip #1: Press your material! This is a simple step, though one that can easily go overlooked. Even if you want to just jump into constructing your project, taking the time to level out the fabric you’ll use can help in making sure things line up as they should. So before you sew the first stitch, break out that iron!

Pressing is also something to keep in mind during the process when you sew fabric together. If you connect two blocks of fabric, press that seam! As you connect more material, your blocks will be less likely to have random bumps or puffy spots because the act of pressing as you go will ideally have smoothed out troublesome areas before additional pieces get locked in. That kind of consistency—no puffiness where it shouldn’t be—can create uniformity. You can even get pressing sprays to help solidify the effect!

Around the block

Tip #2: Learn the basics of block patterns! Are you planning a four patch product? Nine patch? It helps to think about those concepts before you start piecing your product so you can plan the design and get an idea of how you’re going to structure your work. This might be particularly true if you’re planning a five patch product since basic mathematics will let you know that such a pattern does not divide evenly by two! There’s a technique for each of these blocks, and being aware of those techniques can help you through the process. You can find out more about those pattern options here.

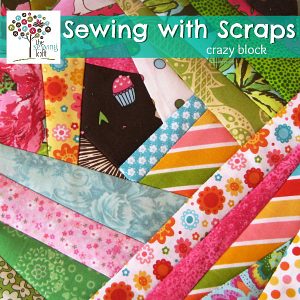
Crazy square block.

Crazy square block.

Once you get comfortable with the more traditional and beginner-friendly possibilities, maybe you can work your way into something less typical, like a “Crazy square block” of material.

Color theory

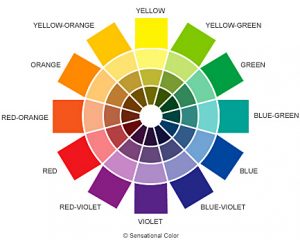
The color wheel.

The color wheel.

Tip #3: Get to know your color options! One site recommends the use of the color wheel, and I think this strategy might be a good one. While aesthetics might be subjective, decisions on color are still something to take seriously before you begin stitching. This, I think, could be particularly true when you’re creating your own block from a series of fabrics. Instead of just having 50 or so segments of color on one product—one per block—you could end up with various colors per block, which leads into a whole lot of color-consideration territory!

If you want to go with a cool tone, for instance, how easily could you do a nine patch product with different variations of color per block—one for greens, one for blues… That example is a perfect illustration of why knowing your colors could be so important. If you don’t know too many shades of cool colors, you might not have the background knowledge that would help you create the cool color, nine patch work. Basically, if you want a cohesive final product of multiple fabrics per block, think about those colors while you consider your fabrics!

Measure twice, cut once

Tip #4: Be exact with your measurements! This one might be a bit obvious—or really obvious—but it’s worth noting. Not only should you make sure your blocks are consistent in size for the best possibility of a final product, but you should make sure the individual sections of the block are measured accurately. Doing so could keep embarrassing things from happening—like running out of fabric in your squares before you get to the end of a block or having excess. Either mistake could lead to the overall product looking off because every block wouldn’t have the same mistakes. If you want uniformity throughout, measure!

Even if Christmas is too close for this concept to result in a 2016 tree skirt, this is still something I can keep in mind for next year. In fact, new goal!

~ Make a home-sewn tree skirt. ~

I wonder if 2017 – me will hate all of these goals I’m tossing her way? If so, maybe she can appreciate it if there’s a by-hand product decorating the bottom of the tree next year!

Homemade Gift Tips

Homemade Gift Tips

It’s the month of Christmas, guys! Are you anywhere near ready? I have some presents still to buy, but to be honest, I might start planning one Christmas before the current one is over. Love of holidays? Crazy organization? Awareness of a budget? Maybe one, two, or all three things—maybe even a few more!—but the bottom line is that a good chunk of my Christmas shopping is finished. Yay, me!

I’m not so naïve as to think that’s the case across the board though! In fact, someone might be thinking, “Yeah, I need to work on that shopping list…” while reading this post. If that’s the case, stick around! I have some tips coming up that you might find useful!

Make it personal

I bought a used record online for about $10 & I don’t if I’d ever seen my mom so happy opening a present.

I bought a used record online for about $10 & I don’t if I’d ever seen my mom so happy opening a present.

In my experience, gift-giving can go best when you really think about the person instead of how much you want to spend or how impressive other people might find the gift. Example: My mom had been saying for years that she wanted a certain record—yes, record!—and one year it occurred to me that buying her said record could be a good idea. Why hadn’t I thought of it before? Maybe I was caught up on the it-has-to-be-new concept for a Christmas present? I’m not sure. Long story short though, I bought a used record online for about $10, give or take, and I don’t know that I’d ever seen my mom so happy opening a present.

If you think outside of the box instead of putting a series of labels on what you’re supposed to buy, it opens a door to a category of gift that will be the focus of this post: homemade. Who says you can’t give someone something you made yourself? Sure, you might not have bought it in a store, but you took the time to craft it with your own hands! Not only can it be a beautiful gift, but there’s a sentimentality to it that might be harder to achieve from something store-bought.

Decisions, decisions…

Still, as with store-bought gifts, it pays to think about what you’ll craft instead of flippantly deciding on something. With that in mind, here are a few tips for any of you who want to change up some of your I-need-to-buy-a-present items to I-think-I’ll-make-something choices, specifically gifts that need a needle and thread to create:

  1. Know your recipient! This could be key no matter if it’s store-bought or homemade. If you have an idea of the recipient’s personality, you could find it easier to plan your gift. Your friend who loves rockabilly, for instance, might love a purse made from material with a 50’s theme! Is another friend’s kitchen decorated in sunflowers? Then maybe a table runner made with sunflower-based fabric could be an option! If you can tailor your gift for the person you plan to give it to, the level of appreciation that person has might seriously increase!
  2. Manage your time. This one might be something to keep in mind for next year since Christmas is so near! But if you decide that homemade gifts are the way to go, don’t underestimate the idea of pacing yourself! Working on a dozen gifts in three weeks might be hectic. Deciding in January that you want to do homemade gifts for that year’s Christmas though would let you space your work out over months—and trust me when I say that pacing yourself can be a WONDERFUL idea!
  3. Consider your budget. Just because it’s homemade doesn’t mean it won’t cost some money! Sure, there are cheaper homemade options than making curtains, quilts, or clothing, but I’m talking about sewing here! Once upon a time, I decided I was going to make my mom a homemade quilt, and I might have ended up spending more on the supplies than I would’ve spent on a store-bought item. But I had a certain fabric I wanted to use, and it required more panels than I thought it would… The bottom line is you shouldn’t assume homemade automatically equals cheap, so if you need to work within a budget, still consider that budget! Should you realize the supplies you need for your projects are going to run too high, tinker with your ideas. Is there a different fabric you can use that’s cheaper, but still a good option? Can you scale it back—maybe make a throw instead of a full-sized quilt? A beauty of crafting your own gifts is that you can make those kinds of calls because it’s your creation!
  4. Browse. You might not be window shopping, but that doesn’t mean you can’t look for ideas online! Pinterest is a clear example of a place to find those ideas. In fact, I was inspired while writing this post, and you can now find my “Homemade Gift Ideas” board here! Even running a Google search can help you get the creative ball rolling by giving concepts that you can alter and tailor to your gift-giving wants. Though the overall idea might have come from someone else, the details—what fabric, what color, what size—can still come from you! You can find a series of sewn gift ideas here ! FYI, I love the cross-stitching lyrics one!

How about you, readers? Are you pro-homemade gift?

Inspiring Christmas Tree Patchwork Projects

Inspiring Christmas Tree Patchwork Projects

Christmas Tree Patchwork is interesting because there are so many different ways to make trees. They can be made using simple or more elaborate designs and can be laid out in many different ways. I’ve scoured the internet to collect all the best blocks and designs for many different ways to make a holiday or Yuletide tree or trees using patchwork. Let these designs inspire you to create something new this year for your home or a gift.  This collection includes:

  • Easy Christmas Tree Patchwork Blocks
  • Single Tree Quilt Designs
  • Abstract Christmas Tree Patchwork
  • Modern Tree Quilt Designs
  • Other Christmas Tree Patchwork Projects

 Easy Christmas Tree Patchwork Blocks

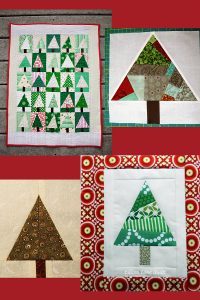
Photo credits: Diary of a Quilter (top left); Happy Quilting Melissa (top right); ChezStitches (bottom left); Ellison Lane (bottom right).

Photo credits: Diary of a Quilter (top left); Happy Quilting Melissa (top right); ChezStitches (bottom left); Ellison Lane (bottom right).

These patterns and design ideas use different ideas to construct the tree blocks, but they all produce quilts with a whole lot or forest of trees. Every one of these designs is easy to piece and quilt.

Patchwork Forest by Amy Smart at Diary of a Quilter is my choice for the holiday quilt to make this year. I just love this easy design and the quirky trees that are not all the same.

These crazy patch trees are arranged into the shape of a larger tree for a different arrangement of the many trees theme.

This Easy Christmas Tree Patchwork Block Tutorial at ChezStitches shows a totally different but equally easy way to piece trees, using mirrored triangles joined back to back.

This way to make strip pieced trees adds more fabric variety within each tree. You can play with this to achieve bedecking and bedazzlement and simulate trimmed trees.

Single Patchwork Christmas Tree Quilts

These quilt designs feature a single tree.

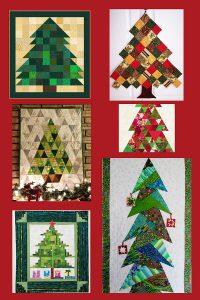
Photo Credits: Quilting at About.com (top left); Treasures-n-Textures (top right); Material Girl Quilts (middle left); Hoffman Fabrics (middle right); McCall's Quilting (bottom left); Waterwheel House Quilt Shop (bottom right).

Photo Credits: Quilting at About.com (top left); Treasures-n-Textures (top right); Material Girl Quilts (middle left); Hoffman Fabrics (middle right); McCall’s Quilting (bottom left); Waterwheel House Quilt Shop (bottom right).

This tutorial for a single Christmas Tree Patchwork design is as easy as it gets.

I’m inspired by this Emma’s Tree design to use reds and gold squares for twinkle and tree trim when following the About.com pattern above.

Here is a different single Christmas Tree Patchwork design constructed from triangles. I love the metallics for the background fabrics on this, and the easy quilting of the individual triangles.

Here’s another triangle Christmas Tree Patchwork, this one built from equilateral triangles, at Hoffman Fabrics.

O Tannenbaum is Christmas Tree Patchwork made from Log Cabin style blocks. This free miniature quilt pattern from McCall’s includes a star on top and presents underneath the tree.

This design, suggested by Moose Creek  Quilting, can serve in lieu of a real or artificial tree. The pattern includes sewing 25 red buttons to hang tiny patchwork or other ornaments you sew yourself. I love this version of this pattern that was made by Waterwheel House Quilting Studio using Kaffe Fassett fabrics.

Abstract and Modern Christmas Tree Patchwork Quilts

These designs are a little different, reflecting a more modern or abstract feel.

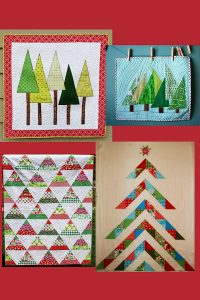
Photo credits: May Chappell (top left); Jacey Craft (top right); Ann Kelle (bottom left); Moda Bakeshop (bottom right).

Photo credits: May Chappell (top left); Jacey Craft (top right); Ann Kelle (bottom left); Moda Bakeshop (bottom right).

This Mod Tree Wall Hanging by May Chappell makes me think of a Christmas Tree farm.

Another design with a tree farm vibe is Happy Trees Mini Quilt. Jacey named this one Happy Trees because it reminds her of dear Bob Ross and his “happy little trees.”

This modern Christmas Tree Patchwork quilt by Ann Kelle shows another kind of happy trees, this time with colorful, trimmed trees in an abstract triangle design.

The Oh, Christmas Tree Quilt by Amy Rivera for Moda Bakeshop is a completely different take on Christmas tree patchwork. It looks sophisticated but is easy to pull off. This quilt is extra fun because it calls for a charm pack to use for the colorful patchwork strips.

Other Christmas Tree Patchwork Projects

Patchwork Tree Skirt

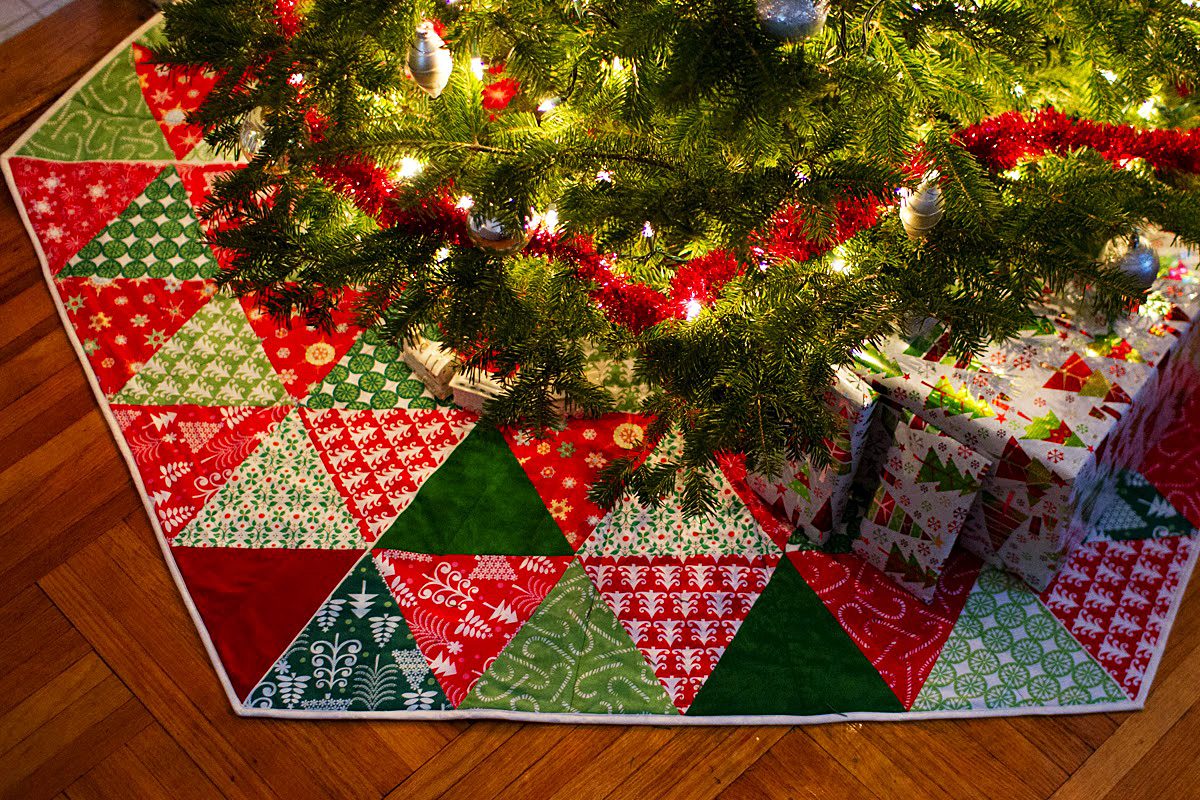
Every quilter needs a patchwork tree skirt. If you haven’t made yours yet, check out this full step-by-step video tutorial from the fat quarter shop. This beautiful tree skirt is made from a jelly roll of fabrics.

[youtube https://www.youtube.com/watch?v=YLGr2YsKoGE]

Here are the rulers needed for this tree skirt project.

Photo credits: A Quilting Life, top; She Can Quilt, bottom.

Photo credits: A Quilting Life, top; She Can Quilt, bottom.

Christmas Tree Patchwork Pillow

I love the border and construction of this pillow that uses still another Christmas Tree Patchwork design. You could make a forest of trees using this design and turn it into another quilt, if you wanted to. But I think a pretty patchwork pillow is a lovely bit of holiday cheer for any sofa or chair.

Christmas Tree Patchwork Ornaments

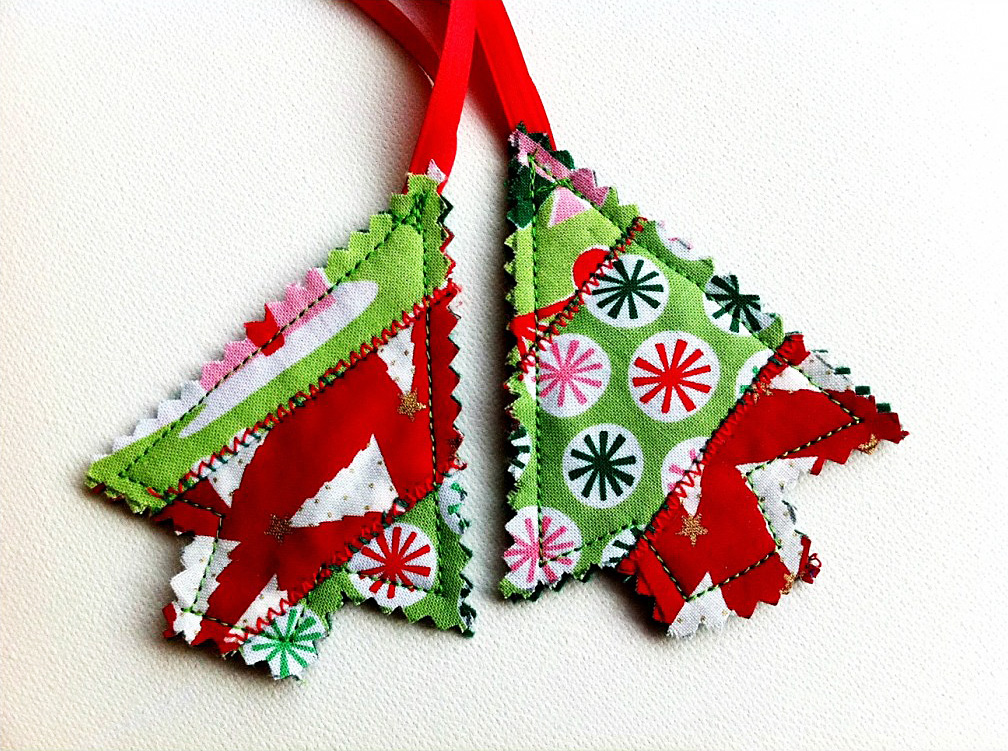
These Christmas Tree Patchwork ornaments are a super small project. Makea bunch of these for your tree, or they will make precious present toppers. You could tie one on to dress up gifts you give this year. I love this project because it uses such tiny scraps.

I hope these Christmas Tree Patchwork projects have inspired you and that you’ll make one patchwork tree or many this holiday season. Which one of these fun designs do you like the best?