I can’t recall the first time I heard the phrase, “June bride,” but it’s something that’s stuck in my mind as the years have passed. While, to me, other months might present better options for a wedding (Sue me! I don’t like 90-degree weather!), June has somehow become what could arguably be the staple month for wedding ceremonies. Since we’ve entered that month, it seems fitting to target those ceremonies for a post or two. For this particular one, we’ll focus on a tiny wedding detail that can be handmade for that extra bit of sentimental value, and that’s the ring bearer pillow.
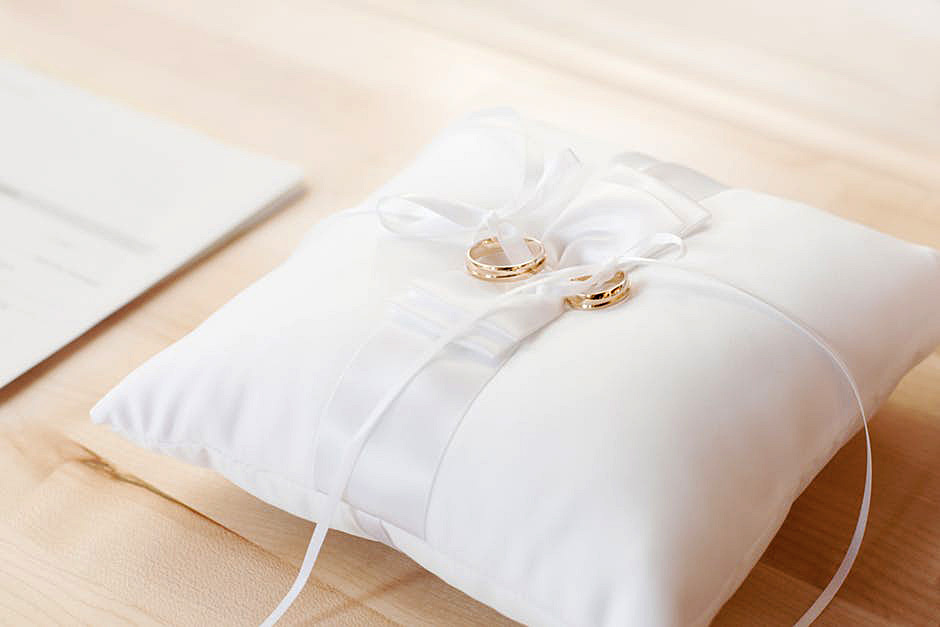
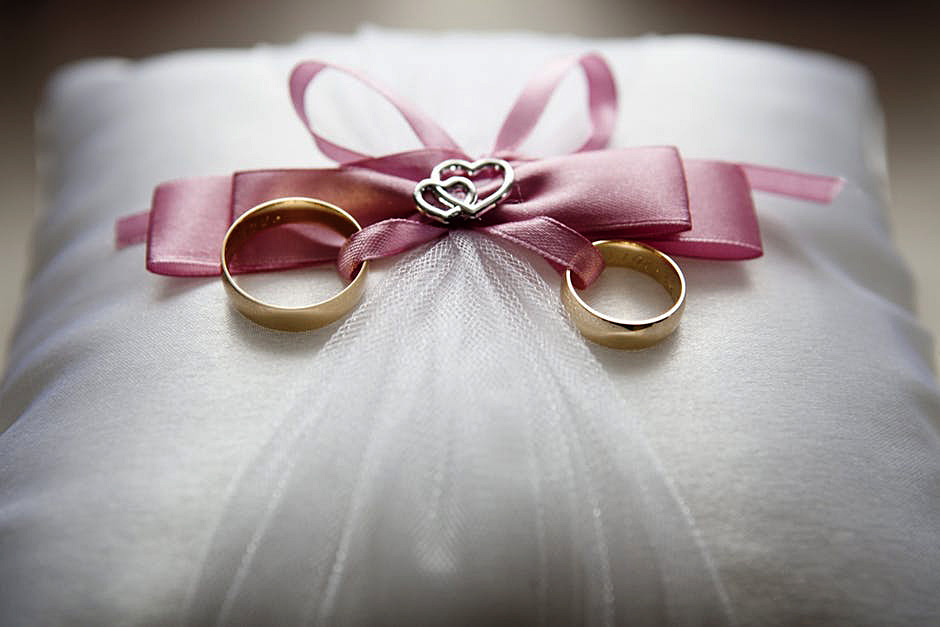
The ring bearer’s pillow.
For instructions on how to make a throw pillow in general, you can check out this link. But because pillows can be treated as such simple projects, I won’t discuss how to construct the actual pillow. Instead, I’ll concentrate on more decorative details in regard to the pillow’s appearance. These are aspects of the pillow that could come into play while you’re selecting fabrics and such—little concepts that you can do to construct something that stands out for your big day!
Choose your fabric wisely
The most important thing to consider for your ring bearer pillow is your fabric choice, and the most obvious option would fabric that has a bright white look to it. This matches the bride’s ensemble and showcases the brightness of the day, but if you want to go with something less traditional for your wedding, you might think a little outside of the box in regard to color.
You might think a little outside of the box in regard to color.
For instance, I adore fairies in fiction and movies. If I were to have some kind of fairy garden theme to a wedding, it might make sense to use fabric options that are more creatively colored than basic white. Maybe a pale blue or a light green would work, or perhaps even a combination. It’s worth considering, overall, how your theme and wedding colors could be represented in the pillow for a unique look.
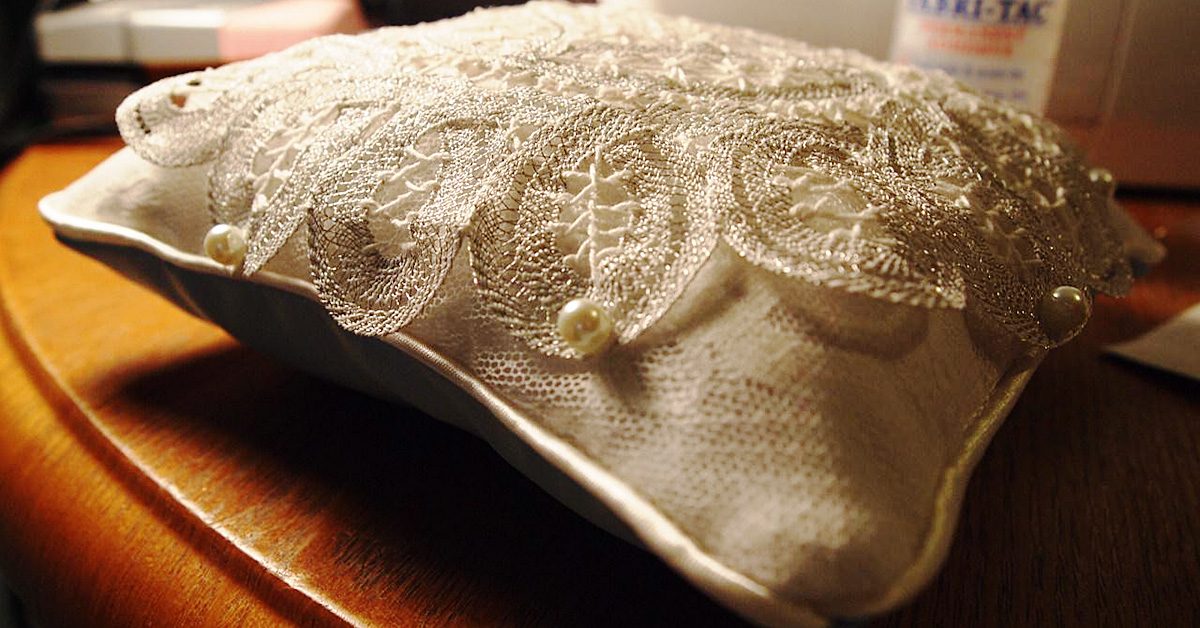
Fabric additions can be applied to the basic pillow structure to give it a more distinctive, lively look—things like lace, ribbon or tulle.
Time to accessorize!
You might also want to consider accessories for the ring bearer pillow, and I don’t just mean the rings that will be carried on it! Fabric additions can be applied to the basic pillow structure to give it a more distinctive, lively look—things like lace, ribbon or tulle. Again, you can go with the basic white, or you can better pair the accessories’ hues with your theme or wedding colors if doing so feels like the right option.
Not only can these accessory decisions make your ring bearer pillow stand out that much more, but they can also be used as ways to fix technical errors. If you sew lace around the ends of the pillow, as an example, you might find that a spot where your stitches weren’t that fantastic on the actual pillow can be covered by the lace. If you accidentally punch a smaller hole on the top of the fabric, you can make sure that ribbon you have meeting in the middle to create a bow covers the error. Essentially, while prettying up your ring bearer pillow with visual elements, you could improve its appearance as well by making your mistakes less visually obvious!
And in regard to those accessories, don’t limit your options to fabrics either! Sometimes the smallest trinkets and gems can push a normal-level work into more amazing territory, and things like gems speckled around your ring bearer pillow or a pin that looks like a heart can create a simple elegance that adds a level of sophistication to the project. Another similar idea would be to use sequins that could catch the light of the event and shimmer to again mimic the brightness of the ceremony. Each of these embellishments are options that, if used in the right amounts and ways, could lead to a ring bearer pillow worth talking about at the reception!
Structure is key
Structural details that you could vary would be the shape of the pillow –
maybe use a heart, oval, or star shape.
Keep in mind that even the construction of the pillow could highlight a particular quality that you want to embrace in your wedding if you’re going for something more modern and less traditional. Structural details that you could vary would be the shape of the pillow—maybe use a heart, oval, or star shape—as well as the face of the pillow itself. Instead of thinking, “How can I decorate this simple pillow,” you could make the top of the pillow its own design that doesn’t need any décor at all because the design is the décor—like a large flower, made of fabric, that covers the top. These decisions are structural elements that could create the unique, one-of-a-kind ring bearer pillow that you’re searching for to spice up your wedding!
So to give a sentimental touch to your wedding, turn this traditional addition to the ceremony into something homemade, unique, and fitting! It could add a splash of perfection to an already perfect day!