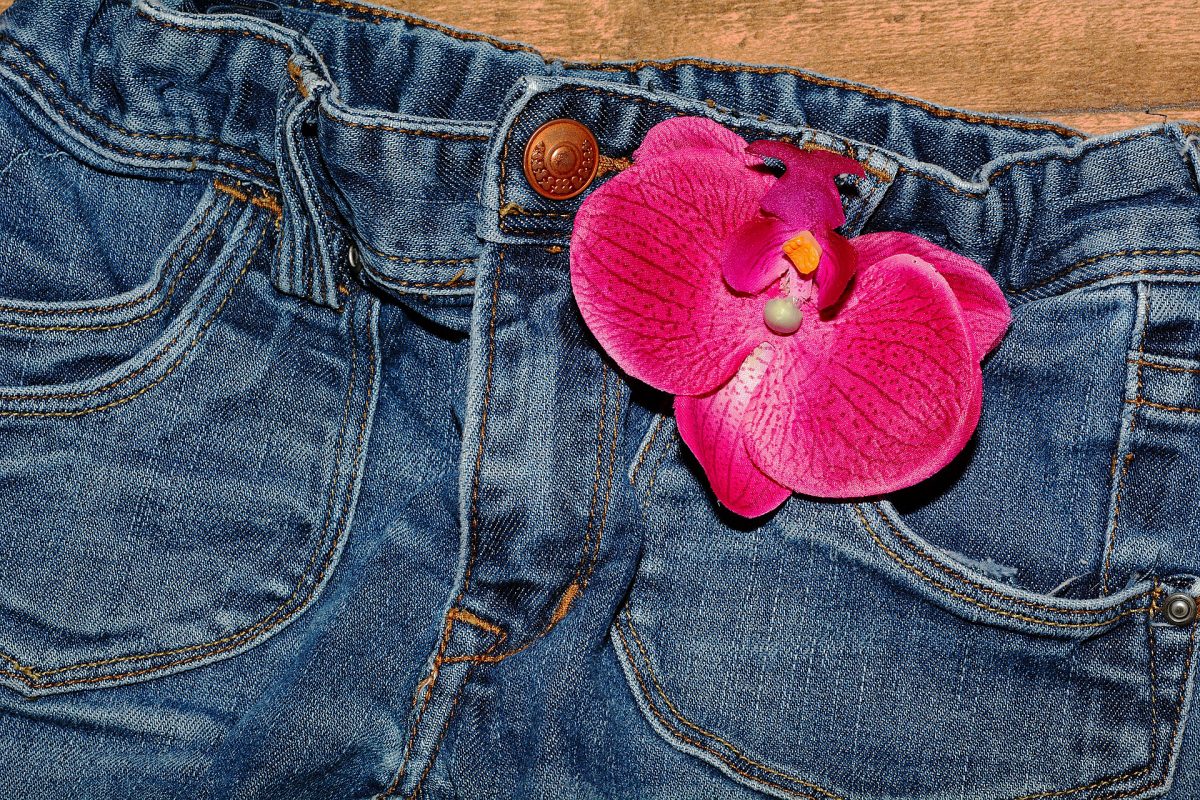
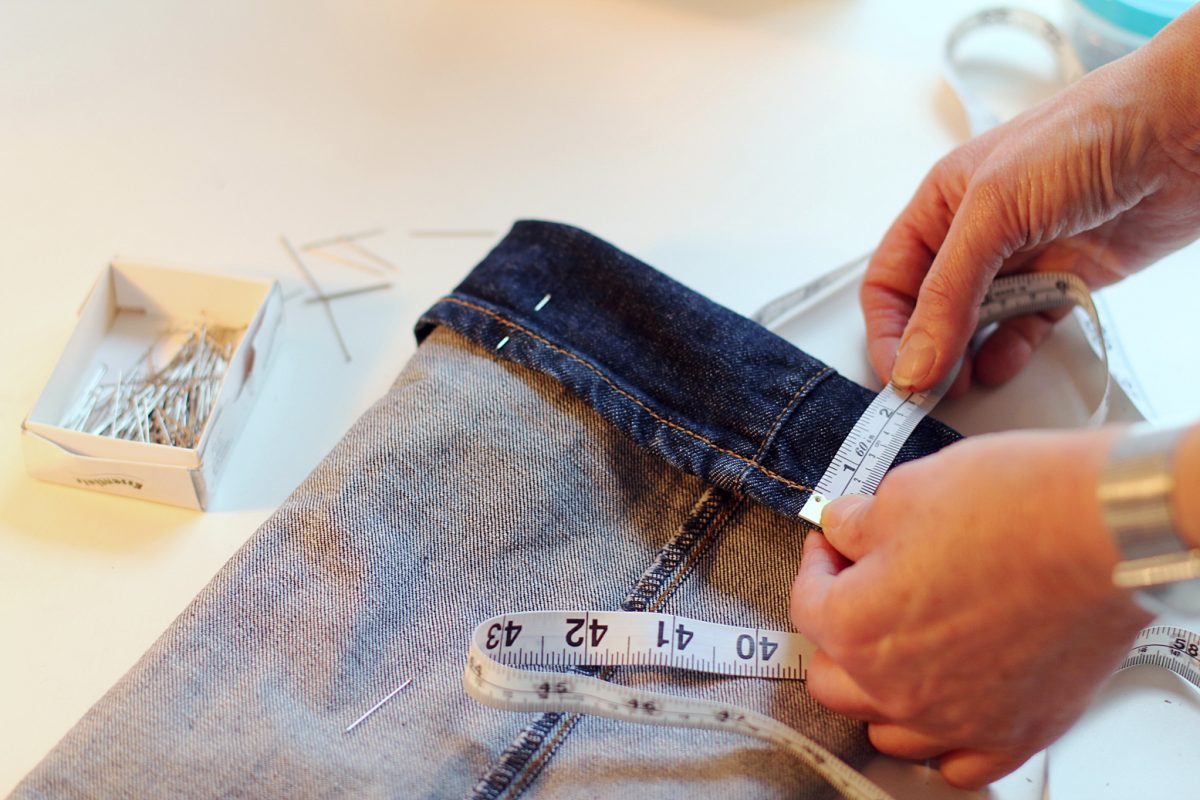
I think jeans are one of the most comfortable items in my wardrobe. They’re also a little boring. Sometimes I want to express myself while still enjoying the comfort of my favorite pair of jeans. With this awesome DIY jeans project, I can – and so can you.
Patches
I’m not great at embroidery, but with the abundance of patches available in craft stores and online, I don’t have to be – and neither do you. Pick up patches in a variety of sizes. Any that you think are fun and express your personality. You may not use them all on one project. That’s okay.
Lay out the pair of jeans you’re going to spruce up and place patches to see what they’ll look like. Do one side at a time and sew them down with hand stitches. Don’t forget the waistline, pockets and cuffs. Well placed patches give jeans personality and character. Best of all, if that pair of jeans gets worn out or no longer fits, you can easily move them to another pair.
Contrasting Fabric
This is a great way to use up some of your fabric stash while making a great item for your wardrobe. Choose some contrasting fabric you really love. You should have about a yard or so of the fabric depending on how wide you plan to go with the next step.
Slit the jeans on the outside from the bottom of the cuff up the seam to about half way to the knee. Using a triangular piece of contrasting fabric as an insert, resew the seam edges on the fabric creating a flared bottom. The more fabric you use, the wider the flare will be. Do both legs if you want the jeans to be symmetrical or do just one leg to create a unique look.
Combine It
You can do either of these DIY jeans projects alone and wind up with a fabulous pair of jeans or you can combine them to create a pair of jeans like none other. I love both of these DIY projects because no special machinery or equipment is needed. Patches are inexpensive and I can use up some of my fabric stash.
If you give either of these DIY jeans projects a try, share the pictures of your results. I’d love to see them!
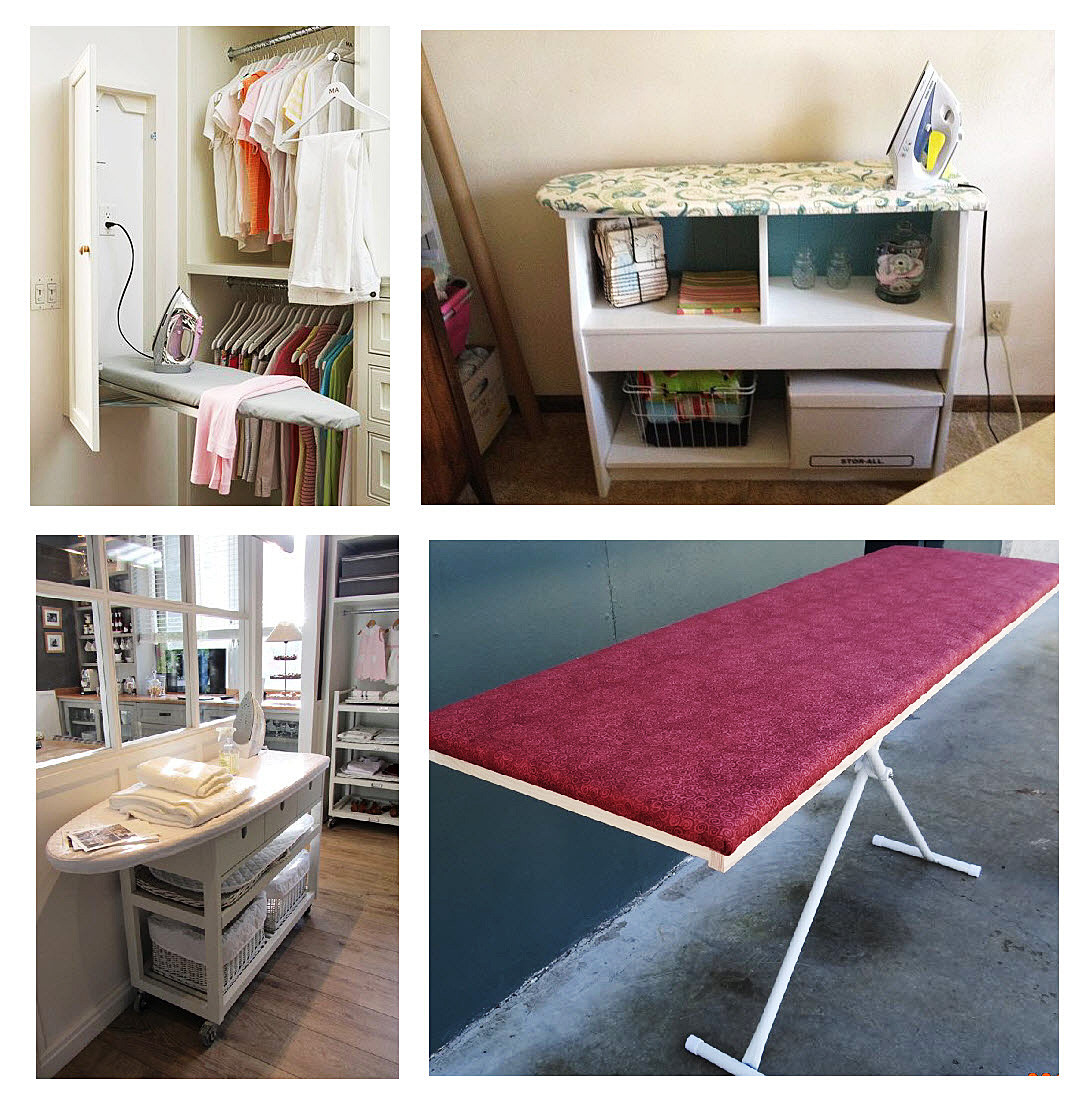
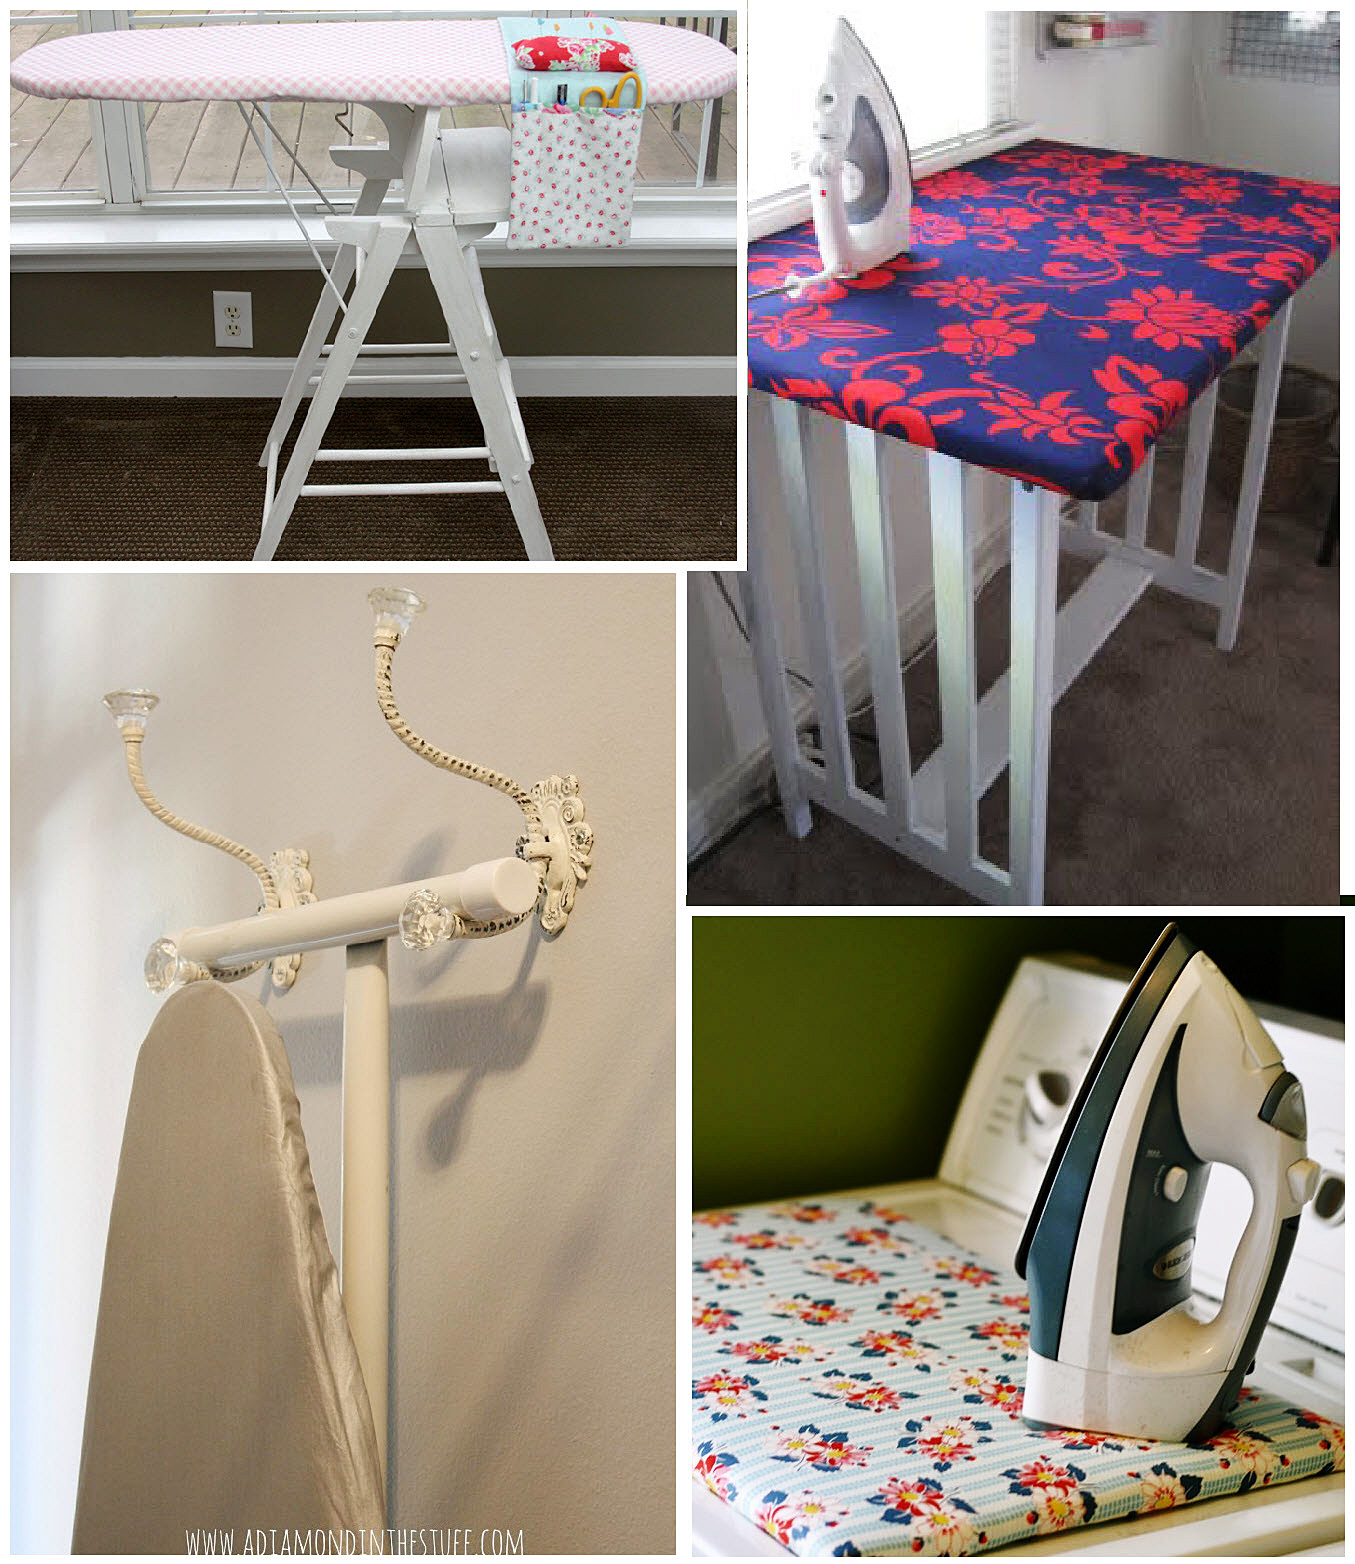
The sky is really the limit when planning where you want to iron. Do you want to be able to iron a lot of fabric at a time? Go big. Do you want to save space? Go between the studs or hang from the wall. Almost anything with a flat top can be converted into an ironing board.
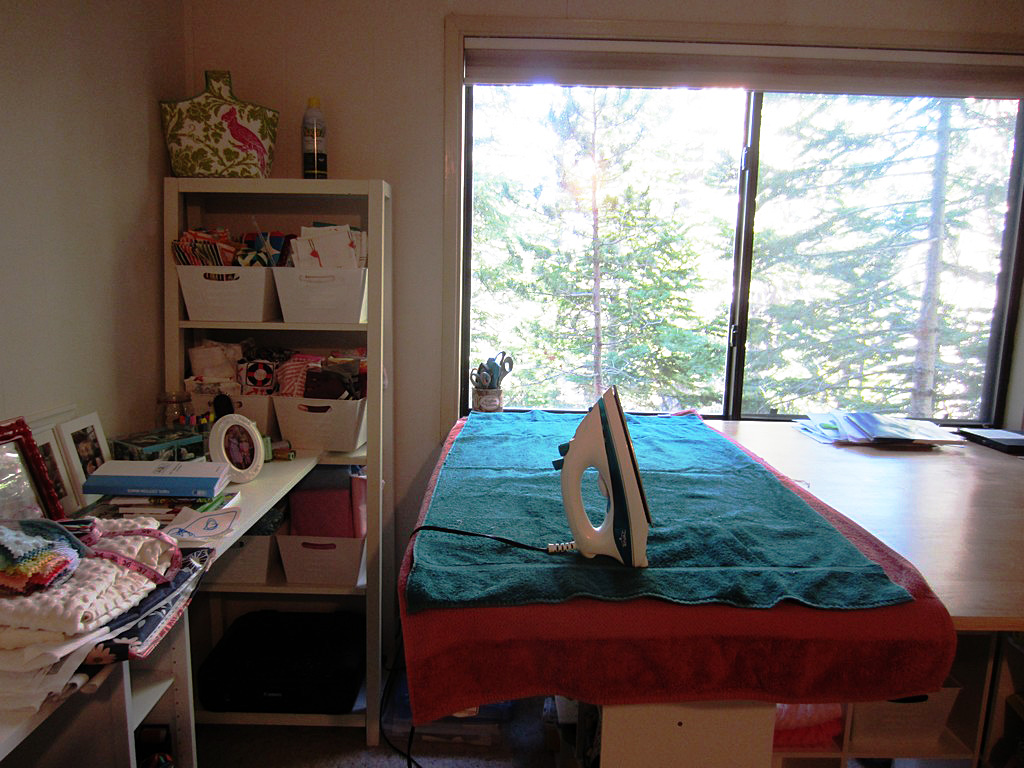
Thing Long Term
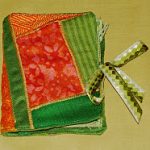
Images from left to right: Flaming Toes, Stitchery Dickery Dock, A Diamond in the Stuff, A Crafty Fox.
Will you want your ironing board to always be on display? Consider the fabric you choose and if it coordinates or clashes with the space you’ll be ironing in.
Consider the fabric you choose and if it coordinates or clashes with the space you’ll be ironing in.
I made my cover removable. It snaps firmly into place on my work station, but I can slip it off in a moment if I want the whole space.
Be Resourceful
Want to save money? You can line your ironing board cover with many things. Try using old wool blankets, receiving blankets, towels, or the innards of your former ironing board covers. Layers of batting work as well. If you want to use Insul-Bright, make sure to include a layer of batting to absorb extra moisture.
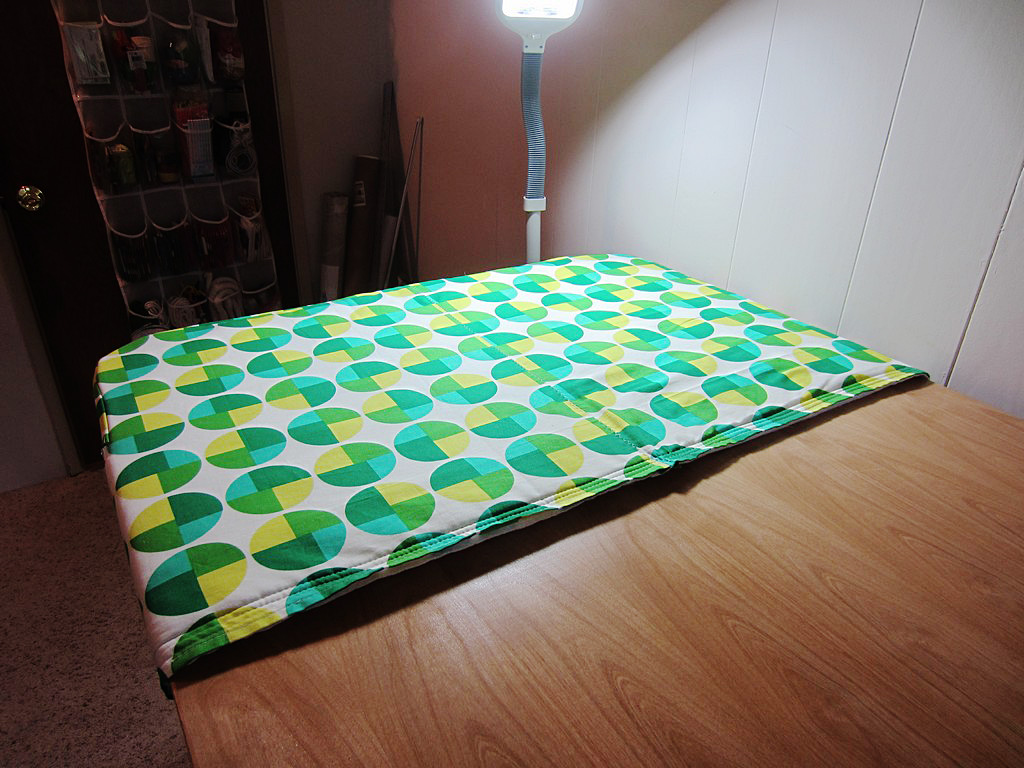
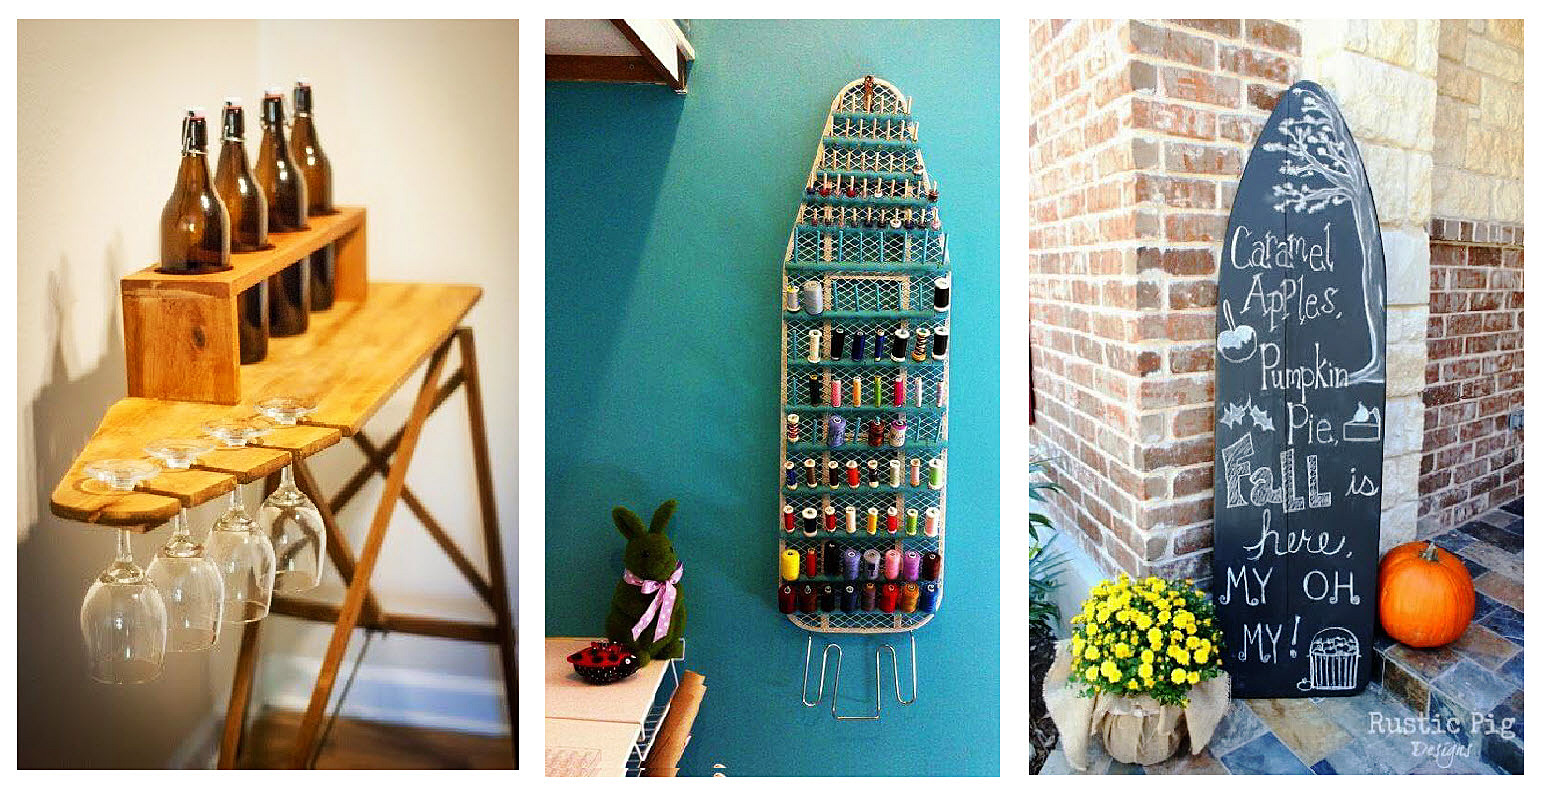
Go Vintage
Images from left to right: Simply Pallets, Recyclart.org, The Rustic Pig.
If you are retiring a vintage ironing board for a newer one, don’t let the old board go to waste.
Use it as a wine station, to store your thread, or for holiday decorations.
Have Fun!
Have you ever made a DIY ironing station? Tell us about it!
Have you ever made a DIY ironing station? Tell us about it!
—————————– Charlotte Kaufman is a writer and sewist in Mammoth Lakes, California. She specializes in marine and home interiors and continues to fall more and more in love with quilting. You can follow her at charlottekaufman.com.
Sometimes, there are things in life that are pretty fantastic, but a bit of extra effort could make them even more so. That mentality can lead to furthering an education or moving to a different city…
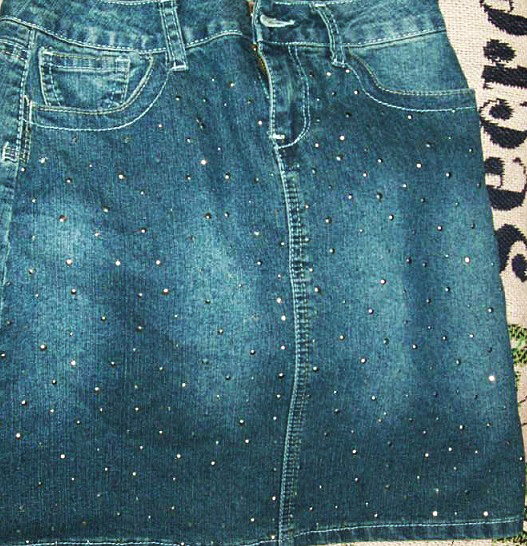
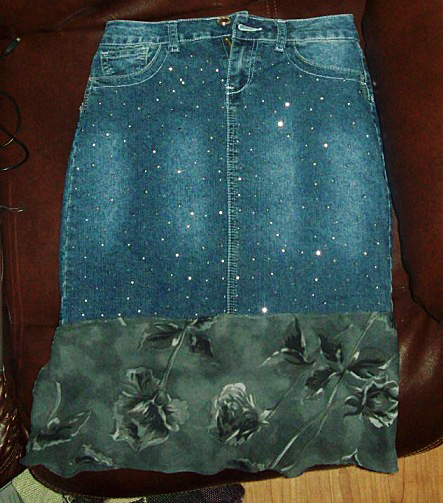
This skirt belongs to one of the nieces & the sparkly glam is enough to make me jealous!
Or adding fabrics. What looks remarkable in and of itself can take on a whole new level of beauty with a bit of thought or creativity. Example? This skirt. It belongs to one of the nieces, and the sparkly prettiness is enough to make me jealous that I don’t have a skirt like this one. What I do have though is material from my own clothing that zipper-made holes ruined, and the color scheme was kind of perfect to go along with the niece’s pretty, sparkly skirt.
Well, there was no sense in throwing away usable material that could be a sewing project, right? This might or might not have been my logic before diving into said project.
So, let’s break this down, shall we?
Let’s begin! Step-by-Step
The mission: Use the zippered-up material on the already wonderful and sparkly skirt.
The process: Simple, but effective!
Step 1: Cut the zippered-up material into usable pieces. To do this, I first cut away the zipper territory, then cut along the clothing’s seam. That seam was easier to follow than an imagined line, so there was less chance of me getting waaaaay off in my cutting. The results weren’t small enough to use at this point, but they were flat enough to help me gauge what I needed to do for the future.
Cut off the underlining black fabric from my ripper-ruined clothing.
Step 2: Cut off the underlining black fabric from my ripper-ruined clothing. This way, it was completely separate from the pattern I wanted to use, and it was handy for an underlining detail for the skirt. Win/win, right?
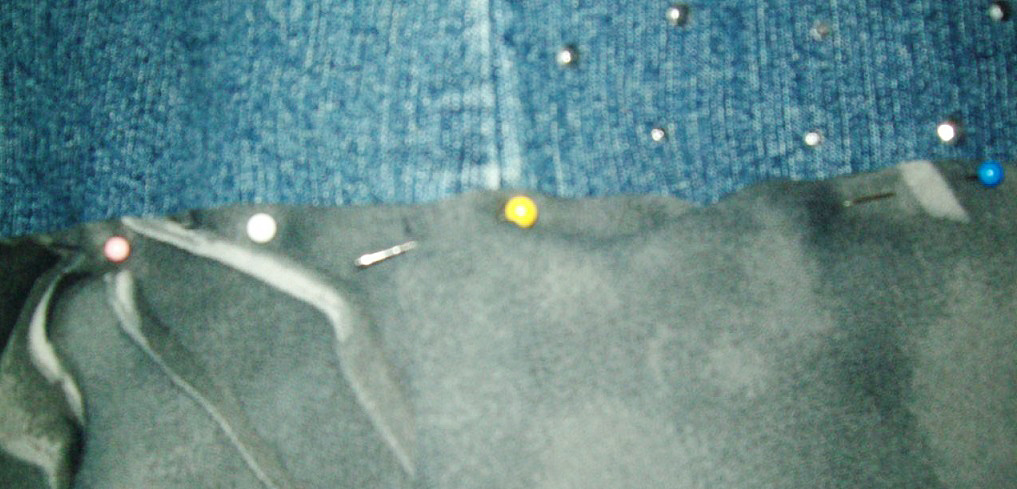
Step 3: Pin the underlining material to the skirt using straight pins. Luckily, it didn’t matter (since I didn’t think about it) if the line from my sewing matched to any line in the skirt because the floral pattern would cover it anyway. I just needed to make sure I stayed in the vicinity of the skirt’s already-present hem in order to not go so off-base with my sewing that the end result looked crooked.
Step 4: Hem the underlining fabric and make sure it came together when it needed to overlap at the end of its line. Again, it’s a good thing no one is supposed to see this piece of material because the section I used needed an extra piece sewn on to make it all the way around. That random addition might stick out, but who knows if I don’t tell them, right? Hey! You live and learn! I also made sure to cut away extra bits of material after I’d sewn so that there wasn’t excess falling well below the hem I’d created.
Step 5: Move on to the patterned fabric! After I looked over my options with the material I had, I decided on the piece that was at the bottom of the underlining black material so I could make use of the manufactured hem of the fabric. In addition, the material would already be set up for equal enough proportions since it began and ended in generally the same way from start to finish. All I needed to do was follow the same lines of the material to get a decent look for the skirt.
It’s time to straight pin the skirt!
Step 6: Once I’d selected the fabric I would use, it was time to straight pin it to the skirt! I kept it loose enough that the skirt didn’t bunch (if you pin it too tightly, you might end up with a pinched look you don’t care for) and made sure the fabric was being sewn above the underlining material. I also considered, this round, where my seam would be since A) I actually remembered, and B) it mattered since people would be able to see it. While the seam isn’t in exact line with the skirt’s side seam, at least it didn’t randomly show up in the front or something!
Almost there…
The final step of the process!
Step 7: Sew along the general area of those straight pins, and to piece together the floral fabric itself at the right moment when the sides would overlap. I did, however, have to make sure that the edges at the very bottom of that overlap would even out by adding a small hem. Since the overall hem was already there from the original clothing’s design though, that would be the final step of the process!
And, there you go! A pretty, sparkly skirt that has been upgraded into a pretty, sparkly skirt with matching material as an accessory!
A pincushion is one of the first things you need for sewing. You will love yours if it is a pretty one and you make it yourself. This project is super easy and it makes a perfect first project at your new machine. This pincushion is a generous size and you won’t find one quite as nice for sale at the store.
If you are not an absolute beginner, you can whip up this pretty pincushion quickly for yourself or for a friend. This makes a sweet gift. You could even make these for friends who don’t sew by filling with lavender flowers instead of stuffing so that they can enjoy it as a pretty sachet instead.
Even non-beginners appreciate a fast project. Making one or a few of these might be a nice pick-me-up on an otherwise dreary afternoon.
Though it does make a pretty sachet, this project was designed as a pincushion, and it is my favorite of the many in my room. I sewed snaps on the back of mine and made a permanent place for it on my sewing room organizer curtains.
Pin it
Speaking of pins, here’s an important word to the wise: All pins are not created equal! I highly recommend you further beautify this pincushion with head pins. Really, I can’t stress this enough- do yourself a favor and arm yourself with this kind of pin. Pearl or flower head pins are easy to see, find, and remove from your project while sewing. Plus, they are pretty!
To make this beginner project pincushion, you need:
Two six-inch fabric squares
Felt scraps, for cutting petals. I made mine using purples, greens, and blues. You could make a more realistic flower using all one color of felt, or perhaps several shades of the same color.
A button for the flower center
Embroidery thread
Polyester fluff or other stuffing
To make the flower:
I cut my petals into pointy football shapes. I tapered the petals at both ends to reduce bulk behind the button center.
Six graduated layers of six petals each make a nice, full flower. Use the six largest petals for the back layer, stepping down to the smallest set of six petals for the front layer. Also cut a small, one-inch circle of felt to place in front of your smallest layer of petals as the flower center.
Cut a three inch backing circle from the same color of felt as the back layer of petals and assemble all layers atop this circle and stitch them down by hand through the center. Then place the button at the flower center and sew the button down using embroidery thread in a contrasting color. I used a metallic silver thread in this example.
Now, set the flower aside.
Assembling the pincushion
Place the right sides of the 6″ squares together. Sew around the square, leaving an opening for turning. Be sure to back-stitch the beginning and end of this seam.
After you’ve done that, clip off the tiny corner triangles outside of your seam, and turn the pincushion right side out. Use a point turner or other tool to push the corners out well.
Now stuff. Stuff it nice and full, and then top-stitch to close your opening. I like to continue the top-stitching and go all around the entire square using matching thread.
Center your flower on top of the pincushion. Affix it by hand-stitching the backing circle to the cushion. The larger petals will prevent these stitches from showing.
And now you made a pretty pincushion and completed this easy project that fast.
I wanted to take an opportunity to tell you about something I learned very early in my sewing experience. Hopefully, it will help when you have to square off fabric for blocks or other things.
When I resumed by sewing hobby after being away for several years, I found many things have changed. Well, me for one, because I started out thinking I would make a few things, have a sewing machine available for mending, and leave it at that. I wanted to make a shirt or two.
But, never, in my wildest dreams, I thought I would have an interest in quilting. Being able to buy many different fabrics, mix them up, find harmony between them, and create an awesome piece of art was exciting!
So my first fabric obsession started with “fat quarters”. You know, they are bundles of one designer’s collection, or curated by someone else mostly sold in online fabric stores offering 10, 15, 20 or more pieces that have the same colors or coordinating fabrics! Oh… shopping online!! A whole other obsession!! Sorry. I got distracted!
But, I knew right off, I couldn’t cut them with fabric shears or pinking shears. It would take years off my life.
So, today I want to share how I learned to share how to cut “ fat quarters” for multiple precise pieces all at once.
Three tools necessary for straight and square pieces:
RULE #1 – Never Cut Toward Yourself or Sideways with a Rotary Cutter – Always Away from Your Body
RULE #2 – Measure Twice and Cut Once
This piece is 4 ply +9” high by 22” wide
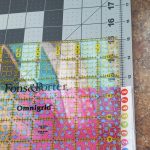
Use the ruler edge and line it up with the mat edge at the top and bottom as well for exact measured cuts.
The measure above is not important. It’s the matching cutting line. The above example is for illustration only.
Open 21 x 18 inch piece. Press with iron flattening fold creases. It makes a difference, you will see!
Cut away selvage edge. You will have the longest part on the mat. Do not double the fabric and trim as close to the edge of the selvage as possible.
Refold the length piece in half by taking the left side and match the edges on the right side where the selvage was.
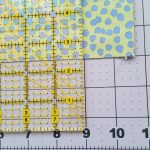
Square right hand edge with ruler and mat. Take off just a little sliver. Then trim the opposite side for threads. Not much to do there if it is square.
Now, the left has a fold, the top is folded two times giving you 4 layers of fabric. The top folded pieces have to be shaved too and the left side so you will still have exactly 9 inches on those two sides if you are careful.
Are you still here? Almost done!
Line up the longer piece with the ruler, and trim off the small 2 inch piece to have 4 perfectly squared 9 x 9 pieces. The best part is you only lose about 1 ½” of the fabric by cutting it this way.
However, if you are feeling bold… and you put:
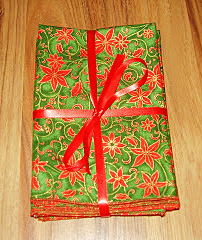
Beautiful 8 x 8 inch napkins ready for your next meal or party.
Right sides together, sew up the sides at ¼ inch leaving an inch or two (somewhere close to the end but not the corner) to turn them to their right sides, press seams, pin opening closed and top-stitch around all sides.
Then you have:
Beautiful 8 x 8 inch napkins ready for your next meal or party.
I would love to hear your comments or questions. Stop by and see me again soon!
Do you make most of your holiday gifts? Have you wanted to start this tradition? If you haven’t, this is a great year to sew gifts for everyone on your list.
I have been sewing and/or making most every gift I give for many years now. So I know from experience that it is easy to get stuck for ideas, especially for certain recipients. But I have learned that with time and thought, it is possible to sew gifts for everyone on your list.
The most important tip I have learned in making holiday gifts over the years is to get started early. With an early start you can complete your gifts in plenty of time to enjoy your holidays. Starting in December can make for a stressful season! Learn from my mistakes and get started now, or you could wind up as I have- sewing late into the night on Christmas Eve.
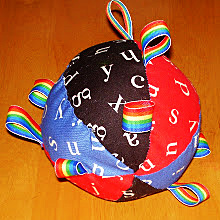
For babies, try a stuffed ball with ribbon tags for grabbing.
You can sew gifts that everyone will love. Here are some ideas to consider for everyone on your list:
Soft Toys – dolls, stuffed animals, robots, monsters. For babies, try a stuffed ball with ribbon tags for grabbing.
This rainbow book of colors is one of my favorite gifts ever.
These are a lot of fun, both to make and to play with.
Soft Books – These are a lot of fun, both to make and to play with. This rainbow book of colors is one of my favorite gifts ever.
Bags – make a tote bag with divided pockets for crayons and include a coloring book. Or whip up a precious little purse to match a sweet girl’s personality. I’ve even made a Star Wars backpack from an outgrown favorite T-shirt.
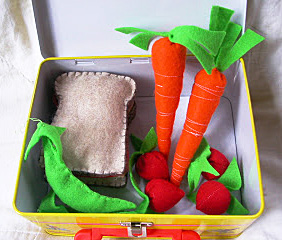
Felt Food – these are both easy and lots of fun to make. You could sew a sack lunch, complete with felt brown paper bag; pretty cupcakes and donuts; even a whole roast turkey! There are a ton of free patterns and tutorials for felt foods available online, but these are easy to make up off the top of your head, too.
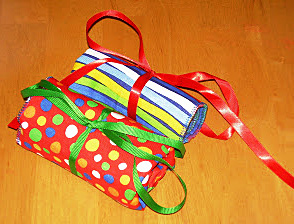
Crayon, Marker or Colored Pencil Rolls – make a great gift for kids on-the-go.
Doll Clothes and Accessories – Sew something new for her favorite dolly. Make a dress or two, a carrying bag with a front pocket designed as the doll’s bed, or a doll quilt.
For Anyone
Zip Bags – These are useful for everyone. Ladies can use them for cosmetics, men will appreciate them for holding shaving and toiletry supplies for travel. Children can use them as crayon or pencil bags, or for containing sets such as legos to-go. They also make great first aid kits for the car or travel.
Lap Quilts – Be inspired by your recipient’s favorite colors or personality and sew them something special for snuggling.
Pillowcases – You can sew a pillowcase from any yard of cotton fabric. Choose a beautiful print or fun novelty fabrics.
For Ladies
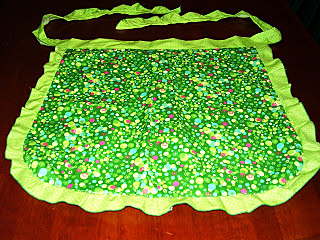
Half Aprons – These are always appreciated and a great way to use fat quarters from your stash. Embellish with ruffles, pockets and/or appliqué.
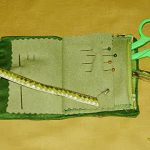
Needlebook front.
Needlebook inside.
Needlebooks – These are a fun little project for playing with patchwork and make useful and treasured gifts.
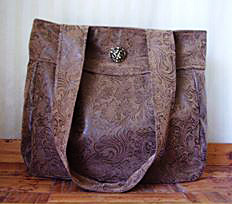
Folklore Bag
Purses – What lady wouldn’t like a pretty new handbag? My favorite purse pattern is the Folklore Bag from the book One-Yard Wonders. I like to add special details like an attached clip for easily finding keys.
Cloth Napkins – Holiday themed sets from novelty fabrics make a lovely gift. This is my go-to for teacher gifts.
Cloth napkins.
For Men
Barbeque Apron – Here’s another fun place to use novelty fabric. He’s sure to appreciate one emblazoned with his favorite ball team’s logo, or choose a funky fabric with vintage cars, guitars, or hot dogs.
Handkerchiefs – I use the embroidery feature on my machine along the edges. My machine has an alphabet, so I like to sew “Bless You” on these too.
Throw Pillows – with football fabrics or something else he’ll appreciate. Be sure they match the couch or décor in his man-cave!
Over-the-Visor CD Pockets for the Car – include a mix cd for extra fun.
For Furry Friends
Dog or Cat Bed – You can make these as a simple stuffed rectangle or square, or go fancier with patchwork or other design details.
Stuffed Toys – catnip stuffed mouse or felt or fleece “bones.”
Matching Collar and Leash – I buy ugly collars from the dollar store for the hardware, then I make nicer, new collars with nylon webbing covered with embroidered ribbon. These make a super nice gift for pet parents.
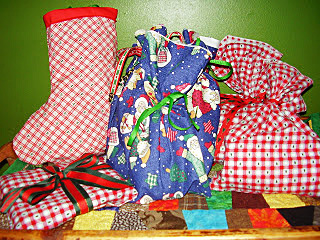
Make this the year that you sew gifts for everyone on your list and they will thank you for it! And don’t forget the gift wrap; use holiday fabric and whip up gift bags to fit any size gift. These re-usable wrappers are zero-waste and your recipients will be happy to use them again next year.
Let’s same I’m thrifty, shall we? I like shopping at the Goodwill, and I’ve been known to make my way over to the clearance section in the clothes department of a non-Goodwill store. It’s a theme that’s pretty easy to spot if you look through my posts from the past. I reuse material, and updating my sewing supplies is something that I found reason to put on my 2017 goals list because I haven’t invested too much into it. I can be a bit of penny-pincher if the situation calls for it, so it’s no real shock that so much of my sewing experience involves reusing and repurposing.
Today, I offer you yet another example of that reusing and repurposing.
The bottom half in particular caught my interest.
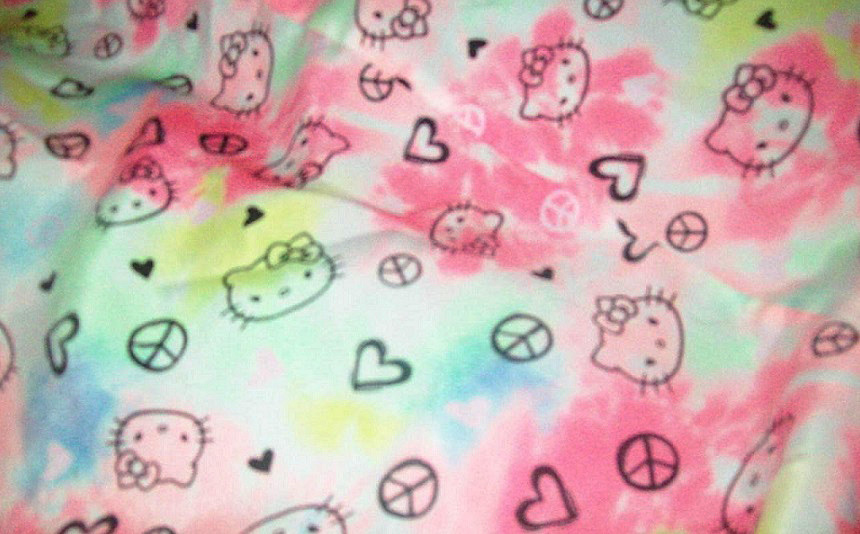
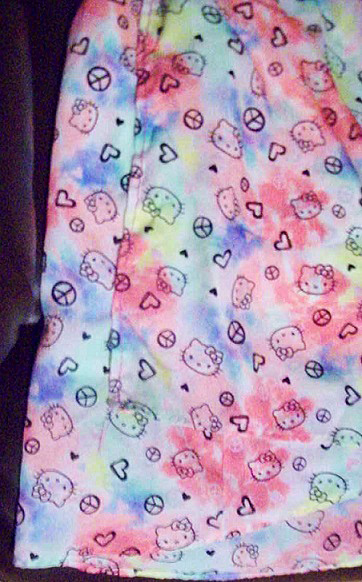
You see, I have a niece who had this Hello Kitty dress. Personally, I don’t get the interest in Hello Kitty—I’m more of a Tinker Bell kind of girl—but after the dress ended up getting ripped, my thoughts got to rolling about what could be done with the material that was left over. The bottom half in particular caught my interest. Even if I don’t particularly care for Hello Kitty myself, the material was colorful enough and in good enough shape, if you overlooked the rip, that it seemed a waste to just toss it out. My niece, after all, deserves her Hello Kitty attire!
In the end, the answer seemed simple. If the bottom half of the dress was salvageable, then a skirt was the perfect option! The white material underneath it was still in decently good shape, so I could use that like it’d been used for the dress itself. All I needed to do was plan, cut, figure, and reassemble.
Cutting was relatively easy when it came to the bottom half because I didn’t worry too much about getting straight edges. If I needed straight edges, I could do a touch-up job later. As it turned out, I wouldn’t I have to because the material was designed in a way that there wasn’t one side that specifically needed to be on the top or the bottom. See how Hello Kitty is in two different directions in the earlier picture? I could just use the more raggedy-edged side to fold over the elastic I would eventually use, and no one would see it anyway. The bottom part of the dress could be the actual line that was company-given by design.
The raggedy edges where the tear had been, I felt, could use hemming, so I saw to that. I wasn’t sure if I actually needed both sides to be hemmed, but since I was figuring it out as I went along, it seemed better to be safe than sorry! Once both sides were hemmed, I was ready to pin the Hello Kitty material onto the underlying fabric.
I opted to tack the end of the colored material to the section of Hello Kitty material beneath it.
So I did! But as I’d already noticed, there was a bit of a design issue that would require an executive decision. You see, this Hello Kitty material was asymmetrical, meaning if I pinned it evenly at the top of the white material, the bottom of the Hello Kitty piece wouldn’t be even. My options then included either hemming the bottom for a symmetric look, or embracing the quirkiness of the not-so-symmetric hem.
In the end, I decided to go with the easier but more distinguishable option of letting the hem be asymmetric. I also made another executive decision to not cut off the extra side-to-side material once the white material had been completely covered. Instead, I opted to tack the end of the colored material to the section of Hello Kitty material beneath it, so the final result would seem more like a wrap-around skirt.
Once that step was finished, the top looked something like this.
Once I’d made those decisions, sewn the raggedy edges where the tear had been on the dress, sewed all layers of material at the top, and tacked the material for that wrap-around look, all I had to do was add in the elastic. The process involved a one-section-at-a-time strategy of folding the top portion of material over the elastic, sewing so that the material overlapped the entire width of elastic, then moving to the next section—bit by bit, and at times pushing and pulling the elastic and/or fabric so that the entire top portion of the skirt was encasing that tiny piece of elastic. Once that step was finished, the top looked something like this.
And there you have it!
And with that step completed, the skirt was done!
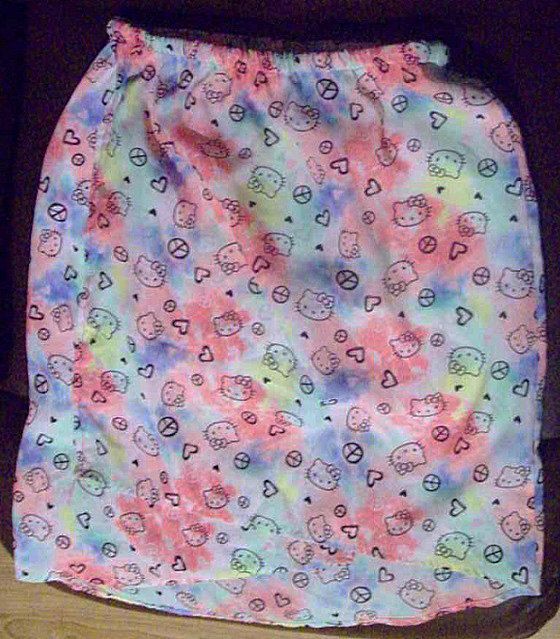
And there you have it! A Hello Kitty skirt from the remnants of a Hello Kitty dress! I still have the top portion of the dress that could be used for something, but who knows? Maybe it’ll become a part of a project, and maybe it won’t 🙂
What do you guys think??? Like? Hate? Something in between? Let me know!
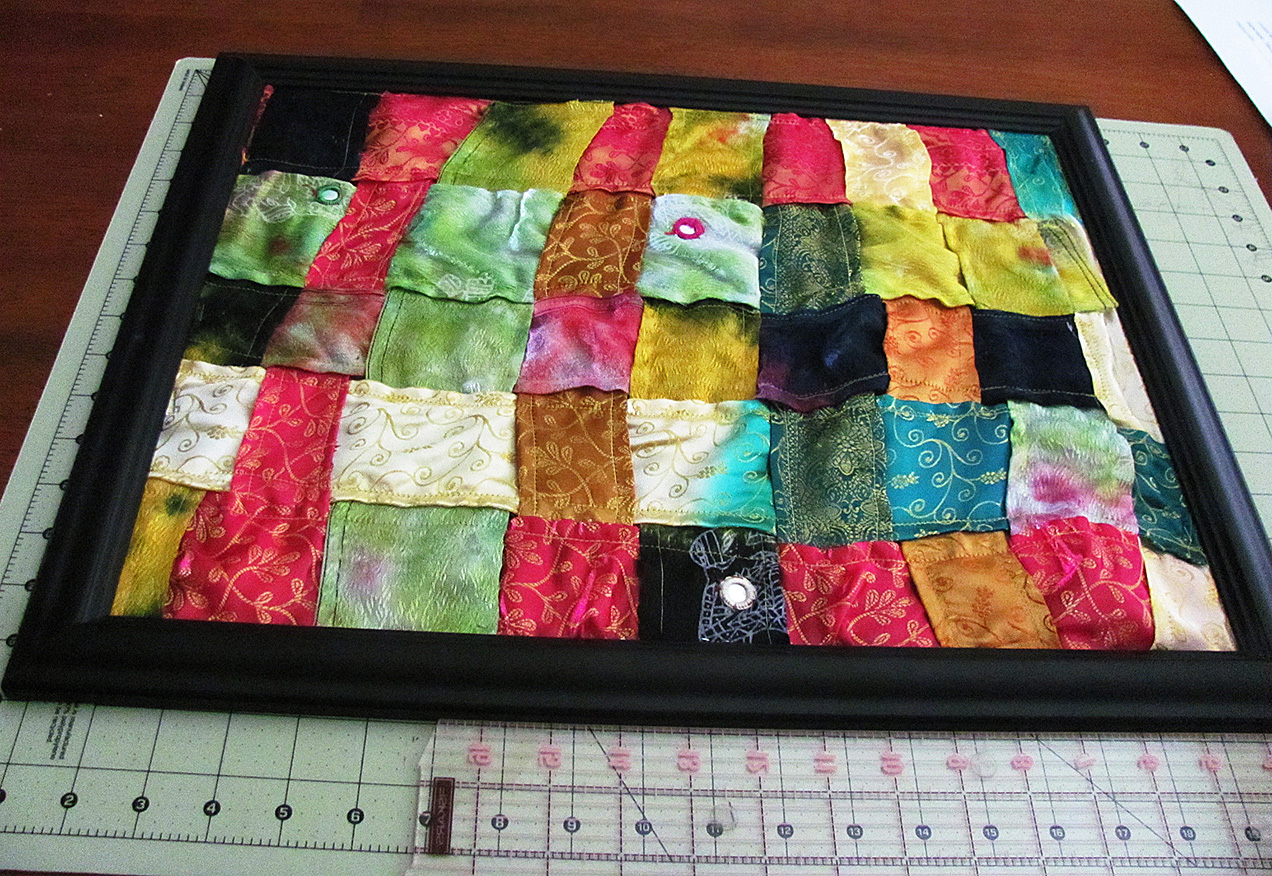
I really dislike drab walls. I’m always looking for cheap, out of the box ways to splash up my walls. I’ve never attempted any type of fabric wall hanging before, so I thought, “Throw caution to the wind and dress up that naked wall!”
I was given some really awesome cashmere materials in vibrant colors. Sadly, the pieces weren’t big enough to make a nice blouse or skirt out of. I’ve been searching for a great creative way to showcase this amazing material. This wall art turned out to be the perfect display piece.
**Tip: Wash all new materials prior to use to avoid shrinkage resulting from later washes.
**ProTip: Iron cut pieces before sewing and in between each step. This helps in the sewing process as well as setting the stitches to lessen unraveling with age. Often the end results tend to look more professional as well.
Level: Beginner
Time to Complete: 1 – 2 hours
Sewn By Machine: 1/4 in. straight stitch
Materials
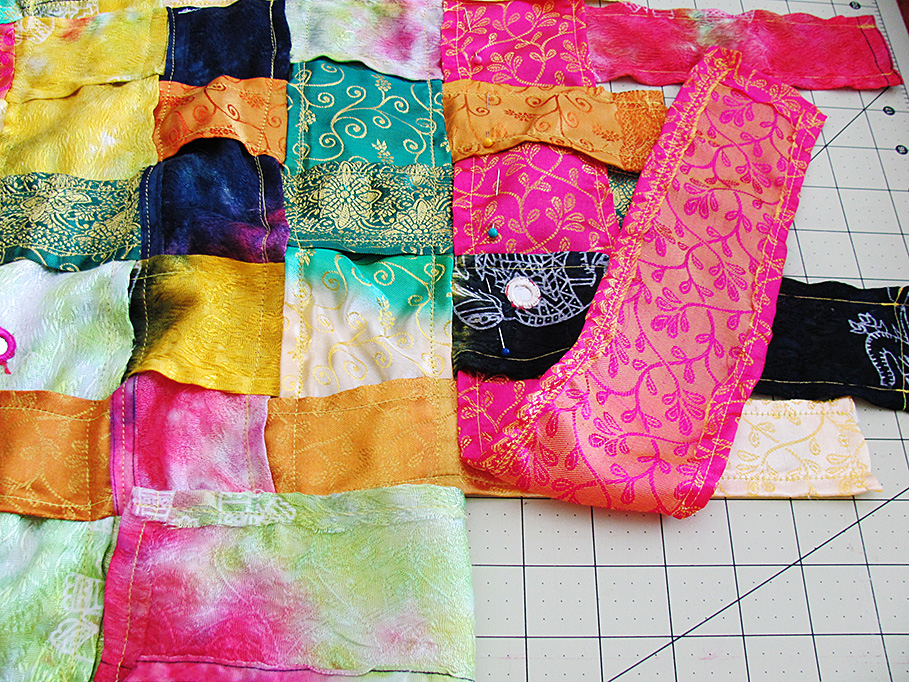
9 – 16″ W strips, varying lengths
5 – 20″ L strips, varying widths
**I made 1″, 2″ and 3″ strips. I didn’t want a basic uniform checkerboard pattern and varying the strip size helped add some uniqueness to the finished design.
1 – 14″ W x 18″ L Canvas Frame
1 – 14″ W x 18″ L Cardboard for back of wall hanging
I measured an extra 1″ on all sides of the frame. I’d rather it be a little big than too small. It can be quickly cut down to fit the frame if too big.
Let’s Get Started
Cut out strips and iron.
Iron the 1/4″ seam on all four sides of the strips. Since this material is 100% cashmere, it doesn’t hold well when pinned, moved quite a lot during sewing. The pins were also falling out the second I moved my material to the sewing machine. I found ironing each seam on a wool heat setting helped secure the seam without using pins.
Fabric strip seams.
Sew around all four sides of all fabric strips using the 1/4″ ironed seam.
Arrange the fabric strips in lines down and across. I arranged them, then put the frame over it to help visualize. It took me several times to find an arrangement I was happy with.
Once you have the strips set up the way you want them, put them under and over each other to create a more defined checkerboard look.
Start sewing the fabric strips together. I pinned the various short strips to the first long strip. It took awhile to sew each individual strip onto the longer one but it paid off in the next step.
Piecing together.
Note the over/under pattern.
Sew on the remaining long strips. Remember to keep the over/under pattern. This step went much easier. Since the smaller strips were already attached to the first and in order, all I had to do was sew around the 4 sides of the long strip. The smaller strips were all sewn on in one, quick easy step.
Piecing together.
Take the fabric piece to the frame. Place on the cardboard back piece. Cut the fabric on all sides about 1/4″ past the cardboard edge.
Fit to the frame.
Sew around the piece using the extra 1/4″ seam you just measured out.
Attach fabric artwork to back of the cardboard. I used staples around the edges.
Place into frame. I decided not to use the glass for the frame. I felt the way the fabric flowed without being pinned down by the glass really added some splashy appeal.
Hang on your wall, plop into a chair, sip a cup of tea and enjoy the vibrant new addition to the room!
Stacey’s Stitches
Hi all! I’m Stacey Martinez 🙂
I love to design imaginative custom items for my active, crazy family. Bright colors and beautiful fabrics sing “Stacey, Stitch Me!” Let your imagination inspires you to breathe personality into every stitch!
Please feel free to comment with questions, suggestions, and pictures of your own creations. I can’t wait to see what you come up with!
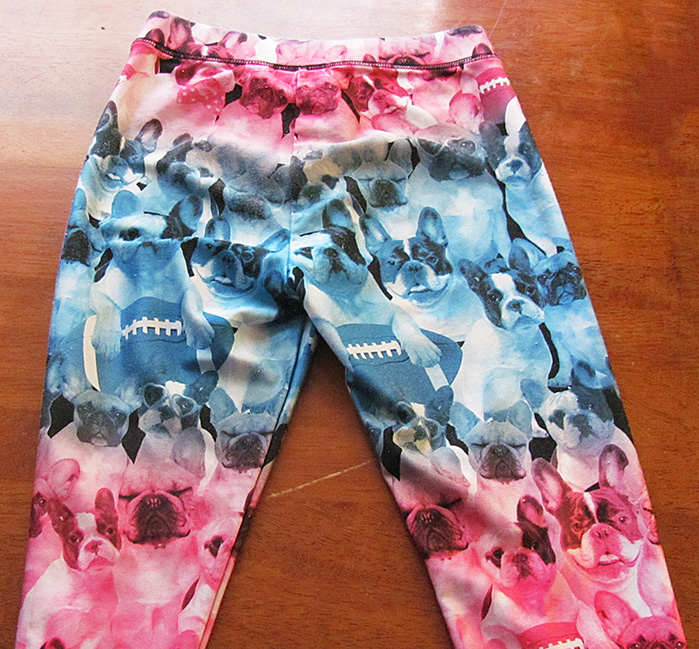
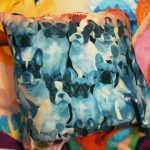
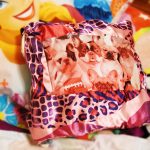
“Mom, my doggie leggings don’t fit anymore!! I love them, Mom, don’t throw them away!” To save these precious doggies for eternity, my daughter’s distress signal turned into the Doggie Leggings Pillowcase.
Leggings are a very popular fashion trend today. I’ve seen hundreds of unique, bright designs on websites, in stores, and worn by passers-by. I’ve admired many of the designs and agreed with my daughter that creating something with them would preserve their awesomeness 🙂
Fair warning, everything except the zipper was measured, cut, and sewn by my 7 yr old daughter. The pieces aren’t straight, the stitching is all off, the corners look funny. But that’s ok, it’s awesome the way it is because she made it. It turned out to be a great learning project for her. She’s super proud of it, and so am I.
Awesome doggie leggings!
Completed back side.
Completed front side.
Level: Beginner
Time to Complete: In An Evening
Sewn By Machine:1/4 in. straight stitch
**Tip: Wash all new materials prior to use to avoid shrinkage when you wash it.
**ProTip: Iron cut pieces before sewing and in between each step. This helps in the sewing process as well as setting the stitches to lessen unraveling with age. Often, the end results tend to look more professional.
**All measurements based on a craft pillow I already had. Measurements should be adjusted to fit the size of the pillow you are working with. I typically add an extra 1/2″ to measurements when I do a zippered pillowcase to allow for the extra bulk of the pillow.
Materials:
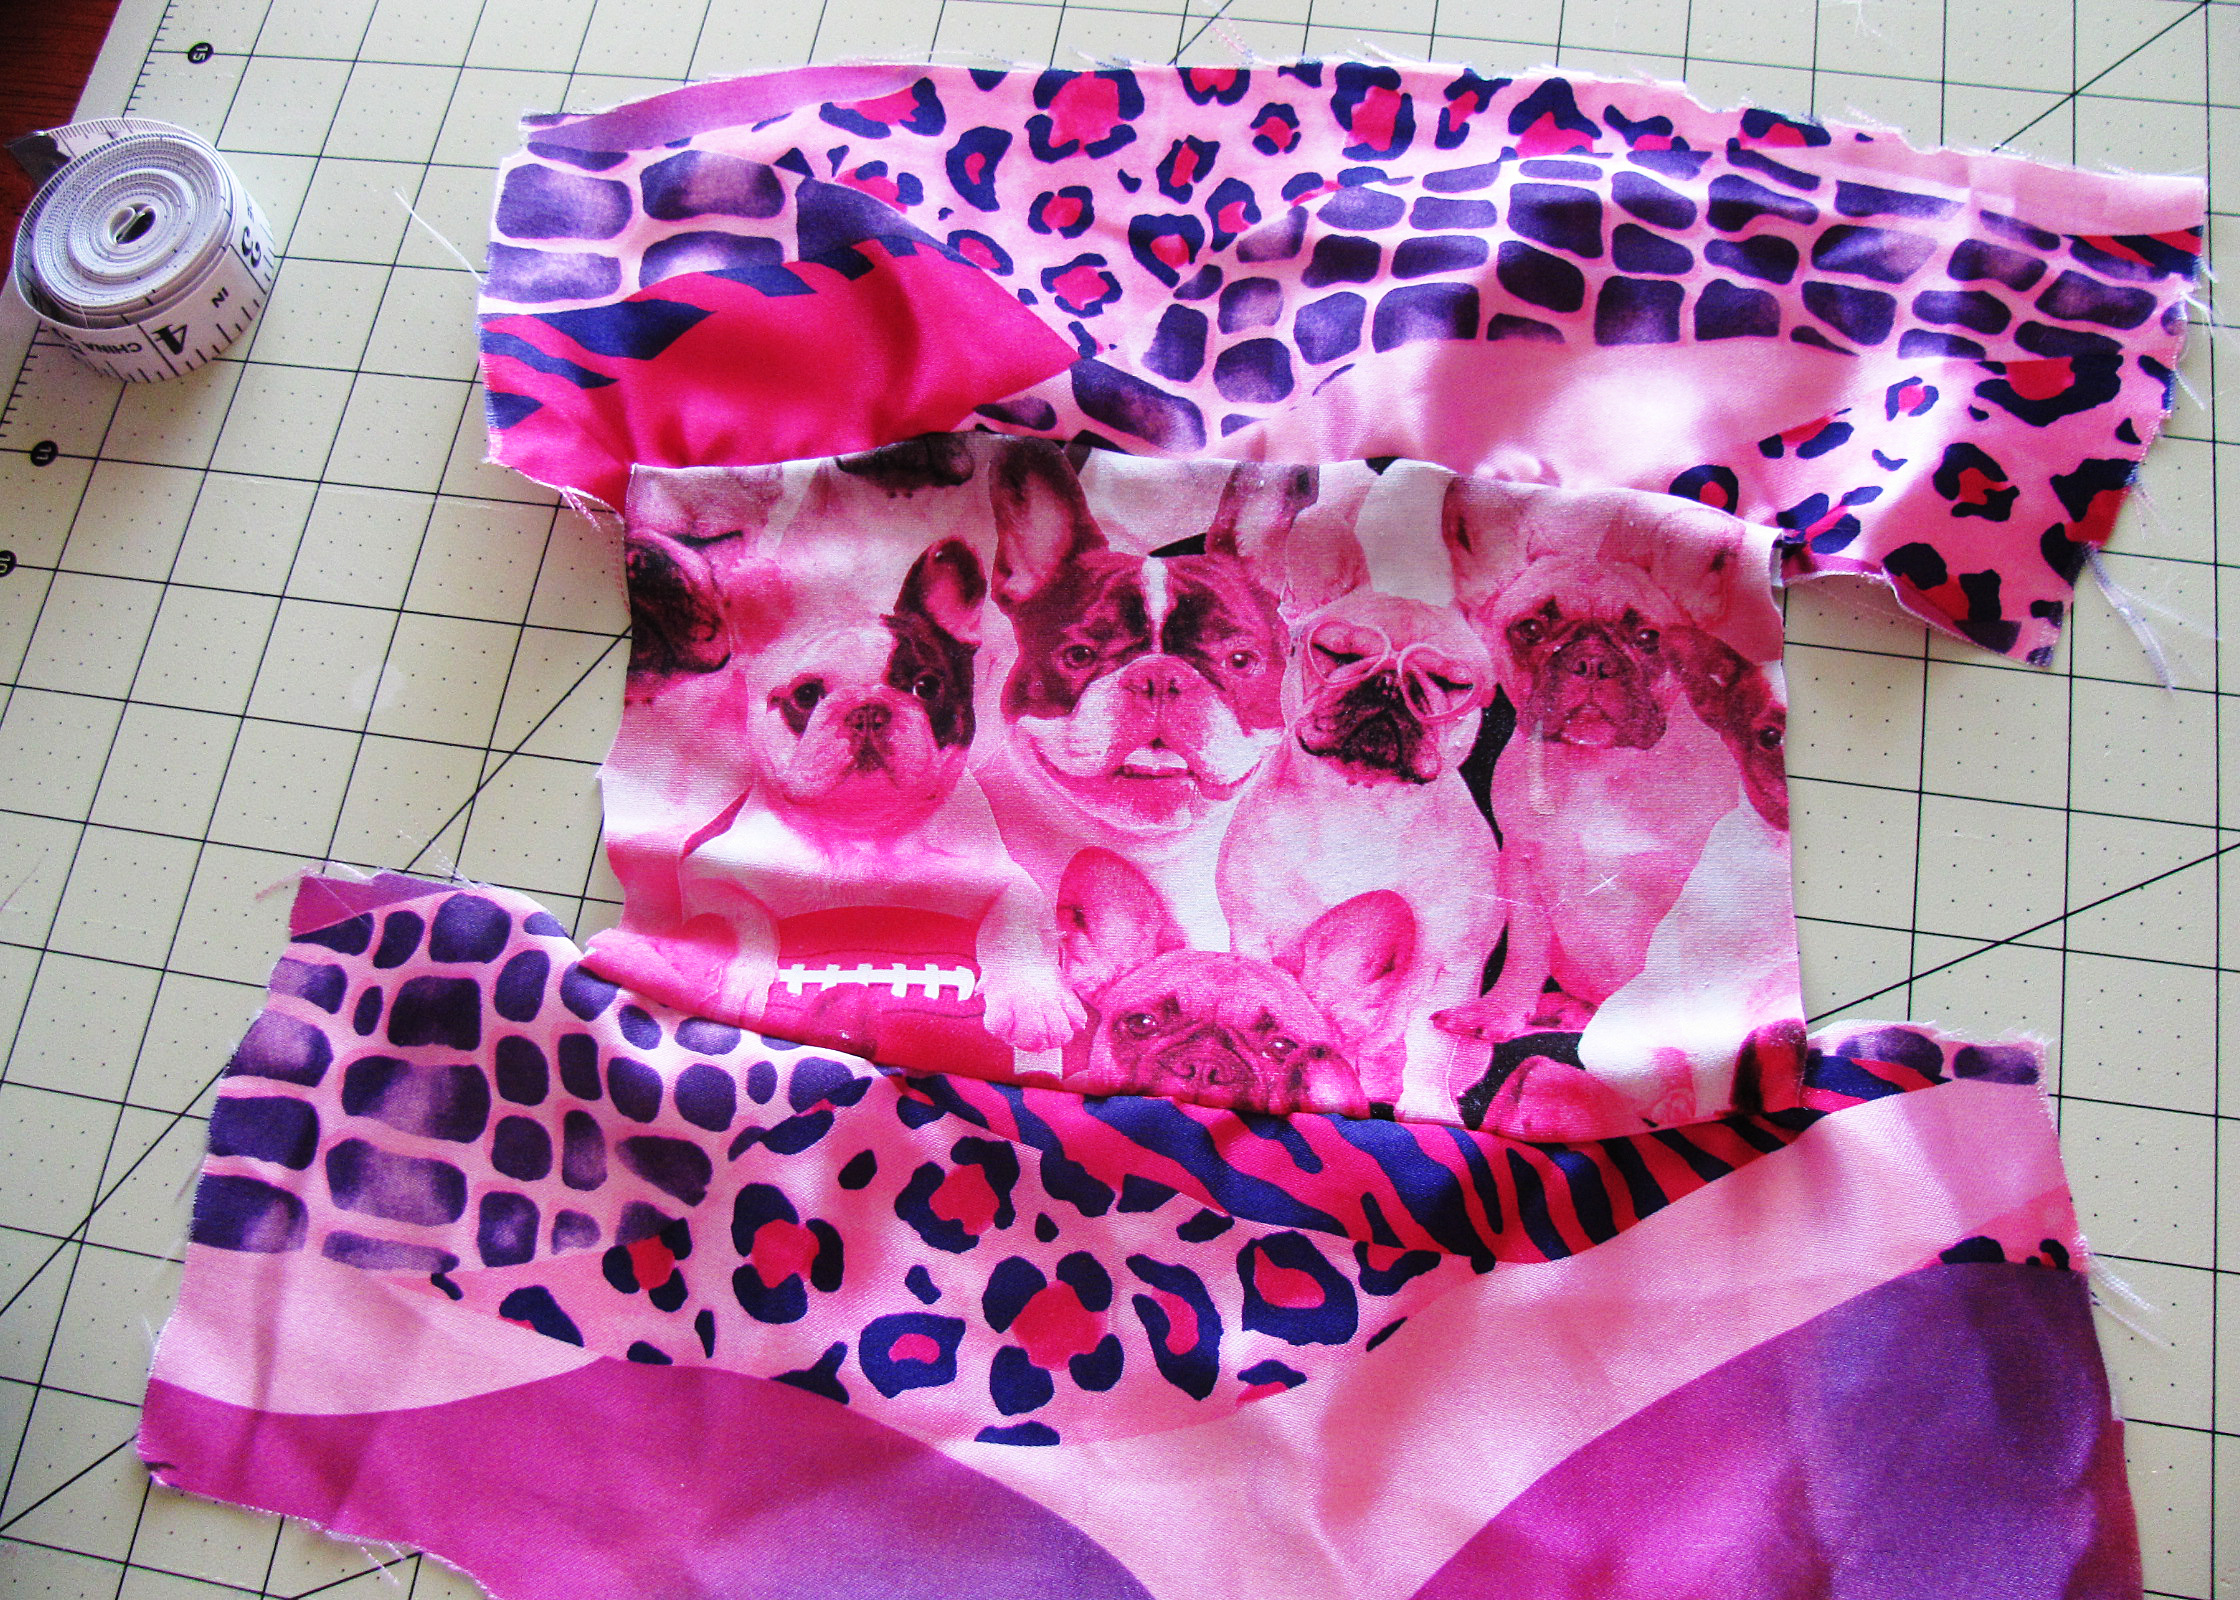
1 – 13″ L x 13″ W Leggings (side 2)
1 – 5″ L x 8″ W Leggings (side 1)
2 – 4″ L x 13″ W Pink/Purple Material (side 1)
2 – 6″ L x 3″ W Pink/Purple Material (side 1)
1 Zipper, Cut to Fit After Pillowcase is Finished – measuring for zipper after pillowcase is assembled helps ensure the zipper isn’t too short
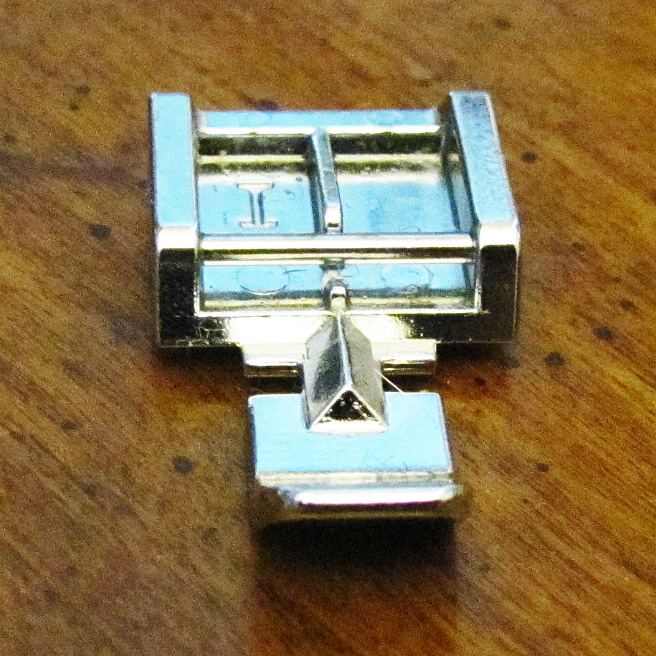
1 Zipper Foot – to use when sewing on zipper
Sew top strip to top of side 2 Leggings, right sides together. Repeat for bottom strip.
Step 1
Sew right side strip to right side 2 Leggings, right sides together.
Sew top of side strip to bottom of top strip. Make sure corner with Legging is sewed shut.
Attaching sides.
Sew bottom of side strip to top of bottom strip. Make sure corner with Legging is sewed shut.
Repeat steps 2-4 for left side strip.
Zipper foot.
Sew side 1 and side 2 right sides together on three sides only. Leave one side open for zipper.
Trim corners. Turn right side out.
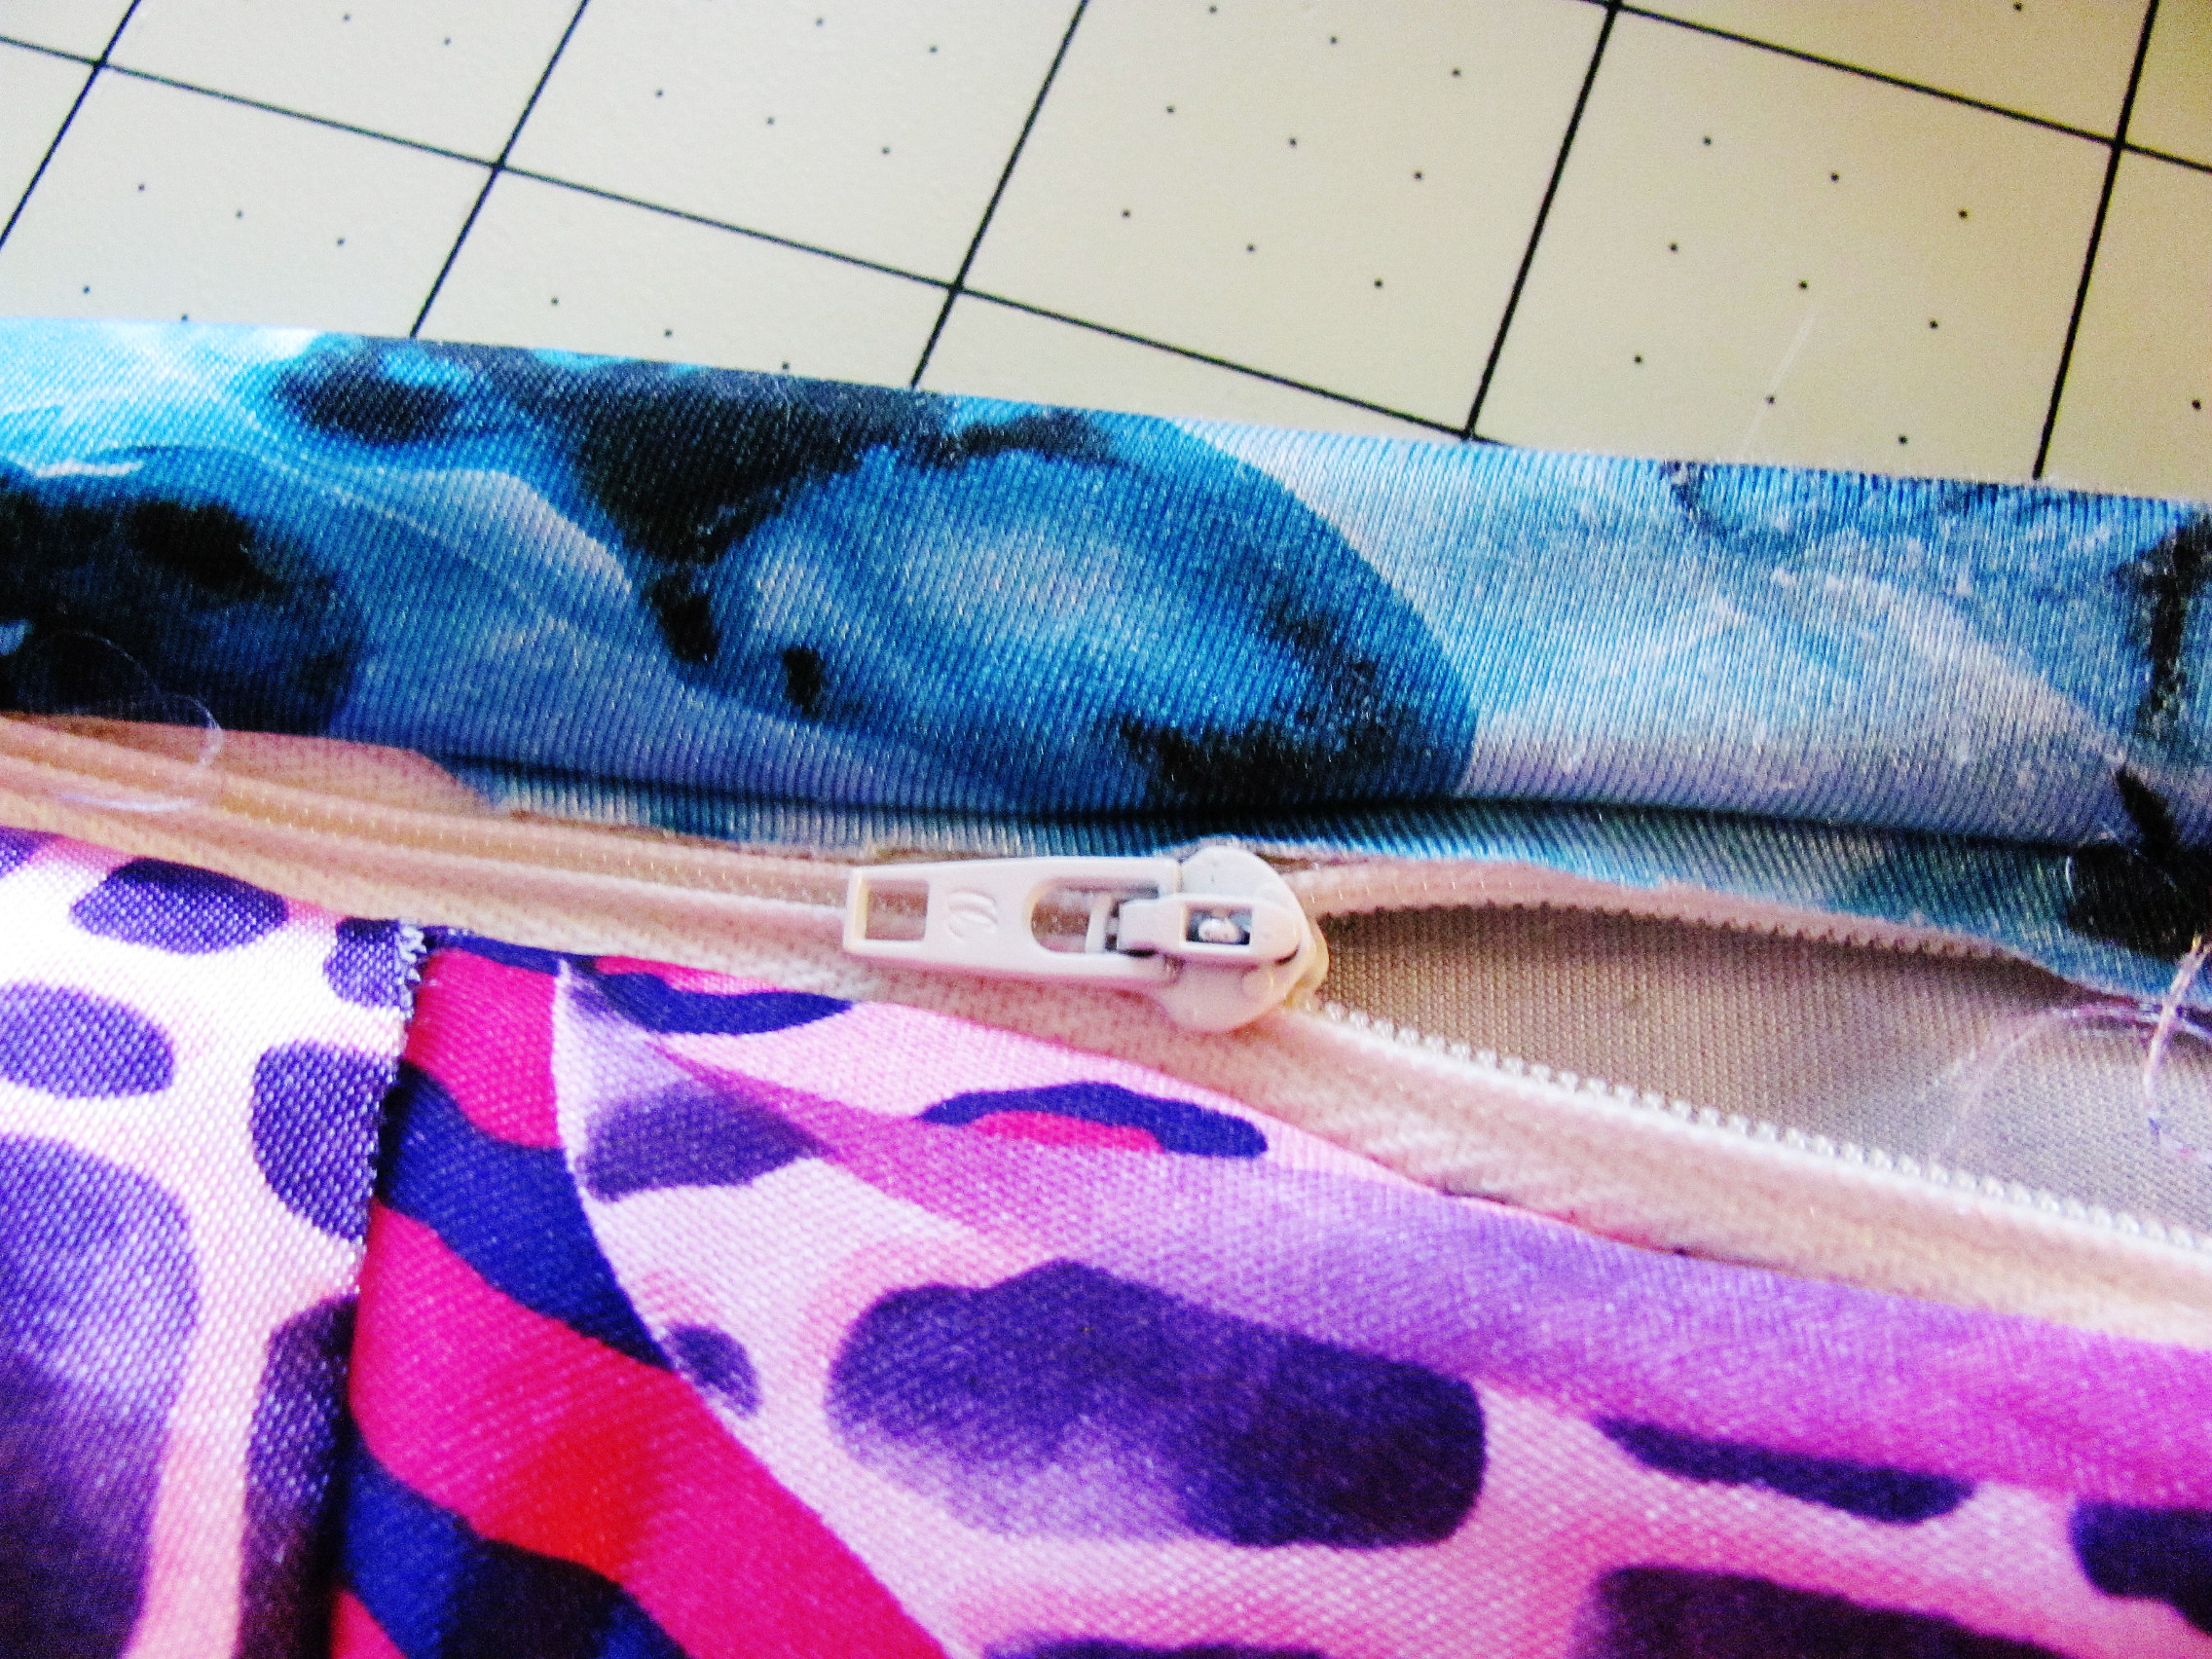
Place open side of zipper on one open end of pillowcase and extend zipper to other end. Cut zipper about 3/8″ – 1/2″ past end of pillowcase. In this case, my zipper measured 12″. I usually buy longer zippers and keep several on hand so I can cut to fit for any project.
Finished zipper.
Attaching the zipper.
Sew across zipper end several times to make sure the bottom of the zipper never unzips all the way.
Switch to zipper foot on sewing machine.
Unzip zipper.
Place under side of zipper to right side of pillowcase, teeth side outside. Non-tooth side should be end to end with right side of pillowcase. Zipper will be upside down. Pin and sew.
Naptime!
Do the same for the other side of the zipper. The placement will be the same, with the underside of zipper to right side of pillowcase, non-tooth side matching end of pillowcase.
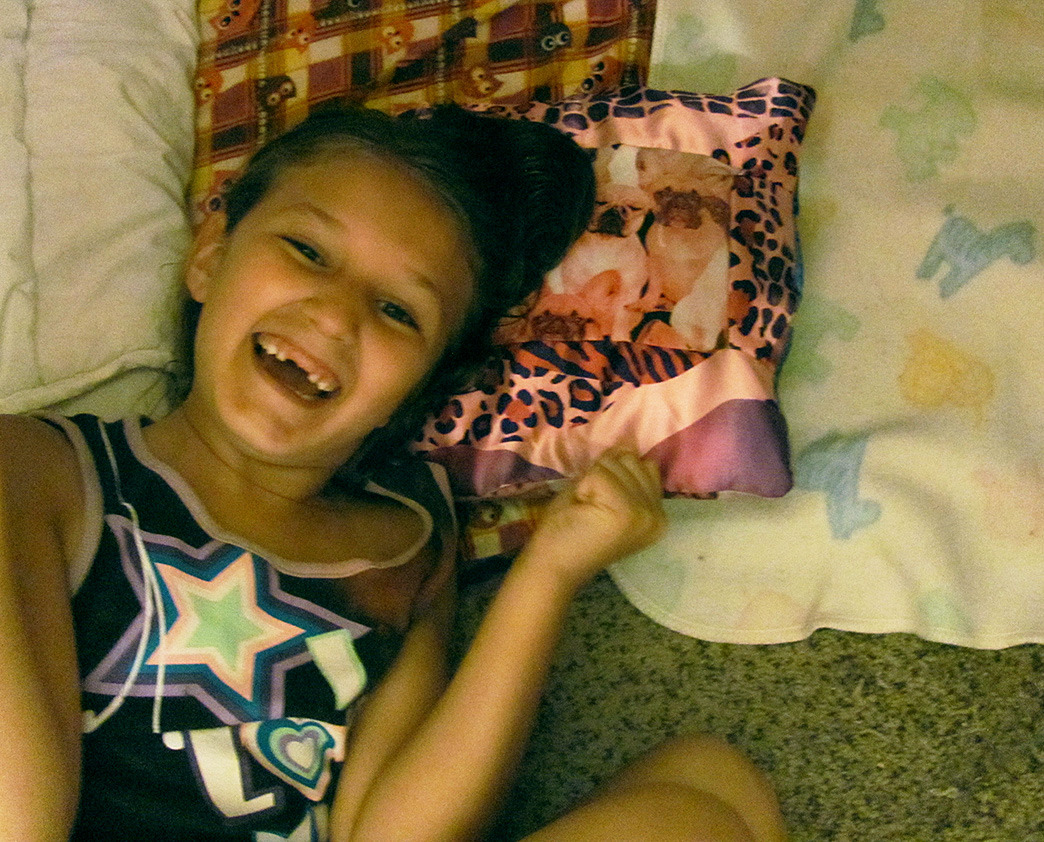
Stuff pillow inside the pillowcase, zip up, pop on the bed and take a nap!
Hi all! I’m Stacey Martinez 🙂
I love to design imaginative custom items for my active, crazy family. Bright colors and beautiful fabrics sing “Stacey, Stitch Me!” Let your imagination inspires you to breathe personality into every stitch!
Please leave comments, questions, helpful tips, or pictures of your pillowcase creations. I can’t wait to see what you come up with!
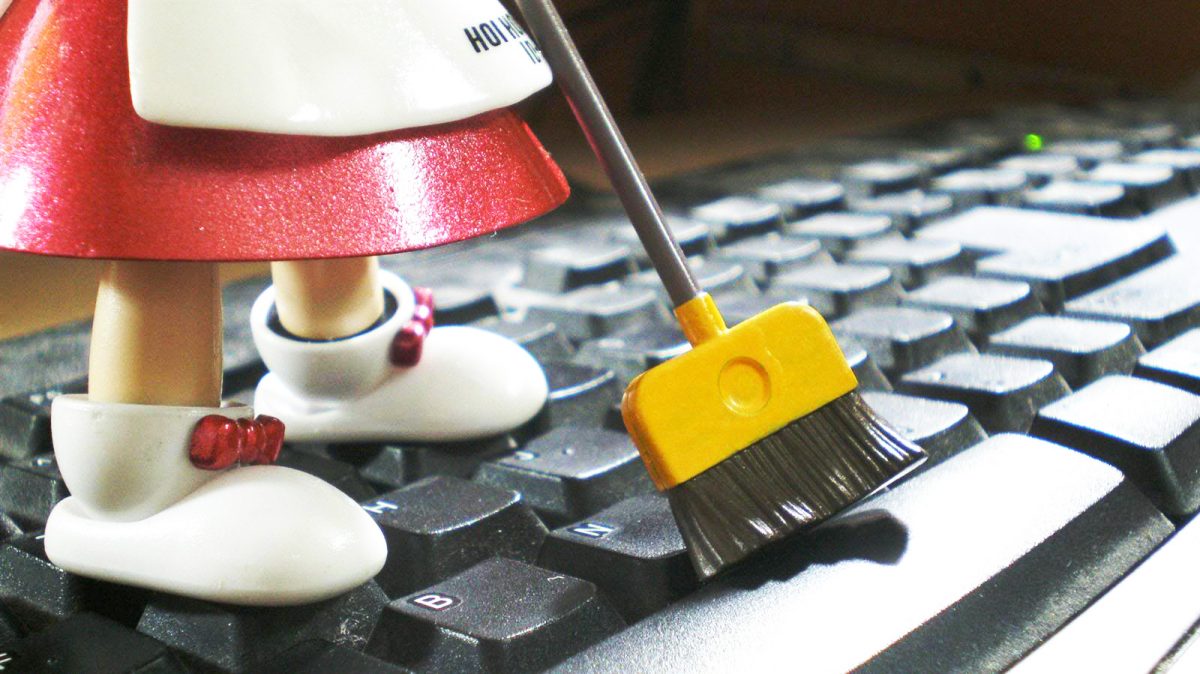
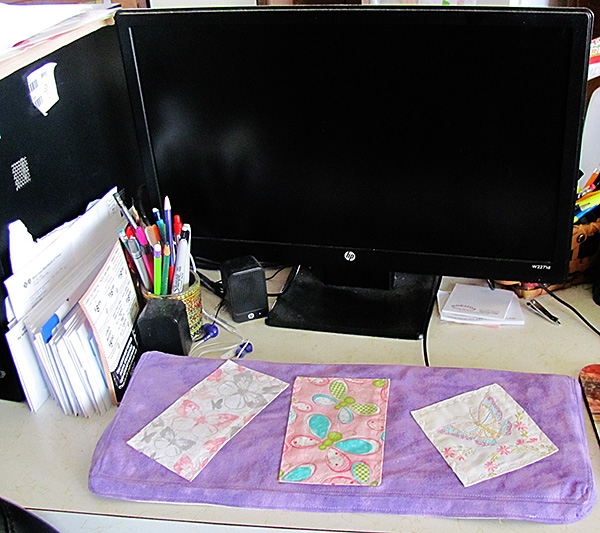
Ick, dust! I abhor dusty, dirty keyboards at work and at home. Those keyboard sprayers to get in between keys just aren’t enough for me. Time to make a cover to protect the keyboard while adding some flair to the office space!
Keyboard Kozy
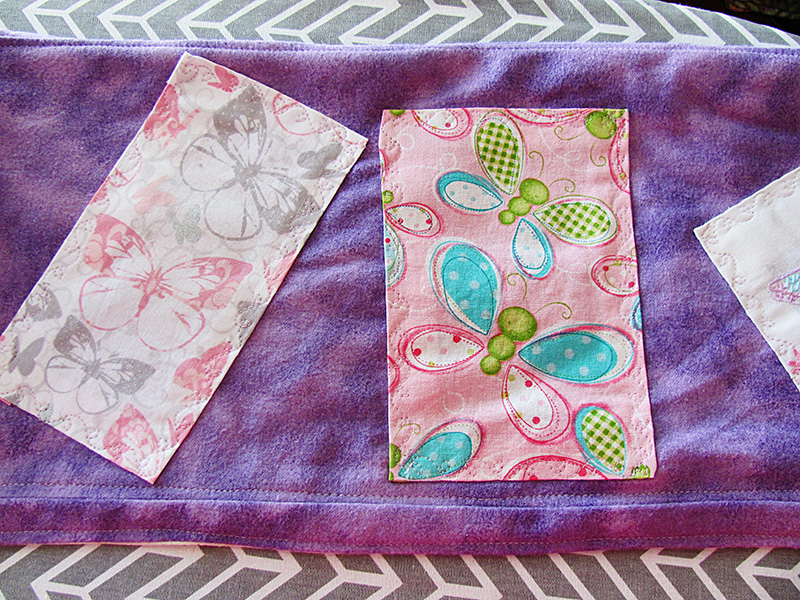
I love projects like this. I can create something useful while adding some personality to my space. I’m adding butterflies from different fabric I picked up here and there. I try to buy a quarter or half yard of the popular designs of the moment. Doing so helps add all sorts of different designs to my collection so I’m more likely to have what I want or need on hand. I have a decent collection of butterflies and have been waiting for the perfect project to showcase them.
Level: Beginner
Time to Complete: 1 hour
Sewn By Machine: 1/4 in. straight stitch
***Washing and ironing materials before sewing is extremely important!! Measurements are based on material already washed. If they aren’t washed before sewing, they may shrink by an inch or more when washed later on, resulting in being too small.
Materials:
1 – 19″ L x 7 1/2″ W Material for top of keyboard
1 – 19 ” L x 7 1/2″ W Underside material
2 – 19″ L x 1 1/2″ W Material for long sides
2 – 19″ L x 1 1/2″ W Underside material
2 – 6 1/2″ L x 1 1/2″ W Material for short sides
2 – 6 1/2″ L x 1 1/2″ W Underside material
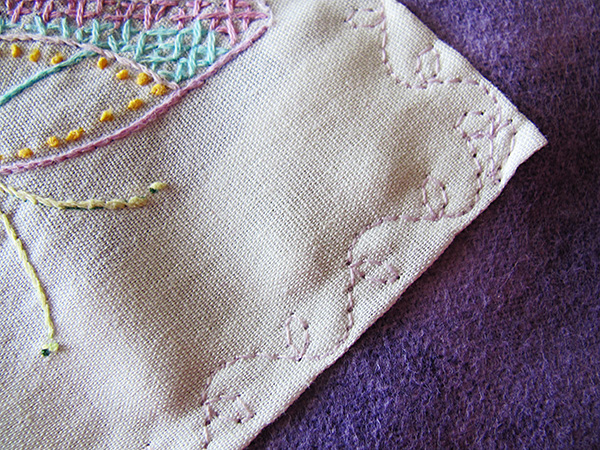
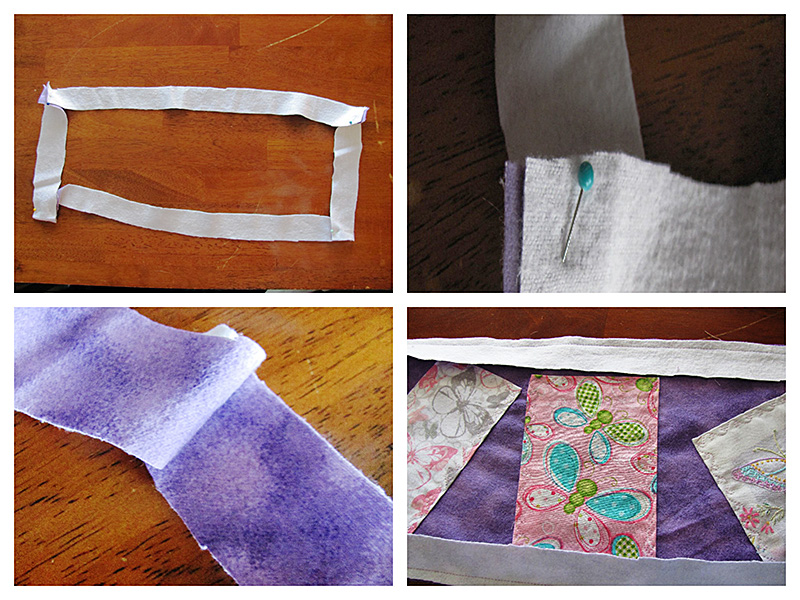
Any material to be used as accents on the keyboard cover – I used 3 rectangular butterflies.
I used two layers, the cover and then absorbent material for the underside of the cover. In my house spills are everyday events. I’ve learned to dual layer so spills are soaked up and less likely to damage anything. The keyboard cover can also be made with just one layer leaving off the underside backing. It’s totally up to the needs of your home or office space.
One Step Hem and Attach
Wash and iron all material.
Measure and cut material.
Sew accent pieces on cover top. I did not hem them beforehand. Instead, I hemmed and attached in one step.
One Step Hem and Attach (see image)
I used a petal decorative stitch when attaching my accents to add a bit of flare.
Petal Stitch
Petal Stitch (see image)
Sew side pieces together at ends, right sides together. (It is possible to sew each side to the cover top individually, but I found this much quicker and easier.
Attachment of sides
Attachment of sides (see image)
Iron seams open, making attachment to cover easier.
Pin and sew side rectangle to cover.
Turn right side out and iron seams open.
For the inside layer, repeat all above steps.
Pin and sew outside cover and inside layer, right sides together. Make sure to leave a 2″ – 3″ opening to pull material right side out.
Top Stitching
Pull material right side out.
Top stitch around outside of cover top, using 1/8″ edge.
Finished Keyboard Kozy
Top stitch around entire outside of cover, using 1/8″. Make sure to sew closed the opening left to pull material right side out.
Top Stitching (see image)
Place on keyboard and enjoy!
Finished Keyboard Kozy (see image)
Stacey’s Stitches
Hi all! I’m Stacey Martinez 🙂
I love to design imaginative custom items for my active, crazy family. Bright
colors and beautiful fabrics sing “Stacey, Stitch Me!”
Let your imagination inspire you to breathe personality into every stitch!
**Please feel free to leave comments, questions, suggestions and pictures of your creations. I can’t wait to see what you come up with!