DIY Car Seat Poncho

DIY Car Seat Poncho

Did you know it is not safe to put kids in winter jackets in car seats? It’s true. Winter jackets are so puffy that parents need to loosen the seat belts to accommodate them, however this loosening makes the child unsafe in their car seat should they be in an accident. The jackets would compress but the child would move too far forward for safety due to the loosened seat belts.

Snow day!

So what’s a parent to do who lives in cold weather?

So what’s a parent to do who lives in cold weather?

So what’s a parent to do who lives in cold weather? The good news is that you can still put snow pants on them. So use a pair of snow pants and a car seat poncho and all your problems are solved!

I’ve never sewed a hood before so I was excited to try something new and make one with this project. I used the pattern for the hood from Oliver & S’s Little Things To Sew Book and then attached the hood to my own design for the poncho.
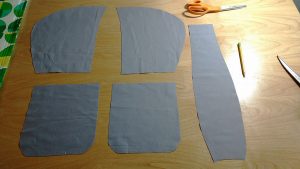
I used the pattern for the hood from Oliver & S’s Little Things To Sew Book and then attached the hood to my own design for the poncho.

I used the pattern for the hood from Oliver & S’s Little Things To Sew Book and then attached the hood to my own design for the poncho.

Cozy pockets

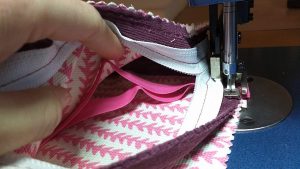
I also wanted to make lined pockets on the inside of the poncho, so she could slide her hands inside them and keep toasty while the car warmed up.
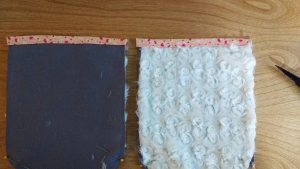
I also wanted to make lined pockets on the inside of the poncho, so she could slide her hands inside them and keep toasty while the car warmed up.

I also wanted to make lined pockets on the inside of the poncho, so she could slide her hands inside them and keep toasty while the car warmed up.

I’ve been trying very hard lately to make my projects with materials I already have on hand. Everything you see for this car seat poncho, I already had in my stash.

If you’ve never sewn with minky or cuddle fabrics, I’m here to tell you that it’s time to try. They are so warm and cozy and people always like when you make gifts with minky. If you have a walking foot, use it when you’re sewing fabrics like these. For more on how to sew with minky, check out my post here.

Grab that pincushion
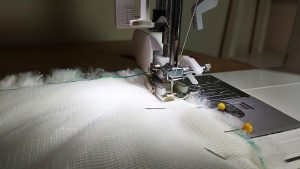
If you have a walking foot, use it when you're sewing fabrics like these. For more on how to sew with minky, check out my post here.

If you have a walking foot, use it when you’re sewing fabrics like these. For more on how to sew with minky, check out my post here.

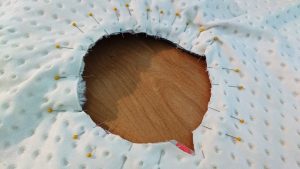
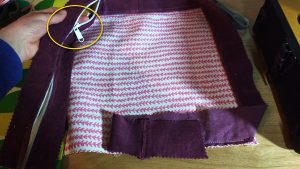
When working with minky, you definitely need to pin things in place. I’m not a big fan of pins, except when you really do need them; sewing the hood and the neckline of the poncho was a definite need.

Tip: if you are going to add a ribbon so you can hang the jacket from the back of the neckline, this is the moment to do it.

When working with minky, you definitely need to pin things in place.

When working with minky, you definitely need to pin things in place.

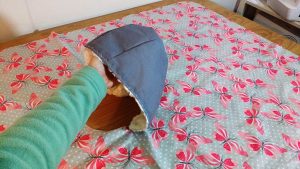
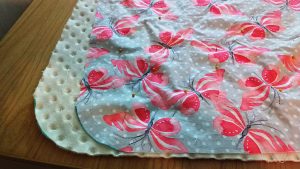
Ta da!!! The hood is lined with a gorgeous cuddle fabric that looks like rose swirls. I used minky dot fabric on the underside of the poncho. The butterfly fabric is left over from a baby quilt I made last year.

The hood is lined with a gorgeous cuddle fabric that looks like rose swirls.

The hood is lined with a gorgeous cuddle fabric that looks like rose swirls.

Tales from the hood

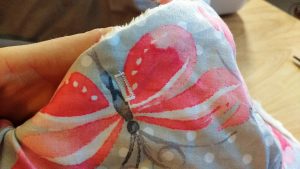
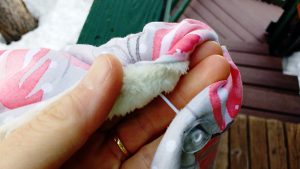
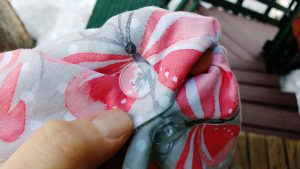
When I tried the poncho on my youngest, the neckline was too big. No problem. I used my buttonhole foot to make two button holes right at the v of the neckline like this.

The butterfly fabric is left over from a baby quilt I made last year.

The butterfly fabric is left over from a baby quilt I made last year.

Next I threaded elastic through two buttons and tied knots on each side. This tightened up the neckline but still allowed her to easily pull it over her noggin.

Next I threaded elastic through two buttons & tied knots on each side.

Next I threaded elastic through two buttons & tied knots on each side.

Lovely, no?

Lovely, no?

Lovely, no?

Once the hood and neckline were complete I smoothed out the top and bottom fabrics and made sure they fully matched. Any parts that extended past each other got chopped. Then I pinned the HECK out of the entire poncho before adding binding (See all those pins?).

See all those pins?

See all those pins?

Put a clip on it

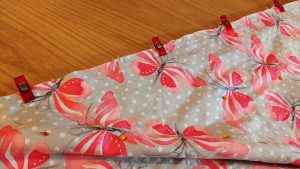
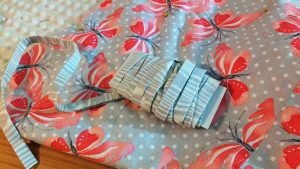
I used these awesome Wonder Clips by Clover to keep the edges in place as I added the binding.

I used these awesome Wonder Clips by Clover to keep the edges in place as I added the binding.

I used these awesome Wonder Clips by Clover to keep the edges in place as I added the binding.

This binding was extra I had made for a quilt last December. It matched the project perfectly.

This binding was extra I had made for a quilt last December.

This binding was extra I had made for a quilt last December.

Momma’s little helper

When everything was sewn, I enlisted the help of my six year old to remove all the pins and then get off any remaining fuzzies from sewing with minky.
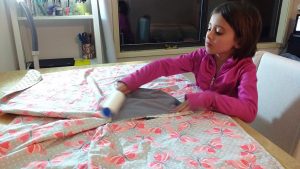
I enlisted the help of my six year old to remove all the pins & then get off any remaining fuzzies from sewing with minky.

I enlisted the help of my six year old to remove all the pins & then get off any remaining fuzzies from sewing with minky.

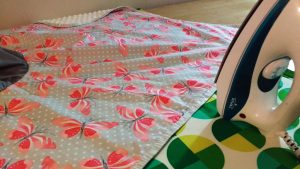
Lastly, I ironed. Always, always iron. It takes your project to the next level!

Pro Tip: never iron on minky directly. Do not press too hard because you’ll ruin the pattern on the minky dots (you’ll flatten the dots). I ironed the top side with steam on a wool setting.

Never iron on minky directly.

Never iron on minky directly.

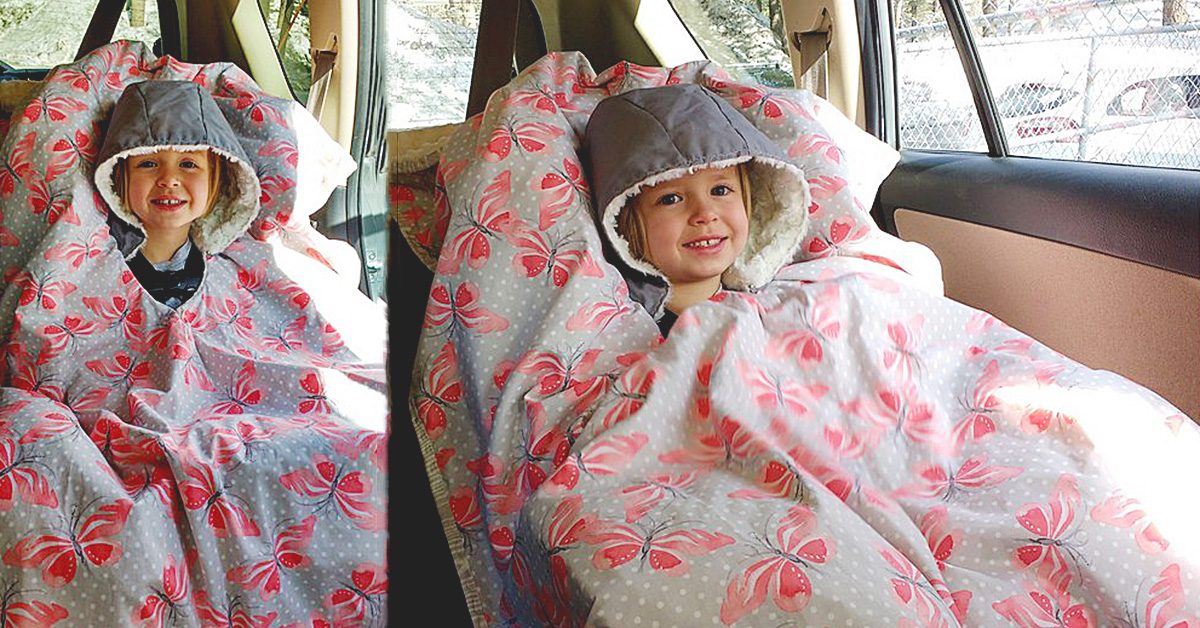
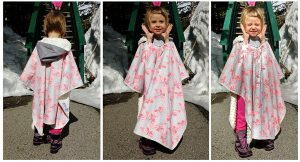
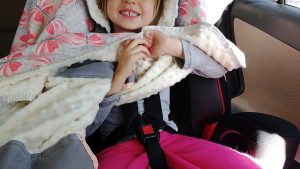
Here’s the finished project. My 4 year old absolutely loves what she calls her ‘car blanket.’

My 4 year old absolutely loves what she calls her ‘car blanket.’

My 4 year old absolutely loves what she calls her ‘car blanket.’

Safety first

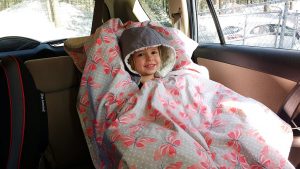
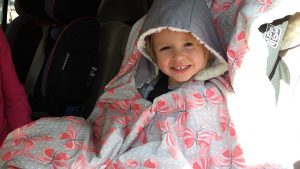
See how she is safely buckled underneath the poncho?

See how she is safely buckled underneath the poncho?

See how she is safely buckled underneath the poncho?

The back of the poncho just drapes up and over the back of the car seat.

The back of the poncho just drapes up and over the back of the car seat.

The back of the poncho just drapes up and over the back of the car seat.

Here she is modeling it next to her daddy. Adding the elastic and buttons at the neckline was the perfect solution.

Here she is modeling it next to her daddy.

Here she is modeling it next to her daddy.

Under the hood

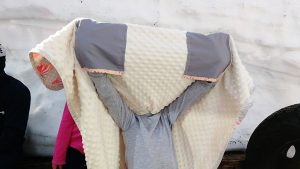
And here you can see the pockets that are on the underside.

And here you can see the pockets that are on the underside.

And here you can see the pockets that are on the underside.

Yep, this project was a hit. And she has plenty of room to grow with it.

Yep, this project was a hit. And she has plenty of room to grow with it.

Yep, this project was a hit. And she has plenty of room to grow with it.

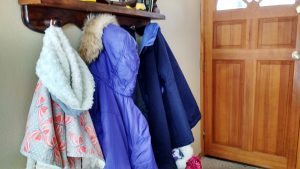
I’m so glad I took the time to add something to hang it with.

I’m so glad I took the time to add something to hang it with.

I’m so glad I took the time to add something to hang it with.

Have you made your own car seat poncho? How do you like it? Let us know in comments!

———————————————————————————–
Charlotte Kaufman is a writer and sewist in Mammoth Lakes, California. She specializes in marine and home interiors and continues to fall more and more in love with quilting. You can follow her at charlottekaufman.com.
Free Singer Sewing Projects

Free Singer Sewing Projects

I love free sewing patterns. I bet you do too! Here’s a few of my favorites from SMP.

I love free sewing patterns. I bet you do too! Here’s a few of my favorites from SMP.

The cold weather doesn’t seem to want to let go this year – at least where I live. As much as I’m yearning for warm days so I can get outside and enjoy nature, it’s a perfect time to sew. I love free sewing patterns. I bet you do too! Here’s a few of my favorites from SMP.

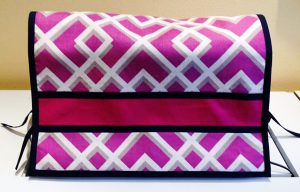
Sewing Machine Cover

I love that it’s soft and easy to remove, but keeps the dust off and the pet hair out.

I love that it’s soft and easy to remove, but keeps the dust off and the pet hair out.

My mom made one of these for the Singer she taught me on many years ago. I love that it’s soft and easy to remove, but keeps the dust off and the pet hair out. With four cats, everything gets covered in fur fairly quickly if it’s not covered. I also love that it can be made with any fabric or print so you match it to the décor and colors in your sewing room.

https://www.sewingmachinesplus.com/media/projects/singer/Sewing-Machine-Cover.pdf

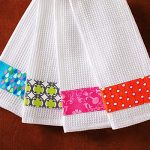
Embellished Kitchen Towels

Bring a little color and spring into your home, no matter what the weather is doing outside with some fancy kitchen towels. They’re easy to make, no matter what your skill level. Even better, they’re a great way to use up some of your fabric stash and require nothing more than a white kitchen cloth (or any other color if you prefer).

https://www.sewingmachinesplus.com/media/projects/singer/Embellished-Kitchen-Towels.pdf

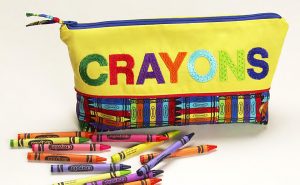
Crayon Pouch

This awesome sewing pouch makes it easy to carry all the colors I need & look fashionable to boot.

This awesome sewing pouch makes it easy to carry all the colors I need & look fashionable to boot.

Have you been bitten by the adult coloring bug yet? I have! And I love using crayons. I bought a container of around 120 crayons that I can carry, but if I’m working on a specific picture, I may not need all 120 colors. This awesome sewing pouch makes it easy to carry all the colors I need and look fashionable to boot. The ladies in the sewing group at the public library will swoon if I bring this in…maybe an extra source of income? *wink

https://www.sewingmachinesplus.com/media/projects/singer/Crayon-Pouch.pdf

These three free singer sewing projects are just a few of the ones you can find at sewingmachinesplus.com See the whole list and get inspired here.

Scrap-Fabric Keychain!

Scrap-Fabric Keychain!

If there’s one thing I’m interested in regarding sewing, it’s finding new ways to use my leftover fabric. In fact, if you’ve been keeping up with my posts (I won’t hate you forever because you haven’t! Honest!), it’s a concept that’s been explored already. But I still have fabric at my disposal, so the idea of how to use those pieces continues as a subject worth looking into.

So, for today’s post, I’m going to give you yet another way to use your leftover fabric — even if that leftover fabric is fairly small! Need proof? The project I’ll use for an example was made out of ONE fabric block that was less than ten inches in either direction. Sound good? Then let’s dive into this project, which for the record, is a keychain!

What you’ll need:

  • One fabric block. The size varies depending on what shape you want to make your keychain — and what size you want your keychain to be — but you don’t need anything over 10″ x 10″. Also, remember that flimsy fabric might not keep your keychain shape too well, so try something that’s sturdy — maybe even felt.
  • Key ring. It isn’t really a keychain if you can’t hang a key on it!
  • Sewing essentials like needle, thread, and straight pins, as usual!

What you’ll do:

Step One:  Choose your fabric, keeping in mind the guidelines about size and texture. You should also note that your shapes for your keychain will only be so big, so you should consider that size. If your final goal is a one-inch shape, for instance, you should pick a fabric that’ll look good when cut down to that size. I changed my fabric choice on this detail because with my initial decision, I would’ve potentially had part of a flower, a whole lot of plain color, or scattered bits that didn’t really look that fantastic to me. It might be something you want to consider as well!

I changed my fabric choice on this detail because with my initial decision, I would’ve potentially had part of a flower, a whole lot of plain color, or scattered bits that didn’t really look that fantastic to me.

I changed my fabric choice on this detail because with my initial decision, I would’ve potentially had part of a flower, a whole lot of plain color, or scattered bits that didn’t really look that fantastic to me.

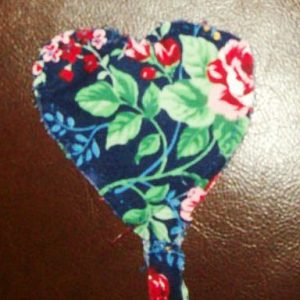
Also, decide what shape you want your keychain to be. For me, I went with a heart because it was simple and traditional, but there are plenty of other options. Once you know your shape, you can create a stencil, or use an existing stencil, to make sure your fabric is going to be cut in the right way.

Cut it out

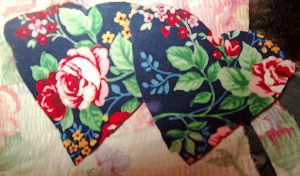
Step Two: Cut out your shapes! This was a perk to choosing a heart because you can make one by only cutting one side of the heart, as many of us might have learned in childhood. I don’t need to cut both sides if I fold the fabric in half, and I ended up only having to make that folded cut once for both sides of my keychain by folding the fabric into fourths. That way, with one swooping I-want-a-heart-shape cut, I got two bits of fabric that admittedly needed a bit of tailoring, but were good starting places for my heart.

With 1 swooping I-want-a-heart-shape cut, I got 2 bits of fabric that admittedly needed a bit of tailoring, but were good starting places for my heart.

With 1 swooping I-want-a-heart-shape cut, I got 2 bits of fabric that admittedly needed a bit of tailoring, but were good starting places for my heart.

Whether you find a simple method to make both pieces at once or use a stencil, cut two shapes out of the block of fabric — one for the keychain’s front side and one for the back. Make sure they’re even enough so that too much excess material doesn’t show on either side and that you’ve accomplished cutting the shape you wanted — or at least one you can live with! Also, remember to cut a line of fabric that is a couple of inches long and wide enough to suit your purpose (maybe ¼”). This will be your loop to put the keyring through. NOTE: These numbers can vary depending on what size you want your keychain to be!

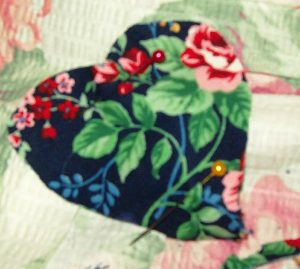
Step Three: Once your shapes are cut and trimmed, it’s time to start planning your sewing. Even though this is a small project, it could still pay to have straight pins keeping your work in place, so you might want to break out a couple! Be sure before you pin or sew that your main fabric pieces are together with their patterned sides facing outward, and don’t forget to fold that additional line of fabric and place the tips of both ends between the two shapes.

Be sure before you pin or sew that your main fabric pieces are together with their patterned sides facing outward.

Be sure before you pin or sew that your main fabric pieces are together with their patterned sides facing outward.

Put a ring on it

You might think about going ahead and adding your keyring here as well so that you don’t have to put your fabric through the stress of being twisted through the keyring. To do that, you’d just need to loop the line of fabric through the ring before you pin it between the shaped fabric pieces for sewing.

Step Four: Sew! Since this is a keychain, the process won’t take long! And be sure to cut off the excess thread when you finish!

Sew! Since this is a keychain, the process won’t take long!

Sew! Since this is a keychain, the process won’t take long!

Step Five: Hang a key on it and enjoy!

DIY Chair Cushions for Kids

DIY Chair Cushions for Kids

DIY Chair Cushions for Kids

DIY chair cushions for kids.

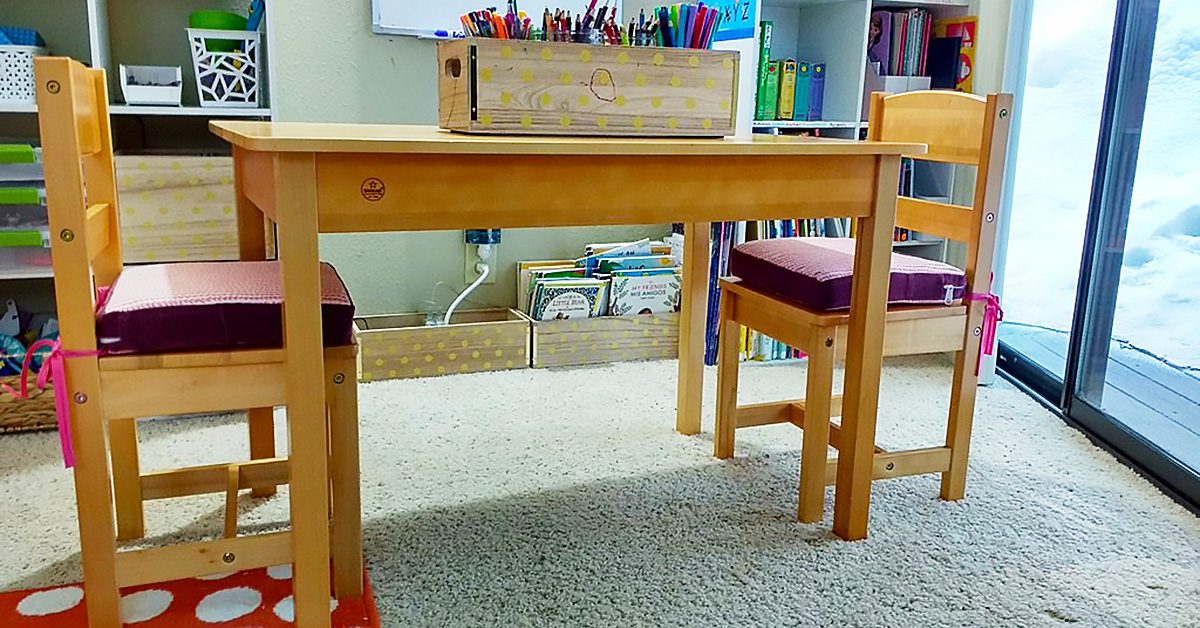
I’ve been wanting to make cushions for the art table chairs in our girls’ room for a while and I finally made it down to a craft store that sold foam this week to get started on the project.

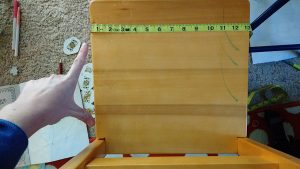
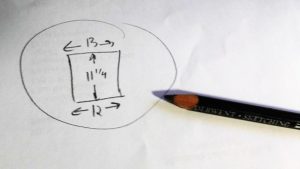
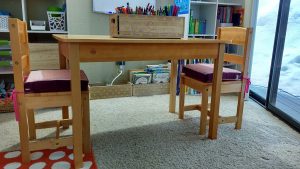
The first step in making custom cushions is accurate measurements. Notice how the chairs are not true squares? The front measurement was 13” and the back 12”. The distance between the front and back was 11 ¼”.

The first step in making custom cushions is accurate measurements.

The first step in making custom cushions is accurate measurements.

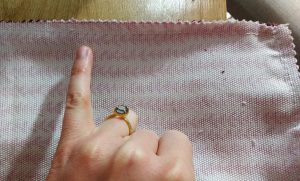
Want to know a trick with cushions? Cut your fabric to the exact size of the foam. I know this sounds counter-intuitive. ‘But what about seam allowance?’ you’re thinking. The thing is, foam compresses. If you cut your fabric to the size of the foam, and then sew ¼” seams (or ½” if using heavier duty fabric), the compression of the foam once it is in the cushion cover will more than cover the seam allowance you are used to providing on other sewing projects.

Want to know a trick with cushions? Cut your fabric to the exact size of the foam.

Want to know a trick with cushions? Cut your fabric to the exact size of the foam.

I’m trying to use up my fabric scraps this year, so I pulled out a few larger, odd-shaped scraps I had from this fabric and was able to cut out four top and bottom panels for the two chairs.

I’m trying to use up my fabric scraps this year, so I pulled out a few larger, odd-shaped scraps.

I’m trying to use up my fabric scraps this year, so I pulled out a few larger, odd-shaped scraps.

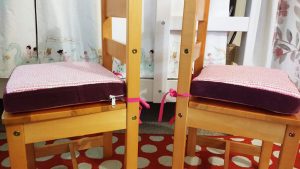
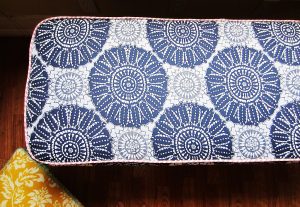
I used this fabric to make custom piping for a bench seat for the girls’ godmother. I like that they’ll have a small piece of the project I made for her in their own room. See the pink trim on the cushion below? That’s the same fabric.

See the pink trim on this cushion? That’s the same fabric.

See the pink trim on this cushion? That’s the same fabric.

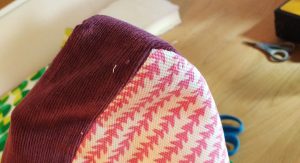
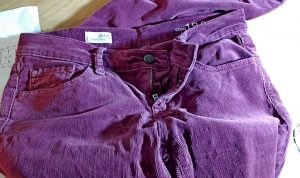
For the side panels I decided to use corduroy from an old pair of pants I’d been saving for just this kind of project. They’d developed holes along the belt loops so I had held onto them just for the pretty fabric.

For the side panels I decided to use corduroy from an old pair of pants I’d been saving for just this kind of project.

For the side panels I decided to use corduroy from an old pair of pants I’d been saving for just this kind of project.

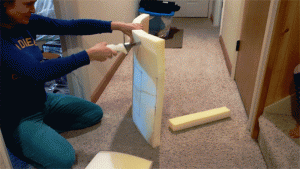
After marking the measurements with a Sharpie, I used an electric bread knife to cut the foam. It cuts through that stuff like butter. Here’s a gif as proof.

My electric bread knife cuts through the foam like butter.

My electric bread knife cuts through the foam like butter.

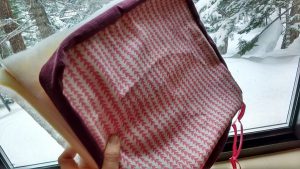
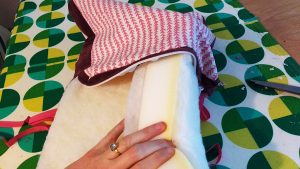
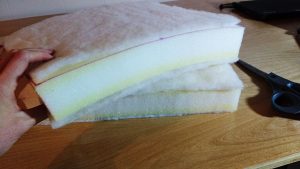
Another make-your-cushions-super-great secret is to use batting!! Wrapping them in batting or putting a layer on the top and bottom will improve how the puff up in your cushion covers. I used an adhesive spray to affix the batting to the top and bottom of each one.

I used an adhesive spray to affix the batting to the top and bottom of each one.

I used an adhesive spray to affix the batting to the top and bottom of each one.

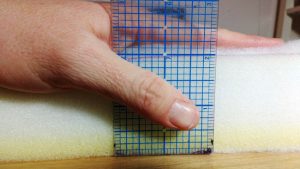
Don’t measure the height of your sides until you’ve added batting. While the foam is 2”, adding the batting made the total measurement just under 2 ¼” (I should know what that measurement is, but I don’t. I just mark to the line under that ¼”).

While the foam is 2”, adding the batting made the total measurement just under 2 ¼”.

While the foam is 2”, adding the batting made the total measurement just under 2 ¼”.

Grab your zippers and zipper pulls, or, if you aren’t like me with spares on hand, plan ahead and order them before you begin.

Grab your zippers and zipper pulls!

Grab your zippers and zipper pulls!

I like to sew the zipper plaques first. Use whichever technique you like. I generally use the first method shown in this video by Sailrite.

I like to sew the zipper plaques first.

I like to sew the zipper plaques first.

If you need to attach extra fabric to the side panels, consider adding it to the ends in small amounts so the joins don’t show on the front of the cushion.

If you need to attach extra fabric to the side panels, consider adding it to the ends in small amounts.

If you need to attach extra fabric to the side panels, consider adding it to the ends in small amounts.

Attach the zipper plaque to the side fabric and then sew onto the bottom fabric piece.

Before you begin sewing the top piece on, make sure to mark your corners accurately. Fold them to each seam to make sure they match (the yellow mark in the photo below is my matching point.)

Fold the corners to each seam to make sure they match (the yellow mark in the photo below is my matching point).

Fold the corners to each seam to make sure they match (the yellow mark in the photo below is my matching point).

Next, make sure to slide on the zipper pulls BEFORE you sew the top piece onto the final assembly or you’ll be sad.

Next, make sure to slide on the zipper pulls BEFORE you sew the top piece onto the final assembly or you’ll be sad.

Next, make sure to slide on the zipper pulls BEFORE you sew the top piece onto the final assembly or you’ll be sad.

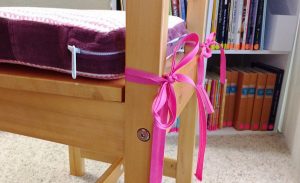
And finally, do not forget to sew your tie backs in between the seams as you go.

Do not forget to sew your tie backs in between the seams as you go.

Do not forget to sew your tie backs in between the seams as you go.

Whoohoo, you’re done! But, before you start celebrating, go over every seam to make sure they are secure.

Whoohoo, you’re done! Now, go over every seam to make sure they are secure.

Whoohoo, you’re done! Now, go over every seam to make sure they are secure.

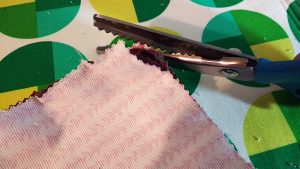
Then take your scissors and round the corners so they turn prettier. I used pinking shears on the fabrics in this project. Check out my post from January to learn about their benefits, along with other important cutting tools for your sewing room.

Take your scissors and round the corners so they turn prettier.

Take your scissors and round the corners so they turn prettier.

When you turn the covers right-sides out, use your fingers to pop out each corner.

When you turn the covers right-sides out, use your fingers to pop out each corner.

When you turn the covers right-sides out, use your fingers to pop out each corner.

If you’ve done this right, your finished cover is going to look smaller than your foam; that’s because it is! Now is the time to put the cover on the cushion and here is where you’ll see how foam compresses to fit your new cover.

Now is the time to put the cover on the cushion & here is where you’ll see how foam compresses to fit your new cover.

Now is the time to put the cover on the cushion & here is where you’ll see how foam compresses to fit your new cover.

I’m going to use caps lock here to get across how important this next step is: DO NOT TUG OR PULL ON YOUR FABRIC TO GET IT ONTO YOUR CUSHION. I promise you, if you do that, your seams will pop. Instead, fold the cushion to slide it into the cover, and then slowly work the foam into the fabric, NOT the other way around. Just keep thinking ‘move the foam, not the fabric.’ Don’t be afraid to really get your hands deep into the cover and use them to maneuver the foam in place. Adjust, adjust, and adjust, until the cushion sits perfectly in the cover, with the lines of the foam matching the lines of the cover.

DO NOT TUG OR PULL ON YOUR FABRIC TO GET IT ONTO YOUR CUSHION!!!

DO NOT TUG OR PULL ON YOUR FABRIC TO GET IT ONTO YOUR CUSHION!!!

Ta-da!!!

Ta-da!

Ta-da!

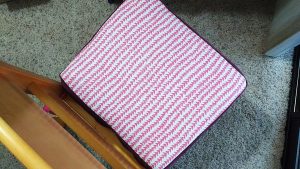
This project turned out just darling. The corduroy almost looks like velvet and I love the effeminate touch it brings to the room.

The corduroy almost looks like velvet and I love the effeminate touch it brings to the room.

The corduroy almost looks like velvet and I love the effeminate touch it brings to the room.

These cushions will inevitably get marks on them. That’s okay, they have zippers so they can be washed, AND, they are reversible. I can just flip them over if I need to.

I can just flip them over if I need to.

I can just flip them over if I need to.

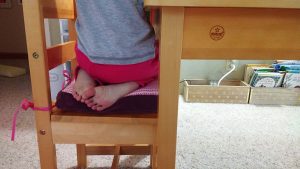
My daughters loved these and immediately hopped on and got cozy.

My daughters loved these and immediately hopped on and got cozy.

My daughters loved these and immediately hopped on and got cozy.

What DIY projects have you made for your home lately? Let us know in comments!
What DIY projects have you made for your home lately? Let us know in comments!
What DIY projects have you made for your home lately? Let us know in comments!

———————————————————————————–
Charlotte Kaufman is a writer and sewist in Mammoth Lakes, California. She specializes in marine and home interiors and continues to fall more and more in love with quilting. You can follow her at charlottekaufman.com.
The Scraps of Christmas

The Scraps of Christmas

It’s officially Christmas week, guys! The day is just around the corner, and soon we’ll be heading into a less twinkle-lit world. Until then though, there’s still time to revel in the holiday for one more blog post! For this particular one, how about we go with a nice wrap-up idea?

You see, I’ve covered a tree skirt, ornaments, and homemade gifts, but if you chose to go all of those routes, you potentially would have collected a series of Christmas fabrics. Each project could have its own material, so there might be quite the variety. Another decent assumption would be that you didn’t have just enough material for all projects, so you could easily have scraps of Christmas fabric left over from your handmade-Christmas-extravaganza.

The Scraps of Christmas

Sure, you could stash it away for future use, but if you keep every scrap of material you ever come across, you’re treading on fabric-hoarder territory! There’s nothing wrong with keeping the pieces that would reasonably be user-friendly in the future, but I’m talking about the small bits that won’t be much use without other smaller parts to make something happen, or for a small enough project.

So, maybe this post will help keep that fabric stash a little smaller and farther from hoarder territory by answering one simple question: What projects can you do with those small parts of leftover Christmas fabric?

Answer: Plenty, and I plan to take you through a number of those options!

Possibility #1: Make a banner

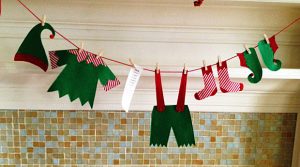
This is such a simple option, but it can add a classy touch to your Christmas decorations. All you need to do is pick a shape for your fabric, cut the scraps in that shape, make sure those hems are smooth, and link them together—maybe with some ribbon or yarn. If you’re feeling particular, you can make sure that each of those shapes is two-sided by sewing two pieces together—maybe spice things up by using more than one fabric for the cause. With that method, you could have (as an example) a bell-shaped addition to your banner that has Rudolph on one side and Frosty on the other! If you’re good at embroidery, use enough shapes to embroider a message across. You could even do this laundry-line idea if you had the right fabric! The options on this idea alone are numerous!

The options on this idea alone are numerous!

The options on this idea alone are numerous!

Possibility #2: Make fabric garland

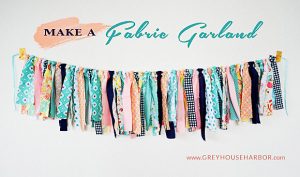
This is like the banner, but requires strips of fabric tied instead of differently shaped pieces embellished and sewn. I mean, sure, you could add gems and such, but the draping quality of the fabric is kind of its distinctive factor, which doesn’t leave a whole lot of room for the Merry Christmas message! Still, this is a simple, elegant idea that could add a touch of holiday cheer to your house by hanging from your mantel. And, as is the main idea of the post, it’s a great way to use that extra Christmas fabric you might have once you finish your holiday sewing projects!
This is like the banner, but requires strips of fabric tied instead of differently shaped pieces embellished and sewn.

This is like the banner, but requires strips of fabric tied instead of differently shaped pieces embellished and sewn.

Possibility #3: Make a Christmas tote

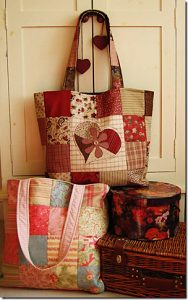
While you might not have enough material to make the entire tote in one style (then again, maybe you will!), you could create a patchwork look for a homemade Christmas tote! You can find patterns for totes here, and Sewing Machines Plus offers free patterns for bags as well. Can you imagine a patched-up Christmas tote in this design! I would definitely carry one of those!

I would definitely carry one of those!

I would definitely carry one of those!

Possibility #4: Make fabric bookmarks

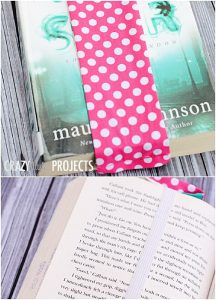
Call me a literature nerd, but how awesome would it be to give someone a copy of A Christmas Carol with a hand-sewn bookmark to go along with it? In fact, this could be a thing you do next year — give out holiday classics with hand-sewn bookmarks in Christmas fabrics! These projects are small, and who knows how many you could make in one day? And they require little fabric, which is the theme of this post! Whether it’s to hold your place for your own holiday reading or for small gift-gestures to let someone know you’re thinking of them, these creations could bring a festive touch to a book-and-hot-chocolate December time!
Call me a literature nerd, but how awesome would it be to give someone a copy of A Christmas Carol with a hand-sewn bookmark to go along with it?

Call me a literature nerd, but how awesome would it be to give someone a copy of A Christmas Carol with a hand-sewn bookmark to go along with it?

Possibility #5: Make a keychain

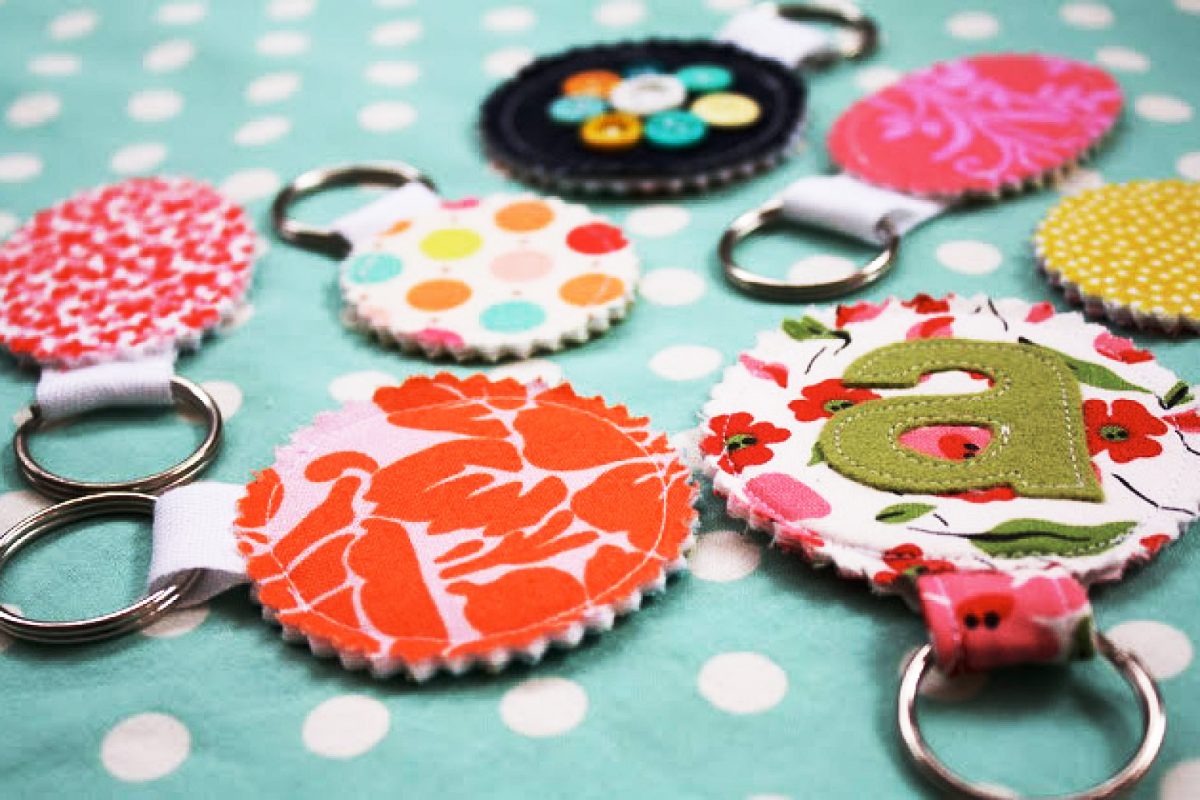
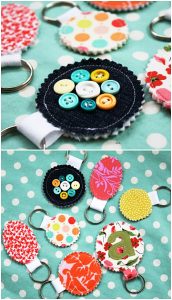
Since childhood, I’ve had an interest in keychains. I don’t know why, but it’s true just the same. So, why not take a bit of that excess material and make a one-of-a-kind keychain? Keyrings don’t have to be expensive, and it’s possible that everything else you’d need you could find around your house—maybe even down to buttons like what you see in the picture. Given the teeny-tiny-ness of keychains, this craft would be a good way to use some of that excess fabric! You can find this possibility (and #5) here!

Given the teeny-tiny-ness of keychains, this craft would be a good way to use some of that excess fabric!

Given the teeny-tiny-ness of keychains, this craft would be a good way to use some of that excess fabric!

So, the moral of the story is that you don’t have to be a Christmas-fabric hoarder after your holiday sewing! There are plenty of avenues to expend some of that scrap material!

DIY Fabric Gift Bags instead of Wrapping Paper

DIY Fabric Gift Bags instead of Wrapping Paper

DIY Fabric Gift Bags instead of Wrapping Paper

Ready for a DIY project that will last for years and is good for the environment (and your pocket book?) This year, instead of wrapping your gifts in holiday paper that will be thrown away after the presents are opened, consider making fabric gift bags instead. I made five different sized bags in under 20 minutes. Here is how.

Assemble your fabric.

Get all of the holiday-themed fabric scraps you’ve been hoarding. The sky is the limit on the sizes you can make as presents come in all manner of shapes, sizes and weights/heights.

DIY Fabric Gift Bags instead of Wrapping Paper

To keep this project FAST, you aren’t going to finish any of the seams, which means you need to use pinking shears, a serger or a zig zag stitch to finish your raw edges.

DIY Fabric Gift Bags instead of Wrapping Paper

Great deals on sergers here

If you’ve been thinking about getting a serger, SewingMachinesPlus.com has them on sale right now, right in time for the holidays. This Juki Garnet Serger is the one I’ve been looking at. I love that it comes with bonus feet and additional thread cones.

Square up your fabric, fold over, pin, and then sew a straight stitch around all three sides. Leaving the tops of the fabric gift bags exposed (but pinked) will give them a whimsical, handmade feel.

DIY Fabric Gift Bags instead of Wrapping Paper

Nice little folds

For this fabric, I decided to create box corners (think like a brown paper lunch bag).

DIY Fabric Gift Bags instead of Wrapping Paper

I also wanted to add a casual drawstring. To do this without creating a casing, I marked every 1.5″ and then snipped the openings. I love these Clover Chalk-Liner pens. They are an essential part of my sewing tool kit. They mark precisely and I can just sweep off the chalk when I’m done.

Ribbon feeding trick

I used a safety pin attached to the end of some twill tape to feed the twill through the holes I’d clipped to create the drawstring for this bag.

DIY Fabric Gift Bags instead of Wrapping Paper

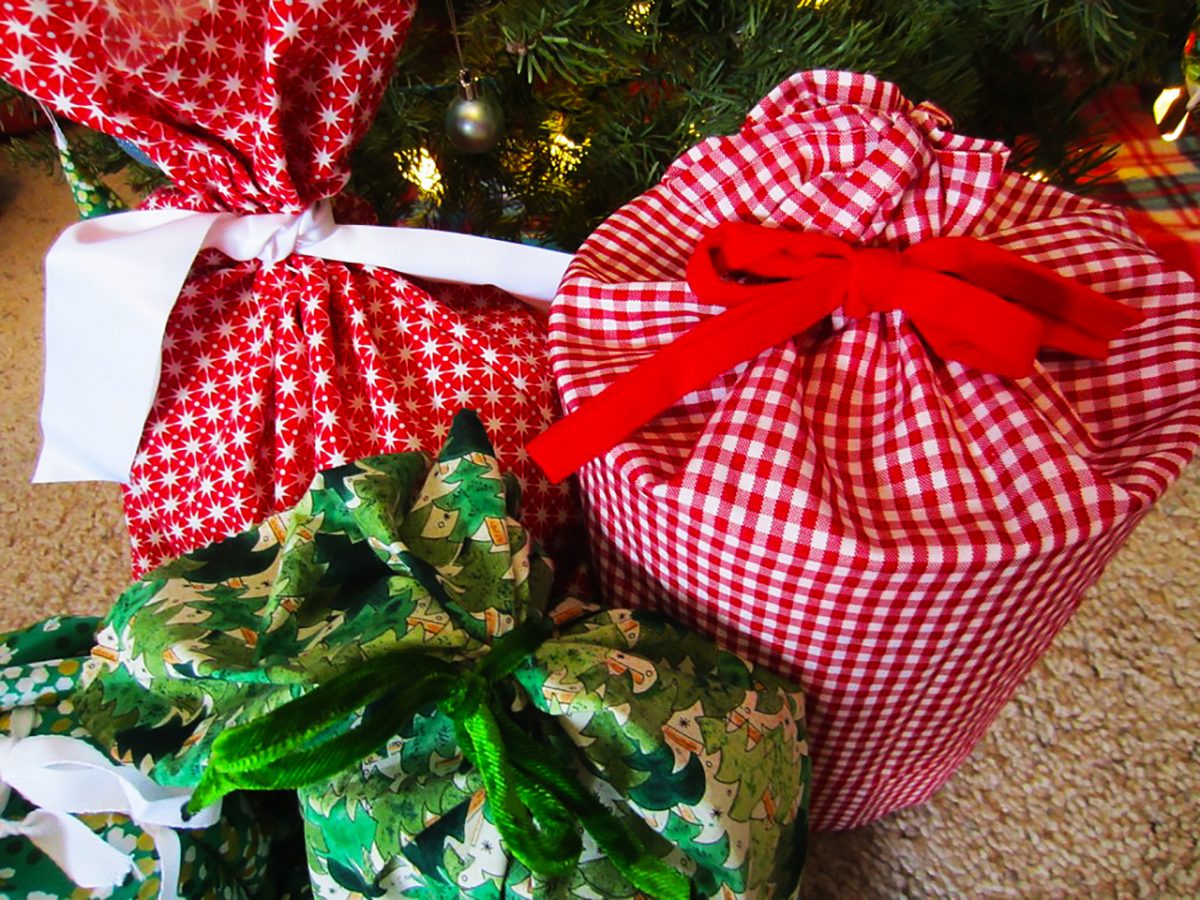
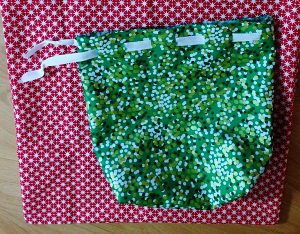
The green bag has box corners and will stand up easily once filled. The larger red bag behind it resembles a pillow case in shape and will be perfect for larger, bulkier gifts.

DIY Fabric Gift Bags instead of Wrapping Paper

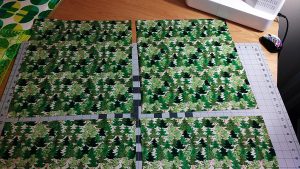
I had the most of this pine tree fabric. Because of the orientation of the trees, I couldn’t fold the double the fabric over to quickly create rectangular bags (if I did that, one side of the bags would have upside down trees). Instead, I cut four even pieces and then placed the pieces on top of each other (2 bags total), right sides together. Then I pinned, pinked and sewed them together.

DIY Fabric Gift Bags instead of Wrapping Paper

Last but not least

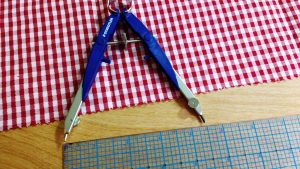
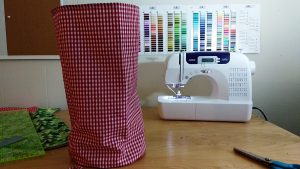
My final piece of fabric was a large, gingham napkin that I’d been holding onto. For this, I thought it’d be fun to create a barrel shape with a circular end. I dug out my compass to make the circle. I knew the circumference of the finished bag would be 25″ so I used the formula d = C/π. I then added .5″ on either side for seams and my diameter was just under 9″.

DIY Fabric Gift Bags instead of Wrapping Paper

Isn’t it darling? Now it was time to wrap some gifts (This was sooooo easy. So much easier than using traditional wrapping paper, scissors and tape).

DIY Fabric Gift Bags instead of Wrapping Paper

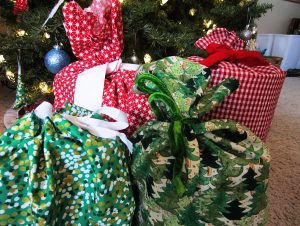
I used some trims I had on hand, a velvet green ribbon, a red fleece ribbon and some white satin binding to close everything up.

DIY Fabric Gift Bags instead of Wrapping Paper

I love that I can re-use these year after year and they are reminiscent of Santa’s bag of gifts too.

DIY Fabric Gift Bags instead of Wrapping Paper

Happy Holidays!
—————————–
Charlotte Kaufman is a writer and sewist in Mammoth Lakes, California. She specializes in marine and home interiors and continues to fall more and more in love with quilting. You can follow her at charlottekaufman.com.
Bunk Bed Privacy Curtains

Bunk Bed Privacy Curtains

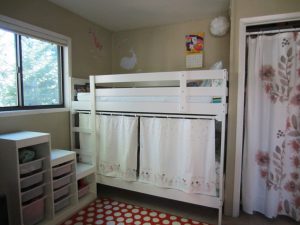
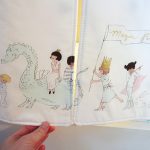
Privacy curtain open.

Privacy curtain open.

If you’ve ever been on a sailboat you might have seen little panels that draw closed across the sides of berths to give sailors a modicum of privacy. It was this tack I took when figuring out how to make each bunk in my daughters’ bed a small, personal space of their own.

Privacy curtain open.

Privacy curtain open.

Supplies

Here are the items you need to make your own bunk bed privacy curtains:

  1. Tension rod and curtain rod holders. We had to affix two square pieces of wood on either end of the bunk bed in order for the rod to fit.
  2. Shower curtain rings (I used clear).
    3. Fabric for the panels (mine are double-sided).
    4. Batting for structure (if using white or light-colored material).
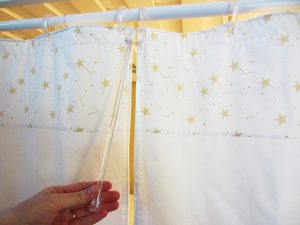
    5. Drapery wands. These are especially useful for keeping little hands off of white fabric, plus they are a ton of fun. I got mine on Amazon in a mini-size by searching for RV Drapery Wands.
Drapery wands.

Drapery wands.

Put it all together

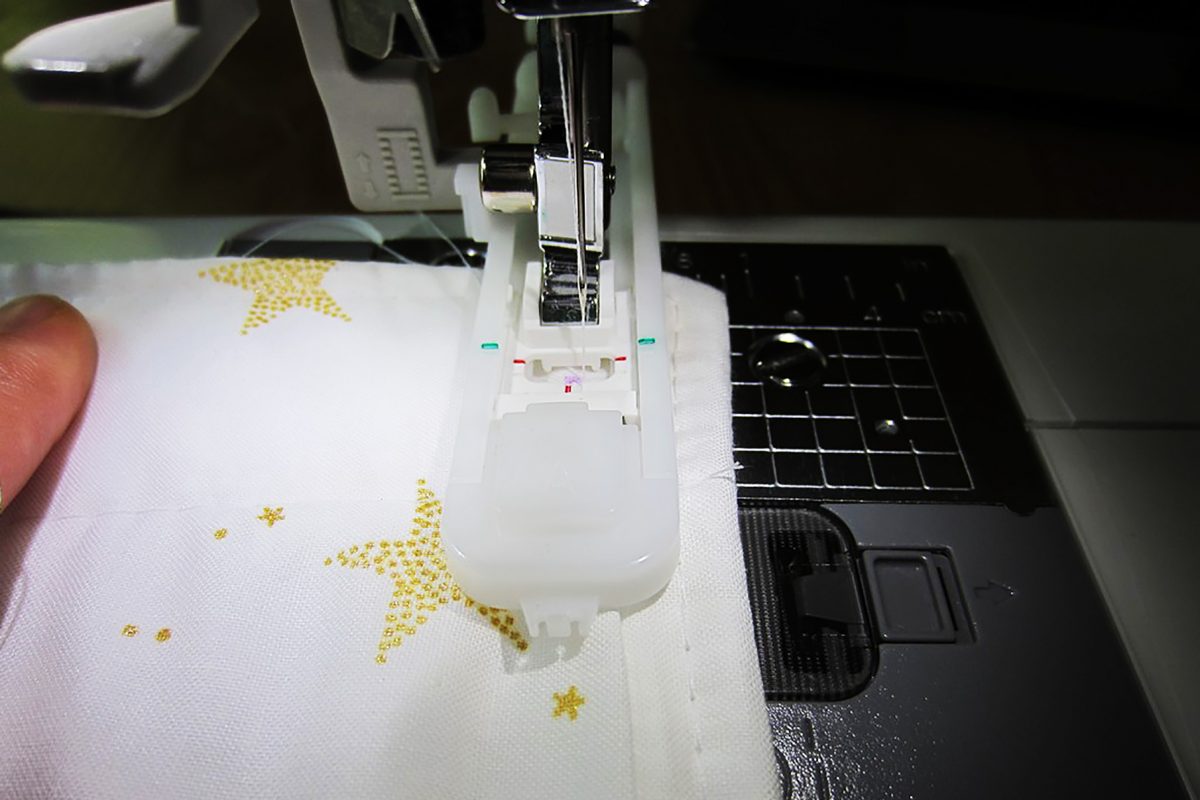
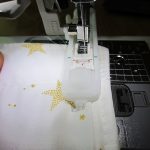
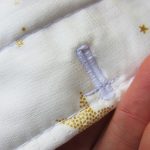
Each panel is 36”x29”. I sewed button holes along the top width and then used shower curtain rings to hang the panels. On my first attempt, I made the buttonhole too close to the top hem.


One of the things I love about sewing is how easy it is to remedy your mistakes. Here I simply sewed across the upper portion of the hole to align it with the others at the correct height. And unless you take a magnifying glass to the finished project, no one is so much the wiser.


The fabric is from Sarah Jane’s Magic line. I used a mix of Magic Parade Double Border in White Metallic and Lucky Stars in White Metallic.

Ta-da!
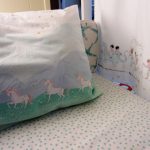
My girls adore these too, as you can see.

My girls adore these too, as you can see.

Projects that come together quickly and look awesome are my favorites. My girls adore these too, as you can see.

What types of quick projects have you done lately that really knocked it out of the park?

—————————–
Charlotte Kaufman is a writer and sewist in Mammoth Lakes, California. She specializes in marine and home interiors and continues to fall more and more in love with quilting. You can follow her at charlottekaufman.com.
The Safety Pin

The Safety Pin

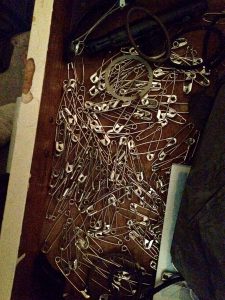
I try to collect them all in one drawer, but they escaping & disburse themselves all about the apartment.

I try to collect them all in one drawer, but they escaping & disburse themselves all about the apartment.

Almost every pocket in every article of clothing I own, there are a couple of safety pins. I can also usually find at least three of four of the little buggers on the bedroom floor. Sometimes they end up outside my apartment door because I reached for my keys and pulled out a fistful of safety pins instead. I try to collect them all together in one drawer but seem intent on escaping and disbursing themselves all about the apartment.

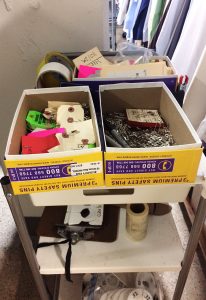
I use safety pins for fitting clothing, for hanging patterns, to attaching notes to things. Of course, there are different sizes and flavors of safety pins.

Size matters

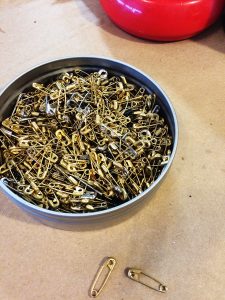
I use the tiny gold ones when I’m fitting something very delicate like silk or gauze so that they don’t make an unsightly pin hole.

I use the tiny gold ones when I’m fitting something very delicate like silk or gauze so that they don’t make an unsightly pin hole.

I use the tiny gold ones when I’m fitting something very delicate like silk or gauze so that they don’t make an unsightly pin hole. For some reason, someone thought that gold pins without the end spiral were good idea. I suspect because sometimes things snag on the little coil but, without that coil, the pin is free to slide about so it’s hard to know exactly where/what the mark is.

I use the big number 3s for the majority of my fitting needs. And the number 2s if I need a thinner pin.

History Hunt

Walter Hunt invented the safety pin in 1849. He was the first one to create a pin with the coiled spring on one end and the clasp or catch on the other end to keep the pointy bit safe from tender fingers. Hunt sold his idea outright for $400.00 so never collected any royalties or anything from it. Legend has it that he needed to pay off a debt and thus invented the safety pin and sold the rights within a few hours.

I use safety pins for fitting clothing, for hanging patterns, to attaching notes to things.

I use safety pins for fitting clothing, for hanging patterns, to attaching notes to things.

Selling his safety pin idea wasn’t Hunt’s only unfortunate business decision though. He was also the first one to invent many of the significant parts of the sewing machine, including a curved needle and a shuttle. Hunt created the first sewing machine prototype in wood, which didn’t work all that well so he ended up selling his idea to Elias Howe and Isaac Singer.

Hunt invented a plethora of other things including a streetcar bell, a knife sharpener, paper collars, and an antipodean walking device – or suction cup shoes!

Alas, Hunt didn’t seem to have much business savvy or any true idea of what his inventions could be worth, and just how wide spread and common place they would become.

A modern twist

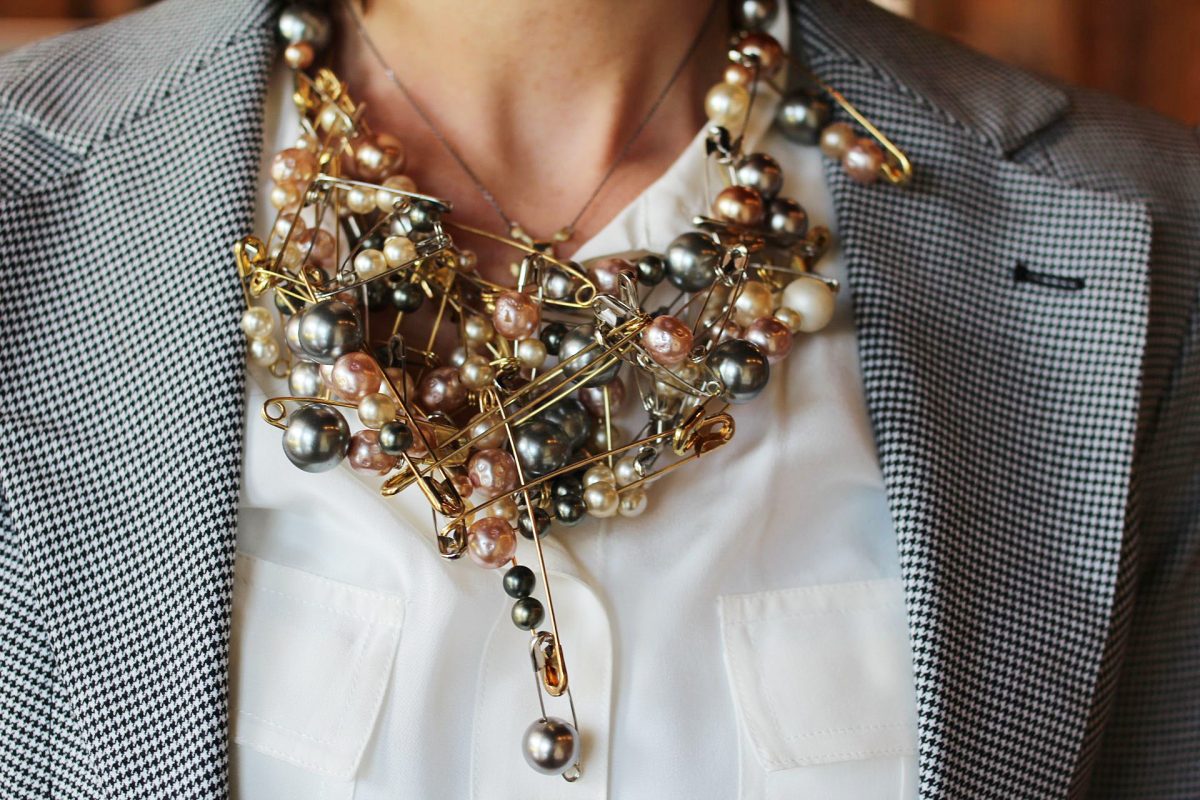
The safety pin has found its way onto the catwalk and into high fashion with decorated, embellished safety pin broaches and large dangling safety pin earrings.

The safety pin returns as punk becomes more relevant than ever – via Independent.

The humble safety pin also has a rich symbolic history and significance. Punk culture has long used the safety pin as an expression of individual freedom and DIY culture. In the wake of the UK’s Brexit and the US presidential election it has come to symbolize tolerance and unity with all people.

Wonder what Walter Hunt would have sold his idea for back in 1849 if he had been able to foresee even a small fraction of what his pin would become.

Pressing Accessories: Essentials To Buy and DIY

Pressing Accessories: Essentials To Buy and DIY

Last week, Charlotte Kaufman showed us her precious pressing station she made for her sewing room. Vanessa Nirode wrote about irons a while ago. But we haven’t discussed pressing accessories on this blog yet. We need to, because there are a few things that you really must have near your iron to get things done well.

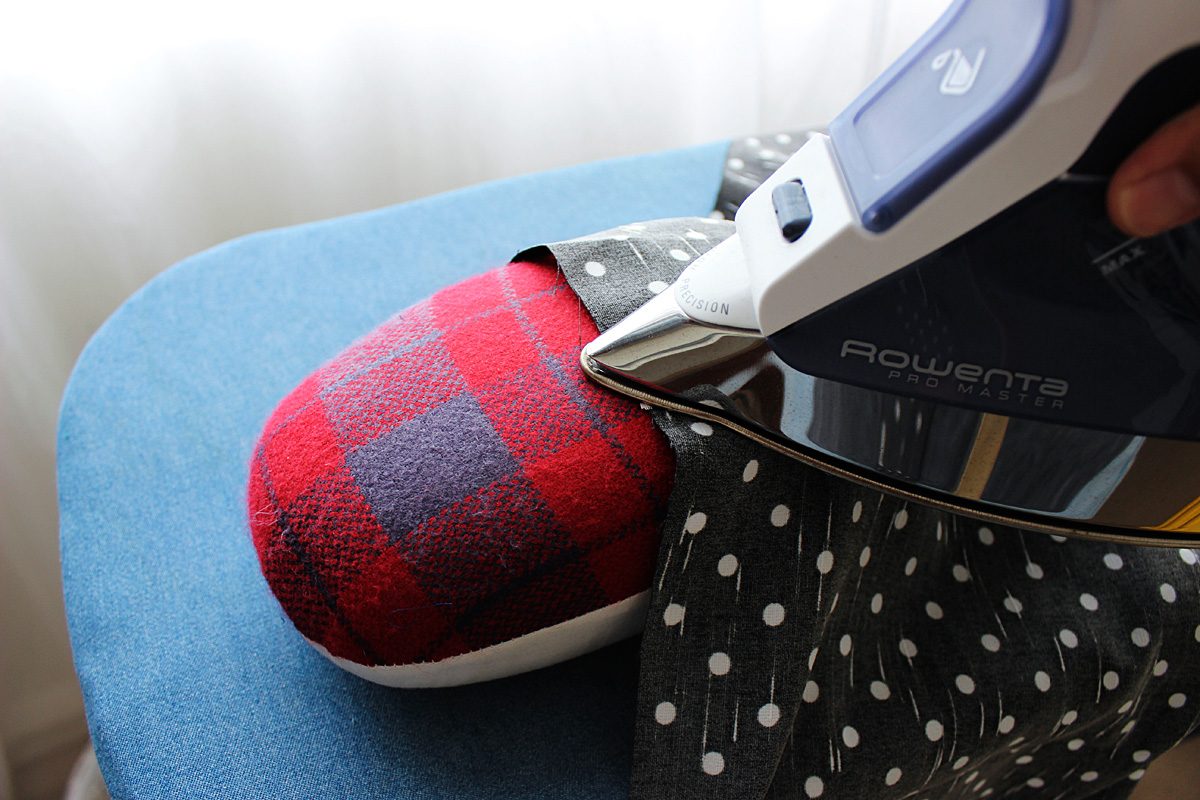
While I am on the subject, I want to explain the important difference between pressing and ironing, because they are not the same thing. Ironing is when you move the iron back and forth across a fabric or garment, smoothing wrinkles out. In pressing, you don’t move the iron back and forth in the same manner, but rather press down with the iron, moving it slowly or not at all. You can iron clothes or fabric, but usually use pressing in sewing. Press seams open or to one side. Press to shape garments during construction. And press to affix fusible web and other heat treated adhesives to fabric.

Proper pressing technique makes the difference between a perfect finished product and a mess. Quilters who press every seam know that it’s key to success. Other things that can make a difference to your finished products are pressing cloths, a seam roll, pressing ham, and spray starch- or something better than starch. Useful but not as essential are a clapper, seam board, and pressing mitt. If you are lacking these things, you fix that with DIY; here is a link to a detailed page with instructions for making them: Make your own pressing equipment

Let’s take a closer look at the pressing accessories that are essential, so that you can understand why these items are must haves.

Pressing Accessories: Essentials

Don’t be without these:

Pressing Cloth

These serve more than one purpose. They can protect delicate fabrics from too much direct heat, and protect your iron from gunk and goo when you are affixing glue. A pressing cloth is essential for fabrics like linen and rayon, which develop a sheen if pressed without one. For most projects, I prefer to use a large square of T-shirt knit that I cut for this purpose. However, a see-thru pressing cloth is essential as well, to see what you are doing when working with small pieces and applique.

Seam Roll

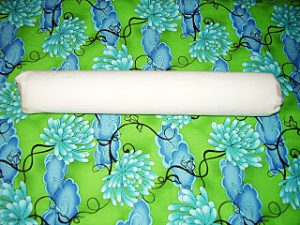
A seam roll is helpful to have for pressing small curved seams and darts.

A seam roll is helpful to have for pressing small curved seams and darts.

A seam roll is helpful to have for pressing small curved seams and darts. It also prevents seam allowances from impressing through to the front of the fabric when you iron garment seams open. The way to do it is to place the spread open seam down over the roll, then press the right side of the fabric instead of the seam itself. I made a seam roll following the directions linked above, except I made one variation. I started with a couple of magazines, rolled tightly together as the base. Then I covered these completely by wrapping electrical tape tightly around. I added the extra layer of a felted wool sweater sleeve, and then wrapped the whole thing with another piece of cotton canvas and hand sewed it closed.

Tailor’s Ham

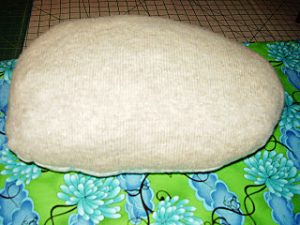
It's called a ham because it looks just like one. It's a stuffed and curved helper.

It’s called a ham because it looks just like one. It’s a stuffed and curved helper.

It’s called a ham because it looks just like one. It’s a stuffed and curved helper. You can use a tailor’s ham for many purposes, most importantly and often to shape garments and curved seams. You’ll use it on collars, sleeves, sleeve caps, cuffs, bustlines and darts, waistlines, hip seams, and more. You want a ham made from two fabrics: wool on one side for pressing wool, synthetics, and other fabrics that need low or medium heat; cotton on the other side for high heat tolerant fabrics like cotton and linen.

Here’s the one that I made, instructions are linked at the top of this page. Or you could save time and stuffing and just order one from our store.

Best-Press

I’m not a big fan of starch. It can be messy and it smells, polluting my room. Anyway, aerosol cans are environmental bad guys and I try to be environmentally conscious. Treating fabrics is essential,though, so I use Mary Ellen’s Best Press instead. I love this stuff and go through it quickly, because I never use my iron without it. As opposed to starch, it smells really nice. It doesn’t flake or leave any residue, which starch sometimes does. It provides a crisp finish and makes fabrics soil-resistant. I really recommend ditching the starch and switching to Best-Press instead; you’ll be glad that you did. Order some right now. In fact, do yourself a favor and get two bottles, because you will love this stuff and not want to be without it.

Be sure that your sewing room has all of these items so you can conquer any pressing job.

These will make gorgeous DIY gifts.

DIY Pom Pom Fleece Blanket

I rarely meet someone who doesn’t like pom poms or fleece. They are two great unifiers and when you put them together, magic happens. They became my inspiration recently when perusing through Pinterest for ideas for our handmade holiday gifts for the girls’ teachers. I began my search for ideas in September, well in advance of December, so I knew that I’d have time to get them done.

This DIY tutorial was my starting template. However it is a no-sew version of what I’m about to show you. Here is how to make a DIY pom pom fleece throw blanket.

Assemble your Materials

Order a bunch of fleece. I waited until Joann’s had a 50% off coupon and I ordered 9 yards. I want to make 6 blankets and each blanket will be 1.5 yards in length. 1.5 x 6 = 9. Do the math for however many blankets you need.

This is Joann’s anti-pill fleece fabric in Ivory.

This is Joann’s anti-pill fleece fabric in Ivory.

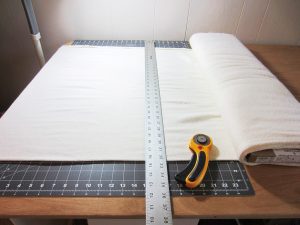
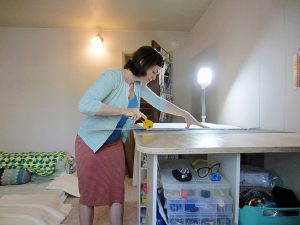
This is Joann’s anti-pill fleece fabric in Ivory. The roll arrives with the fabric doubled on the roll. Carefully measure out 1.5 yards for each blanket and then square up the sides as needed.

Carefully measure out 1.5 yards for each blanket and then square up the sides as needed.

Carefully measure out 1.5 yards for each blanket and then square up the sides as needed.

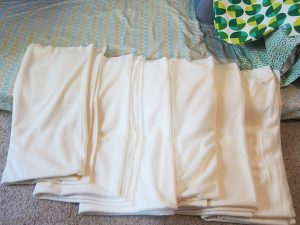
Voila, six blankets awaiting their pom poms.

Voila, six blankets awaiting their pom poms.

Voila, six blankets awaiting their pom poms.

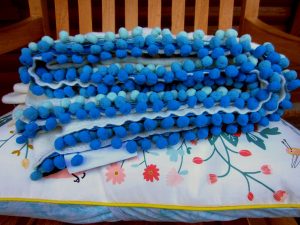
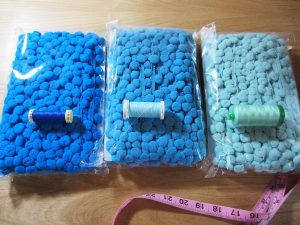
I wanted to do an ombre, triple row of pom poms on each end of the blankets. I did the math here again. The fabric I ordered is 58” wide, by 1.5 yards (54”). I planned to add the pom poms on the shorter side, so I’d need 3 yards (1.5 yards per end) for each blanket. 3 yards time six blankets is 18 yards of EACH color of pom poms.

I got these from IchiMyLove on Etsy. Handily, they sold pom poms in bulk by 18 yards (IT’S LIKE IT WAS MEANT TO BE!) And their color selection was fantastic. They ship from Thailand but the shipping was only a little longer than the wait for a US shipped product. Plan ahead!

Their color selection was fantastic.

Their color selection was fantastic.

Know Your Fabric

A few tips when sewing fleece:

  1. Use a longer stitch length.
  2. I saw a lot of tutorials that said to use a ball point needle but I didn’t have any. I used a quilting needle, size 14, and it worked out great.
  3. Don’t mess up. It’s really difficult to rip out stitching on fleece. To prevent mess ups, practice on a bit of scrap to make sure you have stitch length and tension set correctly.
  4. Fleece doesn’t fray when cut. Because of this, you can decide to add reinforced stitching on the longer (non-pom pom) side or not.

Fleece doesn’t fray when cut. Because of this, you can decide to add reinforced stitching on the longer (non-pom pom) side or not.

Take Your Time

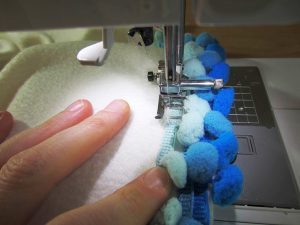
Stitching on the triple rows of pom poms on each side is time consuming. Put on some music or your favorite podcast and zen out.

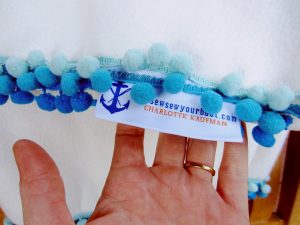
If you have a tag to include, plan out between which layers you want to add it.

If you have a tag to include, plan out between which layers you want to add it.

If you have a tag to include, plan out between which layers you want to add it.

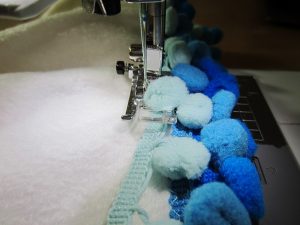
Take it slowly, pushing each pom pom out of the way of the foot, or you’ll end up like this, with your needle in the middle of a pom pom and your project on hold until you get yourself out of that mess. Don’t be me like me!

Take it slowly, pushing each pom pom out of the way of the foot, or you’ll end up like this, with your needle in the middle of a pom pom and your project on hold until you get yourself out of that mess.

Take it slowly, pushing each pom pom out of the way of the foot, or you’ll end up like this, with your needle in the middle of a pom pom and your project on hold until you get yourself out of that mess.

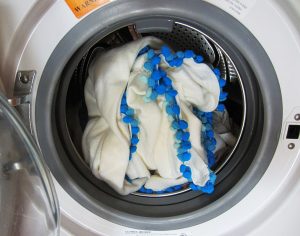
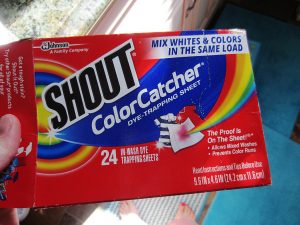
Once completed, I washed the blankets on the gentle cycle in warm, not hot, and did not use fabric softener. Tumble dry on the gentle cycle as well. I added a Shout Color Catcher just to make sure the pom poms didn’t bleed.

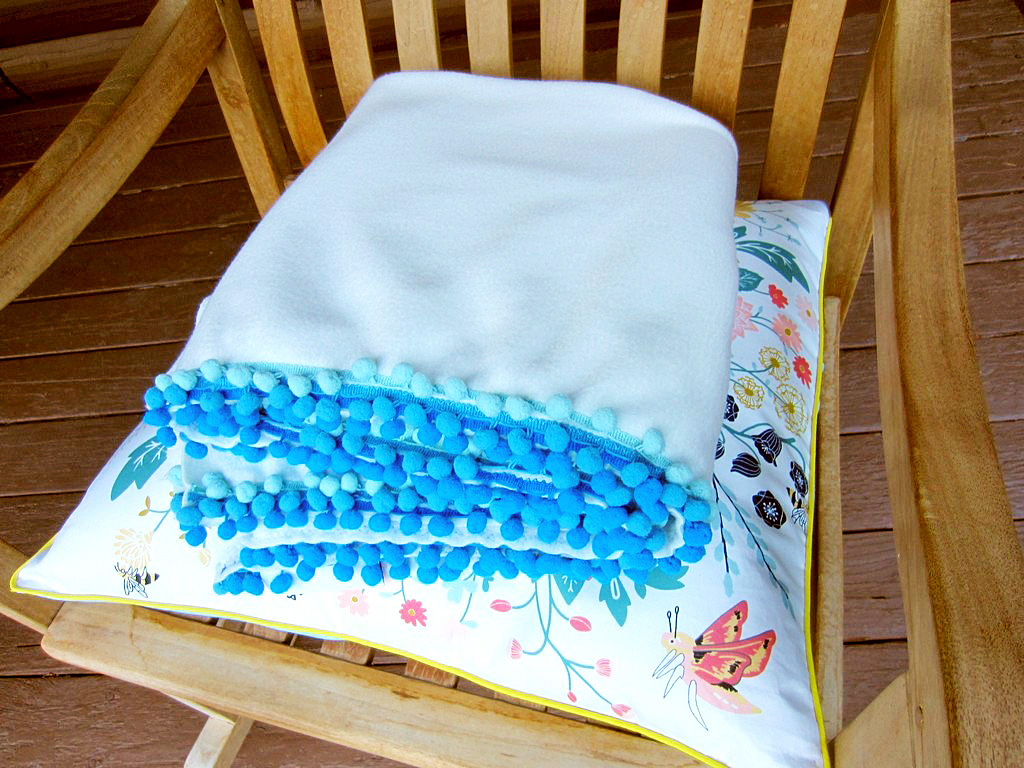
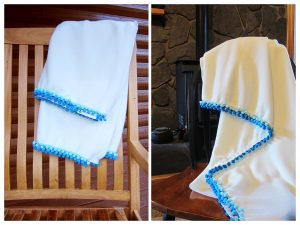
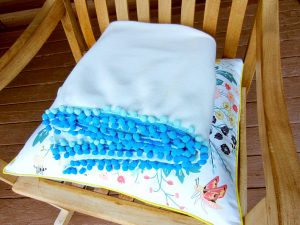
Here is the finished product. These will make gorgeous DIY gifts.

Do you give handmade gifts during the holidays? What are your plans for this year?

—————————–
Charlotte Kaufman is a writer and sewist in Mammoth Lakes, California. She specializes in marine and home interiors and continues to fall more and more in love with quilting. You can follow her at charlottekaufman.com.