Posts by Vanessa Nirode

Vanessa is a writer, solo traveler, cyclist, and runner based in New York City. In her spare time she works as a tailor and pattern maker for television shows and movies. Follow her on twitter @exsetgirl.
The Traveling Tailor

The Traveling Tailor

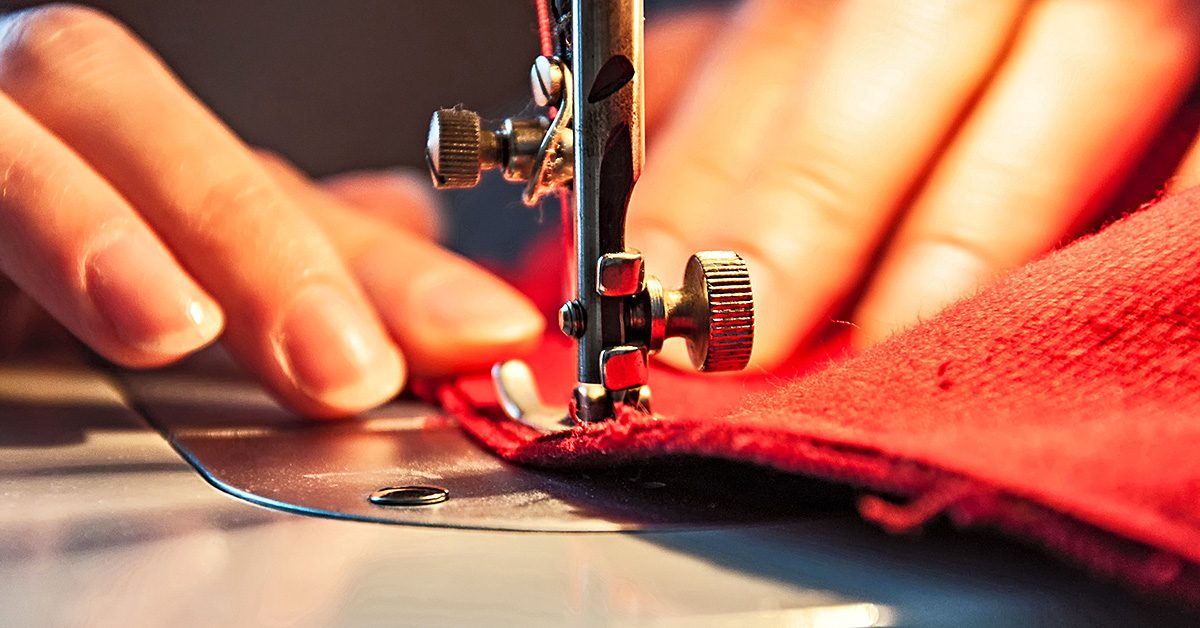
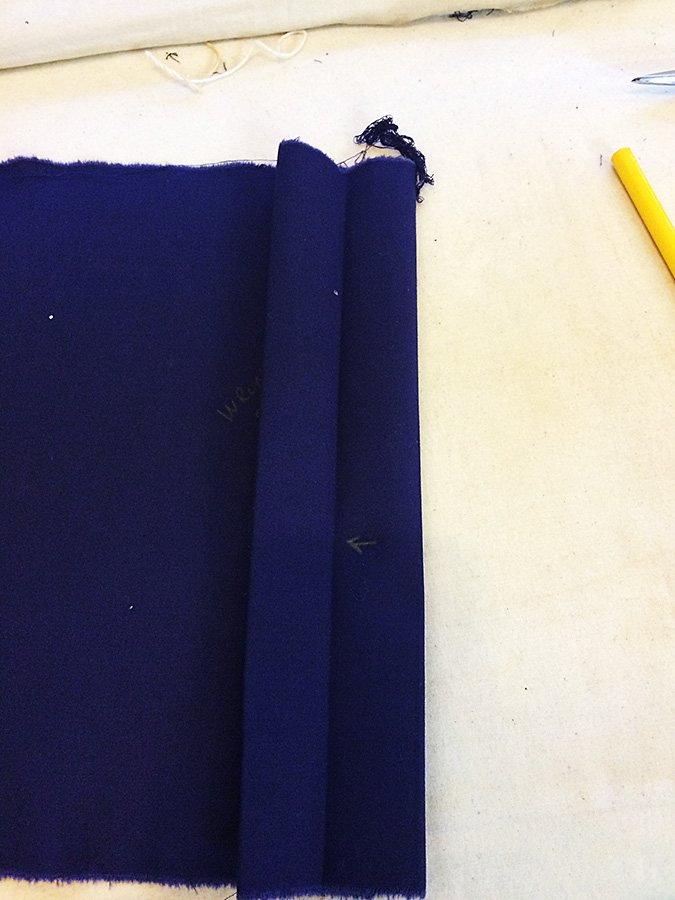
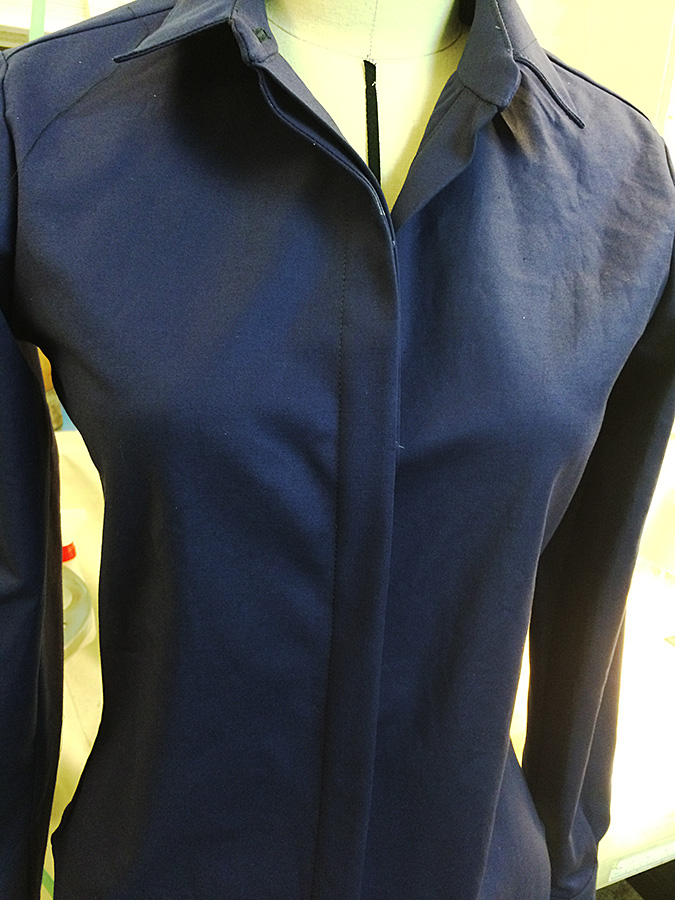
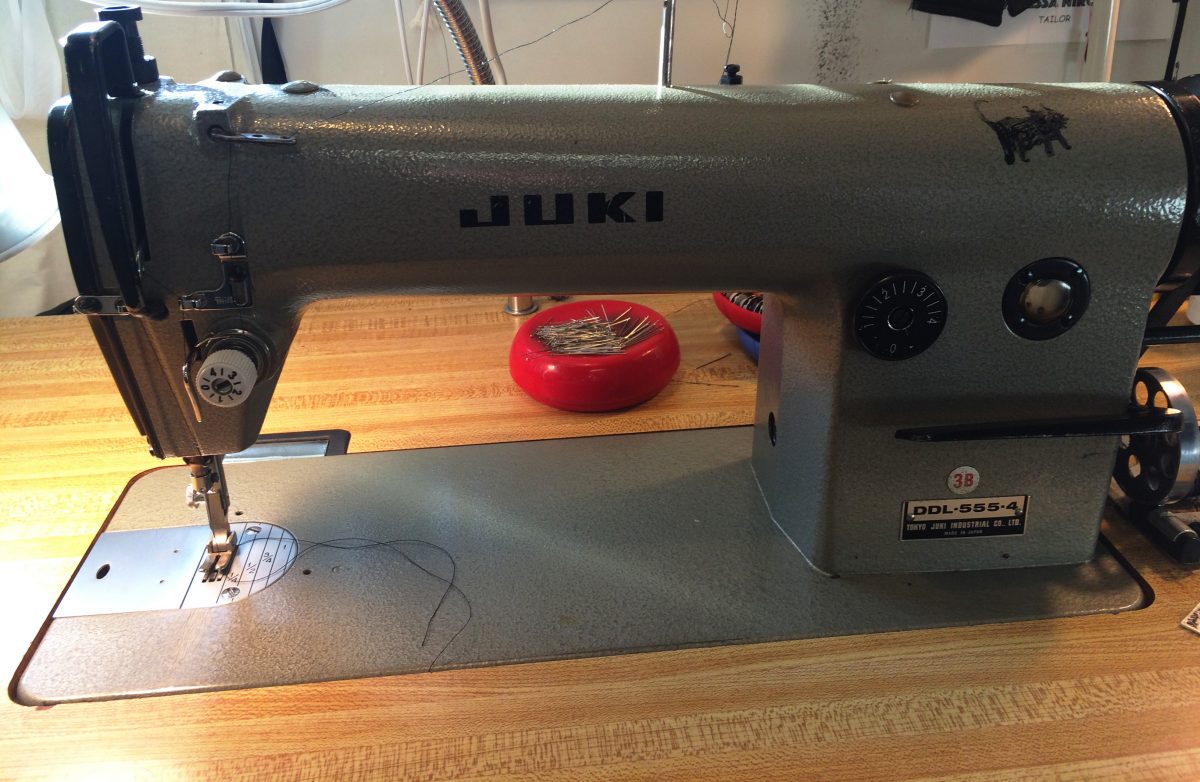
Sewing machines and supplies aren’t exactly the most portable things. Sometimes, when I’m not working fulltime on a show, I’ll get a one or two day job that requires me to schlep a machine and supplies to a work space. These are my least favorite kind of jobs – for no other reason than I have to transport my machine and a small kit of sewing supplies somewhere.

I live in New York City. I haven’t owned a car in over ten years.

What’s the big deal, you may ask, just throw it all in your car and go. Well, that’s the thing: I live in New York City. I haven’t owned a car in over ten years. The last time I drove was about two years ago. And I’m not a huge fan of Uber or even good old-fashioned yellow cabs. Cars are just not the most efficient way to get around the city. So, I’m usually dragging a sewing machine up and down the subway stairs to get to where I need to go.

On the go

I know I’ve recommended these machines before, but Brother makes some incredibly good and lightweight machines. I have two SC9500s. They are so lightweight that I carry them in a tote bag on my shoulder. I then use a backpack to carry my supplies: scissors, threads, rulers, chalk, a small collection of notions.

Other Brother machines that are very light weight are the CS5055 and the ES2000.

I also bike a lot, which is always the most efficient way to get around the city, and have been known to strap a machine (in a box) to the rear rack on my bicycle.

When going to a job that is only one or two days, sometimes it’s hard to figure out what to bring, especially if you’re trying to not lug your entire shop down the length of Manhattan and across the bridge to Brooklyn.

Here’s a list of what I usually bring to a short one-day job:

  • 1 pair of tailor’s points or small scissors
  • 1 pair of medium sized shears
  • 1 pair of pinking shears (because I’m certainly not bringing a serger along to finish seams.)
  • 1 gallon sized Ziploc of thread. Must have colors include black, grey, white, tan, a greeny-brown, nude, and a yellow-orange for topstitching on jeans.
  • 12” see through 2” wide ruler
  • 1 soft tape measure
  • Tailor’s chalk, red marking pencil, pencil, black disappearing ink pen
  • Seam ripper
  • Metal hem gauge ruler
  • Small container of straight pins
  • Extra bobbins for machine
  • Small collection of hand and machine needles (I always bring some leather needles and double needles, just in case.)
  • 1 gallon sized Ziploc of bias tape (black and white), elastics, twill tape, and hem tape.
  • Small containers of snaps and hook & eyes.
  • Muslin pressing cloth
  • Small collection of nude spandex and netting scraps and interfacings

Lighting is key

Sometimes it’s nice to bring along a small light of some kind. I often find myself sewing in inadequately lighted spaces. I tend not to bring a lamp because, well, the subway. I always make sure the light in the machine is working. And the flashlight on an iphone can be extremely helpful in especially dark circumstances.

Gear up

I’m not very high tech with my carrying cases but there are lots of really lovely ones out there if you’re not into backpacks and tote bags.

https://www.sewingmachinesplus.com/sewing-accessories-cases.php

The key is to keep everything super organized. And don’t worry about not having all the thread. Unless you’re topstitching, most things can be sewn with black, white, or tan. I know some tailors that only use those colors of thread. It really is ok if your thread doesn’t match exactly. And sometimes you just have to use what you have, especially if you are a traveling tailor.

Sewing Myths and Sewing Myth Myths

Sewing Myths and Sewing Myth Myths

This week, I decided I’d write a bit about popular sewing myths. I have my own list but thought I’d do a quick Google search to see what others had written about the subject. This brought me to a few sewing myth lists that I found rather odd, and not at all myth-like – meaning I thought the myths were myths. Do you follow me?

I’m going to start with some things I do believe are myths, and then get the myth myths part.

Myth 1: quilting direction

It’s ok to quilt some rows up and some rows down when quilting a garment.

Not true. There will be less possibility of bubbling or puffing if you quilt all the rows in the same direction. Overall, the whole garment will look better.

Myth 2: smaller underlining

The underlining should be smaller than the fashion fabric, especially on a jacket.

Not always true. It really depends on the fabrics being used. Hair canvas should be slightly smaller to prevent buckling but it will also restrict the give or stretch of a fabric it is joined with. Many tailors cut their canvas on the bias to prevent this.

Myth 3: cutting selvage edge

Always cut off the selvage edge.

Not true. If you think the selvage will shrink, clip the edges so it will lie flat. Otherwise, there is no need to cut it off.

Myth 4: basting stitches

Stitch next to basting stitches when sewing a basted seam lines.

Not true. If you do have the need to baste seams together, always sew right on top of the basted lines for accuracy.

Myth 5: necklines

Machine stay stitch necklines to prevent stretching.

Another, more accurate way to prevent any stretching in your necklines (and arms eyes) is to leave a whole bunch of seam allowance until you’ve done your stay stitching.

Another, more accurate way to prevent any stretching in your necklines (and arms eyes) is to leave a whole bunch of seam allowance until you’ve done your stay stitching.

Not always true. You can also hand baste your seam line, also called thread tracing. If you do machine stitch your necklines, take special care not to stretch the fabric as you sew. Another, more accurate way to prevent any stretching in your necklines (and arms eyes) is to leave a whole bunch of seam allowance until you’ve done your stay stitching. When it comes to necklines, I usually cut a straight line from shoulder seam to shoulder, leaving all the extra fabric there. If I’m bias binding the neck edge, I attach my bias without trimming anything away too. This prevents any possibility of the neckline stretching.

Myth 6: top = waistline

The top of your pants or skirt is your waistline.

Very often not true. Your waistline is where your body is the smallest, most times an inch or so above your navel. This is why, often, when you measure a pair of pants that is sized as a 27, the waistband of the pants measures more than 27.

And now, for a few sewing myth myths.

Myth myth 1: $ewing cost too much

Sewing is too expensive.

This really depends on how you look at. Sewing is not necessarily expensive but it isn’t cheap either. Especially, most especially, if you are taking into account your time. I earn my living by sewing. And my years of experience and knowledge aren’t cheap. Sewing is a skill. I always ask people what they pay their car mechanic or plumber an hour. Often, it’s somewhere in the 60 to 100 dollar and hour range. If you don’t want to pay that amount of money, you figure out how to do it yourself. The same goes for sewing.

If you’re making something for yourself or as a gift out of love then it could possibly be cheaper than buying the same thing. But remember, nice high-end fabric and supplies are not cheap, nor should they be. If you want cheap, buy clothing made in Malaysia or Bangladesh sold at Old Navy or someplace like that.

Myth myth 2: sewing is the hardest

Sewing is too hard.

Well isn’t not exactly easy, either. To sew really well takes practice. I find it incredibly annoying when someone says something like, “It’s just an easy alteration, it won’t take long.” If you don’t sew, how do you know? And if you do sew, you should know that sometimes you open a thing up to do what should be an easy alteration and find you’ve just taken the lid off a proverbial can of worms.

Myth myth 3: sewing super powers

Sewers have special creative talents.

I believe everyone, if they put their mind to it, can learn how to sew. But saying that sewers (I actually hate that word) do not have special creative talent is ridiculous. I think I’ve said this before, but really good tailors and pattern makers know the language of fabric. I don’t know how else to put it. And that, is indeed, a special talent.

How to Sew Faster

How to Sew Faster

My job as a tailor on a television show often requires me to complete an alteration in a seemingly impossible amount of time. Not to be overly cocky or self-congratulating but, I can be pretty fast when needed. People frequently ask me how I’m able to do something so quickly.

Don’t hesitate. Just, do.

Honestly, I don’t think so much about it anymore: its pretty much second nature at this point. But, I suppose if I were to break it down, the process would go something like this:

First, don’t panic. Whatever you do, don’t panic. If you do, you could find that suddenly you’re unable to thread a needle, or your needle breaks, or the thread tangles.

Second, don’t hesitate. Just, do.

As you’re working, think about the next step. Plan ahead.

Concentrate fully on what you’re doing. Don’t listen to the conversations going on around you. Pay no mind to whatever random chaos might be happening in another part of the room. Just focus your full attention on the one thing you are doing. That is all that is important.

Whatever you do, don’t thread mark. I know that’s what they teach in sewing school but there is no reason to have to thread mark a pant hem.

A few tips on how to sew faster:

Do as much as you can without stopping to iron.

If I’m really pressed for time, I tend to leave all the ironing until the very end (pun intended).

Learn how to eyeball measurements. Think about it, if you’ve been sewing long enough, you know what a ½” looks like. You honestly do not need to mark every single little line. If you want to measure, go ahead, put use your pins to mark the line. I often work with a metal seam gauge but rarely actually draw a new stitching line. One exception is if I’m re-mitering a suit jacket sleeve corner though I know lots of tailors that do not need to draw that line either.

Whatever you do, don’t thread mark. I know that’s what they teach in sewing school but there is no reason to have to thread mark a pant hem. I once had an additional tailor helping me on a show who insisted on thread marking the fold line on hems for cop pants. Buy some tailor’s chalk and use that to mark your hemline. It’ll disappear when ironed.

Unless you’re topstitching, you really don’t have to have your thread match exactly. Believe me. Whatever thread is in your machine is just fine. I cannot begin to tell you how many black garments I’ve altered quickly with red or yellow or whatever happened to be in the machine colored thread.

Learn how to undo a chain stitch. A lot of manufacturers use chain stitches in clothing construction. This makes it super easy to take them apart when needed. You can only unravel a chain stitch in one direction, the direction it was sewn in. Most of the time, all you need to do is insert a seam ripper and pull in that direction and all the stitching will come undone. The center back seam of men’s pants, often will have two rows of stitching so you’ll need to pull each row separately.

A couple other seam deconstruction tips:

To take apart a serged seam, use a nice sharp seam ripper and run it through the threads that wraps around the edge of a seam. After you do this, the rest of the threads will usually come apart rather quickly. Some serged seams are on a chain as well and you can undo them by pulling the thread on the straight stitch.

One of the fastest ways of taking apart a seam is to, again, use an extremely sharp seam ripper and insert it into the seam from the right side and just pull upwards through the seam. This technique takes a bit of practice (and bravery) though as the potential to accidentally slice through the fabric is ever present. There’s a knack to getting the angle of the seam ripper just right though and once you figure that out, you’re golden.

In the end, the one sure way of becoming a faster tailor is by practice. The more often you repeat the same task, the more efficient at it you become.

As you do an alteration, try to think of ways you could save time: do you really need to flip everything back right side out then inside out then right side out again? Probably not. If you sew this first, will it make it easier to sew this? Or visa versa? Experiment and try things multiple ways until you’ve figured out the quickest sequence of steps for yourself.

I love discovering a new, faster way of doing something I’ve done a million times. Sewing is kind of cool like that: there’s always something more to learn and fresh tactics to uncover.

Costume Department Positions for Movies and Television Shows

Costume Department Positions for Movies and Television Shows

Last week, I wrote about how it takes a whole team of individuals to make a television show or movie, often more than most people realize. Then I got to thinking about all the conversations I’ve had throughout my life trying to explain to family, friends, acquaintances and sometimes strangers, what I do at work and what others in my department do.

One of the daily call sheets for Blindspot which lists the positions with call time (time to report to work). O/C means on call and is what is used for those who do not need to be on the actual shooting set.

One of the daily call sheets for Blindspot which lists the positions with call time (time to report to work). O/C means on call and is what is used for those who do not need to be on the actual shooting set.

Here’s a list of some common positions found in costume and wardrobe departments of films and television shows.

But first, the difference between the costume and wardrobe departments. Theses terms are basically interchangeable but, if a dividing line were to be drawn it would separate the costume and wardrobe departments by union locals.

The labor union for theatre, film, television and live events, founded in 1893, is IATSE or, the International Alliance of Theatrical Stage Employees, Moving Picture Technicians, Artists and Allied Crafts of the United States, its Territories and Canada.

Designers, assistant designers, shoppers and coordinators are normally members of Locals 829 (United Scenic Artists) or 892 (Costume Designers Guild). There are various locals across the country that are wardrobe specific. In New York City, the wardrobe local is 764.

Common costume and wardrobe positions on movies and television shows

Design/Costume Department:

Costume Designer

This is fairly self-explanatory. The costume designer is responsible for developing the look and feel of a show. They usually spend time talking with producers or the creators of a show, reading scripts and discussing character with the actors and actresses, as well as researching. They conduct fittings and manage the entire department.

Assistant Costume Designer

Again, pretty self-explanatory. Often, the assistant designer is the one who dresses the background actors. They also often deal with the budgets.

Shopper

The shopper spends his or her day out in the world, shopping. Being a shopper in NYC is completely different than being a shopper anywhere else because well, you can’t get around NYC efficiently in a car. NYC shoppers spend a lot of time walking, schlepping and taking the subway. There’s often a costume department driver who will meet them to pick up purchases.

Wardrobe Department (764 positions):

Wardrobe Supervisor

This position is the department head. He or she manages the day-to-day execution of the designers vision. They are responsible for making sure everything runs smoothly on set. They spend a lot of time looking ahead and anticipating problems and catastrophes before they arise. They are also very good at putting out fires.

Set Costumer

A set costumer takes care of the actors on set. He or she is responsible for continuity (making sure the correct outfit is worn at the correct time in the proper manner). Shows are rarely, if ever, filmed in order. A set costumer watches during filming and makes adjustments as needed. He or she pays attention to things like: How many buttons are buttoned, are the sleeves of the shirt supposed to be rolled, should that bag be over the right or left shoulder.

There is usually more than one set costumer on a show. Some actors have personal set costumers who only take care of them but most television shows don’t have the budget for this. Some high paid, “famous” actors have a personal costumer written into their contracts.

In Europe, a set costumer is often called a stand by costumer.

Production Assistant

Every department tends to have a production assistants who are usually people just starting out in the business. They do all sorts of things. In the world of television they spend a lot of time returning unused clothing and organizing receipts.

Costume Coordinator

I always think of the Costume Coordinator as the glue that holds the entire department together. They should really be paid more money than what they are.

They are the accountants of the department, the phone call makers, the calmer of nerves, the birthday party planners, the detectives, the soothsayers, the joke makers, the ice cream and alcohol buyers, the lunatic whisperers and the magicians. A costume department with a shoddy coordinator will most certainly fall apart at some point.

On Blindspot, we are very lucky to have an amazing coordinator named Sade.

Tailor

Most contemporary television shows have one full time tailor who is responsible for alterations and clothing construction. Big, costume heavy shows often have a full in house costume shop.

It Takes a Village

It Takes a Village

I was thinking about writing a post this week about some of the favorite things that I’ve made throughout the years. But, once I really started trying to decide, I realized I had way too many ‘favorites’ to put in just one post, mainly because I’ve made a ridiculous amount of stuff. Truth be told, I can’t remember a lot of it.

Also, ‘favorite’, is a bit of a shifty word. I have favorites for all kinds of reasons: favorite fabric, favorite pattern, favorite last minute construction miracle, favorite vintage piece, favorite thing made without a pattern, favorite complicated pattern, favorite funky design detail, favorite sewing technique.

So, I decided instead to write a little about some of the most memorable things I’ve made. Most (perhaps all) of them listed here were for HBO’s Boardwalk Empire, designed by John Dunn and Lisa Padovani.

And speaking of designers…

I just want to clarify that every show and movie has a Costume Designer. Sometimes, on low budget and indie or college productions, the costume designer is the same person who also makes and shops the clothes. This is not the case on any mid to high budget shows. It takes a village to create the finished product. I didn’t design anything for Boardwalk Empire or any of the other major television shows and movies I’ve worked on as a tailor and pattern maker. I just make what is in the designer’s head.

How do I know what’s in the designer’s head?

Sometimes I get a sketch, sometimes pictures and photos from magazines and catalogues, sometimes vintage garments to use as a starting point, and sometimes it’s just a conversation with a scribbled line drawing on a manila oak tag.

And one other thing about the village: I made the patterns for all of the pieces to follow but, most times, I had the help of very talented tailors in the construction of the finished product.

A (partial) list of most memorables:

Outfit from an existing vintage pattern.

Outfit from an existing vintage pattern.

I used an existing 1930s vintage pattern for this ensemble. I altered the pattern slightly for fit. It’s a bit hard to see in the photo, but the jumper has an asymmetrical over lap opening in the front (that button is functional.) If I recall correctly, I did put together the blouse but I know that the jumper was constructed by one of the tailors in the shop, Amy.

Showgirl ensemble:

Showgirl ensemble.

Showgirl ensemble.

We made quite a few showgirl ensembles for Boardwalk but the sailor girls were my favorite. The trickiest part of any of the showgirl things was always the time constraints. We routinely had a week (at most) to construct the outfits, and this was on top of all the other things we were making and altering. Thankfully, the actresses playing the showgirls remained the same throughout the season so once I had their measurements I was able to pattern (relatively) efficiently and go straight to fabric without doing any sort of mock up. Any showgirl extravaganza was always a true group effort, as in the day before the costumes were needed, almost every single person in the shop was working on them.

Costume involving fish:

Costume involving fish.

Costume involving fish.

We made two of these for the final season of Boardwalk Empire. The fish have batting and wire in them to make them slightly three dimensional, and there are two more on the back. These took an especially long time as all the pearl trim had to sewn on by hand.

Complete outfit in shortest amount of time:

Complete outfit in shortest amount of time.

Complete outfit in shortest amount of time.

I will always remember this one. I had literally two days to get this done. On the morning of the first day, the actor came in for measurements. I started patterning as soon as he walked out the door. John (designer) found fabric he wanted to use that we already had in house so I was able to cut as soon as my patterning was done. I handed off the jacket pieces to one person and the pants to another and I put together the vest. The very next afternoon, I did the fitting. As you can see from the photo, the only changes needed were a sleeve and pant hem. This illustrates the importance of proper (and extensive) measurements.

Strangest costume:

One of the oddest costumes I’ve made were these lobsters, again for Boardwalk.

One of the oddest costumes I’ve made were these lobsters, again for Boardwalk.

One of the oddest costumes I’ve made were these lobsters, again for Boardwalk. I think the over bodice and sleeves were attached to the tail bit and it was put on like a coat, snapping and tying center front. I do remember the use of quite a large amount of wire.

Most adorable:

Most adorable.

Most adorable.

I patterned all of the boys’ things for Boardwalk. The principal men’s suits were made by Greenfield’s in Brooklyn but the in house shop that I ran always did the suits and jackets for the younger boys.

So that’s a short list of some of my most memorable projects. There are definitely many more though. One of the best things about my job is that there is always something new to make.

Funky Design Details in Men's Shirts

Funky Design Details in Men’s Shirts

I alter a lot of men’s long sleeve button front shirts at work. We use a variety of brands, each of which usually has its own little signature detail or cut. I can often tell what designer brand a shirt is without having to look at the tag.

I suppose, though, that as a designer at Rag & Bone or Varvatos, or Paul Smith, or the like, you can find yourself hard pressed to come up with some new, unique detail that makes your shirt special. Contrasting fabric on collars and cuffs has been done, funky buttons have been done.

Sleeve and center front plackets in a different fabric: done. Welt breast pockets. Done. Stand collars, unfinished seams, all of it, has been done. At times, I think there isn’t anything new left to do. I was pretty sure I’d seen it all when it came to cool, weird, and even sometimes bizarre design details on mens shirts.

Varvatos shirt showing collar stand unattached from shirt body.

Varvatos shirt showing collar stand unattached from shirt body.

But, John Varvatos proved me wrong. The newest feature on their long sleeve button front shirts is to leave the part of the collar stand that contains the button – you know, the portion that extends past the collar and is, essentially the center front overlap – unattached from the shirt body. Odd, because, if the shirt is buttoned, it really doesn’t look any different. And if the shirt isn’t buttoned, it kind of looks like a rip or tear.

Varvatos shirt with collar stand pinned and ready to sew.

Varvatos shirt with collar stand pinned and ready to sew.

I spent some time last week sewing collar stands to shirt fronts. I do, though, have to give the designers at Varvatos kudos for coming up with something I hadn’t seen before. It also ensures that, in the future when I see that particular detail, I will automatically know it’s a Varvatos shirt. So, good job on the branding. 🙂

To do list

While I’m on the subject, here’s a short list of design (or construction) element quirks that tend to be slightly annoying to film and television customers.

Rag & Bone with their painted white buttons.

Rag & Bone with their painted white buttons.

Rag & Bone and their painted white buttons.

They put the same painted white buttons on most every shirt. The buttons are kind of cool in a shabby chic-look-at-me kind of way but, the last thing you want when filming are shirt buttons that upstage the person wearing the shirt.

I’ve wasted many an afternoon, replacing those buttons with normal, non-descript ones.

Brooks Brothers and the glue they insist on using in their seams.

Taking apart a Brooks Brothers shirt is no quick and easy task – the stitches are miniscule and, as if that’s no enough, they use some sort of glue in their flat felled seams.

Ralph Lauren Polo.

Ralph Lauren Polo.

Ralph Lauren and the polo horse logo.

We’re rarely able to use any piece of clothing on a film or television show with an obvious logo for legal reasons. Most shows need clearance to use anything that clearly advertises a particular brand.

I can tell you that removing those cute little polo horses takes a really long time.

Any shirt that says it’s a ‘slim fit’ yet still has a back pleat.

I think I’ve written before about removing the back pleat (or pleats) in button front shirts. These are the pleats in the shirt body where it joins the yoke. They exist to add a good amount of ease to the shirt through the body. The only thing is, in the world of film and television they just end up looking bulky, a bit messy, and definitely not slimming. So I take them out. If I have the time, I usually take the entire back off and recut it, moving the armseye and side seams in the appropriate amount. If it’s a quick and dirty thing, I just throw some side back darts in and hope there isn’t a close up of the actor’s back.

That’s all I’ve got today though I’m sure there are more. I’ve got to get some sewing done now.

There’s a pile of Varvatos shirts on my table that need the collar stand stitched to the shirt body.

How to Make a Hidden Button Placket

How to Make a Hidden Button Placket

Last week, I waxed on about all the endearing qualities of my Industrial Juki straight stitch machine and I promised that, next, I’d write a little bit about my other favorite sewing machine, a vintage tan and white Singer 401K.

But then, this week at work, I spent a couple days making women’s button front cotton shirts for the character of Zapata on Blindspot. I’ve made her quite a few shirts over the course of this season. I created the pattern from her measurements and referencing how she liked the fit of a few off the rack shirts. She doesn’t fit into any brand without altering (she has a very small waist but is still curvy) so the costume designer and I decided we might as well make custom shirts for her.

So far it seems to be turning out quite well:

http://www.imdb.com/title/tt4474344/mediaviewer/rm2804286976

http://www.imdb.com/title/tt4474344/mediaviewer/rm3758241792

Shirt making

I am not, by any means, a master shirt-maker (those do exist like the man who wrote Shirtmaking, developing skills for fine sewing). His name is David Page Coffin and he is definitely a shirt-making master. His book is filled with many helpful tips and suggestions. I reference it now mainly for the sleeve placket instructions and pattern. For some reason, no matter how many times I make a shirt, I always need a little reminder as to which way to begin a proper sleeve placket attachment.

Sleeve placket instructions from David Page Coffin’s book.

Sleeve placket instructions from David Page Coffin’s book.

Never feel bad if you need to look something up, especially if it’s a technique you don’t do on a regular basis. There are always new things to learn (or remember).

Concealed buttonhole placket

Another element of shirt making that took me awhile to be able to do without looking up a reference picture was making a concealed buttonhole placket. I’ve finally got it etched in my brain though – at least I think so.

The first step is to decide how wide you want to finished placket to be. I use an inch (1″) for ladies’ shirts but some people do an inch and ¼ (1 ¼”) or an inch and ½ (1 ½”).

Next mark out your fold lines on your pattern or fabric. You’ll need an extra four to six inches past the center fold/finish line.

Fold lines marked a numbered on pattern piece.

Fold lines marked a numbered on pattern piece.

Starting out from the center fold line, measure out ½” and draw a parallel line. This is the seam allowance line. Many commercial patterns use 5/8″ as a standard seam allowance so if you’re adding a hidden placket to a store bought pattern, check to see what they’ve used and do the same.

Then draw three more lines, each 1″ apart. Finally, mark your cutting line ½” from the last line (or whatever seam allowance you’re using).

To help explain and keep track of your folds, number your lines starting with the outermost one: 1, 2, 3 and 4.

Press lines 1 and 2, wrong sides together. This is the part that will get the buttonholes. You can mark and do them now or, as I usually do, you can wait until you’ve got everything pressed and secured. I also press the 1/2″ outer seam allowance but do not leave it folded under – it’ll get caught inside the seam once you’re done.

Almost there

Fold along lines 1 and 2.

Fold along lines 1 and 2.

Next, accordion fold the remaining fabric. Fold along line 3, right sides together, then line 4, wrong sides together. Press.

Once you’ve done this, open the placket up so that its double wide with the seam allowance toward the front edge of the shirt. Topstitch along line 3 (which will be 1″ or however wide your placket is from the fold center fold line).

Open the placket up to topstitch.

Open the placket up to topstitch.

Once you’ve done your button holes, you’ll need to sew small hand tacks in between each hole to keep the placket from opening up (and essentially defeating its purpose of being hidden).

Voila!

Shirt almost finished in dress form.

Shirt almost finished in dress form.

And next week, unless something more interesting comes up, I’ll continue on with my favorite sewing machine ruminations.

Should you buy an Industrial Machine?

Should you buy an Industrial Machine?

One of the questions I often get when I tell people that I sew for a living is: What sewing machine do you like the best?

I usually respond that it all depends on what I’m doing and I use different machines for different things. Which is mostly true. But if I’m being completely honest, I do have a favorite. Well, actually two favorites.

The first is my Juki straight stitch industrial. Mine is an older model, the DDL-555-4, which is no longer made.

The first is my Juki straight stitch industrial. Mine is an older model, the DDL-555-4, which is no longer made.

The first is my Juki straight stitch industrial. Mine is an older model, the DDL-555-4, which is no longer made. Juki does though, of course, still make straight stitch industrial machines (the updated models for mine are the DDL-8700 and DDL 5550-N).

Many people are a bit hesitant about buying an industrial machine. Lots of people have told me that industrials frighten them because they’re so fast. Well, these days, a lot of industrials come with a speed setting so you can control how fast it goes (even if you accidentally push all the way down on pedal the machine will not ‘take off’ if you have the speed set to ‘slow’). Nothing to fear. You can start out slow and, as you gain confidence, crank up the speed.

It is important to note, though, that the older models, like mine, do not have this feature. And each machine is a bit different in how it responds to the pressure of your foot.

One of the most crucial things to know about using an industrial machine is that, unlike the majority of domestic machines these days, it does indeed need oil to run properly. Once your machine is all assembled, with the machine head sitting securing in the table, simply tip the machine backwards. Underneath, you’ll see a metal bed. Fill it with machine oil.

Underneath, you’ll see a metal bed. Fill it with machine oil.

Underneath, you’ll see a metal bed. Fill it with machine oil.

I think the new models have a line indicating how much oil you should put in. Mine does not but I fill it so that the deeper part of oil pan (the right side) is about half full.

The next thing to remember is that, if you ever have to transport the machine, you need to drain the oil first. Or you’ll end up with quite the mess. On the right side there will a black screw in plug you can loosen and take out (make sure you have a bowl or plan positioned underneath to catch the oil) to drain the oil from the bed.

One of my favorite things about industrial machines is that you can wind a bobbin while sewing. Most industrial come with a two spool thread stand and the bobbin winding mechanism is separate from the machine on the right side. Place a spool in the thread stand, then thread from back to front through the bobbin stand tension. Pull the thread to the front and around the bobbin. You’ll need to engage the bobbin by pushing it backwards so that the wheel connects with the belt of the machine.

You’ll need to engage the bobbin by pushing it backwards so that the wheel connects with the belt of the machine.

You’ll need to engage the bobbin by pushing it backwards so that the wheel connects with the belt of the machine.

Unlike, domestic machines, there is no disengaging of the machine needle when bobbin winding so if you are winding a bobbin while not sewing make sure you take the bobbin case out and unthread at least to the pick up thread pick up lever.

The beauty of the industrial machine is that, once you are comfortable with it, they are so much faster than domestic machines. You’ll get a lot more done in a shorter amount of time. They also sew through many layers of fabric without complaining. I find that I never have to mess with the tension on my Juki, it’ll sew through light weight chiffon and six layers of denim without needing any adjustment. Brilliant.

Sometimes people are concerned about the lack of a free arm but I can confidently say that you don’t need one. If you need to sew a small circumference like a sleeve hem, turn it the opposite way out you would if you were using a free arm: meaning if you want to stitch on the wrong side or inside of the hem, leave the sleeve right side out, then position it under the presser foot like so:

If you need to sew a small circumference like a sleeve hem, turn it the opposite way out you would if you were using a free arm.

If you need to sew a small circumference like a sleeve hem, turn it the opposite way out you would if you were using a free arm.

See, easy!

If you’ve been debating about getting an industrial, debate no more! Take the plunge. You won’t regret it.

PS: I’ll tell you all about my other favorite machine next week: a vintage Sing

Thanks for the Fabric, Tahari

Throughout my career I’ve worked on a variety of projects. People often ask what my favorite show to work was, or what my favorite period is. Both of those questions are difficult for me to answer. I could probably tell you what my least favorite show to work on was but narrowing them all down to one single absolute best and favorite is not possible.

It all depends. Some projects require more creativity than others. Some are relatively simple straightforward gigs that involve hemming a staggeringly large number of pants. Some shows are more stressful than others with a higher than normal rate of last minute changes. Some involve working with difficult people. Others are filled with co-workers that quickly become family.

Whenever I mention any of the period shows or movies I’ve worked on, people usually say, “Oh that must be so much fun!” When I say I work on a contemporary procedural crime drama, the response is more something like, “Oh. The show with the tattoos?” or “That’s interesting.” Meaning: That doesn’t sound interesting at all. Don’t actors just wear store bought clothes? What do you possibly have to tailor on those shows?

To this all I can do is laugh. No major actor or actress on any contemporary procedural crime drama wears clothing that hasn’t been fit and altered specifically for him or her.

There are, always, a few exceptions to this, notably when a talented costume designer knows the cut and style of high-end clothing well enough to know which designer label will fit a particular actor the best with little or no alteration. Frank Fleming who designs Power for Starz Network is an absolute master at this.

I truly enjoy working on Blindspot (my current gig). Everyone in the costume/wardrobe department is absolutely amazing and all the actors are lovely to work with.

One of the lead actresses wears a lot of expensive high-end dresses and skirts and blouses. Most of the dresses I alter for her require alterations in the shoulder, side, and waist seams. Altering the shoulder seams means the neckline will need to be altered and the sleeve taken out and reset. Altering the side seam means (again) the sleeve will need to be removed and put back on. Basically, I must take apart the entire dress and put it back together (Thanks for the fabric, Tahari! or Black Halo or Escada or Nanette Lepore).

We also do things like changing necklines (from a high scoop to a vee) and changing short sleeves to long sleeves or even adding sleeves altogether. Jared B Leese who designs Blindspot comes up with many creative and brilliant ways to alter something so that it no longer is a dress ‘off the rack’. He’ll ask things like, “Can you open this neckline?” or “Will you make sleeves for this dress?” or “What if we turn this into a v-neck – do you think that would look better.”

The answer is always “yes”.

This beautiful suede Tahari dress used to have a high crew neckline and short sleeves:

Tahari dress with new neckline and sleeves.

Tahari dress with new neckline and sleeves.

This lovely dress (also by Tahari, I think) used to be sleeves and all suede. We replaced the center panel and added some sleeves.

Tahari dress with new sleeves and center piece.

Tahari dress with new sleeves and center piece.

And this Black Halo dress used to be navy.

To be honest, this one was a complete rebuild. I copied the pattern from the existing dress, made a few adjustments and cut out and built a whole new dress.

Make of Black halo dress.

Make of Black halo dress.

See, contemporary procedural crime dramas are anything but boring (and often my favorite type of show to work on).

Just a closer view of the Black Halo dress.

Just a closer view of the Black Halo dress.

How to See in the Dark

How to See in the Dark

During the course of my career, I’ve had the good fortune to work on quite a few large film productions with some highly recognizable actors and actresses. Film-making is exciting and tedious all at once, both exhilarating and debilitating. It’s not a life choice to venture into lightly – at least not if you require a steady, dependable job and paycheck.

You’ll never work again…

In movie making, and even more so in television, nothing is ever a sure thing. Shows get cancelled or pushed (postponed), people get let go for various, and sometimes odd, political (company) and personal reasons. I, personally, never believe a gig is going to happen until I’m actually there on the first day, filling out the inevitable novel of start paperwork you must complete at the commencement of every single job.

I’ve worked like this for twenty-five years now and I can say only two things for sure. One, explaining to people not in the business, be it your family, friends, or the bank you want a mortgage from, what you do and how you are hired, is never an easy thing. And two, that weird space you enter when you’re between jobs and the phone isn’t ringing and the little voice inside your head whispers you’ll never work again, never gets easier, not really. It doesn’t matter that history has always proven that you will indeed work again; you simply believe, irrationally, that this time is different.

At least that’s how it usually is for me. Yet, at the same time, I can’t imagine doing anything else. I can’t fathom going to the same office every day for thirty years or more and doing the same thing over and over. It’s just not how I’m made. So I take the uncertainty and the freelance roller coaster ride in exchange for getting to do something that, most days, I love.

If you’re thinking of a freelance career in film, television and the theatre, you need to be really honest about whether or not you’re able to live with a heightened amount of insecurity.

I fought, bit, screamed, clawed and scratched my way in. There was no way I was giving up.

Here are a few of the things that I’ve found invaluable and helpful in surviving the freelance life.

1. Tenacity

Be determined. Wholly and truly give it your all. Remain persistent. Things don’t necessarily come easily. I remember a conversation I had long ago with a friend and colleague. We were talking about ‘breaking in’ to the movie business and how we landed our first job on a major film.

“I fought, bit, screamed, clawed and scratched my way in,” my friend said, “There was no way I was giving up.”

2. Resilience

It’s easy to believe in yourself and your talents when other people do. The true feat, though, is to believe in yourself and your abilities when no one else seems to. There will be failures and missteps and things that you wished had turned out differently. That’s all part of the whole thing.

There will, of course, always be that odd, seemingly infinitely lucky individual, who coasts, completely upright, into a successful freelance career with out skinning even one knee. But that’s the exception.

Most of us arrive a bit battered and disheveled with grass stains on our knees and twigs in our hair.

3. Vision

As the extremely successful celebrity stylist (and all around nice guy), Derek Roche has said, Build your own dreams or someone will hire you to build theirs.

 4. Learn how to see in the dark

When the darkness comes (and it will) you have to be able to navigate your way out and through it…

Some of my first theatre jobs were as a backstage dresser during live performances. This involved laundry and maintaining the costumes, as well as, helping the actors get dressed if needed (period things like corsets and garments with multiple back closures) and doing quick changes backstage in the dark.

Many backstage dressers use small bite lights to help them see while performing fast costume changes. I never really did. If you spend enough time in the wings in the dark, you eventually are able to see. I have no idea if this is a scientific fact; I only know that it was true for me. I have no problem finding zipper ends, or a slew of hooks or snaps in the dark.

Darkness, of course, can come in different forms – it can be literal like working backstage or it can be figurative like not being certain what your next move should be or being unable to see the path in front of you. When the darkness comes (and it will) you have to be able to navigate your way out and through it, you have to reach for that zipper and be able to insert one end into the other by feel.

Seeing in the dark is a tricky thing to master. It involves taking all your tenacity, resilience and vision at once and stepping forward, all the while trusting that the ground is indeed beneath your feet – just as it should be.