Getting In

Getting In

Whenever I tell people what I do for a living (Tailor and Pattern Maker for film and television) they inevitably say one of two things.

“Wow. How did you get into that?” or “What a cool job!” Sometimes acquaintances will ask me if I can talk to their niece or son or daughter’s friend or cousin or something and give them advice on how to ‘break into’ the business.

I’m never entirely sure what sort of advice to give. As Hunter S. Thompson said (or maybe didn’t say depending on who you ask),

The TV business is a cruel and shallow money trench, a long plastic hallway where thieves and pimps run free, and good men die like dogs. There is also a negative side.

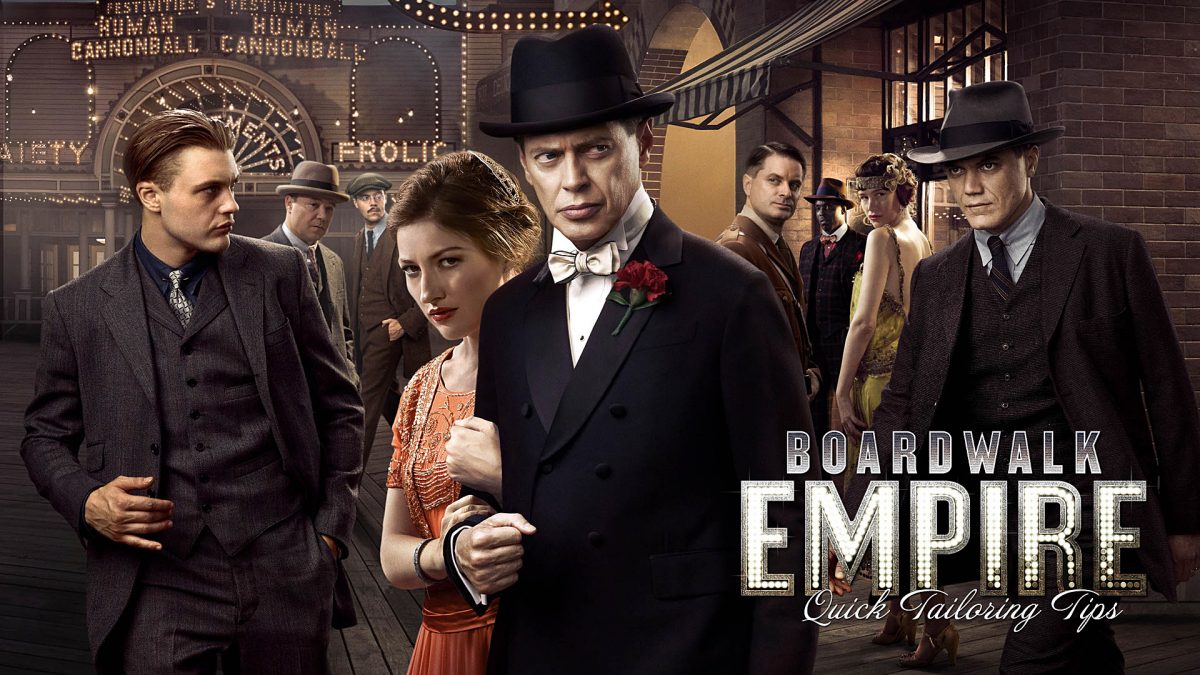
There is some truth in that Hunter quote. Especially now when the major networks are increasingly concerned with cost and ratings and everyone wants to do more (and more) with less money. Period television is quite popular right now. The only problem with that is that period television is hard, perhaps the hardest genre.

“But, why?” you may ask, “It looks like so much fun!”

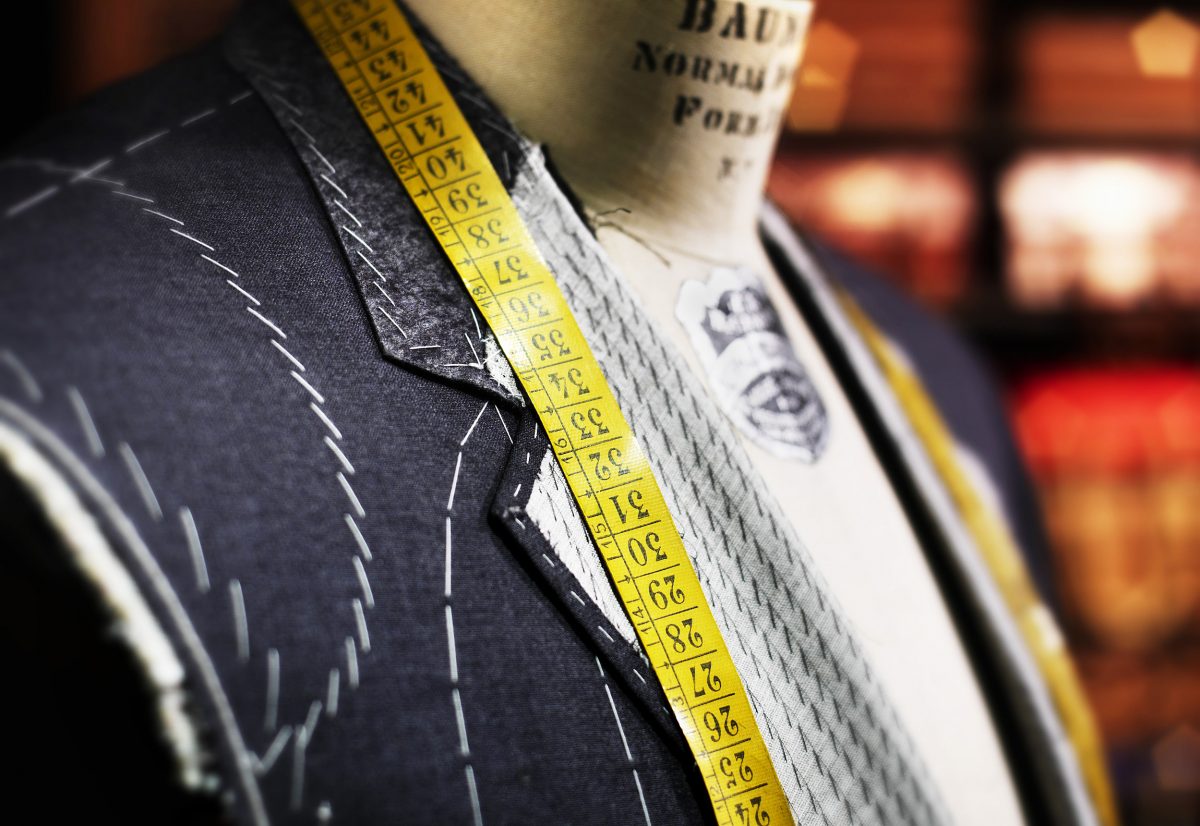
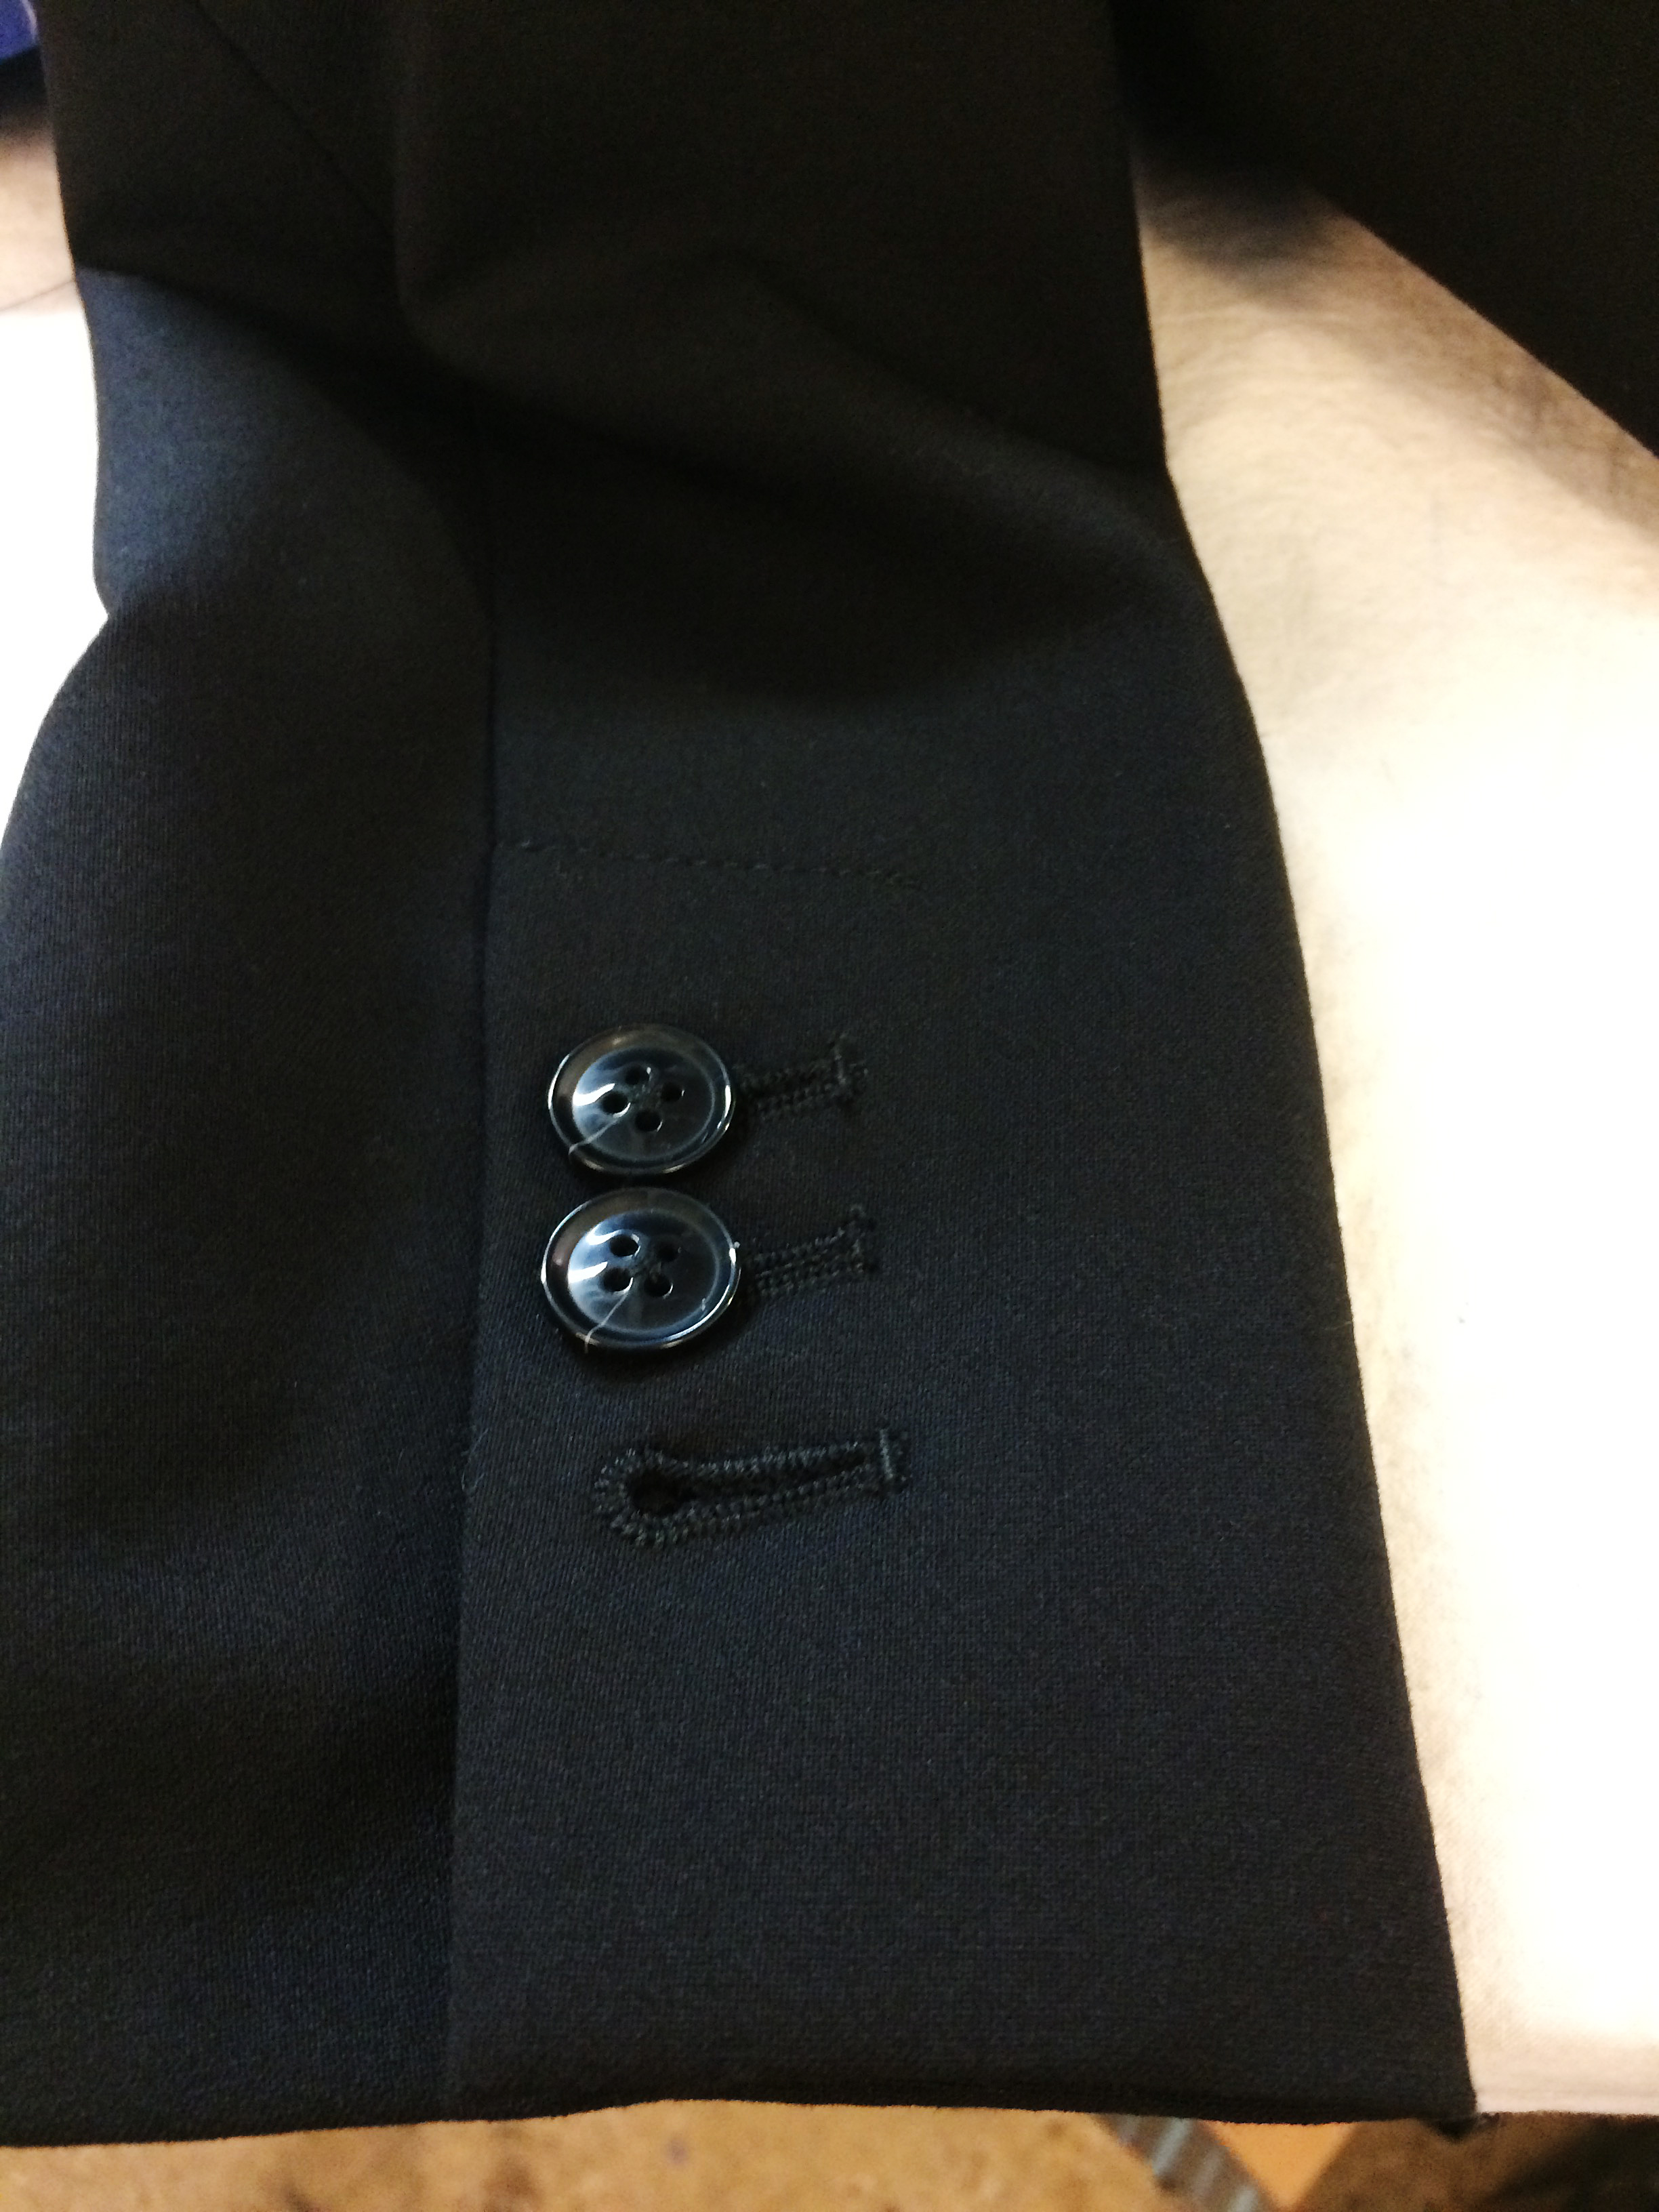
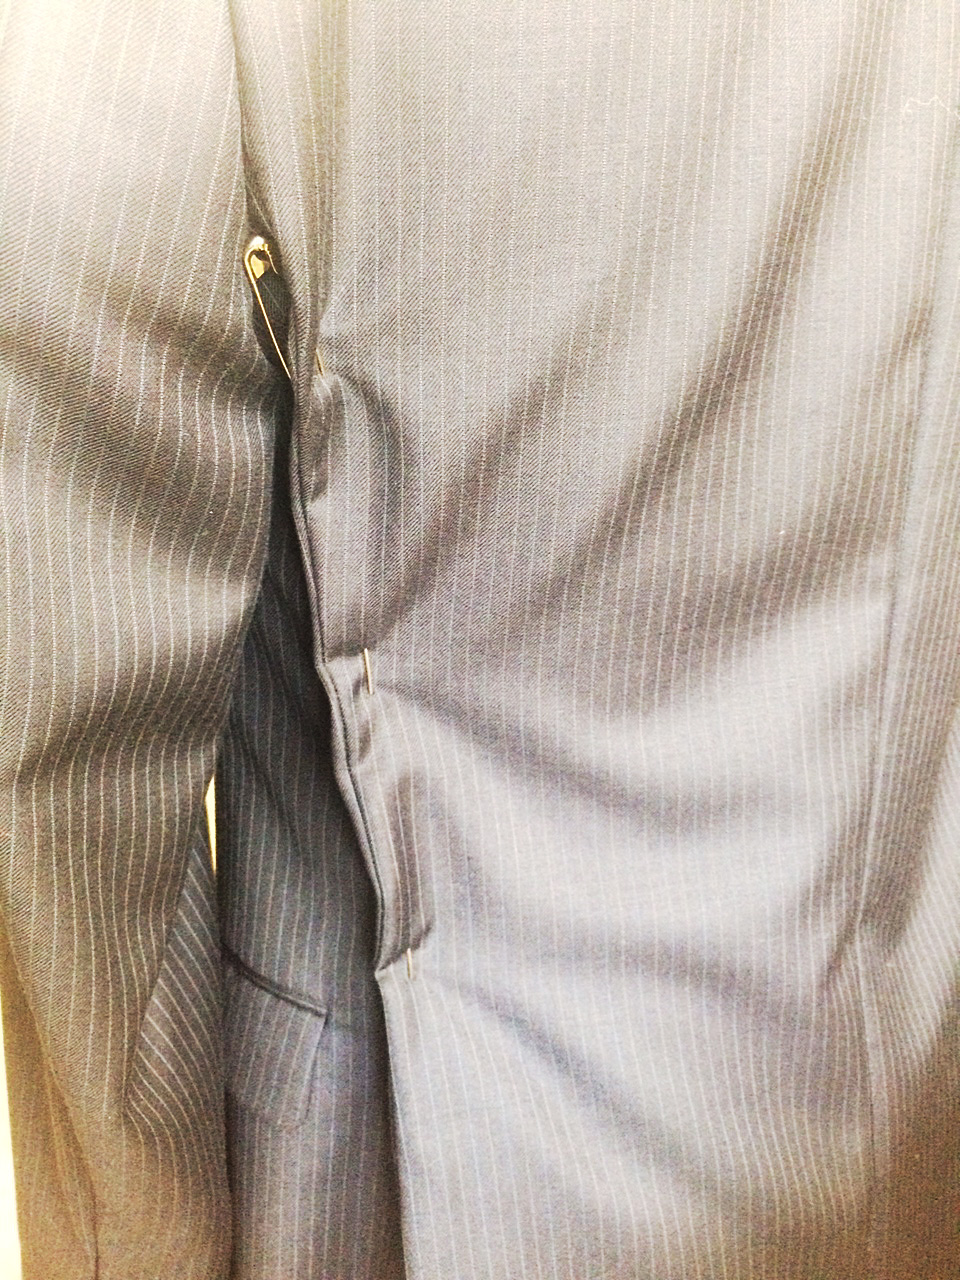
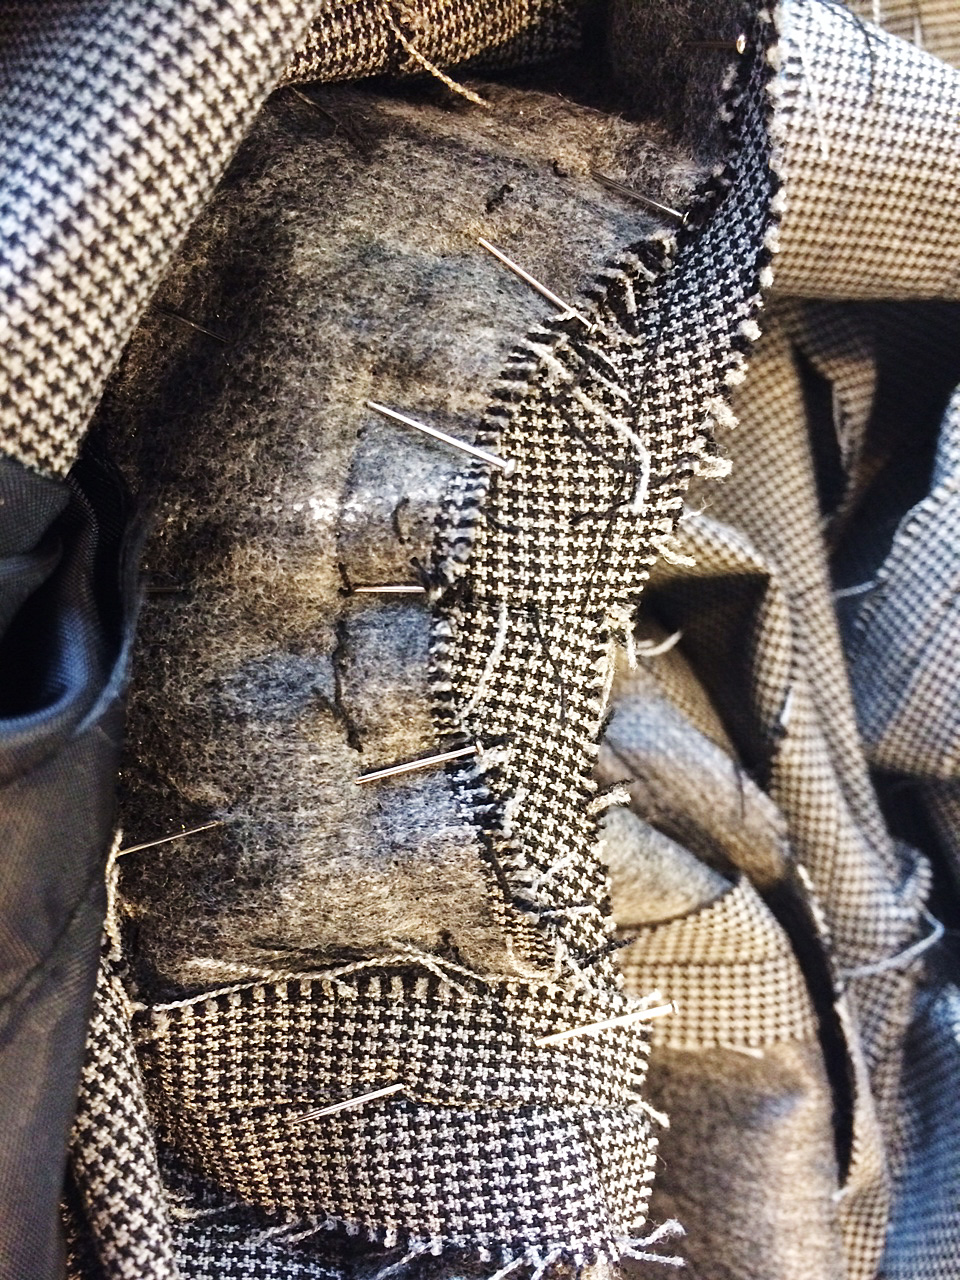
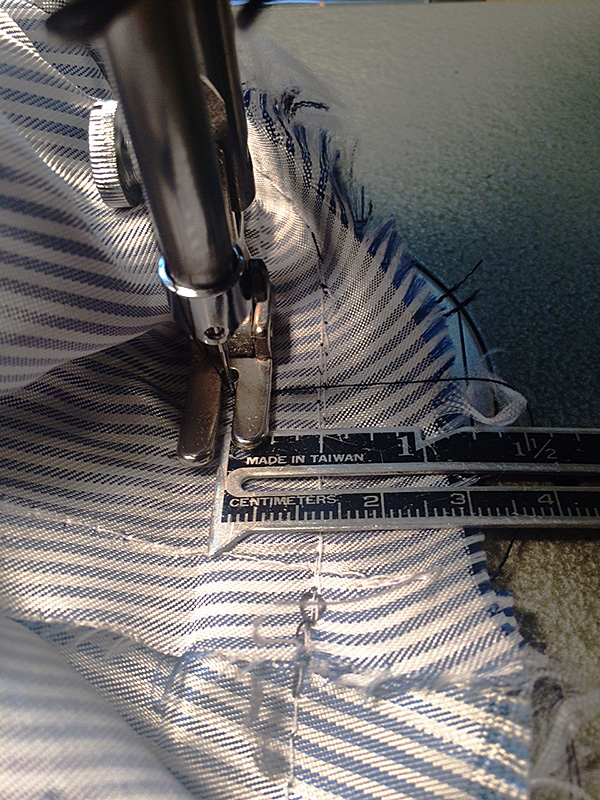
The Devil is in the details

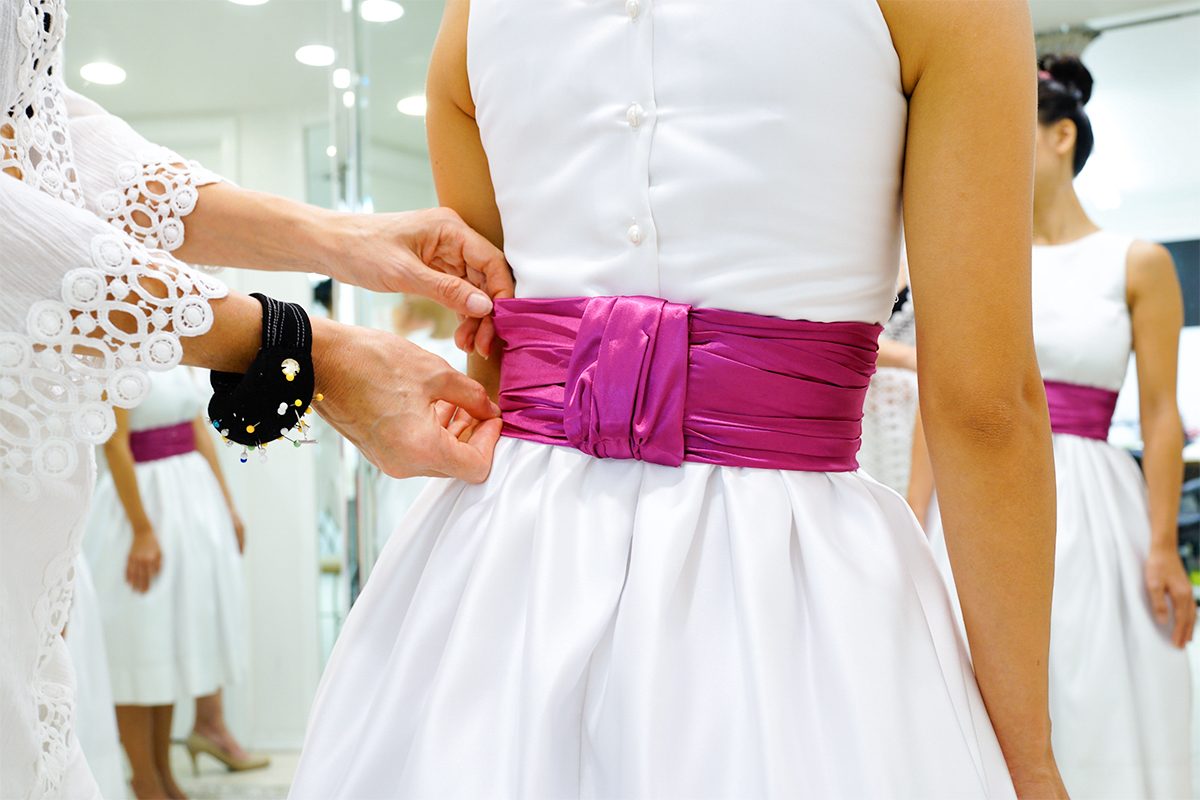
Here’s the thing: period TV is expensive. You have to dress every single background actor and actress as well as the principals. On shows such as Law and Order, often the background (BG) performers are wearing something selected from their own personal closet. What generally happens is that the BG will come to work with a few clothing options. An assistant designer will usually pick which of these options is best and that’s what the actor will wear. Most people don’t have closets full of 1920s or 1880s clothing so, on a period show, the entire costume is provided, fit, and altered. This takes more time and manpower which, in turn, takes more money.

TV is also fast – faster than filming a movie. Most shows shoot an episode in 8 to 10 days, with at least a day or two when they are shooting two episodes at once. (We call those tandem days.) Because of this, you never really get any down time. On a movie, there is most always a point where you’re over the hump – you’ve established all the costumes needed. Or you’re working on something where all the action takes place on the same day and no one changes their clothes. Then, all you need to worry about is multiples and the rest of the work is up to the set costume crew who keep track of continuity and make sure everyone looks how they should in front of camera.

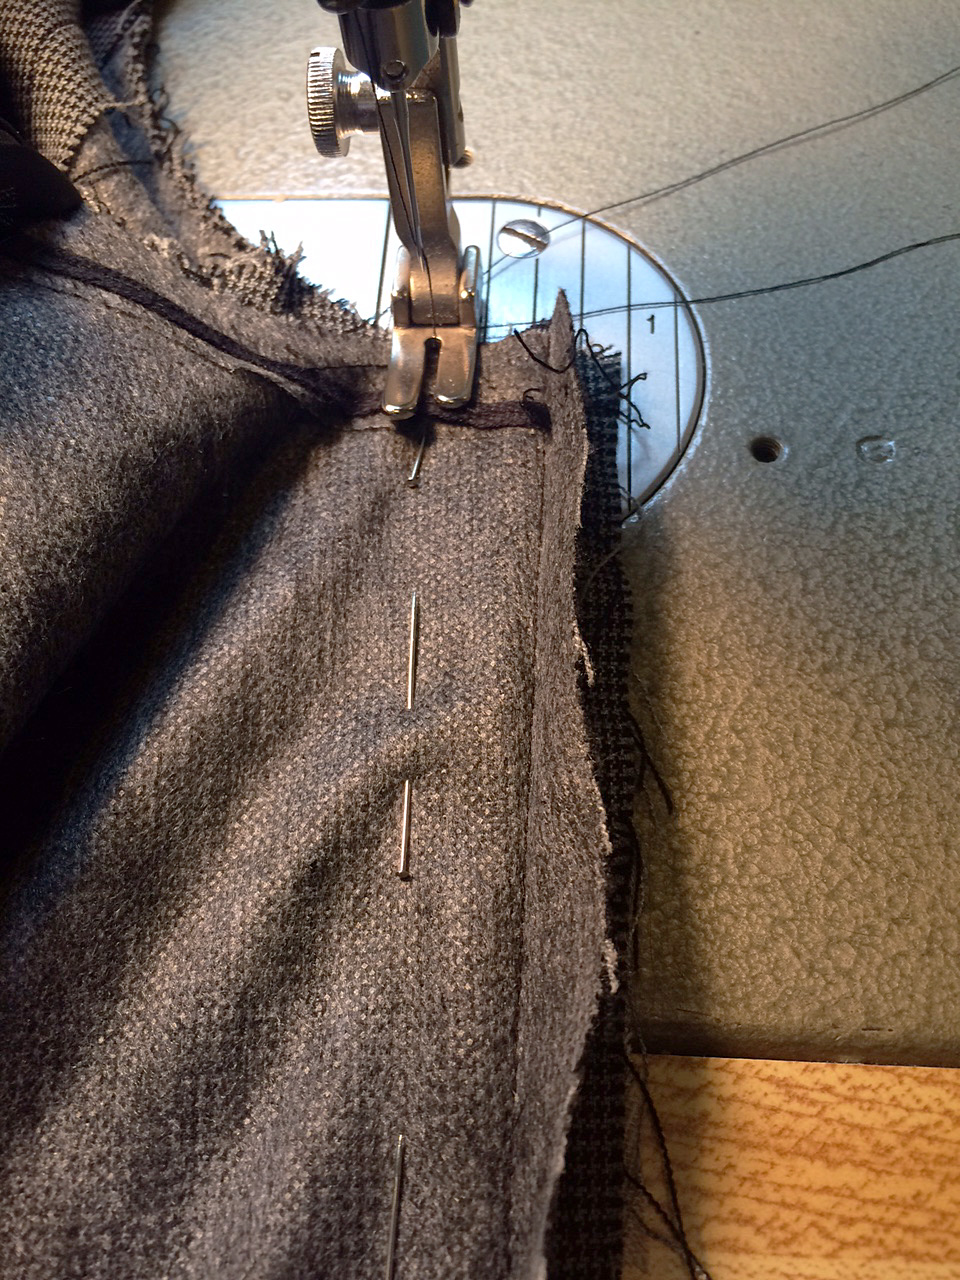
Do your thing & do it GREAT

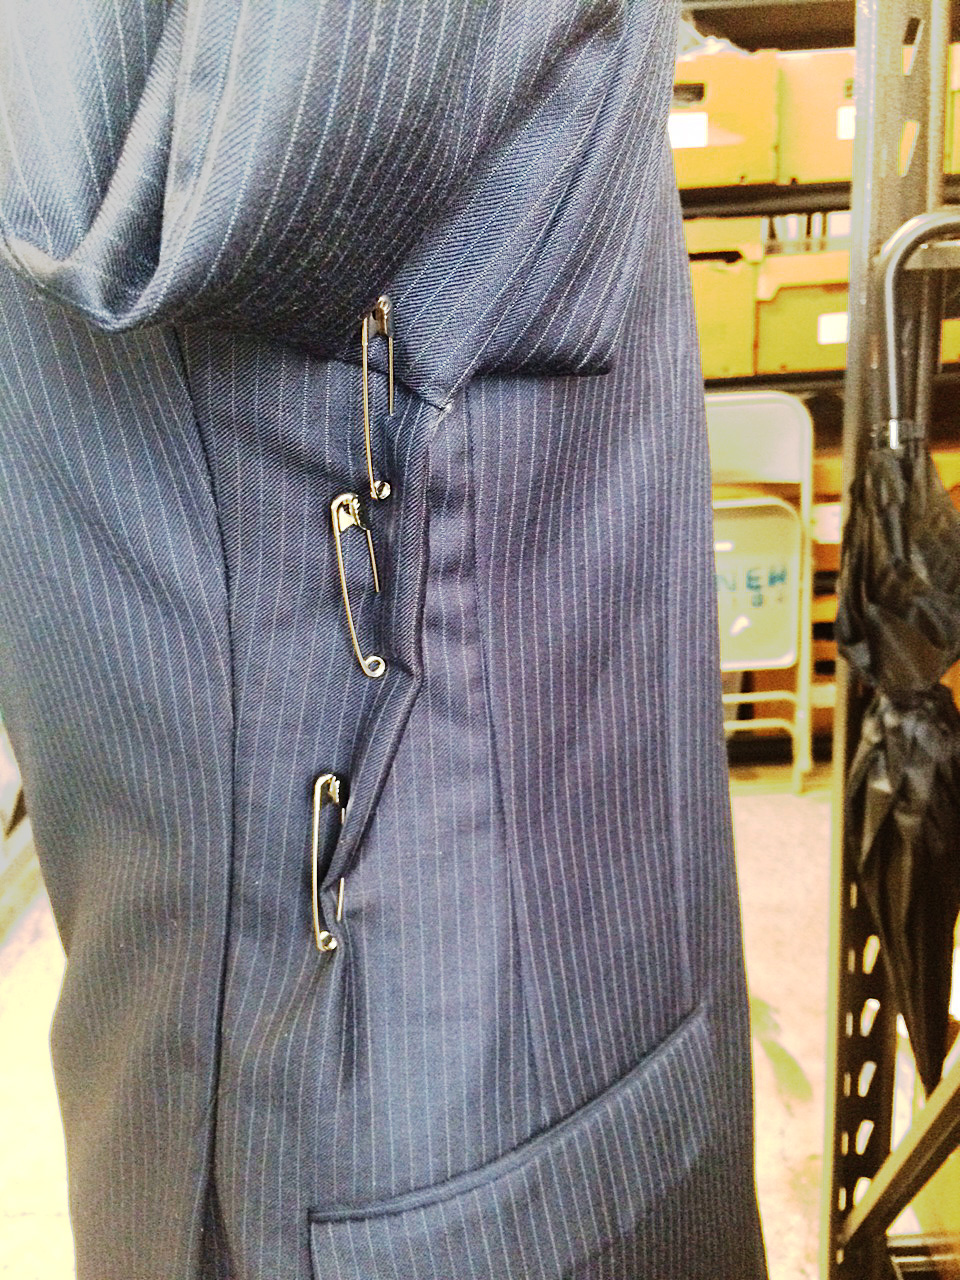
I guess if I were to give one piece of advice I would say to become really good at the thing you want to do. Then, figure out how to do it very quickly if needed. I may have said this before (I say it a lot) but there are lots of good tailors and pattern makers out there. What there isn’t a lot of are exceptional tailors and pattern makers who can also work really fast. If you want to work in TV and film that will definitely give you an advantage.

As far as finding TV and film jobs, talk to people, contact your city’s (or state’s) film commission. Word of mouth is still the best way to find a job in this business.

Mind your manners

And be nice to everyone, even if you think they have no ‘influence’ or are looking for the same kind of job as you are. You never know who knows who and you never know when someone might need help because they have more work than they can handle on their own.

Oh, and that “What a cool job!” comment… Some days it is and some days it isn’t. I can assure you there is nothing glamorous about it but, at the same time, it is also rarely boring.


Miter Me This

Miter Me This

One of the alterations I did last week for the television show Blindspot was lengthening the sleeves on a woman’s suit jacket for one of our actresses – a straight-forward and fairly simple task.

Or so it should be

Functional, cut buttonhole, unless you need to lengthen the sleeve.

Functional, cut buttonhole, unless you need to lengthen the sleeve.

This time, though, the alteration gods (and the clever designers at Banana Republic) were against me. The suit jacket had cut, functional buttonholes (three of them) on the sleeves. Not that big of a problem. I just needed to lengthen the sleeves 3/4″ and could get away with leaving the buttonholes as they were as the first hole was only an inch and ¼ from the hem.

No biggie

So, no big deal, I could still re-miter the corner 3/4″ below the original hem and not have to mess with the buttonholes. I might have to cut some of the seam allowance free from the bottom hole but it shouldn’t matter. I would still have enough fabric to do the miter properly.

I pulled both sleeves inside out to find the one with the top stitched opening. Women’s jackets normally just have one sleeve with the lining opening and the entire thing can be pulled through that hole and inside out. This is because, in most cases, the armhole lining isn’t attached all around the seam allowance as it is in men’s suit jackets.

I pulled my two sleeves inside out through the opening and started taking the hem apart. Much to my annoyance, I discovered that the miter corner had been trimmed so it was impossible to redo the miter at a longer length. I also needed to add more seam allowance to be able to lengthen the sleeve the amount I needed.

Take a step back

A simple alteration just got a bit more tedious. First, I dug into my fabric stash to find a wool similar to that of the jacket. In this particular case, the jacket I was working on was a dark brown and black tweed. The jacket was paired with black wool pants so I decided I could get away with using a black wool for my corner and added seam allowance.

I cut two pieces of black wool 2″ wide ( ¾+ ¾+ ¼ for each seam allowance. you need ¾ twice because you need the length for both the lining and the face fabrics) and 10″ long (this length doesn’t matter except it needs to be longer than the sleeve hem) on the bias (or diagonal). I also cut an addition 2″ wide by 6″ long bias piece for the corners.

Sleeve lining with topstitched seam (open up from here and pull everything through).

Sleeve lining with topstitched seam (open up from here and pull everything through).

The next thing to do after opening the entire sleeve hem up (don’t press, you’ll want to see the original seam creases) is to sew the black wool to the miter edge. Follow the stitching line from the original miter and make sure to leave additional fabric on both ends. Then, open the sleeve hem up so you can see the straight angles of the bottom and side edges. Draw straight lines to connect those edges, then trim.

The mitered corner.

The mitered corner.

Next, attach the 2″ piece to hem edge and trim any excess off the ends. At this point, I redraw my miter line. Measure down ¾ from the original hemline exactly on the fold line – that’s your cross line for miter. Use your old miter line as a guide for the proper angle. Sew the miter, press, and turn. Don’t cut. I use a wooden tailor point pressing block, a simple point turner, and generous steam.


Diagram on where to add fabric and redraw miter seam line.

Diagram on where to add fabric and redraw miter seam line.

Wash, rinse, repeat

Mark the ¾ down on the un-mitered corner and any sleeve underarm seams into your fabric extension so that you can match up the lining properly. Then, pin together your hem edges and sides. Sew. Repeat for the other sleeve, turn everything back right side out, and sew the opening closed in the sleeve lining.

The finished contrasting corner miter: (note: the suit jacket will be worn with black pants so the corner coordinates nicely).

The finished contrasting corner miter: (note: the suit jacket will be worn with black pants so the corner coordinates nicely).

Done. I now have a jacket with a cool little detail. Most people probably won’t notice it but if you happen to watch Blindspot and see it, let me know! I like it and my designer and actress like it, if only for the reason that the sleeves are the proper length.

The Safety Pin

The Safety Pin

I try to collect them all in one drawer, but they escaping & disburse themselves all about the apartment.

I try to collect them all in one drawer, but they escaping & disburse themselves all about the apartment.

Almost every pocket in every article of clothing I own, there are a couple of safety pins. I can also usually find at least three of four of the little buggers on the bedroom floor. Sometimes they end up outside my apartment door because I reached for my keys and pulled out a fistful of safety pins instead. I try to collect them all together in one drawer but seem intent on escaping and disbursing themselves all about the apartment.

I use safety pins for fitting clothing, for hanging patterns, to attaching notes to things. Of course, there are different sizes and flavors of safety pins.

Size matters

I use the tiny gold ones when I’m fitting something very delicate like silk or gauze so that they don’t make an unsightly pin hole.

I use the tiny gold ones when I’m fitting something very delicate like silk or gauze so that they don’t make an unsightly pin hole.

I use the tiny gold ones when I’m fitting something very delicate like silk or gauze so that they don’t make an unsightly pin hole. For some reason, someone thought that gold pins without the end spiral were good idea. I suspect because sometimes things snag on the little coil but, without that coil, the pin is free to slide about so it’s hard to know exactly where/what the mark is.

I use the big number 3s for the majority of my fitting needs. And the number 2s if I need a thinner pin.

History Hunt

Walter Hunt invented the safety pin in 1849. He was the first one to create a pin with the coiled spring on one end and the clasp or catch on the other end to keep the pointy bit safe from tender fingers. Hunt sold his idea outright for $400.00 so never collected any royalties or anything from it. Legend has it that he needed to pay off a debt and thus invented the safety pin and sold the rights within a few hours.

I use safety pins for fitting clothing, for hanging patterns, to attaching notes to things.

I use safety pins for fitting clothing, for hanging patterns, to attaching notes to things.

Selling his safety pin idea wasn’t Hunt’s only unfortunate business decision though. He was also the first one to invent many of the significant parts of the sewing machine, including a curved needle and a shuttle. Hunt created the first sewing machine prototype in wood, which didn’t work all that well so he ended up selling his idea to Elias Howe and Isaac Singer.

Hunt invented a plethora of other things including a streetcar bell, a knife sharpener, paper collars, and an antipodean walking device – or suction cup shoes!

Alas, Hunt didn’t seem to have much business savvy or any true idea of what his inventions could be worth, and just how wide spread and common place they would become.

A modern twist

The safety pin has found its way onto the catwalk and into high fashion with decorated, embellished safety pin broaches and large dangling safety pin earrings.

The safety pin returns as punk becomes more relevant than ever – via Independent.

The humble safety pin also has a rich symbolic history and significance. Punk culture has long used the safety pin as an expression of individual freedom and DIY culture. In the wake of the UK’s Brexit and the US presidential election it has come to symbolize tolerance and unity with all people.

Wonder what Walter Hunt would have sold his idea for back in 1849 if he had been able to foresee even a small fraction of what his pin would become.

As Pinned: Sewing Alterations in the Film Biz

As Pinned: Sewing Alterations in the Film Biz

Most film and television costume departments in New York City use bright pink oak tags to identify a garment as needing an alteration.

Most film and television costume departments in New York City use bright pink oak tags to identify a garment as needing an alteration.

Most film and television costume departments in New York City use bright pink oak tags to identify a garment as needing an alteration. Larger (and usually period) shows, like Boardwalk Empire, The Deuce, The Get Down, have two or three Costume Fitters who run the fittings for the background actors. They keep everything organized in the fitting rooms, take measurements and photos, assist the designers, do a lot of the pinning (unless something really wacky is going on, then they’ll usually call the Head Tailor in to check it out), and write the alteration notes on the tag.

Inevitably, a high percentage of alteration notes will read something like: “Take in as pinned” or “CB as pinned”. ‘CB’ means center back if you didn’t know. And ‘AP’ is the abbreviation for ‘as pinned’.

So, anyway: “Take in as pinned.”

Measure twice, cut once.

Take in as pinned

Here’s the thing, even if I pinned the alteration myself in the fitting room, ‘take in as pinned’ shouldn’t necessarily be followed literally. Seriously. It is indeed true that humans in general are not always symmetrical but it’s rare that you honestly need to take in one side more than the other. I also cannot tell you how many times an initial, “he has one arm longer than the other” turned out to be a jacket not sitting evenly upon the shoulders.

The garment can, of course, be lopsided to begin with – always a possibility if you’re dealing with vintage clothing. Measuring is always a good idea. As my Dad always says, “Measure twice, cut once.” He was talking about lumber and carpentry but the same advice applies to sewing as well.

I usually mark (or just measure) the pinned out alteration with chalk or wax on the wrong side of the garment. Then I take the pins out and assess the situation. If two side back seams were pinned in and one is considerably larger than the other, even them out. Do the same thing on both sides.

This is actually one of the top five laws of sewing – if there are laws of sewing.

I just pin everything out in through the center back then figure out later the best place to take it out.

I just pin everything out in through the center back then figure out later the best place to take it out.

I often only pin one side of a thing. More often, I just pin everything out in through the center back then figure out later the best place to take it out. A large amount will look better if you distribute it through more than one seam.

For example, if you pinned out 5 inches at the center back waist of a shirt or jacket, split the amount up between the center back, side back and side seams. The end result will look much better.

An alteration I do a lot is taking in the backs of men’s button front dress shirts. Unless it’s a slim cut John Varvatos, most men’s dress shirts are excessively roomy in the back. The quick and easy solution to this is to add side back darts.

If I have time, and the shirt has back pleats going into the yoke, I’ll take the whole back off and take out the pleats – re-cutting the bottom part of the armseye and the side seams. This can take quite a bit longer, especially if you are dealing with a shirt by Brooks Brothers, who insist on gluing their side seams as well as sewing them.

Take in as pinned.

Take in as pinned.

Speaking the same language

At Blindspot, since I’m the Head and only tailor, we just put blank pink tags on the garments as indications that they need altering. If I pinned it, I don’t need any notes. The Costume Designer for the show is also an excellent tailor (which is rare) so if I wasn’t in a fitting for some reason, he can easily tell me what needs to happen – often without pinning.

He’ll come to me and say, “I threw this on so and so, it just needs to be taken in about this much in the back.” Then he’ll show me by pinching an amount out with his fingers.

Tailoring and patterning is indeed a language all its own and it’s a beautiful thing when you work with someone who speaks it as well as you do.

Scissors, scissors, scissors

Scissors, scissors, scissors

Partial scissor collection.I have a bit of a scissor problem, as in, I have a lot of them. I’m not always good about getting them sharpened, or sharpening them myself and often will just order a new pair – which isn’t necessarily very economical but, often, much more fun. This photo is of the scissors that are currently in my shop at Blindspot. It doesn’t include the scissors I have at home or the scissors that are in my sewing kit on the wardrobe truck or the scissors I probably forgot about that are at the bottom of a bag somewhere in a closet.

In New York City, you can have someone come to your shop and sharpen all your scissors with an electric grinder. There’s also a scissor and knife sharpening truck that still trolls the streets of Brooklyn (like the Mr. Softee ice cream truck). I never have any scissors on me when I see the truck though I always want to flag it down. You can, of course, sharpen your own scissors using a sharpening stone but I never seem to get around to doing that.

Most tailors have a favorite pair or a preferred model that they own more than one of.

My absolute best loved are Gingher’s original 5” tailor points, the ones that are actually pointy on the end. For some reason, when Fiskar acquired the Gingher brand, they altered the 5” tailor points. Now they have more rounded blades and a blunter end and are often called ‘craft’ scissors. The pair on the left in the following photo is the oldest pair. See how much narrower and pointier the blades are?

Evolution of Gingher’s 5” tailor points.

Evolution of Gingher’s 5” tailor points.

I do quite a bit of cutting. I never really took to the mat and rotary blade camp though I can understand how it can be an efficient and accurate way to cut. Probably because I started my whole tailoring/pattern making career before cutting mats and rotary blades were prevalent. Or maybe I’m just old. At any rate, my favorite scissors to cut with are Gingher 11” knife edge shears.

Cutting shears.

Cutting shears.

Other scissors that I use on a daily basis are:

Gingher 8” straight blade shears

– For trimming seam allowances, though you can cut with them. I just like a longer blade.

Gingher 7 ½” pinking shears

– I usually pink the hems in men’s suit pants as opposed to serging, mainly because a serged hem will leave a ridge if someone (drycleaner or otherwise) gets over zealous with the hem pressing.

Gingher 6” applique scissors

– I use these when I need to trim something very close the edge, or when I’m cutting around an applique (obvi.)

Gingher 7” straight blade scissors

– I use a pair of these as my paper scissors when patterning.

One of the sacred sewing laws is to never use someone’s fabric scissors to cut anything but fabric. Ever.

One of the sacred sewing laws is to never use someone’s fabric scissors to cut anything but fabric. Ever.

Excuse me… What are you cutting?!

Speaking of paper scissors. One of the sacred sewing laws is to never use someone’s fabric scissors to cut anything but fabric. Ever. The standard response from someone who sews to the question, “Can I borrow your scissors?” is “What are you cutting?”

The reason why is fairly simple: try cutting fabric with a pair of craft or paper scissors and you’ll find your edge looks as if it were chewed off by some sort of extremely hungry wild animal.

Wiss pinking shears.

Wiss pinking shears.

A few years ago, I acquired some old scissors for a mens’ tailor in the city who was retiring. I love this pair of old Wiss pinking shears. Despite the knicks and scratches on the exterior, they still cut very well.

What’s your favorite pair?

Families, Mentors, Legacies and Sewing

Families, Mentors, Legacies and Sewing

My first long-term professional job in a Costume Shop was at The Alley Theatre in Houston, TX. The Alley has two stages and puts on a creative and diverse season of plays, often mounting the regional premieres of new productions. I certainly never intended to live in Texas for as long as I did but I spent my 20s at The Alley. The Alley is where I grew up and where I learned the basis for pretty much everything I know about sewing and pattern making.

Family

Years later, I was having a conversation with some friends and co-workers about our professional backgrounds. One of them asked me if I was still friends with the people I knew when I worked there.

“Friends?” I said, “They’re family.”

Then I got to thinking about family and home, mentors, and the sense of ‘belonging’ somewhere, of finding your people. Sewing is often a solitary activity. In fact, I spend most of my time these days in my little windowed corner at Steiner Studios sewing and patterning by myself. Some days, I miss being in a shop with others, everyone working and creating together.

There were days at The Alley when we would all be bent over our machines or projects, working diligently and quietly. Sometimes there was music playing, sometimes NPR (there weren’t podcasts yet), then suddenly, from the silence, someone would say, “Ummm…do we have any more of this fabric?” And everyone would burst out laughing. Ha. Tailor humor.

Nothing Beats Experience

The thing, or person, I miss most from those years in theatre, though, was my mentor, Jorge, the man who taught me patterning, millinery, and gave me to courage and tools to think outside the box and trust my instincts.

I don’t have a degree in any sort of Costuming or Fashion Design and I only ever took one sewing related class at college. Lots of people I know follow patterning or draping guidelines from a particular book. I don’t dispute that many of these books are extremely useful with their formulas and precise calculations (I own and reference many of them) but I always like to say that I pattern from the heart. I know that sounds dorky but that’s the way I work. Pretty much ten times out of ten I end up at the same result as I would if I had followed some directions in a book.

And, yes, I have tested this theory many times.

The point, I think, that I’m trying to make is that the books are useful but they only tell you the how, not the why. I always want to know the why. I believe that once you figure out why something needs to be done a certain way or why that curve should look like that, the how easily follows. I also believe wholeheartedly in mentors. I think our country and society is sorely lacking in that arena. Here’s a great paper about the importance of mentors.

My Mentor

“Are you going to save that thread?”

“Are you going to save that thread?”

One of the best and lasting gifts I’ve ever received was Jorge’s knowledge. I am his legacy. I hope that in my approaching old(er) age I will be able to give back and share his knowledge which has become my knowledge to someone young and just starting out. In this way, he, and eventually me, will continue to live on. How humbling to think that I might have a legacy to leave.

Teach someone, even if it’s just one someone, the things you know and have learned through the years. Before books and computers, people passed their stories and knowledge to their children who passed them to their children and so on and so forth. Create your own legacy. The knowledge and talent you have so worth passing on.

Jorge has been gone from this world for over ten years now but every single time I am unwinding a bobbin because I need an empty one and its less than halfway full, I hear his voice in my head, “Are you going to save that thread?”

And often, I do. I wrap it around a manila card because you never ever know when you might need a bit of bright green thread.

Costume Shops I Have Known

Costume Shops I Have Known

I’ve worked in a variety of costume and tailor shops over the past twenty-five years – some of them very permanent spaces, others makeshift and temporary. Some of them have been hellholes, some of them heavenly, and most of them somewhere in between.

One of the worst “shops” I’ve worked in actually happened this past summer. I was working on a new period Netflix show that was going to be filming for a few weeks in Savannah, GA. Now, Savannah itself is a very lovely city with a beautiful historical district, a properly chilling Ghost Tour and interesting & welcoming people. Sadly though, the space that I was told was mine to work in was an inner room of a sprawling low industrial type building. There were no windows, the air conditioning vents in the room didn’t work (think Georgia summer humidity), and none of the overhead lighting was functional. The room was essentially a hallway, providing the only path between the front and back of the building.

You Can’t Touch This

Long ago, in Houston, TX, I worked on a VH1 movie about MC Hammer (Yes, we made many pairs of Hammer pants). The Costume Shop was housed in a vault (as in a bank vault). We had so many lights rigged up in the space that I was sure one day we were going to start an electrical fire. That never happened but Tropical Storm Allison did. The Friday when the storm began, we were doing iron on letter transfers on t-shirts and sweatshirts – the kind where you peel off the backs and then stick the letters to the fabric. The Monday after the storm we opened the vault door to find about a foot of water and all the letter backs floating around like some giant pot of alphabet soup.

I spent most of my twenties at The Alley Theatre in Houston, TX. The original Costume Shop there was deep in the basement. As far as underground shops went, it was actually a very nice one with adequate lighting, three huge cutting tables, and lots of floor space. Sadly, that shop didn’t fare so well during Allison as the entire basement floors of the Alley filled with water when some underground bayou retaining walls broke.

All Washed Up

The only real ‘good’ thing about Tropical Storm Allison is that it hit late on a Friday night so most of downtown Houston was empty of people. The Alley was dark that night (meaning no show was scheduled). A few of the actors had been out and decided to stop in to The Alley on their way home. They were the first to discover that something had gone horribly awry in the underground tunnel system of Houston. Water was almost to the top of the steps and ramps that led down to the tunnel and shops. They immediately called the Production Manager who was sound asleep and had no idea yet what was going on. Her response, which since then has been immortalized in a very exclusive, limited run t-shirt, was, “Just put some towels down.”

It took a few years but, after the storm, The Alley built one of the best Costume Shops I’ve seen in my life. My friend Alice, who ran the shop for many years, called it “The Costume Shop in The Sky.” The shop (along with the rest of production) is up on one of the two top floors of the parking garage attached the theatre. There are huge windows and tons of space. It is truly a spectacular thing.

Another exemplary shop is the one at Troublemaker Studios (Robert Rodriguez’s studio) in Austin, TX. Again, it has large windows all along one wall. The windows are especially cool because they are the kind that, although the people inside can see out, folks outside can’t see in (perfect spy conditions).

Boardwalk Empire Refugee Camp

The Boardwalk Empire Shop was in a quanset hut – one of those dome shaped metal buildings – and essentially (no matter how hard we tried) always looked like a refugee camp. It was in the back of the ‘hut’ near a big rolling metal garage door. In an effort to provide sunlight and some sort of energy efficiency, the set construction guys made us wooden frames stretched with plexiglass that we set up in the doorway. We’d raise the rolling garage door to just above our “windows”. I saw lots of beautiful sunsets over the East River from those rickety plexiglass windows.

Brooklyn Blindspot

One of my favorite shops is the one I have now at Blindspot, mainly because of the big windows that look out over a busy Brooklyn intersection. For me, natural light and windows are one of the key things that make a good shop. If I have that, I can usually make the space work. The second thing would be proper electricity/power. I like to be able to plug all the things in at the same time without blowing a breaker.

What is the one essential thing for your dream shop?

The Zen of Making

The Zen of Making

I’ve been a professional tailor and pattern maker for twenty-five years. Some days I love my job. Some days I hate it. Some days everything goes together without mishap. Other days needles break, threads knot, seams bunch, the sewing machine makes crazy bobbin art for no reason, and garments with alteration tags that read, “drop a lining in” hang on the to-do rack. (please see ‘drop a lining’ rant at the end of this post). All of these things sometimes make me forget that I actually really do like to sew, to make things, to create from a pile of fabric a new complete garment.

The hard part about ending up in a career that involves doing something you love is that, every once awhile, you end up hating the very thing that you know you love.

Which is a shame. Thankfully, I always get over it. Sometimes the getting over it as easy as finishing an annoying project and moving on to something new. Occasionally, I need to have a little talk with myself, take a deep breath, and slow down (even if there are three people asking me when I’m going to be done.) I have to block out outside distractions and focus fully on what I am doing. That is when the ‘flow’ happens.

…my alterations motto is: leave no trace.

Currently I’m working on a show that, though it involves endless multiples (lots of stunts so actors usually need four to five of the same outfit plus one for their stunt double), never really sends me to the “I hate sewing” place of darkness.

One of the characters, new to this season, wears high-end clothing that usually requires quite a bit of alteration. I love taking apart a designer dress and figuring out the best way to alter it without anyone being the wiser. As in hiking, my alterations motto is: leave no trace. I can get happily lost in such a project.

Go with the Flow

The same goes for when I’m patterning or building something from scratch. I find that I’m in the flow of making. I forget about everything else going on and just concentrate on the thing I am doing.

Psychologist Mihaly Csikszentmihalyi says that Flow is the secret to happiness — a statement he supports with decades of research. During a 2004 TED talk, he said “When we are involved in (creativity), we feel that we are living more fully than during the rest of life. You forget yourself.”

A study titled, The Neurological Basis of Occupation, found that music, drawing, meditation, reading, arts and crafts, can stimulate the neurogical system and enhance health and well-being. And this study concluded that computer activities; craft activities, quilting, playing games; and reading books were associated with decreased odds of having MCI (mild cognitive impairment).

What this all adds up to is probably what most of us who sew and create already know: making things is good for your psyche and your soul (and your memory!). However you do it, wherever you find your flow is important and necessary to your well being, to you being you.

Drop a Lining In Rant

“Just drop a lining in,” they said, “It’ll be easy. No big deal. Shouldn’t take you that long.”

Anyone who tells you this really doesn’t know much about sewing or patterning. “Dropping a lining in,” is no easy task and certainly not as simple as dropping, well, anything. Unless your garment is a true honest to god couple of rectangles sewn together (and believe me it very likely is not) there isn’t anything ‘just’ about it. To line a jacket, or skirt, or dress, or anything, you really need to make a pattern and it’s going to take more than a couple hours to do it correctly. On Boardwalk Empire, we would regularly end up with vintage dresses literally hanging on by thread with the note, “Drop a lining in!” attached. None of us wanted to do them. We’d shuffle them to the end of the rack until we couldn’t put it off any longer and finally someone would say, “Ok, ok, fine, I’ll do this one if you’ll do that one.”

What I Do at Work All Day (Part 2)

What I Do at Work All Day (Part 2)

(As promised) The Dart and Drop

Pinned side back seam.

Pinned side back seam.

I do a lot of suit alterations. Sometimes I alter up to eight suits in a single day.

Often, suit jackets fit well in the shoulders but are a bit too roomy in the body. Because of the inner canvas and the inevitable front pocket, you can’t really successfully alter the front of a suit jacket. You need to take in at the center back or side back seams. While pinning, you’ll usually notice that you need to take in the side back seam all the way into the armseye.

This presents the conundrum of:

  1. Should I also take in the sleeve so it will still fit?
  2. Do I need to get into that seam at all?
  3. Do I really need to take the sleeve out?

The answers are no, yes and yes. Do not take in the sleeve. Do take the bottom part of the sleeve out.

Men’s suit jackets are traditionally cut without an actual side seam. The place where you really want/need to take a jacket in, though, is often in that invisible side seam. The way to accomplish this is by using the dart and drop method.

The Dart

Dart pinned into side seam.

Dart pinned into side seam.

Take the lining out and the underarm sleeve apart from the side back seam to a few inches in the front of the side seam. There should be a notch in the jacket to indicate where the side seam would be if there were one. If no notch is present, lay the jacket flat on a table, buttoned up. Where the jacket naturally folds will indicate basically where that side seam is. Mark with chalk on the wrong side of the fabric in the coat body and in the sleeve.

Next, from the wrong side of the fabric, fold on the notch. At the top, measure in the amount you need to take in (as you determined by pinning your side back seam). Then draw a dart from that point down about 3 or 4 inches (or until you run into the top of the pocket). Sew the dart. You can put the same dart in the lining or you can simply do a tuck. Either is fine.

The Drop

The next step is to redraw your underarm seam. The armseye should remain the same size as it originally was. To do this, drop the underarm seam. I suspect there may be some actual formula for this but I’m more of an intuitive sewer. Dropping an inch is usually a good place to start. Use a curved ruler

to draw the new line making sure the connections are smooth. Pin your sleeve at your new side seam an inch below the original seam line. Then pin the rest. You might have to undo more of the original seam if the sleeve isn’t fitting. Do this in the back until you can easily fit the sleeve back in without any excessive easing.

Don’t Worry

Pinned underarm seam.

Pinned underarm seam.

If you end up having to undo part of the shoulder pad and sleeve header, that’s fine. Just reattach them once you have put your sleeve back in.

You can apply the same principle to jackets (or really anything) that have side seams. Unless you want to narrow the sleeve, dropping the armseye is a more accurate way to accomplish this alteration.

At this point I also want to add a little something about the idea of ‘a right way’ to do something. I don’t believe there is only one right way to do things.

Sewing jacket with side seam.

Sewing jacket with side seam.

I ran the costume building shop for Boardwalk Empire for four years. It was a shop full of talented tailors from all sorts of backgrounds and places (Russia, Uzbekistan, Turkey, Tunisia & various U.S. states). We had a running joke about people who insist that their way of doing things is the only way (We even had a little song called, “There’s only one right way to do things. The other ways are wrong…”).

Walk Your Own Path

You need to figure out the way of doing things that works best for you while accomplishing the desired result. Sometimes someone can show you a whole new way of doing something that makes it easier for you. Sometimes not.

The tips and tricks I write about are the things I’ve learned work best for me over the years. Hopefully they will prove to be useful to someone else as well.

Missed Part 1? Check it out here!

What I Do At Work All Day (Part 2)

What I Do At Work All Day (Part 1)

Just a view of my shop.

Just a view of my shop.

I’m currently the Key Tailor on a New York City based major network crime-procedural drama television show (Blindspot on NBC). I work mainly out of one of the Brooklyn studios with occasional on-set last minute fittings. Most of the work I do each day is for things that need to be ready for the actors to wear the next day on camera. What this means is that, over the years, I’ve become pretty fast at doing a variety of alterations (as well as patterning and constructing from thin air). In my industry, there are certainly a lot of excellent tailors but there aren’t all that many excellent and fast tailors. Here are a few of the tricks I’ve discovered along tQuhe way that help speed up some common alterations.

Shortening the Sleeves of a Men’s Suit Jacket (without fancy functioning buttonholes)

Topstitching on sleeve lining.

Topstitching on sleeve lining.

First, just go ahead and remove all the buttons. They’ll just be in your way. Turn the sleeve inside out and find the topstitching along the sleeve-lining seam. This is how the sleeve was originally put together. Open up that seam and turn your sleeve inside out. Take apart the mitered and straight corners but do not undo the lining from the rest of the hem. (Go ahead and release any stitching holding the actual hem up though.) Undo any fake buttonhole stitching that you need to. These should be on a chain stitch and easy to undo.

Press miter corner with point turner inside out.

Press miter corner with point turner inside out.

Measure up or down the distance you want to shorten or lengthen at your corners and redraw your miter line if you need it.

Re-stitch all corners at new hem marks. I flip everything back right side out at this time and press my corners and the new hemline. Use a handy point turner

Don’t undo original stitching at hem.

Don’t undo original stitching at hem.

and please don’t trim anything away from the mitered corner. If you press inside out first with the point turner inserted the fabric will go where it needs to. No need for trimming. One of the most annoying things is to go and alter a jacket sleeve only to find that someone has trimmed the miter corner, meaning I can’t lengthen the sleeve properly.

(Still don’t unattach the lining)

Redraw miter line.

Redraw miter line.

After pressing, turn inside out again. Then simply measure up or down (I use an old fashioned metal seam gauge) from the current stitching line the desired amount and sew along that line. If you are shortening, there is no need to undo the original stitching line. If you are lengthening, you will need to. Machine tack the seam allowances together at the seam to keep the hem up.

Sew new stitching line shortening hem.

Sew new stitching line shortening hem.

Turn everything back right side out and topstitch the seam of the sleeve lining closed, put your buttons back on and you’re done!

There are of course a few situations that will make this alteration a bit more challenging – such as functioning buttonholes or having to add fabric to the hem seam allowance because of lengthening. If I’m having a good day and nothing strange is going on inside the sleeve, I can usually do this alteration in 30 minutes.

Center Back or Side Back Alterations on a Suit Jacket

The time saving trick on this one is pretty simple. Open up the under vent seam and turn everything inside out through there. When done, just topstitch the vent closed again, no opening up the lining and sewing it back by hand.

Men’s Vest Alterations – Center Back or Side Seams

I’m a huge fan of bagging things out. Men’s vests are one of my favorite things because you can bag everything out through a mere 2 inches on one of the side seam linings. First, find the opening where the vest was bagged out originally, probably a small hand stitched couple inches on one of the inside side seams. If its not there (if the vest was bagged through the neck, make your own. Then pull the entire vest inside out through those two inches. It will fit.

Vest side seams are most usually put together with one stitching line through all 4 layers (fronts and backs with linings). On the side without the opening just stitch a new line taking in (or out, though most commercial vests don’t have a lot of seam allowance to let out) the desired amount. If the amount is significant, you may need to re-stitch the arms eye curve so that everything lines up properly under the arm.

If you need to take in the center back seams, undo at the neck and bottom hem, alter as desired, the re-sew what you released.

On the side with the opening, stitch in two sections, above and below the opening. In the 2 inch gap, sew through all layers except the back inside lining.

Pull everything back through your opening, press and voila!

I just topstitch my opening from the right side of the vest, hiding the stitches in the seam line.

Check out Part 2 here!

My next post will tell you about the one of the sneakier men’s suit alteration tricks – the old dart and drop! So keep a look out for the follow up and as always – keep sewing!