The hot weather means flowing, loose clothes that keep you cool while flattering your body. For me, it also means it’s time to sew! Sundresses are some of my favorite things to make. I’ve lost count of how many I’ve made over the years – most of them I still wear! The key to success with making a sundress is choosing the right pattern. The right sundress pattern will flatter your body.
Think About What You Want to Accentuate
We all have things about our bodies we like…and things we don’t. Start by thinking about the things you like about your body. Great legs? Go with a shorter length dress. Love your flat stomach? Make sure the dress is fitted at the waist. Adore your curves? Don’t be afraid to show them off with some well-placed darts. Keep all of these things in mind as you search for your sundress pattern. It’s easy to get pulled into a pattern that looks great on the package or model, but by keeping in mind what flatters YOUR body, you’ll be able to set aside any that won’t work.
Figure Out What You Want to Cover Up
Now, think about those parts of your body you want to cover up. Tummy not as flat as it used to be? Try an empire waist to accentuate other curves and avoid the cling around your stomach. Wish you were a little less curvy? Try something loose and flowy with material to match. Wish your legs were longer or skinnier? Go with a long sundress.
Pro tip: If you don’t like your arms, add a sheer shawl to the ensemble. Some patterns even come with the shawl included.
Match Your Skill Level
When you’ve determined the style of sundress you want to make based on your body and what you like and dislike about it, look at patterns that match your sewing skill level. You’ll find that using these three factors it’s easy to narrow down your sundress pattern options to a manageable number. Then, pick the one you like best and hit the fabric aisles!
Every sundress I’ve made from a pattern chosen this way is one I still wear. Sundresses where I picked the pattern simply because I liked it and didn’t think about my body or my abilities were worn once, at best, and discarded. No one wants to see that happen after the effort of making a sundress. Instead, make a sundress you’ll love to wear using these simple steps to pick your pattern.
Last week, I spent a couple days making six silk dresses for a freelance client. I did the work at home, in my fifth floor walkup apartment in New York City. I only mention this because the dresses were made from silk charmeuse and I don’t, interestingly enough, have a proper cutting table at home. This really isn’t so much interesting as it is unfortunate and slightly annoying. Because, as anyone who has ever cut silk charmeuse knows, it’s a slippery sliding thing.
I cut the first dress out on the floor. Not ideal but it does work, as long as you use enough weights to keep it from shifting around. I usually cut things on the double with the fabric folded, selvedge edge to selvedge edge, which is how most consumer patterns instruct you to cut. Silk charmeuse can be a bit woodgy (yes, that’s a technical term) but the weave tends to be tight enough that you can confidently cut on the fold.
Some fabrics with an especially loose weave where it’s hard to keep the lengthwise grain line (and cross grain) straight are best cut in a single layer.
Shall we
To begin cutting, I tear a straight cross grain so I have a right angle to work from. Almost all fabric can be torn in this way. The cross grain of a fabric is made from the yarns woven over and under the lengthwise fabric grain at a 90 degree angle. The over under weaving provides less tension so crosswise grains have a tiny bit more stretch than the lengthwise grain. They normally run around a person’s body.
The lengthwise grain is the one that runs parallel to the selvedge edge and is the grain marked by the arrow on every pattern piece.
After tearing the the cross grain so I have a straight line, I fold my fabric in half right sides together, selvedge to selvedge. Once I have the fabric relatively flat and smooth on my cutting surface, I place a long metal ruler about an inch or two from my torn crosswise edge. I use a metal ruler because they’re heavy enough to act like a weight.
I line up the edge of the ruler perpendicular to the selvedge edge and across the full width of both layers of fabric. Then I make sure that the edge of the fabric that extends past the ruler is even. I do this to ensure that my cross grain is lined up correctly and not sloping down or up in relation to the selvedge.
I cut the next five dresses out on my old wood dining room table. It has leaves that fold up to make it almost six feet wide. At about 39” high, my cutting tables at work are higher than a standard dining room table. This height means I don’t have to bend so far over a table when cutting and, ultimately saves my back from hurting. If you don’t spend entire days cutting out garments, a dining room table usually works just as well.
You can also buy one of the cool folding style cutting tables available.
Grain line
So, what about grain line? Do you need to always pay attention to it?
That depends. At Boardwalk Empire, we would sometimes jest (when we didn’t have enough fabric and had to get creative with our cutting layouts), “Grain lines are for suckers.”
What we really meant, though, was “As long as you know what you’re doing, you can manipulate and vary the placement of your pattern pieces.”
If you happen to have a striped fabric, playing with the grain line can be fun. Thomas Pink, who makes high end men’s dress shirts will sometimes cut one side of the front on the lengthwise grain and the other on the cross for a quirky asymmetrical look.
Striped fabrics will also naturally chevron at the side seams if you match them up correctly when cutting and sewing.
You can also turn collars, cuff pieces, and/or pockets of striped fabrics on a different grain to add an interesting design effect.
All of these things are most easily done with a fabric that doesn’t have a lot of give, like a tightly woven cotton.
Measure up
If you’re interested in getting a little creative with your next project, you may want to invest in a quilter’s ruler. These rulers have 45 and 30-degree angles marked which is helpful when adjusting grain lines.
If you’re matching stripes or other patterns, you’ll find it much easier to cut in a single layer so you see everything clearly.
This may seem obvious, but if you’re experimenting, it’s always good practice to test things out first. If you have plenty of fabric, you can use some of it to do a little practice run. If not, you can use muslin or something similar to try out your idea. If you’re using a striped fabric, you can mark lines on your muslin before cutting to show you how everything will line up.
Bias
Bias is the diagonal angle across your fabric. The bias grain has quite a bit of stretch. A dress that clings to the body closely without having multiple seams is very likely cut on the bias. When you’re making a bias garment, especially a dress or slip, you’ll want to let the bias hang out for a while if possible as it will stretch out. You’ll notice that the bottom edge of your pieces will end up uneven if you do this, which is exactly what you want. You’ll need to remark your hemline after you’ve put together the garment.
I usually stay stitch my arm and neck holes, then pin my cut pieces on a form and, if time permits, let them hang over night. It’s also beneficial to then pin the seams together while they are hanging on a form to help alleviate any puckering.
Once you have a good understanding of grain lines, there’s no reason why you can’t try different things. Get creative (just remember that bias does stretch a lot more than something on the straight so you may need to stabilize with a lightweight fusible interfacing).
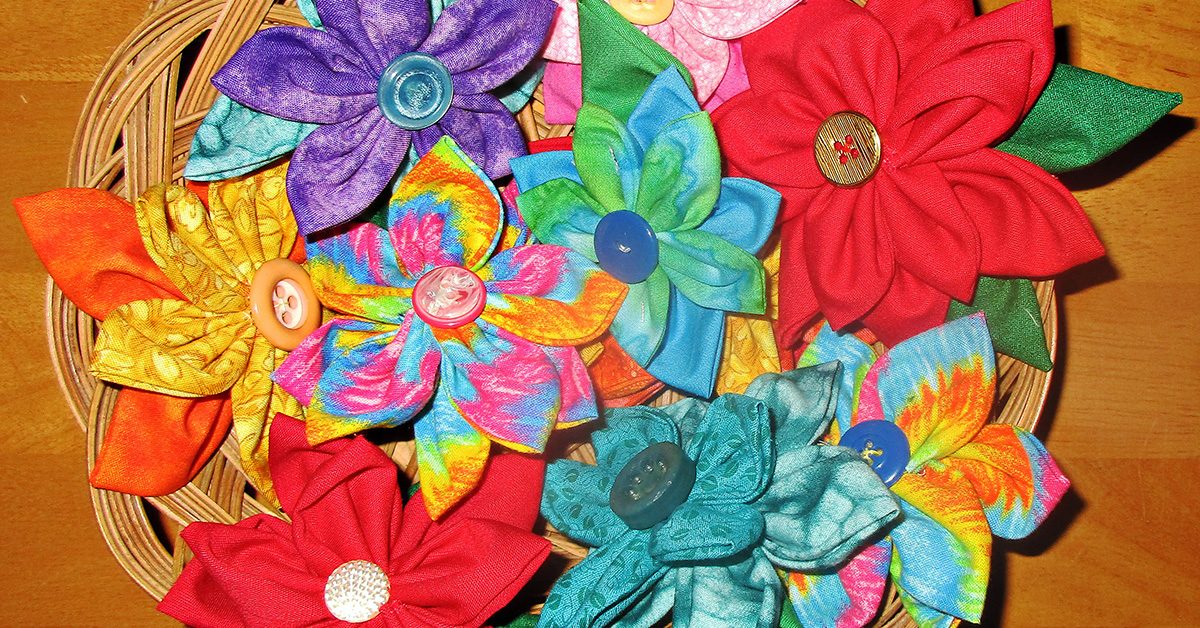
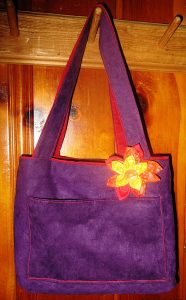
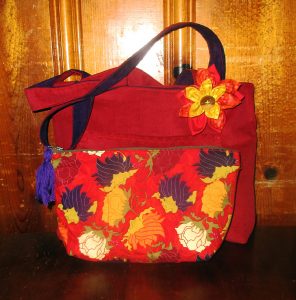
I wanted to make a fabric flower pin to dress up and bring together the complementary colors on a reversible tote bag I made for my mother-in-law’s Christmas gift.
These fall colors are her favorites.
I think they look great together.
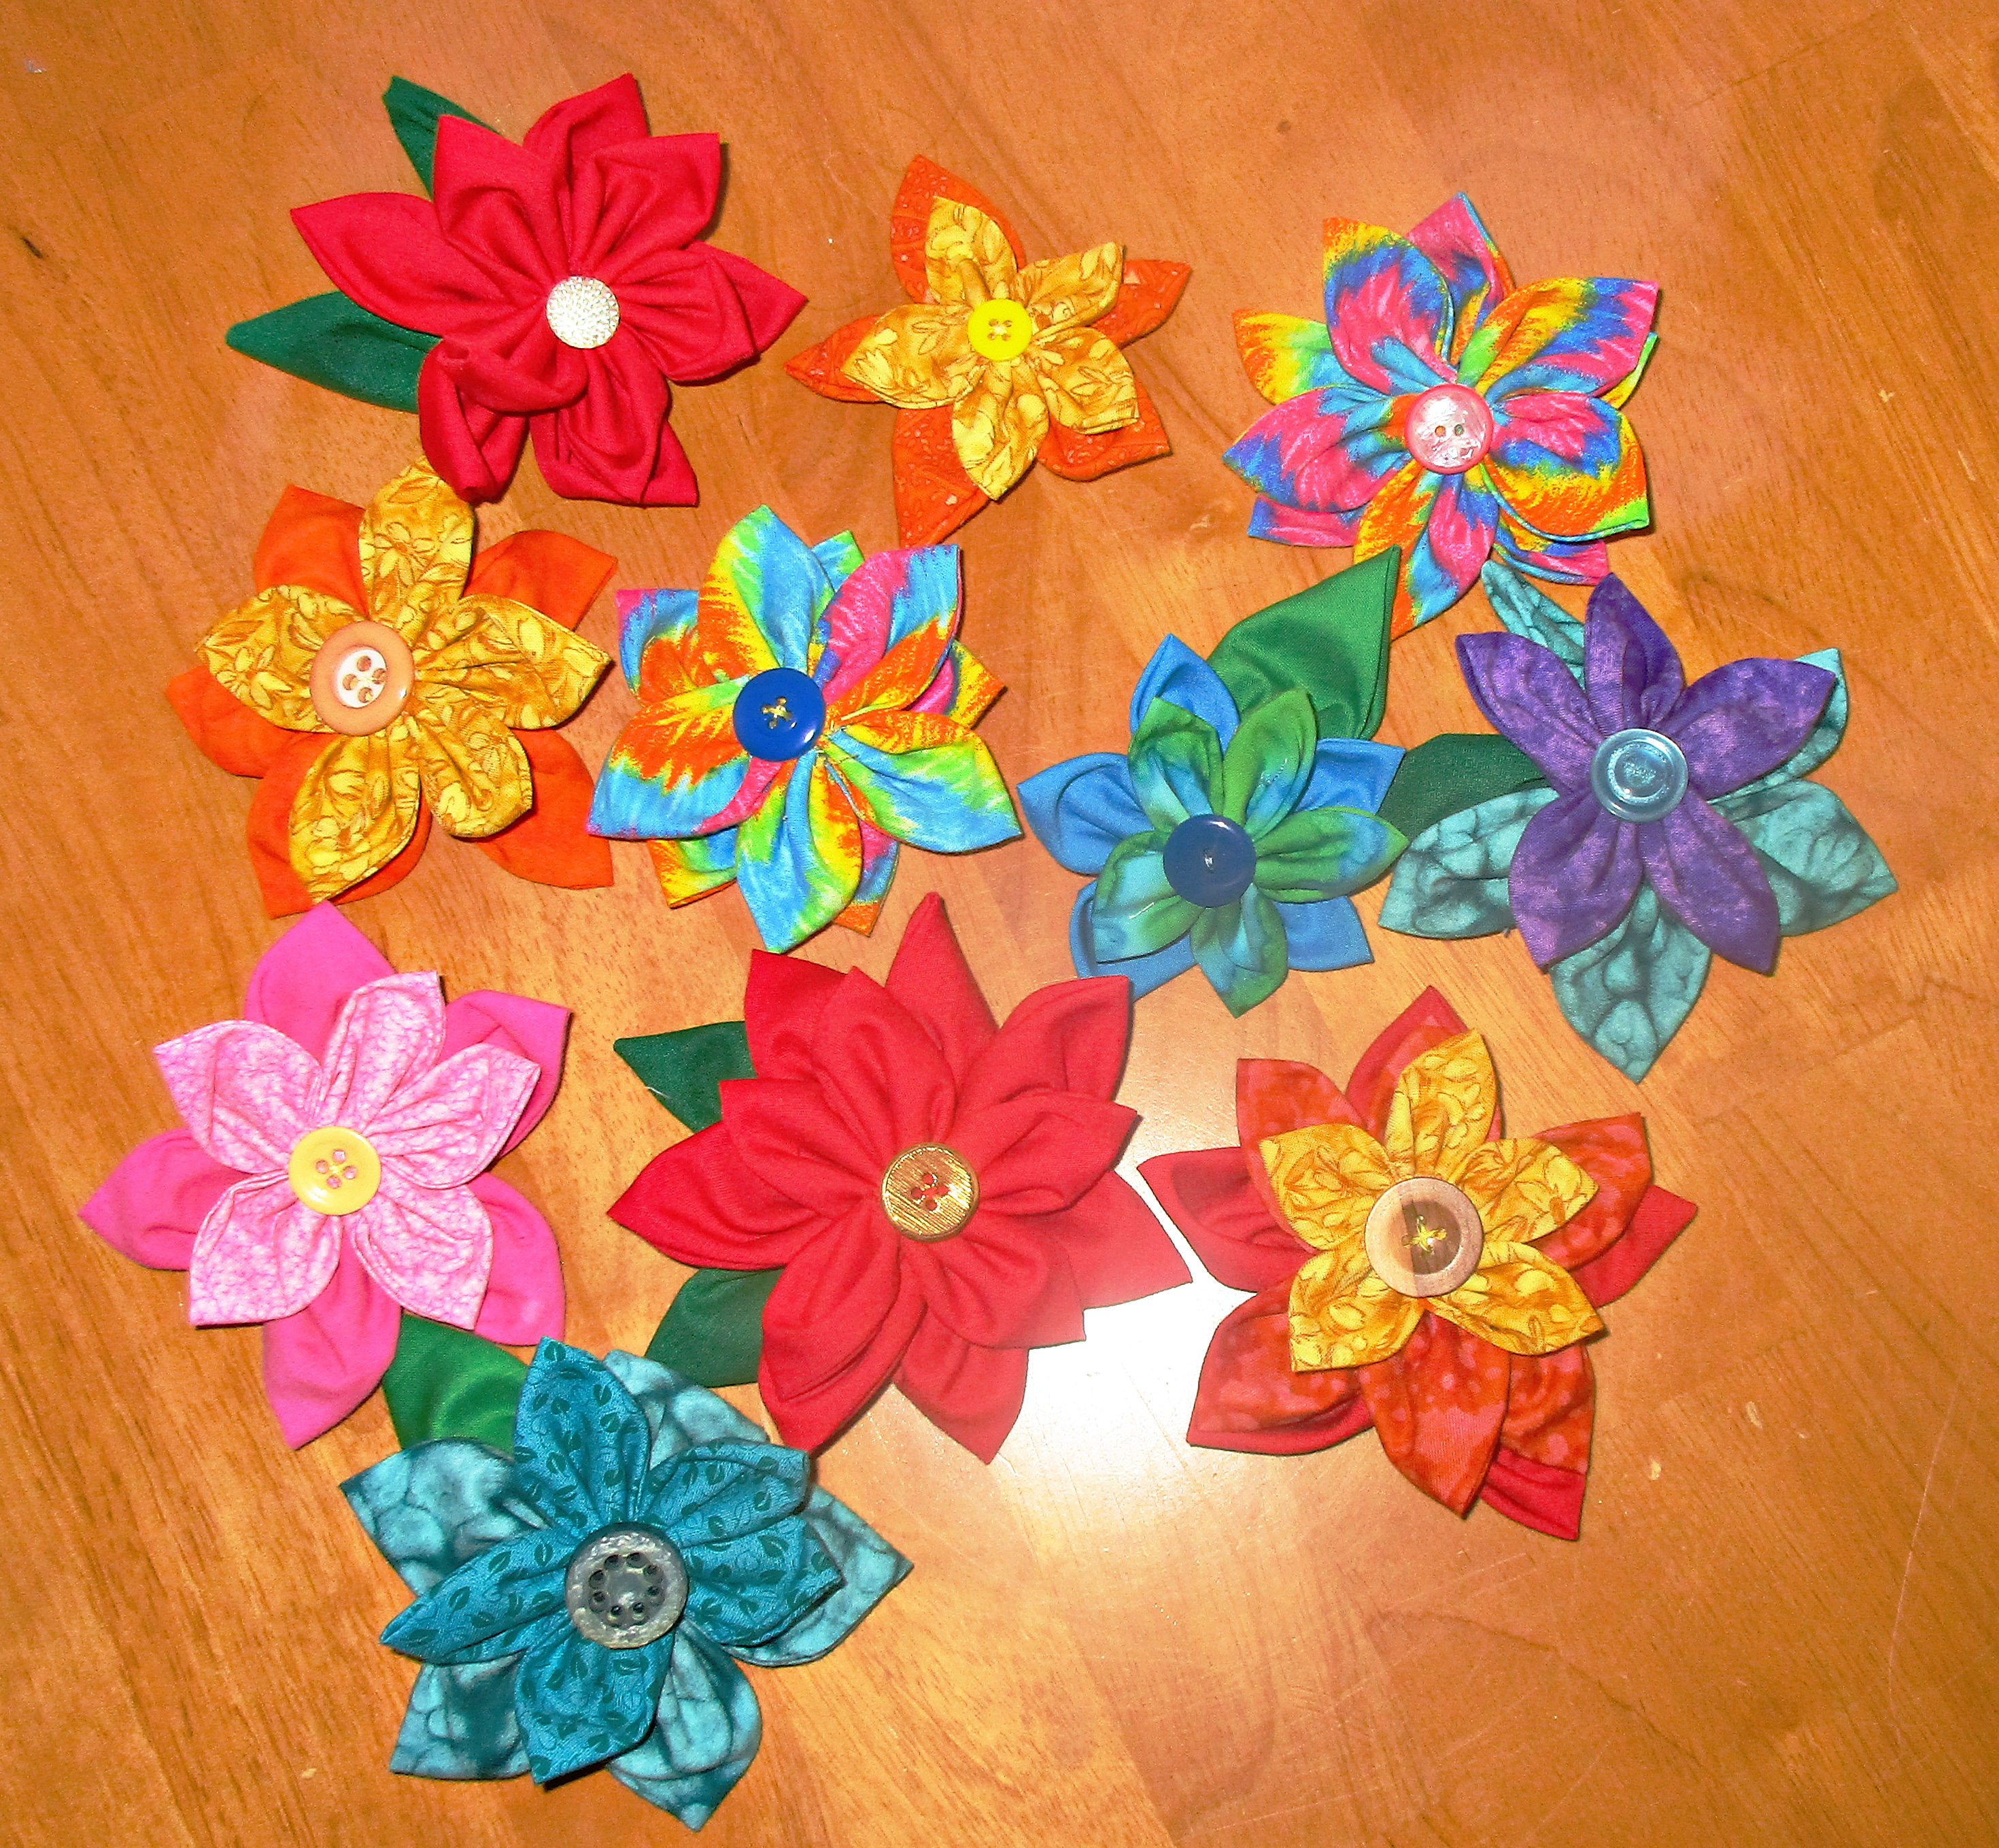
Yes, I’m getting a head start on my Christmas making now. And that’s why, when I loved the flower I made for her bag, I kept going and made a bunch of these pretty flowers. I kept my favorite of the bunch for my hair, and the rest are for gifts.
You could sew these directly onto a ponytail elastic, barrette, headband, clip, clothing, or bag, but I opted to make them more versatile by sewing them onto small brooch pins, which I can then pin on my hair elastic, hat, or bag.
Who can make a flower?
While making these, I had a sweet memory of my great grandmother, Lucy, who was a Sunday school teacher and loved nothing more than hearing children sing. Of all the songs she taught us, my favorite was always this one:
“Oh, who can make a flower?
I’m sure I can’t, can you?
Oh, who can make a flower?
Only God, it’s true.”
While these aren’t the real thing, I sure felt happy while creating these fabric flowers and thinking of this old song and Grandmother Lucy. I hope you enjoy making them, too.
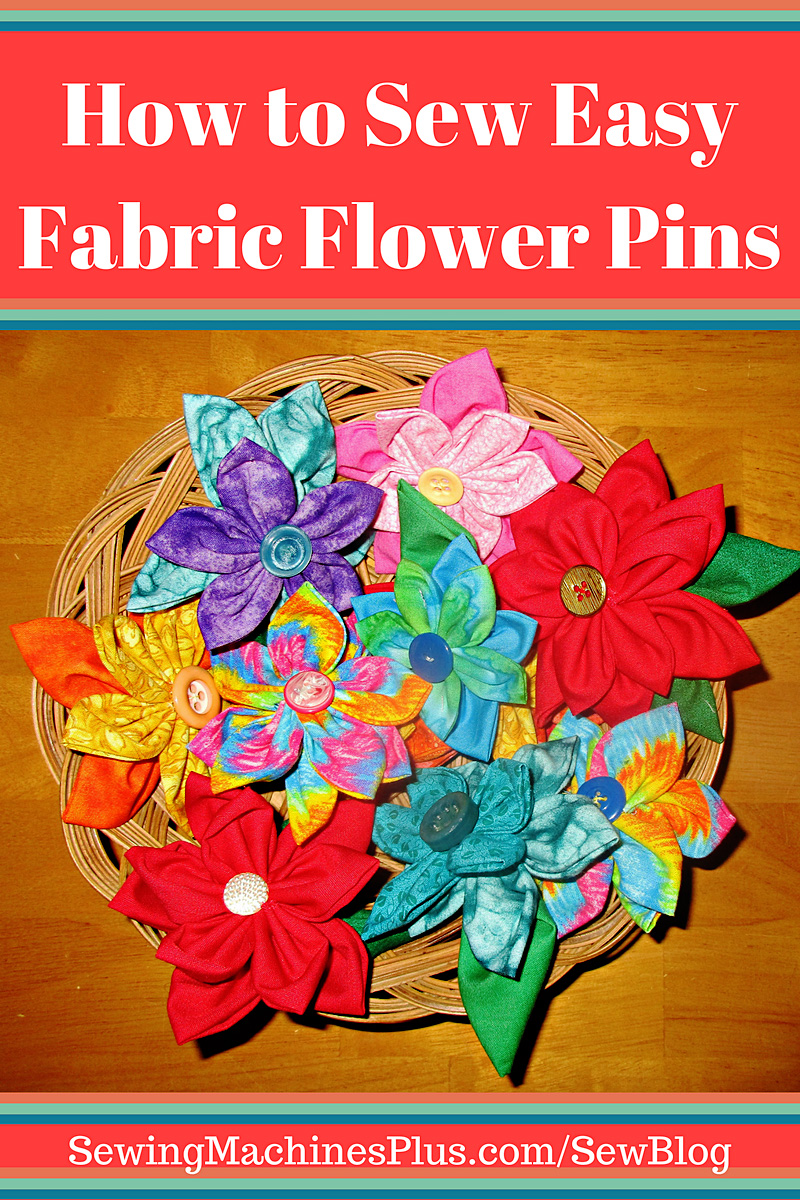
How to sew fabric flower pins
To make these double flowers, you need ten or twelve circles of fabric, a strong hand needle, thread, and a button for the flower center. You may cut five circles each of two different sized circles, or you can use all same sized circles. You may choose to cut seven rather than five for the bottom layer; these will be the larger circles if you are using two sizes.
If you would like to make leaves, cut these from slightly larger circles than you used for your largest flower petals.
You can cut your circles using an Accuquilt Go, a compass, or with the help of an Olfa circle rotary cutter.
You can also make your circles by tracing around a glass or other round object. I traced and then cut my circles several layers at a time. I used several sizes of mug and glassware and made my flowers in a few different sizes.
Sew by hand
Once you have your circles cut out, you can sit and sew them. This little project is sewn entirely by hand, and so is a great opportunity to sit and watch TV, or to have something to do while sitting in a waiting room or traveling as a passenger.
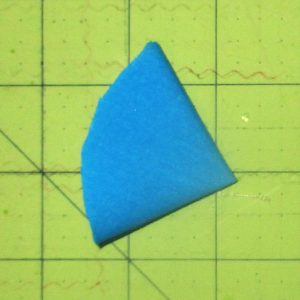
Thread a needle with a long, double length of thread. What I mean is, thread the needle and then tie the two thread ends together at the end. Then, take your first circle and fold it in half, wrong sides together, and then in half again, forming a quarter circle.
Fold circle in half, then in half again.
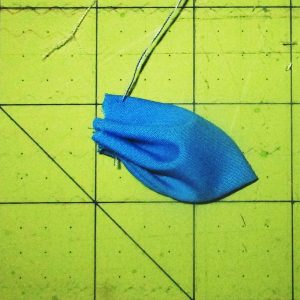
Then pull the thread taut to gather the petal & repeat with the next petal.
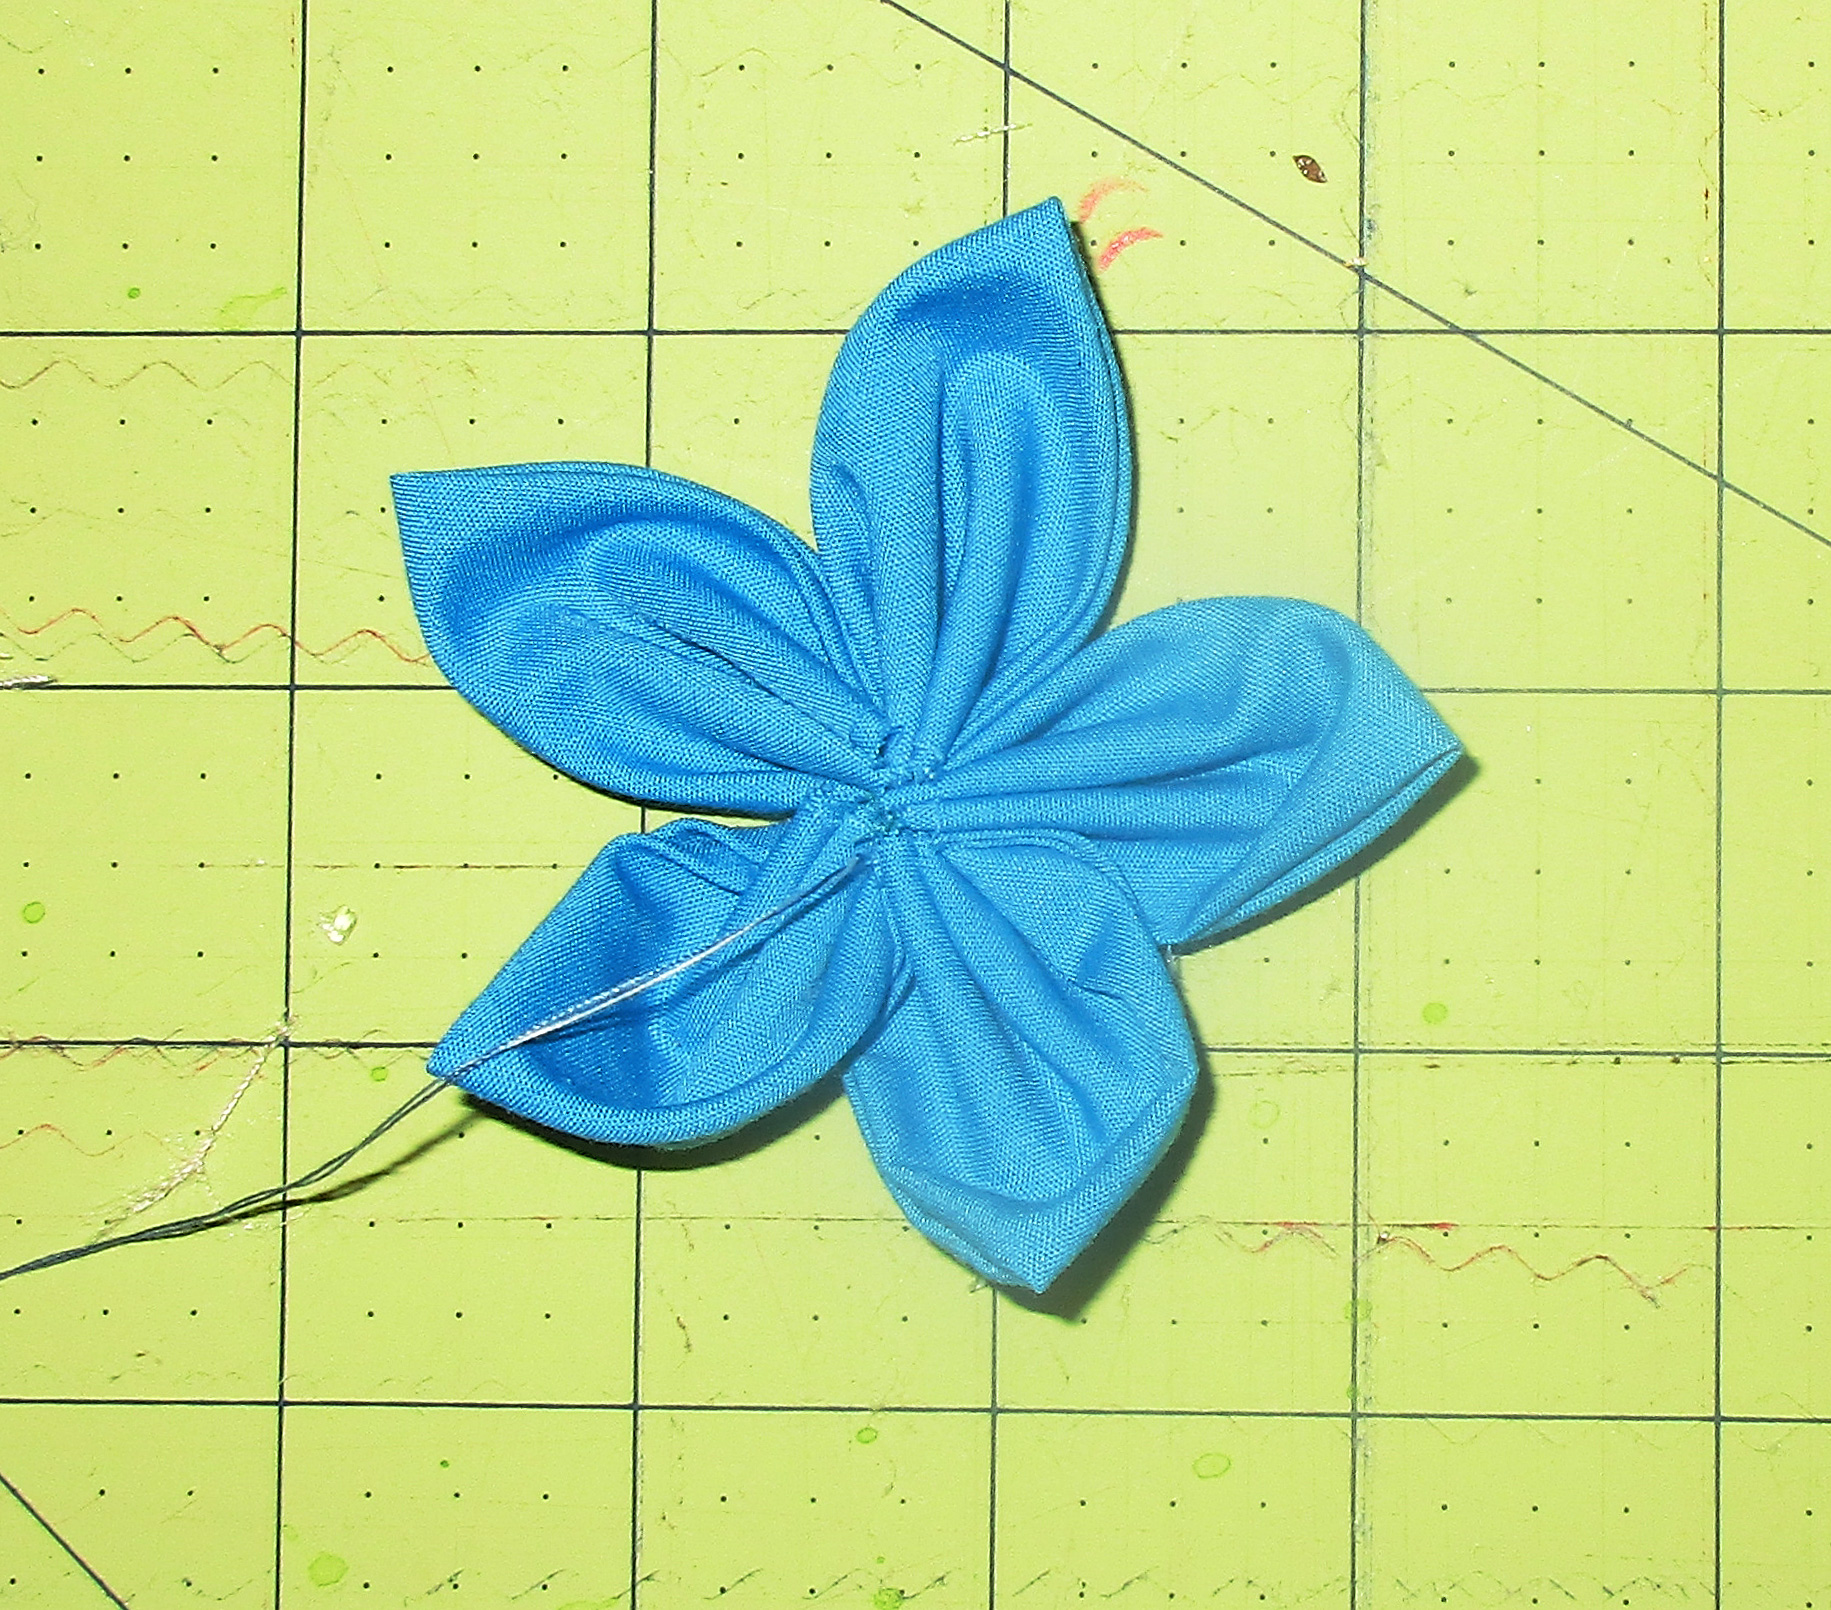
Sew a long running stitch through all four layers of the curved edge. Then pull the thread taut to gather the petal and repeat with the next petal. After you have sewn and gathered five petals, pull thread to tightly gather and sew the last petal you gathered to the first one of the five.
Sew the last petal to the first, then neaten center.
Continue to sew the raw centers of the petals tightly to each other, to tighten and neaten the inner edge of the flower center. Do this on both sides, then tie and cut your thread. You can set this flower aside for now.
Wash, rinse, repeat
Now sew another flower, perhaps using a different sized circle. Once you have both, sew them together with the smaller flower on top. If you’d like to add one or a couple leaves, do that now.
I made my leaves slightly differently than the flower petals. Instead of folding the green circles into quarter circles, I folded the circles in half, and then thirds. Then I sewed them with less gathers than the flower petals. Sew the leaves onto the back of the bottom flower layer.
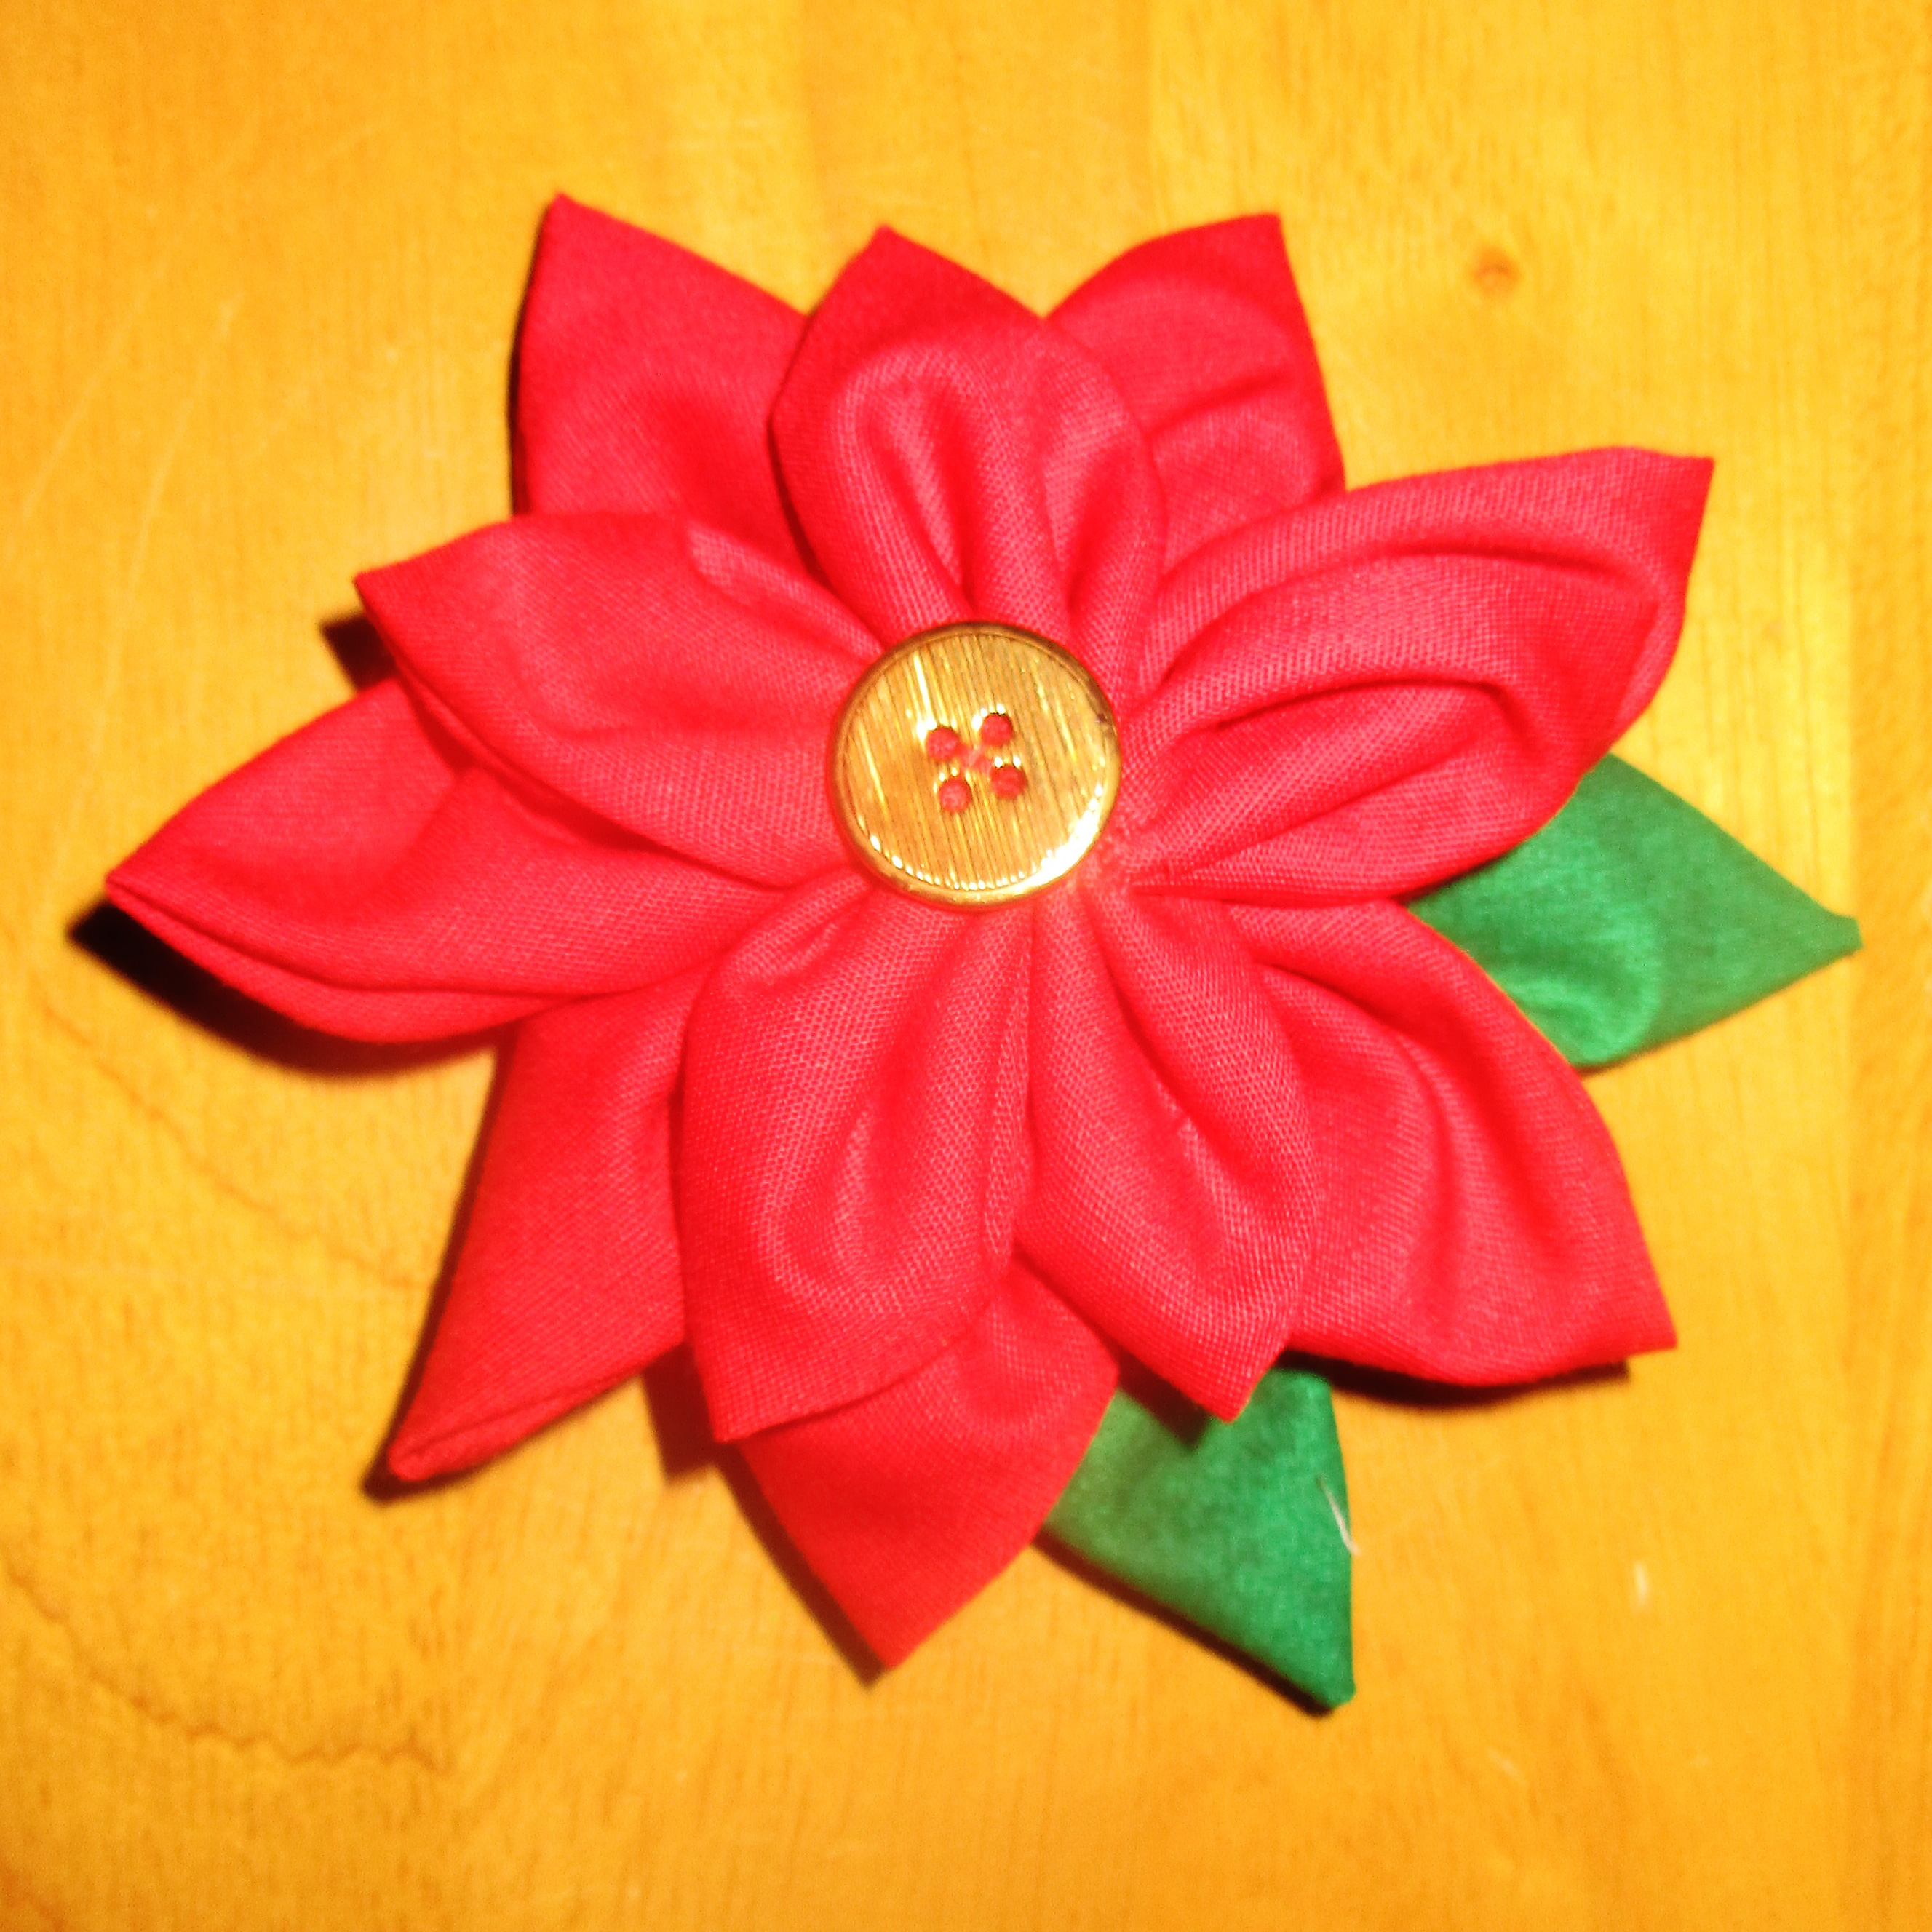
Choose a matching or contrasting button or use a bit of embroidery for the flower center. Sew the button down through both layers of fabric flower.
Then sew the whole thing to a brooch pin, hair elastic, bag, or anything else. Small brooch pins work best, in my opinion, as these can then easily pin across a ponytail elastic or even a small barrette, not to mention on bags, lapels, hats, and etc.
Poinsettia pins
You can sew both flower layers from red fabric and make these into poinsettias. These will be useful during the holiday season. I plan to make small gifts of brooch pins at least, but I can think of lots of other ways to use these for holiday decorations and gifts, and I think I’ll be making a lot more of these fabric flowers in red.
You can sew both flower layers from red fabric & make these into poinsettias.
Enjoy making them
I hope they will bring joy when I give them as gifts.
I felt joyful making these and I hope they will bring joy when I give them as gifts. Whether you make just one fabric flower or a basket full, I hope you will enjoy making these as much as I did. Happy sewing!
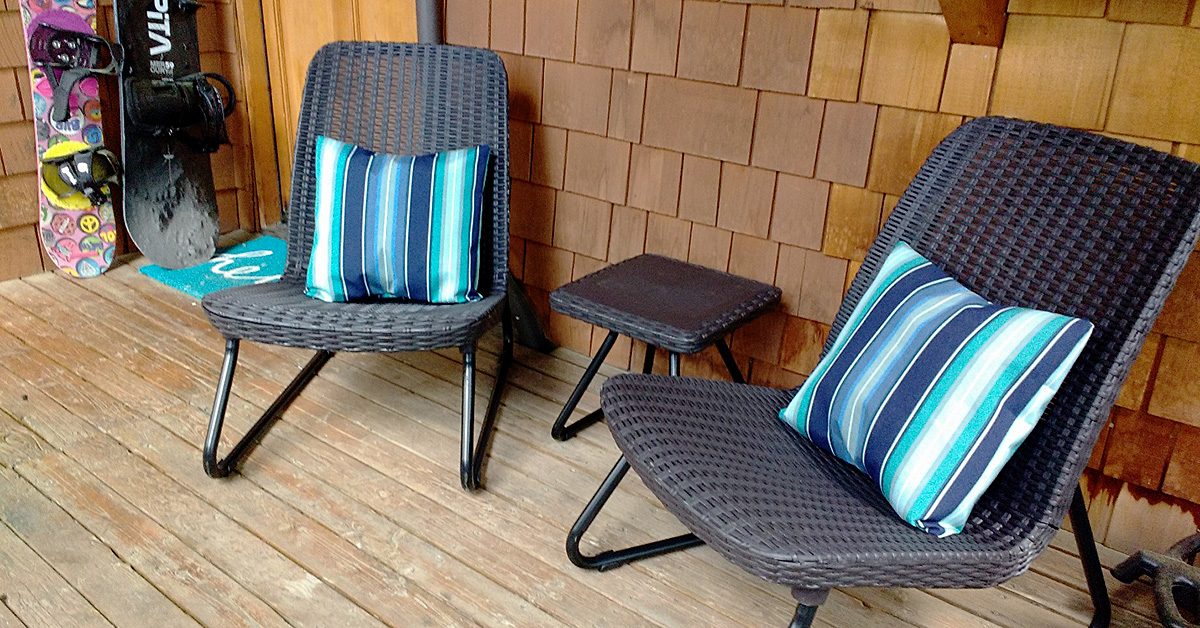
After a record amount of snowfall this year and the ensuing snow melt and run off, my new home town of Mammoth Lakes, California is in full summer swing. We live at 8,000ft elevation. This means that while we’re high up amongst mountains and the trees, we’re also closer to the sun. UV exposure increases about 4% for every 1000 ft. (305 m) gain in elevation (source). So at my house, we are 32% more exposed to UV rays than at sea level.
I mention this because I recently made some outdoor pillows for our patio furniture. I immediately chose Sunbrella fabric as my go-to because of its incredible sun resistance and durability (among many, many other factors. Seriously, read up on Glen Raven’s Sunbrella fabric and see why it’s the number one choice in marine environments).
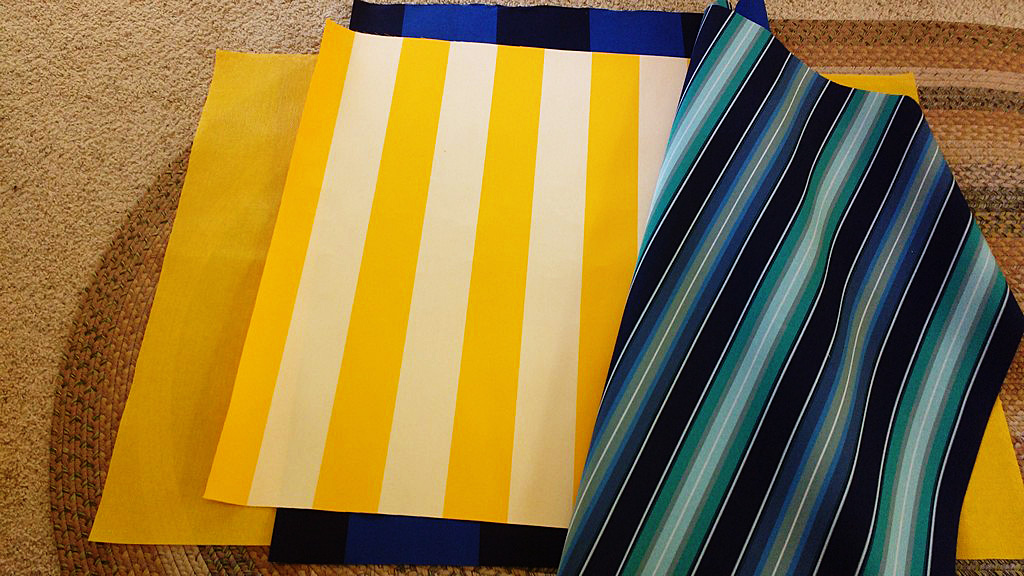
Sunbrella
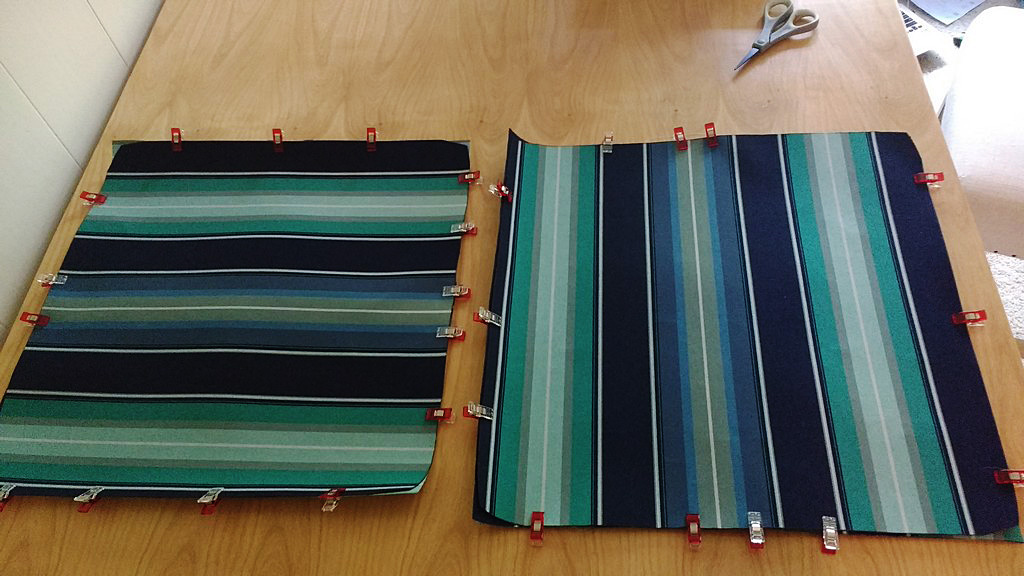
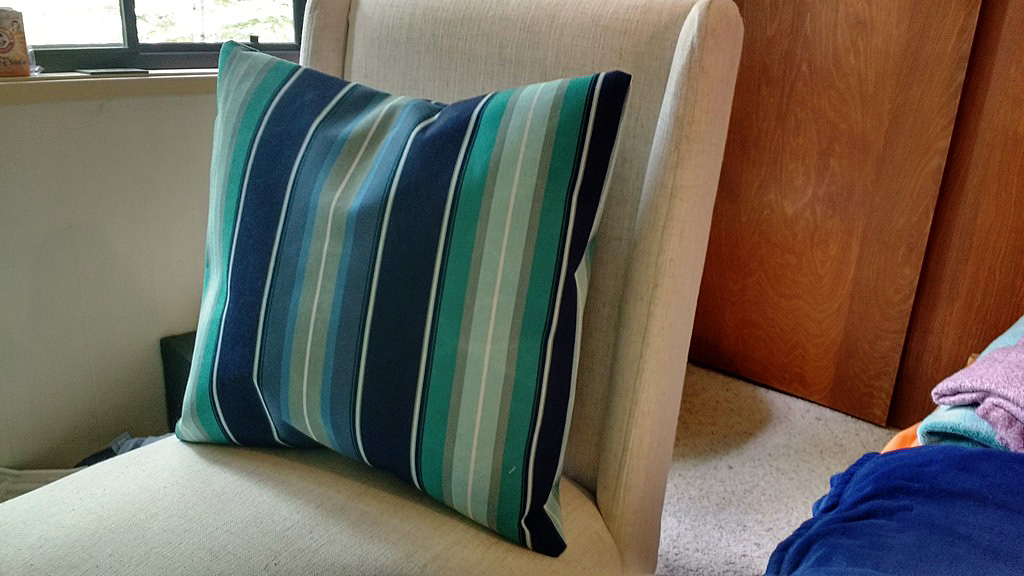
I dug through my stash of Sunbrella which is currently three yards of fabric. I settled on Sunbrella Saxon Cascade, both because I liked the pop of turquoise and how it matched with my welcome door mat, and because the other two pieces’ stripes were too big for the 18″ x 18″ pillow forms I planned to use.
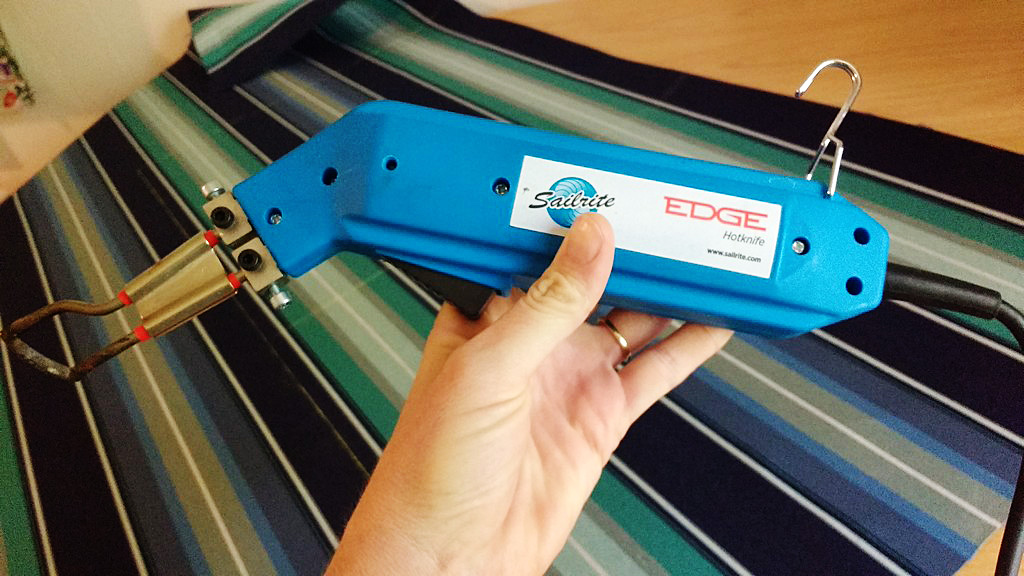
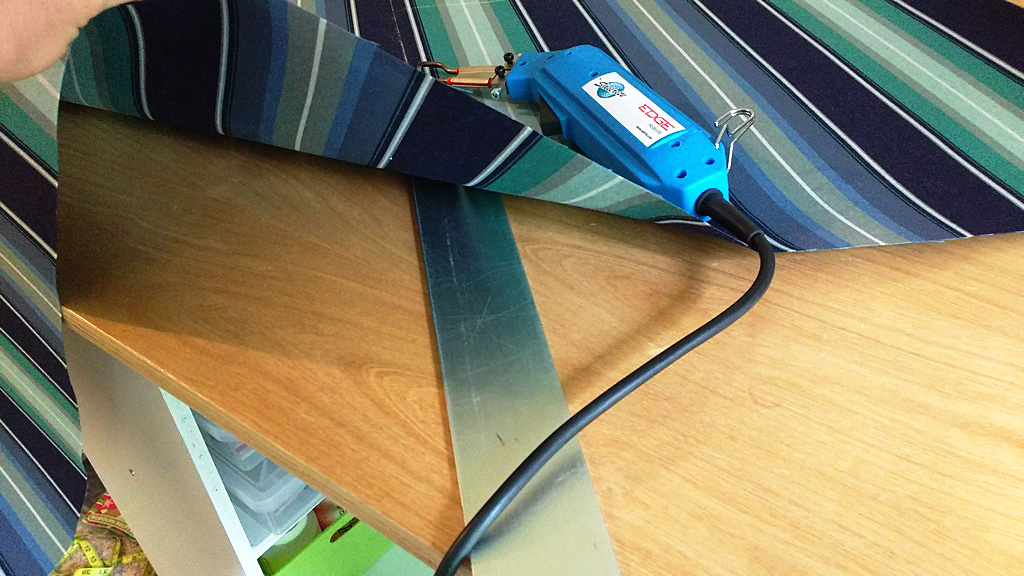
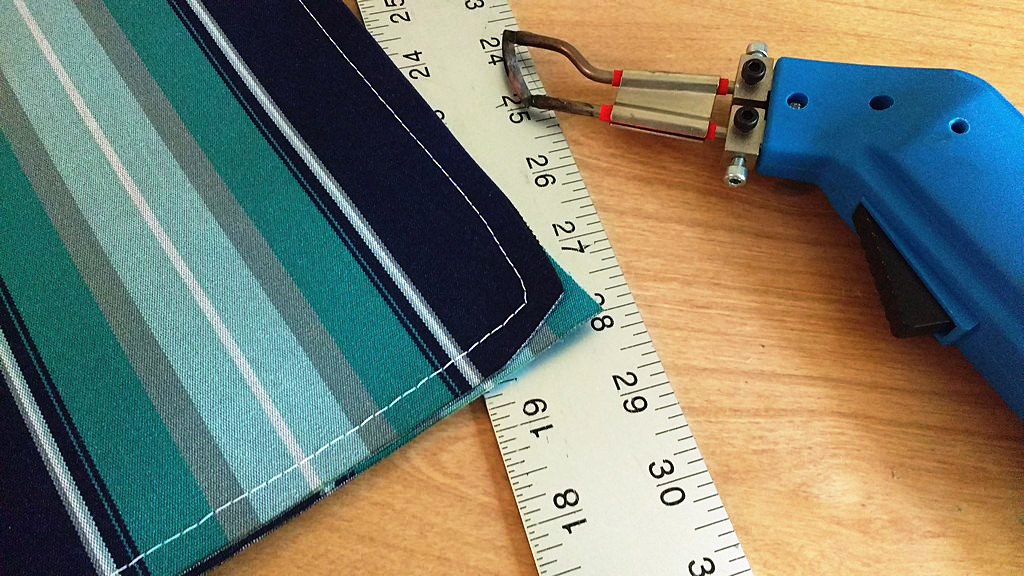
Sunbrella is an acrylic fabric & hot knives cut through it like butter.
Sunbrella is an acrylic fabric and hot knives cut through it like butter. I love to use hot knives when I cut out my pieces because the knife seals the edges to prevent unraveling.
I love to use hot knives when I cut out my pieces because the knife seals the edges to prevent unraveling.
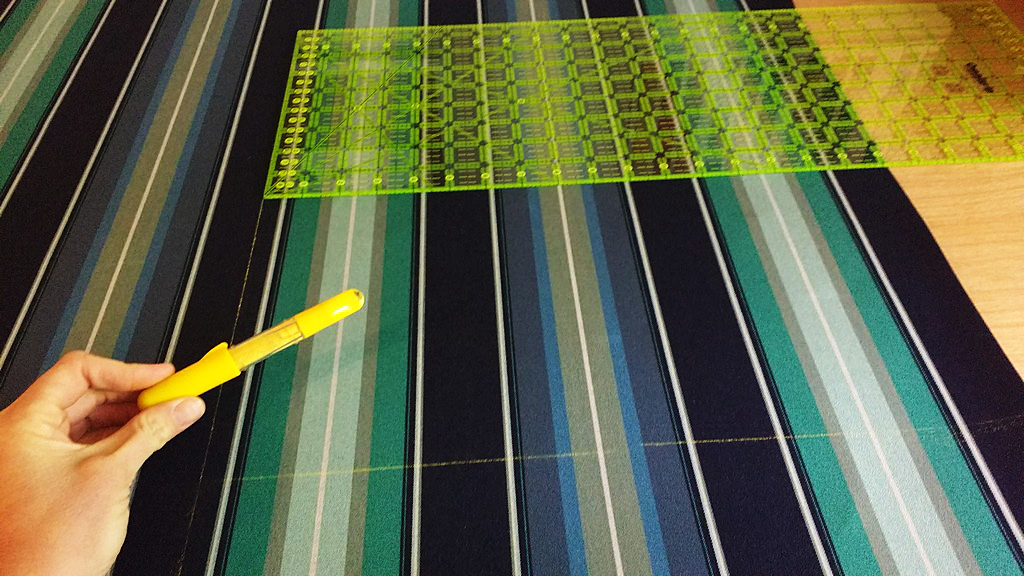
Clover Chaco Liner pen
I planned to do envelope closes for these pillows so I marked out my two front pieces and four back panel pieces. For navy or black-colored fabric I use my Clover Chaco Liner pen in Yellow which is available from SewingMachinesPlus.com.
For navy or black-colored fabric I use my Clover Chaco Liner pen in Yellow.
It’s super important that you put metal or ceramic, or something safe under the marked lines you’ll be using the hot knife on. I flip my 48” Starrett ruler over and cut on that.
It’s super important that you put something safe under the marked lines you’ll be using the hot knife on.
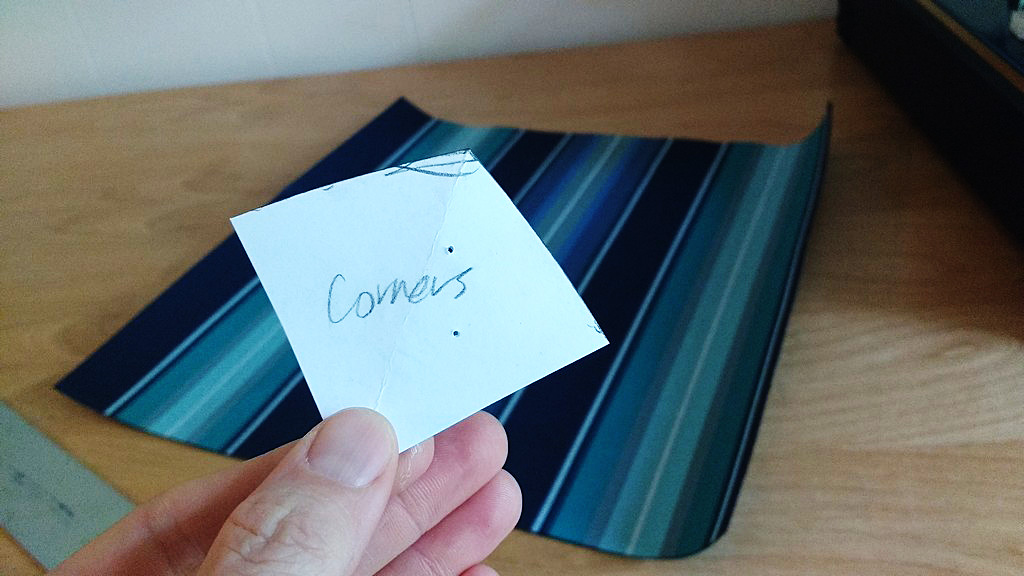
Rounded corners
Next, I like to slightly round the corners of the pillow fronts (I’ll do it to the back pieces too once everything is sewn together.) I went over this method in my post here on how to sew square pillows with piping.
I like to slightly round the corners of the pillow fronts.
Now it’s time to finish the seams on your back panels. Sunbrella is great for finger folding over, plus working with stripes often makes marking your seams easy.
Tip: when you use a hot knife it can make the finished edges of Sunbrella fabric a little sharp. Be careful when finger folding that you don’t hurt your fingers!
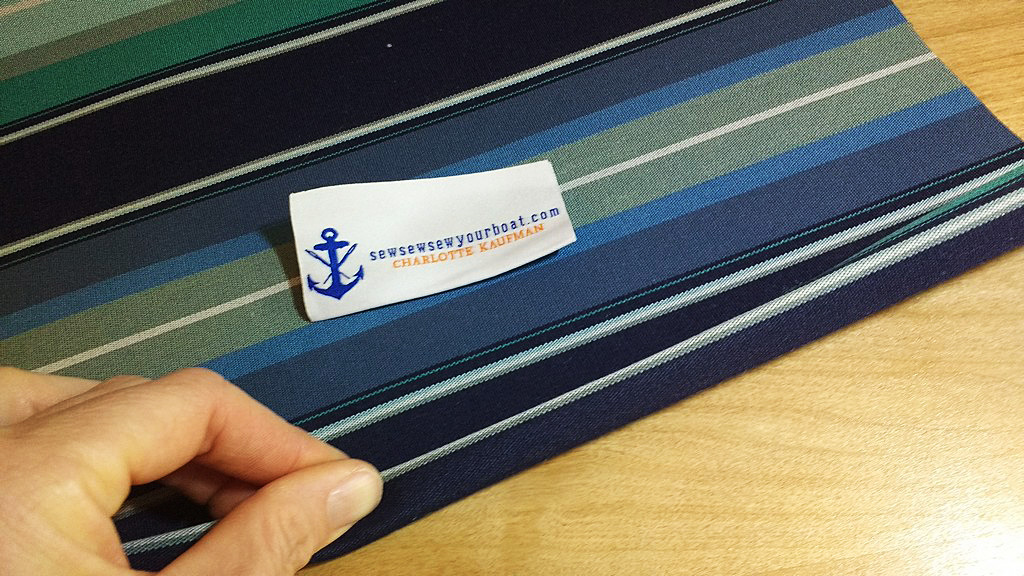
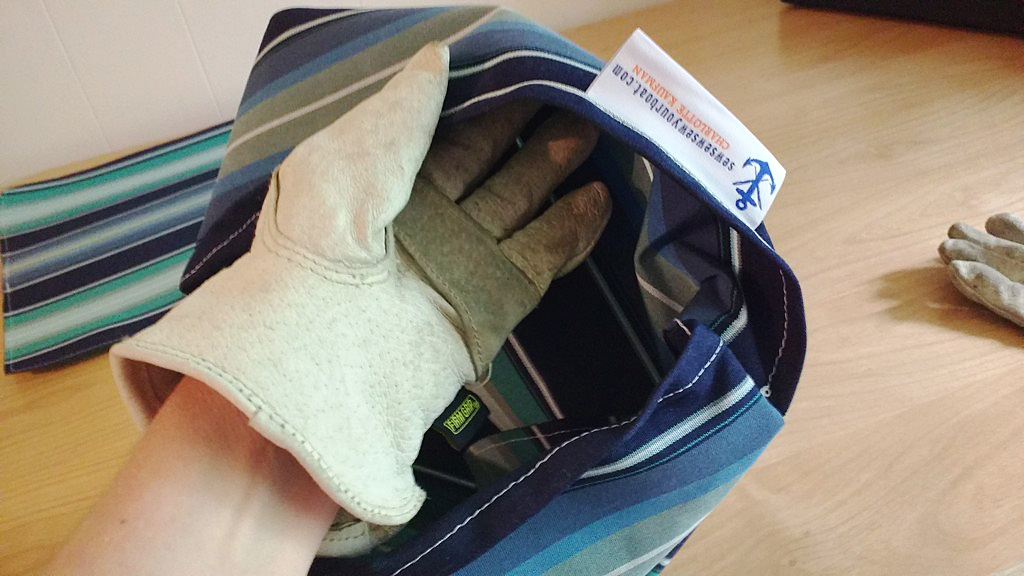
Now is the time to sew in a tag if you have one.
Now is the time to sew in a tag if you have one.
Wonder Clips
Putting a regular sewing pin through Sunbrella is almost impossible. I use Wonder Clips on projects this small to hold my pieces together. SewingMachinesPlus.com has them available here.
I use Wonder Clips on projects this small to hold my pieces together.
Once sewn, I use the hot knife to round the corners of the back panels to match the top panels.
I use the hot knife to round the corners of the back panels to match the top panels.
Now it’s time to turn. This will be crinkly!
Tip: use leather gloves or gardening gloves while turning your fabric to avoid getting your skin cut or scratched from the hot-knifed edges of fabric.
Use leather gloves or gardening gloves while turning your fabric.
Fluff time!
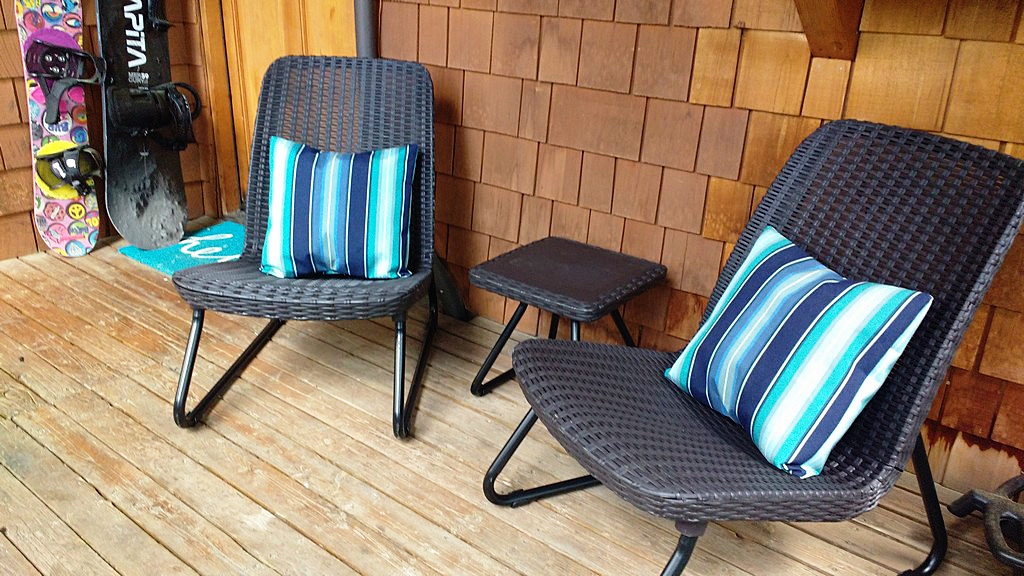
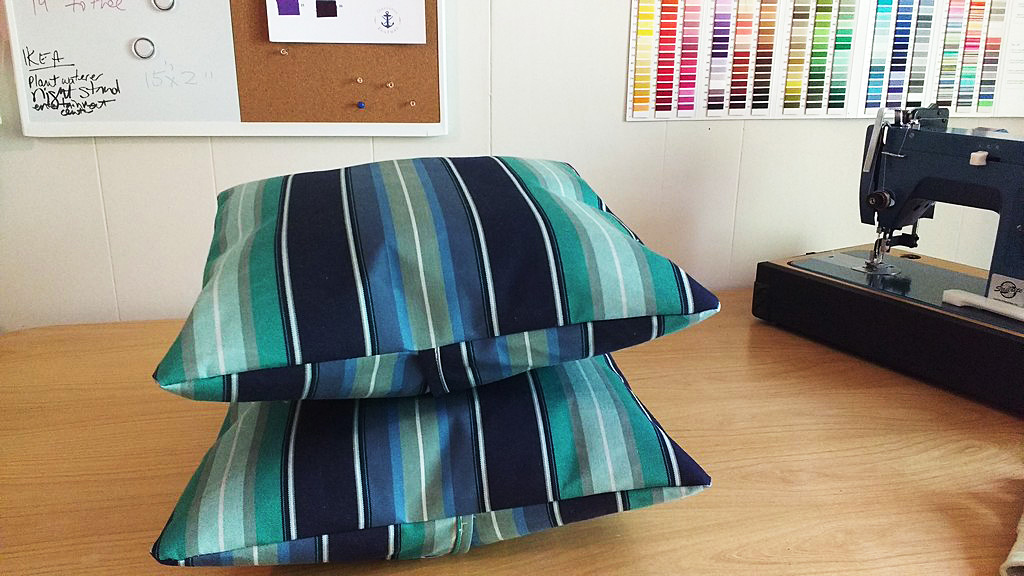
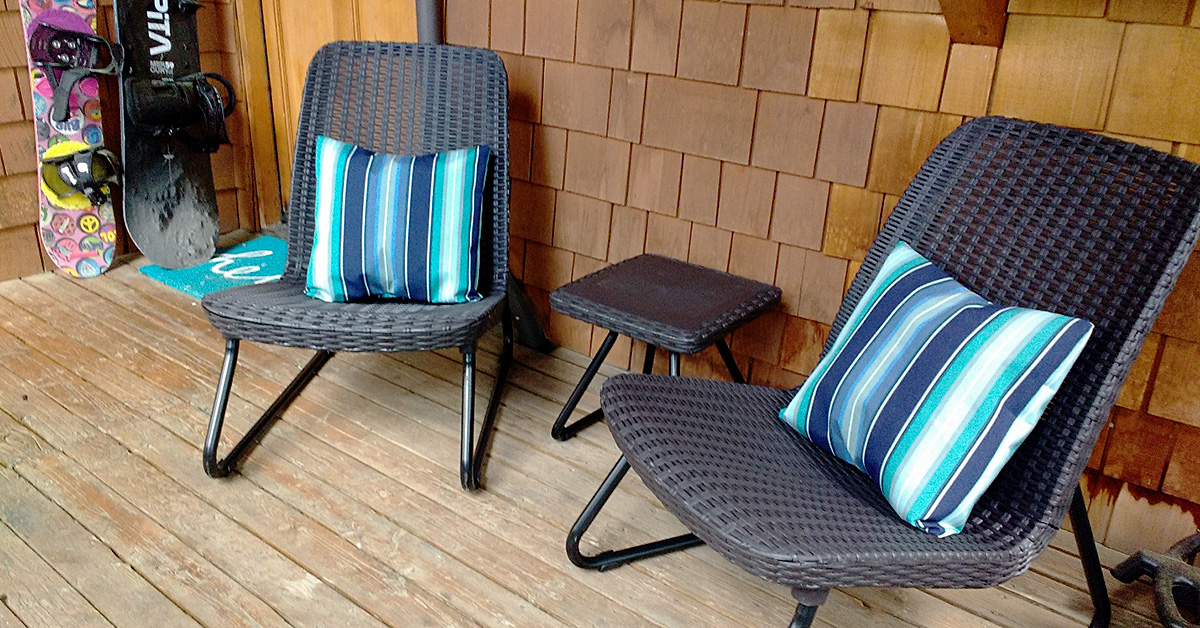
Slip in your pillow forms and enjoy!
Slip in your pillow forms and enjoy!
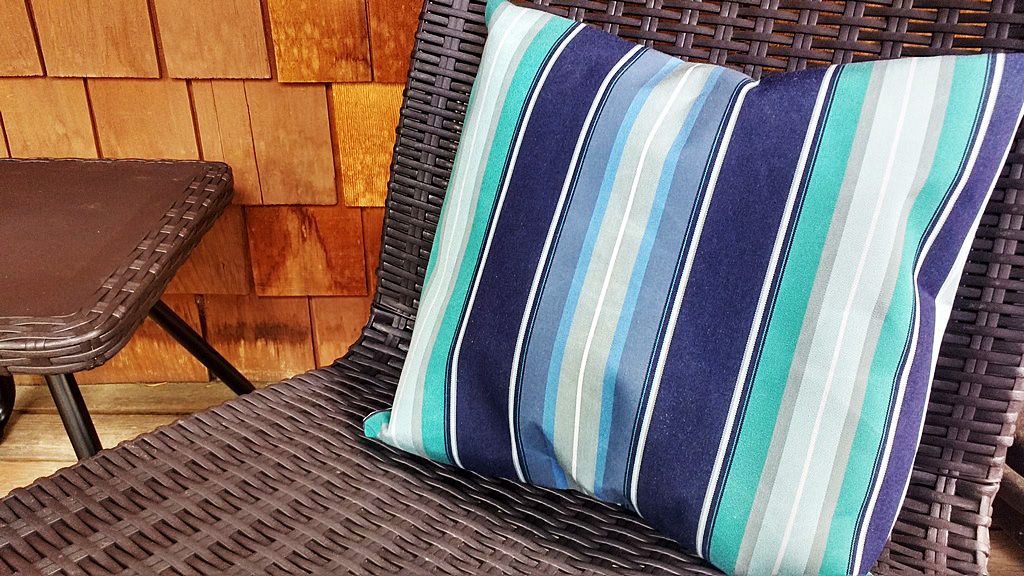
How gorgeous is that fabric? Truly!
How gorgeous is that fabric? Truly!
And an outside view.
And an outside view.
Do you make your own outdoor furniture accessories? Tell us about it in comments!
Do you make your own outdoor furniture accessories?
———————————————————————————– Charlotte Kaufman is a writer and sewist in Mammoth Lakes, California. She specializes in marine and home interiors and continues to fall more and more in love with quilting. You can follow her at charlottekaufman.com.
I’ve written before about answering the question, “What do you do for living?” and how I really don’t like it and have trouble explaining it accurately.
Another type of question I find slightly troublesome as well are the ones that start with, “You’re into clothing and fashion, what do you think of…”
Or questions about specific names for types of fabric or techniques.
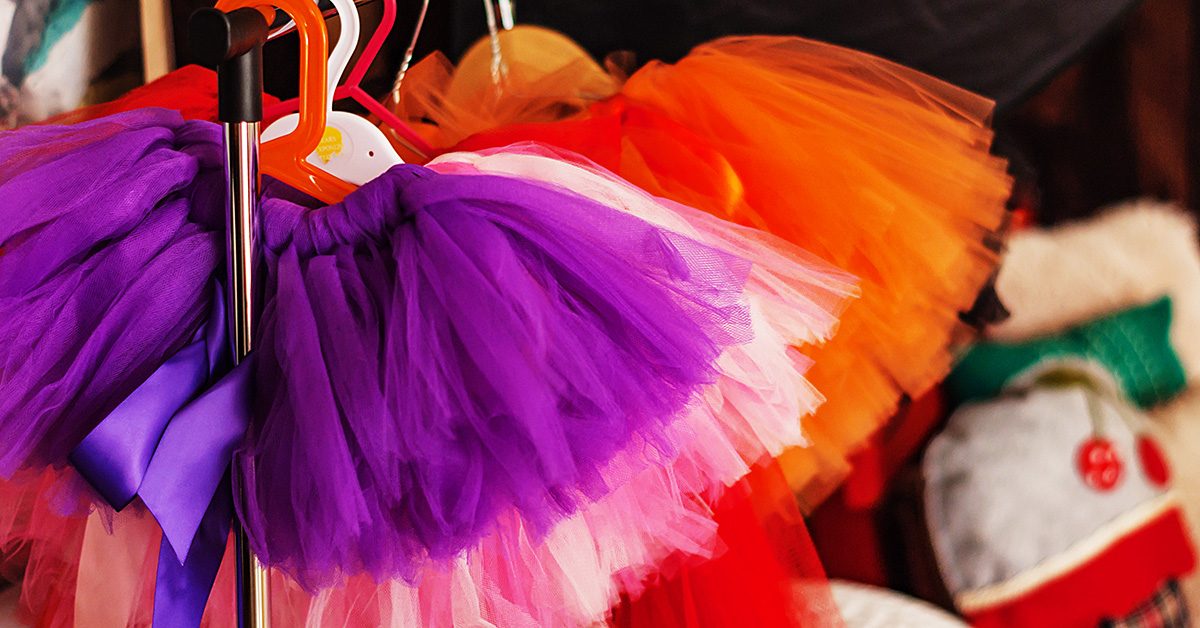
First of all, I would never say that I’m into fashion and clothing (If you saw the way I dress, you’d definitely believe this! I usually define my personal style as homeless chic). I just speak the language of fabric and patterns. I certainly have my own ideas about what styles I like but I’m no expert on whether or not that poofy princess dress you just bought for your niece is tasteful or not.
You go girl
If she likes it, is happy, and feels like a princess, then I’d say it’s perfect.
Humans have a wide variety of tastes and, ultimately, the things you like are the things you like. I’m a big advocate of never reading any article that has a title along the lines of What to Wear Now or Fashion Must-haves.
Wear what you want – be happy
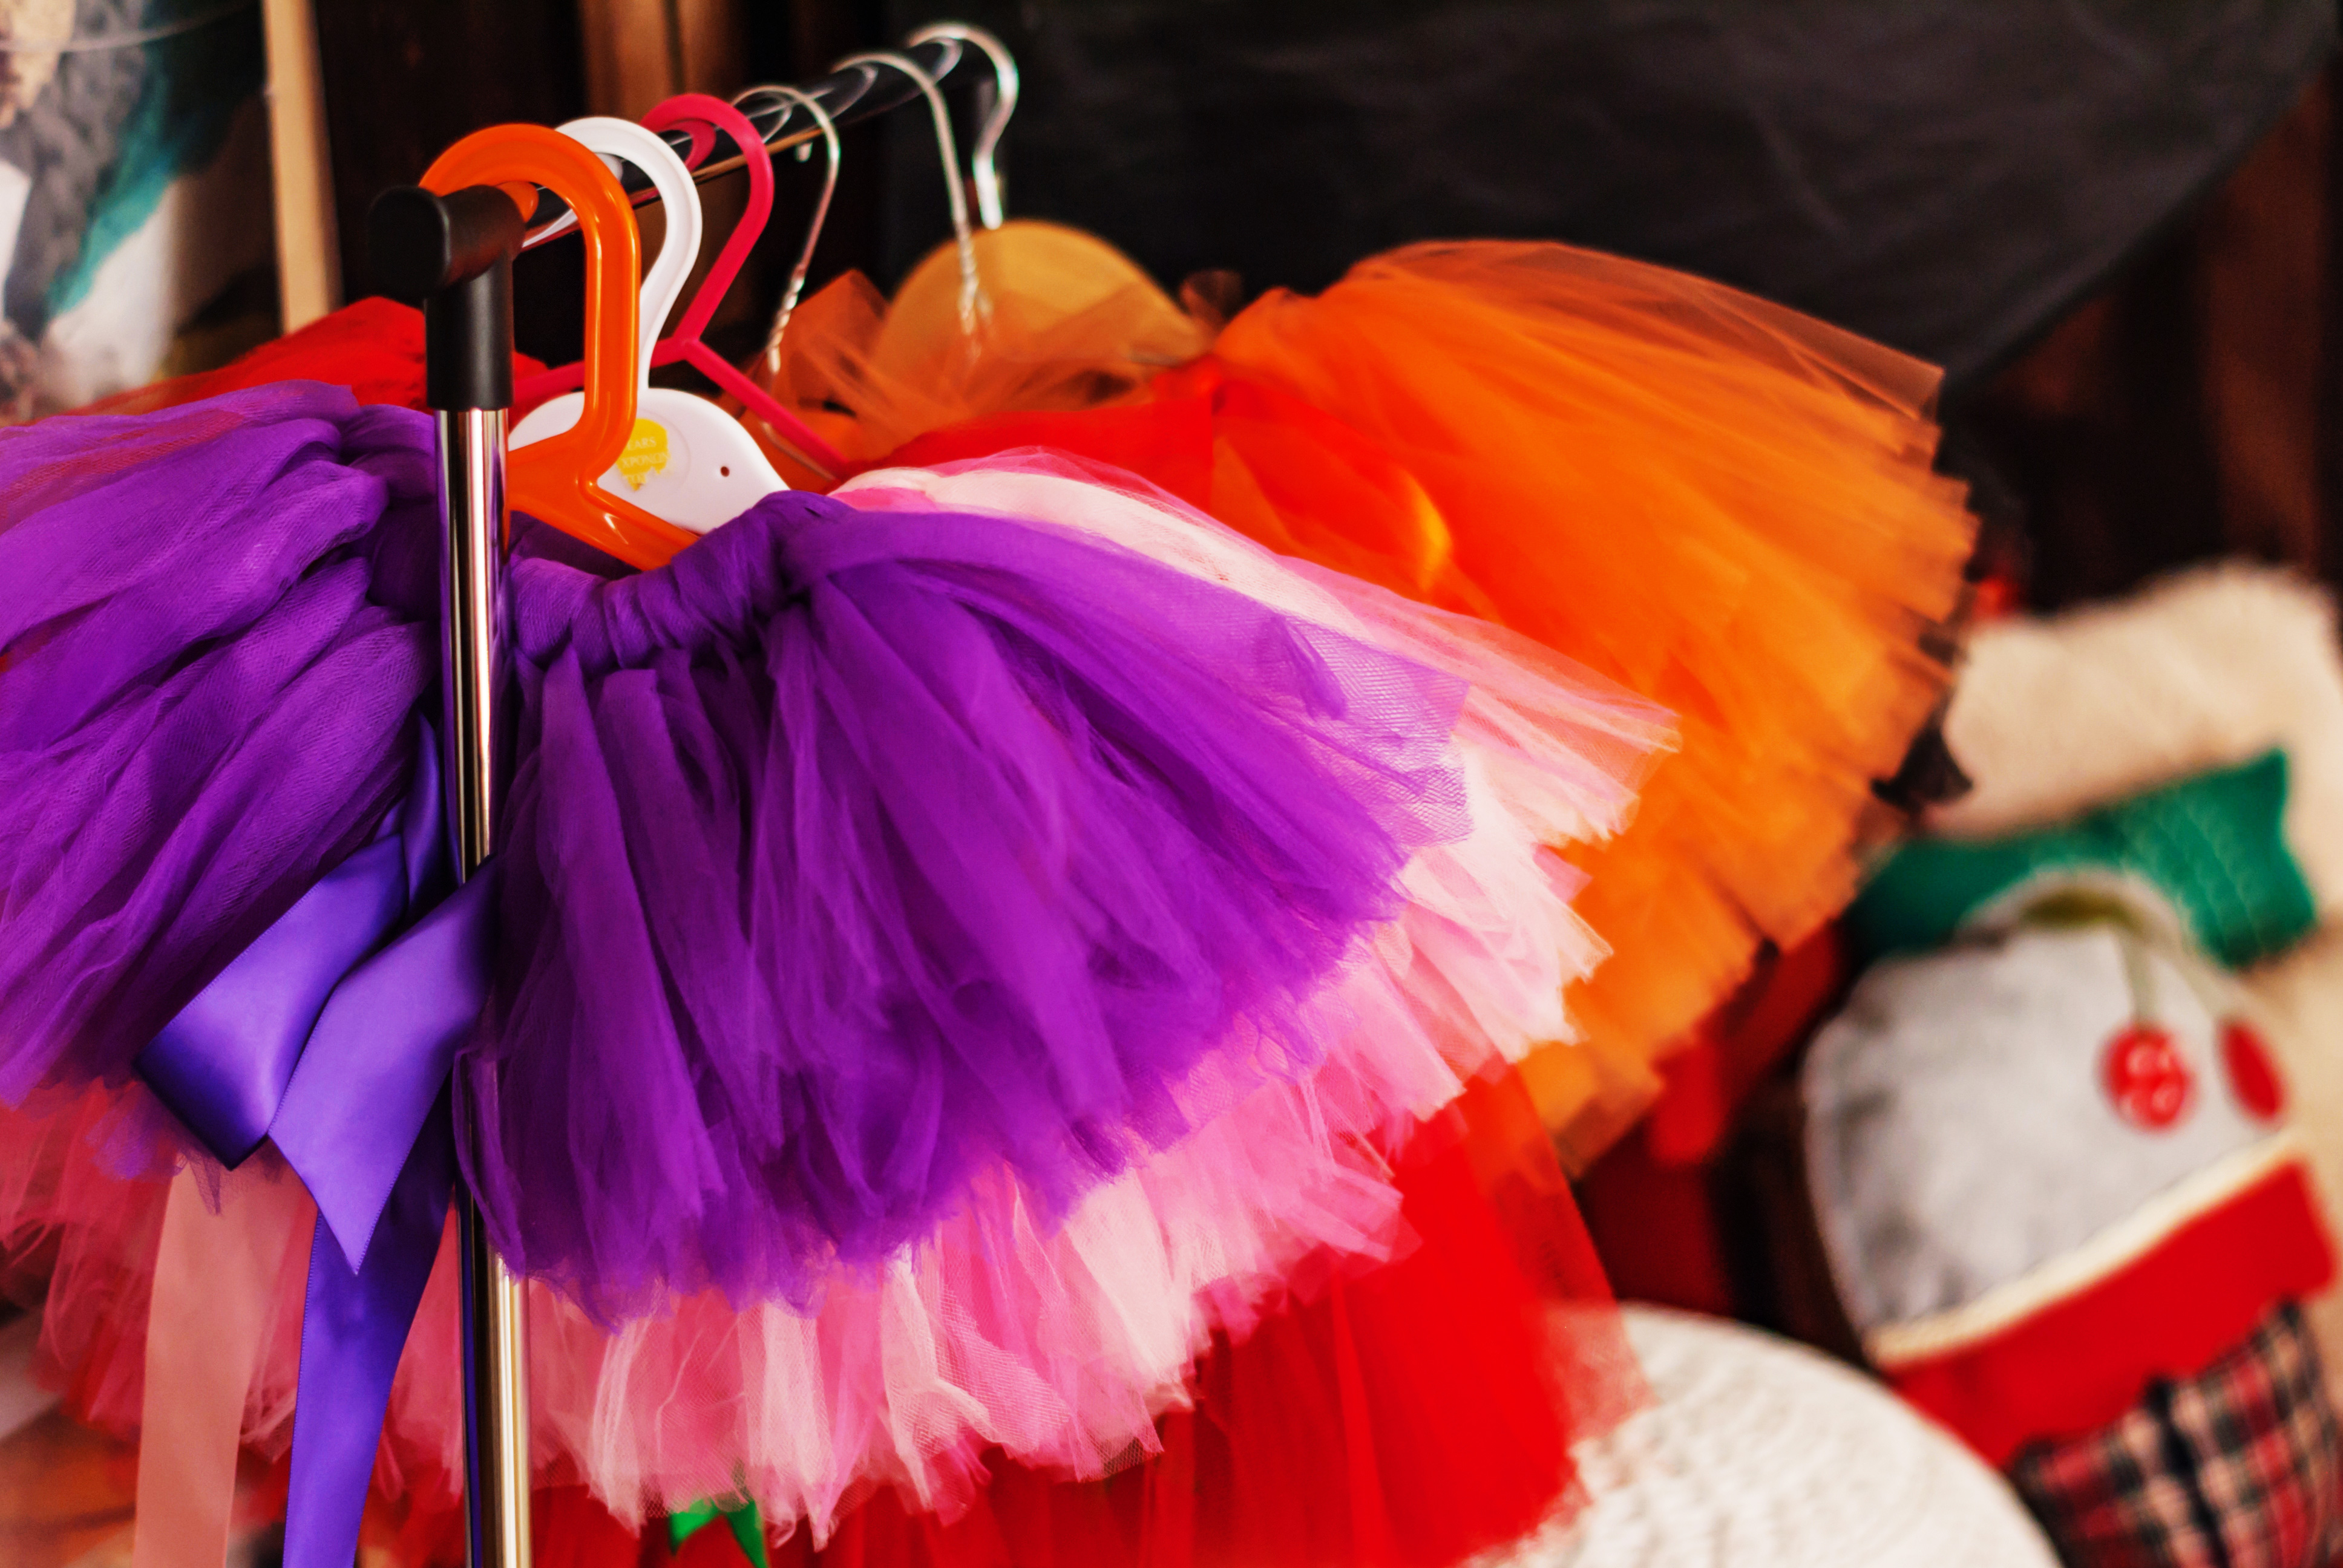
I have an amazing, wacky friend, who is an ultra-runner – meaning she routinely runs 100 miles in a row. She’s also run the New York City Marathon a bunch of times. And sometimes she does this wearing a pink tutu. For no reason than it makes her happy. Just because.
I love this picture of her. So did the promoters of the marathon this past year as they featured it in subways and on the sides of city buses. I was on my way to work one morning, on my bike as is my custom, stopped at a light at the corner of Lex and 62nd, when suddenly this huge photo of my friend went rolling by. It was kind of amazing.
The other line of questions about names of fabrics and techniques annoy me (slightly) only because, honestly, I usually don’t know the “proper” name for things. Why, you may ask?
My big secret
Well, here’s the thing: my big secret. I never finished college. This was a huge deal at the time as I was valedictorian of my high school class and accepted into the Honors Tutorial College at Ohio University. I was considered smart and a brain.
So I went. For a year. But then I didn’t go back.
And I’ve never regretted it. Colleges and degrees are great for some people, if that’s what you want. But, honestly, I was sick of memorizing stuff and just “practicing” at doing things for life. There was no challenge for me at University. I needed, wanted, to be out in the real world, working at something I loved and was, quite frankly, quite good at in a very natural, intuitive way.
One size does not fit all
Put on your tutu & run.
Sometimes I think the downfall of our education systems is the one size fits all approach to learning. (I’m allowed to say this because both my parents and two of my brothers are in education.) People learn differently.
And for me, at 18 or 19 years old, whatever it was, the best option was to be actually in a real working costume shop learning everything I could. Practical application, if you will. Developing new skills by trial and error (sometimes trial by fire) but ultimately, doing. Not sitting in a lecture hall listening or draping yet another sloper or princess seam bodice.
My main reason for bringing this up is that I’ve noticed recently that sometimes people are ashamed of the fact that the don’t have some fancy degree from some fancy college and think it makes them not as smart or talented as someone who does.
I can tell you with certainty that that is not the case. You either have the talent or you don’t. No college anywhere can teach you that. They can teach you the difference between organdy and organza in words but you won’t really know what that difference means until you’ve worked with both fabrics in a practical application.
The same with something as simple as the difference between cotton and wool. Its easy to say cotton is a natural fabric made from the cotton plants and wool comes from sheep but, in order to understand that difference, you need to use those fabrics and get to know them on a personal level.
I know its kind of cheesy, but I’m a big believer in the language of things. There is nothing inherently scientific about my belief. I just think people in general don’t pay close enough attention to their environments (in part because so many of us spend entirely too much time looking at our phones) and, as a result, miss a lot of the information that is right in front of us and don’t hear what someone (or something) is saying.
I know this post is a bit rambling and disjointed (I had a rather busy weekend lacking in sufficient sleep.) But, the point(s) I’m trying to make are put down your phones, put on your pink tutus, listen to your fabric, and make something unique and wonderful to let loose in the world.
I’m going to try and do the same today. And, then, I’m going to get some sleep.
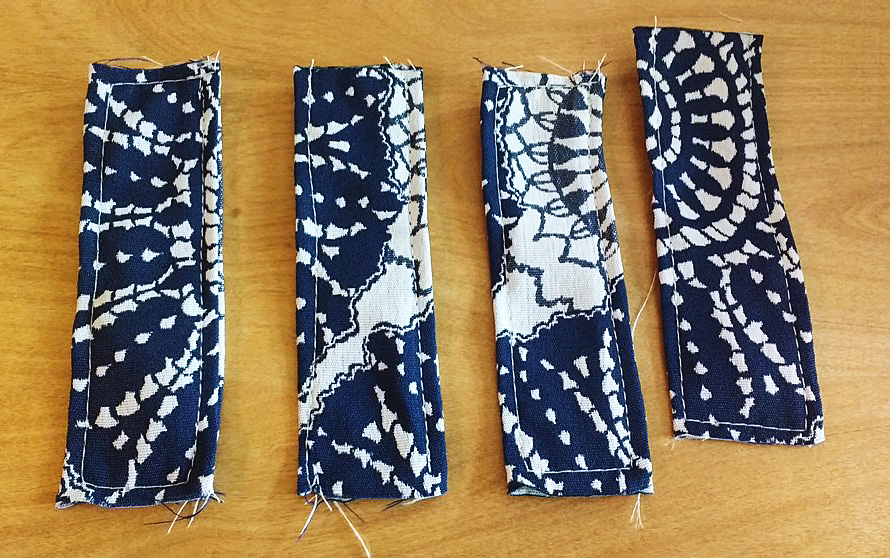
I’m barely over 5’ tall. It used to be that clothing companies made pants in “short” lengths to accommodate people of my stature. More and more often now, though, I’m finding that clothing companies, particularly jeans producers, make pants in “regular” and “tall.” I’m not sure why they think all the short (or as I prefer to call it, concentrated awesome) people no longer need pants, but there you have it. As you can imagine, this leaves me with the choice of either patching jeans and pants until there’s nothing left to them, or buying clothes that are too long and hemming them. Hemming something I’ve paid money for ticks me off, so I want to get it done and over with quickly. I developed a fast and easy way to hem jeans and pants.
First
Find a pair of pants that are a length you like. These will act as your template or guide. Lay them flat and smooth. If possible, I suggest pinning them down to keep them flat. Next, turn the pair of pants you’re going to hem inside out. Lay them on top of the pants that are the correct length.
Let’s begin
Choose a place on the leg of the pants where you’ll be okay with seeing a line. I often opt for the upper thigh. In that spot, pull the leg of the pants that are too long up, gathering the extra fabric in a straight fold that goes around the entire leg as you go. When the pants are the right length, pin this fold so that it comes directly out from the leg itself. Do this on both legs.
Almost done…
Sew around the fold to create your shortened pants, then cut off the extra fabric. Whip stitch around the cut edge for extra strength in the seam and reassurance that it won’t split apart while you’re wearing your new pants. Again, do the same thing on both legs.
Viola!
Hemmed pants, perfect for your height – no measuring or marking required. This is one of my favorite “sewing cheats” because it’s so quick and helps me buy pants and jeans affordably, even clothing companies no longer feel the need to cater to people my size. Give it a try next time you need to hem pants and let me know what you think!
I hope you are well and staying out of the heat! It is definitely summer in Texas today!
The last time I wrote I hoped to inspire you to take a step or two out of your comfort zone and try some applique projects with a great tool called the AccuQuilt GO Fabric Cutter. I hope you checked them out here at SewingMachinesPlus.com for the one that would suit you the best.
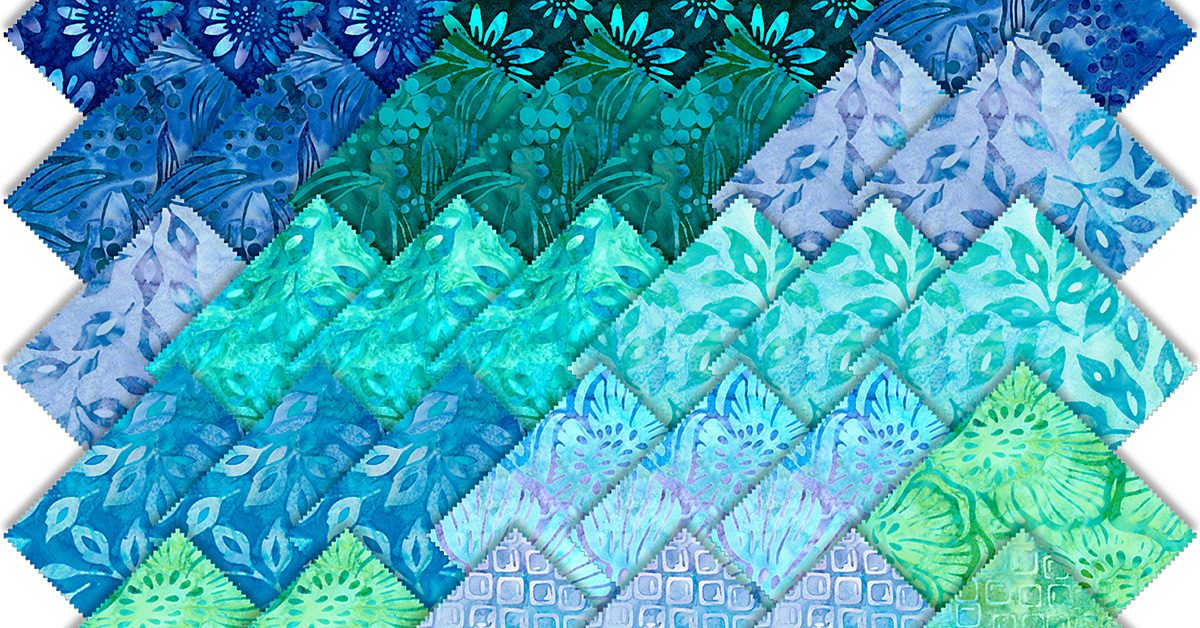
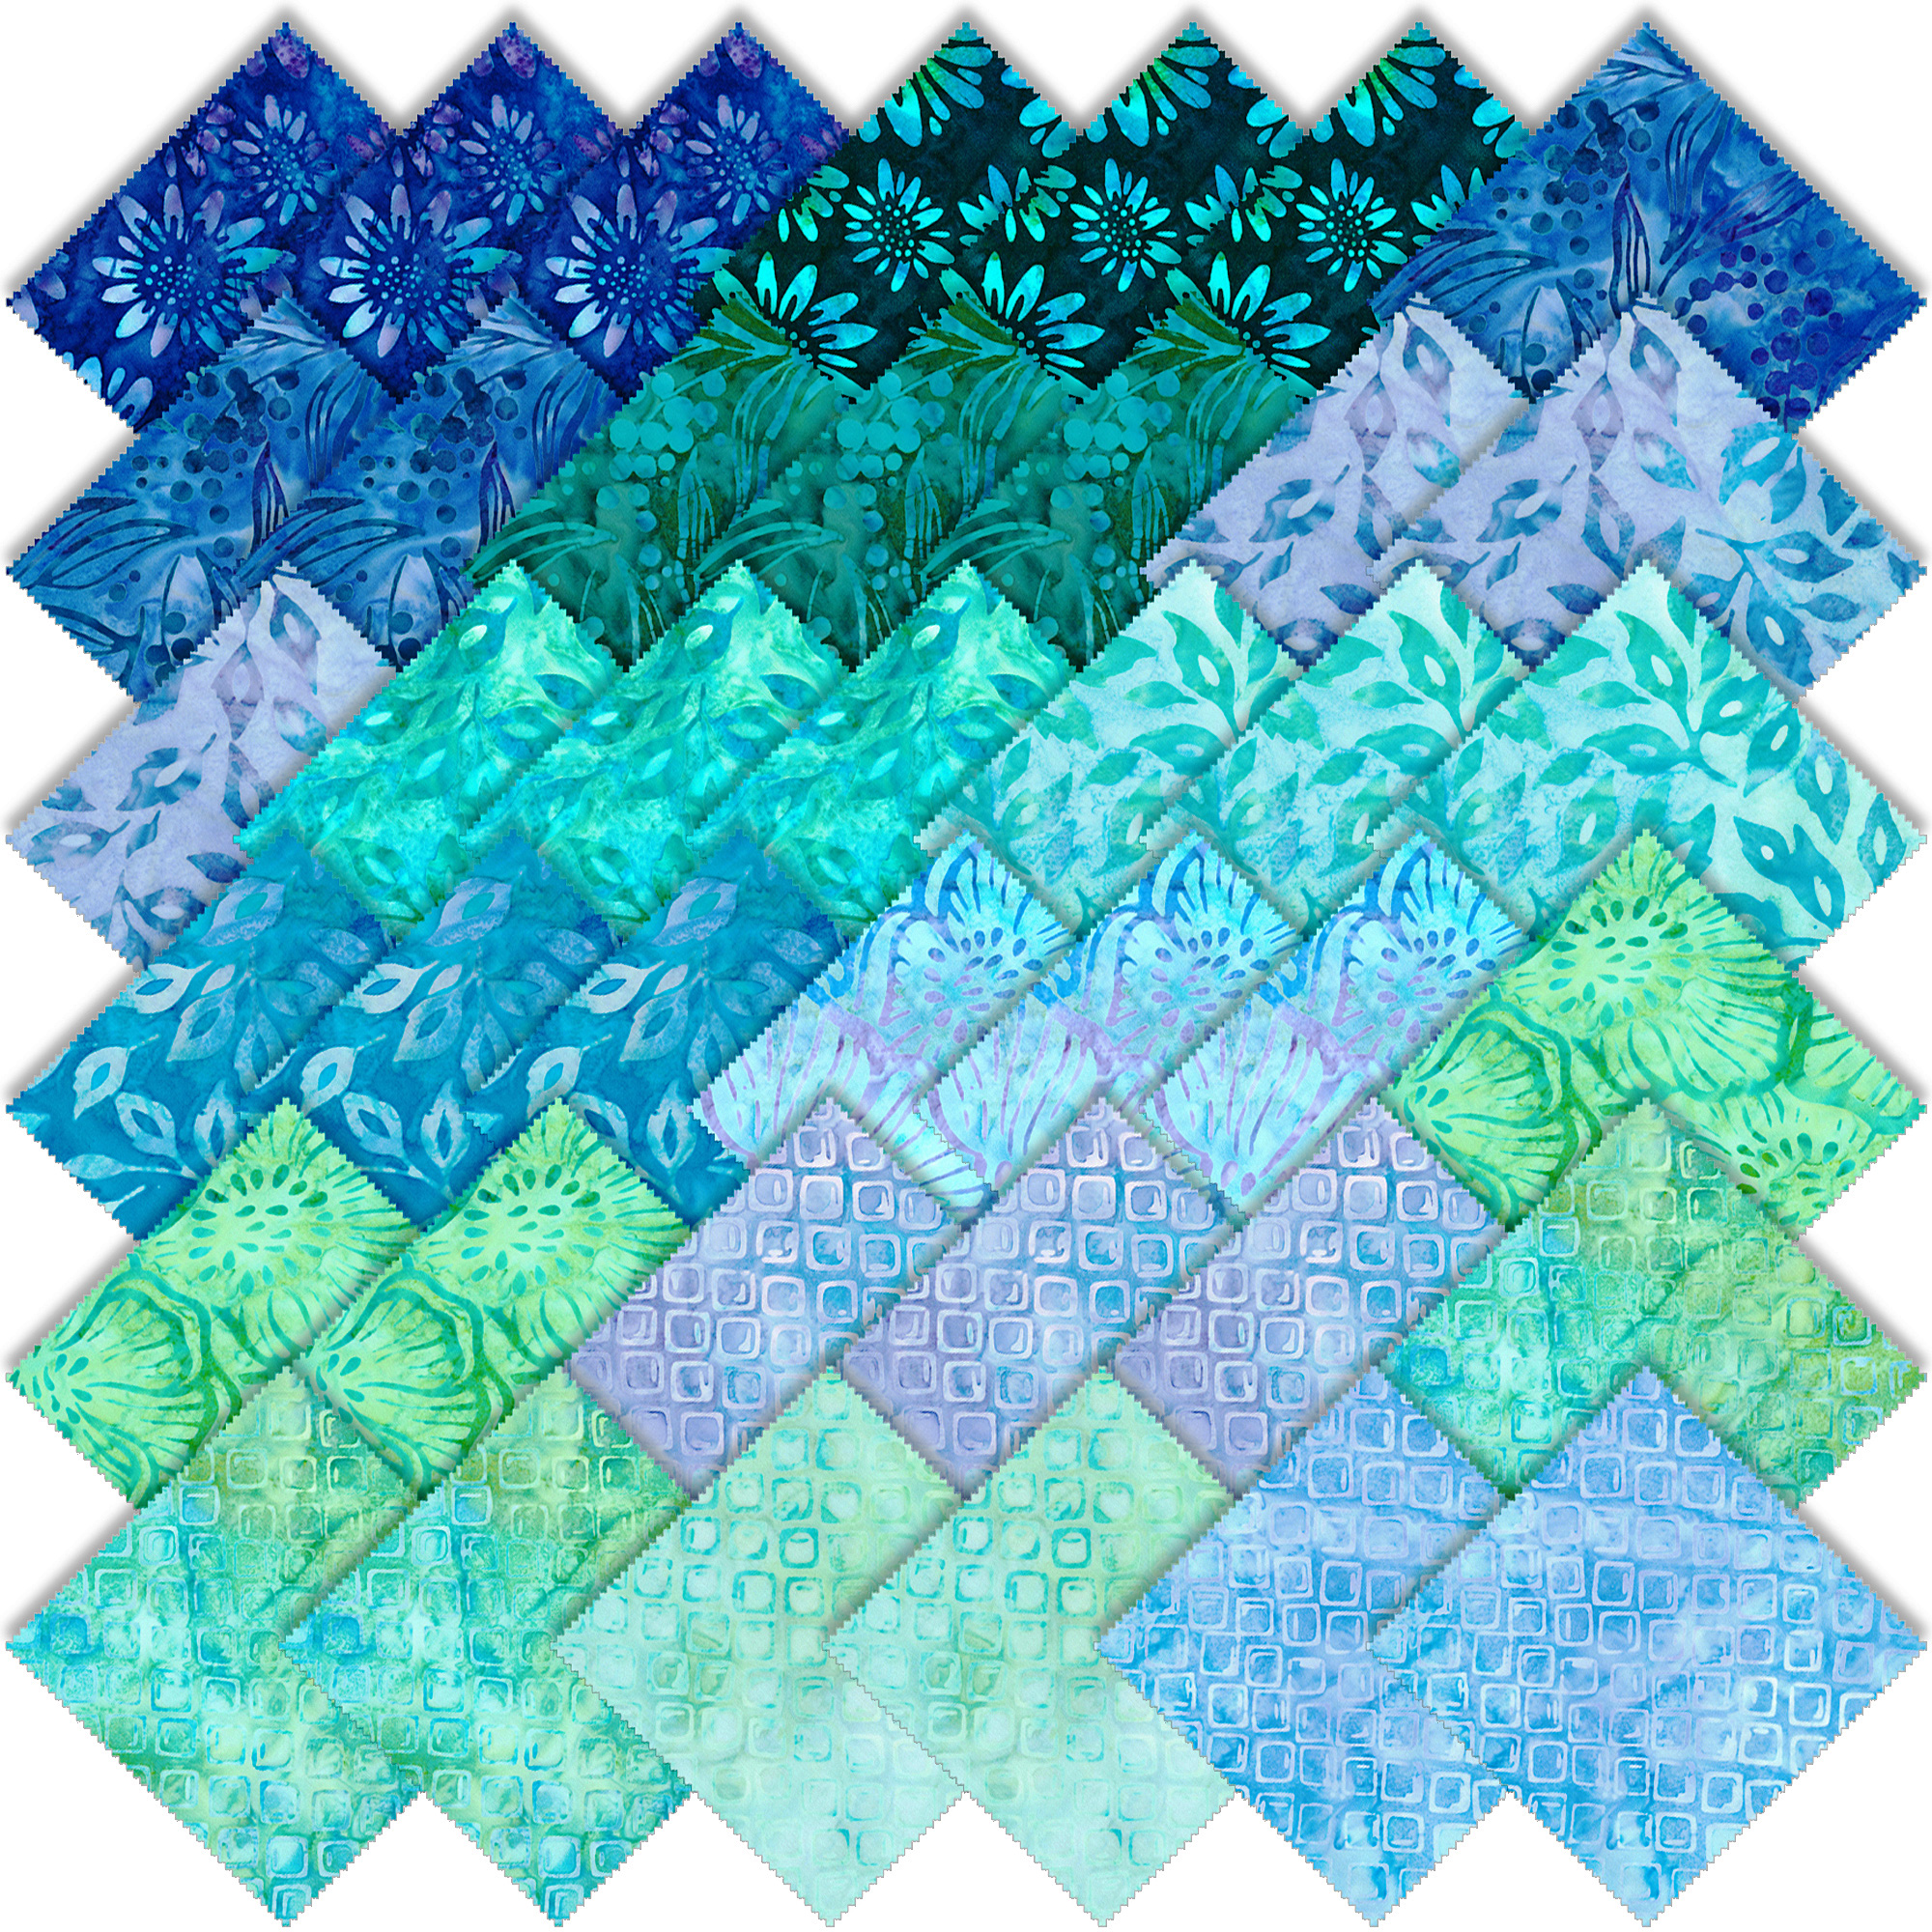
Let us talk about my fabric obsession today. It is called Batik!
The reason for my suggestion of trying “improvisational” quilting or one that you create yourself, is that it brings much satisfaction knowing that no one else has put together the fabric combinations that you love. the best.
Let us talk about my fabric obsession today!! It is called Batik!
What is Batik?
It is a hand dyed textile that is made using a wax resist technique to cover some parts of the fabric so they are not dyed with the color. Selected areas of the cloth are blocked out by drawing or brushing wax over them and the cloth then several colors are used to dye the fabric.*
Contemporary batik, may have etching, stencils and different tools for waxing and dying and use things such as leather, paper, wood, silk or cotton to use in techniques to make the most expressive and subtle of wax resist projects. Note from the pictures above, some look like the fabrics tie dyed and others have small details. Using various amounts of colors, the textile looks printed, but in fact it is hand drawn places of wax resist, it becomes a unique piece of art.*
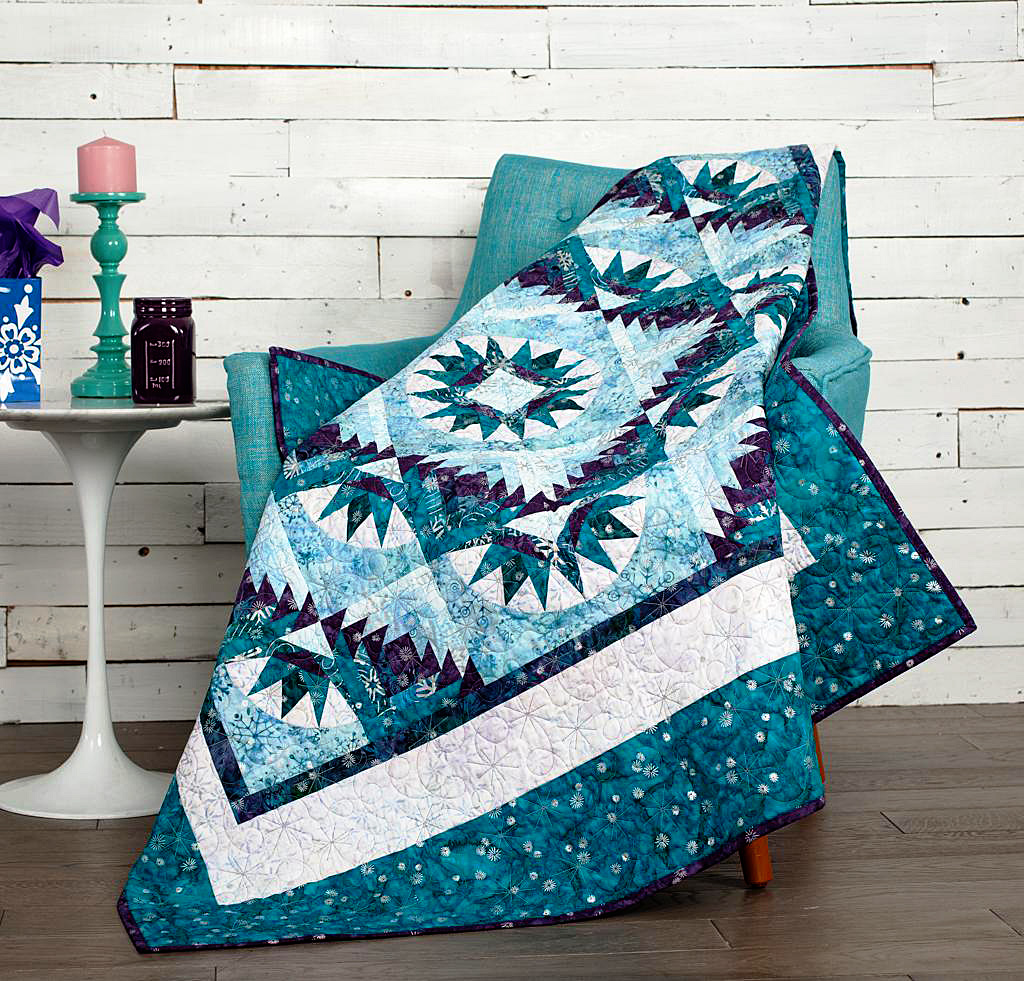
Today, keeping in line with those thoughts, I want to share with you some beautiful fabric that would be a great choice for these fabric cuts to design a beautiful quilt, utilizing the shapes you can make with the AccuQuilt Fabric Cutter. To keep it simple at first, just blocks or basic shapes or strips can be easy to cut and sew in patterns that you can replicate for your own taste.
Let’s go through the design stages. That’s the most fun!
Check out the internet for new ideas about quilts
Purchase magazines on quilting at the bookstores or online
Many of the patterns look complicated, however don’t get discouraged. They are only for inspiration right now
Depending on your quilting experience, play with paper and pencil and come up with a simple pattern using a few different basic shapes. Perhaps blocks and triangles or perhaps all strips
Perhaps all squares or rectangles, it’s all your design
Study the batik fabrics available in online fabric stores and curate your own choices on a design board. It is good to make notes on the particular fabrics so you can go back and order the ones you really like. Depending on where you live, you may be able to find fabric you love in the local fabric stores (I personally have purchased many yards of fabric and precuts online with no problems. It is like Christmas every time I order. Sometimes I get surprises!)
Then play with how these colors look good together. There is no right or wrong. It is your creation, your taste
Leave the palette alone and come back to it to see if your color choices still suit you. If not, play some more
Cut out color combinations from magazines that you admire. Once you are happy with your plan, look for fabric, order online or purchase
Start a small project, a table runner, a pillow, a tote bag or go for a quilt.
Start a small project, a table runner, a pillow, a tote bag or go for a quilt. Any of things will be something beautiful using Batik.
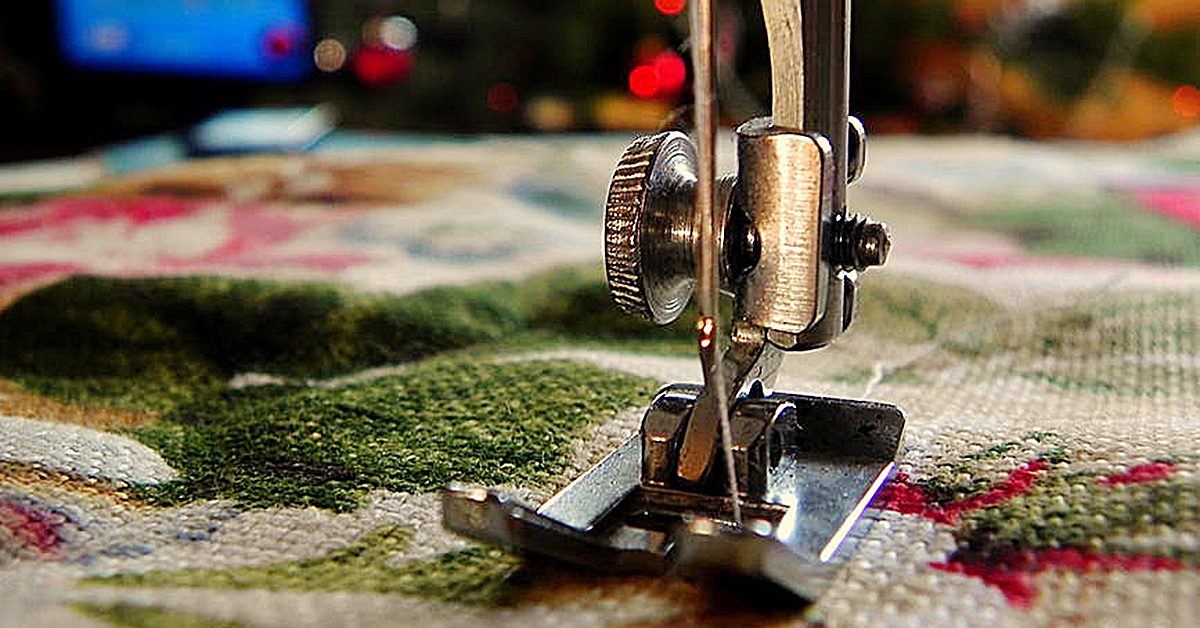
Now would be a great time to check your sewing supplies!
Take a look at your rulers, scissors, pins, rotary cutter blades, and other tools you frequently use. SewingMachinesplus.com has everything you need to make your next project look precise and professional. Besides the AccuQuilt Go, I value my collection of acrylic rulers and cutters for time saving cutting and more time for designing and sewing. Having the necessary tools makes the project more enjoyable as well!
As I said last time, I believe that if I strive to keep an attitude of “I am proud to use this, because I made it with my own design and it shows a part of me”, my positive attitude brings positive results. Find your Happy Place in sewing!
Until next time, discover Batik fabric and let me know what you think! Would I ever love to try making my own Batik fabric and using them in sewing!
Not so long ago, I had a series of plaques that I’d earned hanging on my wall above my bookshelf. Since then, the bookshelf was moved for the sake of rearranging my bedroom, and those same plaques were then hanging to the right side of my bed with a big space of emptiness below them. Now, because I had a concern about those plaques falling off the wall and onto the bed during the calm of a night’s sleep, I took them off of the wall altogether. And now?
Now, I have an even bigger empty space—one that exists from the ceiling to my bed.
Now, I have an even bigger empty space—one that exists from the ceiling to my bed.
Yawn
That’s boring. Very, very boring. It’s like my bedroom is incomplete, and I will potentially feel frustration over this until it’s covered and decorated as fully as the rest of the area is. So because I have such a distaste for the blankness of the wall, my mind has been perusing the possibilities as to what specifically could go on this space to fix the issue and therefore give me a more relaxed mentality in regard to this wall that’s so close to the right side of my bed.
My original idea for fixing my wall-is-too-empty issue was to hang a Marvel poster beside my bed, even though I know by experience that having a poster fall on you in the middle of the night can be a frightening experience. Why? Well, call me a child, but I still appreciate a good poster (and certain Marvel movies). It’s an easy fix that won’t give me a concussion if it falls at night, and it’s a cheap one if I buy the right poster. But then I got to thinking…
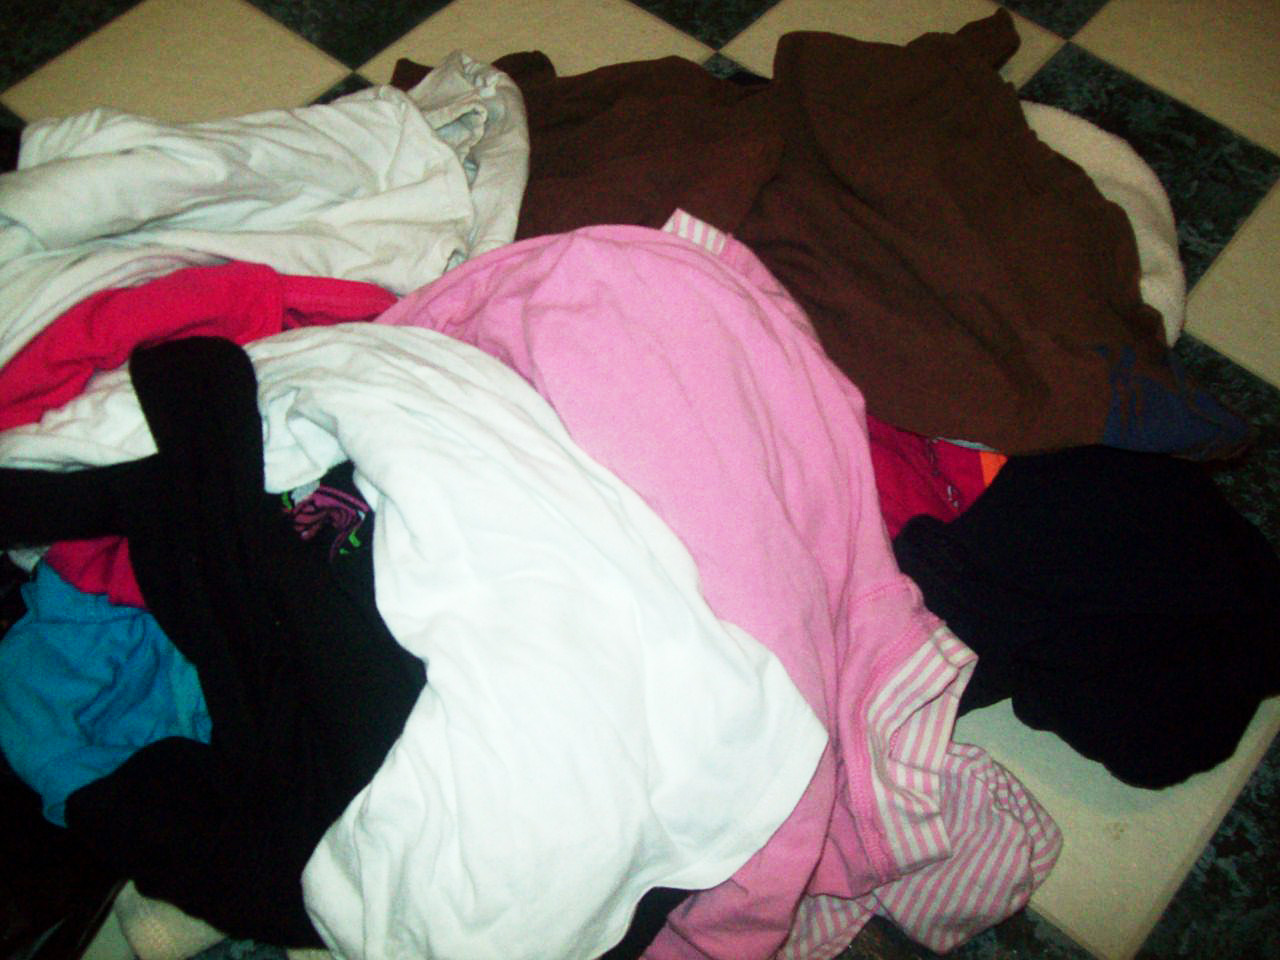
You see, I recently cleared out some clothes from the dresser, and if you’ve learned one thing about me through reading my posts on this blog, it could be that I’m cheap and like to make use of what I already have for fabric. So since I did that dresser-clearing, I have material right in my bedroom that can be used to create something to go on this too-empty wall to my right.
So since I did that dresser-clearing, I have material right in my bedroom that can be used to create something
But what would that something be? That became the question, and through internet browsing, I’ve come up with two options I’d like to share with you.
Let’s brainstorm
The first of these possibilities is to create a wall quilt to hang there, one that’s a combination of the pieces of fabric that were banished from the dresser. Since I adore patchwork quilts, this option could be accomplished by the simple process of using similarly sized pieces of fabric for each block to compose something that’s bright and vivid—and an interesting touch to my wall décor. As I’ve covered patchwork quilts a number of times already on the blog, I won’t go into too much detail about how to make one. Just know that it’s a prospect, and time and effort could lead to a one-of-kind wall hanging to fix my problem through this method.
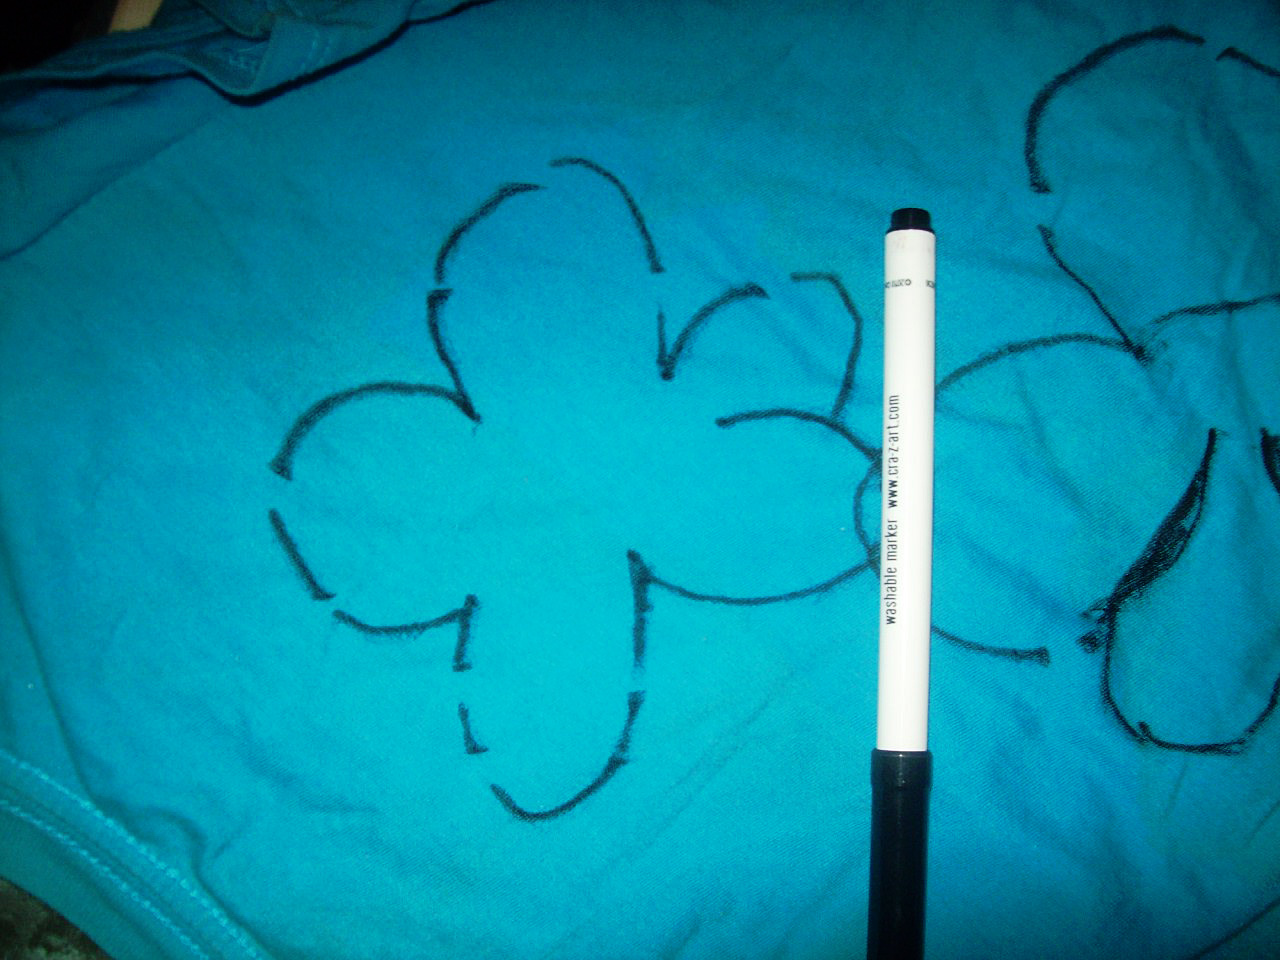
Beyond that though, I noticed a particular quilt idea that sparked an idea that moves away from the actual quilt theme. It was from a quilt that depicted a flower garden, and it occurred to me that the overall scene could be applied away from the quilt setting. How? You’d just need to assemble the pieces of the quilt project in separate formations and hang them on your wall instead of sewing them to the quilt. For instance, you could take a marker (use a fabric-friendly writing utensil!) and trace the patterns of flowers, butterflies, clouds, the sun, a house… Whatever you feel is appropriate for the scene you’re trying to showcase. Simple rectangles could be used to create a fence, or a combination of fabric types could come together to create something as intricate as a rosebush. Just imagine a hole fabric-created garden scene placed right on your wall!
Take a marker (use a fabric-friendly writing utensil!) & trace the patterns of flowers, butterflies, clouds, the sun, a house…
In fact, this idea could be embraced for more than just using your fabric to cover up an empty space on your wall. You could use your old fabric to create holiday scenes, for example, for a sentimental touch to your decorations. If you only have red and white, you could make candy canes. Only blue? How about snowflakes?! A series of fabrics? Get to work on a gingerbread house! These individual pieces could be tiny projects that of themselves are beautiful and worth showing off, but when you bring them together, their appeal increases—a lot!
Don’t overlook the prospect of constructing these tiny projects that come together for a bigger work of art! It’s like a quilt, but without the actual quilt part—which is a pretty interesting twist to me!
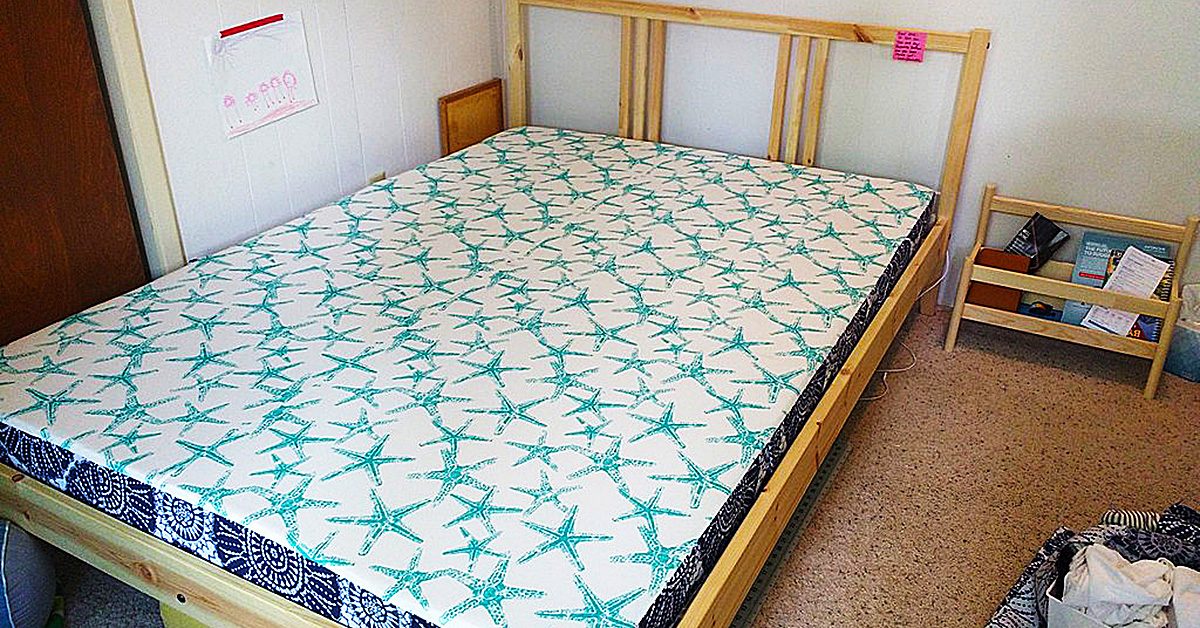
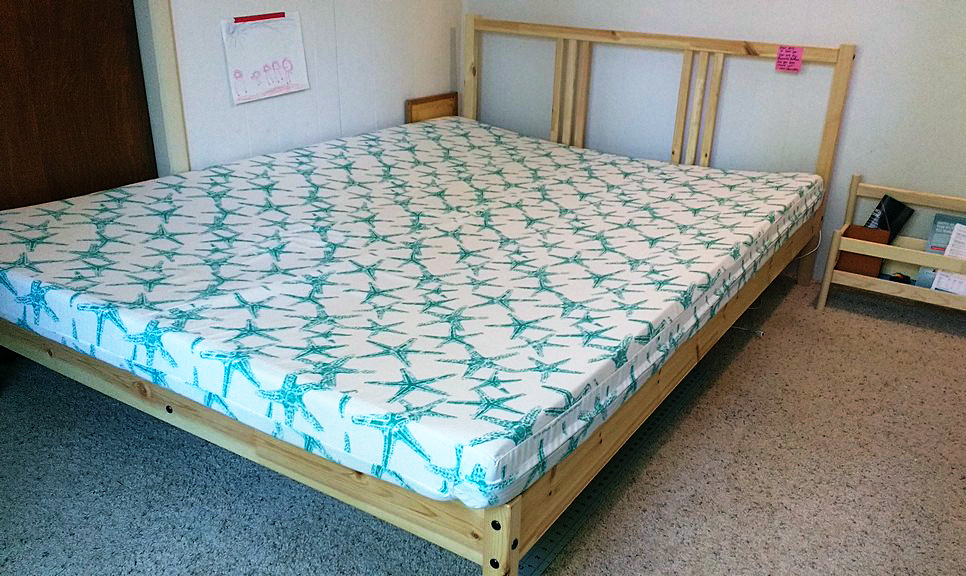
My husband and I sleep on a full-sized bed on 4” of high density foam that we bought from Keyston Brothers, a store that specializes in auto and marine foam and fabric (We use density type Q41 for anyone interested in doing the same). We find the foam lasts about five years before we need to replace it and for a full-sized mattress’ worth, it costs about $250. That is loads cheaper than a fancy mattress and we sleep like babies.
Sweet dreams!
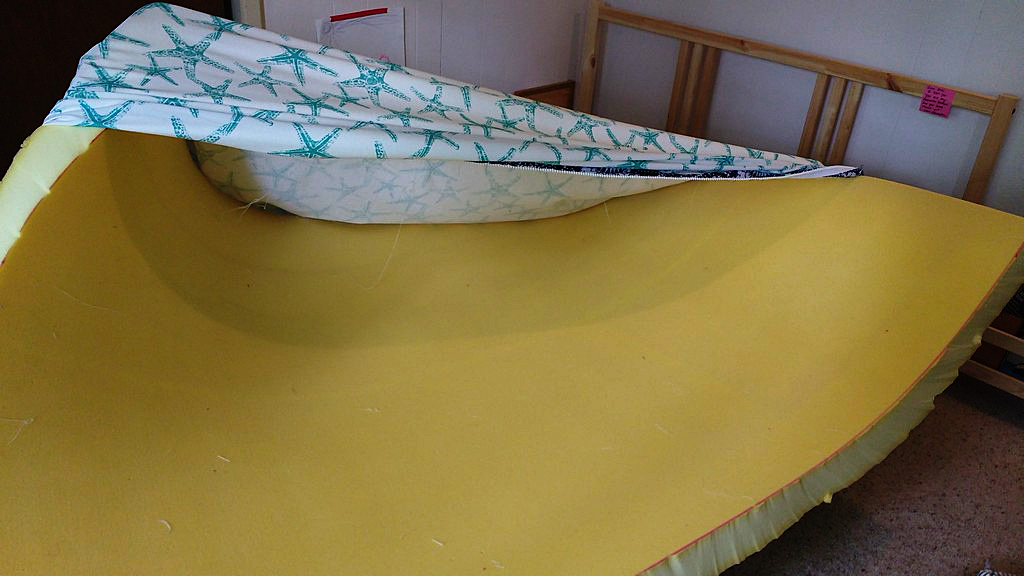
We discovered this foam when we were replacing the cushions in the v-berth of our sailboat. We lived aboard for almost eight years and slept amazingly. When we moved on land we decided to cut costs and stick with the foam. I made a custom cover for it but this frame we recently got from Ikea is smaller than the foam. See how it curves down into the bed and up and over the edges? My husband and I were getting rolled into each other at night so I knew I was going to have to take matters into my own hands.
See how it curves down into the bed and up and over the edges?
Let’s get started
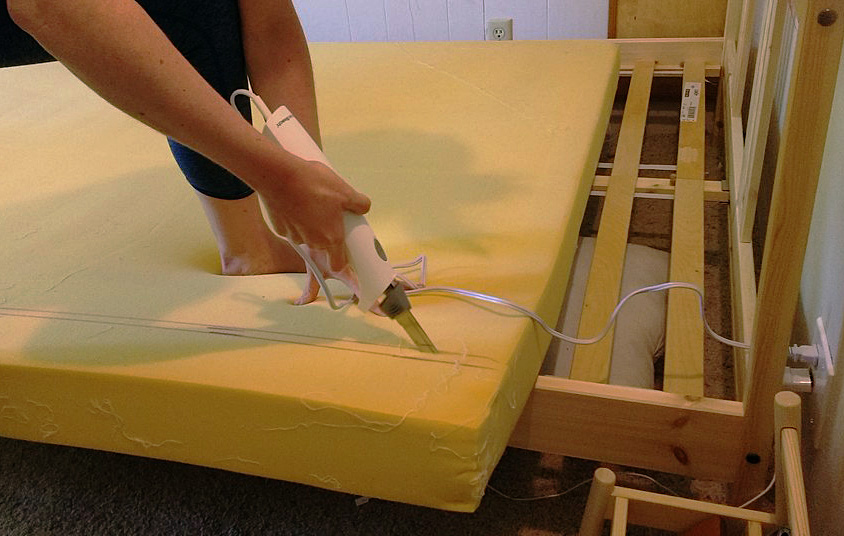
I took off the cover I had made and measured the foam to a size that would fit in the frame. Then I got out my $20 electric cutting knife from Walmart and got to slicing.
Take a deep breath. We’re about to slice into our bed. Ready? Let’s go!
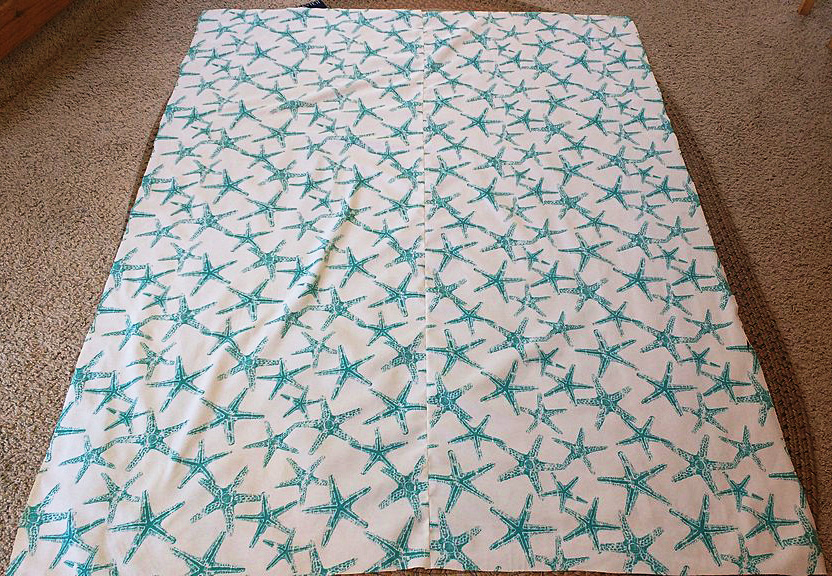
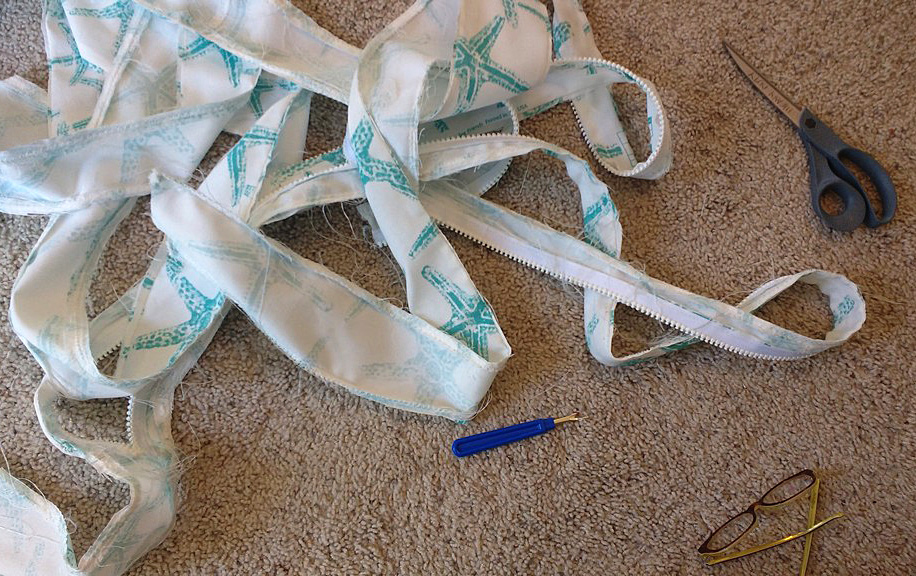
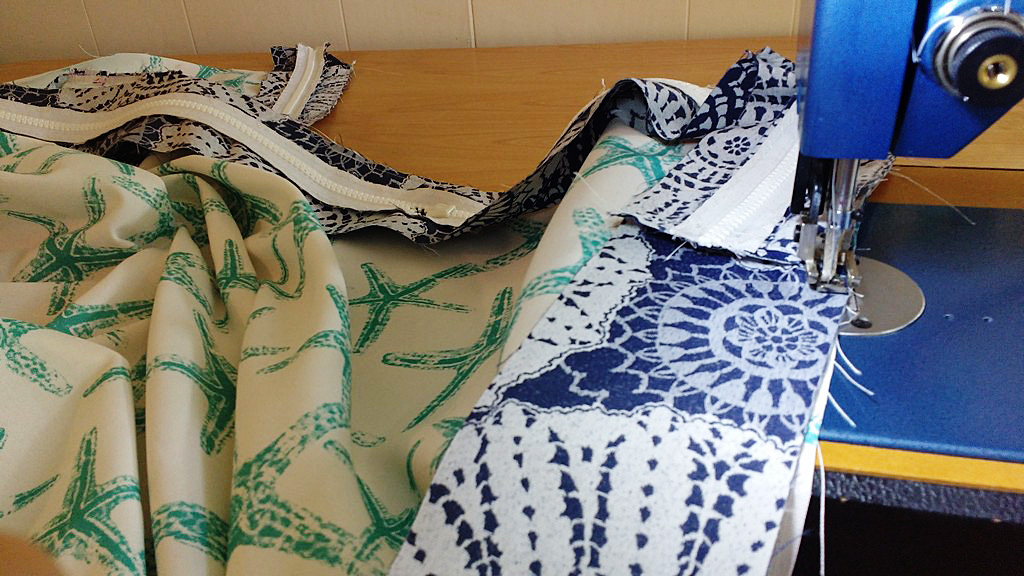
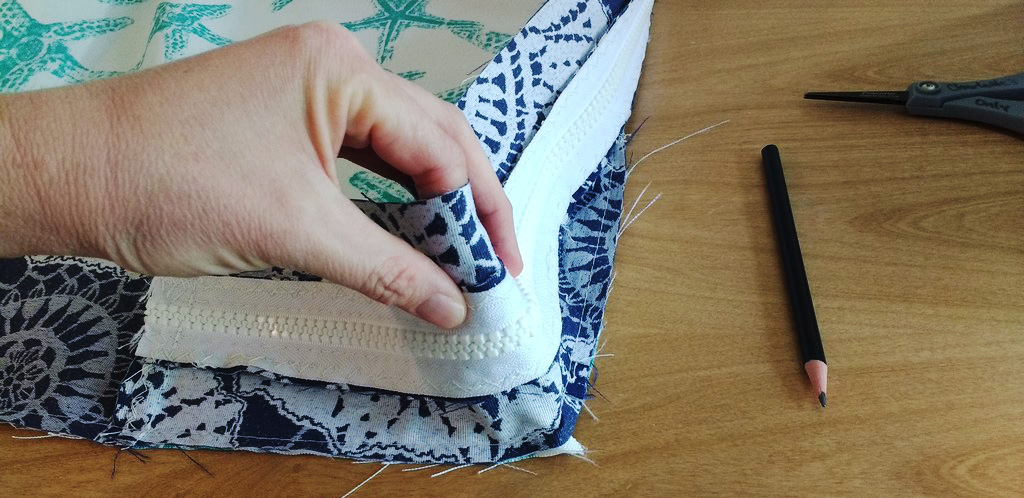
Upstairs, I cut the side piece (zipper piece) off of the top and bottom of the cover. Here are the two main panels laid out.
Here are the two main panels laid out.
Zipper time!
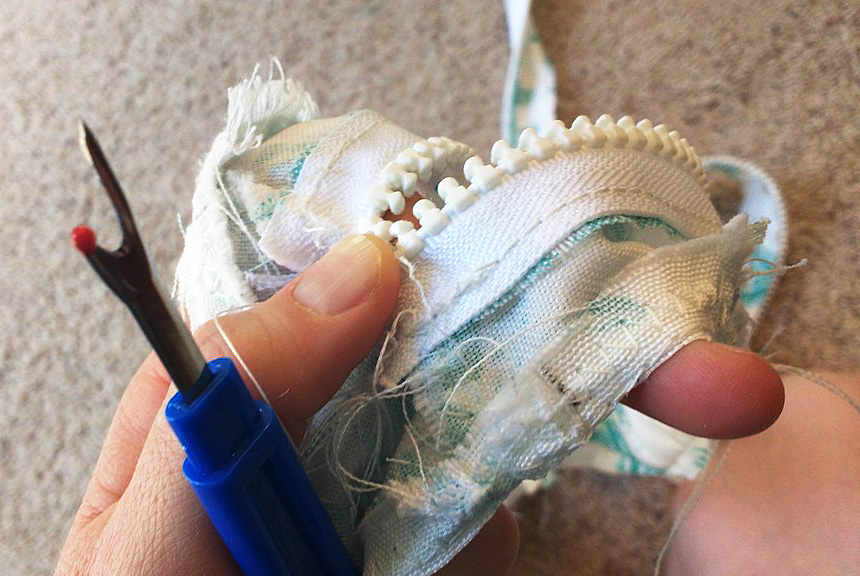
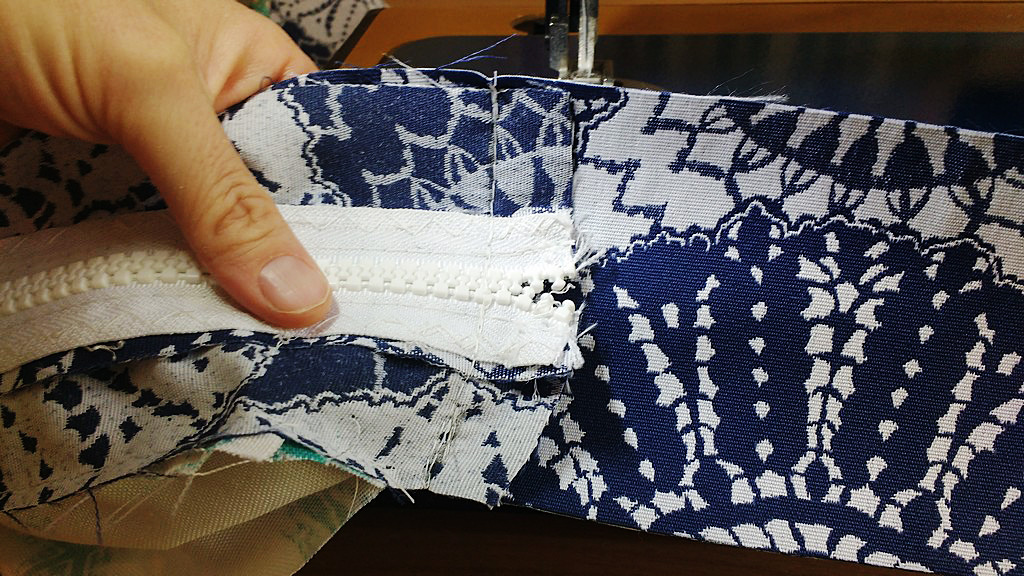
I had finished all my seams with zigzag stitches and there was no way I wanted to take out all those stitches. Instead I saved the zipper by just taking out the straight stitches holding it to the cover.
I saved the zipper by just taking out the straight stitches holding it to the cover.
Zipper saved! Now I didn’t have to buy another one for the smaller sized cover.
Zipper saved!
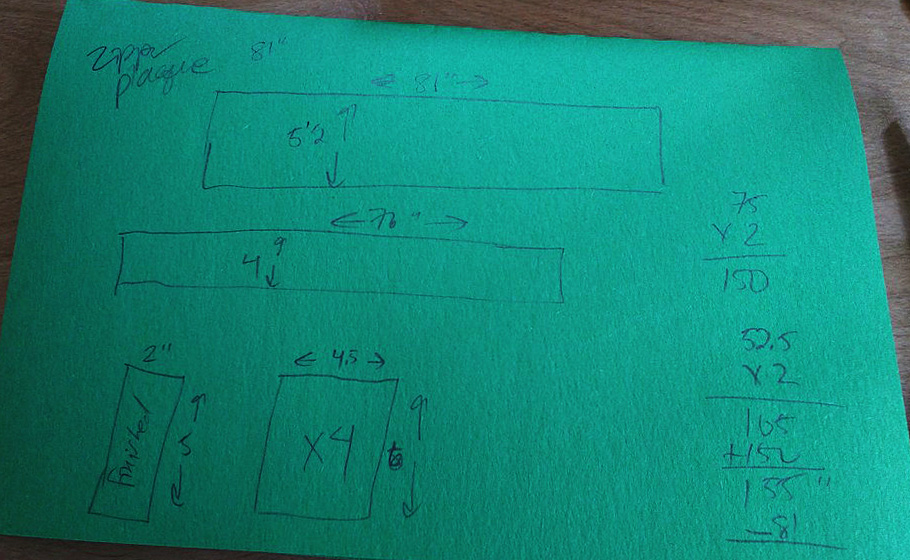
Let’s sketch this out…
Math time! Here I had to work out the new size of the zipper plaque and the rest of the side facing. Plus I wanted to add handles this time so I measured out those too. I also cut the top and back panels to the same size as the foam that now fit in the bed frame.
Math time!
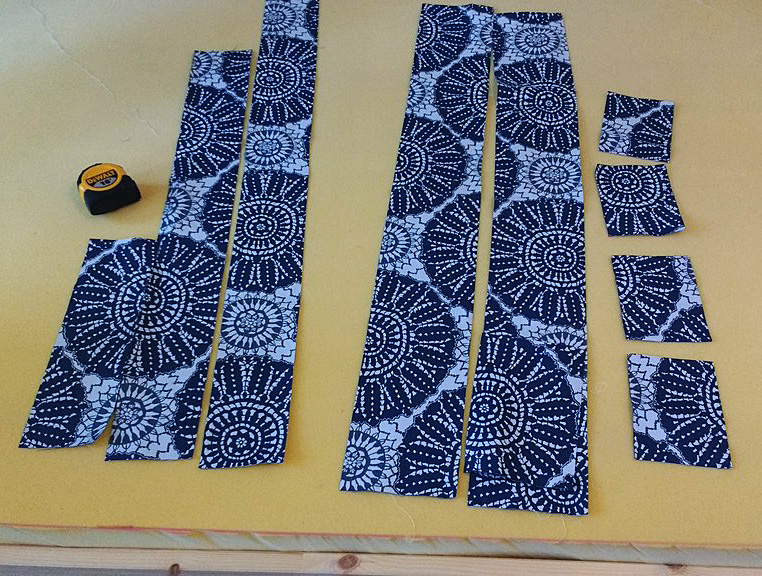
I was all out of the original fabric I had used to make the mattress cover so I used some leftover Sunbrella scraps I had from another project. Here are the parts I’ll need to piece together for the zipper plaque, the rest of the sides and the handles.
Here are the parts I’ll need to piece together for the zipper plaque, the rest of the sides, & the handles.
I made quick work of the four handles and top stitched them for strength. The ends are unfinished as they’ll be sewn inside the cover.
I made quick work of the four handles & top stitched them for strength.
Next I sewed the zipper plaque and side pieces together. I also made sure to zig zag stitch each join to prevent the fabric unraveling.
Next I sewed the zipper plaque & side pieces together.
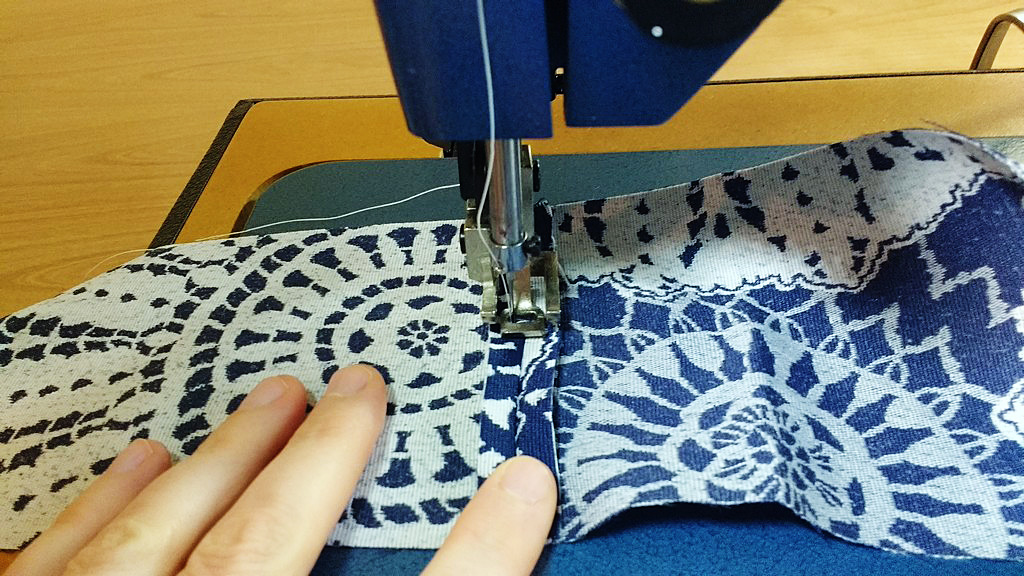
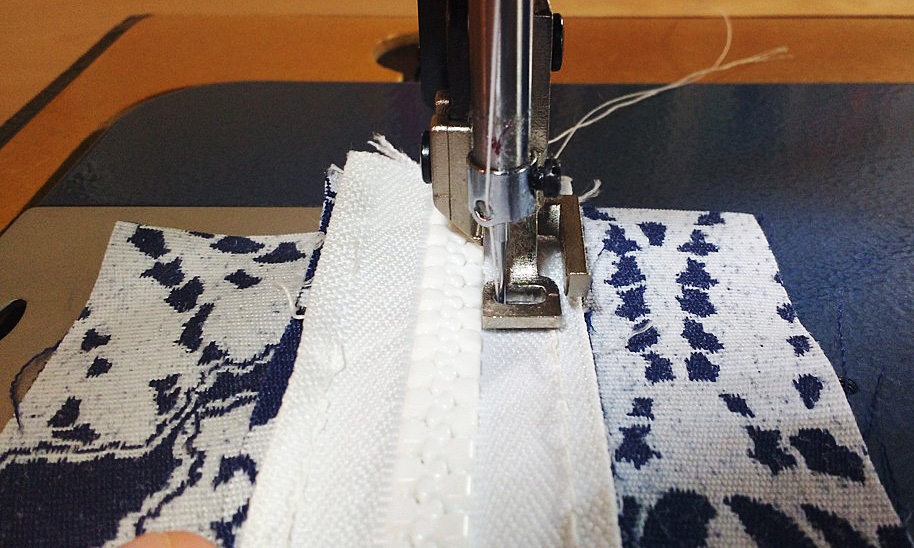
Making the zipper plaque is my favorite part. It means I’m getting close to being done. Here I’ve switched to a zipper foot so I can get super close to the zipper.
Making the zipper plaque is my favorite part.
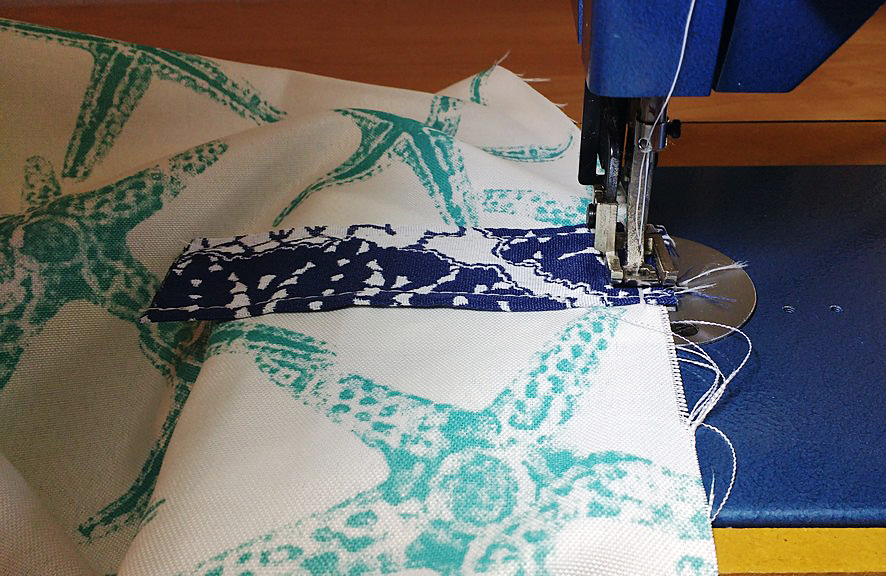
Next I sewed on the handles to one of the large panels.
Next I sewed on the handles to one of the large panels.
Side facing
Now it was time to add on the side facing. Yes! I joined one end of the side panel to the zipper plaque and started sewing on the zipper plaque portion first. Then I just transitioned to the side piece and kept going all the way around.
Now it was time to add on the side facing.
I stopped several inches before I got back around to the beginning and joined the two ends. Then I trimmed off the excess, zig zag stitched the join, and then sewed that piece onto the bottom panel completely.
I stopped several inches before I got back around to the beginning & joined the two ends.
Pro tip: make sure you open up your zipper enough right now that you can get your hand through it to open it completely when turn this right sides out in a few more steps.
You are so close now!!!
You are so close now!!!
Before you begin sewing on the top panel there are still two important things you need to do.
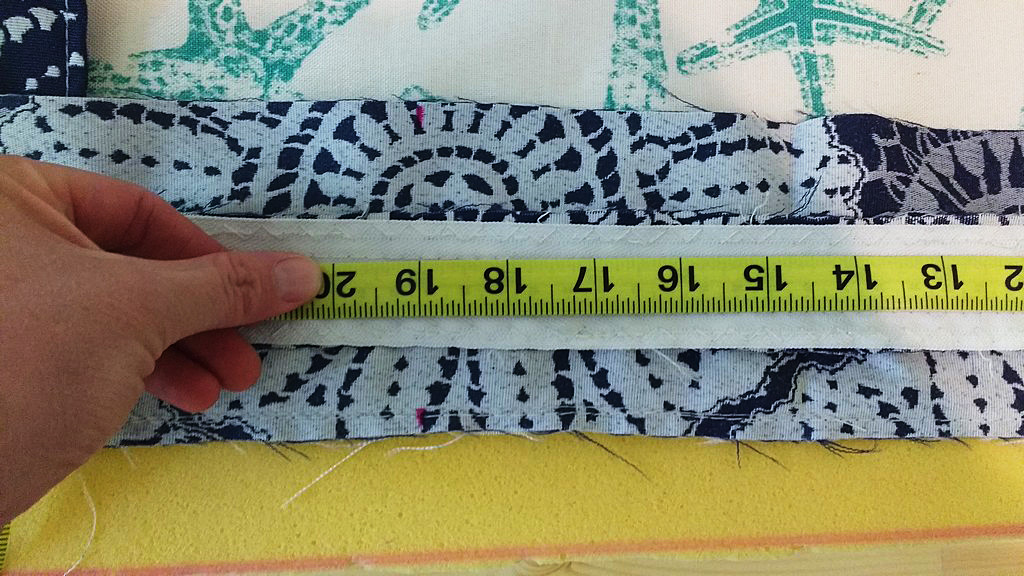
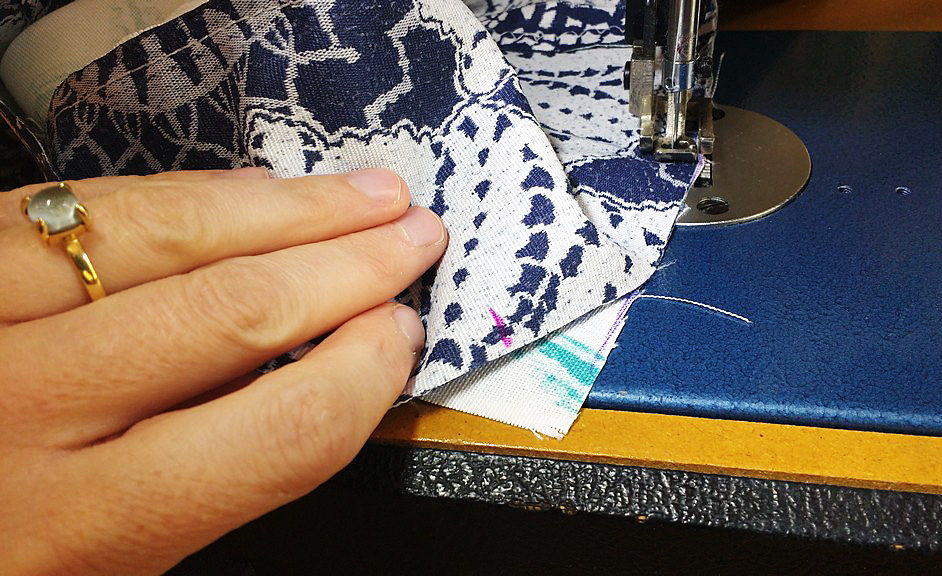
Create match up marks.
Create match up marks. When you are working with large pieces of fabric, things have a tendency to shift. These marks will let you know you are joining the two pieces together where you should. If you look carefully you will see pink marks on either side of the fabric at the 19” mark. I marked the side pieces and then the top piece so everything should match up when I sew.
Do your corners!!! This is crucial. Go to each corner and fold it down and back until you are sure the piece is square with each side. Then mark that spot so you know you’re at the actual corner when you get there.
Do your corners!!!
Begin sewing your final panel to the cover. I like to put the panel that is being sewn on the bottom. Here you can see I’ve matched my corners perfectly.
Here you can see I’ve matched my corners perfectly.
When you’ve sewn all the way around you are ALMOST done but not quite. There are two things to be done first.
Take the time to carefully inspect ALL seams, fronts and backs. Sew anything you might need to.
Then you need to zigzag stitch both seams in order prevent the fabric from unraveling.
You may think you have finished the hardest part, but the worst is yet to come.
Pat yourself on the back
You may think you have finished the hardest part, but the worst is yet to come. It’s time for cushion Olympics. Yes, wrangling foam into cushions should be an Olympic sport.
Here’s what you need to know:
Go slowly. Do not pull the fabric or you will rip your seams and pop your zippers.
Rather, walk the foam into the cover. I like to fold it on the ends and walk it a little sideways.
Patience, patience, patience. Fit your foam into the pattern just the way you designed it. It you did your math right, it WILL fit.
Go slowly.
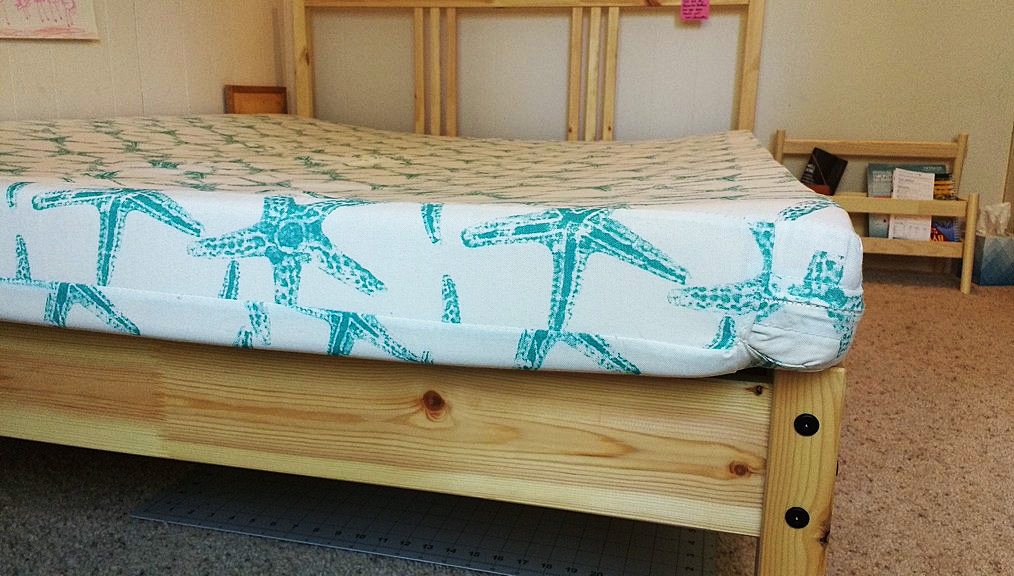
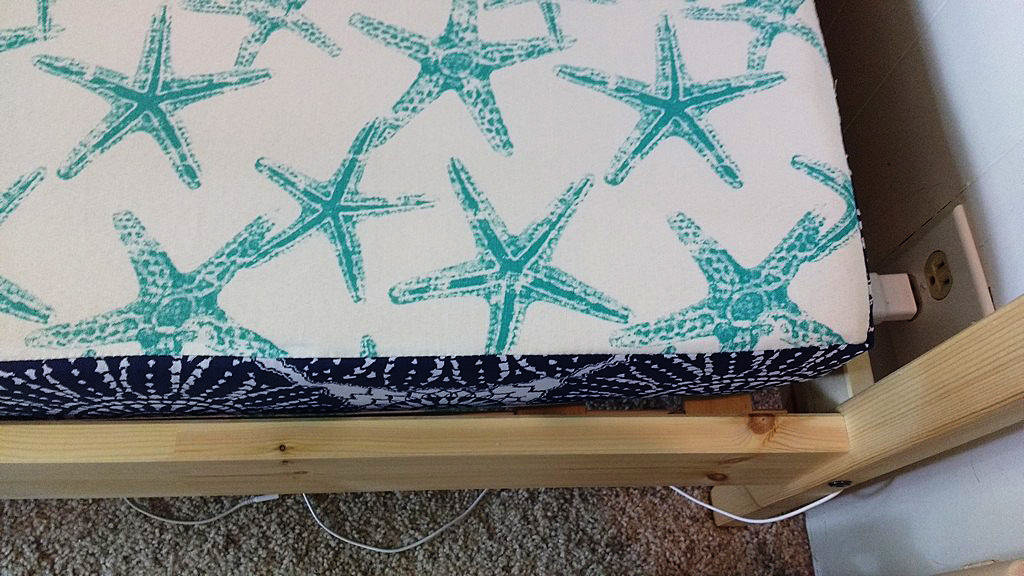
After burning some calories (always a good thing), you will have your new mattress with custom fitting mattress cover that actually fits into your bed frame. Now you may rejoice.
Now you may rejoice.
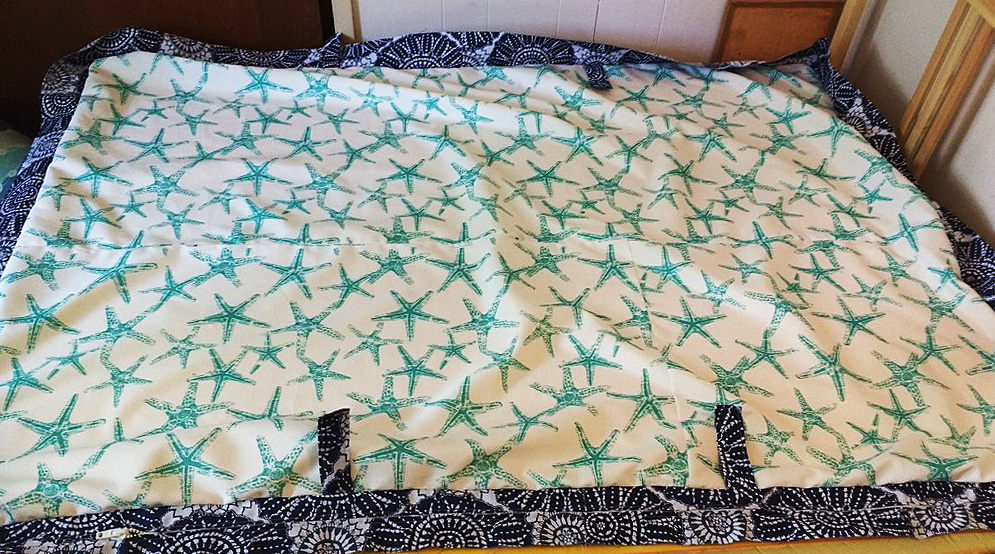
Look at those clean lines!
Look at those clean lines!
Do you make your own bedding, including mattresses? We’d love to hear about your work.
———————————————————————————– Charlotte Kaufman is a writer and sewist in Mammoth Lakes, California. She specializes in marine and home interiors and continues to fall more and more in love with quilting. You can follow her at charlottekaufman.com.
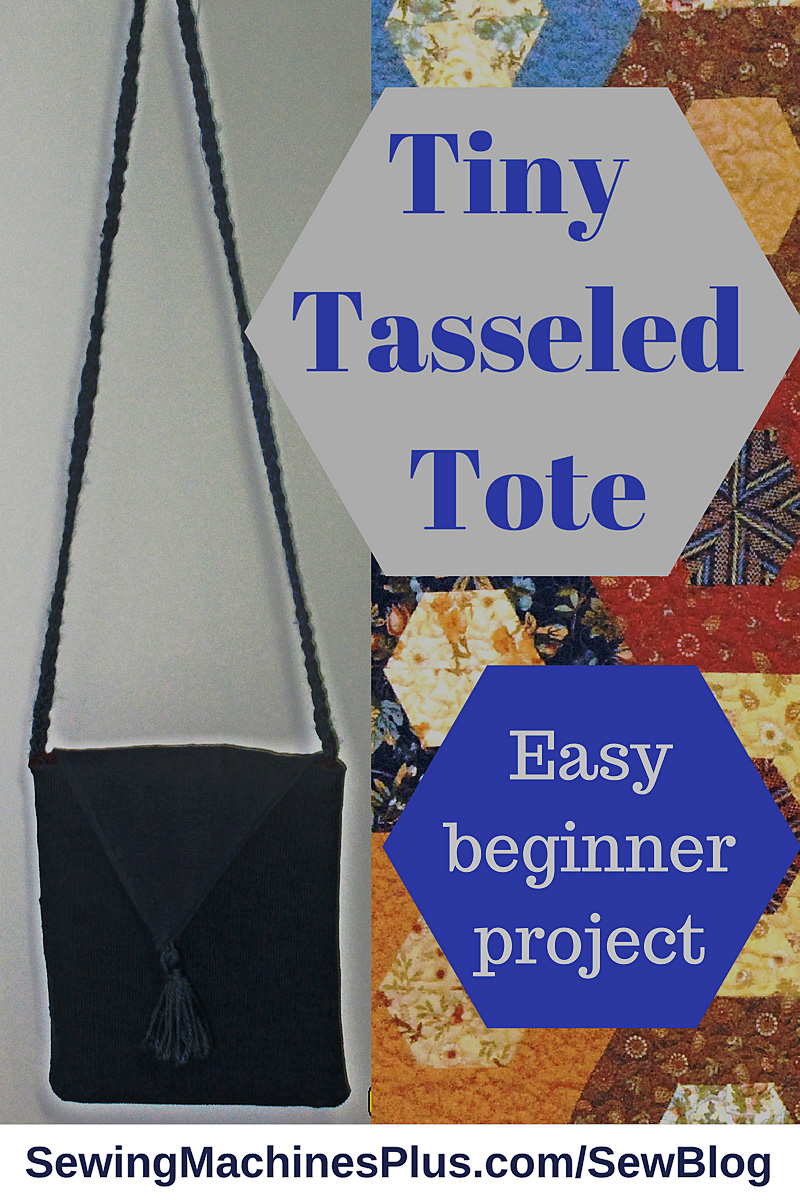
This elegantly simple bag is incredibly easy to sew and offers endless opportunities for embellishment. It is tiny as totes go, but as a small purse it is offers plenty of space for all your essentials, with room to spare. It features an outside pocket big enough for your phone or sunglasses, and two inner pockets, one sized for your ID and debit card.
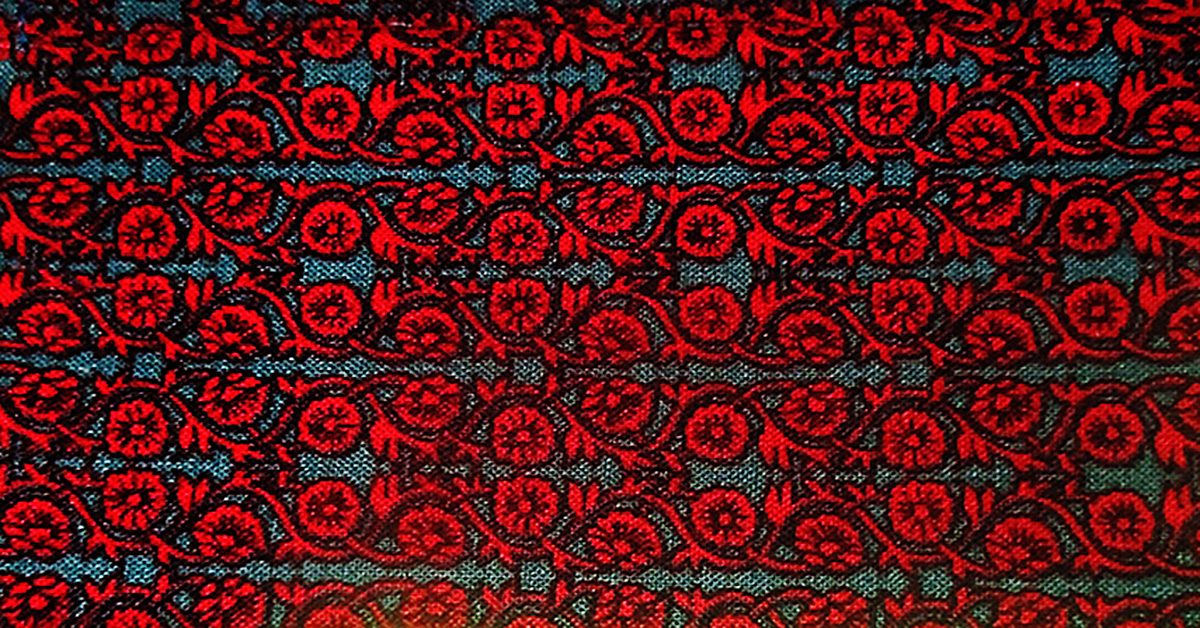
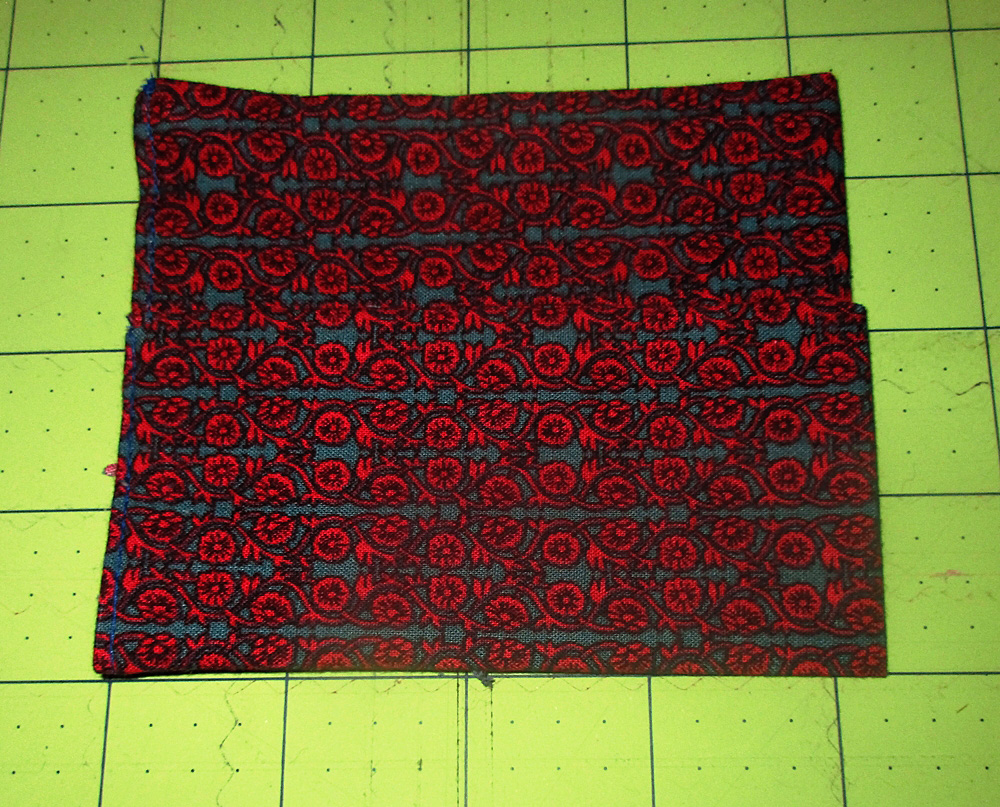
I really wish I had an embroidery machine; if I did I would completely cover this small bag with colorful embroidery. Since I don’t, I decided to make mine understated and casual in all one color and with minimum embellishment. I think this denim blue corduroy is nearly a neutral color and I know it will go with much of my wardrobe.
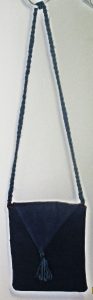
Tassel bag (front).
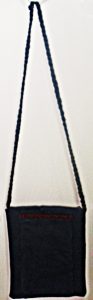
Tassel bag (back).
I want to buy some silk cord to make the tassel and make a bag like this in a dressier fabric, too. Keep tuned to this blog, as I will soon share another small purse tutorial for a variation on this bag that is a lot of fun to make, too.
Without further ado, here’s this small purse tutorial, suitable for beginner sewists:
Tiny tasseled tote small purse tutorial
You need fabric for the bag body and lining, a little bit of interfacing, and yarn for the strap and tassel.
Cutting instructions
Cut:
2 bag body pieces (main fabric) 7.5″ by 9″
2 bag lining pieces (second fabric) 7.5″ by 9″
(optional) 2 interfacing pieces 7″ by 8.5″
(optional) 1 interfacing piece 4.5″ by 8″
2 main fabric pieces 5″ by 7″
2 pieces second fabric 5″ by 7″
1 piece second fabric 6″ by 9″
Step one is optional – interface or quilt
If you choose to add interfacing to your bag, do it now. Because my outer fabric was corduroy and the quilter cotton lining fabric less sturdy, I chose to interface the back of my lining fabric (7.5″ by 9″ inch rectangles). If you use quilter cotton or other lightweight fabric for the outside of your purse, then interface that instead. Also apply interfacing to one of the 5″ by 8.5″ rectangles.
Another option is to forego interfacing and quilt one layer of your bag, either the outside or the lining. Just quilt these now, before we move on to construction.
Make the outside pocket
Take one 5″ by 7″ piece of your main fabric, and a matching piece of the lining fabric and align these right sides together. Sew around all four sides, leaving an opening of at least 2″ to turn right sides out. Clip the corners, turn, and press.
Now fold over the top about half an inch, press, and topstitch. I chose to press mine with the lining fabric forward, to show a bit of contrast on the outside of this otherwise plain blue bag. You can fold towards the inside though, if you’d rather not show off your lining fabric on the outside of your purse.
Center the pocket on one of the bag body 7.5″ by 9″ rectangles, with the hem you just sewed at the top of the bag. Sew the sides and bottom of the pocket to the bag body piece about 1/8″ from the pockets edges.
Make the inside pockets
Take the 6″ by 9″ lining fabric, and fold it right sides together to make a rectangle 4.5″ by 6″. Sew with a ¼ inch seam allowance along all three open sides, leaving an opening of at least 2″ for turning. Turn right sides out, press, and top stitch the opening closed.
Now fold one short edge of this finished rectangle upwards about 2 inches and press this fold line well. Then, center this pocket on one of the 7.5″ by 9″ bag lining rectangles, and sew the bottom and sides down on the lining fabric.
Inside pocket image.
Sew the bag body and lining
Now take the two main fabric rectangles and put them right sides together. Make sure the outside pocket is facing with the opening pointing up, then sew the side and bottom seams.
Then repeat for the bag lining pieces, again making sure the pocket opening is facing up before sewing the sides and bottom together. Set both bag and lining aside.
Make the tassel
Wrap yarn around the four outstretched fingers of hand about ten times. Tie the yarn together at the top of these loops with a short piece of yarn, then cut through all the loops at the bottom. Take another piece of yarn and wrap it around and around the strands, about half an inch from where you tied the yarn together at the top, then tie. Voila, a tassel!
How to tie a tassel.
Make the flap
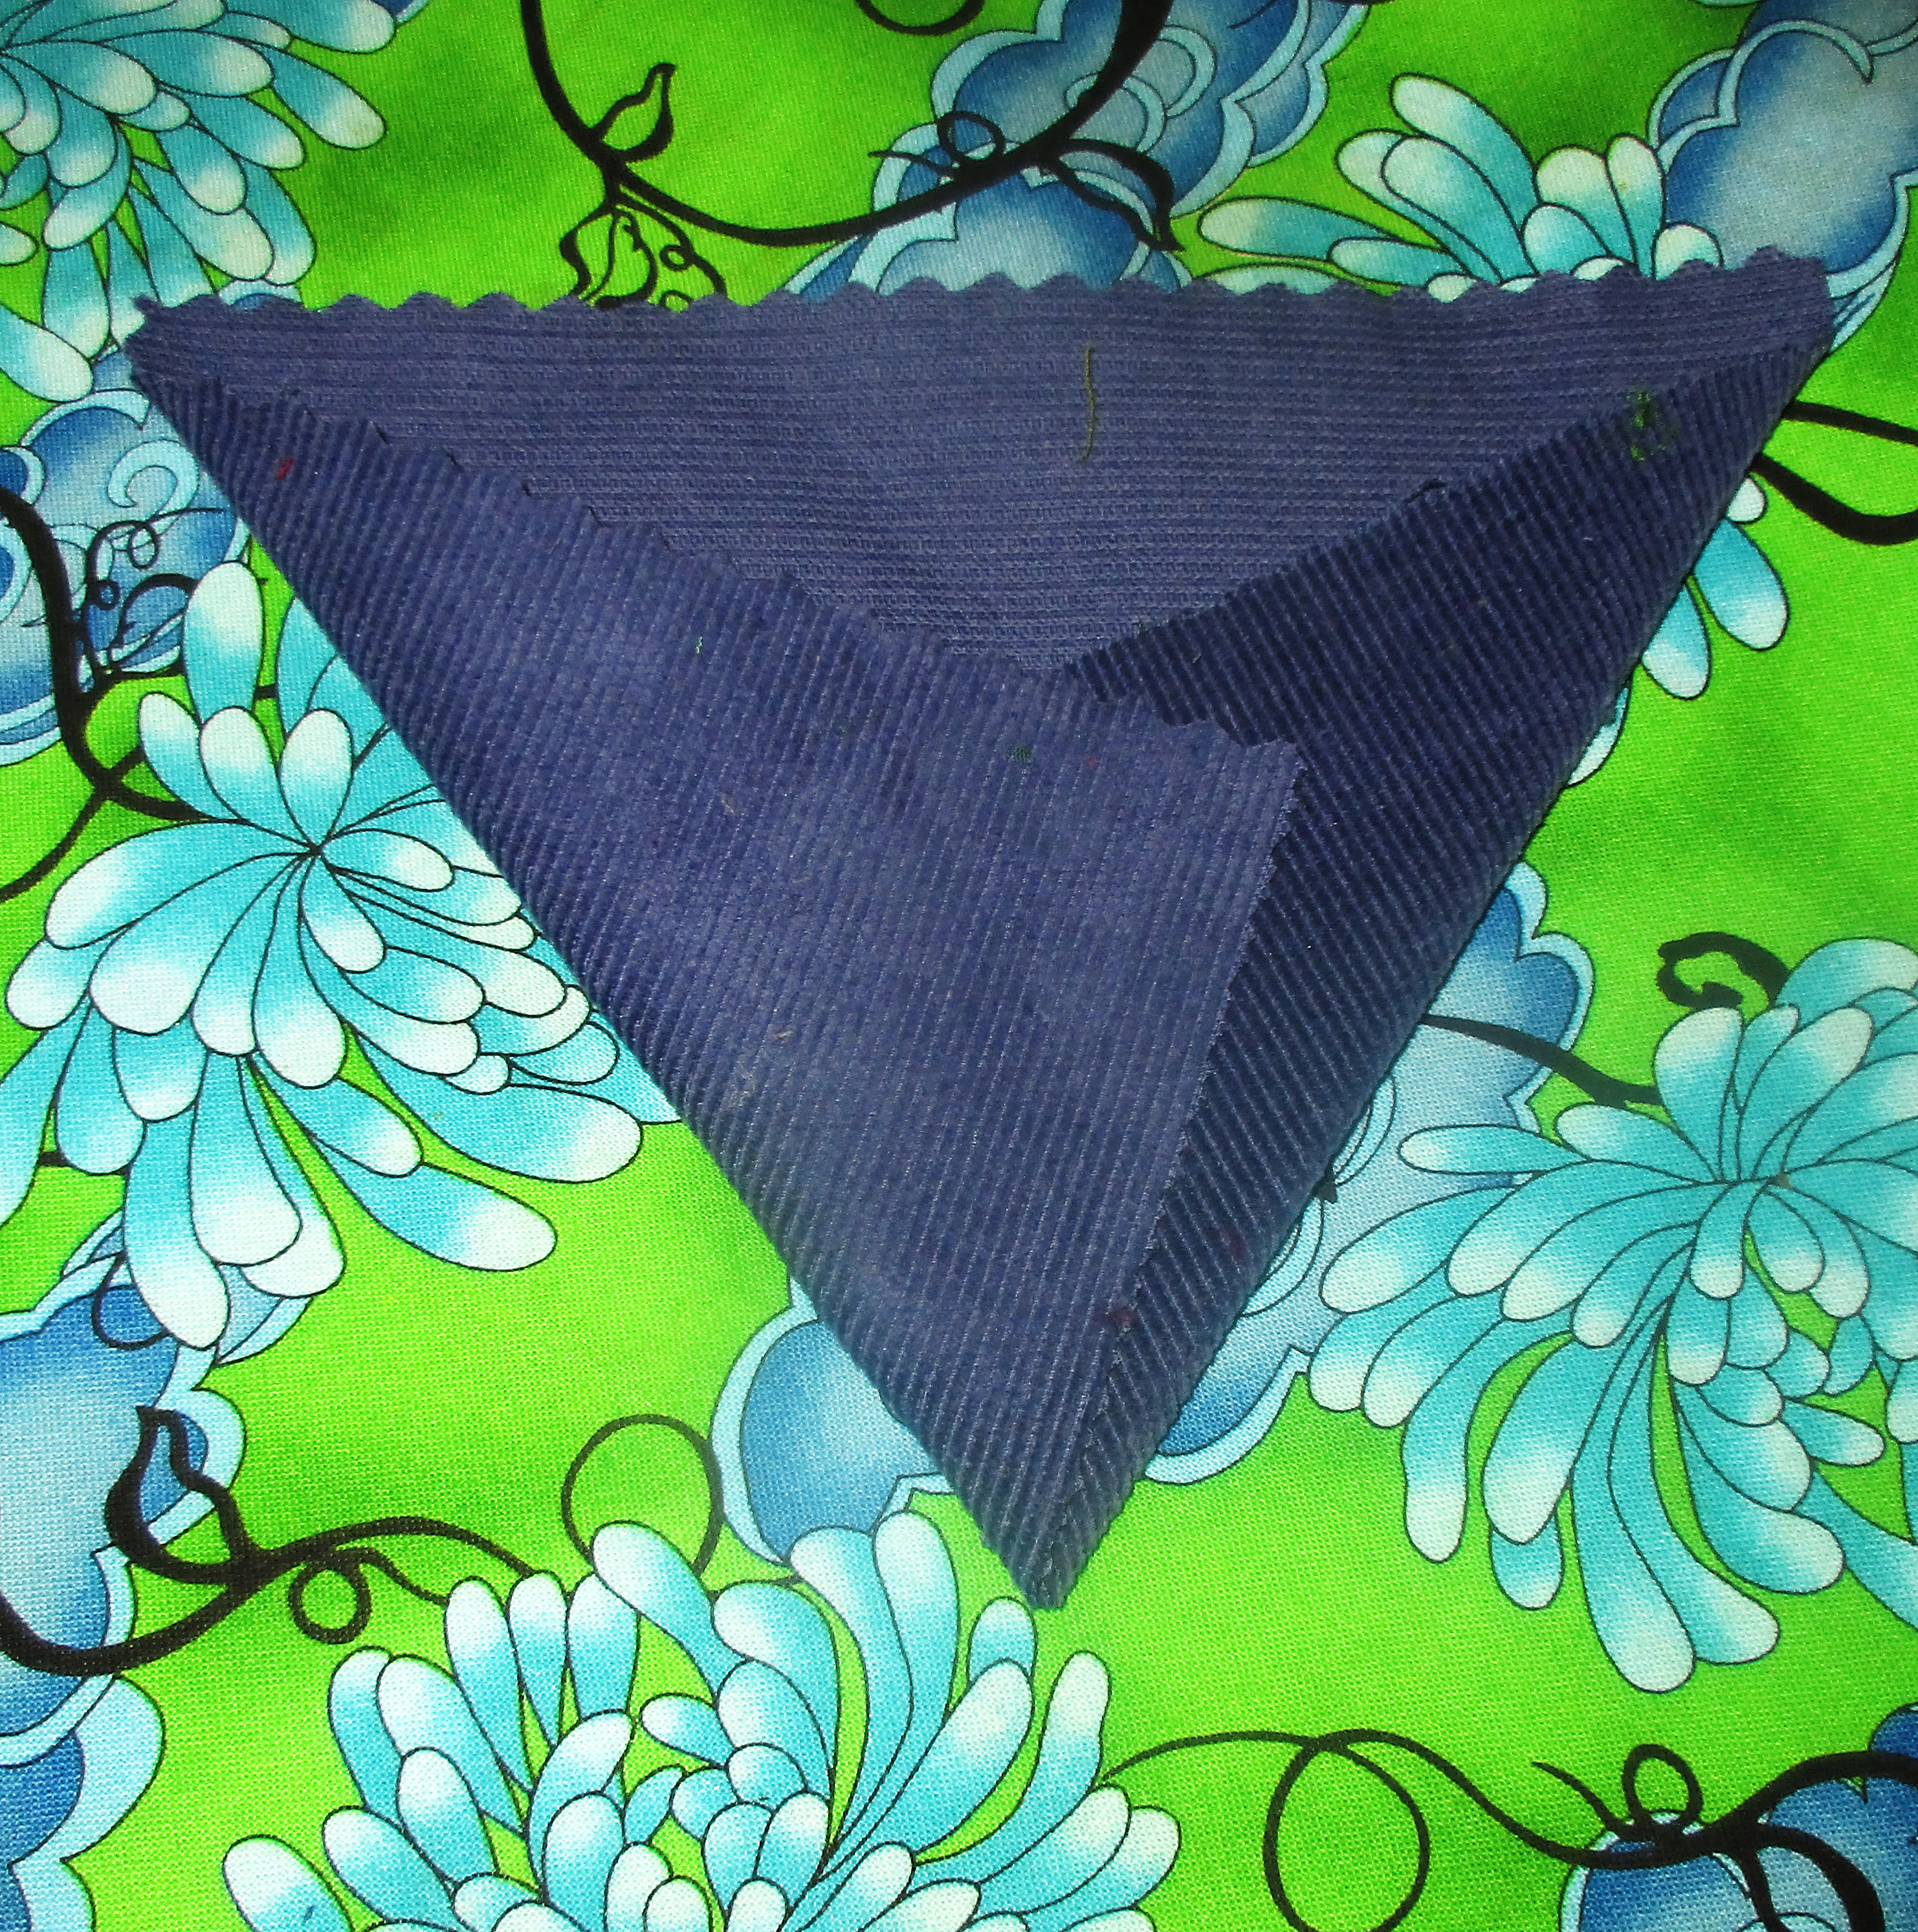
Take one of the 5″ by 7″ pieces to your ironing board and place it right side down, aligned with the long edges horizontal and the short edges vertical. Then fold the bottom corners upward to make a point in the middle and press these fold lines well.
Tassel bag point image.
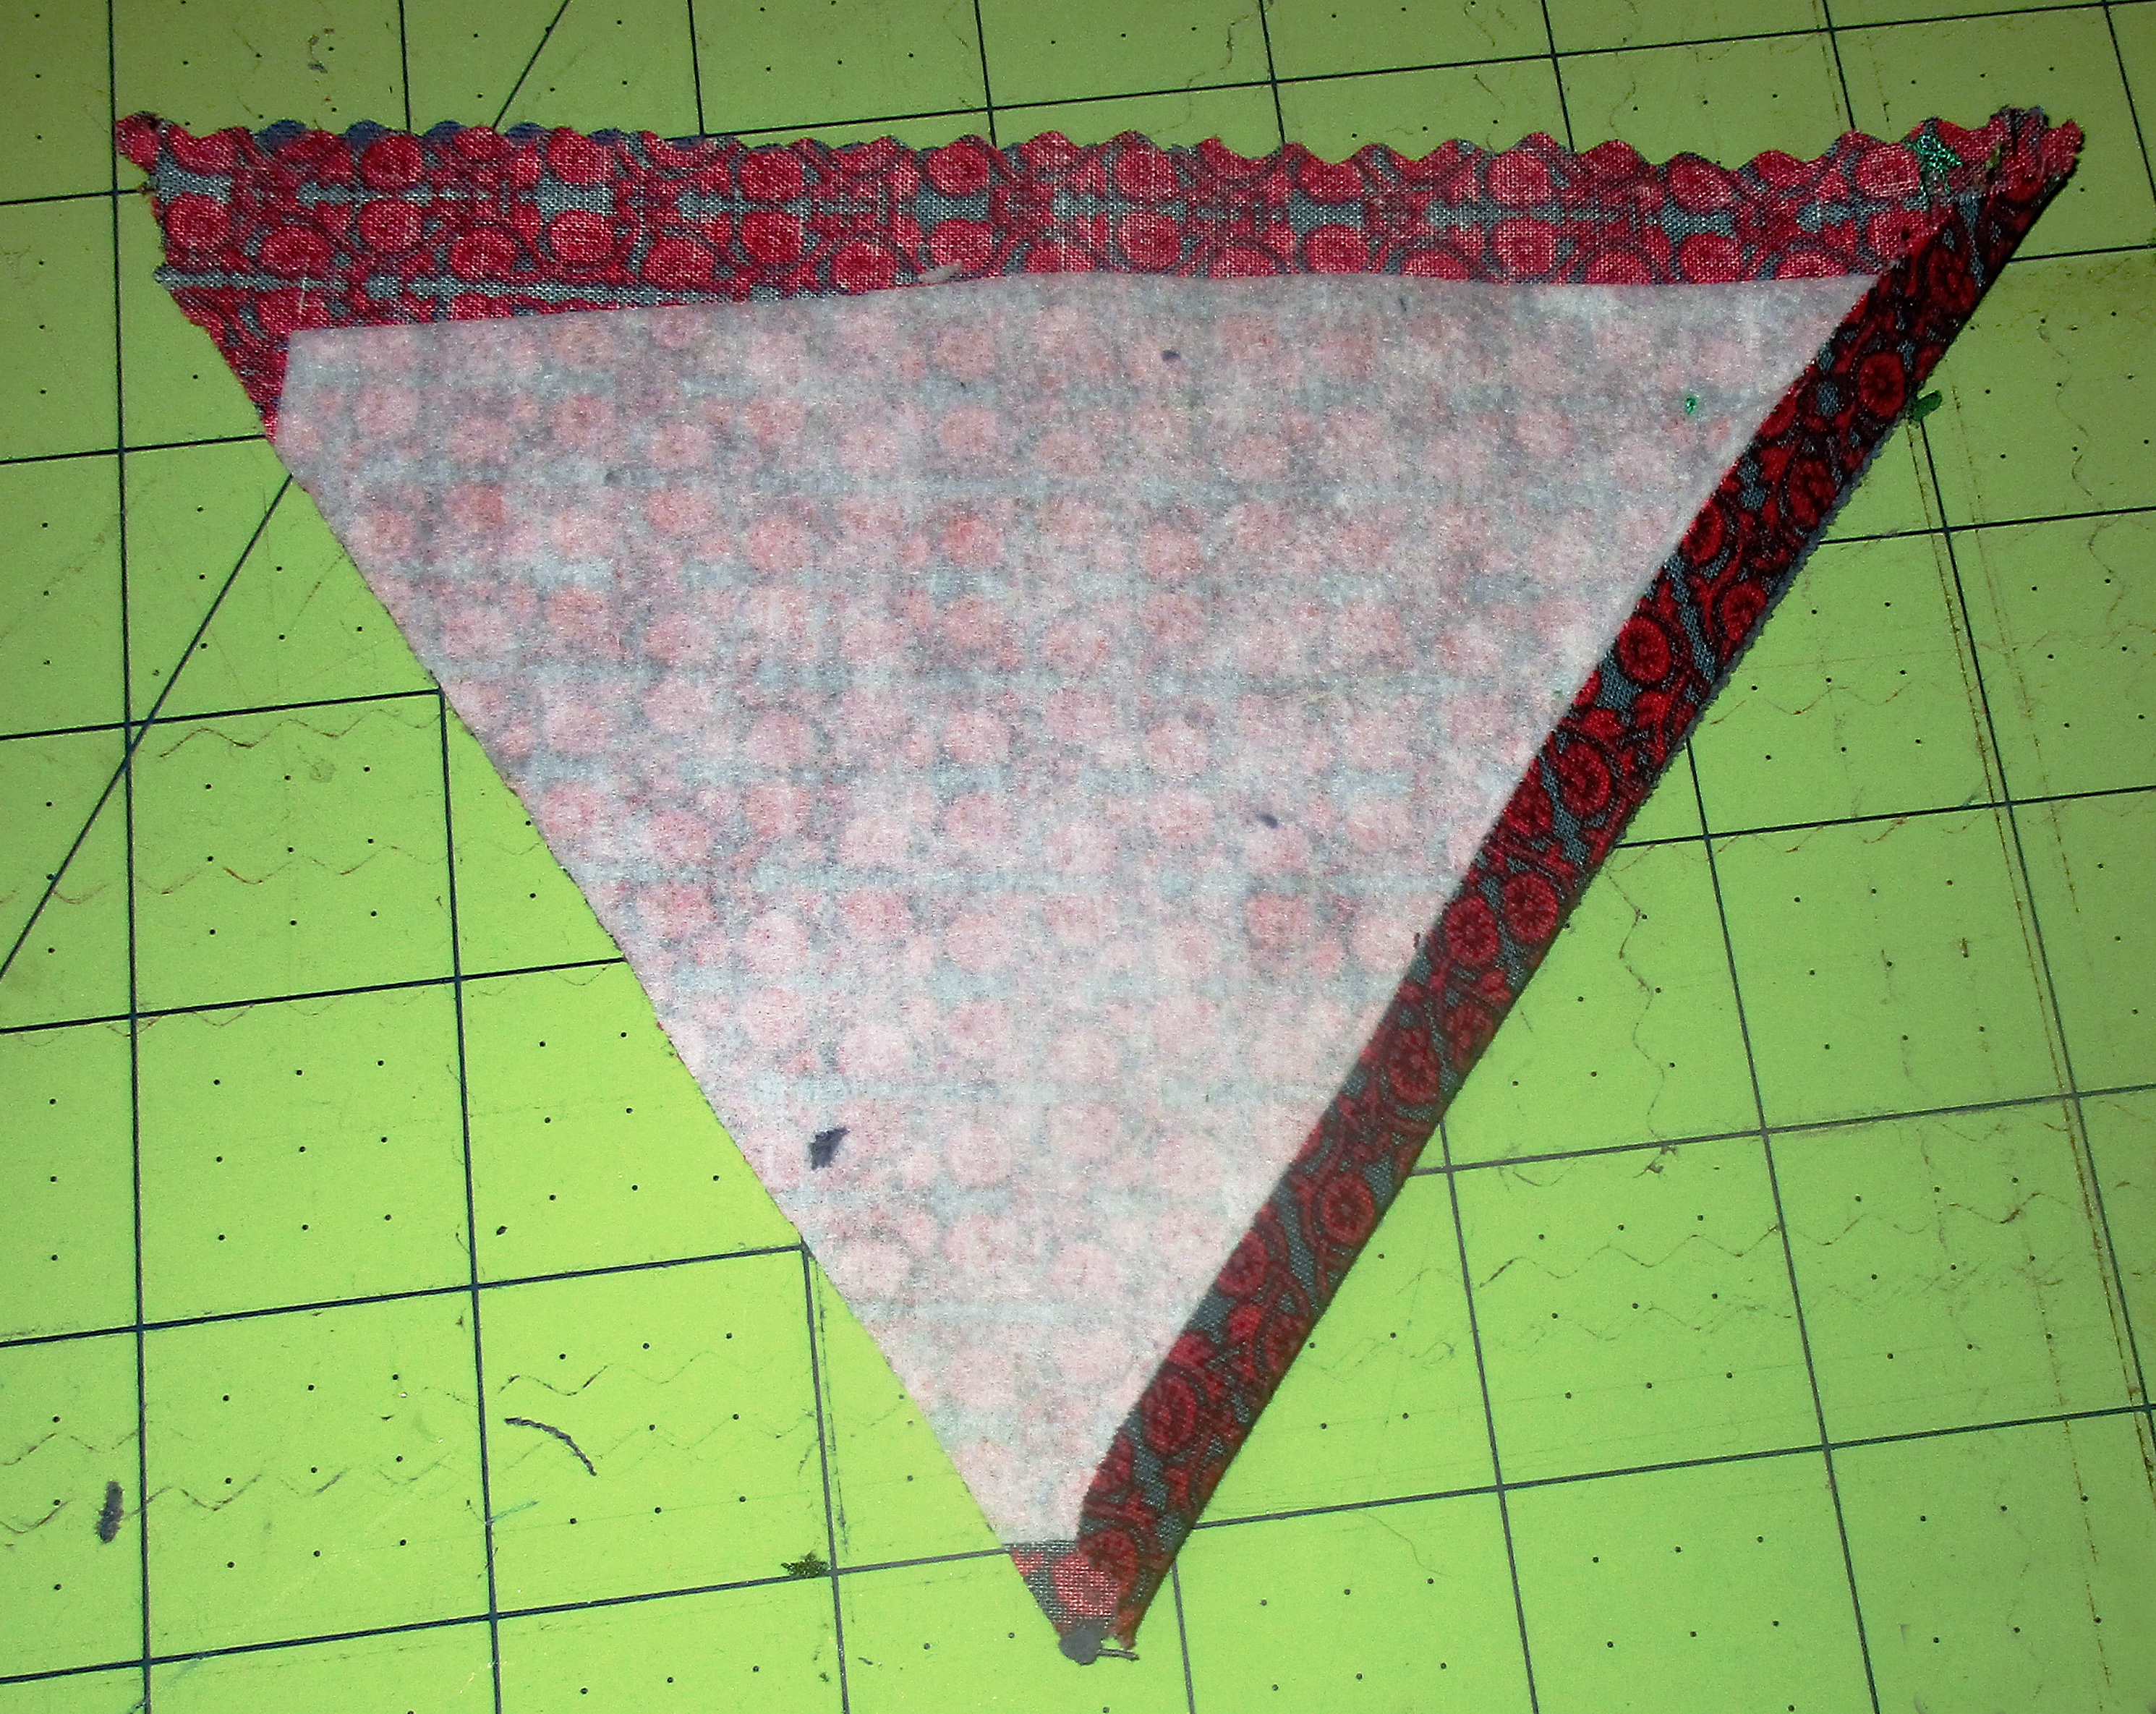
Then, cut along these pressed lines to make a triangle shaped piece for the flap. Cut a lining rectangle piece to match, too. Now, go back to your ironing board with these pieces. Fold one of the edges you just cut to form the triangle back ¼ inch and crease this well with your iron. Repeat on the second triangle.
Tassel bag point crease image.
Now place the two triangles right sides together and sew together along the opposite side of the triangle from the side that you just creased. Clip the seam allowance from the triangle point, turn right sides out, align the creased seams you previously pressed, and press again.
Now insert the two short yarn tails from where you tied the yarn together at the very top of your tassel into the triangle point. Topstitch along the seam you just sewed, then topstitch to sew the side with the pressed seams closed, too, being sure to catch the yarn at the top of the tassel inside the seam.
The third side of the triangle flap remains open. Align this open edge with the top edge of the back side of your bag body, right sides together, and sew right along the edge to baste these pieces together.
Make your strap
To make the yarn strap, use 9 pieces of yarn about 4 feet long. Use 3 strands each to make three long braids, then braid these three all together. Secure ends by tying with another piece of yarn. Or opt to use ribbon or make a long fabric strap instead, if you prefer.
Final assembly
Take your main bag body and your bag lining body and insert one inside the other, with right sides together. The flap should be between the two bag bodies. Now place your strap inside, also between the two bag bodies, aligning each end with the side seams.
Use the free arm on your machine, and sew these together, leaving an opening to turn. You will sew the backside with the flap and the straps, and leave the opening in the front. Turn right sides out and push the lining side into the bag body. Now fold the edges of the opening inward, topstitch this opening closed, and you are done.
It’s reversible
Technically, this bag is reversible. Although, if I were going to reverse this bag, I would change the construction of the inner pocket. I wouldn’t want a debit card pocket on the outside of my bag. To do this, just omit the step of folding the inside pocket up to create the card pocket. Sew it on as a larger patch pocket instead, the same as you did for the outside pocket.
I hope you use this small purse tutorial to make one, too. What fabric will you use? How will you embellish yours?