How to Sew Pocket Organizers

How to Sew Pocket Organizers

Sew pocket organizers to hold all your stuff!

Pockets are not only for clothes and bags.  You can sew pocket organizers for:

  • Shoes
  • Jewelry
  • Sewing supplies
  • Knitting or crochet supplies
  • Art supplies
  • Any other kind of supplies
  • Baby gear
  • Guitar gear
  • Other kinds of gear
  • Remotes
  • Cords or cables
  • Tools
  • Toiletries
  • First aid kit
  • Other kits
  • Frequently used pattern pieces
  • Bills or mail
  • Money
  • Magazines
  • Papers
  • Games
  • Toys

Those are just quick ideas off the top of my head; the possibilities are endless.

How to sew a single hanging pocket

Anyone can sew a pocket organizer, even absolute beginner sewists.  A basic hanging pocket is just two finished  squares or rectangles, one sewn down on three sides on top of the other.

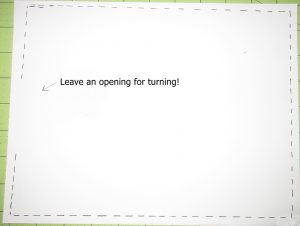
To finish the squares, you cut two identical layers and sew them around all four corners and sides with right sides together, leaving an opening for turning.

I drew this because the ink shows up better than my stitching in the photo.

I drew this because the ink shows up better than my stitching in the photo.

Clip the corners and turn right sides out. You can stick something inside to push the corners out.

Then stitch the opening closed. I usually just topstitch along that entire side. Sometimes I topstitch around all four sides.

Fold the top down an inch and a half or more towards the back and sew the edge down to form a casing for hanging. Then make a smaller finished square or rectangle pocket piece using the same directions as above.

Topstitch the pocket onto the larger panel along the sides and bottom. Don’t sew the top of the pocket closed!
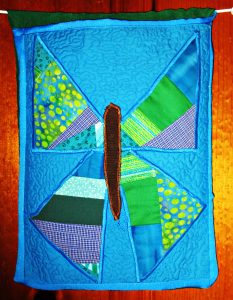
I made this pocket from my leftover butterfly block to hold mail, which used to pile up in my entryway.

I made this pocket from my leftover butterfly block to hold mail, which used to pile up in my entryway.

Or cheat and use jean pockets

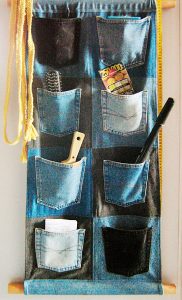
I did some searching to find some cute projects to recommend for you.  And I found some examples of organizers that were made by reusing jeans pockets. These save a step and so you can make these with super speed. Just be sure to use a jeans needle.

I think this one is a great idea for a closet organizer.

I think this one is a great idea for a closet organizer.

I will like to make a long double sided one of these to hang in the middle of a closet that’s shared by two boys at my house. This will solve a couple of different organizational challenges in that small closet nicely.

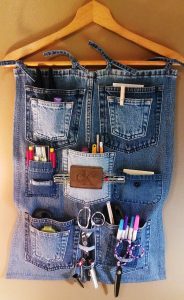
Here is one on a hanger that is being used for sewing supplies storage.

Here is one on a hanger that is being used for sewing supplies storage.

How to sew pocket organizers with multiple pockets

To start, make a backing panel. Cut two square or rectangular pieces to the desired size of your organizer pocket panel. Press interfacing to the wrong side of one of the two square or rectangular pieces. Then layer the two pieces right sides together and sew around, leaving an opening for turning.  Turn right side out, push the corners out well from the inside, press, and then sew closed.

To allow for hanging, you can simply fold over at the top and sew a casing, or you can make hanging loops and attach these by tucking between the two pieces when you sew them together in the steps above.

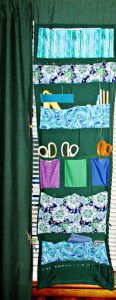
My sewing room curtain organizer panels use all of the above kinds of pockets.

My sewing room curtain organizer panels use all of the above kinds of pockets.

For the pockets, you could make several or many individual pockets in the same way as the larger backing piece and topstitch each pocket onto the backing panel separately. Or you could make long pockets the width of the backing panel. You can then topstitch to divide these long pockets into shorter sections.  You can also make your pockets slightly wider than your backing panel.  Then pleat them at the bottom and add elastic casings along the top edges, to build roomier pockets with more holding power.

My sewing room curtain organizer panels use all of the above kinds of pockets. I also stuffed a long one and sewed it closed around all sides to make a pin cushion way up high and out of the reach of grabby kids.

You can customize your pocket panels to suit your organizational challenges, no matter what they are.

Sew a money bag pocket

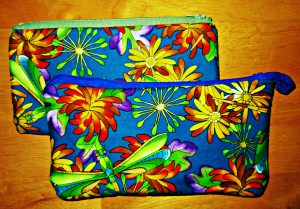
Maybe you’d call it a bag, but this project is simply a big pocket with a zipper at the top. You could use these as bank bags for deposits or otherwise holding cash. I made them big enough to hold multiple envelopes for monthly budgeting.

For stashing cash or other goodies.

For stashing cash or other goodies.

Or you could make these zippered pockets to hold your pencils or some other small collection.  I’m using one of mine for stashing my jewelry pliers set where no kids can reach them. Keeping my things out of the reach of children seems to be the major part of my own organizational challenges!

Favorite pocket organizers from around the web

If I haven’t given you enough inspiration to sew pocket organizers yet, check out these other ideas and tutorials that I found and collected from around the web. I will make the handy ironing board pockets right away, I can’t believe I have never thought of this simple solution before. And I think the pocketed towel will make a great gift for a sunbather I know and love.

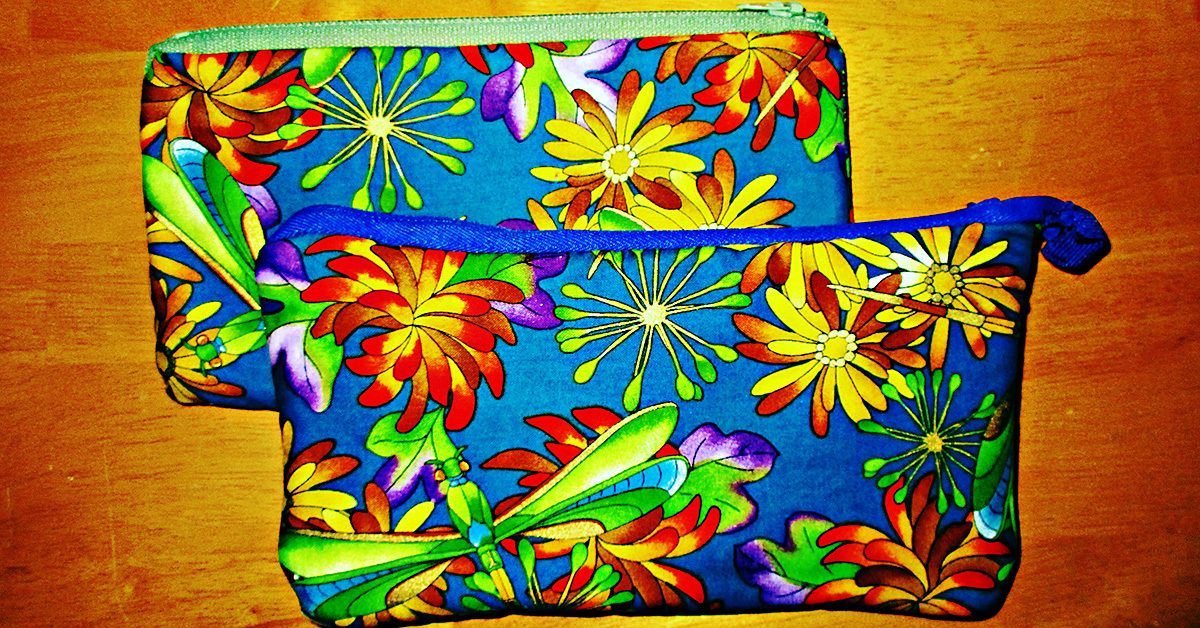
Are the gears in your brain turning now? What problems could you solve if you sew pocket organizers to keep things in place?

Crazy Patch Butterfly Applique Blocks

Crazy Patch Butterfly Applique Blocks

These crazy patch butterfly blocks happened by accident.

These crazy patch butterfly blocks happened by accident.

These crazy patch butterfly blocks happened by accident.

The last time I made a crazy patch quilt, I wound up with two extra blocks. I have no intention of collecting UFO blocks, but I’m not inclined to throw my handiwork away. So I stared at them a while, trying to think of something to make from these extra blocks.

Something told me to cut them into triangles, so I did, still not knowing what I’d do with them. I played with the triangle pieces for a few minutes, and this design idea came to me. I think it’s a good one.

You could make a bunch of these for a quilt, a few for a table or bed runner, feature one in a sampler quilt, or just make one for a small project.

I plan to use one of these to make an oversized pocket on a skirt. And I’ll show you what I’m going to do with the other one next week, so stay tuned.

Here are the steps to make these:

Crazy Patch Butterfly Blocks

For each block, you will need:

  • Background rectangle or square
  • Muslin square
  • Assorted small scraps

Step one: make the crazy patchwork

You could make these crazy patch butterfly blocks any size, but my examples started with a six inch square. Take your muslin square and arrange a several sided scrap somewhere near the middle of the square.  Choose another scrap with one side at least as long as one side of the first fabric, and place it right side down atop the first.  Sew along this seam, flip the second fabric down where the right side faces up, then press.  Repeat this process, gradually adding scraps, until the square is fully covered by your assorted scraps.

Then, place the block right side down on your cutting mat and use your rotary cutter and ruler to trim the fabric scrap from the edges of the muslin square.

I made one on video so you can see exactly how to do this step:

I should mention that traditional crazy patchwork also incorporates embroidery stitches over the seam lines. If you have a machine that does decorative stitching, then you can sew a line of decorative stitches along the seam after you add each new scrap to your crazy square. You don’t want to wait until the end, since these scraps go every which way.

Step two: cut triangles

Now lay the crazy patchwork square right side up on your cutting board. Use your ruler and rotary cutter to cut it in half diagonally, then move your ruler and cut diagonally the other way, to end up with four quarter square triangles. You could use scissors if you don’t have a rotary cutter, but if you want to make patchwork, you really want to get a rotary cutter and cutting mat.

Step three: appliqué

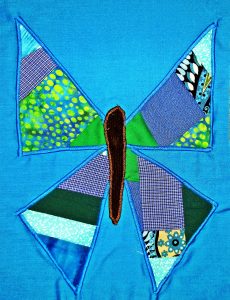
Here’s how to arrange the triangles to construct these crazy patch butterfly blocks. Place the top pair of wings with points together and the ninety degree angles at the outside bottom corners. Then angle the bottom wing pieces with the longest edges on the inside and the ninety degree angles pointing out.

Crazy patch butterfly block.

Crazy patch butterfly block.

Pin these to your backing square and appliqué using a satin stitch. I made these using a rectangular backing cut at nine and a quarter by eleven and a half inches.

If you will be using these for a small project rather than a quilt, there is an alternative way to hold your pieces in place rather than using pins. You could use double-sided fusible web. You would affix this to the back of your appliqué pieces and then remove the paper backing and affix the other side to the backing rectangle.

This makes appliqué really easy, but I don’t recommend using it for quilts, because it will be crinkly inside the appliqué. If you are making a wall quilt or other small decorative project, it is an easy choice.

Bust out the scraps

After you appliqué the crazy patch butterfly wings, then use corduroy or another scrap fabric to cut a long, tapered oval for the caterpillar body. Applique this in the middle, to cover the intersecting wings.

My son just pointed out that I forgot to add antennae to mine. If you’d like to add antennae, you can do this using hand or machine embroidery. Or you can use Debbie Mumm’s easy idea that she calls pen-stitch embroidery. That is, you can draw them with a fine tipped Sharpie or other permanent pen.

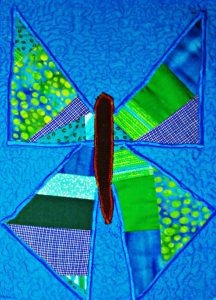
Here is one that I quilted the background using using tight free-motion quilting.

Crazy patch butterfly block quilted.

Crazy patch butterfly block quilted.

As you can see, these crazy patch butterfly blocks are super easy to make. They’d be cute on a baby, wall, or bed quilt. Or you could feature just one on an apron or skirt.

What will you make with these crazy patch butterfly blocks?

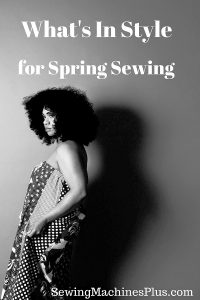
What’s In Style for Spring Sewing?

What’s In Style for Spring Sewing?

Spring sewing for your wardrobe is one of the best ways to chase away the end of winter woes.

What’s in style and on trend? What should you sew for this year?

What's In Style pin

Spring sewing: what’s still in style

There a few trends that popped up last year that we saw again this year on Spring runways, namely:

Lingerie-inspired fashions

Romantic and baby doll style lingerie continues to be a fashionable influence, with nightgown style dresses, both short and long, and even pajama styles being featured by many designers this year.

New this year to this category are wraps and dresses that mimic menswear-style silk robes.

Paper bag waists

These came back last year and we are still seeing them now. Luckily for us, they are easy to sew, especially for elastic waist skirts and pants. Just fold over the top of your garment an inch or more farther than you would normally fold over for an elastic casing, sew a line of stitching slightly lower than the fold to create the casing, insert your elastic, and voila.

Or sew a paper bag neck; higher necklines are on trend this year, too.

Or sew a paper bag neck; higher necklines are on trend this year, too.

Metallic shimmer and shine

Metallics started popping up everywhere last year, and these are still in now. You can sew most any garment in a lamé or other metallic fabric now.

Gold lamé? More like gold fabulous!

Gold lamé? More like gold fabulous!

Midi lengths

The flattering midi-length skirt is still where it’s at this year. We also see midi length cropped pants and jumpsuits cut to this length now.

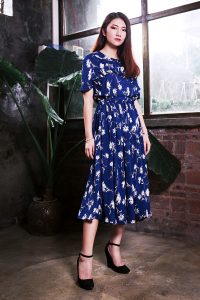
The flattering midi-length skirt is still where it’s at this year.

The flattering midi-length skirt is still where it’s at this year.

Pleats

Last year we saw these primarily as small, accordion style pleats. This year, these are still in style. But so are pleats of slightly wider widths.

Plaids

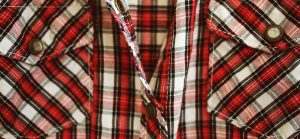
Where large plaids were the rage last year, this year the trend is toward smaller plaids. You’ll also see a mixing and matching of similar plaids in differing scales worn together.

Forget the large plaids; small plaids are where it's at this year.

Forget the large plaids; small plaids are where it’s at this year.

Florals

Florals are usually everywhere in Spring. This year, they are trending a few different ways. Designers continued last year’s trend of using small scale florals in romantic, feminine style, though they’ve sometimes paired them with edgier pieces. The small scale romantic florals are particularly popular for jumpsuits now.

Larger, 70’s style florals are also popping up all over this year.

Larger, 70’s style florals are also popping up all over this year.

Ruffles

Large and wide ruffles continue to trend this year. Use these on blouses, skirts, and dresses.

Stripes

Stripes were featured widely last year, and they are still big. We saw stripes on Spring runways this year in different ways. Vertical stripes in navy or black and white are in, and so are colorful, wide horizontal rugby stripes.  Pinstripes also featured widely in men’s shirt style dresses.

Use black & white stripes vertically this year.

Use black & white stripes vertically this year.

What’s New for Spring sewing 2017

Embroidery and embellishments everywhere

You can put your embroidery machine and embellishment software to good use in your Spring wardrobe now.

You can embroider any garment this year.

You can embroider any garment this year.

We saw embroidered motifs here and there last year, but it is more widely featured this year. Designers paired embroidered vests with embroidered pants and emblazoned dresses and blouses with heavy embroidery. Handbags especially were covered with embroidery designs this year.

Bags, blouses, dresses, jackets, and pants also saw lots of beading and sequins in designers’ Spring collections. From beaded and sequin designs such as florals to covered sleeves, embellishments are on trend.

Bold prints

Besides the kitschy 70’s style florals already mentioned here, other 70’s style prints are in. Also make use of graphic geometric prints this year, especially large scale prints.

Higher necklines

Mock turtlenecks are in, even on bathing suits. Boatneck styles are cut higher than usual, too, right at the neckline.  For necklines cut a bit lower, designers paired these with silk scarves wrapped tightly around the neck, to imitate the turtleneck style.

Pair dresses with less coverage, such as spaghetti straps, with higher necked tops worn underneath.

Shoulders out

There are also plenty of shoulder-baring styles this year. Off the shoulder cuts are popular, especially for peasant blouses and dresses.

Off the shoulder peasant top.

Off the shoulder peasant top.

Hopefully you still have the patterns you bought in 2011, because one shouldered designs are in again. One sleeved styles are trending, too.

A-line mini skirts

Cut these on the bias. A-line minis are my absolute favorite skirts to sew; I’ll share how to draft your own pattern for a perfectly fitting bias skirt here on the blog soon .

Sheers

Sheer skirts over leotard style tops. Even sheer hoodies!

Sheers and cutouts are big this year, along with higher necklines.

Sheers and cutouts are big this year, along with higher necklines.

Glam

In tribute to David Bowie, 80’s style glam is trending now, especially with puffed-at-the shoulder sleeves and wide ruffles.

Flared hems

Both ankle flare pants hems and bell sleeved blouses are in style now.

Flared bell sleeves on a one-shouldered design.

Flared bell sleeves on a one-shouldered design.

Jumpsuits

Here is another major way what was hot in 2011 is back again today. Jumpsuits are big now, in all lengths, particularly wide legged midi styles, in floral prints.

Patchwork

Runways this year featured patchwork dresses of all kinds. From a mix of solids reminiscent of Amish quilts, to patchworks of patterns and florals, any kind of patchwork can work in your Spring sewing and wardrobe this year.

Feathery fringe

Feathery fringe is everywhere now, from necklines and sleeves to bags, even dresses covered in tiers of brightly colored feathered fringe.

Feathery trim.

Feathery trim.

BIG bags

While smaller handbags with heavy embroidery are in style, super XL bags are all the rage.

Spring sewing: color trends

Spring sewing: color trends

Besides the florals, bold patterns, and stripes trends already discussed, here are the color trends for this season:

  • Khaki – it’s everywhere
  • Pinks – pale pinks, mauves, raspberry
  • Blue – all shades of blue, especially several different blues worn together
  • Neutrals – these are featured more often than usual this year
  • Gold – metallics are hot in general, but especially gold
  • Yellow – while orange was hot last year, yellow seems to be the it color this year
  • Neons – these bright colors are coming back again now
Yellow & blue are both hot colors now.

Yellow & blue are both hot colors now.

I’m excited that patchwork and embroidery are trending now, and I’ll be adding more of these pieces to my closet. On the other hand, in style or not, you’ll never see me wearing yellow, gold, or feathery fringe!

Which of these styles are you excited to sew for your wardrobe now and which trends would you rather skip?

Sewing on the Go: What and How to Pack for Class or Traveling

Sewing on the Go: What and How to Pack for Class or Traveling

Sewing on the Go: What and How to Pack for Class or Traveling

Whether you are attending a sewing class or planning a leisurely vacation, sewing on the go is something you will want to do sooner or later.

We’ve talked a lot about sewing rooms here on the blog, but we haven’t addressed the issue of sewing on the go here before now.

Sewing on the go won’t work if you aren’t properly prepared, so I’ve made this short video to cover all the areas you need to address to ensure you have what you need when you take your sewing on the road.

Here’s everything you’ll need:

Sewing on the go: portable machine

Janome Jem Gold

I already discussed this machine in my beginner sewing machine buying guide. It is definitely my choice for best lightweight portable machine.

Sewing on the go: machine carriers, luggage and totes

You definitely want to think about this before you get ready to take your sewing to go. I hadn’t ever considered this myself until the day before I taught my first sewing class at the community center. I suddenly realized I was going to have a lot of equipment and gear to lug and I had no idea how I was going to carry it all!

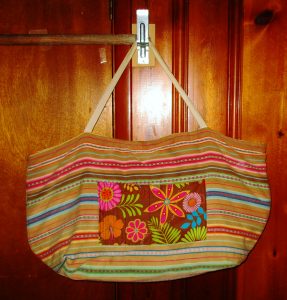
So I grabbed a thick piece of table linen and whipped up a humongous bag to carry everything.

So I grabbed a thick piece of table linen & whipped up a humongous bag to carry everything.

So I grabbed a thick piece of table linen & whipped up a humongous bag to carry everything.

While this bag has proven itself to be quite useful in other ways, I don’t recommend this solution for sewing supplies and gear. I only used it that one time for this purpose and then I found a more suitable option. I have appreciated the ample sack for carrying beach supplies for myself and my kids, and it carries three of our ukuleles in boxes safely in the trunk when we travel with them these days.

For toting your sewing machine and supplies, save time and trouble by ordering one of these great choices from Sewing Machines Plus:

Here is a link to SMP’s full selection of trolleys, totes, and cases.

Sewing on the go: sewing supplies

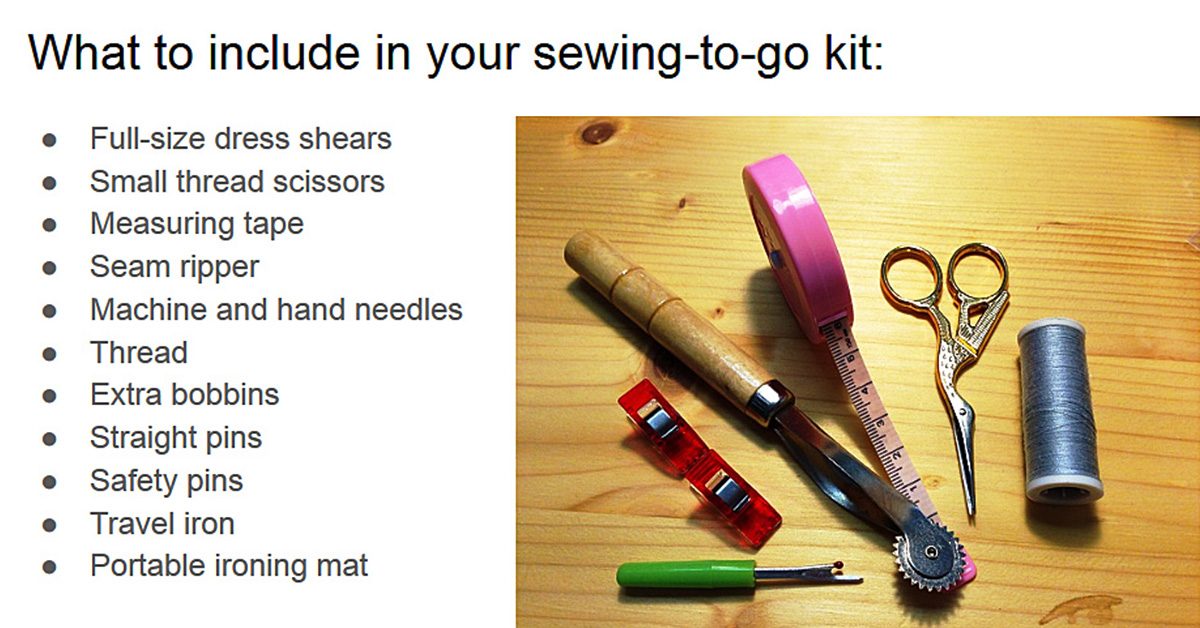
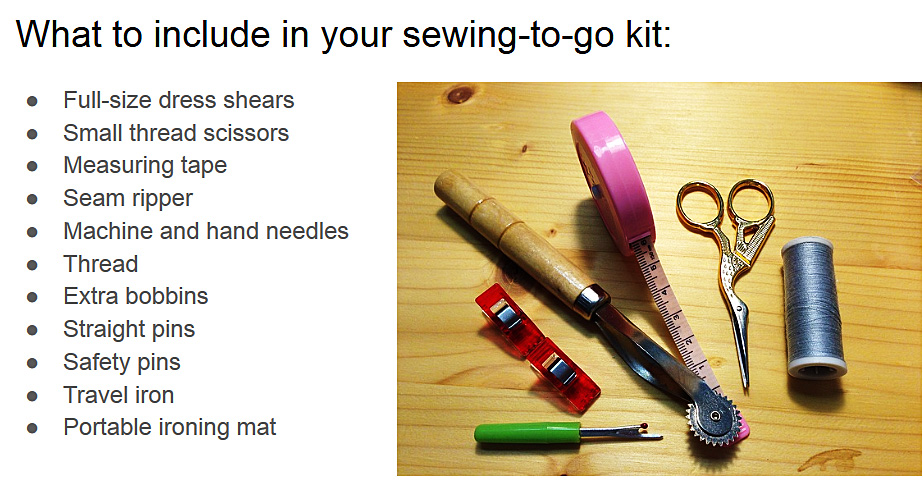
Here is the list of supplies to be sure to include in your travel sewing kit:

Here is the list of supplies to be sure to include in your travel sewing kit:

Be sure to get an extra pair of dress shears to keep in your go bag at all times.

You’ll also like to have a portable rotary cutter.

Here is the combo cutting mat/ pressing board mentioned in the video.

And here is that Rowenta travel iron.

The clover mini-iron is available in a couple of different options:

Here are the cooling sleeves for the mini-iron.

And that’s what you need to be well equipped for sewing on the go. Happy travels to you!

How to Sew a Luck O’ the Irish Flag Quilt for Your Wall

VIDEO: How to Sew a Luck O’ the Irish Flag Quilt for Your Wall

Celebrate St. Patrick’s Day or your heritage with an Irish flag quilt

Luck O' the Irish PIN

We always celebrate St. Patrick’s Day around my house because my dear is a bit obsessed with Ireland. He claims to be Irish, although his parents say his heritage is mostly English and Scottish. I guess he’s just Irish at heart.

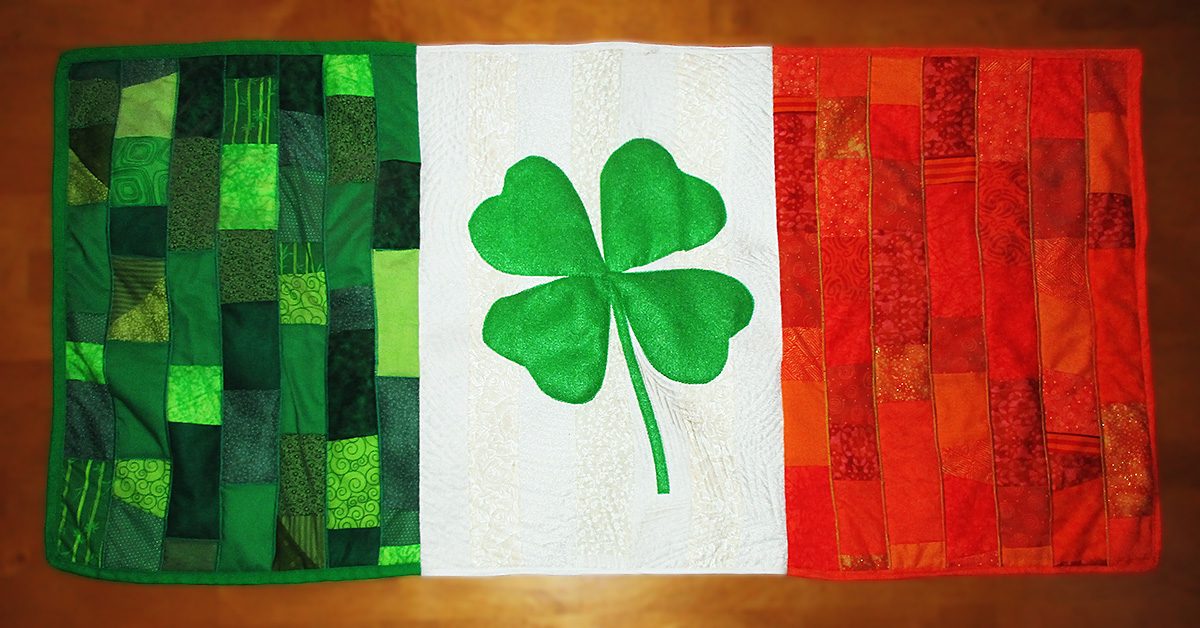
So one year I decided to surprise him with a St Patrick’s Day present and I designed this Irish flag quilt for him. He loved it so much that he rearranged all the other décor in his man cave to give it a place of honor on the wall.

Of course the flag of Ireland does not feature a four-leaf clover, but I thought it would be a nice addition to the design.

Here’s how you can make an Irish flag quilt featuring a four-leaf clover for your wall or table, too.

Luck O’ the Irish flag quilt how-to

You will need:

  • Assorted green and orange quilter’s cotton scraps
  • White quilter’s cotton
  • Muslin
  • Green, white and orange bias binding, grosgrain or fabric to make binding
  • Green felt
  • White, green, and orange thread

Please note that this Irish flag quilt is designed to be the same ratio as the official flag of Ireland. So for an authentic look, use these exact dimensions when making this project.

Sew the patchwork sections

For the green and orange sections of this Irish flag quilt, you will need seven strips of muslin 2.5” x 20.5” per section. For the white section, you can do as I did and cut seven strips of white and off white quilter’s cotton, or you can do as I wish I’d done and simply cut one large rectangle 14.5” x 20.5”.

To make the patchwork strips, take one of the long muslin strips and lay a colored scrap right side up at the top of the strip. Then, take another scrap and place it right side down directly on top of the first scrap. Sew a quarter inch seam at the bottom, flip the second fabric down to face right side up, and press. Then repeat, placing the next scrap right side down atop the second, sewing across the bottom, turning, and pressing. Repeat until you reach the end of the strip. Place them right sides down and trim, then set aside.

Here’s a video of me showing how to do this step:

Complete seven green patchwork strips and join these together using quarter inch seams.

Then complete seven orange patchwork strips and join these in the same way.

For the middle section, I went with a patchwork of alternating white and off-white print strips. But I wish I had instead used a single piece of a plain white fabric or a white-on-white print. I think this would show off the echo quilting better. You could choose to do either.

Applique the four-leaf clover

I experimented with constructing the four-leaf clover from a patchwork of fabrics, but I decided it looked better done in a single color of green.

Make the clover from two pieces of green felt. Cut two leaves connected in the middle from each piece. You can freehand your design or you can print mine if you’d rather.

Download: Clover PDF pattern

For the stem, cut a long rectangle 9” x ½”

Layer the top end of the stem at the bottom with the two clover pieces crossed over each other on top of the stem in the middle of your white section. Pin in place and then stitch down. If you use felt, as I did, then you can use a straight stitch. If you use a green quilter’s cotton, you will want to appliqué this with a satin stitch.

Quilting

Because we are going to be using three colors of binding for this Irish flag quilt, we are going to quilt each section separately. Construct three “quilt sandwiches” by layering each section’s top over a piece of batting and then a piece of backing muslin. Make the batting and backing slightly larger all around than the top pieces.  Then pin.

For the orange and green sections, I quilted along the seams using a satin stitch. Satin stitch is just a zig zag with a wide width and a short length. I set my machine to a 3.0 width and a .5 length. This gives extra interest to this small quilt. Use green thread for the green section and orange thread for quilting the orange patchwork.

For the white section, we’ll do the quilting differently. Use white thread and echo the shape of the clover all around. Start close to the design and then make larger outlines. After you have gone around the shape a few times, you will start to run out of fabric on the edges of the design. Just pretend that you didn’t and pick back up on the fabric as the design continues around.

Triangles for hanging

Here is an easy method to prepare small quilts like this for hanging on a wall.

Cut two 4” squares from muslin and press them in half diagonally to make triangles.

Place one triangle on the back outer top corner of the green patchwork section with the raw edges aligned. Sew with a scant eighth inch seam along the top and side edges to attach.

Then do the same with the other triangle on the back upper outside corner of the orange patchwork section.

Once the quilt is assembled, you can insert a dowel into these triangles to hang the quilt flat on the wall.

Binding

We are going to bind each section separately so that we can use different colors of binding for each section. You will bind three sides of the green and orange sections and just the top and bottom of the white section.

When I made mine, I discovered at the last minute that I didn’t have any green binding. I’m all about using what I have, and I had plenty of green grosgrain ribbon, so I used this for the first time as quilt binding and it worked fine. If you have neither bias or grosgrain ribbon, make your own binding strips from fabric.

Sew the green binding continuously along the bottom, left side, and top of the green patchwork section. Sew the orange binding along the top, right side, and bottom of the orange patchwork section. Then sew two pieces of white binding on the white section, one along the top and another along the bottom.

Put it all together

Now sew the green section to the left side of the white section and the orange section to the right side of the white.

Now hang it on your wall.

Now hang it on your wall.

I used my serger to finish these seams neatly on the back.

If you don’t have a serger, you could use an overcast foot to neaten the back seams, or you could encase them in a bit of narrow binding.

Or you could decide that since it is the back of the quilt no one is looking and leave the seams raw if you want to.

The serger really makes them look nicely finished though, and if you don’t have a serger, I suggest you think about getting one. A serger can quickly boost your sewing to pro level.

Cut a dowel to 41” and pop it in the triangles on the back of your Irish flag quilt. Now hang it on your wall.

I hope you have fun making this project and that your Irish flag quilt blesses you with good luck!

Beginner Sewing Machine Buying Guide

Beginner Sewing Machine Buying Guide

Buying a beginner sewing machine is an exciting decision that will impact your future in wonderful ways, but only if you choose a good beginner machine.

There is a huge difference between a great sewing machine and a not-so-great machine

Beginner Sewing Machine Buying Guide

The difference a well designed machine makes to a sewing beginner’s journey will save an enormous amount of frustration.  With a good machine, you will enjoy the process and learn to sew without trouble. With a poorly designed nightmare of a machine, your progress will not be near as fast. That is, if you progress at all; many beginners have thrown up their hands and given up on learning to sew thanks to an overly complicated or inferior beginner sewing machine, and this is a shame.

I’m speaking from experience here. If someone had told me these things I could have been spared an awful lot of trouble and tears. I’m not exaggerating to say tears, either; I not only cried but also screamed and wanted to tear out my hair in frustration when I was learning to sew. Learning to sew seemed so hard to do, but this was only because I was trying to teach myself on a terrible machine. I bought it at the same store where I shopped for groceries and it was, to put it mildly, a piece of junk!

If I had only known that I could have bought a much better machine for about the same amount of money, I could have enjoyed my beginner sewing experiences so much more. I’d love to save someone else that same trouble.

Start with a mechanical model sewing machine

My first recommendation is to start with a mechanical-only model. There are awesome computerized and electrical sewing machines available, and soon you will definitely want to add one of these to your collection, too. But I recommend you start with a mechanical model for two reasons.

First of all, you don’t want to confuse yourself with too many options and features when you first start sewing. I think it is best to focus on learning the basics of sewing on a good, basic machine.

And perhaps more importantly, you need to have a mechanical back-up machine in your collection before you buy an electronic or computerized machine. That’s because computerized machines require regular maintenance that you cannot do yourself. Nor can you repair any problem that might arise on a computerized machine at home.

When your machine is away, sometimes for as long as a few weeks, you cannot sew—unless you have a mechanical backup. So I think this needs to be the first sewing machine you buy.

I’d think I was sewing and then realize that I was sewing without thread! Argh, this is what made me scream and want to tear out my hair when using that machine!

Don’t buy a beginner sewing machine without these features:

Built-in needle threader

You’ll be threading your machine every time you sew.  With an easy machine, you are going to love sewing and want to make lots of things, so you will thread your machine thousands or even ten-thousands of times.

Save yourself a lot of time and trouble by getting a machine with a handy dandy built-in needle threader. Even if you are young with great eyesight and steady hands, this will still make needle threading go a lot faster for you. I wouldn’t buy a machine without this feature.

Top loading drop-in bobbin

The poorly designed bobbin system was the thing that caused me the most frustration on my first sewing machine. On that thing, the bobbin was concealed inside the front of the machine. To change it, I had to take the case off the front and then remove the bobbin casing to get to the bobbin which was held vertically inside.

Besides all those extra steps, the problem with this system was that there was no way to see that my bobbin was running low on thread. So what would happen is that my bobbin would run out without me knowing it. I’d think I was sewing and then realize that I was sewing without thread! Argh, this is what made me scream and want to tear out my hair when using that machine! I’d have to remove my project from the machine, rewind and replace the bobbin, and then start all over again. NOT fun!

A top loading bobbin system is so much better. With this system, the bobbin just pops out and drops into place without your having to disassemble a bobbin casing to get to it. Even better, this kind of system is accompanied by a see through cover plate. So you can see at a glance when your bobbin thread is low. Believe me, you want to get a machine with this feature.

Free arm capability

With a free arm, you can sew narrow, round garment pieces such as sleeves and pant hems. If a sewing machine won’t convert to free arm sewing you can’t sew these things easily, if at all.

As a beginner sewist, you will want to make many small projects. That’s because they are easy and satisfying, not to mention useful. Not having the ability for free arm sewing is unnecessarily limiting. There are basic beginner sewing machines that do limit you in this way. Be sure the machine you buy includes this important feature.

My recommendations for your beginner sewing machine:

I always recommend Janome brand machines. That is because I have seen for myself that Janome offers the best quality and the best value, by far. From my experiences with my own nightmare first machine to my experiences helping others with frustrating machines when I teach sewing classes, I have seen clearly that there is a big difference in user friendliness between different makes of machines. I can’t imagine buying any other brand and I recommend them as being the best choice for beginners and experienced sewists alike.

Janome Sewist 500

If I were buying a beginner machine, I would buy the Janome Sewist 500. I like this one because, besides offering my must-have features listed above, it goes beyond being a basic machine and offers a lot of options without being overly complicated. It has 25 different stitches, including some decorative stitches, and a one step buttonholer. I love this option on Janome machines, it makes sewing buttonholes as easy as pie.

Janome Jem Gold 660

I would also recommend this machine as being a great choice for a beginner sewing machine. It too includes all the features I would demand. And besides the fact that the price is nice, this machine is also lightweight. This makes it easy to grab and go to class or wherever else you’d like to take it. While it only has eight stitches to choose from, these include everything you need. Almost all sewing uses either a stretch or a zigzag stitch. This machine performs both, and with adjustable stitch length and width. It also has two different useful stretch stitches and a buttonhole stitch.

With either of these as your beginner sewing machine, you will be sure to enjoy learning to sew and you won’t have to suffer needless frustration. Either of these high-quality Janome machines will continue to serve you well long beyond your brief time as a beginner.

To save yourself another easily avoided frustration, be sure to read my guide to machine needle selection, too. Besides using a poorly designed beginner sewing machine, nothing else can cause you as much trouble as using the wrong size or type of needle. You won’t have to suffer this problem when you clearly understand which needle to use when.

Happy sewing to you!

Embroidery Software and Designs Guide

Embroidery Software and Designs Guide

There is a wide array of embroidery software and design choices available

Embroidery Software Pin

Embroidery Software Pin

When I shared an embroidery machine buyer’s guide last week, I did not touch on the subject of embroidery software and downloadable designs. That’s because you don’t need to buy any software or additional designs to start creating on an embroidery machine.

But once you have gotten comfortable with your machine, chances are you will want to expand your capabilities and design options by investing in more designs and/or software.

Without a good understanding of the different options, this subject can be just as confusing as choosing a machine. Let’s look at the different types of embroidery software and additional designs available in order to gain a clear view of the different types of software and other options available for extending your possible embroidery designs. Your choices include:

  • Design collections
  • Membership club
  • Digital downloads
  • Editing software
  • Lettering software
  • Digitizing software
  • Thumbnailers
  • Cataloging programs

Designs on disc

An easy investment to start building a larger library of embroidery designs is to purchase collections on CD-ROM. There are a ton of options to choose from in this category. Each will include many designs within a particular theme.

A great choice for these is Anita Goodesigns, which offers a huge collection of gorgeous designs. Sewing Machines Plus has fifteen pages of different Anita Goodesigns to choose from, including:

  • Baby designs, from vintage to cartoon-style, and everything in between
  • Holiday, seasonal, and religious motifs
  • Animal designs, both whimsical and realistic
  • Butterflies, dragonflies, and bugs
  • Fruits, vegetables, and baked goods such as cupcakes and donuts
  • Foliage and flowers galore
  • Faeries
  • Customizable designs for your sewing club
  • Mandalas
  • And plenty more
Anita Goodesigns Sun

Anita Goodesigns Sun

These collections work for many different machine formats: ART, DST, EMD, EXP, HUS, JEF, PCS, PES, SEW, SHV, VIP, and XXX.

You may also like to check out design collections from Amazing Designs, Dakota Collectibles,  Michelle’s Designs and Notcina.

VIP Club

Individual design collections on disc are an inexpensive way to start expanding your design library. But if you are like me, you will want them all! Buying all the individual collections separately would require a tremendous investment. But luckily, the folks at Anita Goodesigns realize that we will want them all, and so they made it easy for us to get them with their membership club.

The VIP club gives you ALL of the designs previously released, and then sends you the new designs that are released throughout the year. Plus, they include more member benefits, such as all the quilt and cutwork designs, as well. To read about all these benefits and extras, head over to the Anita Goodesigns Club page.

Digital downloads

You can find many designs online, through Etsy and elsewhere, available as digital downloads.

You need to know which file format your embroidery machine requires before downloading designs. Different machines require different formats and other formats are not compatible. For example, most Janome machines use .JEF files, Singer uses .XXX, Brother and Babylock generally use .PES format. Be sure to choose the correct format for your machine when downloading designs. However, if you own editing software, which we will discuss next, you can convert design formats.

You can find some free designs for digital download online. It is also possible to get premium designs for free. For example, Floriani includes a POP coupon code for a free design download on the label inside each package of their stabilizers. Once you collect ten of these codes, you can redeem them for ten design downloads. You will need stabilizer for all your embroidery designs. Floriani stabilizers are high-quality and are available in all types and weights. So the free download bonus packaged inside makes choosing these stabilizers a no-brainer.

You can also get five free Floriani downloads every month after you buy their Total Control software, which we will discuss soon.

Embroidery software for editing

Editing software will allow you to do many things, such as:

  • Resize designs and recalculate stitches
  • Merge designs
  • Convert thread brands
  • Colorize
  • Add lettering, including large letters
  • Convert design formats to the type your machine accepts
  • Overlap designs
  • Change or remove individual colors in a design
  • And more

Editing software is available in a wide range of prices. Embrilliance Essentials is an awesome option that is super affordable and will allow you to easily do all of the above, plus more. This program works on both Windows and MAC operating systems, too.

Embroidery software for digitizing

If you want to stretch your creativity further and make your own designs, then you need digitizing software. This type of software will take a piece of clipart, a vector drawing, or other image and convert it into an embroidery design.  Digitizing software will also convert fonts from your computer into letter embroidery. They can do lots of other amazing things, too; for example, you can use them to convert regular embroidery designs into cross stitch.

Many folks consider Floriani digitizing software to be the best. It is a super high quality all-in-one program which covers every possible editing and digitizing function. It also comes with the added benefits of having tons of tutorials and other help available online, and the five free design downloads a month that I mentioned previously here.

I prefer a different option, however.  I’ll be going with the Artistic Suite and Artistic Premium upgrade for my own embroidery software, and here’s why:

The Artistic Suite and Premium software costs less and includes more. This software goes beyond embroidery and includes a slew of helpful applications for quilting, appliqué, reverse appliqué, fabric cutting, heat transfer, and making elaborate rhinestone designs.  It is also useful for scrapbooking applications, and will make cut-outs from most anything, including paper, foam, and even balsa wood.

Artistic Suite does all these things as an editor, and the Premium upgrade adds digitizing capabilities. I’m amazed by everything I can do with these programs, and I can buy both of them without spending an arm and a leg! The Artistic program is available for both single needle and multi-needle machines.

Embroidery software: thumbnailers and cataloging

The Embrilliance thumbnailer is a little program that you won’t want to be without. And the price is so nice that there is no need not to pick this up right away.

This program collects all your embroidery designs into one place on your computer and lines them up as thumbnail images so that you can easily them all. Without it, you have to search and view every design individually, which can cost a lot of time and cause much frustration. But there is no need to waste any time or be frustrated at all when this solution is so simple. It is compatible with both PC and MAC.

There is another option for cataloging your designs into categories on your computer. That is Floriani’s My Design Album. This program is easy to install and will find all the various embroidery designs on your computer and compile them into one easy-to-find place. Then you can set up categories to find these designs more easily. The Design Album includes some editing capabilities as well.

Now is the best time to buy

February is National Embroidery Month, and Sewing Machines Plus is celebrating by offering big discounts on all embroidery equipment and supplies. So now is a great time to invest in additional embroidery designs and embroidery software. Take advantage of these great deals and expand your design library and capabilities today!

Embroidery Machine Buyer’s Guide

Embroidery Machine Buyer’s Guide

Which embroidery machine should you buy?

Here’s an embroidery machine buyer’s guide to help you decide

Which embroidery machine should you buy? Here’s an embroidery machine buyer’s guide to help you decide.

Which embroidery machine should you buy? Here’s an embroidery machine buyer’s guide to help you decide.

Choosing an embroidery machine can be confusing. There is a dizzying array of model choices and feature options available.

But there is no need to be overwhelmed. For the last several weeks, I have studied this issue to get a clear idea of how to choose the best embroidery machine. I have tested and played with every machine I could get my hands on. I also poured over the details for most every embroidery machine on the market.

And I talked to Torrie Root, the super helpful Sales Manager at Sewing Machines Plus. We talked more than once for a long time and I asked her a ton of questions.  She answered all my questions in depth. She also sent me more info so I could study this question further.

I have compiled everything I learned into this embroidery machine buyer’s guide. Hopefully this will help you decide which embroidery machine to buy to suit your needs best.

Embroidery machine considerations

There are several things to consider when buying an embroidery machine. These include:

  • Cost and Value
  • Embroidery field and hoop sizes
  • Design library
  • Connectivity
  • Display quality
  • Embroidery only vs combo machine
  • Extra features

Cost and value

Because embroidery machines tend to cost more than regular sewing machines, you want to get the most value for your money. You also want to ensure that you choose a machine that will serve you happily for many years. It would be a waste of your money to go for a model that you will soon outgrow.

Your embroidery machine is an investment and you want to choose the best machine you can afford.

For me, I know an entry-level machine will not satisfy me for long.  I will want more and better features than a basic machine comes equipped with. So I would rather save up for a little while to be able to afford a higher quality machine that I can grow with, rather than one I will soon outgrow.

Embroidery field and hoop sizes

Many embroidery machines are limited and can embroider only a small area. Some of these lower priced machines have an embroidery field of only four inches square!

I know I will want more creative freedom than a four inch square field, and I bet you will too.

There are many options for machines that come packaged with multiple hoops in different sizes. And most of these machines offer other hoop sizes and shapes that you can purchase separately to use with these machines, too. I definitely recommend choosing a machine that offers you multiple options for hooping.

Design options and connectivity

Different machines are loaded with different sized libraries of embroidery designs. Some have many more than others. And some offer prettier and more useful designs. I looked at a few machines that had boring designs and nothing much that I would actually want to use. Of course you will want to choose a machine that offers you plenty of embroidery designs that you like and will want to use.

However, you can also download and/or purchase additional designs online or on disc, so you will not be limited to the design library that comes with your machine.

Some machines make this easier to do than others, however. There are some embroidery machines which require an actual computer connection for additional designs, while others have a USB port so that you can use a little flash drive for transferring extra designs, instead.

This makes more sense if your computer is a desktop in the den, for example. I wouldn’t want to have to connect my embroidery machine in the den; that computer desk doesn’t have enough space for an embroidery machine. So I’ll definitely buy one with a USB port so I can sit at my computer in the den to shop and download designs and then easily bring the designs to my sewing room on a thumb drive.

Display

Here’s another reason why I know I don’t want a basic model embroidery machine: there is a drastic difference between the displays of different machines. Some offer only a tiny window and no clear picture of the designs to choose from.

I want a clear view of the design I am embroidering, and I don’t want to have to consult the book or connect to the computer every time I use my machine. This is an important consideration when you are making multi colored designs, for example.  I want a display where I can see at a glance an actual picture of the design in full color.

Take a look at the difference between the displays on these two machines, for example, and you’ll see just what I mean:

Embroidery only or combo machine?

Since I already have a sewing machine that I really love, I was thinking that I would be able to get the best value for my money by going with an embroidery only machine. I figured I didn’t need to spend money on sewing capabilities when I am already well equipped for sewing. I also thought it would be more efficient to switch between two adjacent machines for two functions rather than having to switch functions on the same machine between tasks.

I’ve changed my mind about this, however. That’s because most of the better machines are combination sewing and embroidery machines. This is great because a machine that both sews and embroiders offers more bang for your buck. And these machines are larger with more sewing features and space than most regular sewing machines have.

If you are a quilter like me, you will really appreciate the extra space these machines offer. It is not likely that your favorite sewing machine is as nice as your new sewing and embroidery machine will be! So in addition to adding an embroidery machine to your collection, you will be adding your new favorite sewing machine, too.

There is one reason you might prefer to go with an embroidery-only machine, however. If you plan to operate a home business and do a ton of embroidery, you may want to consider a multi-needle machine.  This kind of home embroidery machine will complete your designs more quickly.

Multi-needle embroidery machines are also the only machines that will do a good job with embroidering hats. Torrie told me that all the combination models have a little trouble with this task, so if you think you will want or need to do embroidery on hats, you will want to consider this type of embroidery-only machine.

Helpful features:

Some embroidery machines are complicated to use. Extra features ensure ease of use and add a lot of extra value to some machines. Here are some helpful features that you might really want your machine to have:

  • Automatic thread tension – When your machine automatically adjusts the thread tension, there is no chance of mistakes due to improper tension.
  • Thread trimming – Trimming all your threads by hand can be a pain. A machine that automatically clips all your threads for you will save a lot of time.
  • Embellishment capability – In addition to regular embroidering, you may also want to be able to do sequins and beadings. Some machines offer attachments that will enable you to attach these.
  • Archable fonts – Allow you to curve your lettering. This offers more design freedom and can look a whole lot more attractive than straight monogramming when combined with other designs.
  • Onscreen editing – On some machines, you can’t edit designs much, if at all. Many machines allow size editing of no more than 20%. A few machines offer greater size editing, and some allow you to create your own designs by offering corners and borders which can be combined with other design parts.
  • Variable speed – Some machines have variable speed controls, which you can set to start slowly and gradually speed up.
  • Knee lifter – This handy gadget lets you use your knee to lift the presser foot, leaving your hands free.

My choice:

I thought I was in the market for an embroidery-only machine, but after carefully considering every option available, my choice for the best machine for me is the Janome Memory Craft 9900 combo machine. On this machine, you can sew with the embroidery unit attached, so you don’t need to reconfigure the machine when switching between functions.

The Memory Craft 9900 offers 175 different embroidery designs, including pieces and parts for creating your own designs, and 200 sewing and quilting stitches. It has archable monograms, a knee lifter, and all the other helpful extra features I have already listed. Plus a full color display and much more.

This exceptional machine is packed full of value with way too many extra features for me to list here. Instead, I’ll invite you to check out this page at Sewing Machines Plus to read all about it.

I am a Janome loyalist because I have consistently found Janome machines to offer the most user-friendly features and best value for my money. Though the MC9900 is not Janome’s most expensive machine, it offers top-of-the-line features. And Sewing Machines Plus is throwing in hundreds of dollars worth of extra attachments, for free. All this is why I see this model embroidery machine as clearly the best choice for me.  If you are looking for a great value for an exceptional machine, I recommend that you choose this one, too.

How to Sew Valentines: 33 Project Ideas to Show Your Loved Ones How Much You Care

How to Sew Valentines: 33 Project Ideas to Show Your Loved Ones How Much You Care

Sew valentines this year

I challenge you to sew valentines this year to show your love.
I challenge you to sew valentines this year to show your love.
I challenge you to sew valentines this year to show your love. Anyone can buy trinkets, but making something with love infuses more meaning into even simple gifts. Heartfelt gifts don’t need to be elaborate to mean a great deal.
From simple sewn hearts to labor of love quilts, the web is full of fun ideas that you could use to sew valentines this year. You can make a little something for every person you love. And there is nothing wrong with sharing a little love with people you just like, too. From your sweetheart to your grandma to your neighbor or teacher, everyone who you bless with a handmade gift will appreciate that you spent time making something just for them.
Sew valentines: my simple ideas

I’ll start by sharing three simple ideas of my own that I’m using this year to sew valentines for my family and friends, including an easy way to add a homemade touch to candy I’ll pick up at the store.

Felt or fleece hearts

These couldn’t be simpler to make. Just draw a heart pattern on paper, cut out, and pin to two layers of fleece or felt. Cut these out, then sew them with right sides together, leaving an opening for turning. Stuff, and then sew the opening closed. I’m stuffing them with dried lavender flowers to make simple sachets for my friends. I once made a pair of these and filled them with baking soda to stuff in my gym shoes, and this worked well to eliminate odor. You could also use lentils and make a set of heart bean bags for a game for your kids.
You could also use lentils & make a set of heart bean bags for a game for your kids.

You could also use lentils & make a set of heart bean bags for a game for your kids.

Valentine novelty fabric pillowcases

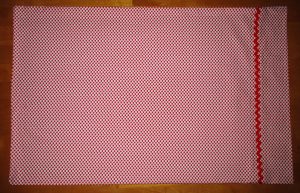
There is nothing easier to make from a yard of cute fabric than a pillowcase. To make one, hem across one long side. Then fold the fabric widthwise, with right sides together, and sew or serge the other two sides. Turn right side out. That’s it! Of course, you can dress these up with decorative trim. But choose a cute enough fabric and there’s no need to dress it up further.

Attach trim after hemming, before sewing together.

Attach trim after hemming, before sewing together.

Simple gift bags

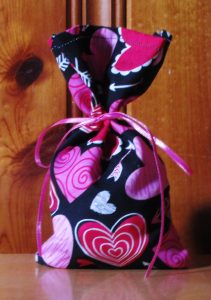
Use the pillowcase instructions above in miniature form to create simple gift bags to fill with chocolates or other candy from the store. Or for children, include dollar store trinkets such as small toys. Tie with a ribbon. You could amend the directions slightly to make drawstring bags instead.

Use the pillowcase instructions above in miniature form to create simple gift bags.

Use the pillowcase instructions above in miniature form to create simple gift bags.

I’ll also be making some projects that I have collected from all over the web. Follow these links to find the perfect projects to sew valentines for everyone that you love:

Sew valentines: more easy ideas

I might make one for myself!

I might make one for myself!

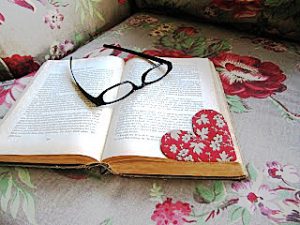
  • Fabric Heart Bookmarks: Here is another project so easy that you can whip up several in mere minutes. This is the kind of sweet gift that most anyone could use. I might make one for myself!
  • Felt Heart Ornament and Garland: I plan to make a couple of these ornaments to share as gifts, and the garland for my house.
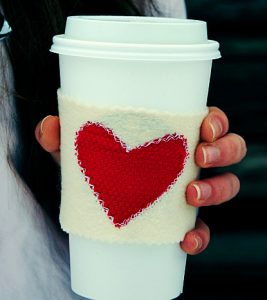
  • Warm Heart Coffee Cozy: Here is another simple idea that makes a nice gift for most anyone.
Warm heart coffee cozy.

Warm heart coffee cozy.

Sew valentines: cards

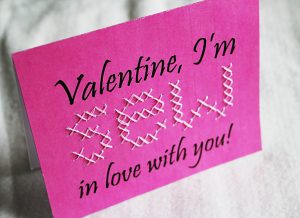
Here’s how to incorporate your love for sewing by hand while making paper cards.

Here’s how to incorporate your love for sewing by hand while making paper cards.

Sew valentines: a game and a toy

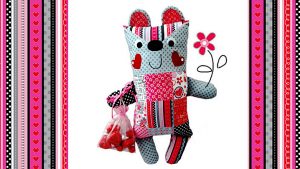
There are lots of ideas for softies to sew, but none are as cute as this sweetie.

There are lots of ideas for softies to sew, but none are as cute as this sweetie.

Sew valentines: bags and purses

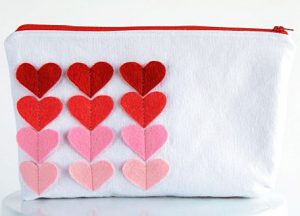
This change purse includes a key ring.

This change purse includes a key ring.

Sew valentines: pillows

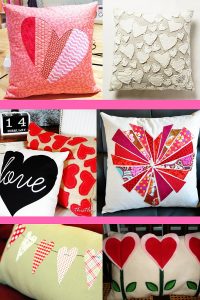
This pattern features reverse appliqué.

This pattern features reverse appliqué.

Sew valentines: quilts

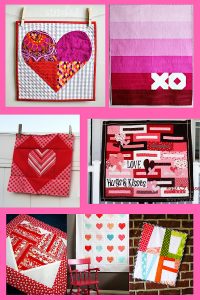
Valentine quilt roundup.

Valentine quilt roundup.

Whichever projects you choose, I hope you have a happy Valentine’s Day!

Sewing Room Organizing: The Rules

Sewing Room Organizing: The Rules

Sewing Room Organizing: The Rules

Sewing room organizing can be a constant battle. That’s because creative folks make lots of things, including what my dear calls “creative explosions.” I just call these big messes. You know what I mean: quilt trimmings & other scraps on the floor, piles of fabric or other supplies on the table, idea books scattered about, bins & boxes pulled out with their contents askew and similar messes.

I battled this kind of mess for years. But I seem to have finally developed the skill of keeping order in my creative room. For example, the days between Christmas and New Year have historically been sewing room organizing time for me. But last year after Christmas, I was surprised when I realized I didn’t have any sewing room organizing to do. In years past, I have worked busily making gifts, moving from one project to the next, and letting messes pile up around me until the holiday passed.

I can’t stand to do that anymore. Instead, I clean up thoroughly after every project, before moving to the next. Since learning to do this, and by vigilantly following a few other rules that I have discovered which help to ensure order, I have enjoyed my creative pursuits more than ever before. I think these sewing room organizing rules will help you, too, if you haven’t discovered them for yourself yet.

Whether you need to clean up after your own creative explosions or you want to prevent their occurrence in the first place, keep these rules in mind.

Sewing room organizing rule one: machines first

It might not sound like sewing room organizing, but the very first thing to do is to give all of your machines a thorough cleaning. This is the most important task in cleaning up messes in the sewing room.

If your floor is littered with threads and clippings, I guarantee your machines have similar build-up inside. And continuing to sew with a dirty machine will cause it to break! So get your chosen brush and sweep and clean every machine in your room really well.

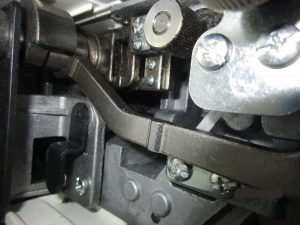
It's easy to miss a spot.

It’s easy to miss a spot.

Keeping machines clean

For sewing machines, remove the bobbin casings and take particular care in cleaning out inside and behind these. For sergers, sweep out every nook and cranny. When you think you’ve gotten it clean, sweep it out again. It’s easy to miss multiple spots. You can spend a lot of time sweeping out a serger repeatedly, and still not get it completely clean. Unless you have a magic tool, that is. The best thing you can buy to ensure a longer life for your machines is a tiny vacuum attachment to help get them really clean.

Always cover your machines to prevent unnecessary build up of dirt or dust when these are not in use. If your machine did not come with a hardcover, you can sew a pretty one yourself.

After cleaning, oil your mechanical-only machines according to their user manuals.  Don’t oil your computerized or electronic machines at home; take them to Sewing Machines Plus or your local repair shop for yearly maintenance.  Go ahead and take them in now so this will be done. If you cannot be without them right now, schedule this on your calendar to be handled as soon as possible. If you neglect your machine maintenance you will regret it. For future reference, a good plan to avoid being without your machines when you need them is to send them out for maintenance while you are on vacation.

Sewing room organizing rules 2 & 3:

Have ample workspaces

Keep them clear

After your machines, the most important things to consider in sewing room organizing are your workspaces. It is not possible to work efficiently without ample space.  If you are using more than one machine, such as a sewing machine, a serger and a coverstitch or embroidery machine, you need enough space to have them all set up. You also need table space for cutting and layout.

It is best to have the largest table that will comfortably fit in your room in order to provide ample space for working. I have a kitchen table in my room that I keep clear for cutting, and separate desks for my machines. I reconfigure machine placement depending on the project, however. When I am working on a bed sized quilt, I place my machine on the big table, so it can support the quilt. Having multiple workstations enables flexibility.

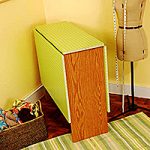
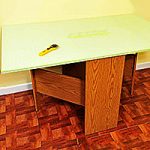
If your sewing room lacks enough space to house such a large table, Sewing Machines Plus has an excellent option for you to consider. The Arrow Pixie cutting table doesn’t take up much space when folded compactly, but opens to provide table space for both cutting and sewing. It even has measurement guides and comes with a cutting board. It’s super cute, too.

Keep tables clear!

Ample work space will do you no good if they are covered with unfinished projects, supplies, or irrelevant items. My favorite rule for making sure that my creative space stays organized and is always ready for working is to keep all work spaces clear. I do not allow myself to store any items on top of my table top or desks, other than machines, of course. But because I reconfigure my machine placement according to what I am working on, I prefer to store most of them, covered, on shelves.

This way, you can keep your table and desks clean and shining, waiting for you to make something new whenever it suits you.

Other rules to remember

There are several other rules that have helped me to keep my sewing room neat and organized. Following these rules will help to keep your room working well for you, too.

  • You can’t organize clutter; keep unnecessary items out of your room.
  • Be creative with storage. For example, to maximize working space in my sewing room, I use an antique wardrobe and chest of drawers in the next room. The beauty of these storage pieces blends nicely with my family room décor. These happily hold my fabric, trims and notions, and other less often used items, such as my looms. Here are some DIY projects for creative storage solutions which will work inside the sewing room.
  • Keep like things together. Rather than storing tools all over the place, use a bin or other storage solution to keep these neatly together. The same goes for thread, notions, and etc.
  • Let the fabric live at the store. I am no longer tempted by fabric clearance sales and refuse to buy fabric to stash. I have learned that stashed fabric steals time, space, and money, so I do not buy any without a particular project in mind. Pretty quilter cottons are the only exception I make to this rule, as I know for sure that I will put these to use. Be a savvy shopper and take advantage of sales for stocking items you must have and will use. For example, I only buy white and neutral thread, and also cotton batting, when it is on sale.
  • Finish what you start. It is easy to get excited about new projects, but for keeping order, it is much more sensible to complete each project before starting another.

Do you have any other useful rules for keeping order in your sewing room? If you do, please add a comment and share it with us.