Recreation, Meet Sewing!

Recreation, Meet Sewing!

Ever get the feeling that you have 2,394,093,294,032 things to do, but you only have time for, like, 3?

Ever get the feeling that you have 2,394,093,294,032 things to do, but you only have time for, like, 3?

Ever get the feeling that you have 2,394,093,294,032 things to do, but you only have time for, like, 3? Yeah, that. Between work, family, and such, I feel like I just don’t have enough time in the day to tend to everything that requires attention. But I guess that’s being an adult, right?

It’s a real issue to find time for everything that’s a major priority on my plate, but that leaves less time for recreational things that aren’t so big of a priority. You know how long it’s been since I read a book? A while, let me tell you!

But at the end of the day, I’m a southern girl. I like front porches, fresh-picked blackberries and time that’s just for enjoying life. So even with a busy itinerary, I’m all for finding time to relax and do things I appreciate.

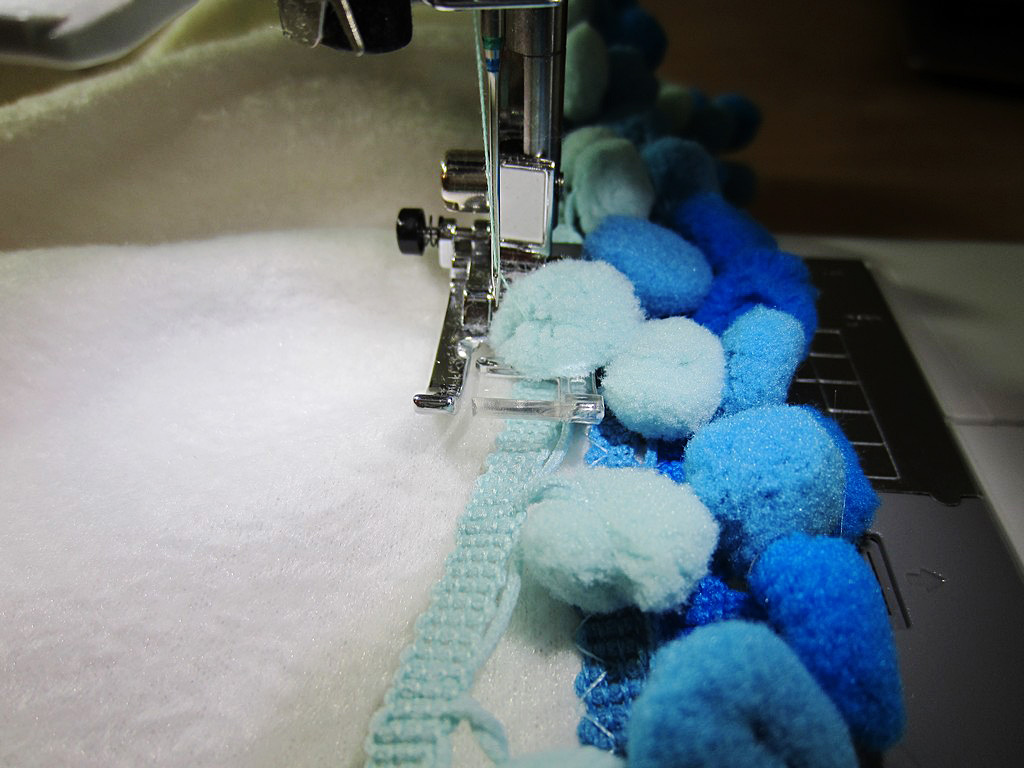
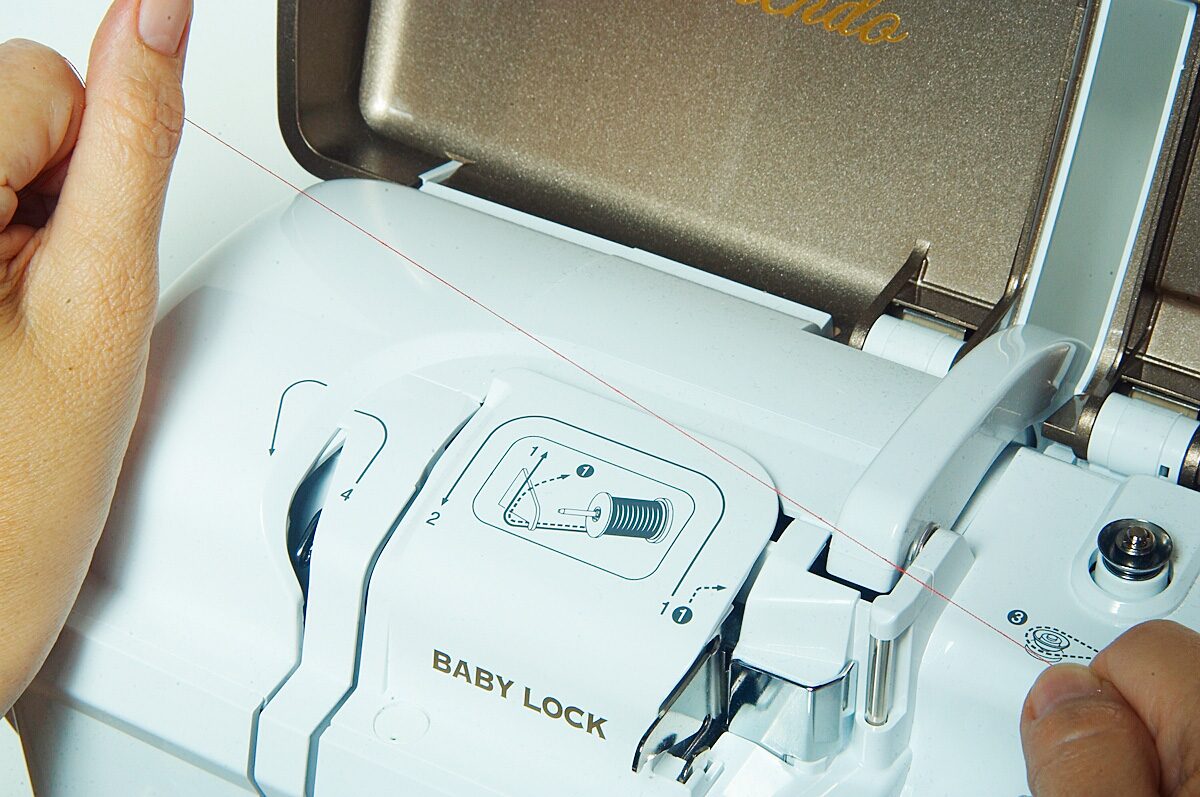
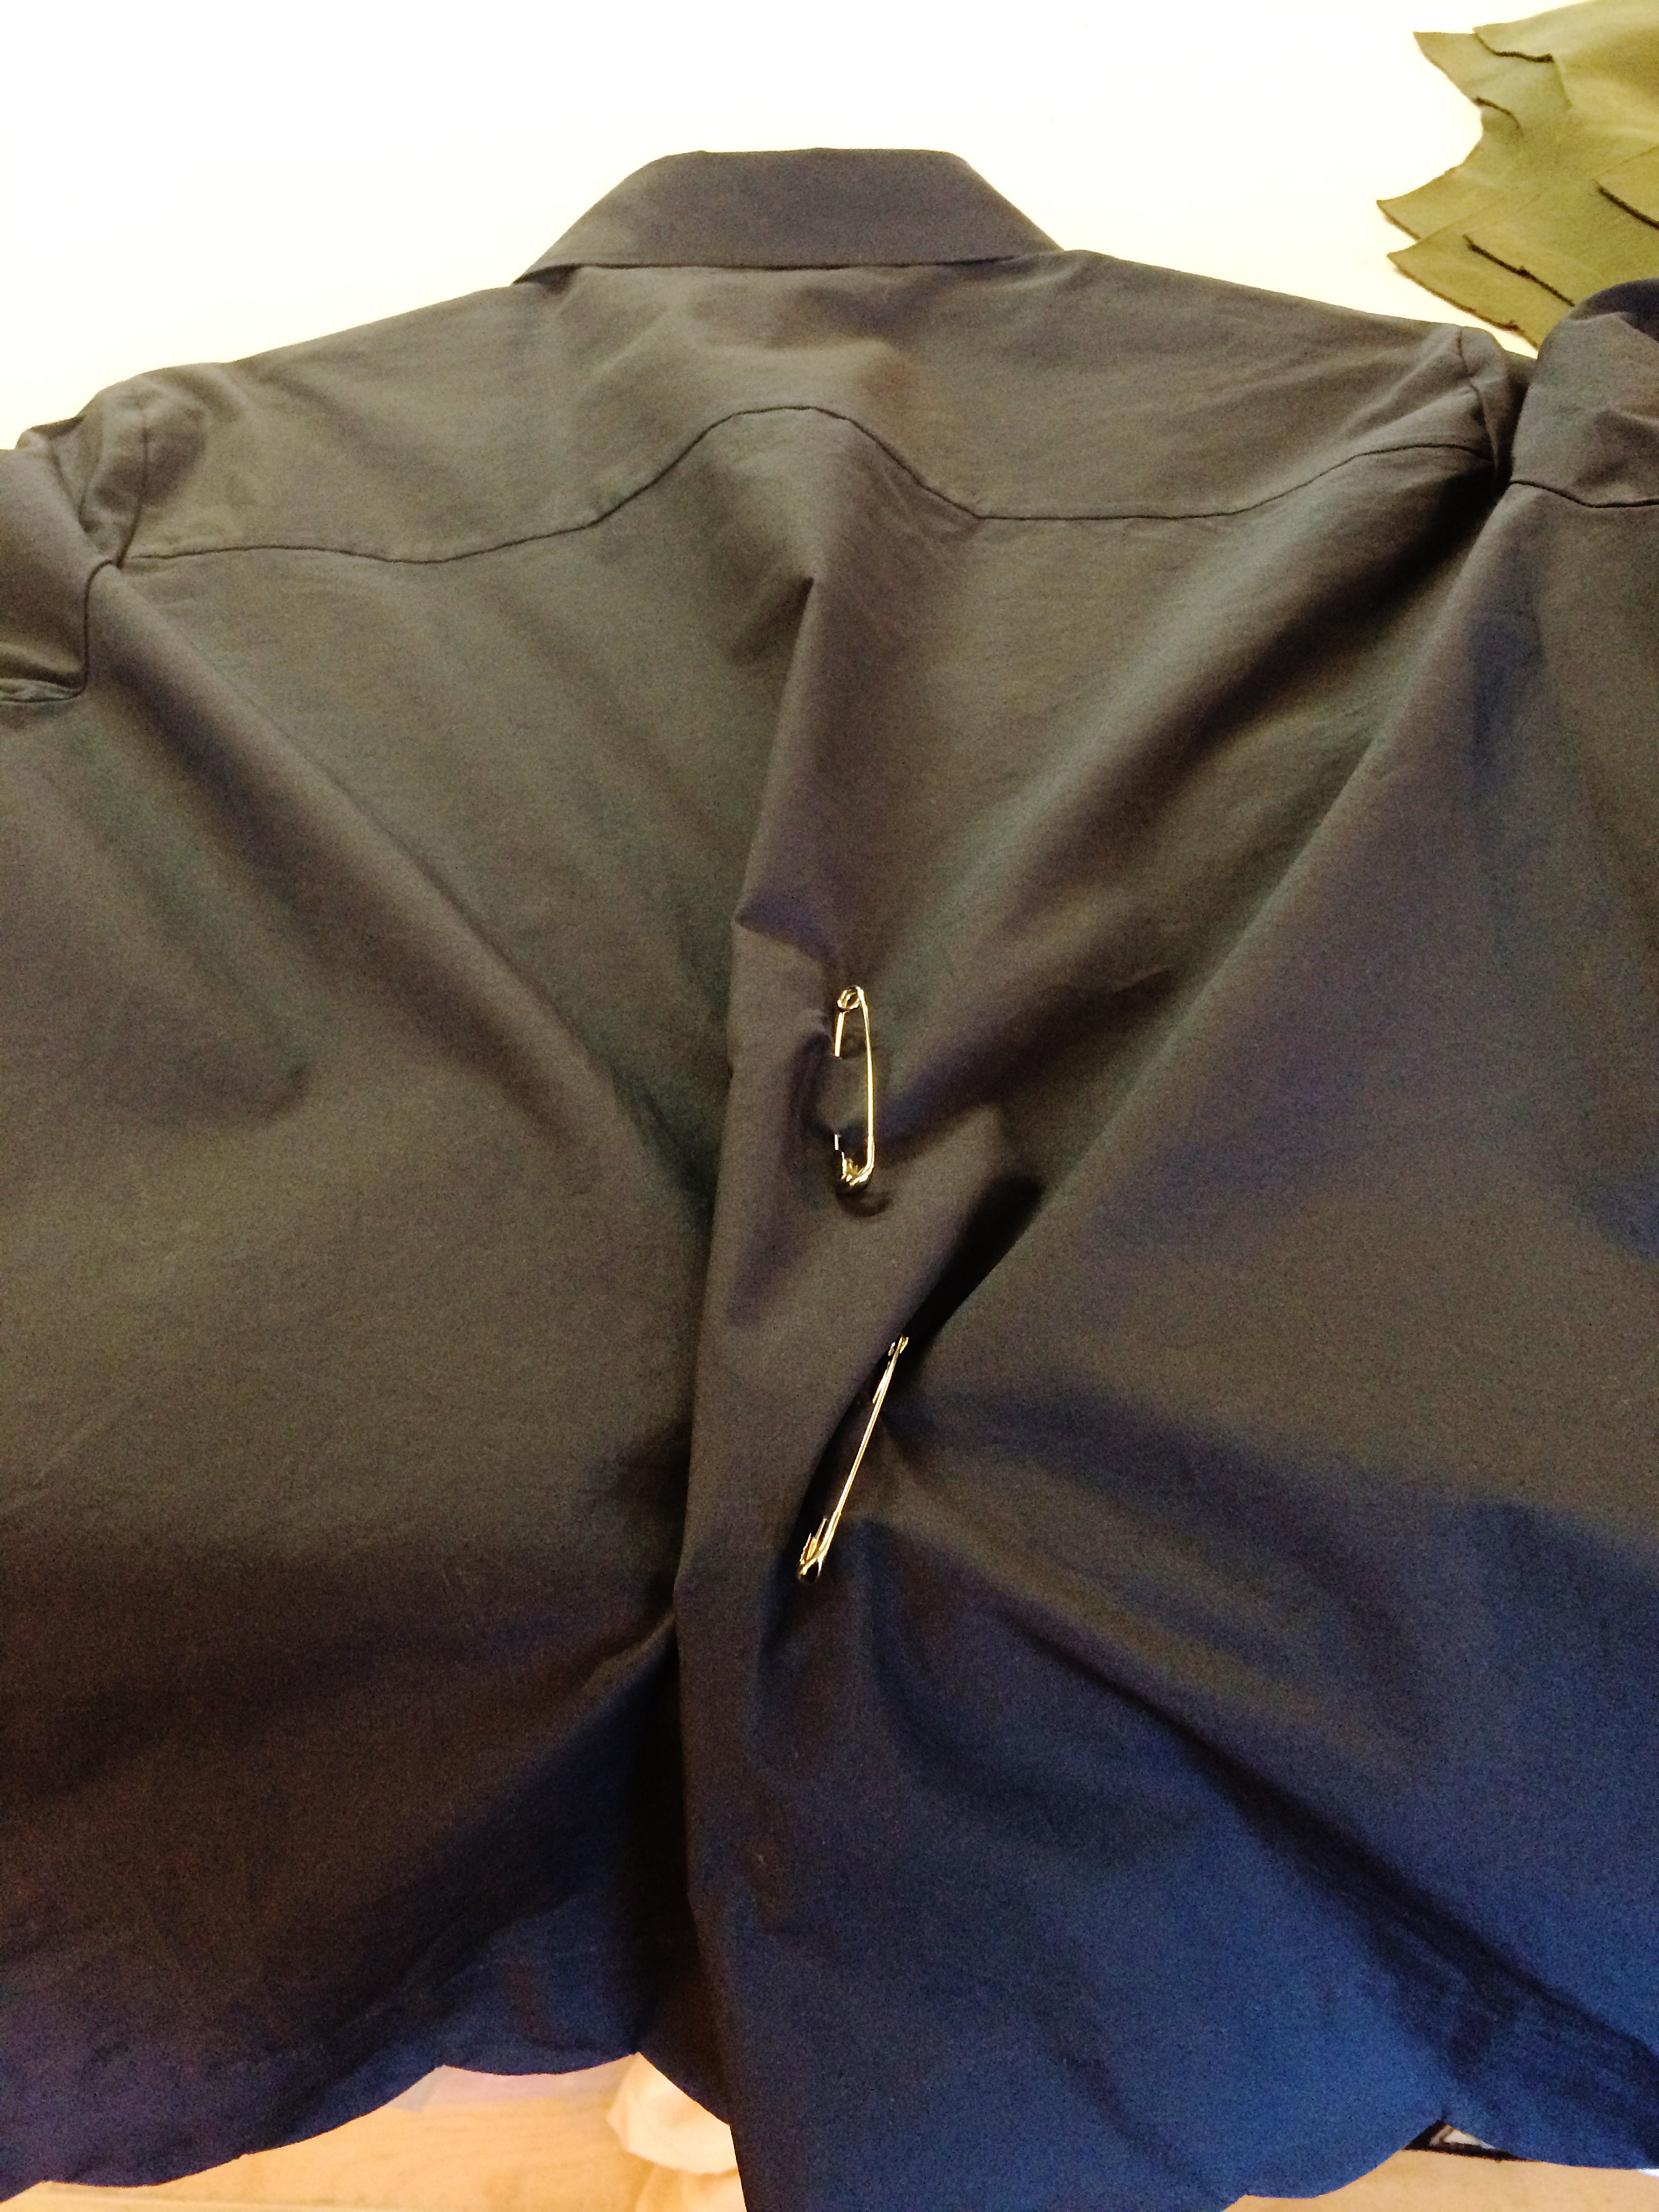
In order to have that time, it pays to find ways to mingle productive endeavors with enjoyable concepts to get the best of both worlds, and sewing happens to be a task that allows the kind of openness to let that happen. For one thing, even if I’m working on a business project, the overall process of sewing can already be soooo relaxing. No matter what’s going on around me, it’s a basic process that gives me a structured place to send my focus—straight pin here, needle there, and I’m doing something productive!

And the relaxation element can go beyond the general details of sewing itself, since I don’t have to just sew while I’m sewing. The task is so flexible that working in other recreational hobbies with it is fairly easy!

For me, I sew when I watch TV, which would let me catch up on my favorite TV shows (I’m caught up on none of my favorites!!!) while doing something productive. I say “would let” that happen, because until I get a HDMI cable, anything that I need to watch via computer just isn’t showing up on the flat screen in the living room! Still, TV and sewing can go hand-in-hand for me!

Food Network

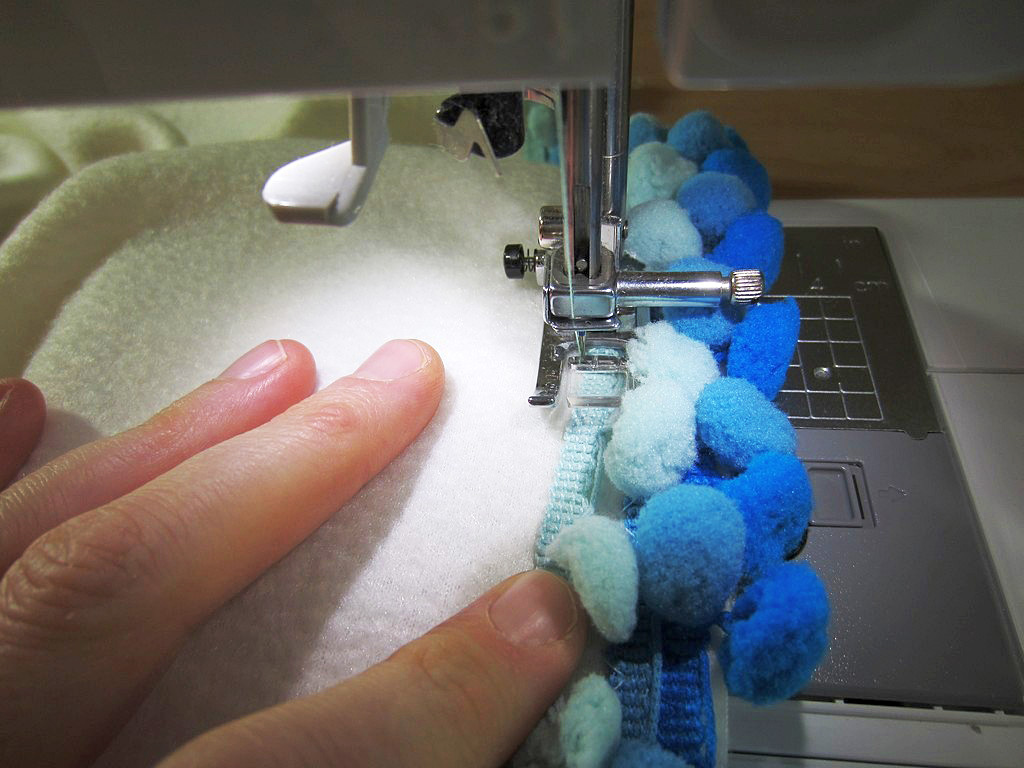
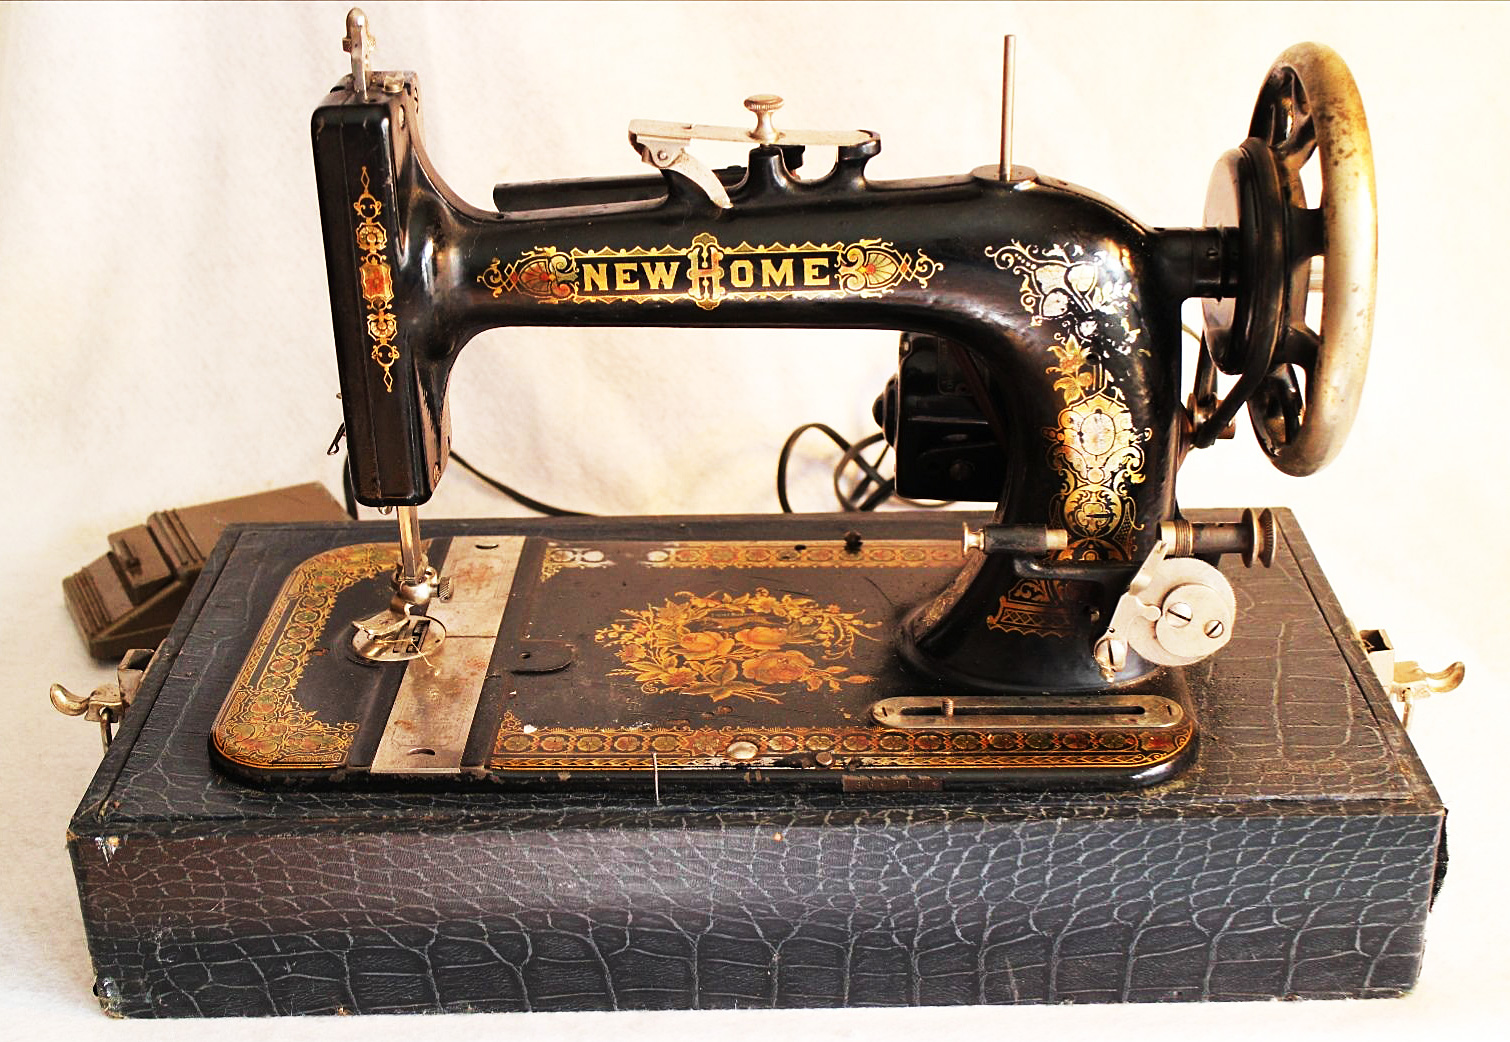
Of course, there might be a drawback or two for this TV-sewing notion. For instance, those with louder-running machines might find that there’s too much noise to bother trying to hear the TV. But for those with a quieter machine, those who are hand-sewers, and those who are in various stages of sewing that are before or after the sewing machine comes into play, it’s an option! I might not even know what sewing machine I’ll have in the future, but I do know that I hand sew, and that any project I can think of involves those before and/or after stages in regard to a sewing machine. Basically, no matter the project or the noise level of a machine, sewing is one hobby that I can do while watching episodes of my preferred TV shows — like ones from my darling Food Network.

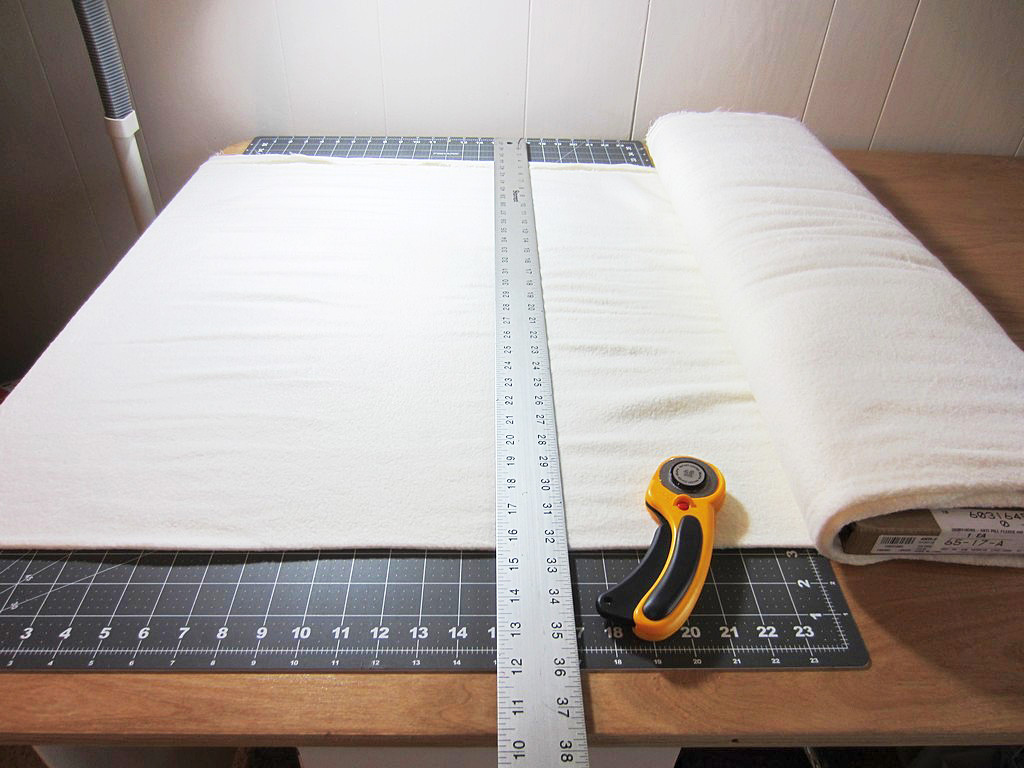
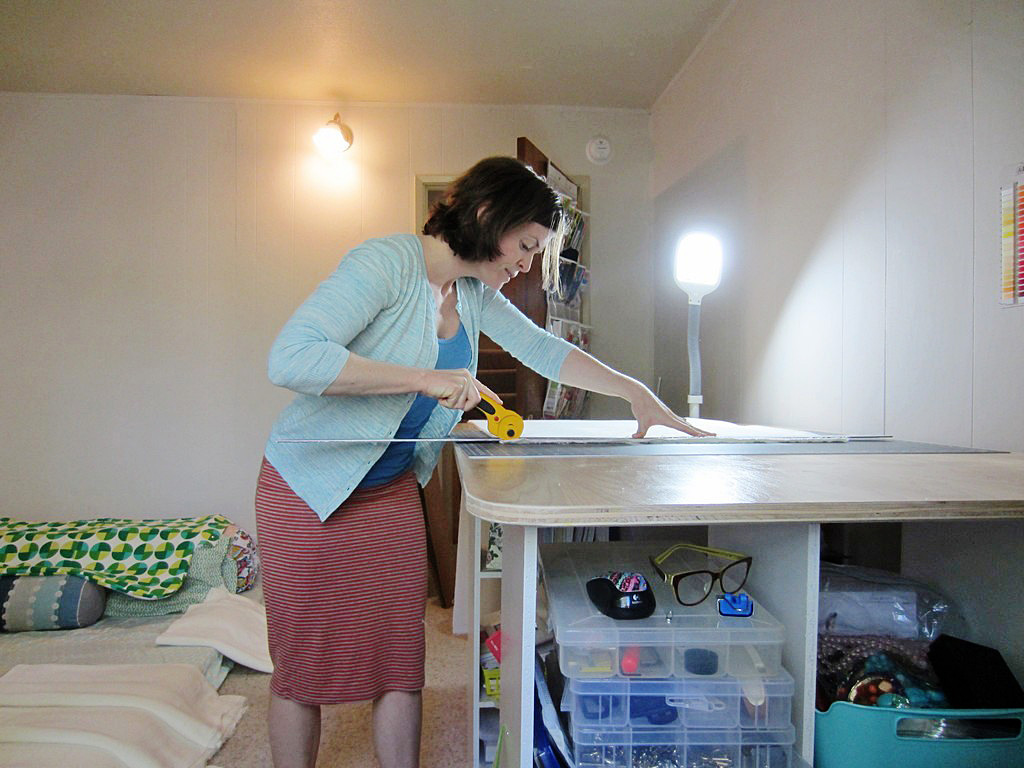
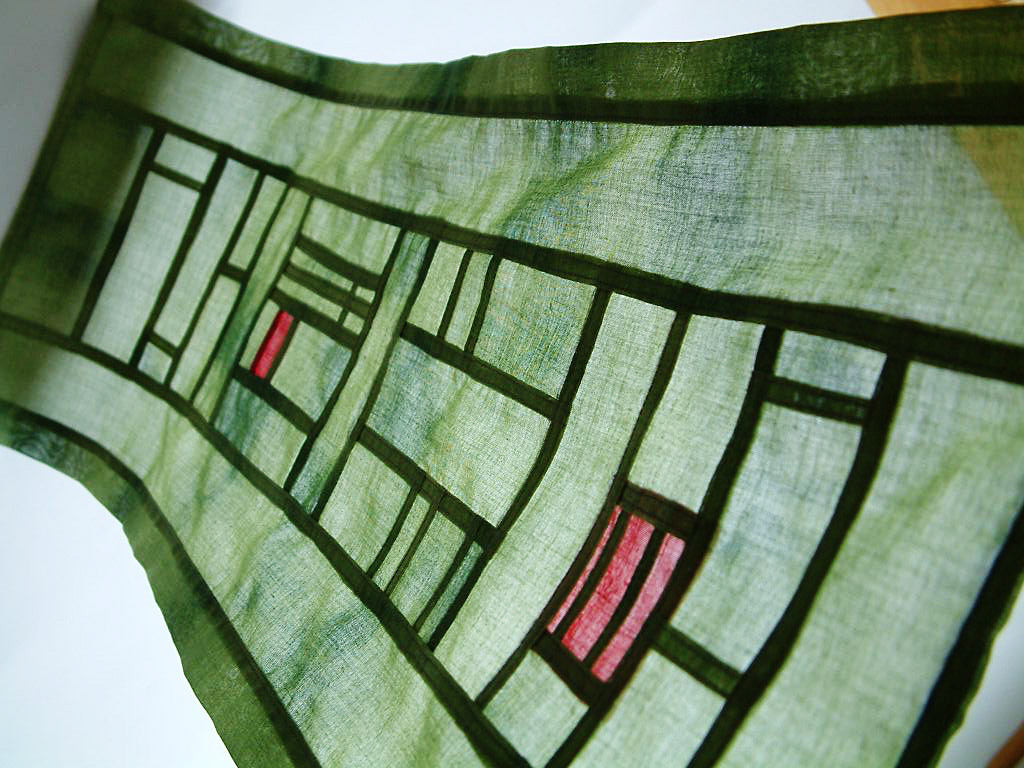
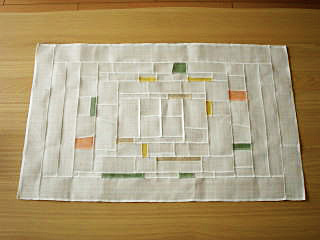
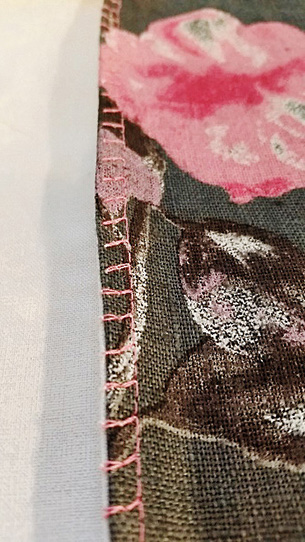
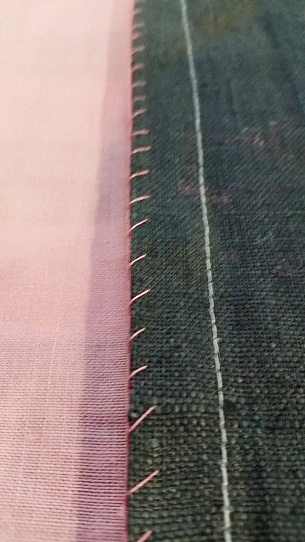
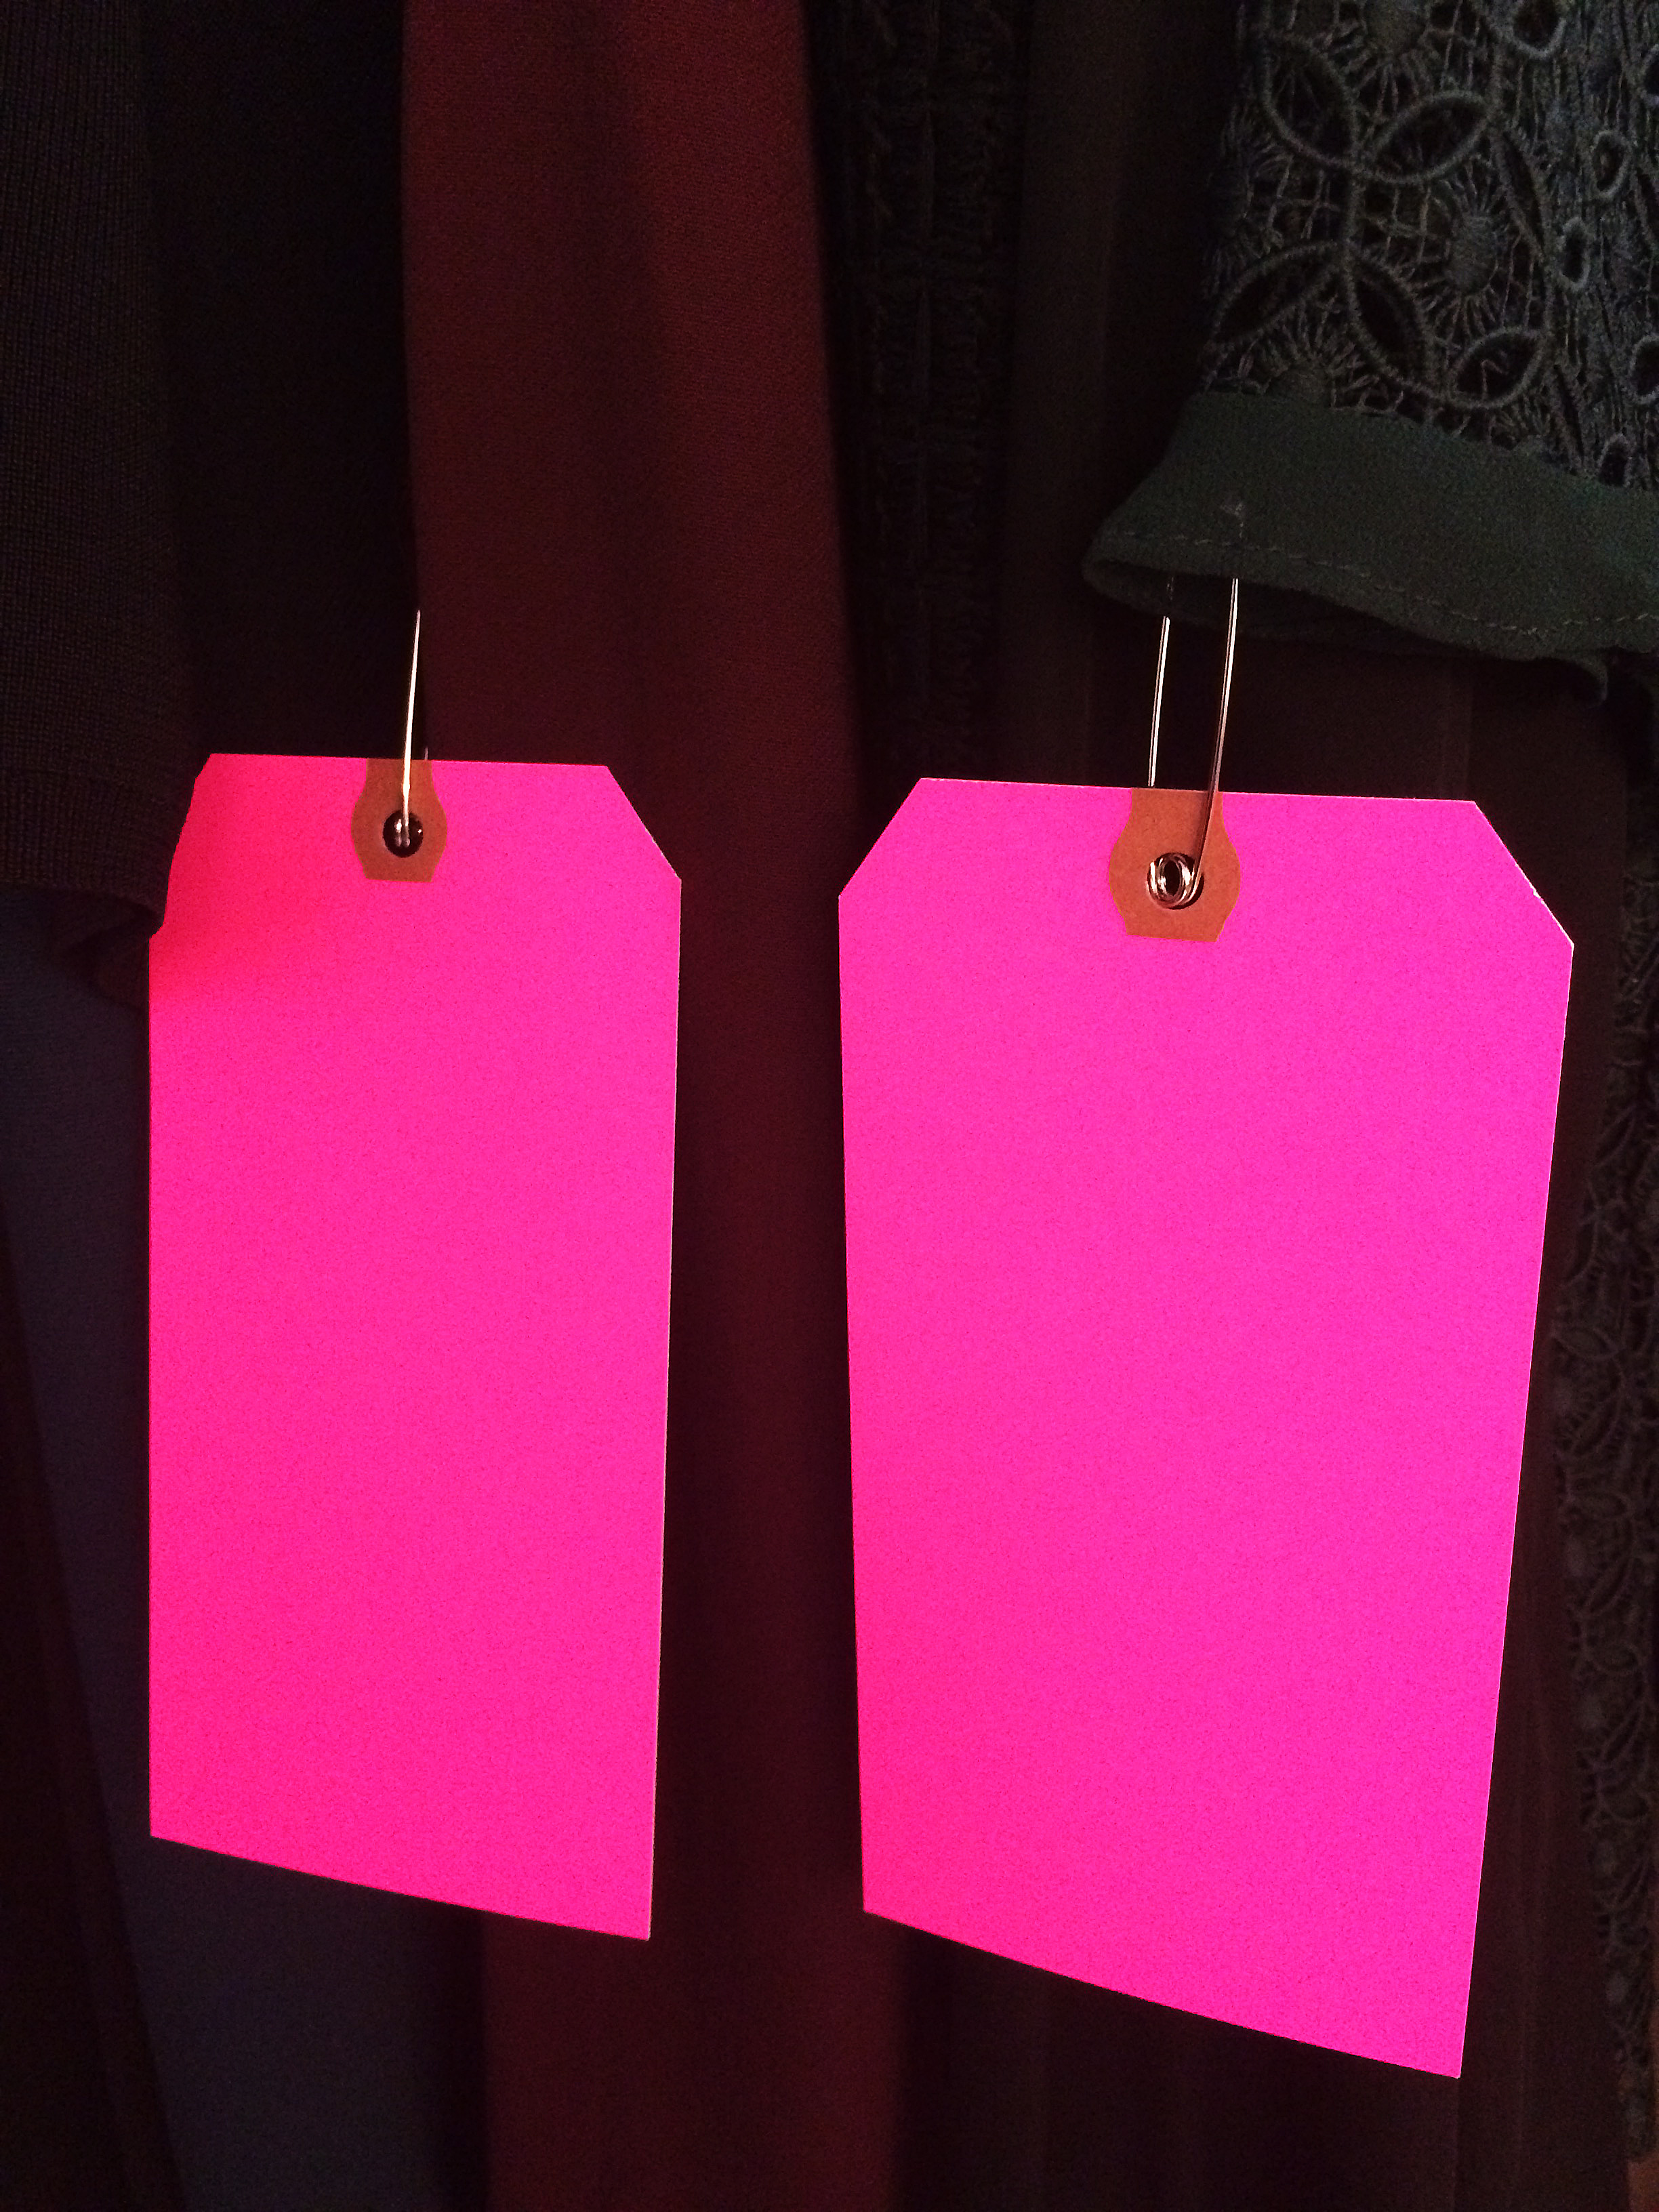
Cutting fabric, shredding material along the edges, plotting the pattern for a project… These are all things I can do away from a machine, and if I can do them without a machine, I can do them in front of a TV.

I do like sitting on the front porch with some lemonade & mountains like this around me for the visual.

I do like sitting on the front porch with some lemonade & mountains like this around me for the visual.

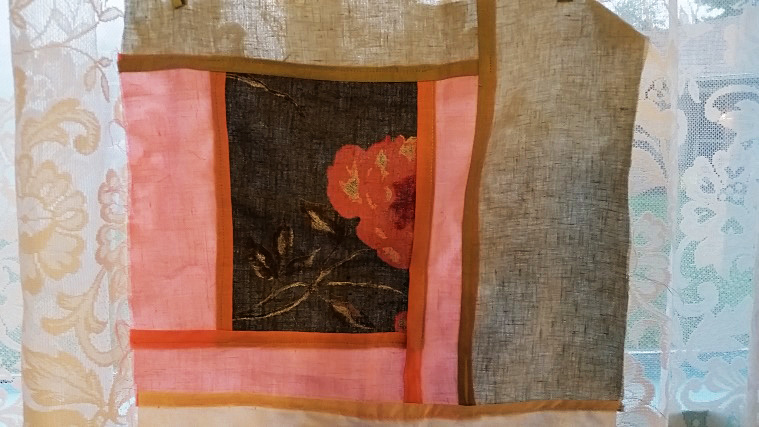
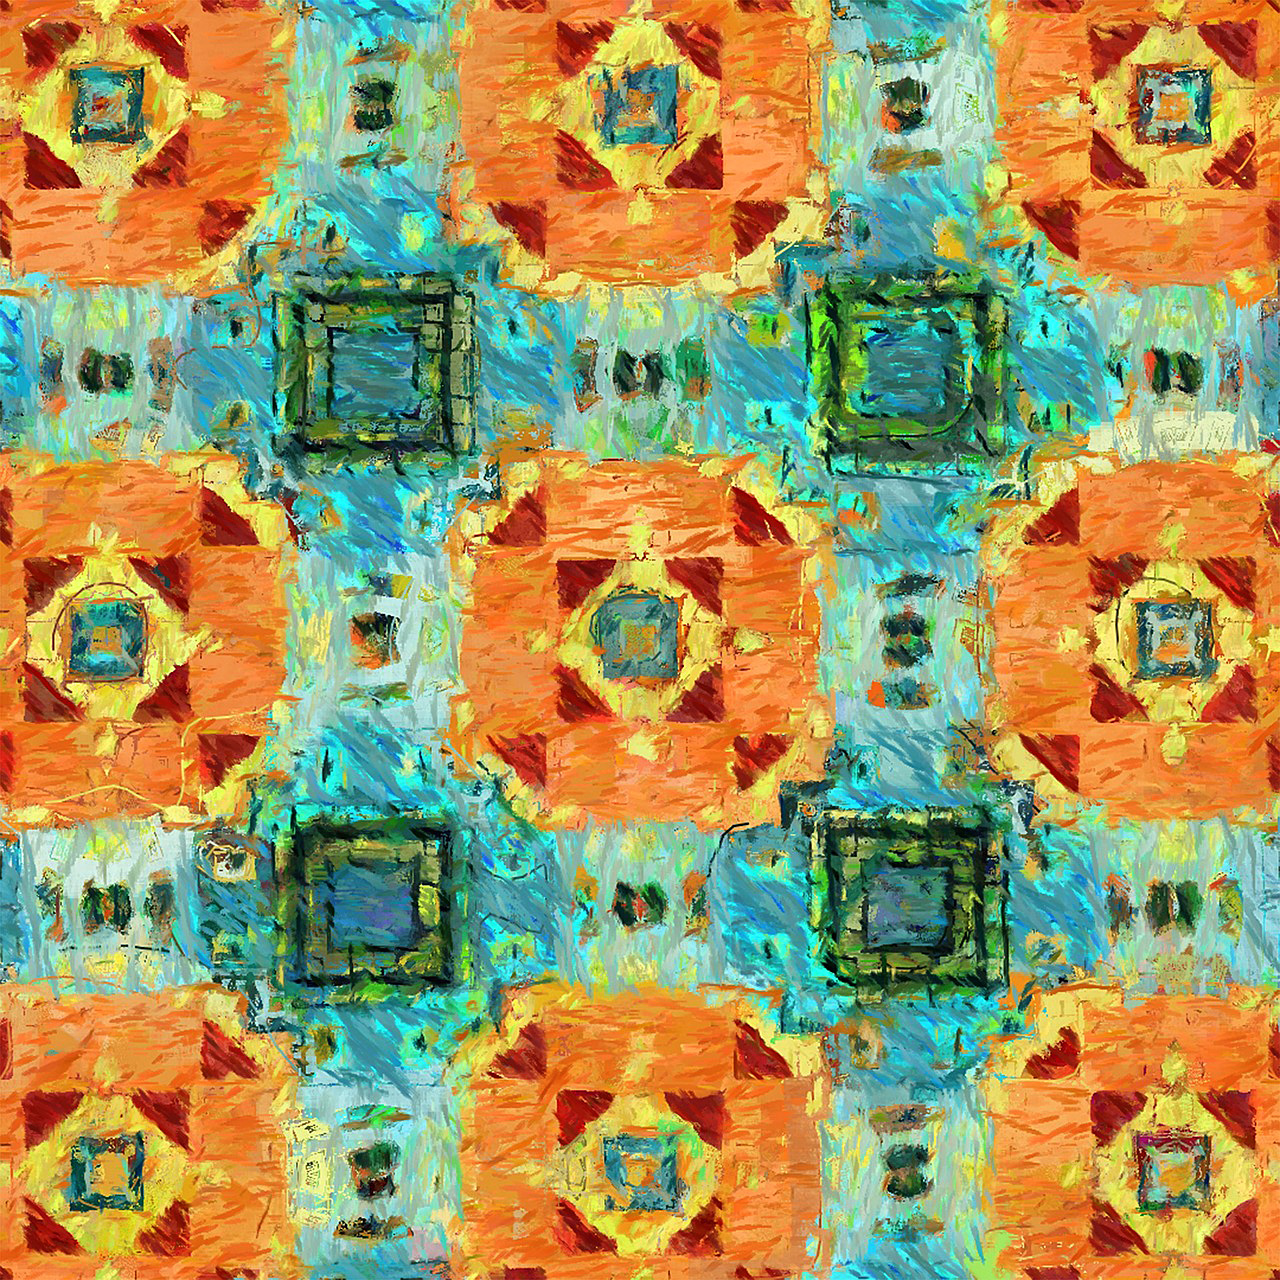
There are other options as well for the pause-and-enjoy life aspect that can still fit with working on projects away from a machine, and one that I haven’t tried — but might try in the future — is to sit on my front porch sewing, preparing, or plotting. As I said, I’m a Southern girl, and I do like a good-sized front porch! Sitting there with some lemonade and mountains like this around me for the visual? That’s a big yes, and a muse for that matter! Can you imagine plotting a new quilt with this kind of Autumn color scheme in mind? Talk about inspiration right before my eyes! I’m inspired just thinking about it!

I could also listen to audio books while sewing, or plot out a new project when sitting in a waiting room. Sewing truly is a hobby that can be tended to alongside other tasks, letting me do what needs to be done and what I want to do while moving those projects along. I like sewing, and this flexibility might be one of the main reasons!

I’m a TV sewer with an interest in sewing on my front porch, but as I mentioned, those aren’t the only possibilities for multitasking with sewing.

Do you have other activities you like to do while sewing or working on projects? Comment and let me know!

The Safety Pin

The Safety Pin

I try to collect them all in one drawer, but they escaping & disburse themselves all about the apartment.

I try to collect them all in one drawer, but they escaping & disburse themselves all about the apartment.

Almost every pocket in every article of clothing I own, there are a couple of safety pins. I can also usually find at least three of four of the little buggers on the bedroom floor. Sometimes they end up outside my apartment door because I reached for my keys and pulled out a fistful of safety pins instead. I try to collect them all together in one drawer but seem intent on escaping and disbursing themselves all about the apartment.

I use safety pins for fitting clothing, for hanging patterns, to attaching notes to things. Of course, there are different sizes and flavors of safety pins.

Size matters

I use the tiny gold ones when I’m fitting something very delicate like silk or gauze so that they don’t make an unsightly pin hole.

I use the tiny gold ones when I’m fitting something very delicate like silk or gauze so that they don’t make an unsightly pin hole.

I use the tiny gold ones when I’m fitting something very delicate like silk or gauze so that they don’t make an unsightly pin hole. For some reason, someone thought that gold pins without the end spiral were good idea. I suspect because sometimes things snag on the little coil but, without that coil, the pin is free to slide about so it’s hard to know exactly where/what the mark is.

I use the big number 3s for the majority of my fitting needs. And the number 2s if I need a thinner pin.

History Hunt

Walter Hunt invented the safety pin in 1849. He was the first one to create a pin with the coiled spring on one end and the clasp or catch on the other end to keep the pointy bit safe from tender fingers. Hunt sold his idea outright for $400.00 so never collected any royalties or anything from it. Legend has it that he needed to pay off a debt and thus invented the safety pin and sold the rights within a few hours.

I use safety pins for fitting clothing, for hanging patterns, to attaching notes to things.

I use safety pins for fitting clothing, for hanging patterns, to attaching notes to things.

Selling his safety pin idea wasn’t Hunt’s only unfortunate business decision though. He was also the first one to invent many of the significant parts of the sewing machine, including a curved needle and a shuttle. Hunt created the first sewing machine prototype in wood, which didn’t work all that well so he ended up selling his idea to Elias Howe and Isaac Singer.

Hunt invented a plethora of other things including a streetcar bell, a knife sharpener, paper collars, and an antipodean walking device – or suction cup shoes!

Alas, Hunt didn’t seem to have much business savvy or any true idea of what his inventions could be worth, and just how wide spread and common place they would become.

A modern twist

The safety pin has found its way onto the catwalk and into high fashion with decorated, embellished safety pin broaches and large dangling safety pin earrings.

The safety pin returns as punk becomes more relevant than ever – via Independent.

The humble safety pin also has a rich symbolic history and significance. Punk culture has long used the safety pin as an expression of individual freedom and DIY culture. In the wake of the UK’s Brexit and the US presidential election it has come to symbolize tolerance and unity with all people.

Wonder what Walter Hunt would have sold his idea for back in 1849 if he had been able to foresee even a small fraction of what his pin would become.

Pet Sewing Project Roundup

Pet Sewing Project Roundup

Do you have four-legged family members? I’ve got four cats. They’re my kids. My fur babies won’t take well to clothes, but I often imagine how cute they’d look in certain outfits. They’re also not awesome about sleeping in beds I make them, but that doesn’t stop me from trying! If your four-legged family members are better about using or wearing the projects you make them, check out these cool projects.

Dog Boots

Does your dog hate going out in the snow? Make them a set of boots. Their feet won’t get cold and the boots protect their pads from the salt and sand used to keep you from slipping. They’re also adorable and stylish. The grippy bottoms on these boots help your dog keep their balance and the fleece lining dries out quickly.

Each boot takes less than 10 minutes to make and fit on any of their four feet. The quick and easy nature of these boots means you don’t have to worry about making new ones when they inevitably wear out. If you’ve got a small dog, you might be able to make these dog boots with your scrap stash.

Pet Beds

Does your pet destroy blankets trying to make themselves a bed? Or maybe, like my cats, they take up more space on the bed than they give you? Show them you love them and save yourself money on new blankets or a bigger bed with these cute pet beds. They come in three sizes and styles suitable for any pet. Each one has a contrasting inner pillow for added comfort. Give your pet a comfortable place to sleep and choose easy care fabrics so you can wash it any time you need!

Dog Coat

Pet Sewing Project Roundup

Dogs who get shaved regularly as part of their grooming regimen feel the cold more deeply than those who keep their full body of fur. Help your dog withstand cold weather by making them a dog coat (Note: this can also be adapted to make a coat for hairless cat breeds). Depending on your dog’s tolerance, you can add additional lining for more insulation or use snaps or buttons instead of Velcro if your dog is skittish with noises.


Dog Pullovers

Does your dog already have a coat, but still looks cold? Maybe they need a hood! Or maybe they’ll just look adorable with a hood pulled up and their nose peeking out. Either way, try this cute pullover pattern. It comes in four sizes, so you’ll be sure to find one that fits your pup – big or small.

What items have you sewed for your pet? Take some pics and share!

Pressing Accessories: Essentials To Buy and DIY

Pressing Accessories: Essentials To Buy and DIY

Last week, Charlotte Kaufman showed us her precious pressing station she made for her sewing room. Vanessa Nirode wrote about irons a while ago. But we haven’t discussed pressing accessories on this blog yet. We need to, because there are a few things that you really must have near your iron to get things done well.

While I am on the subject, I want to explain the important difference between pressing and ironing, because they are not the same thing. Ironing is when you move the iron back and forth across a fabric or garment, smoothing wrinkles out. In pressing, you don’t move the iron back and forth in the same manner, but rather press down with the iron, moving it slowly or not at all. You can iron clothes or fabric, but usually use pressing in sewing. Press seams open or to one side. Press to shape garments during construction. And press to affix fusible web and other heat treated adhesives to fabric.

Proper pressing technique makes the difference between a perfect finished product and a mess. Quilters who press every seam know that it’s key to success. Other things that can make a difference to your finished products are pressing cloths, a seam roll, pressing ham, and spray starch- or something better than starch. Useful but not as essential are a clapper, seam board, and pressing mitt. If you are lacking these things, you fix that with DIY; here is a link to a detailed page with instructions for making them: Make your own pressing equipment

Let’s take a closer look at the pressing accessories that are essential, so that you can understand why these items are must haves.

Pressing Accessories: Essentials

Don’t be without these:

Pressing Cloth

These serve more than one purpose. They can protect delicate fabrics from too much direct heat, and protect your iron from gunk and goo when you are affixing glue. A pressing cloth is essential for fabrics like linen and rayon, which develop a sheen if pressed without one. For most projects, I prefer to use a large square of T-shirt knit that I cut for this purpose. However, a see-thru pressing cloth is essential as well, to see what you are doing when working with small pieces and applique.

Seam Roll

A seam roll is helpful to have for pressing small curved seams and darts.

A seam roll is helpful to have for pressing small curved seams and darts.

A seam roll is helpful to have for pressing small curved seams and darts. It also prevents seam allowances from impressing through to the front of the fabric when you iron garment seams open. The way to do it is to place the spread open seam down over the roll, then press the right side of the fabric instead of the seam itself. I made a seam roll following the directions linked above, except I made one variation. I started with a couple of magazines, rolled tightly together as the base. Then I covered these completely by wrapping electrical tape tightly around. I added the extra layer of a felted wool sweater sleeve, and then wrapped the whole thing with another piece of cotton canvas and hand sewed it closed.

Tailor’s Ham

It's called a ham because it looks just like one. It's a stuffed and curved helper.

It’s called a ham because it looks just like one. It’s a stuffed and curved helper.

It’s called a ham because it looks just like one. It’s a stuffed and curved helper. You can use a tailor’s ham for many purposes, most importantly and often to shape garments and curved seams. You’ll use it on collars, sleeves, sleeve caps, cuffs, bustlines and darts, waistlines, hip seams, and more. You want a ham made from two fabrics: wool on one side for pressing wool, synthetics, and other fabrics that need low or medium heat; cotton on the other side for high heat tolerant fabrics like cotton and linen.

Here’s the one that I made, instructions are linked at the top of this page. Or you could save time and stuffing and just order one from our store.

Best-Press

I’m not a big fan of starch. It can be messy and it smells, polluting my room. Anyway, aerosol cans are environmental bad guys and I try to be environmentally conscious. Treating fabrics is essential,though, so I use Mary Ellen’s Best Press instead. I love this stuff and go through it quickly, because I never use my iron without it. As opposed to starch, it smells really nice. It doesn’t flake or leave any residue, which starch sometimes does. It provides a crisp finish and makes fabrics soil-resistant. I really recommend ditching the starch and switching to Best-Press instead; you’ll be glad that you did. Order some right now. In fact, do yourself a favor and get two bottles, because you will love this stuff and not want to be without it.

Be sure that your sewing room has all of these items so you can conquer any pressing job.

These will make gorgeous DIY gifts.

DIY Pom Pom Fleece Blanket

I rarely meet someone who doesn’t like pom poms or fleece. They are two great unifiers and when you put them together, magic happens. They became my inspiration recently when perusing through Pinterest for ideas for our handmade holiday gifts for the girls’ teachers. I began my search for ideas in September, well in advance of December, so I knew that I’d have time to get them done.

This DIY tutorial was my starting template. However it is a no-sew version of what I’m about to show you. Here is how to make a DIY pom pom fleece throw blanket.

Assemble your Materials

Order a bunch of fleece. I waited until Joann’s had a 50% off coupon and I ordered 9 yards. I want to make 6 blankets and each blanket will be 1.5 yards in length. 1.5 x 6 = 9. Do the math for however many blankets you need.

This is Joann’s anti-pill fleece fabric in Ivory.

This is Joann’s anti-pill fleece fabric in Ivory.

This is Joann’s anti-pill fleece fabric in Ivory. The roll arrives with the fabric doubled on the roll. Carefully measure out 1.5 yards for each blanket and then square up the sides as needed.

Carefully measure out 1.5 yards for each blanket and then square up the sides as needed.

Carefully measure out 1.5 yards for each blanket and then square up the sides as needed.

Voila, six blankets awaiting their pom poms.

Voila, six blankets awaiting their pom poms.

Voila, six blankets awaiting their pom poms.

I wanted to do an ombre, triple row of pom poms on each end of the blankets. I did the math here again. The fabric I ordered is 58” wide, by 1.5 yards (54”). I planned to add the pom poms on the shorter side, so I’d need 3 yards (1.5 yards per end) for each blanket. 3 yards time six blankets is 18 yards of EACH color of pom poms.

I got these from IchiMyLove on Etsy. Handily, they sold pom poms in bulk by 18 yards (IT’S LIKE IT WAS MEANT TO BE!) And their color selection was fantastic. They ship from Thailand but the shipping was only a little longer than the wait for a US shipped product. Plan ahead!

Their color selection was fantastic.

Their color selection was fantastic.

Know Your Fabric

A few tips when sewing fleece:

  1. Use a longer stitch length.
  2. I saw a lot of tutorials that said to use a ball point needle but I didn’t have any. I used a quilting needle, size 14, and it worked out great.
  3. Don’t mess up. It’s really difficult to rip out stitching on fleece. To prevent mess ups, practice on a bit of scrap to make sure you have stitch length and tension set correctly.
  4. Fleece doesn’t fray when cut. Because of this, you can decide to add reinforced stitching on the longer (non-pom pom) side or not.

Fleece doesn’t fray when cut. Because of this, you can decide to add reinforced stitching on the longer (non-pom pom) side or not.

Take Your Time

Stitching on the triple rows of pom poms on each side is time consuming. Put on some music or your favorite podcast and zen out.

If you have a tag to include, plan out between which layers you want to add it.

If you have a tag to include, plan out between which layers you want to add it.

If you have a tag to include, plan out between which layers you want to add it.

Take it slowly, pushing each pom pom out of the way of the foot, or you’ll end up like this, with your needle in the middle of a pom pom and your project on hold until you get yourself out of that mess. Don’t be me like me!

Take it slowly, pushing each pom pom out of the way of the foot, or you’ll end up like this, with your needle in the middle of a pom pom and your project on hold until you get yourself out of that mess.

Take it slowly, pushing each pom pom out of the way of the foot, or you’ll end up like this, with your needle in the middle of a pom pom and your project on hold until you get yourself out of that mess.

Once completed, I washed the blankets on the gentle cycle in warm, not hot, and did not use fabric softener. Tumble dry on the gentle cycle as well. I added a Shout Color Catcher just to make sure the pom poms didn’t bleed.

Here is the finished product. These will make gorgeous DIY gifts.

Do you give handmade gifts during the holidays? What are your plans for this year?

—————————–
Charlotte Kaufman is a writer and sewist in Mammoth Lakes, California. She specializes in marine and home interiors and continues to fall more and more in love with quilting. You can follow her at charlottekaufman.com.

Tension from Scratch?

Baking is hard

One of the best pieces of advice my mom ever gave me in regard to baking was to buy a box of white cake mix and blend in whatever flavor of cake I wanted to make. It’s proven effective for banana cake and coconut cake, and I’m interested in trying an orange cake later on down the road. The problem with the strategy though is that I never really learned the more elaborate way to make those cakes, if you consider it a problem. I mean, the cakes taste fine, so what does it matter if Pillsbury was involved?

I find myself having a similar conundrum now that it’s potentially approaching the right time for me to buy a new sewing machine. Which, by the way, isn’t the easiest step for me. I’m a creature of habit and comfort, guys — to the point where making myself watch a new movie might be a challenge. So buying a new sewing machine? Not necessarily an experience I excitedly dive into!

Decisions, decisions.

It also doesn’t help matters that I can be a cheap frugal person, so my #1 criterion in the past might have been, “Which one is cheapest???” Well, now that I have different goals in mind for the sewing machine other than just a hobby, I’m thinking I might want to expand my ideas a bit to make a more complex decision. That decision though has led me into the Pillsbury version of a sewing problem — should I learn more from scratch, or rely on modern conveniences?+

Let me explain that reasoning!

The truth of the matter is that I’m nowhere near a sewing expert, and there are details about the process and machinery that still leave me metaphorically scratching my head. I’ve come some distance in the things that I did learn and have practiced with, but there’s still so much left to find out and excel at. One of those things — something that I haven’t quite gotten the hang of yet — is tension, which can be SUCH A BIG DEAL with sewing by machine. As one source said, “[n]o matter what stitch you are sewing, it will look terrible if the tension if off” (Lawson, 2011, “Tension” section).

That’s a hefty amount of pressure to put on any one specific aspect of a sewing machine. Basically, I could do everything else perfectly and still have a horrible final product because I missed the mark on the tension detail. I kid you not when I say that my experience and understanding of tension might be laughable to a number of more advanced sewing enthusiasts, so logically, finding a machine that can make that detail easier would be a good idea for me, like one that automatically adjusts the tension.

Or would it?

That question moves into the Pillsbury section of territory for the sewing concept. Should I get a machine that will automatically adjust it for me, like Pillsbury assists me with cakes? Is that the best strategy in the long-run?

The lazy part of my brain screams, “YES!” and can back up that idea with coconut and banana memories of simple, scrumptious treats. But the other part of my mind — the one that realizes technology has definitely eased up sewing (and baking) to the point that my grandmother would probably be disappointed — says, “Uh, no.”

Can you picture someone casually sewing on one of these now?

Can you picture someone casually sewing on one of these now?

Honestly, when I think about the history of sewing and how few tools used to be available for the process, it’s potentially hard not to be a tad bit ashamed if I lean too much on technology to do the work for me. Even after sewing machines became a thing, there were still real differences to what we now have.

The struggle is real

It’s just like the notion that my Pillsbury-based cakes lack a certain impressive quality in comparison to a tasty baked-from-scratch cake. Sure, they’re good, but they aren’t that level of remarkable.

It’s a struggle between wanting an easy route and wanting a more challenging route, and at this point, I’m not 100% sure which way the decision will go. I could buy a machine that does the tension for me, and I could end up with wonderful projects without ever fully getting a handle on how to do tension for different crafts. Or I could make things harder on me for the moment, then come away from the experience as a more advanced quilter/sewing enthusiast.

Should I Pillsbury-cheat, or go the distance? Decisions, decisions, guys!

What do you think? It is worth it to learn how to do these things by hand and my own skills, with limited technology, so I can have a better grasp on the issue? Or do you think it doesn’t matter so long as the end products are good?

References
Lawson, S. (2011, August 17). “Sewing Back-to-School: Stiches & Tension.” Sew Sweetness. (2016, November 10). Retrieved from http://sewsweetness.com/2011/08/sewing-back-to-school-stitches-tension.html
Pojagi - The Art Form of Korean Quilting

Pojagi – The Art Form of Korean Quilting

I have always had a fascination with brightly colored things. The beauty of the sun shining through the trees, through the clouds, and even through the window gives such a warm feeling and the appreciation of nature and our surroundings. I especially love the beauty of stained glass windows in the ancient churches and buildings in Germany and Italy. The sun shining through the color seemed to draw me into the grace of the house built so long ago and so carefully maintained as to not disrupt the aura it was intended to project.

One time, not so long ago, I was intrigued by some pictures that were like stained glass, but made with mostly irregular blocks and random shapes of fabric.

Pojagi

Sometimes referred to as “Bojagi”, this is a highly improvisational project to do what you feel!

Sometimes referred to as “Bojagi”, this is a highly improvisational project to do what you feel!

Light can be seen through the block which shows outlines of the seams around them, as well as diffused color of the fabric in each block. The interesting part is some were made with one color or neutral colors, and as I researched, I found many others were pleasing to the eye with multiple colors.

The art form I was seeing was called “Pojagi”, which was started about 2000 years ago in Ancient Korea. Pojagi was made by hand stitching fabrics like ramie (which is similar to hemp or (linen), cotton, and silk formed into 14” squares to wrap and carry things. Even today, it is said the Korean parliament uses Pojagi to transport documents.

Tools of the trade

Women took old clothes and repurposed them into these wrapping cloths. It was a highly creative way to do improvisational designs from old clothes, scraps, and multiple fabrics, using only what was available to them. They would turn down the fabric from the top ¼ inch and crease it with a Clover Hera Tool.

I was interested to learn that a Hera tool was a sharp piece of hard plastic, that when pressed on fabric, makes a visible crease on both front and back of the fabric. How convenient would that be rather than measuring with a ruler and ironing that edge?

The left side is machine stitched with an Overcast stitch. The right side is hand stitched. Both have no raw edges showing on either side.

The left side is machine stitched with an Overcast stitch. The right side is hand stitched. Both have no raw edges showing on either side.

This example is a “work in progress” of mine. I started making panels to cover a closet opening, and quickly decided I needed more fabric than I have. So it is one more thing I have on my project list to complete.

This example is a “work in progress” of mine. I started making panels to cover a closet opening, and quickly decided I needed more fabric than I have. So it is one more thing I have on my project list to complete.

When the crease was made all the way across the fabric piece, the top is picked up folded inward and hand stitched. Then hand-stitching is done along that fold. From the side, the seam is folded down toward each other. The result is what we call “Flat Fell Seams”. The best way to describe them is they are a row of 2 seams with no fraying edges, finished both inside and outside. (Like the seams on your jeans!)

Although it was used by all economic classes in Korean history, Pojagi had categories based on the fabric and who the recipient of the cloth would be. For instance, a princess would receive a lined Pojagi possibly made with silk, where as a commoner may be something coarser like ramie or hemp. They were called different names by type as well.

Modern use

This is a portion of my closet screen hung in the window. I love that you can see the flat fell seams like outlines around the fabric, and the soft colors showing the fiber. There is lace behind that panel so it is makes it interesting!

This is a portion of my closet screen hung in the window. I love that you can see the flat fell seams like outlines around the fabric, and the soft colors showing the fiber. There is lace behind that panel so it is makes it interesting!

Today, pojagi is used as screens, curtains, wall hangings, or sometimes fabric sewn on top of each other, irregular shapes and sizes, even repurposed clothing. Pojagi is a great improv project to do whatever design appeals to you.

No measuring and using scraps, even sometimes fabric sewn on top of each other, irregular shapes and sizes, pojagi truly brings out your creativity.

No measuring and using scraps, even sometimes fabric sewn on top of each other, irregular shapes and sizes, pojagi truly brings out your creativity. It takes time to sew by hand, however, sewing by machine made me feel that I was cheating myself of the real Korean experience. I did complete this one panel for my closet, however. It is lined at the back with cotton duck type material for strength.

I hope you will be inspired to research this unusual art form and make a square or two. You may decide the freedom of expression is something you were missing all along.

I would love to hear your comments or see your designs in Pogaji!

As Pinned: Sewing Alterations in the Film Biz

As Pinned: Sewing Alterations in the Film Biz

Most film and television costume departments in New York City use bright pink oak tags to identify a garment as needing an alteration.

Most film and television costume departments in New York City use bright pink oak tags to identify a garment as needing an alteration.

Most film and television costume departments in New York City use bright pink oak tags to identify a garment as needing an alteration. Larger (and usually period) shows, like Boardwalk Empire, The Deuce, The Get Down, have two or three Costume Fitters who run the fittings for the background actors. They keep everything organized in the fitting rooms, take measurements and photos, assist the designers, do a lot of the pinning (unless something really wacky is going on, then they’ll usually call the Head Tailor in to check it out), and write the alteration notes on the tag.

Inevitably, a high percentage of alteration notes will read something like: “Take in as pinned” or “CB as pinned”. ‘CB’ means center back if you didn’t know. And ‘AP’ is the abbreviation for ‘as pinned’.

So, anyway: “Take in as pinned.”

Measure twice, cut once.

Take in as pinned

Here’s the thing, even if I pinned the alteration myself in the fitting room, ‘take in as pinned’ shouldn’t necessarily be followed literally. Seriously. It is indeed true that humans in general are not always symmetrical but it’s rare that you honestly need to take in one side more than the other. I also cannot tell you how many times an initial, “he has one arm longer than the other” turned out to be a jacket not sitting evenly upon the shoulders.

The garment can, of course, be lopsided to begin with – always a possibility if you’re dealing with vintage clothing. Measuring is always a good idea. As my Dad always says, “Measure twice, cut once.” He was talking about lumber and carpentry but the same advice applies to sewing as well.

I usually mark (or just measure) the pinned out alteration with chalk or wax on the wrong side of the garment. Then I take the pins out and assess the situation. If two side back seams were pinned in and one is considerably larger than the other, even them out. Do the same thing on both sides.

This is actually one of the top five laws of sewing – if there are laws of sewing.

I just pin everything out in through the center back then figure out later the best place to take it out.

I just pin everything out in through the center back then figure out later the best place to take it out.

I often only pin one side of a thing. More often, I just pin everything out in through the center back then figure out later the best place to take it out. A large amount will look better if you distribute it through more than one seam.

For example, if you pinned out 5 inches at the center back waist of a shirt or jacket, split the amount up between the center back, side back and side seams. The end result will look much better.

An alteration I do a lot is taking in the backs of men’s button front dress shirts. Unless it’s a slim cut John Varvatos, most men’s dress shirts are excessively roomy in the back. The quick and easy solution to this is to add side back darts.

If I have time, and the shirt has back pleats going into the yoke, I’ll take the whole back off and take out the pleats – re-cutting the bottom part of the armseye and the side seams. This can take quite a bit longer, especially if you are dealing with a shirt by Brooks Brothers, who insist on gluing their side seams as well as sewing them.

Take in as pinned.

Take in as pinned.

Speaking the same language

At Blindspot, since I’m the Head and only tailor, we just put blank pink tags on the garments as indications that they need altering. If I pinned it, I don’t need any notes. The Costume Designer for the show is also an excellent tailor (which is rare) so if I wasn’t in a fitting for some reason, he can easily tell me what needs to happen – often without pinning.

He’ll come to me and say, “I threw this on so and so, it just needs to be taken in about this much in the back.” Then he’ll show me by pinching an amount out with his fingers.

Tailoring and patterning is indeed a language all its own and it’s a beautiful thing when you work with someone who speaks it as well as you do.

Color Theory for Quilters

Color Theory for Quilters

Color Theory for QuiltersColor theory and scheme play an essential part in any design, and color choices are most important in planning any quilt. Choosing a color scheme that works for your quilt prevents muddy color or boring results from your hours of work.  You want quilts that both stand out and fit in, and the key to this is using color theory to your advantage. Using colors that work together as a quilting team in your design can enable you to do any or all of the following:

  • Achieve harmonious results using a wide array of many fabrics
  • Make some colors pop and others recede, to emphasize or unify block patterns
  • Design quilts to complement interiors without any clash, and without being boring
  • Have backgrounds that work well, rather than as competition to spoil design effects
  • Balance any design and make all your quilts sing
  • Add extra Oomph and Wow Factor, for perfect success

You can do all this with ease when you understand color theory and recognize the logical choices available.  We don’t have to reinvent the wheel, and so we can choose from a preselected menu of color scheme styles, or teams, that we know will always work wonderfully together.

The Color Wheel

Color theory and schemes

What are some of these tried-and-true color teams? Let’s look at them all:

Monochromatic

A monochromatic color scheme uses only one color, choosing from all shades and tones of that color. How many greens are in the garden, and all of nature? It feels like shades of blue are unlimited when you think of the many colors for sky and sea.  The brown palette includes all colors of dirt and soil layers, skin tones, fur shades, tree barks, and more. You could use hundreds of different fabrics in one quilt and stick to one color. Or limit yourself to less, if you like, but know that a monochromatic quilt is a viable option in any color. You can also use a monochromatic palette as an element of your quilt, rather than the whole thing. This trick will enable you to paint with your fabric and achieve dramatic landscapes or picturesque quilts.

Analogous

Analogous colors are next to each other in the color wheel.  You can choose a narrow or a wide analogous scheme. You could choose to use all shades of just red, orange, and what is between them, or include all the way to yellow for more contrast. Choose from the other side of the wheel using blues and indigos, or including violets. Or go with yellow, green, and blue, including everything in between them, or blue, purple, and red with shades in between these. There are a lot of options for analogous quilts. I made one using blues and indigo, I showed how to make it on this blog a while ago.

Complementary

Complementary colors really set each other off.

Complementary colors really set each other off.

Complementary colors are opposites on the color wheel. They go well together as natural pairs and seem to reflect their differences pleasingly. Complementary pairs are: red and green, blue and orange, yellow and purple, and more.  Indigo is between blue and purple, so its opposite shade is between yellow and orange. You could also choose two analogous colors and also use both color’s complementary colors. For example, I have never used indigo and violet with yellow and orange yellow as a color scheme, but I know that it would work well.

Triadic – primary, secondary and tertiary

The familiar primary color scheme of red, yellow, and blue is triadic. Triadic colors are evenly balanced and play well together without competition. The secondary triadic trio includes green, purple, and orange. Tertiary triads include indigo, red-orange, and yellow-green together, or yellow-orange, blue-green, and violet red. Remember that you can choose from different shades of each color. For example, the familiar pastel trio of pink, pale yellow, and light blue used so often for babies, is a just a lightened up version of the primary color triad.

This rainbow book of colors is one of my favorite gifts ever.

I used a Rainbow color scheme for the cover of this baby color book.

Rainbow

The rainbow color scheme includes, you guessed it, every color of the rainbow. Don’t leave any out; a rainbow palette must include red, orange, yellow, green, blue, indigo, and purple. You can decide for yourself whether to include the tertiary colors that fall between these or not. A rainbow scheme will work with or without these colors. A rainbow scheme always results in a vibrant quilt.

Warm and cool

Warm and Cool

Warm and Cool.

Warm colors range from red to yellow, like the colors of the sun. Browns and sands are included in this group, too. Cool colors go from blue-green to purple, like the seas and the skies, including at night. Warm colors advance; cool colors retreat. Cool colors separate and warm colors unify. Stars pieced from warm colors really pop against a cool background.  Pairing warm and cool colors differently can make dramatic differences in blocks, and changing this up may provide a lot of interest in repeating motifs.

Light and dark

This is the ultimate contrast, like black and white. Shapes are emphasized and the look is simple and uncluttered. Use your choice of colors for the light and dark pairing. You could choose light and dark shades of the same color or a complementary pair to contrast between light and dark, for example. While black and white can be starkly dramatic, this can also be downplayed in a light/dark combo by choosing a mix of lights and darks and gradating the tone.

Neutral

Natural colors: the seashore and shells; barks and stems; wood; dried grasses; crinkly leaves; skin-tones; rocks and soil. Grays like the sky sometimes and clouds, or concrete, and silvery steel. Creams, ivories, bone, and every shade of brown are all neutral colors. Neutrals can be light or dark. They are non-competitive, and help other colors. This is why they work so well as backgrounds. Neutrals are peaceful and offer support, so in general they are always welcome.

Traditional

A traditional quilt color scheme depends less on color than value. It is traditional to choose three colors for quilting: one that is dominant, one that is subordinate, and one as an accent. The dominant and subordinate colors play off each other, and the accent provides a pop. The red squares traditionally used as the centers of Log Cabin blocks both provide pop and serve to unify and define this classic design. You can use your dominant color to emphasize a repeating motif and the subordinate color as the background, sprinkling the accent color about to add sparkle and interest.

Scrap bag

It is a valid choice to use no color scheme at all and choose indiscriminately from among a plethora of colorful scraps. Scrap quilts, with their confetti of riotous colors, are endlessly pleasing, both to make and to look at. You can piece together a pleasing string or strip patchwork quilt by choosing blindly from an abundant scrap pile.

Choose a variety of fabrics

Color Theory for QuiltersYou can use a favorite fabric as a starting point to choose your scheme around, or you can begin choosing fabrics according to a predetermined scheme. The unlimited choices available to quilters are a big part of what makes quilt-making fun. You can increase your enjoyment in making any quilt by widening your variety of fabric choices. If you choose a triadic color scheme, for example, but then choose only one fabric of each color to complete your quilt, you may be bored by the lack of variety.  Choose several fabrics in each color to increase interest instead.

Don’t be daunted by color choices. Choose any one of these color schemes and your quilt is sure to be a success. I hope that you understand color theory now and that this has helped you.

DIY Fun Jeans Project

DIY Fun Jeans Project

I think jeans are one of the most comfortable items in my wardrobe. They’re also a little boring. Sometimes I want to express myself while still enjoying the comfort of my favorite pair of jeans. With this awesome DIY jeans project, I can – and so can you.

Patches

DIY Fun Jeans Project

I’m not great at embroidery, but with the abundance of patches available in craft stores and online, I don’t have to be – and neither do you. Pick up patches in a variety of sizes. Any that you think are fun and express your personality. You may not use them all on one project. That’s okay.

Lay out the pair of jeans you’re going to spruce up and place patches to see what they’ll look like. Do one side at a time and sew them down with hand stitches. Don’t forget the waistline, pockets and cuffs. Well placed patches give jeans personality and character. Best of all, if that pair of jeans gets worn out or no longer fits, you can easily move them to another pair.

Contrasting Fabric

This is a great way to use up some of your fabric stash while making a great item for your wardrobe. Choose some contrasting fabric you really love. You should have about a yard or so of the fabric depending on how wide you plan to go with the next step.

Slit the jeans on the outside from the bottom of the cuff up the seam to about half way to the knee. Using a triangular piece of contrasting fabric as an insert, resew the seam edges on the fabric creating a flared bottom. The more fabric you use, the wider the flare will be. Do both legs if you want the jeans to be symmetrical or do just one leg to create a unique look.

Combine It

You can do either of these DIY jeans projects alone and wind up with a fabulous pair of jeans or you can combine them to create a pair of jeans like none other. I love both of these DIY projects because no special machinery or equipment is needed. Patches are inexpensive and I can use up some of my fabric stash.

If you give either of these DIY jeans projects a try, share the pictures of your results. I’d love to see them!