Finding the Fabrics

Finding the Fabrics

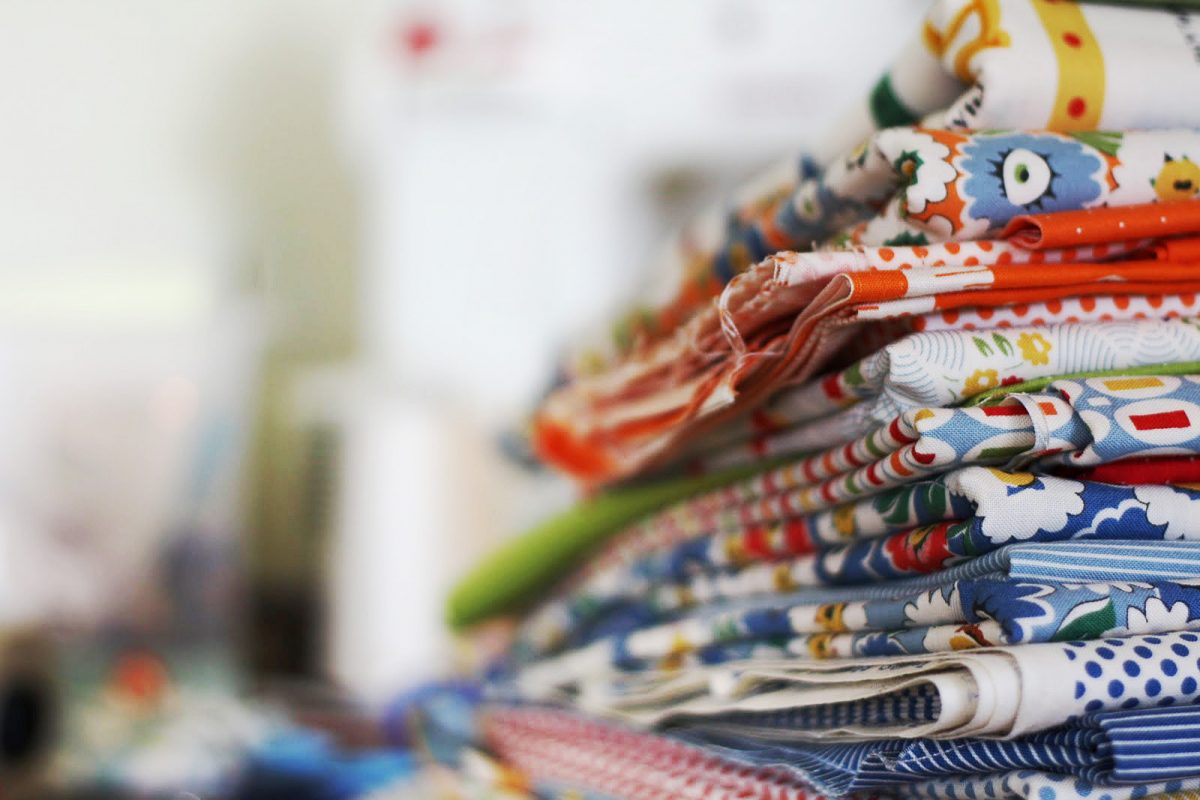
Sometimes, little decisions can make big impacts. Details that are minute and all but brushed aside as secondary could really have an effect on a life. Or in this case, a project! I’ve said before on this very blog that quilting is not baking, and it’s true! While I can guesstimate with my baking ingredients, specifics can be a serious deal when partaking in a sewing-related hobby. I’ve already covered that general topic, but for this blog post, I’d like to funnel that idea to one particular concept. That detail is picking out your fabrics for a project that requires more than one design of material.

In the world of sewing, matching isn’t the goal. Complementing is.

Now, I’m not saying that people don’t take this consideration seriously. I’m saying that in a world where you can find all kinds of free patterns online for sewing projects, this step is worth considering just as much as finding that right pattern, and that maybe there’s less help in regards to learning how to select a fabric set than—for instance— learning how to operate your sewing machine. After all, your fabric might not come with instructions or a series of recommendations for other fabrics to blend together into one project!

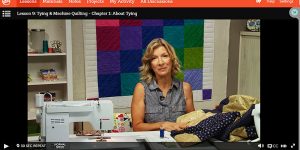
Gail Kesser helps you pick our your fabrics in her Craftsy series.

Gail Kesser helps you pick our your fabrics in her Craftsy series.

Luckily though, you don’t have to be completely alone in the matter! There are certain options for help—like asking friends, particularly ones who are involved with sewing. Likewise, you can find assistance online. Some of the best advice I’ve gotten in regards to picking out quilting fabrics came from a free class on Craftsy.com. The class was called “Piece, Patch, Quilt: Basic Quiltmaking Skills,” and in it, Gail Kesser—the instructor—has an entire section based on fabric selections called “Choosing Your Fabrics.”

In that lesson, Kesser advises the virtual student to choose a “mommy fabric” (Kesser, n.d., Lesson #3), then “walk it around the store” (Kesser, n.d., Lesson #3) to find fabrics that work well with the initial choice. Honestly, I don’t know that there’s better advice when it comes to putting together an entire quilt—or any other project with multiple types of fabric—but I’d like to expand on the overall idea just a bit. Maybe someone reading this post can look at the mentioned video for help, and possibly get a pointer or two from me as well 🙂

So, here are some thoughts to chew on!

Picking out a series of fabrics to use in one cohesive work isn’t about making sure they match in the traditional sense. The situation isn’t like you’re planning an outfit to wear. When deciding on your clothes for the day, you might consider a list of details to make sure everything works together because the result is supposed to match. In the world of sewing, matching isn’t the goal. Complementing is. That idea of complementing can come in the form of sticking with similar colors, or even embracing an overall theme your pieces all agree with, so to speak. As long as it’s a unified idea or connected imagery throughout, you’re good to go!

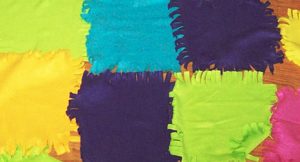
The quilting-for-kids project my niece got for her birthday.

The quilting-for-kids project my niece got for her birthday.

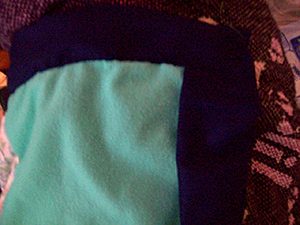
Don’t believe me? Even the people who created this quilting-for-kids project my niece got for her birthday knew that sometimes it isn’t about matching. This design is about complementing, or holding on to one specific theme—like the collection of different colors that my niece can put together!

This concept might seem unimportant, but it isn’t since the distinction is so clear. Think of it this way. If you were picking out an outfit for a typical day, you might not go with a floral pattern top and a polka dot bottom, even if both of them are pink. Why? Because while pink might match pink, the designs don’t match. That disconnect isn’t necessarily okay when putting together an outfit, but when sewing? All you need to do is check out a set of pre-cut shapes to find evidence that the same guidelines don’t apply to the hobby of sewing. All in all, it doesn’t matter if your fabrics match like your outfit would. They can vary in design, and even color, so long as they complement one another in some way.

And that aspect of the situation, my friends, leaves a whole lot of room for exploration and gives you plenty of room to make a design that’s all your own. To be truthful, that detail might be one of my favorite things about quilting and sewing. Whatever I come up with, it’s my design, I made it myself, and no one else likely has one like it. That feeling… That’s an okay thing!
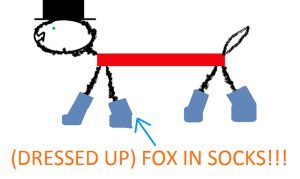
This image is based off of Dr. Seuss’s Fox in Socks, but I didn’t stop with socks! This fox is my “(Dressed Up) Fox in Socks” that was made by taking a general idea, and putting a hat and red attire on him.

This image is based off of Dr. Seuss’s Fox in Socks, but I didn’t stop with socks! This fox is my “(Dressed Up) Fox in Socks” that was made by taking a general idea, and putting a hat and red attire on him.

Anyway, a sewer or a quilter should really take charge in this detail, and maybe push it to unique, individual places. As an example, consider the work of art I created on the Paint program that came with my computer. This image is based off of Dr. Seuss’s Fox in Socks, but I didn’t stop with socks! This fox is my “(Dressed Up) Fox in Socks” that was made by taking a general idea, and putting a hat and red attire on him. It started off simple—just socks from the story—and imagination took it further. Disclaimer: I’m not saying this Paint project is actually impressive—just that it shows how a theme can grow with some thought and creativity!

That’s the kind of pushing I’m referring to when picking out fabrics. Consider what you’re going for, find that beginning fabric, and think outside of the box enough to choose those complementary fabrics to create a breathtaking piece of art. Don’t stay with the easy options all the time! Push yourself, because sometimes the unexpected and the outside-of-the-box things can be a whole lot of fun!

This post might be more centered around quilting, but it could be applied to different areas of sewing (or crocheting, or knitting…) that involve material. A purse that’s going to have more than one fabric, for example, could be planned out with the same guidelines. Any time you’re blending fabrics together, think it through to come up with a cohesive, beautiful work. Complement those designs and colors, or stick to a theme from start to finish. Either way, your work would come out cohesive with your final product being a one-of-a-kind gem that’s beautiful and looks just as put together as a well-planned outfit—just with different rules!

Reference:
Kesser, G. (n.d.) “Piece, Patch, Quilt: Basic Quiltmaking Skills.” Craftsy.com. Retrieved from www.craftsy.com/project/course/piece-patch-quilt-quiltmaking-skills/369
Methods to Conquer Half-Square Triangles (HSTs)

Methods to Conquer Half-Square Triangles (HSTs)

If you plan on diving into the world of quilting, you will soon run head first into half-square triangles, or HSTs in common quilting parlance.

These deceptively simple looking squares can be arranged innumerable ways to make an unending canvas of lovely. When you decide to tackle HSTs you are going to need figure out the best method for you. The most important thing to understand about HSTs is the math behind the size you want. This post does not cover that math. There are many, many charts available online to help you figure out what size triangles & squares to cut and sew in order to get the finished size you want.

Once you know your math, you’ll need to figure out your method. Here are a few to consider:

1. Tried and true

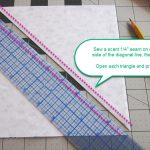
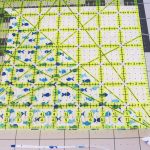
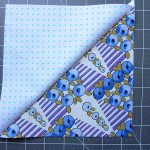
The most basic way for creating a HST is taking two squares of fabric, placing them right-sides-together (RST), drawing a line down the diagonal, and then sewing a scant ¼” on either side of the link. Cut the fabric along the center diagonal line, open and press.

Square that puppy up and before you know it…

…voilà, lovely HSTs, just for you.

Works best: when you need to only do a few HSTs or when each HST you need to do is unique.

2. Make the Magic 8

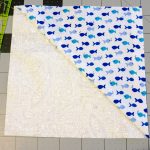
When I sewed these together both squares were evenly on top of each other.

When I sewed these together both squares were evenly on top of each other.

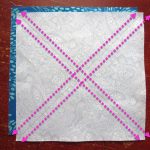
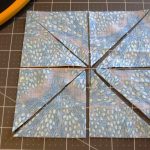
As soon as you see the visual on this you’ll get why they call it magic. Take two large squares, right sides together and draw lines down each diagonal. Sew a scant ¼” on both sides of each line for a total of 4 seams.

Start by cutting first along the two diagonal lines.

Start by cutting first along the two diagonal lines.

(For this tutorial I placed the two squares off center to show you the two fabrics. When I sewed these together both squares were evenly on top of each other.)

Carefully start cutting. Start by cutting first along the two diagonal lines.

Next cut down the center line of each side of the square.

Next cut down the center line of each side of the square.

Next cut down the center line of each side of the square. This will give you your magic 8!

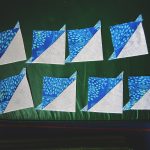
8 lovely matching HSTs

8 lovely matching HSTs

You’ll need to open, press, and square them up, but in no time flat you’ll have 8 lovely matching HSTs.

Works best: when you need more than a few. Some people can really churn out a lot of HSTs this way. If you have a bunch you need to make with the same fabrics, try this method.

3. Tube Method (Tube Quilting)

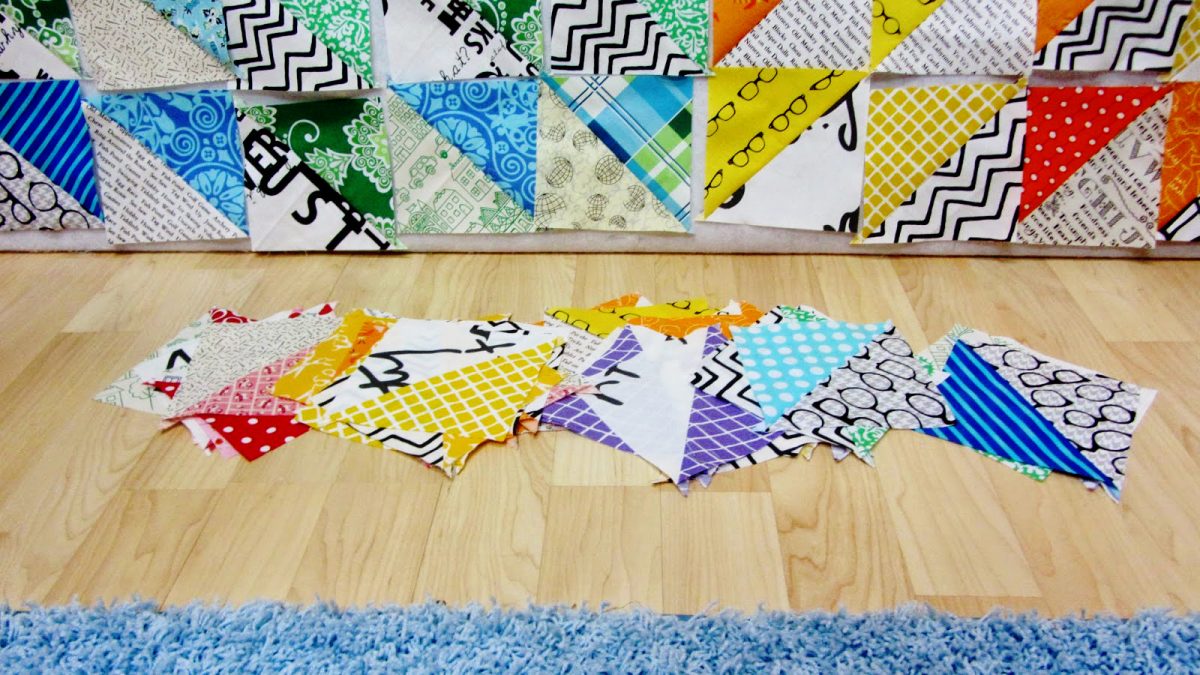
Use your ruler to cut out the size triangle you need.

Use your ruler to cut out the size triangle you need.

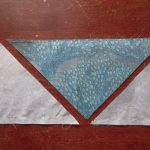
Sew two long strips together on the top and bottom edges. Then use your ruler to cut out the size triangle you need. Here I’ve shown you the tube I sewed and the triangles I cut (I flipped the top triangles over to show you the contrasting fabric).

Works best: when you need multiples of the same type of HST, this method is a production machine!
Note: it really helps to have the exact sized ruler you’ll need for cutting out the triangles.

4. Sewn Strips (Bias Strips)

Create a massive amount of HSTs in a short time!

Create a massive amount of HSTs in a short time!

I found this the most challenging of all the techniques I’ve tried, but I’ve never been pro at cutting on the bias. There is incredible potential here, however, to create a massive amount of HSTs in a short time so I’m keeping this method tucked away for the next time I want to attempt it.

The concept is simple: take two large pieces of fabric and place them RST. Cut the fabric into bias strips (in the correct size you’ll need) and then sew the alternating colors together to create two pieces of fabric with bias strips in the colors you need.

If you did your math right, you can then cut strips of fabric that will have the HSTs already sewn together. As you can see above, I completely botched the math on this, but you live and you learn and like I said, POTENTIAL. This method has so much potential if I can just get right next time.

Works Best: when you need to make HSTs on a massive scale.
Note: take your time to get the measurements just right. If not, you’ll have a whole lot of messed up fabric on your hands. Additionally, there is fabric waste as you cut out the squares. Make sure to account for that when you buy the amount you may need.

Sew the Square

Sew the Square

5. Jenny Doan Method (Sew the Square)

I’m not sure if this method has an official name but I know it has become popularized by Jenny Doan of the Missouri Quilt Company. I consider this a cousin to the Magic 8 method. Perhaps we could even call it the Magic 4.

The Magic 4!

The Magic 4!

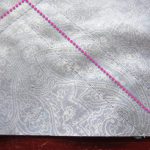
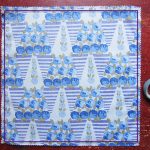
Take two pieces of fabric RST and sew a scant ¼” hem all the way around.

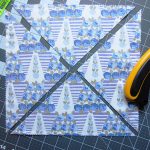
Carefully cut down the diagonals of the square and you’ll get four perfect HSTs.

You get four perfect HSTs.

You get four perfect HSTs.

Works best: this is a quick and easy method that could be easily mass produced especially when using pre-cuts.
Note: some don’t like this method means you are working on the bias. I haven’t found this to be a problem. Press carefully when you iron sew your HSTs together, without unnecessary stress or tugging, and you’ll be fine.

I hope you’ve found these methods useful. How about you? Do you use one of these methods already or do you have a different technique you prefer? Let us know in the comments!

Charlotte Kaufman is a writer and sewist in San Diego, California. She specializes in marine and home interiors and continues to fall more and more in love with quilting. You can follow her at charlottekaufman.com

Blending Interests with Hobbies

Last time, I wrote about the art bug biting, and I’d like to continue with that theme this week. Why? Because when he does bite, it’s relevant to uncover what form of the virus you were infected with, and any particular interest you can bring into that hobby or artistic area.

Everyone isn’t involved with every artistic pursuit just because he or she was bitten by said art bug. Whereas one person might be a wonderful painter, another might excel at photography. One person who is awesome at sketching might be terrible at music, while a musician might not be able to draw a believable landscape. For this post, I’ll refer to this as the Artistic Division of Labor, or ADOL. Sound good? Okay!

ADOL can be driven by skill, in that someone might simply have a talent for a specific division. Maybe someone has been good at sculpting since his or her Play-Doh years, and that skill has grown in the years that followed. If such is the case, it wouldn’t be too surprising to find that said person was well-known among family and friends for that ability.

In other situations, eventual interest might lead to artistic pursuits, and that interest might be something a person has to explore to define. If that doesn’t make sense, hang on! I’m about to give you a real-world example—from my own life!

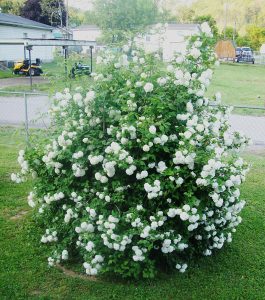
The inspirational snowball bush. So many flowers!

The inspirational snowball bush. So many flowers!

I remember picking flowers when I was younger, though they were admittedly mostly (if not completely) wildflowers. As far as actual gardening goes, one or two of the adults close to me at the time had some kind of flowers planted in a more deliberate fashion than renegade weeds springing up. Even now, my mom has this snowball bush in her front yard, which is flower-ish enough to make this post, and pretty enough when it’s in-bloom to catch my interest. Either way—whether wild or chosen—flowers were a part of my childhood, and I decided I was going to try my hand at flower gardening not too long ago. I got flowers from a store, planted them, watered them, and let them grow. And they were doing okay!

But I eventually realized I wasn’t interested enough in the gardening prospect to tend to it as much as a garden should ideally be cared for. Honestly, I don’t know that I watered the flowers at all after that initial amount, and there was little to no chance I was going to trim weeds away from them. At some point, I was told the weeds around them were moving—something that could be bad when you live in territory that has copperheads and rattlesnakes—so goodbye, flowers.

So far, what this situation amounts to is that I had a childhood interest that became an artsy pursuit I actually had the ability to see through, but didn’t have the focus to continue. The result of this predicament might seem simple: I could just give up on my flower-interest and try other ideas for artistic endeavors. The trouble though is that I still like flowers, even if I don’t have the desire to keep a garden healthy and catered to.

A possible solution then would be more along the lines of what I said earlier in this post. I could explore the topic to see if there was any flower-related ADOL that could hold my interest.

As I said in last week’s post, I tried my hand at floral arranging, and that was a fairly decent win for me. Overall, it was an ADOL I was kind of okay at, and one that could hold my interest enough to keep me involved with it. The idea has led into constructing floral arrangements for display outside of the house, as well as around-the-house projects that catch my eye. For instance, a broken down lamp could potentially use a little prettying up!

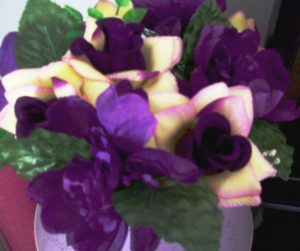
Is that a busted lamp? Or a new vase...

Is that a busted lamp? Or a new vase…

But that’s a pretty specific category, and if flowers are a particular interest of mine, that idea could surface in an ADOL that isn’t specifically built around floral arrangements and gardening. And they have! In fact, flowers have become a part of two of my primary ADOL pursuits: writing, and sewing/quilting. With writing, more than one set of lyrics I’ve written has incorporated flower and/or garden themes, including a song that a character of mine sings to his girl in Emblazed.

More than one set of lyrics I’ve written has incorporated flower and/or garden themes.

More than one set of lyrics I’ve written has incorporated flower and/or garden themes.

More importantly for this blog, floral options are available in sewing/quilting patterns, and of course there’s a number of fabrics that a person can buy with floral designs—which is okay with me! In fact, my current quilting project has had a floral arrangement design to it, in that every piece that’s been sewn on it so far has been a pattern that has some form of floral quality to it. The overall design, when all is said and done, will be floral-related from top to bottom (minus a potential border and back-overlap).

My current quilting project has had a floral arrangement design to it.

My current quilting project has had a floral arrangement design to it.

All in all, I may not have had the focus or interest to keep a flower garden going, but the world of art is so vast that there are plenty of ADOLs out there to try, and enough room to explore within each to come up with ways to utilize interests that maybe weren’t committed enough to make into their own hobbies.

Bottom line: If you’ve been bitten by the art bug, explore to find your ADOLs, and you can find ways to bring your interests into those ADOLs — even if they seem more fitting for another. For the flower-admirer who doesn’t garden, paint pictures! Make floral quilts! Do floral arrangements! Sculpt a flower! There are options to blend your interests into your art, if you look for them!
Sewing for Myself, a Quilt for Me

Sewing for Myself, a Quilt for Me

Our December 2015 hand-made teacher gifts.

Our December 2015 hand-made teacher gifts.

Last December I found myself in the midst of a flurry of handmade gifts. I fussy cut fabric for 12 teacher presents and I laid out the plans for two quilts, one each for friends expecting babies.

When the holidays were over I took stock of both my fabric stash and my sanity and knew it was time to do something different. This time, no matter how long it took to finish, I was going to create something entirely for myself.

A few of the quilts that inspired my own. Images via Quilt for Keeps, Quilting is my Therapy, and Quilter’s Pastiche.

A few of the quilts that inspired my own. Images via Quilt for Keeps, Quilting is my Therapy, and Quilter’s Pastiche.

At the start of the New Year, in between raising my daughters, working part-time, being a friend, wife, and volunteer, I slowly brought to life a quilt that had been rumbling around in my head for ages. I’ve been salivating over quilts with negative space and dark background fabric.

Using my talent to treat myself is something I plan to try more often.

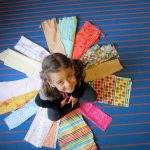
Five year old, C, sits center circle in the order of fabrics arranged solely by her.

Five year old, C, sits center circle in the order of fabrics arranged solely by her.

Out came my horded cache of cheery orange, yellow, pink, and blue fabric. I even engaged my oldest daughter, C, in the project, thus achieving both quality time spent with my kid while working on a project meant for me. C helped me pick all the fabrics for the giant star and then chose their side-by-side placement.

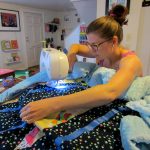
I do my home sewing on a Brother CS-6000i.

I do my home sewing on a Brother CS-6000i.

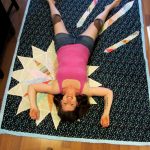
It took me six months of grabbing the time here and there, but finally, after a dozen or more hours, I manifested my dream into a reality. The final result is what I call the Starlight Quilt. It measures 66×89 and is backed with blue minky dot fabric. The main fabric is Floret in Turquoise by Aneela Honey for Cloud 9’s Vignette line. The star itself and its rays are pieced together with a mix of fabrics I’ve been hording and scraps that were too beautiful to let go.

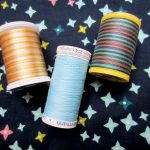
Spools of thread.Using my talent to treat myself is something I plan to try more often. The pleasure people get from receiving a hand-made gift was something almost novel when reflected back towards me. I’m re-energized now to finish my current works in progress if only to pass that feeling onto someone I love and care about. There is also the sentiment of a job well done and a heady sense of completion.

Now when I sleep, I have a small treasure of my own handiwork.I can go back to my usually scheduled program, of devoting time and energy to sewing gifts for friends and family. But now when I sleep, I have a small treasure of my own handiwork. For a brief moment, the expensive spools of variegated thread and the swaths of luxurious minky were spent on me. How about you? When was the last time you sewed for yourself? If you can’t remember when, then now is the perfect time to start.

Charlotte Kaufman is a writer and sewist in San Diego, California. She specializes in marine and home interiors and continues to fall more and more in love with quilting. You can follow her at charlottekaufman.com.
The Final Touches (And Reinforced Lessons)

The Final Touches (And Reinforced Lessons)

Remember on my last blog post when I proclaimed that sewing isn’t baking? In the latest stages of my quilt, I’ve once again found myself facing similar details and thoughts as the ones I experienced earlier. Why? Because — as I said before — guesstimations and “until-it-looks-right” attitudes don’t necessarily spill over from the kitchen to the sewing area.

My homemade backing.

My homemade backing.

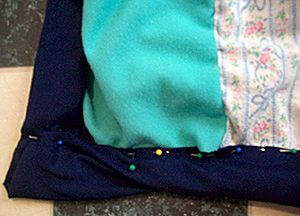
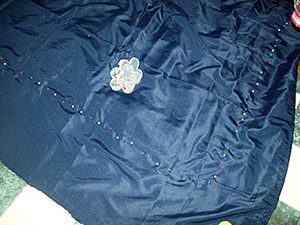
You see, I completed all the main lines of a nearly-finished quilt. What that meant, to me, was that it was time to sew on some kind of backing. My tactic for doing so? Getting a flat sheet, cutting it *very* generically around the exterior of the quilt, and trying to fold the excess material down in an appealing manner for the outer edges of the quilt. I ended up with a mess that looked something like this:

Not good, right? And I couldn’t seem to fix the issue with the backing/quilt this way. Whenever I would try to re-pin something so that the massive/slanted corner was more size-and-style-similar to the line leading up to it, the material would twist unpleasantly (like you can see). This blatant issue led me to undoing most of my pin-and-sew work connecting the backing to the actual quilt, in hopes that the lines and corners would better match up.

The process this go-round was a bit more precise, in that the original wrinkles in the sheet had fallen out, and the overall quilt was more carefully positioned under the sheet for more accurate results. That’s right. Under the sheet. Rather than focusing on exactly where the backing would overlap on the front, I concerned myself with making sure that the back portion was somewhat smooth against the quilt blocks. My rationale was that if I could get that territory as it should be, I could flip it over and fold over the ends with more confidence that what I couldn’t see on the back was proficient enough to allow my focus to safely fall on what I could see. Basically, if the backing was smooth, I could do things, like better decide how much material needed to be beyond the quilt blocks to fold over and work with, without worrying so much that the material on the underside was bunched or wrong in some way:

Pins, pins and more pins!

Pins, pins and more pins!

Once I flipped it over, I cut off a bit of the backing material, and I took out the pins from one side (and admittedly—accidentally—a number more!). Some of the quilt had already been sewn (I’m currently thinking of redoing that section, by the way), but beyond that stopping point, I could fold over the excess material, tuck it under itself, and pin it back down so it would create a more pleasing line and corner:

Progress is progress for an early quilter, right?

Progress is progress for an early quilter, right?

Perfect? Eh. But progress is progress for an early quilter, right? And, perfect or not, this strategy seems to have helped.

Still, knowing if the strategy will prove effective throughout the rest of the process might be something I judge later. After all, I’m less than one line into it, and there are over three sides to go (not to mention inner attachments).

In any event, this particular dilemma has led me to another tactic in learning to quilt better, and that’s to look for answers online. I’ve looked at a quilting video before, but a number of things that I’ve attempted to do are details I could’ve found assistance for online. There are charts, for instance, about how big to cut blocks, or how large a certain size of quilt should be. I might’ve literally been the girl who measured a bed with measuring tape (not sewing tape!) to see how big I should make a quilt, which I wouldn’t have had to do if I’d looked at a chart! I wouldn’t be too surprised if I took more of my sewing/quilting concerns online to try and find answers for them in the future!

Hopefully, this quilt will be finished soon, and I’ll be able to move on to another project with the skills and lessons I’ve learned up to this point. And maybe one day, I can become the quilter I want to be!

Quitling is Not Baking

Quilting Is Not Baking

My mom was the type of cook who didn’t accurately measure ingredients, and to this day, if you ask her how much of an ingredient to put in food, she might say something like, “Until it looks like enough.”

Be exact. The “it’s good enough” mentality I might’ve had for baking doesn’t spill over so well into the world of sewing.I don’t always accurately measure things in the kitchen either. I might use a coffee cup when the recipe calls for a cup, but even then, I’ve been known to eye-ball the food and decide it needs more. I put baked goods in still pre-heating ovens, guesstimate about time, and haven’t owned a measuring cup or spoon in my adult life that I can recall.

This is how I bake, and I’ve come up with some tasty sweets.

This is, to some extent, how I’ve tried quilting, and the results are evidence of the title of this post.

Quilting is not baking…

I’m a bit of an amateur in the quilting/sewing department. I’m working on my second quilt (third if you count that one atrocity I never finished), and my overall products have been somewhat lacking.

Even with missing the mark on projects though, I still learned. As it turns out, a number of things I’ve learned for quilting are in opposition to habits that worked fine in my baking. See? It’s not baking!

My first quilt.

My first quilt.

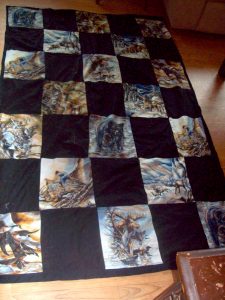
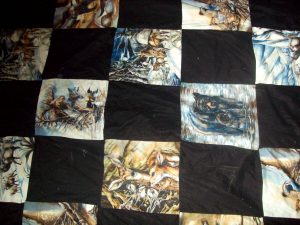
1) Less can be more. I’m not saying smaller quilts are better than bigger quilts, but — let’s connect this food-thing again — “portions” can be too big, and ruin the effect. For baking, if I put in too many ingredients, I might just get more cookies. Who doesn’t love more cookies? For quilting, if the sizing is too big, the best I can do is something that looks amateurish. Like my first quilt:

I hesitate to definitively label this a quilt because it’s so simplistic. The design made sense here, since the animal print was from a fabric I cut up, but imagine how much better this quilt could’ve looked if the panels on that fabric had been smaller. It still might’ve been lacking — hey, it was my first finished one! — but that smaller size of each block could’ve made the overall appearance more refined.

My latest quilt.

My latest quilt.

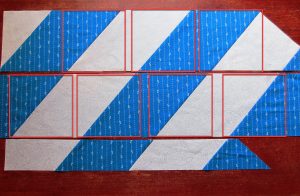
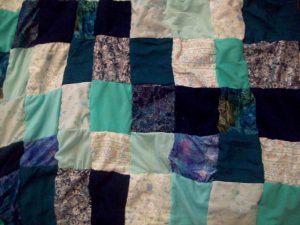
2) Be exact. The “it’s good enough” mentality I might’ve had for baking doesn’t spill over so well into the world of sewing. Want to see an example? Here’s part of what I have so far with my latest quilt:

These shapes were not all cut in the same sizes. Instead, my system was more general—like “it’s good enough” with baking. Spotting places where this work has issues isn’t too hard. Blocks are different sizes, and I’m not entirely sure the middle rows aren’t smaller than the ends. A reason these problems could’ve happened is because I wasn’t exact with my measurements. Here’s another example of the same flaw:

Crooked corners, but a great learning experience!

Crooked corners, but a great learning experience!

See how the corners don’t line up? Oops! Not good! More accurate measuring could’ve kept this from happening.

3) Have the right tools. I might not have measuring cups and spoons. I might not even use an oven mitt. And my baking could still turn out okay. But what I’ve discovered is that tools might be a key in quilting, especially for an early quilter/sewer like me, and I should look into equipping myself with utensils for the job. Currently, I want a rotary cutter and ruler. With those, getting the right measurements could be easier, which could in turn make my final products look more refined.

4) Have a plan. Going into the kitchen and deciding I’m going to experiment with ingredients might be fine. I’ve done that. And I got some pretty tasty banana cake out of the deal. But if I go into a quilt project without a plan, things could go wrong. For my latest quilt, I changed my technique for sewing after I’d started, which caused some let-downs. My quilt is smaller than I intended, holes showed up in my fabric, and my final row of material might’ve been decided by the fact that I didn’t have enough pieces of certain materials to continue my pattern (which I slightly messed up anyway). Basically, with quilting, I should potentially map out my strategy from start to finish. Otherwise, tasty banana cake might not be the end result.

Hopefully, I’ll learn from my mistakes though, and maybe someone else can, too! Like with just about anything, practice can lead to improvement.