French Alterations and a Wee Rant

French Alterations and a Wee Rant

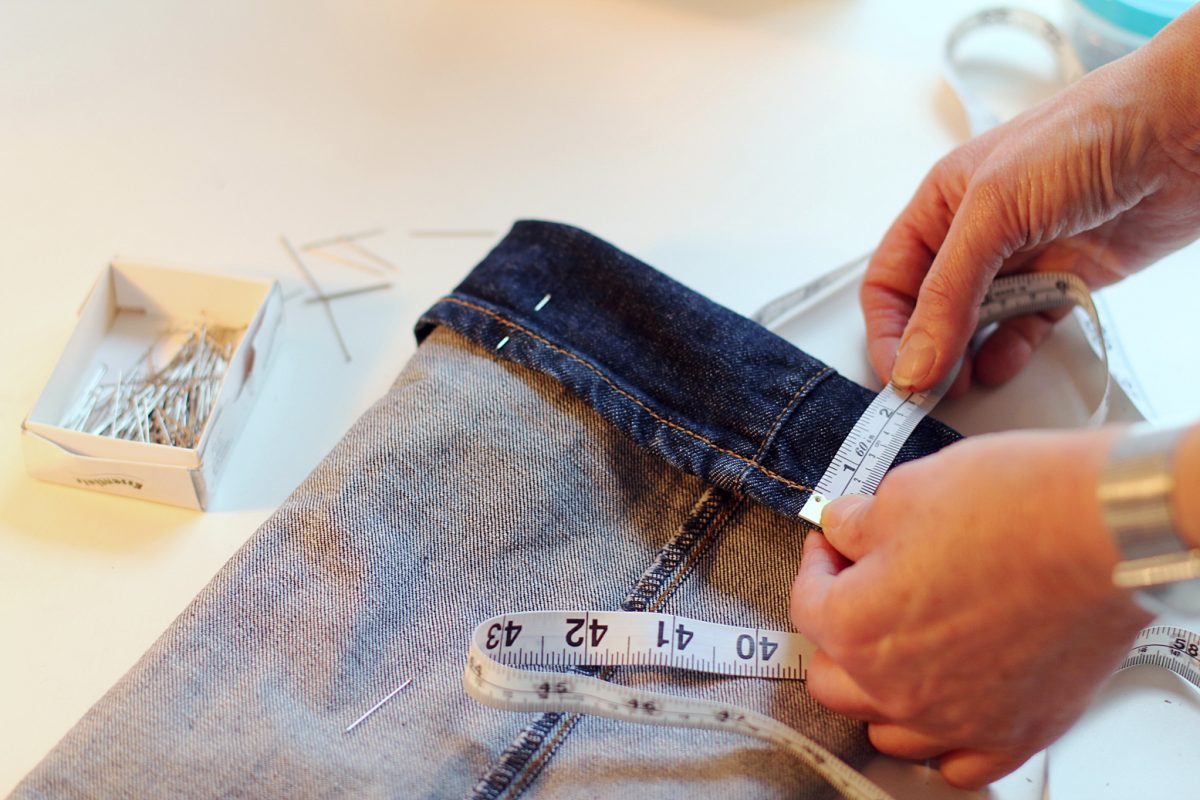
French Alteration: Pinning a garment with a note about something you never intend to actually do – and no one ever knows or realizes!

At this point in my tailoring and patternmaking career, I tend to work with the same five or six designers. Mainly, because I enjoy working with them and our fitting styles and fitting room etiquette mesh.

“Fitting styles and fitting room etiquette?” you might ask, “I didn’t know that was a thing.”

Well, when it comes to TV and film fitting rooms, it is definitely a thing. I prefer to work with designers I know and respect because they, in turn, know and respect me. And, most importantly, they let me do my job. Which is to fit a garment on a specific person’s body.

Take it in

My fitting style is to survey the situation for a few minutes, to let the clothing settle on a person so I can see what it’s doing or what it wants to do. Then I go in and start pinning if I need to. Sometimes, I don’t need to, sometimes I can tell what needs to happen just by looking at it.

On the rare occasions these days when I work with someone who doesn’t know me very well, they often want me to rush right in and start pinning away before I’ve had a chance to actually look at things. Or, one of my big annoyances, they yank in the center back waist of a thing so the side seams are pulled all wonky and tell me I need to “take it in”.

Well, yes, it does need to be taken in, but not like that.

Fit preference

Sometimes they’ll even do this to a jacket without buttoning the front buttons, which means if I did take it in the amount they’ve grabbed, the jacket would never, ever, in a million years, be able to close.

I try to be as nice as possible and say, yes, I see that. Now, can you please let go so I can see what’s going on?

Costume Designers definitely have their own preferences when it comes to fit and hem lengths and stuff. I’m completely ok with that and will fit things how they like them fit but I’m not going to do something that will end up looking bad in the end (and for which, I’ll be the one who is blamed because, as in most things, people tend to blame the last person who touched a thing if something is wrong with said thing).

We tailors have this little term we use called a French Alteration. It’s when you pin something or write a note about something as if you’re going to do it but never actually do and no one ever knows or realizes.

Anyway, so back to fitting room etiquette. If there’s a designer in the room, I let them do all the talking and or schmoozing about how good something looks on someone. I just like to concentrate and do my job. Some tailors like to chat (which is perfectly cool if that’s your thing) but I like to listen to what the clothes are trying to tell me.

Brand fitting

One thing I’ve noticed about some designers is that they don’t always seem to understand that brands are cut differently and certain labels look better on certain people. Sometimes, you need to go through a whole slew of suit jackets to find the one that fits a specific body type the best. I can do pretty much any alteration but after a point its sort of foolish to spend a crazy amount of time altering a thing when you could possibly find a cut of jacket that works with minimal alterations. Like, if you need to shorten the body of a suit jacket, maybe you should buy a short (as in a 40short or something). Men’s suit jackets come in longs, regulars, and shorts for a reason. Use them.

I know I’ve mentioned this before but, one of my favorite designers to work for is Frank Fleming who, among all sorts of other things, is the Costume Designer for the show Power. Frank is the master at finding which suit brand and cut fits best on which actor. He can even usually tell which one is going to be best by just looking at an actor. I love that, ‘cause as much as I enjoy taking a suit jacket sleeve out, re-cutting the back and or shoulders and resetting the sleeve (not really), why not just start with a suit jacket that works on a specific body type and not do that?

I never went to school for costume design so I don’t know if they teach this little idea but, they should. It’s a huge time saver. And it really just makes sense.

The Problem with Over Fitting

The Problem with Over Fitting

In my almost 30 years in the film and television business, I’ve worked with a lot of different designers. Every designer has a specific way they like things to fit, at least in the film and television world. Tailors at men’s suit stores like Brooks Brothers, or department stores like Nordstroms, have standard fit and length parameters they follow.

They’ll tell you that a suit jacket hem must end at a certain point on the wrist and the proper length of the jacket is determined by whether or not you can curl your hand around the hem in a certain way. They’ll also tell you that a pant hem needs to have a specific amount of break over the front of the shoe (the amount the hem buckles in when you’re standing straight up).

In television and film, these things can vary depending on what designer you’re working with. I have five or six different designers I work with fairly regularly and they all have specific ways they want things to fit. I’ve worked with them enough to know what each of them like. One of them likes suit pant hems on the short side but lots and lots of ‘stack’ when it comes to jean hems. Another always wants a rake in the hem because they hate to see an actor’s socks showing in the back when he walks. One likes the shirt sleeves to show a ¼” below the suit jacket. Another tends to want things very slim fitted.

One size fits all

As a tailor, one of the most annoying fit attributes is when a designer wants you to, essentially, over fit something (none of the designers I work with regularly do this). By over fitting I mean, they want me to fit something so tightly that there are absolutely no wrinkles present anywhere at anytime. The main problem with this is that it’s only achievable if the actor or actress happens to be a non-moving, stationary dress form or mannequin. And, as I’m sure you know, most are not.

Actors move, clothing wrinkles. If you fit a dress too tightly, it’s going to ride up at the slightest provocation. If you fit a man’s suit jacket within an inch of its life, the actor won’t be able to lift his arms.

There are a lot of wrinkles I can fix, but I can’t get rid of them all. An over fitted garment looks just as bad on camera as one that isn’t fitted enough. Unless you start putting all kinds of extra seams into a thing, you’ll never be able to get something that isn’t spandex, completely wrinkle free all the time. Wrinkle free-ness is only completely achievable when the actor stands in one specific way and doesn’t move at all, ever.

Oxygen is overrated

I can’t tell you how many times a designer has insisted I take something in so tightly that after it’s done, the actor complains about not being able to breathe. I usually don’t take anything in as much as I pinned in a fitting if I’m working with a designer like this. I honestly find it ridiculous that there are costume designers who don’t understand that when humans move, the clothes they are wearing also move. Sometimes there are wrinkles, and this does not mean that the garment is not fitted correctly.

Stylists who dress people for print or short shoots like commercials tend to fit things more tightly because they’re not used to dressing people for realistic scenarios and situations that involve actual movement.

Stylists who dress people for print or short shoots like commercials tend to fit things more tightly because they’re not used to dressing people for realistic scenarios and situations that involve actual movement.

Stylists who dress people for print or short shoots like commercials tend to fit things more tightly because they’re not used to dressing people for realistic scenarios and situations that involve actual movement. In a photo shoot for print, there is no movement so you can over fit to your heart’s content. That’s why clothing never fits you like it does the model in the catalogue or on the website. And this is not a bad thing.

I’ve also worked with designers who do this thing where they grab a whole wad of fabric center back to demonstrate how something should be taken in. Well, first, when you do that, you’re pulling the side seams into a weird place that they shouldn’t be. Unless its men’s pants, I rarely take something in just from the center back, especially if it’s a wad-full of fabric. One reason is that I like to avoid having to reset the zipper if possible and secondly, it probably needs to come in from the side seams and the side back seams anyway. Or, if it’s four to six inches, it might make sense to purchase the garment in a smaller size. If I were building the garment from scratch, I’d want to recut it if possible.

Stress fractures & signs you are doing it wrong

I don’t know if other people notice this but when I see a dress with side seams that swing backward instead of hanging straight, I think that someone who didn’t really know what they were doing did that alteration. Costume Designers don’t necessarily need to know all the nuances of fit and balance but they should know enough to trust a good tailor when they have one.

Sadly, it normally doesn’t do any good to try and explain yourself to a designer who tends toward over fitting. They’ll just assume you don’t know what you’re talking about.

When I find myself in a situation with a center-back-wad-pulling designer, I just nod and pin it, then alter it in the way I think is best.

Because, as any tailor who’s been in the television and film business for awhile knows, “alter as pinned” is simply a suggestion (and a way to appease an over zealous fitting designer).

Back to School and My First Alteration

Back to School and My First Alteration

It’s the middle of August and, according to the Internet, Back to School time.

It’s the middle of August and, according to the Internet, Back to School time.

I was such a geeky, nerdy kid that I always loved going back to school in the fall. And I always liked autumn clothing better than summer clothing. Probably because I have a soft spot for anything plaid and earth toned, both of which tend to be predominate in fall fashions.

Turn back the clock


I grew up in the 70s and 80s when J. C. Penney and Sears still put out their big book catalogues. I spent hours going through those, ear marking the pages that pictured the clothing items I most wanted. We never actually ordered anything from the catalogues. My mom was a big proponent of in-person shopping. Even to this day, she’s not so keen on ordering things from the internet.

Instead, on a Saturday or Sunday in August, she’d load all four of us kids into the van for a trip to Midway Mall or, if we were feeling fancier, Great Northern Mall. Midway Mall is in Elyria, Ohio and it had a Penney’s and a Sears. (I suspect it still does.) Great Northern Mall is in North Olmstead. We always thought of it as being a bit more high end the Midway Mall though I have no idea if that was true or not. Great Northern had a Penney’s and Sears as well but, it also had a Macy’s.

I would spend hours searching the racks for the garments I had identified in the catalogues, or something as similar as I could find. Then I’d try on a pile of clothing in the dressing room. I always wanted much more than Mom’s budget would allow so then I’d go through a lengthy editing process until my choices added up to what Mom was able to spend. Every year there was one thing I desperately wanted that Mom didn’t want to buy for me because she thought it was too trendy and I’d lose interest in it after a month or two.

Every year there was one thing I desperately wanted that Mom didn’t want to buy for me because she thought it was too trendy and I’d lose interest in it after a month or two.

Every year there was one thing I desperately wanted that Mom didn’t want to buy for me because she thought it was too trendy and I’d lose interest in it after a month or two.

Pin striped adventures

When I was 12 or 13 and in junior high school, I was obsessed with pin striped pants and ties. Mom agreed to buy me one pair of pin striped jeans but told me if I wanted any more, especially the wide legged, pleated pair, I’d have to figure out how to make them myself. As for the ties, she had some old ones from her father I could have.

I had no idea at this time how to go about making a pair of pants. I also didn’t happen to have any pinstriped fabric lying around.

But my Dad did, at least he had some pinstriped pants shoved deep into his closet that he never wore. The pair I liked the most were rust and brown and one Saturday afternoon when both he and my Mom were at work, I extracted them from the closet.

They were, of course, humongous on me but I knew how to sew so I figured I could alter them to fit. I was afraid that someone would come home and stop me mid alteration so I didn’t bother taking anything apart first. I just started adding pleats to the waistband, two to each side that I topstitched all the way down the legs. Then two in the back. I chopped off the hem, unintentionally rendering the pants capri-length. When I put them on, I decided the capri-length made them more fashion-y and I was going to wear them to school the next day.

Zero photo evidence

I wish there was a photo of me in these pants but there is not.

I wish there was a photo of me in these pants but there is not.

I wish there was a photo of me in these pants but there is not. I did put them on Monday morning, along with a brown turtleneck, a brown belt, and my flat brown capezio lace up shoes. The pants were bulky since I hadn’t trimmed any of the fabric out when I altered them and the legs stuck out because of the same but I thought they looked cool. When I walked into the kitchen, my Mom did a double take. She opened her mouth to say something then closed it again. I waited for her to yell at me or, worse yet, to give me the “I’m so disappointed in you” look.

But, instead, she stifled a laugh and said, “Well that explains why there was brown thread all over the sewing room. Next time, you really should trim out some of the excess fabric. That waistband wouldn’t be so bulky then.”

“You’re not mad?” I asked.

I’m not. I’ve been telling your father for years to get rid of those pants. But we should probably ask him if it’s ok.”

And there marked a three or four year period of me altering my father’s 1960s clothing to fit me. My mom was happy that I didn’t ask her to buy me as much at Penney’s and Sears. I was happy that I had clothes that were not like everyone else’s. And my dad was just happy that me repurposing his old trousers gave my mom one less thing to nag him about (my father was never very good at throwing “perfectly good” old items away).

I don’t know what the other kids at school really thought about my vintage dad wardrobe. I was already considered weird before I started donning old pinstriped pants so I suspect it just solidified that sentiment. I am, though, forever thankful to my parents for letting me develop my own little bizarre fashion style, and for encouraging my sewing habit.

Whoever would’ve thought it would turn into a lucrative career.

How to Sew Faster

How to Sew Faster

My job as a tailor on a television show often requires me to complete an alteration in a seemingly impossible amount of time. Not to be overly cocky or self-congratulating but, I can be pretty fast when needed. People frequently ask me how I’m able to do something so quickly.

Don’t hesitate. Just, do.

Honestly, I don’t think so much about it anymore: its pretty much second nature at this point. But, I suppose if I were to break it down, the process would go something like this:

First, don’t panic. Whatever you do, don’t panic. If you do, you could find that suddenly you’re unable to thread a needle, or your needle breaks, or the thread tangles.

Second, don’t hesitate. Just, do.

As you’re working, think about the next step. Plan ahead.

Concentrate fully on what you’re doing. Don’t listen to the conversations going on around you. Pay no mind to whatever random chaos might be happening in another part of the room. Just focus your full attention on the one thing you are doing. That is all that is important.

Whatever you do, don’t thread mark. I know that’s what they teach in sewing school but there is no reason to have to thread mark a pant hem.

A few tips on how to sew faster:

Do as much as you can without stopping to iron.

If I’m really pressed for time, I tend to leave all the ironing until the very end (pun intended).

Learn how to eyeball measurements. Think about it, if you’ve been sewing long enough, you know what a ½” looks like. You honestly do not need to mark every single little line. If you want to measure, go ahead, put use your pins to mark the line. I often work with a metal seam gauge but rarely actually draw a new stitching line. One exception is if I’m re-mitering a suit jacket sleeve corner though I know lots of tailors that do not need to draw that line either.

Whatever you do, don’t thread mark. I know that’s what they teach in sewing school but there is no reason to have to thread mark a pant hem. I once had an additional tailor helping me on a show who insisted on thread marking the fold line on hems for cop pants. Buy some tailor’s chalk and use that to mark your hemline. It’ll disappear when ironed.

Unless you’re topstitching, you really don’t have to have your thread match exactly. Believe me. Whatever thread is in your machine is just fine. I cannot begin to tell you how many black garments I’ve altered quickly with red or yellow or whatever happened to be in the machine colored thread.

Learn how to undo a chain stitch. A lot of manufacturers use chain stitches in clothing construction. This makes it super easy to take them apart when needed. You can only unravel a chain stitch in one direction, the direction it was sewn in. Most of the time, all you need to do is insert a seam ripper and pull in that direction and all the stitching will come undone. The center back seam of men’s pants, often will have two rows of stitching so you’ll need to pull each row separately.

A couple other seam deconstruction tips:

To take apart a serged seam, use a nice sharp seam ripper and run it through the threads that wraps around the edge of a seam. After you do this, the rest of the threads will usually come apart rather quickly. Some serged seams are on a chain as well and you can undo them by pulling the thread on the straight stitch.

One of the fastest ways of taking apart a seam is to, again, use an extremely sharp seam ripper and insert it into the seam from the right side and just pull upwards through the seam. This technique takes a bit of practice (and bravery) though as the potential to accidentally slice through the fabric is ever present. There’s a knack to getting the angle of the seam ripper just right though and once you figure that out, you’re golden.

In the end, the one sure way of becoming a faster tailor is by practice. The more often you repeat the same task, the more efficient at it you become.

As you do an alteration, try to think of ways you could save time: do you really need to flip everything back right side out then inside out then right side out again? Probably not. If you sew this first, will it make it easier to sew this? Or visa versa? Experiment and try things multiple ways until you’ve figured out the quickest sequence of steps for yourself.

I love discovering a new, faster way of doing something I’ve done a million times. Sewing is kind of cool like that: there’s always something more to learn and fresh tactics to uncover.

Funky Design Details in Men's Shirts

Funky Design Details in Men’s Shirts

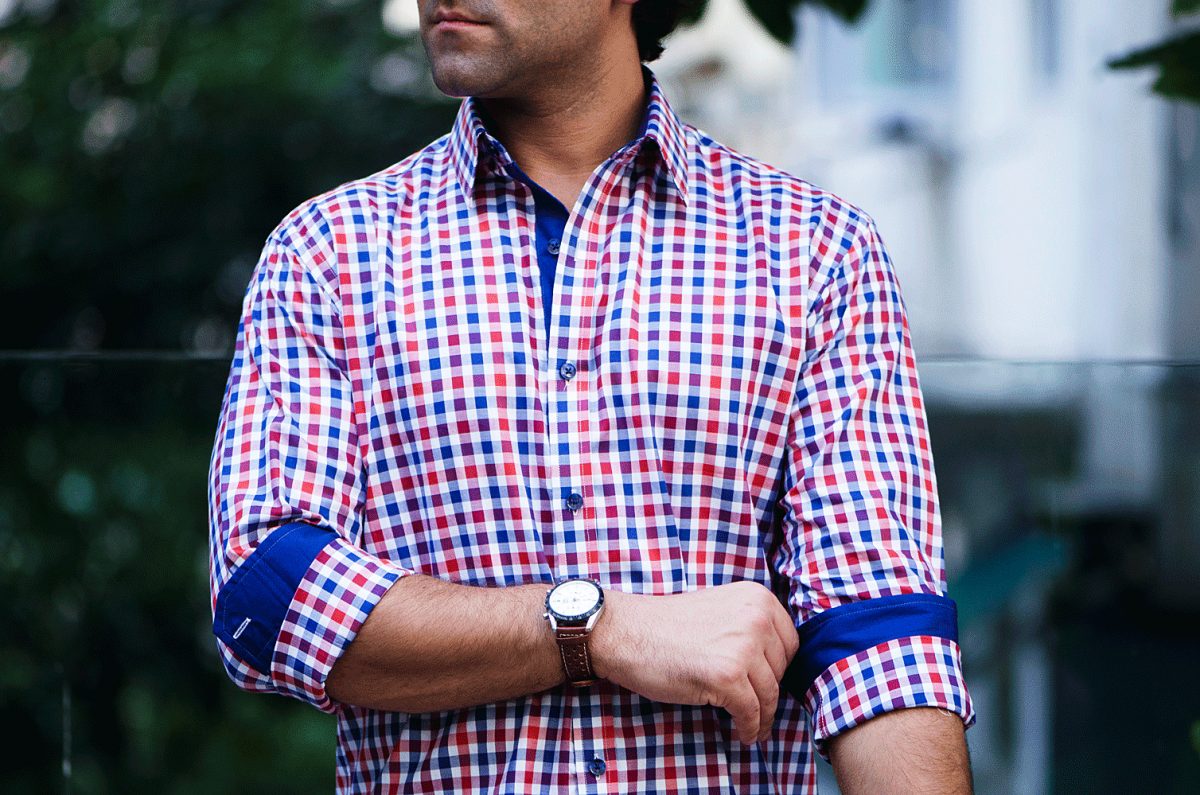
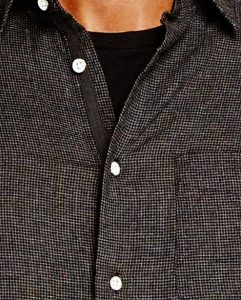
I alter a lot of men’s long sleeve button front shirts at work. We use a variety of brands, each of which usually has its own little signature detail or cut. I can often tell what designer brand a shirt is without having to look at the tag.

I suppose, though, that as a designer at Rag & Bone or Varvatos, or Paul Smith, or the like, you can find yourself hard pressed to come up with some new, unique detail that makes your shirt special. Contrasting fabric on collars and cuffs has been done, funky buttons have been done.

Sleeve and center front plackets in a different fabric: done. Welt breast pockets. Done. Stand collars, unfinished seams, all of it, has been done. At times, I think there isn’t anything new left to do. I was pretty sure I’d seen it all when it came to cool, weird, and even sometimes bizarre design details on mens shirts.

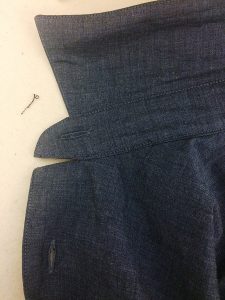
Varvatos shirt showing collar stand unattached from shirt body.

Varvatos shirt showing collar stand unattached from shirt body.

But, John Varvatos proved me wrong. The newest feature on their long sleeve button front shirts is to leave the part of the collar stand that contains the button – you know, the portion that extends past the collar and is, essentially the center front overlap – unattached from the shirt body. Odd, because, if the shirt is buttoned, it really doesn’t look any different. And if the shirt isn’t buttoned, it kind of looks like a rip or tear.

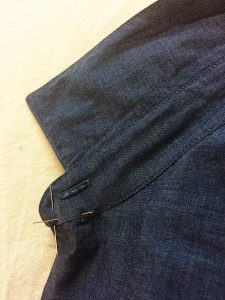
Varvatos shirt with collar stand pinned and ready to sew.

Varvatos shirt with collar stand pinned and ready to sew.

I spent some time last week sewing collar stands to shirt fronts. I do, though, have to give the designers at Varvatos kudos for coming up with something I hadn’t seen before. It also ensures that, in the future when I see that particular detail, I will automatically know it’s a Varvatos shirt. So, good job on the branding. 🙂

To do list

While I’m on the subject, here’s a short list of design (or construction) element quirks that tend to be slightly annoying to film and television customers.

Rag & Bone with their painted white buttons.

Rag & Bone with their painted white buttons.

Rag & Bone and their painted white buttons.

They put the same painted white buttons on most every shirt. The buttons are kind of cool in a shabby chic-look-at-me kind of way but, the last thing you want when filming are shirt buttons that upstage the person wearing the shirt.

I’ve wasted many an afternoon, replacing those buttons with normal, non-descript ones.

Brooks Brothers and the glue they insist on using in their seams.

Taking apart a Brooks Brothers shirt is no quick and easy task – the stitches are miniscule and, as if that’s no enough, they use some sort of glue in their flat felled seams.

Ralph Lauren Polo.

Ralph Lauren Polo.

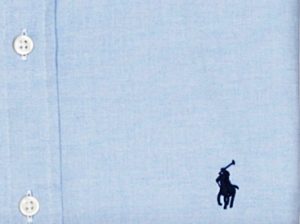
Ralph Lauren and the polo horse logo.

We’re rarely able to use any piece of clothing on a film or television show with an obvious logo for legal reasons. Most shows need clearance to use anything that clearly advertises a particular brand.

I can tell you that removing those cute little polo horses takes a really long time.

Any shirt that says it’s a ‘slim fit’ yet still has a back pleat.

I think I’ve written before about removing the back pleat (or pleats) in button front shirts. These are the pleats in the shirt body where it joins the yoke. They exist to add a good amount of ease to the shirt through the body. The only thing is, in the world of film and television they just end up looking bulky, a bit messy, and definitely not slimming. So I take them out. If I have the time, I usually take the entire back off and recut it, moving the armseye and side seams in the appropriate amount. If it’s a quick and dirty thing, I just throw some side back darts in and hope there isn’t a close up of the actor’s back.

That’s all I’ve got today though I’m sure there are more. I’ve got to get some sewing done now.

There’s a pile of Varvatos shirts on my table that need the collar stand stitched to the shirt body.

Spicing It Up! DIY Skirt Alteration

Sometimes, there are things in life that are pretty fantastic, but a bit of extra effort could make them even more so. That mentality can lead to furthering an education or moving to a different city…

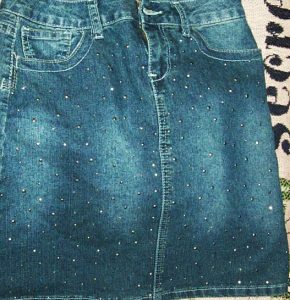
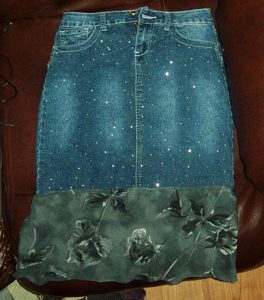
This skirt belongs to one of the nieces & the sparkly glam is enough to make me jealous!

This skirt belongs to one of the nieces & the sparkly glam is enough to make me jealous!

Or adding fabrics. What looks remarkable in and of itself can take on a whole new level of beauty with a bit of thought or creativity. Example? This skirt. It belongs to one of the nieces, and the sparkly prettiness is enough to make me jealous that I don’t have a skirt like this one. What I do have though is material from my own clothing that zipper-made holes ruined, and the color scheme was kind of perfect to go along with the niece’s pretty, sparkly skirt.

Well, there was no sense in throwing away usable material that could be a sewing project, right? This might or might not have been my logic before diving into said project.

So, let’s break this down, shall we?

Let’s begin! Step-by-Step

The mission: Use the zippered-up material on the already wonderful and sparkly skirt.

The process: Simple, but effective!

Step 1: Cut the zippered-up material into usable pieces. To do this, I first cut away the zipper territory, then cut along the clothing’s seam. That seam was easier to follow than an imagined line, so there was less chance of me getting waaaaay off in my cutting. The results weren’t small enough to use at this point, but they were flat enough to help me gauge what I needed to do for the future.

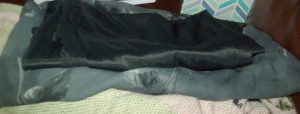
Cut off the underlining black fabric from my ripper-ruined clothing.

Cut off the underlining black fabric from my ripper-ruined clothing.

Step 2: Cut off the underlining black fabric from my ripper-ruined clothing. This way, it was completely separate from the pattern I wanted to use, and it was handy for an underlining detail for the skirt. Win/win, right?

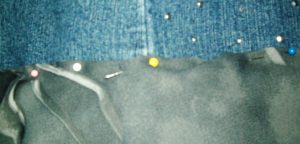
Step 3: Pin the underlining material to the skirt using straight pins. Luckily, it didn’t matter (since I didn’t think about it) if the line from my sewing matched to any line in the skirt because the floral pattern would cover it anyway. I just needed to make sure I stayed in the vicinity of the skirt’s already-present hem in order to not go so off-base with my sewing that the end result looked crooked.

Step 4: Hem the underlining fabric and make sure it came together when it needed to overlap at the end of its line. Again, it’s a good thing no one is supposed to see this piece of material because the section I used needed an extra piece sewn on to make it all the way around. That random addition might stick out, but who knows if I don’t tell them, right? Hey! You live and learn! I also made sure to cut away extra bits of material after I’d sewn so that there wasn’t excess falling well below the hem I’d created.

Step 5: Move on to the patterned fabric! After I looked over my options with the material I had, I decided on the piece that was at the bottom of the underlining black material so I could make use of the manufactured hem of the fabric. In addition, the material would already be set up for equal enough proportions since it began and ended in generally the same way from start to finish. All I needed to do was follow the same lines of the material to get a decent look for the skirt.

It's time to straight pin the skirt!

It’s time to straight pin the skirt!

Step 6: Once I’d selected the fabric I would use, it was time to straight pin it to the skirt! I kept it loose enough that the skirt didn’t bunch (if you pin it too tightly, you might end up with a pinched look you don’t care for) and made sure the fabric was being sewn above the underlining material. I also considered, this round, where my seam would be since A) I actually remembered, and B) it mattered since people would be able to see it. While the seam isn’t in exact line with the skirt’s side seam, at least it didn’t randomly show up in the front or something!

Almost there…

The final step of the process!

The final step of the process!

Step 7: Sew along the general area of those straight pins, and to piece together the floral fabric itself at the right moment when the sides would overlap. I did, however, have to make sure that the edges at the very bottom of that overlap would even out by adding a small hem. Since the overall hem was already there from the original clothing’s design though, that would be the final step of the process!

And, there you go! A pretty, sparkly skirt that has been upgraded into a pretty, sparkly skirt with matching material as an accessory!

What do you think?

I Didn’t Think It Would Look Like This

I Didn’t Think It Would Look Like This

Oops!We’ve all been there. You spend hours, days even, working on a sewing project. In your mind, you’ve got this image in your head of the gorgeous completed project, but when it’s finally done it doesn’t look anything like you thought it would. You thought it would be a simple one, so you didn’t bother with a muslin mock up, but it’s not at all what you expected or wanted. So now what?

Grumble

If you’re like me, you spend a fair amount of time grumbling and cursing about the “messed up” project or worrying about what you’re going to wear to the event instead. This is helpful short-term. It lets off the stress and and can be cathartic, but it doesn’t really solve anything.

Alter

Once you’ve finished grumbling and worrying, try the piece on again. Take a careful look at the seams. Can you alter them to change the fit so it’ll more closely match your vision? Maybe adding some darts or a tuck at the waist would help?

Accessorize

Often the picture on the front of the pattern package shows people wearing shoes or jewelry. Can you add your own accessories or shoes to make the item more closely match your imagined outcome? Maybe a shawl or scarf would help?

Change it Up

Sometimes, when choosing a fabric, you might choose one that turns out not to flow the expected when it’s all sewn up. In these cases, rather than remaking the entire project, add sections of another fabric in areas that will help the flow. It’s nerve wracking to cut apart a completed project, but since you’re not going to wear it the way it is anyway you don’t have much to lose.

Embellish It

Try adding a little pizazz to change the look of your sewing project. Patches, lace work, embroidery, beading, or other fancy details can completely alter the look of your project and provide it with a touch of class or color that may help it more closely match the vision in your head.

Combine It

Depending on how different your vision is from the completed project, combining two or more of these techniques may be necessary. In most cases, though, it’s possible to save the project and make it work for you – sometimes in ways you didn’t expect.

What other techniques have you tried to make your project work?