Picasso Products for Sewing

Picasso Products for Sewing

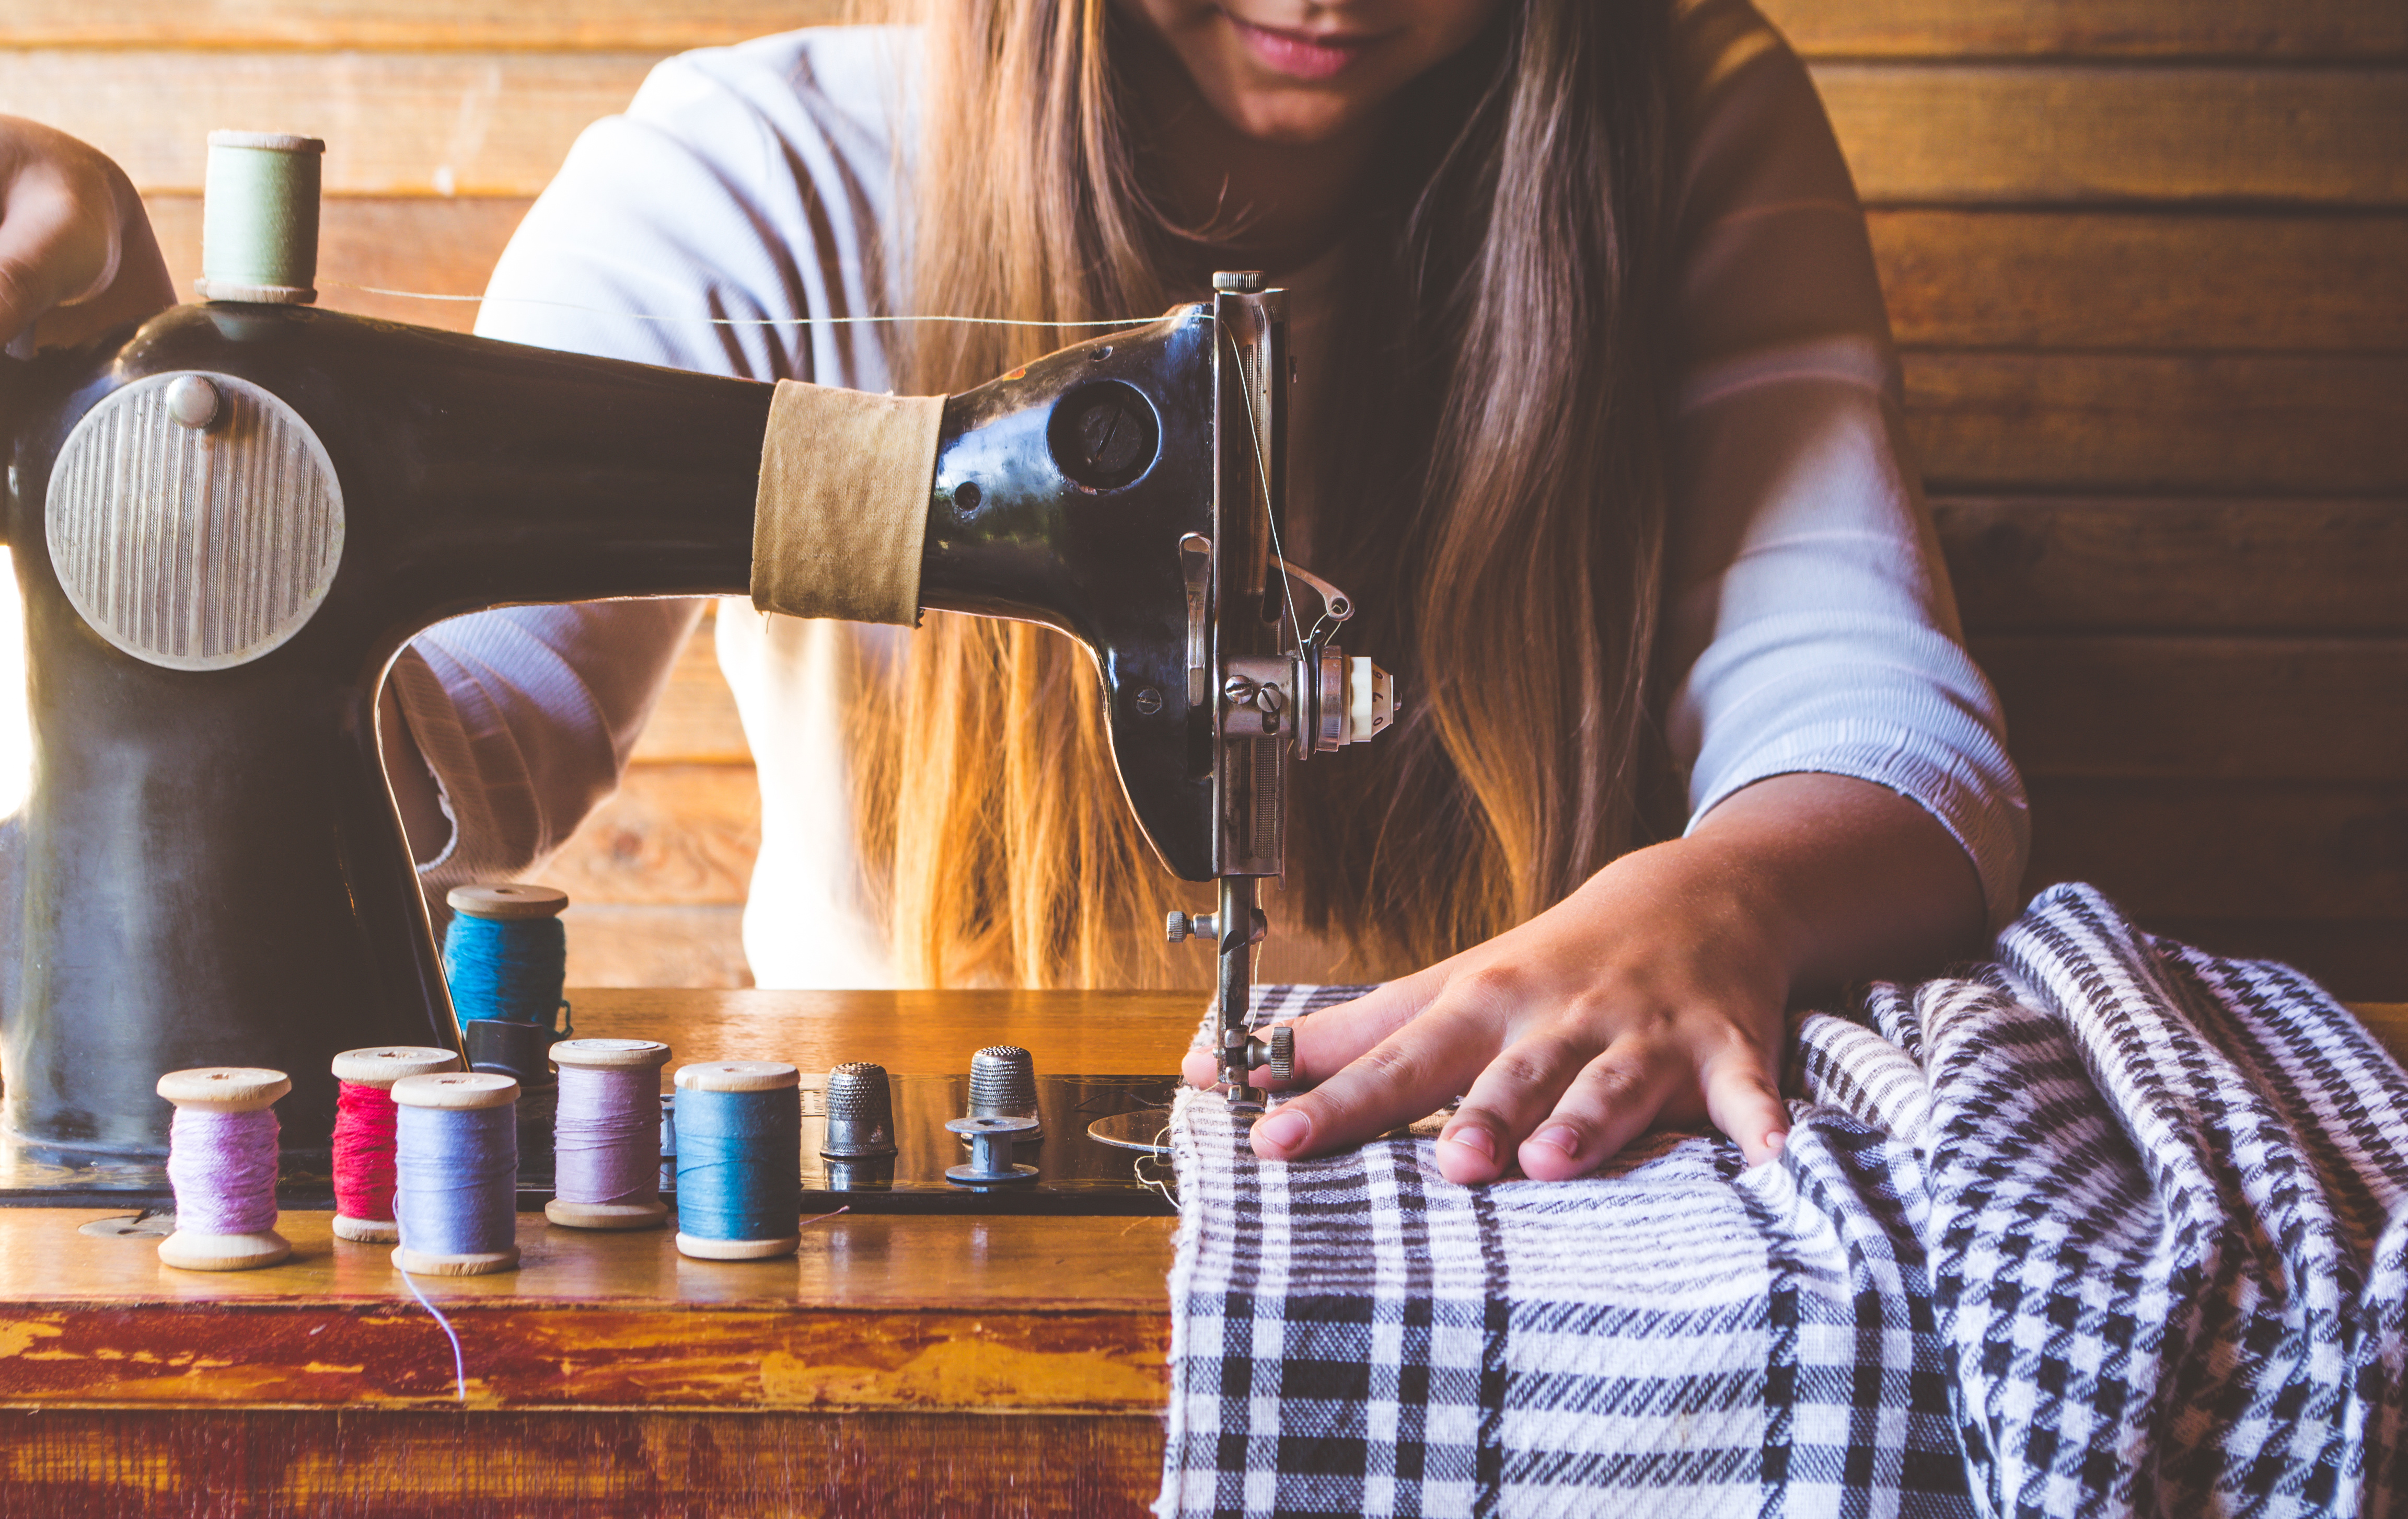
Sewing can be a precise art of measurements and strategies. But at times, it’s kind of fun to loosen the standards and try for something less typical—and the results can be quirky and intriguing! This is what I like to refer to as Picasso Sewing. The title is a bit misleading since there’s structure and definition to Picasso’s works, but the idea of odd elements that don’t necessarily fit together is a fair representation of what you could create if you try for a more lenient method of making your next sewing project.

For example, a Picasso throw pillow, which I recently did!

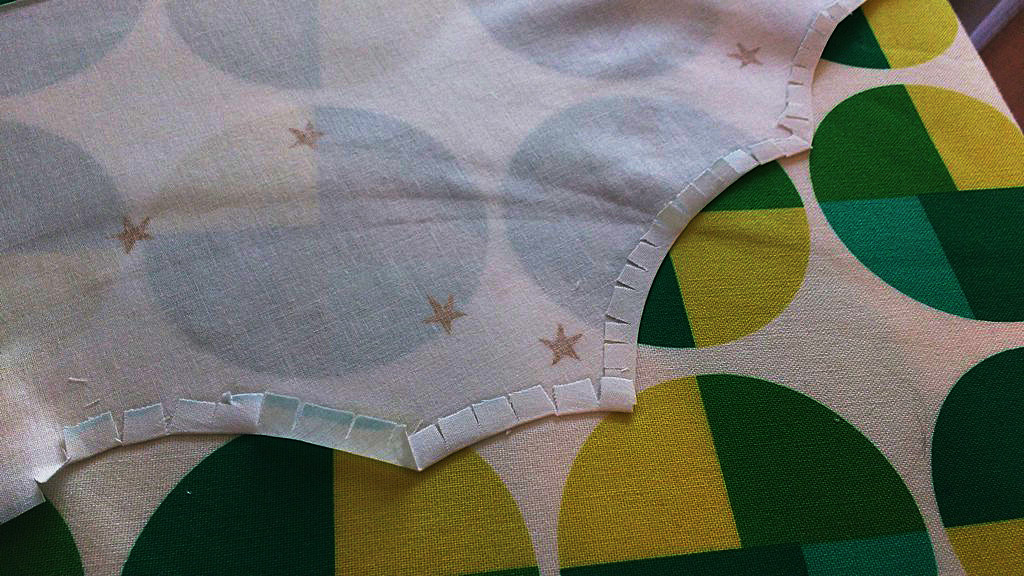
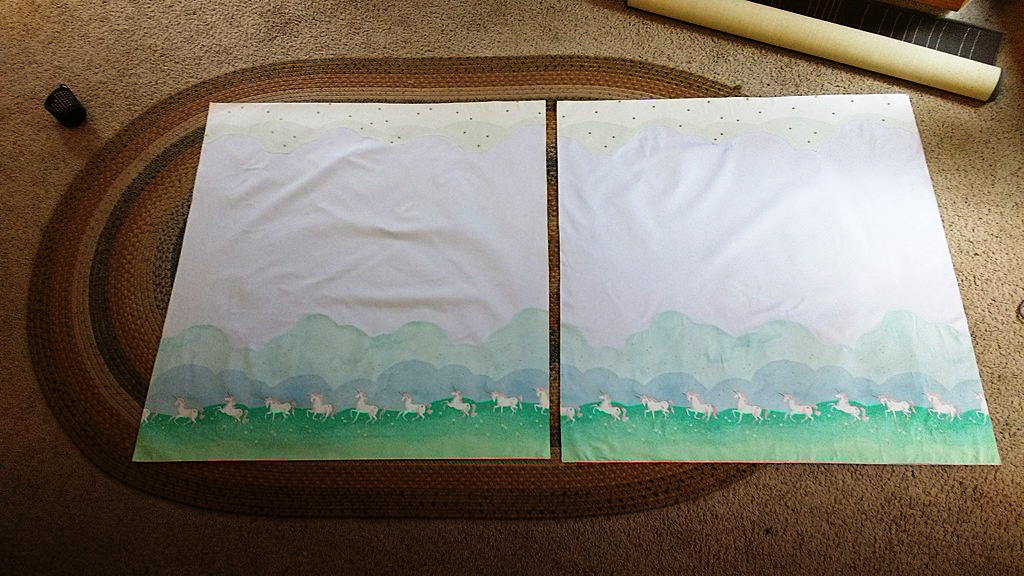
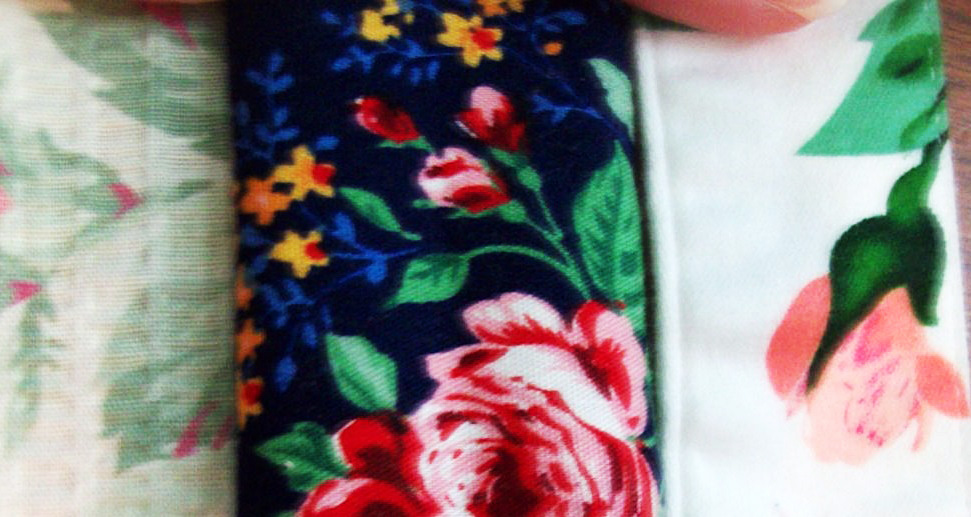
First, I chose fabrics that fit together without matching in the most conventional sense—two patterns that are both based on geometric shapes and lines of color.

Picture 1

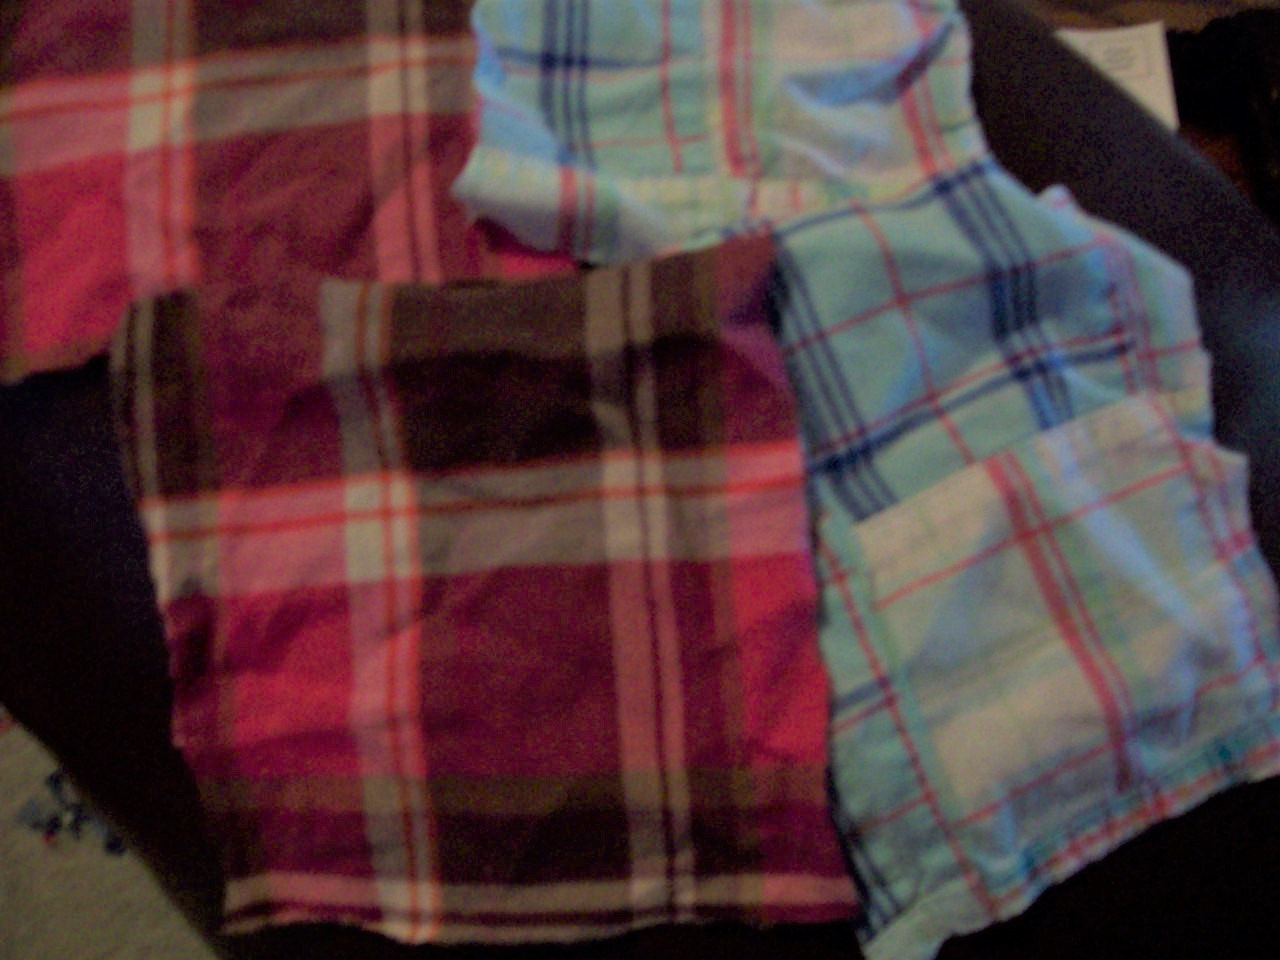
The primary colors stand out from one another, but the blue fabric includes a similar pink shade to what’s on the pink. The most distinctive difference between these two fabrics though could be the pieced-together look of the blue fabric. Whereas the pink blocks are solid pieces, the blue ones were already a patchwork design since multiple geometric shapes form the overall design. The fabric choices essentially match in a shared pink color and a general foundation in geometry, but they’re different enough to create a mismatched look.

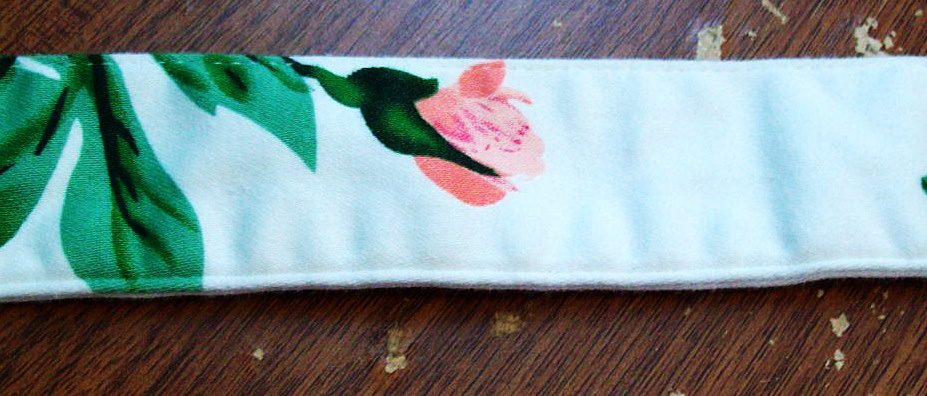
For the backing, I chose a different pink fabric that comes with elastic-esque lines of fabric.

Picture 2
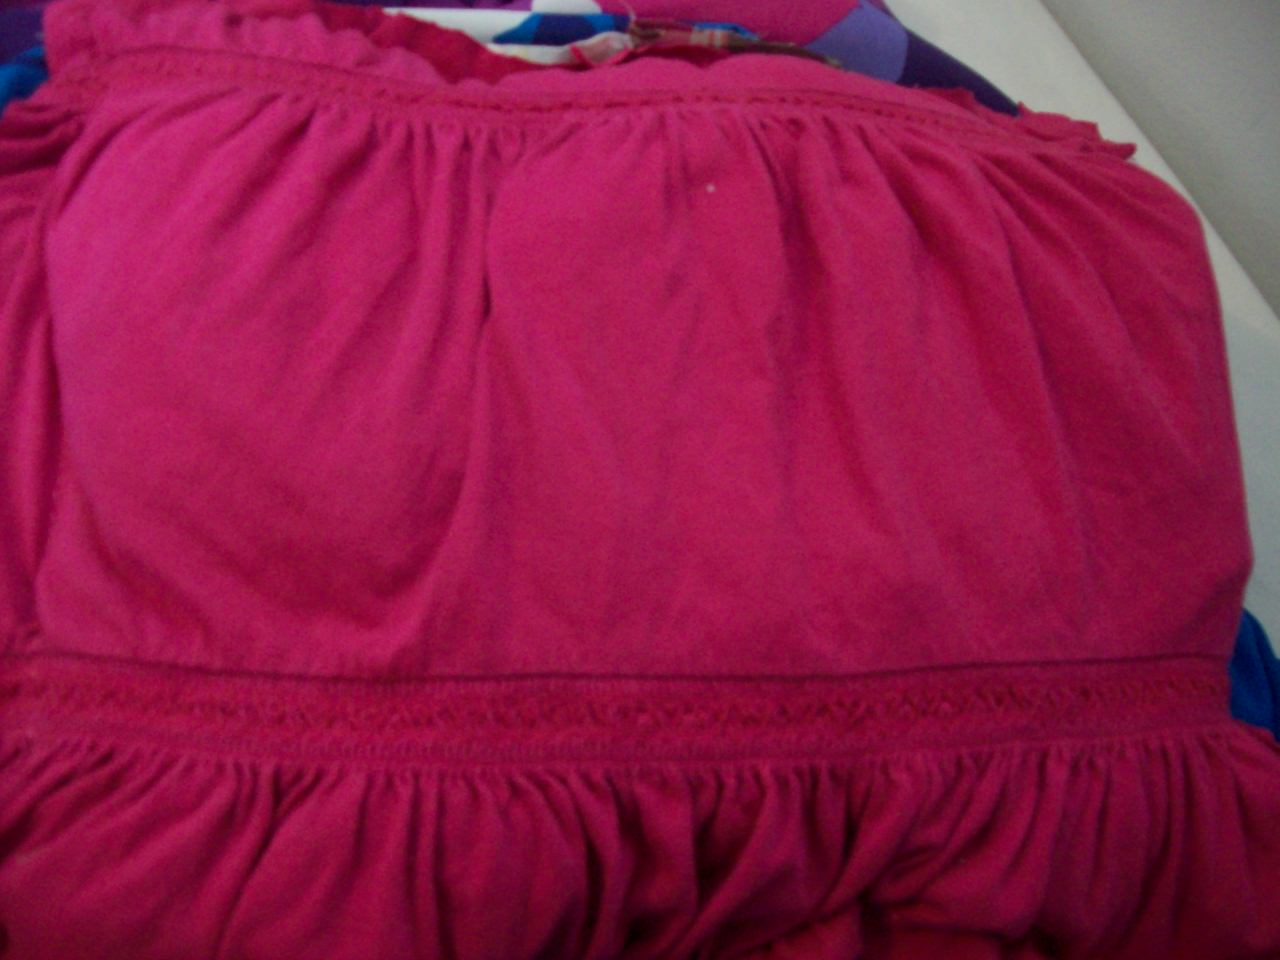
That elastic quality made this fabric a gamble since I didn’t know how the bunched areas would work when the front and back were sewn together, but remember that I was taking risks with this one!

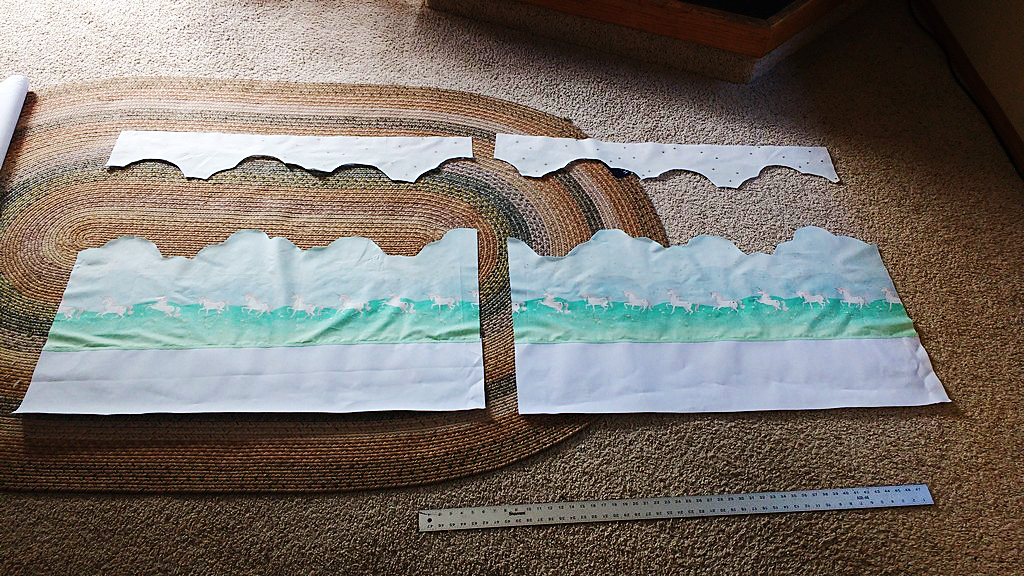
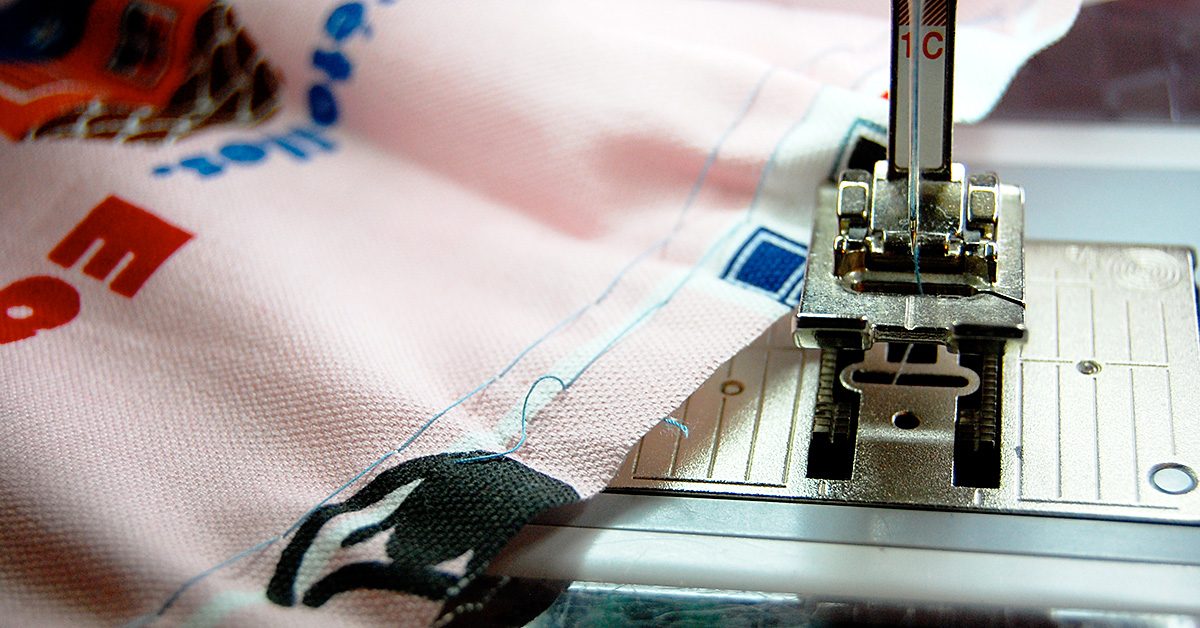
Once I had my out-of-the-fox fabric selected, it was time to start piecing together the front part of my pillow. I chose to go with a patchwork design, but I was lenient with how I put the patches together—and even how I cut them. Basically, I cut out a piece of one fabric, then cut other fabric shapes that were similar, but not necessarily exact, in size. Once I had pieces that looked (to my eye) sensible for a patchwork project—an estimation of approximately 2-3 inches in either direction—I decided on the pattern those pieces would take and started sewing the blocks together.

This is another step where basic sewing strategy was put on a shelf to create something more Picasso than an average throw pillow. I didn’t pin the individual blocks together, and I tugged them so that they fit alongside their neighboring pieces essentially on whims. I just tried to get a good amount of space for each block of fabric, and I didn’t worry too much about making everything exact and organized.

The result was an interesting setup where the blocks were tilted and varied in size, and I love it!Picture 3

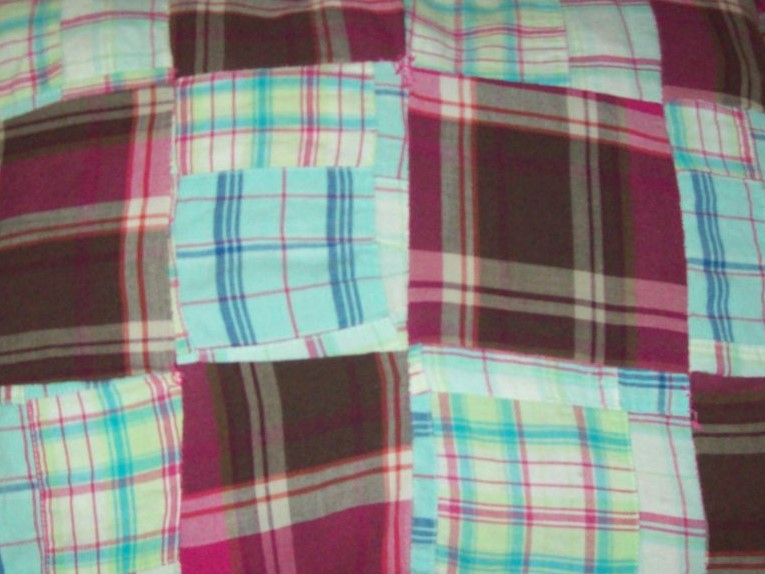
I did give a bit more thought to piecing the lines of blocks together by using a handful of straight pins, but the messy appearance still exists in this pillow!

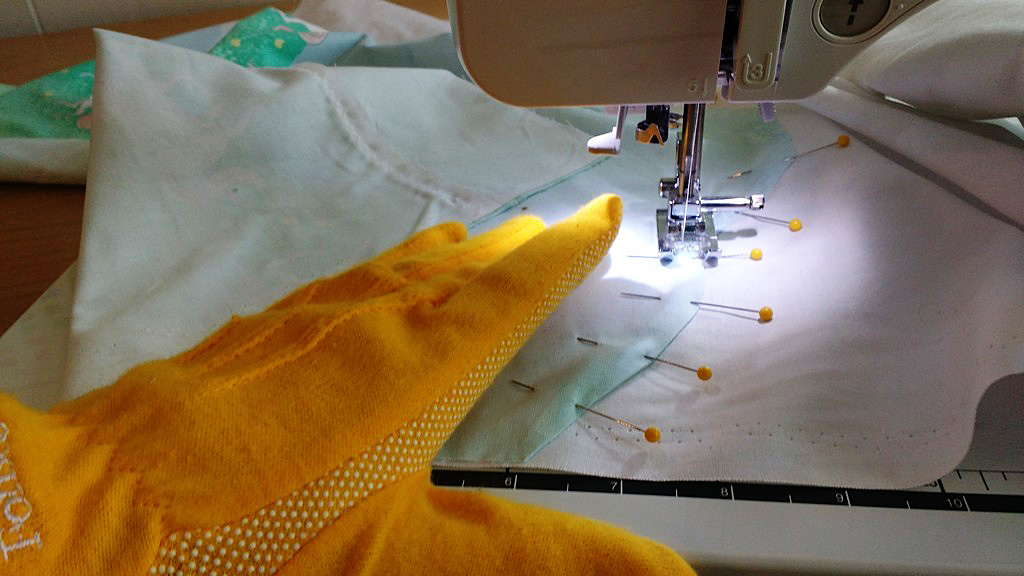
I ended up adding a fourth row of blocks to get the pillow a little bigger (I seriously eye-balled and compared fabric blocks to get every measurement here), but after that, it was time to apply the backing. To do that, I was again unorganized in my methodology. I laid the top layer of the throw pillow on the backing material, then pinched the backing fabric enough to where there would be extra space between the layers for filling.

I only used less than a dozen straight pins to keep the layers of fabric in place as I sewed far enough from the edges of the top layer’s fabric to allow excess material on all sides.Picture 4
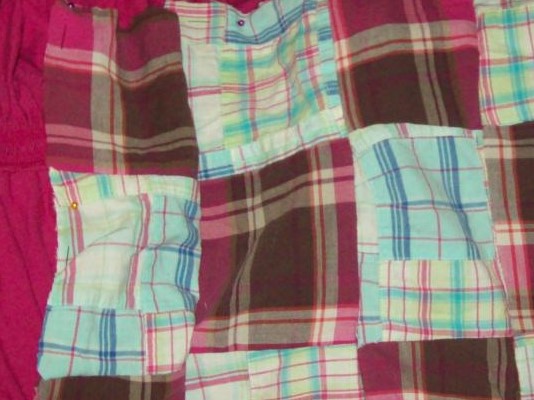
Next, I sewed along all of those sides until there was one patch of open space left to insert the filling, then finished sewing the rest once the filling was inside. Since I had the elastic element to consider for the backing, at times, I had to allow bumps between stitches to make up for the excess fabric for all of this sewing detail.

After that, I’d intended to shred the edges to make this a raggedy throw pillow, but once I cut off the larger portions of the backing fabric, I found I already liked the raggedy look that the unclean edges brought to the product. So rather than rocking the boat by shredding the ends, I just cut off pieces that *needed* trimming—like excess thread or very shredded parts of the fabric.

There are two details about my process that I’ll mention in addition to this basic strategy. The first is what I used for filling. This is a creation that’s not intended to look or be sophisticated, so I used a series of old shirts to stuff into the pillow. If you’re going for something that’s more concerned with comfort, you might want to try for a more standard filling.

The other detail is that this process, since it ends with a ragged final product, can be forgiving for mistakes because it’s understood to look a little worn. For me, that came in handy because I didn’t leave enough fabric to completely link the patches in at least one spot, causing a gap. Since it’s okay for this pillow to look imperfect, I was able to sew up that spot without worrying that the thread would be seen, then add that thread-repair-look at a couple of other spots that didn’t need it.Picture 5
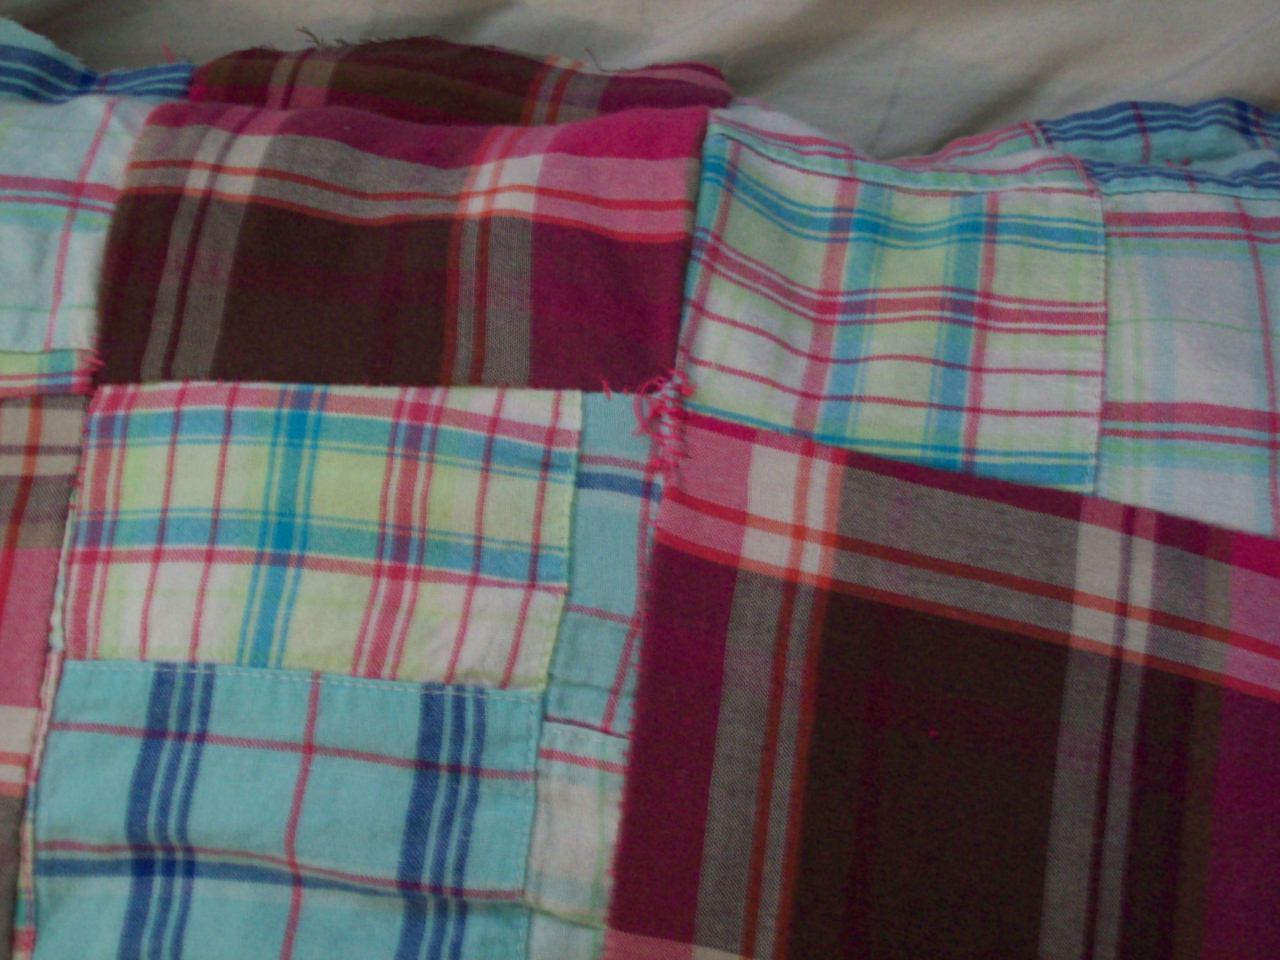
The result seemed like a structural decision to bring that ragged quality to life rather an error in strategy.

The final product is a pillow that’s Picasso-like in its leaning and varied-sized blocks, and so very raggedy with its frayed ends and fake repairs. Had I gone strictly by the books, I might not have come up with something so imperfect looking—and I really would be missing out because I adore this pillow! Picture 6
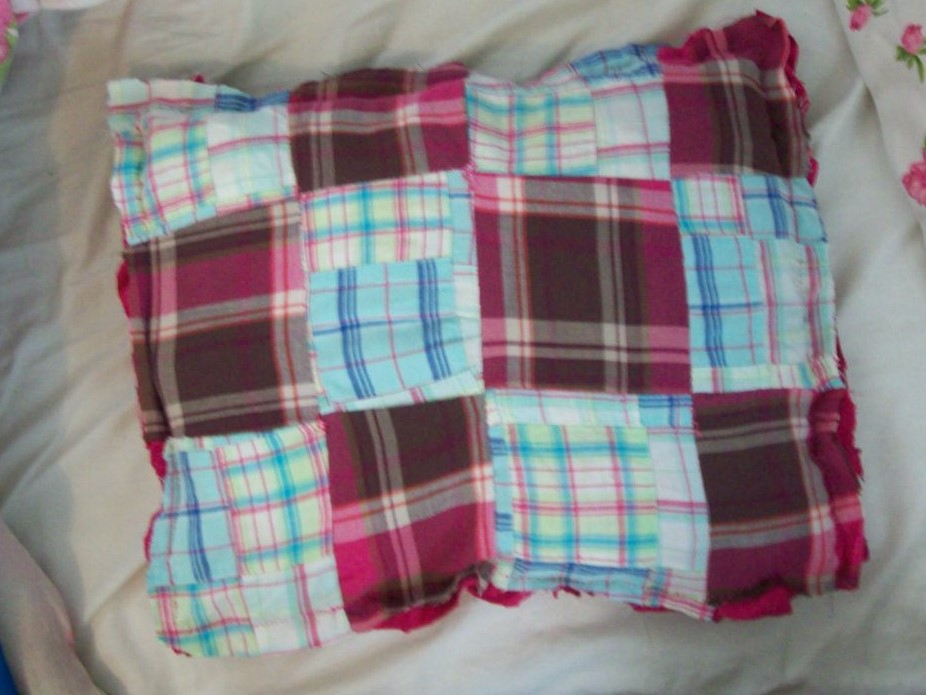
The moral of the story? Don’t be afraid to bring a little imprecision and a lot of Picasso to your sewing to create unique products! Sure, strategy is great, but loosening the guidelines in sewing can be awesome, too!

Sewing Through a Crisis

Sewing Through a Crisis

Like me, I’m sure many of you find sewing to be a relaxing, calming activity. Something about the personal space it affords along with focusing on the details of your project instead of whatever else may be going on is a great relief. When life gets to be too much, I often retreat to my sewing space. It makes sense, then, that when a personal or professional crisis occurs, I’d sew my way through it.

Freelance work

Being a freelancer is a walk on the line between comfort and professional crisis. Not all clients communicate well and sometimes they make changes which impact my income. In some cases, they give me no warning and leave me in panic mode trying to replace the money I made writing for them. As you can imagine, this is stressful. It feels like a crisis.

Crisis mode!

Crisis mode!

Yes, I work hard to replace the income. I spend time seeking new clients, asking existing ones for referrals and going to networking events. But in between these efforts, to keep my sanity in check and my professional demeanor in place, I sew.

I sew anything. It doesn’t have to be a project I’m excited about. In fact, in these moments, it’s often better if it’s something I’m not planning to wear for a special event. That way, I won’t feel any internal pressure to make it come out perfectly.

Scrappy solutions

I sew fabric scraps in my stash pile together to make funky shapes and patterns. Sometimes they get made into a pillow or another decorative piece. Sometimes they don’t. The point isn’t to create a masterpiece. The point is to calm my mind and emotions. It’s to keep me focused and reasonably calm, despite the professional crisis of losing a client and the need to quickly replace the income.

An hour of sewing at lunch gives me the inner peace I need to spend the rest of the day working hard looking for new clients without the grip of anxiety grabbing me at every step.

When you’re facing a crisis, personal or professional, try sewing your way through it. You might just find you’re better able to cope and be the person you, and your loved ones, need you to be.

Bunk Bed Privacy Curtains

Bunk Bed Privacy Curtains (part 2)

Last fall I wrote a post about the bunk bed privacy curtains I created for my youngest daughter for her bottom bunk.

Last fall I wrote a post about the bunk bed privacy curtains I created for my youngest daughter for her bottom bunk. You can read that post here.

They turned out amazingly well; here’s a picture.

They turned out amazingly well; here’s a picture.

They turned out amazingly well; here’s a picture.

It’s only fair…

I also promised my older daughter, who sleeps on the top bunk, that I’d make her a pair too. Her curtains, I knew, would take a lot more work. First I bought ceiling curtain track and used a hacksaw to cut it to size. Then I asked my husband to drill in the holes for the screws.

While he worked on the track, I painted a thin board white to match their ceiling. We attached the track to one side of the board and then attached the board to the ceiling, drilling holes in the side of the board that didn’t have the track, right into a stud in the ceiling.

Drilling holes in the side of the board that didn’t have the track, right into a stud in the ceiling.

Drilling holes in the side of the board that didn’t have the track, right into a stud in the ceiling.

Unicorns and stars

Next up was the curtains themselves. She said she wanted ‘unicorns and stars,’ and for a theme like that you can always count on Sarah Jane Fabrics for something good. The only problem was the space the curtains took up was much larger than the width of a yard of fabric.

Undeterred, I cut the clouds and the stars from the grass and the unicorns and did the math on how to baste the fabric onto white canvas fabric to elongate the scene.

Undeterred, I cut the clouds and the stars from the grass and the unicorns & did the math on how to baste the fabric onto white canvas fabric to elongate the scene.

Undeterred, I cut the clouds and the stars from the grass and the unicorns & did the math on how to baste the fabric onto white canvas fabric to elongate the scene.

I painstakingly snipped around the curves of the clouds and the grass on the bottom and top pieces and then finger folded them over and ironed. I used starch to help the little pieces stay down. This was time consuming because I had to do it for four panels (two front, two back) and the top and bottom pieces of all four.

I love it when a plan comes together

My trouble paid off however.

My trouble paid off however.

My trouble paid off however. I diligently pinned the pieces to the main panel fabric of the top and bottom curtains and then sewed them in place with a decorative stitch.

I diligently pinned the pieces to the main panel fabric of the top & bottom curtains & then sewed them in place with a decorative stitch.

I diligently pinned the pieces to the main panel fabric of the top & bottom curtains & then sewed them in place with a decorative stitch.

Here are the two front panels. Gorgeous, no?

Here are the two front panels. Gorgeous, no?

Here are the two front panels. Gorgeous, no?

For the back panels, I raised the grass & unicorns up higher and added a strip of white on the bottom so the unicorns wouldn’t be hidden from my daughter’s view by the bunkbed railing.

For the back panels, I raised the grass & unicorns up higher and added a strip of white on the bottom so the unicorns wouldn’t be hidden from my daughter’s view by the bunkbed railing.

For the back panels, I raised the grass & unicorns up higher and added a strip of white on the bottom so the unicorns wouldn’t be hidden from my daughter’s view by the bunkbed railing.

Putting it all together

On the back panel, I then sewed drapery tape to the top of each panel. Then I sandwiched the top and bottom panels, right-sides facing, and sewed them together. Next I turned the panels and pressed everything neat and flat. I finished by top stitching the panels, and the opening where I’d turned them, closed.

On the back panel, I then sewed drapery tape to the top of each panel.

On the back panel, I then sewed drapery tape to the top of each panel.

Now it was time to puncture some holes in the drapery tape so I could add the hooks that feed into the curtain tracks. For this, I used my handheld sailmaker needles to pierce a hole in the tape but not through to the front of the fabric.


And voila! The curtains fed onto the track perfectly. But I wasn’t done yet.

For this, I used my handheld sailmaker needles to pierce a hole in the tape but not through to the front of the fabric.

For this, I used my handheld sailmaker needles to pierce a hole in the tape but not through to the front of the fabric.

Train your curtains

My daughter wanted to be able to block out the light of the night lights we use in the room, but also wanted to easily be able to open and shut the curtains too. I took the time to carefully fold the curtains into the bunched position, using ribbon and clothespins to maintain them in that shape while I sewed curtain tie backs. I call this ‘training’ my curtains.


I took the time to carefully fold the curtains into the bunched position, using ribbon & clothespins to maintain them in that shape while I sewed curtain tie backs.

I took the time to carefully fold the curtains into the bunched position, using ribbon & clothespins to maintain them in that shape while I sewed curtain tie backs.

Then I sewed two curtain tie backs and added some mini pompoms for a bit of whimsy.

Then I sewed two curtain tie backs & added some mini pompoms for a bit of whimsy.

Then I sewed two curtain tie backs & added some mini pompoms for a bit of whimsy.

I knew that my daughter would lose them if I didn’t think of a way to keep the tie backs attached to the curtains so I sewed a buttonhole onto each tie back (you can read my post about how to sew buttonholes here). Next I climbed up into her bed and hand sewed a button onto the back panel of each curtain.

Then I connected the tie backs to the curtains via the button hole. Now she can bunch the curtains to open them, wrapping the tie back around them and securing them with the Velcro I sewed on the tie backs. And when she wants to close them for privacy or to shut out the light, she just releases the Velcro and the tie backs remain attached to the curtains.

When she wants to close them for privacy or to shut out the light, she just releases the Velcro & the tie backs remain attached to the curtains.

When she wants to close them for privacy or to shut out the light, she just releases the Velcro & the tie backs remain attached to the curtains.

And I have a very happy six year old! Have you made your own bunk bed curtains? Tell us about it in comments!


———————————————————————————–
Charlotte Kaufman is a writer and sewist in Mammoth Lakes, California. She specializes in marine and home interiors and continues to fall more and more in love with quilting. You can follow her at charlottekaufman.com.
Having a Friend who Sews

Having a Friend who Sews

Some things just work better in pairs.

Some things just work better in pairs.

Some things just work better in pairs—like shoes, socks, friendship bracelets, and the Everly Brothers. Often though, even our pastimes can be enhanced by the addition of another human being. Going to the movies, as an example, is more fun with a friend to offer ridiculous comments to or to discuss the movie with after the credits roll. Another example would be hiking. It could be great for you to wander through nature while getting a workout, but if you have someone to share the experience with, that company provides another level of goodness.

Sewing, too, can benefit from the presence of another person, even if people often think of it like a solo task. Things like classes based on sewing show evidence of this since you’ll be learning—should you take one—in the midst of other people who are interested in the same craft, but the reasons behind sewing non-solo are applicable beyond the notion of gathering in dozens in a classroom. Truthfully, there are common, day-to-day rationales for having a sewing friend or two in your life that you could find useful even if you don’t want to leave your house for your projects. You can pick up your phone, call them, and invite them over for sewing assistance.

And that sewing assistance can come in three specific forms that we’ll cover in this post. Ready to dive in? Then let’s go!

Taking Measurements

You might find that getting your measurements on your own can be complicated.

You might find that getting your measurements on your own can be complicated.

If you’re the type of person who sews your own clothes, you might find that getting your measurements on your own can be complicated. If you try to measure from shoulder to shoulder, for instance, you pretty much have to lift at least one shoulder, and that can throw off your measurement. It helps then to have a second person around who can step in and help you. Now, sure, you can recruit whoever is around to help you get that shoulder measurement, but it’s still best to have that someone be a person who’s familiar with sewing.

The reason for that detail is because people who are accustomed to taking measurements won’t need an explanation about how to take the measurement. They’ll understand, if you want help with your waist measurement, that the sewing tape should be at the smallest part of your waist. The process is familiar, and they’re accustomed enough to know how tight the tape should be held as well as where the cut off is in regard to any kind of tape-overlap. That familiarity can make for not only an easier sewing experience, but also a more accurate one. A non-sewing friend might allow too much slack and cause your clothes to be too big. To go Goldilocks, the sewing friend might measure just right.

Sharing sewing supplies

Sharing is caring.

Sharing is caring.

Sure, you shouldn’t be the person who constantly asks to borrow things—particularly if you don’t return them. But if you’re in a situation where you’re friends with someone you share an interest with and both of you trust the other enough to loan supplies, this can be a very real benefit for you and the person your friends with. If you don’t have the right shade of blue in thread, maybe your friend has it! If your friend doesn’t have a specific sewing needle for a task, perhaps you have one! It’s a great back-and-forth situation where you’re being afforded the opportunity to have a go-to for supplies you need who’s just a phone call away.

This dips into shopping as well since shopping with your friend could help each of you be aware of what the other has in their supply for these sharing moments. Of course, this wouldn’t be the only reason to go shopping for sewing supplies together, but it’s a definite plus! Either way though, in addition to sharing the supplies, you can share the experience of finding the right supplies with a good friend—and what shopping trip isn’t more fun with a friend?!

Socializing

Brainstorm ideas to come up with the best projects you can make.

Brainstorm ideas to come up with the best projects you can make.

Any time you have an interest, it can be nice to have someone to talk to about that aspect of your life. Otherwise, you might find that you have nowhere to turn to discuss interesting or pressing matters in regard to the field. It’s like being an avid reader who finishes a really great book, but then has no one to talk to about that book. You have all of these thoughts, opinions, and reactions, and where exactly are you supposed to send them?

Sewing can be so similar because you pour so much of yourself and your time into your projects. It helps to have someone there to talk to about your progress, your confusions, or your plans. The process can help you brainstorm ideas to come up with the best projects you can make, and it can give you a place to offer your complications in a way where you can ease your tension. You might even get some insight about what to do to fix those complications rather than bottling them up until they potentially run you down so much that you throw in your sewing thread. This social quality can then better your sewing experiences, and it can also increase your odds of continuing your sewing endeavors. That makes it a definite advantage of having a friend who sews!

Bottom line? Don’t think of sewing as an exclusively solo gig! Having that sewing friend can make for a brighter, easier sewing experience—from shopping for supplies to putting together your projects. You might have to sign up for a class to find that friend, but trust me! They could be worth their weight in sewing thread!

Butterfly Bag, Small and Large, and Blue Patchwork Purse

Butterfly Bag, Small and Large, and Blue Patchwork Purse

Reversible butterfly tote.

Reversible butterfly tote.

I have been making lots of bags lately, and I have a few tutorials and different bag patterns coming up here soon. This week, though, I’m showing a couple examples of butterfly bag and another variation of a simple tote bag purse.

First, I used my crazy patch butterfly appliqué blocks to make two different sizes of bags recently.

I made a butterfly bag tote as a gift for my niece’s sixth birthday. It’s a reversible tote big enough to carry coloring books and crayons to the ball park, where her brother plays nearly every day. There’s also room for a small quick quilt I made that she can use to sit on the bleachers or the ground while she’s there.

Baylee quilt, caption, I made this quick scrap quilt in only about an hour & a half.

Baylee quilt, caption, I made this quick scrap quilt in only about an hour & a half.

Here are the step-by-step instructions for making a reversible tote like this. You can use the strip piece method linked as a video below for making the patchwork straps.

Butterfly bag small purse

Then I found a single stray rainbow strip pieced block at the bottom of my scrap bin and I decided to make a small denim bag with a butterfly, too.

This will be a gift for a teenage girl.

This will be a gift for a teenage girl.

I used a rainbow variegated thread in the needle for the butterfly appliqué and also the strap and topstitching for this bag. This is probably my favorite decorative thread, and I have used it in a lot of projects.

To show off the lining fabric, I sewed the bag and lining together without straps, then folded over the top. I sewed the strap to the outside, with the raw edges under the fold. Then I used two rows of topstitching around the whole bag. I made the strap with a wider blue and narrower green piece of bias tape, covered by wide zigzag stitches up and down about five times.

Blue patchwork tote purse

Here is a purse I made for myself last week. It is just a simple tote with the addition of a curved, bias- edged flap at the top. I quilted the patchwork using horizontal rows of a wavy decorative stitch that reminds me, like these blue fabrics, of the ocean.

This one is mine.

This one is mine.

To make the flap, just quilt together a rectangle of patchwork with batting and your lining fabric. Make it about an inch narrower than one side of the bag. Then you can fold it in half and cut the corners into curves. Then bind the curved edge and short ends with bias binding.

I used half of a thick turquoise ponytail elastic and a half-ball style button for a closure. I just sewed down the elastic to the lining side of the flap when I attached the bias edging. It also has a large zippered pocket inside, with patch pockets for cards inside that larger pocket.

Just baste the flap to the bag, and then tuck it between the bag layers when you sew the bag and lining together.

If you don’t know how to make this strip style patchwork, which I also used for the straps on the large butterfly tote above, here’s a video of me explaining how to do this.

I actually made this piece of patchwork some time ago. The blue quilt pattern I showed here was for my baby’s crib, and I made bumper pads, too. We didn’t really use these, so I decided to reuse the patchwork to make bags. This is the first one I have done; I plan to do a bigger laptop tote or backpack with the next one.

Like Amish quilts, these bags include mistakes!

I have to say that each one of these bags includes some little issue that I am not happy with. For example, the lining I chose for my blue bag is a gorgeous midnight blue print. But, especially with the flap, too, it is pretty impossible to see what’s in my bag without shining a light. It’s not a huge issue, since I usually just stick my hand in my bag and grab what I need by feel, anyway.

I boxed the corners too deeply on my niece’s butterfly tote and gave it a different shape than I intended. But this worked out, because the unintended bucket shape of the bag is what inspired me to make the quilt that I otherwise might not have included with this gift. And while I probably won’t ever make a strap like the one I made for the rainbow butterfly bag again, it is interesting and different looking and it works just fine.

The Amish include mistakes in their quilts on purpose. My mistakes were more accidental. The thing is though, all these little issues are lessons learned. I’ll never use a dark fabric as a bag lining again. Maybe I’ll make a post about more of these kinds of lessons I have learned the hard way soon. I’d be happy to save someone from making some of these mistakes.

In the meantime, I hope you will join me in bag making. Happy sewing!

Strip Piecing for a Postage Stamp Quilt

Strip Piecing for a Postage Stamp Quilt

It seems the more I dig into the world of quilting, the more things I find that I never knew about it in the first place. The brand of creativity is like a well of opportunities, or a garden that you can browse until you find the right flower to plant in your yard. Each project and possibility is its own type of craft, and the quilter has to figure out which of them is intriguing enough to try a hand at.

This idea is essentially what I’m doing for this blog when I explore new quilt types. I look at new possibilities, and when one catches my interest, I dig deeper!

For this blog post, that’s exactly what I’ll do for what’s known as a postage stamp quilt.

Postage stamp quilt

A postage stamp quilt.

A postage stamp quilt.

If you’re wondering what a postage stamp quilt is, it’s actually not that complicated of a style to explain! Think of a roll of postage stamps waiting to be applied to envelopes, and you’ll have a good grasp on what they can look like. It’s one small block of fabric after another, like the patchwork quilt I invested time in, but with much smaller pieces. In fact, that seems to be the main difference in the top layer of a postage stamp quilt and one for a general patchwork quilt if they’re both basic block formats. For the stamp quilt, the blocks are smaller—potentially only a couple of inches!

When I was first introduced to this concept, I was a little intimidated. The reason for that intimidation was that I know by experience how much time can be spent assembling the outer layer of a larger-block quilt (something closer to ten inches), so the idea of putting together pieces that are this small felt overwhelming. Taking the process one piece at a time would require a long, long time for me, and the strategy would be so focused on such a smaller area that it would almost have to be tedious. As intrigued as I was, I figured it would be a frustrating task!

Strip piecing

Then I did a bit more research, and I realized you don’t have to sew these pieces one at a time. Another strategy is to strip piece them together.

All strip piecing means is that, rather than focusing on one square block of fabric, you’re using longer sections to sew together  — rectangles in place of squares.

All strip piecing means is that, rather than focusing on one square block of fabric, you’re using longer sections to sew together
— rectangles in place of squares.

All strip piecing means is that, rather than focusing on one square block of fabric, you’re using longer sections to sew together—rectangles in place of squares. For example, if you choose to use two-inch blocks of fabric for your stamp blocks, make sure the width of each strip of fabric is two inches, but don’t worry about creating the two-inch length yet. Rather, keep those strips longer!

As one source pointed out, how long the strips are can depend on you, what you’re able to handle, and how long you can keep cutting in a straight line (Quilt Videos, 2016). If you can go from the top to the bottom of three feet of fabric, you can have three-foot strips of fabric to work with. But if you find that you tend to get shaky or swerve-prone with extended cutting, you might want to keep those strips smaller. For me, I probably wouldn’t go beyond ten or twelve inches, but if you’re a more advanced quilter, you can try for more.

Time to put these pieces together

Once you have your strips, line them up side-by-side and sew them together in a chain fashion, two strips at a time.

Once you have your strips, line them up side-by-side and sew them together in a chain fashion, two strips at a time.

Once you have your strips, line them up side-by-side and sew them together in a chain fashion, two strips at a time. Begin with your first two strips, sewing them along their long sides so that they’re linked with both of their primary images being showcased, and then do the same with one of those linked pieces and a new strip. Once you finish, you should have a series of fabrics connected in long strips that are small enough, width-wise, to embrace the postage stamp quality in a quilt.

Once you finish, you will have a series of fabrics connected in long strips.

Once you finish, you will have a series of fabrics connected in long strips.

From strips to squares

After you’ve sewn a number of strips together—again, it can depend on how much you’re comfortable with working on at a time—it’s time to make those rectangles into squares! If your fabric strips were two inches in width, measure and cut across your connected fabric strips at every two-inch interval from top to bottom, length-wise. At that point, you should have a series of new strips, though these will be made of a series of smaller blocks of fabric—as many blocks as fabric types that you used.

If your fabric strips were two inches in width, measure & cut across your connected fabric strips at every two-inch interval from top to bottom, length-wise.

If your fabric strips were two inches in width, measure & cut across your connected fabric strips at every two-inch interval from top to bottom, length-wise.

You should repeat this process through all of the fabric you plan to use for your quilt until all of it has been transformed into these multi-fabric strips. From there, it’s time to start piecing them together into the top layer of your quilt. All you need to do is arrange them together in a way that looks appealing to you until you reach the width and depth you were looking to achieve in your quilt.

All you need to do is arrange them together in a way that looks appealing.

All you need to do is arrange them together in a way that looks appealing.

The process might sound a bit complicated, but once you get the hang of it, you might be surprised at how quickly your stamp quilt comes together!


References
Quilt Videos. (2016, March 24). Quilt Monkey – Episode 301 – Easy, Strip Pieced Postage Stamp Quilt Block [Video File]. Retrieved from https://www.youtube.com/watch?v=j3N7al2V8C8
Witherby, S. (2011, October 27). Dead Simple Christmas Quilt mock up [Electronic Image]. Retrieved from https://www.flickr.com/photos/inkyswot/6285898784
Grain Line? What Grain Line?

Grain Line? What Grain Line?

Last week, I spent a couple days making six silk dresses for a freelance client. I did the work at home, in my fifth floor walkup apartment in New York City. I only mention this because the dresses were made from silk charmeuse and I don’t, interestingly enough, have a proper cutting table at home. This really isn’t so much interesting as it is unfortunate and slightly annoying. Because, as anyone who has ever cut silk charmeuse knows, it’s a slippery sliding thing.

I cut the first dress out on the floor. Not ideal but it does work, as long as you use enough weights to keep it from shifting around. I usually cut things on the double with the fabric folded, selvedge edge to selvedge edge, which is how most consumer patterns instruct you to cut. Silk charmeuse can be a bit woodgy (yes, that’s a technical term) but the weave tends to be tight enough that you can confidently cut on the fold.

Some fabrics with an especially loose weave where it’s hard to keep the lengthwise grain line (and cross grain) straight are best cut in a single layer.

Shall we

Grain Line? What Grain Line?

To begin cutting, I tear a straight cross grain so I have a right angle to work from. Almost all fabric can be torn in this way. The cross grain of a fabric is made from the yarns woven over and under the lengthwise fabric grain at a 90 degree angle. The over under weaving provides less tension so crosswise grains have a tiny bit more stretch than the lengthwise grain. They normally run around a person’s body.

The lengthwise grain is the one that runs parallel to the selvedge edge and is the grain marked by the arrow on every pattern piece.

After tearing the the cross grain so I have a straight line, I fold my fabric in half right sides together, selvedge to selvedge. Once I have the fabric relatively flat and smooth on my cutting surface, I place a long metal ruler about an inch or two from my torn crosswise edge. I use a metal ruler because they’re heavy enough to act like a weight.

I line up the edge of the ruler perpendicular to the selvedge edge and across the full width of both layers of fabric. Then I make sure that the edge of the fabric that extends past the ruler is even. I do this to ensure that my cross grain is lined up correctly and not sloping down or up in relation to the selvedge.

I cut the next five dresses out on my old wood dining room table. It has leaves that fold up to make it almost six feet wide. At about 39” high, my cutting tables at work are higher than a standard dining room table. This height means I don’t have to bend so far over a table when cutting and, ultimately saves my back from hurting. If you don’t spend entire days cutting out garments, a dining room table usually works just as well.

You can also buy one of the cool folding style cutting tables available.

Grain line

So, what about grain line? Do you need to always pay attention to it?

That depends. At Boardwalk Empire, we would sometimes jest (when we didn’t have enough fabric and had to get creative with our cutting layouts), “Grain lines are for suckers.”

What we really meant, though, was “As long as you know what you’re doing, you can manipulate and vary the placement of your pattern pieces.”

If you happen to have a striped fabric, playing with the grain line can be fun. Thomas Pink, who makes high end men’s dress shirts will sometimes cut one side of the front on the lengthwise grain and the other on the cross for a quirky asymmetrical look.

Striped fabrics will also naturally chevron at the side seams if you match them up correctly when cutting and sewing.

You can also turn collars, cuff pieces, and/or pockets of striped fabrics on a different grain to add an interesting design effect.

All of these things are most easily done with a fabric that doesn’t have a lot of give, like a tightly woven cotton.

Measure up

If you’re interested in getting a little creative with your next project, you may want to invest in a quilter’s ruler. These rulers have 45 and 30-degree angles marked which is helpful when adjusting grain lines.

If you’re matching stripes or other patterns, you’ll find it much easier to cut in a single layer so you see everything clearly.

This may seem obvious, but if you’re experimenting, it’s always good practice to test things out first. If you have plenty of fabric, you can use some of it to do a little practice run. If not, you can use muslin or something similar to try out your idea. If you’re using a striped fabric, you can mark lines on your muslin before cutting to show you how everything will line up.

Bias

Bias is the diagonal angle across your fabric. The bias grain has quite a bit of stretch. A dress that clings to the body closely without having multiple seams is very likely cut on the bias. When you’re making a bias garment, especially a dress or slip, you’ll want to let the bias hang out for a while if possible as it will stretch out. You’ll notice that the bottom edge of your pieces will end up uneven if you do this, which is exactly what you want. You’ll need to remark your hemline after you’ve put together the garment.

I usually stay stitch my arm and neck holes, then pin my cut pieces on a form and, if time permits, let them hang over night. It’s also beneficial to then pin the seams together while they are hanging on a form to help alleviate any puckering.

Once you have a good understanding of grain lines, there’s no reason why you can’t try different things. Get creative (just remember that bias does stretch a lot more than something on the straight so you may need to stabilize with a lightweight fusible interfacing).

Sew a Small Purse Tutorial: Tiny Tasseled Tote

Here’s my own design for a small purse tutorial.

Small purse tutorial.

Small purse tutorial.

This elegantly simple bag is incredibly easy to sew and offers endless opportunities for embellishment.  It is tiny as totes go, but as a small purse it is offers plenty of space for all your essentials, with room to spare.  It features an outside pocket big enough for your phone or sunglasses, and two inner pockets, one sized for your ID and debit card.

I really wish I had an embroidery machine; if I did I would completely cover this small bag with colorful embroidery. Since I don’t, I decided to make mine understated and casual in all one color and with minimum embellishment.  I think this denim blue corduroy is nearly a neutral color and I know it will go with much of my wardrobe.

I want to buy some silk cord to make the tassel and make a bag like this in a dressier fabric, too. Keep tuned to this blog, as I will soon share another small purse tutorial for a variation on this bag that is a lot of fun to make, too.

Without further ado, here’s this small purse tutorial, suitable for beginner sewists:

Tiny tasseled tote small purse tutorial

You need fabric for the bag body and lining, a little bit of interfacing, and yarn for the strap and tassel.

Cutting instructions

Cut:

  • 2 bag body pieces (main fabric) 7.5″ by 9″
  • 2 bag lining pieces (second fabric) 7.5″ by 9″
  • (optional) 2 interfacing pieces  7″ by 8.5″
  • (optional) 1 interfacing piece 4.5″ by 8″
  • 2 main fabric pieces 5″ by 7″
  • 2 pieces second fabric 5″ by 7″
  • 1 piece second fabric 6″ by 9″

Step one is optional – interface or quilt

If you choose to add interfacing to your bag, do it now. Because my outer fabric was corduroy and the quilter cotton lining fabric less sturdy, I chose to interface the back of my lining fabric (7.5″ by 9″ inch rectangles).  If you use quilter cotton or other lightweight fabric for the outside of your purse, then interface that instead.  Also apply interfacing to one of the 5″ by 8.5″ rectangles.

Another option is to forego interfacing and quilt one layer of your bag, either the outside or the lining. Just quilt these now, before we move on to construction.

Make the outside pocket

Take one 5″ by 7″ piece of your main fabric, and a matching piece of the lining fabric and align these right sides together. Sew around all four sides, leaving an opening of at least 2″ to turn right sides out. Clip the corners, turn, and press.

Now fold over the top about half an inch, press, and topstitch. I chose to press mine with the lining fabric forward, to show a bit of contrast on the outside of this otherwise plain blue bag. You can fold towards the inside though, if you’d rather not show off your lining fabric on the outside of your purse.

Center the pocket on one of the bag body 7.5″ by 9″ rectangles, with the hem you just sewed at the top of the bag. Sew the sides and bottom of the pocket to the bag body piece about 1/8″ from the pockets edges.

Make the inside pockets

Take the 6″ by 9″ lining fabric, and fold it right sides together to make a rectangle 4.5″ by 6″. Sew with a ¼ inch seam allowance along all three open sides, leaving an opening of at least 2″ for turning. Turn right sides out, press, and top stitch the opening closed.

Now fold one short edge of this finished rectangle upwards about 2 inches and press this fold line well. Then, center this pocket on one of the 7.5″ by 9″ bag lining rectangles, and sew the bottom and sides down on the lining fabric.

Inside pocket image.

Inside pocket image.

Sew the bag body and lining

Now take the two main fabric rectangles and put them right sides together.  Make sure the outside pocket is facing with the opening pointing up, then sew the side and bottom seams.

Then repeat for the bag lining pieces, again making sure the pocket opening is facing up before sewing the sides and bottom together. Set both bag and lining aside.

Make the tassel

Wrap yarn around the four outstretched fingers of hand about ten times. Tie the yarn together at the top of these loops with a short piece of yarn, then cut through all the loops at the bottom. Take another piece of yarn and wrap it around and around the strands, about half an inch from where you tied the yarn together at the top, then tie. Voila, a tassel!

How to tie a tassel.

How to tie a tassel.

Make the flap

Take one of the 5″ by 7″ pieces to your ironing board and place it right side down, aligned with the long edges horizontal and the short edges vertical. Then fold the bottom corners upward to make a point in the middle and press these fold lines well.

Tassel bag point image.

Tassel bag point image.

Then, cut along these pressed lines to make a triangle shaped piece for the flap. Cut a lining rectangle piece to match, too. Now, go back to your ironing board with these pieces. Fold  one of the edges you just cut to form the triangle back ¼ inch and crease this well with your iron. Repeat on the second triangle.

Tassel bag point crease image.

Tassel bag point crease image.

Now place the two triangles right sides together and sew together along the opposite side of the triangle from the side that you just creased. Clip the seam allowance from the triangle point, turn right sides out, align the creased seams you previously pressed, and press again.

Now insert the two short yarn tails from where you tied the yarn together at the very top of your tassel into the triangle point. Topstitch along the seam you just sewed, then topstitch to sew the side with the pressed seams closed, too, being sure to catch the yarn at the top of the tassel inside the seam.

The third side of the triangle flap remains open. Align this open edge with the top edge of the back side of your bag body, right sides together, and sew right along the edge to baste these pieces together.

Make your strap

To make the yarn strap, use 9 pieces of yarn about 4 feet long. Use 3 strands each to make three long braids, then braid these three all together. Secure ends by tying with another piece of yarn. Or opt to use ribbon or make a long fabric strap instead, if you prefer.

Final assembly

Take your main bag body and your bag lining body and insert one inside the other, with right sides together. The flap should be between the two bag bodies. Now place your strap inside, also between the two bag bodies, aligning each end with the side seams.

Use the free arm on your machine, and sew these together, leaving an opening to turn. You will sew the backside with the flap and the straps, and leave the opening in the front. Turn right sides out and push the lining side into the bag body. Now fold the edges of the opening inward, topstitch this opening closed, and you are done.

It’s reversible

Technically, this bag is reversible. Although, if I were going to reverse this bag, I would change the construction of the inner pocket. I wouldn’t want a debit card pocket on the outside of my bag. To do this, just omit the step of folding the inside pocket up to create the card pocket. Sew it on as a larger patch pocket instead, the same as you did for the outside pocket.

I hope you use this small purse tutorial to make one, too. What fabric will you use? How will you embellish yours?

Getting Through a Sewing Lull

Getting Through a Sewing Lull

Tell me if this sounds familiar. You’re a little bored. You’d love to work on a sewing project, but you’re also in between projects. You don’t have any events coming up and you don’t have the urge to create something new for your wardrobe, or anyone else’s. I call this a sewing lull. In my freelance writing and book writing careers, I sometimes experience the same thing. Over the years, I’ve found some techniques to get through those lull periods without going stir crazy from boredom.

Go Back to Your Joy

Go Back to Your Joy

Why did you start sewing in the first place? Was it to make something specific or was it simply because it was a skill you wanted to learn? Think about what gives you the most joy when you sew. For me, it’s one of two things: either wearing something I’ve made and getting complimented on it or giving something I made to someone and seeing their joy. Tap into what you love about sewing. Then…

Expand Your Repertoire

If you’re like me, you usually have a few favorite things to make. Use your sewing lull to expand your repertoire. If you usually make clothes, try making a stuff toy or blanket. Maybe go really big and learn a completely different sewing skill, like quilting or embroidery. As long as it taps into the reason(s) you started sewing, love sewing, in the first place, you’ll have a winner.

Run with Scissors

Okay, don’t really run with scissors. It’s dangerous.

Okay, don’t really run with scissors. It’s dangerous.

Okay, don’t really do this. It’s dangerous. What I mean is step outside your comfort zone, disregard what usually holds you back and leap into a new sewing skill, project or technique without taking time to talk yourself out of it. Maybe there’s something you’ve been wanting to try for years, but your pragmatic side has been holding you back. This sewing lull is the perfect time to throw caution to the wind and give it a shot.

I find these three things get me through any lull, sewing or writing, and I learn some new things along the way. At the same time, it also helps me reconnect with why I love what I do – we all need that reminder sometimes, right.

Printed Fabric Project Panels and Ideas

Printed Fabric Project Panels and Ideas

Have you looked into the world of printed fabric panels yet? If you are someone who wants to sew, but doesn’t want to take the time to do detailed, intricate work, a printed fabric project might be more your speed. With pre-printed fabric you can easily sew up gifts for babies and new mothers, teacher and holiday gifts, and so much more.

Kids and New Moms

Making a gift for an expectant mother or little kid in your life? Now you can piece together quiet books, soft books, plushies, play cubes, and toys by buying fabric panels, cutting out the patterns, stuffing, and sewing. Here are a few darling examples.

Tara Lilly’s Whimsical Storybook, Sea Urchin Studio’s Forest Fellows 2, Ed Emberley’s Happy Drawing, and Dr. Seuss Enterprises’ What Pet Should I Get?

Tara Lilly’s Whimsical Storybook, Sea Urchin Studio’s Forest Fellows 2, Ed Emberley’s Happy Drawing, and Dr. Seuss Enterprises’ What Pet Should I Get?

Housewarming and Hostess Gifts

The next time I sew an apron, I’m going to buy a pre-printed fabric panel and just cut and sew. Likewise, there are fabric panels available out there for every type of friend and host or hostess gift you may need. I especially like the two highlighted below for beer lovers and DIYers.

Carly Griffith’s Merry Matryoshka, Robert Kaufman’s Cheers, Maia Ferrell’s Home Grown, Hawthorn Thread’s Bengal Panel.

Carly Griffith’s Merry Matryoshka, Robert Kaufman’s Cheers, Maia Ferrell’s Home Grown, Hawthorn Thread’s Bengal Panel.

Make Your Own Pillows

Never buy store bought decorative pillows again. Now you can cut out and sew any size panel with an endless array of patterns, designs, and quotes by inspirational people. I’ve got the John Muir quote one in my shopping cart.

Hawthorne Thread’s Calypso in Aegean, Redwood Panel with John Muir quote, Autumn Fawn with Henry David Thoreau quote, and their Brave Panel in Valor.

Hawthorne Thread’s Calypso in Aegean, Redwood Panel with John Muir quote, Autumn Fawn with Henry David Thoreau quote, and their Brave Panel in Valor.

Full-sized Quilt Panels

That’s right. Now you can buy an entire fabric panel ready to quilt. You don’t have to piece these beauties together. Just add batting and a backing and start quilting. For my Star Wars and Outlander fan friends, yes, you can now get your favorite heroines in full-sized quilts!

Camelot Cotton’s Rey and BB8, Hawthorne Thread’s Bengal Quilt Panel, and their Fawn Quilt Panel in Aspen, and Kathy Hall’s Outlander Panel.

Camelot Cotton’s Rey and BB8, Hawthorne Thread’s Bengal Quilt Panel, and their Fawn Quilt Panel in Aspen, and Kathy Hall’s Outlander Panel.

Season’s Greetings

Holiday decorating and seasonal teacher and co-worker gifts are much easier now that fabric comes in these printed panel projects. Make a stocking for everyone in your kids’ class or just make them all for you and deck the walls at home.

Makower UK’s Wrap it Up Hanging Panel, Ann Kelle’s Jingle 4 Stockings, and Hawthorne Thread’s Oh What Fun Stockings cut outs, and Hawthorne Thread’s Fairisle Panel in Multi.

Makower UK’s Wrap it Up Hanging Panel, Ann Kelle’s Jingle 4 Stockings, and Hawthorne Thread’s Oh What Fun Stockings cut outs, and Hawthorne Thread’s Fairisle Panel in Multi.

This is Halloween

I had to spotlight Halloween printed fabric panels because I know a lot of my friends struggle to find Halloween crafts. No more! Make your own trick or treat or gift bags and spooky buntings and pillows.

Hawthorne Thread’s Nocturne Trick or Treat Bag panel, Halloween Pillows, Halloween Bunting, and Halloween Treat Bags by Heidi Kennedy on Spoonflower.

Hawthorne Thread’s Nocturne Trick or Treat Bag panel, Halloween Pillows, Halloween Bunting, and Halloween Treat Bags by Heidi Kennedy on Spoonflower.

What a Doll

Full fabric quilt panels and doll patterns are where I think preprinted fabric panels really shine. Both categories are a lot of work when you make everything from scratch. These cut-out-and-sew doll patterns will have you finished in no time, and the gift recipients are guaranteed to love what you make.

Daphne by stacyiesthsu, Cute Dia de Los Muertos Doll by elladorine, Frenche by ewa_brzozowska, Ruth Bader Ginsburg by nicoleporter, Angelina Cut N Sew Doll by tiffanyhoward, Cut and Sew Doll Pattern Steampunk Princess by selinafenech, Margo by stacyiesthsu, Frida Kahlo by nicoleporter, and Cut N Sew Bunka Dolls by heidikennedy.

Daphne by stacyiesthsu, Cute Dia de Los Muertos Doll by elladorine, Frenche by ewa_brzozowska, Ruth Bader Ginsburg by nicoleporter, Angelina Cut N Sew Doll by tiffanyhoward, Cut and Sew Doll Pattern Steampunk Princess by selinafenech, Margo by stacyiesthsu, Frida Kahlo by nicoleporter, and Cut N Sew Bunka Dolls by heidikennedy.

Do you use preprinted fabric panels? What are your favorite projects to make from them?

———————————————————————————–
Charlotte Kaufman is a writer and sewist in Mammoth Lakes, California. She specializes in marine and home interiors and continues to fall more and more in love with quilting. You can follow her at charlottekaufman.com.