Back-to-School Sewing Projects

Back-to-School Sewing Projects

Summer vacation is coming to a close, and the upcoming school year is right around the corner! It’s time to take advantage of your final carefree days beside the pool, sneak in that final family trip, and start focusing on what you need to do to make sure you (or your kids) are READY for school to start again! For me, one of my favorite childhood things about summer wrapping up (maybe the only good thing about summer wrapping up) was school shopping. I loved picking out my notebook and backpack, and finding new clothes that I adore is still something I’m a fan of.Back to SchoolBut if you want to make your school preparations more personal, don’t overlook the possibility of going just a little homemade this year. There are definite perks in making your supplies, like being able to tailor the design to your own preferences and the comfort of knowing you (or your child) will be carrying one-of-a-kind school supplies on the first day of school.

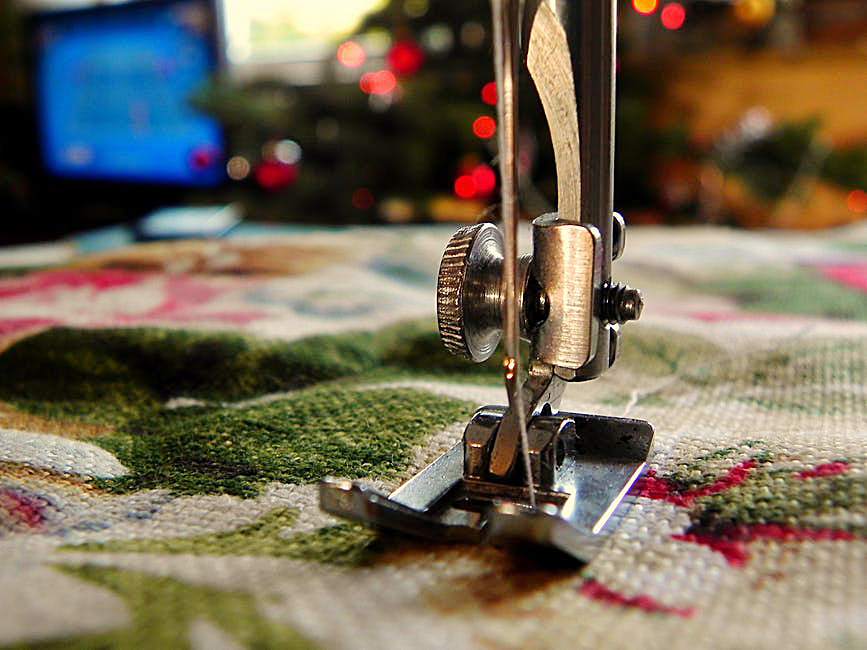
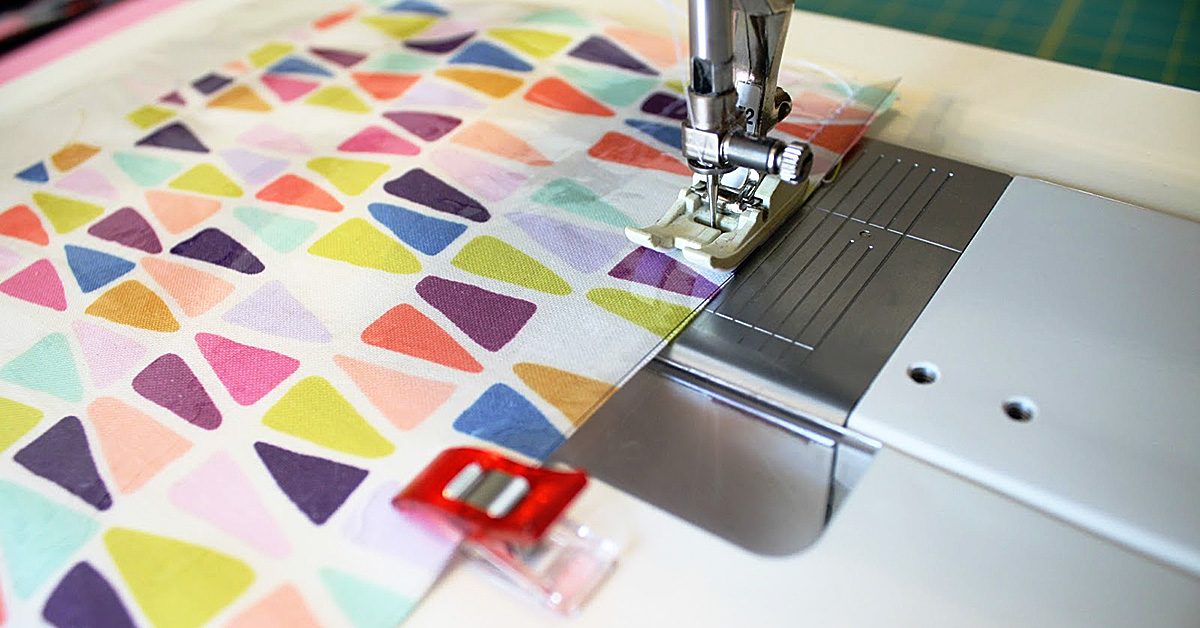
So if you decide this is the right path for you or your child, here are some ideas for things you can make by hand and/or machine to prepare for the next school year.
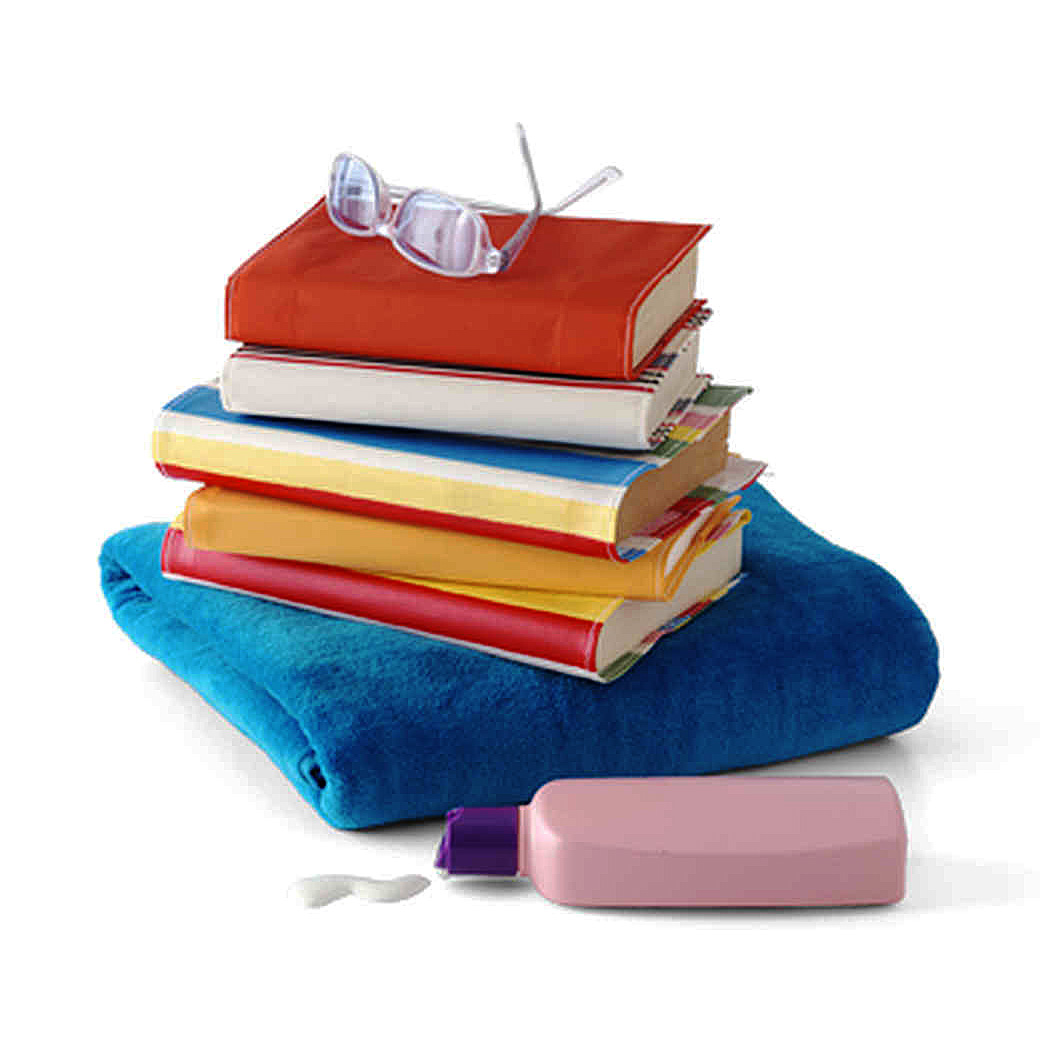
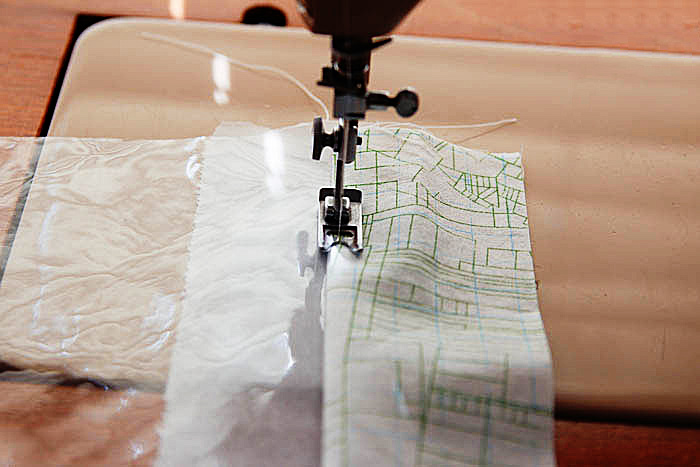
1. Book Covers

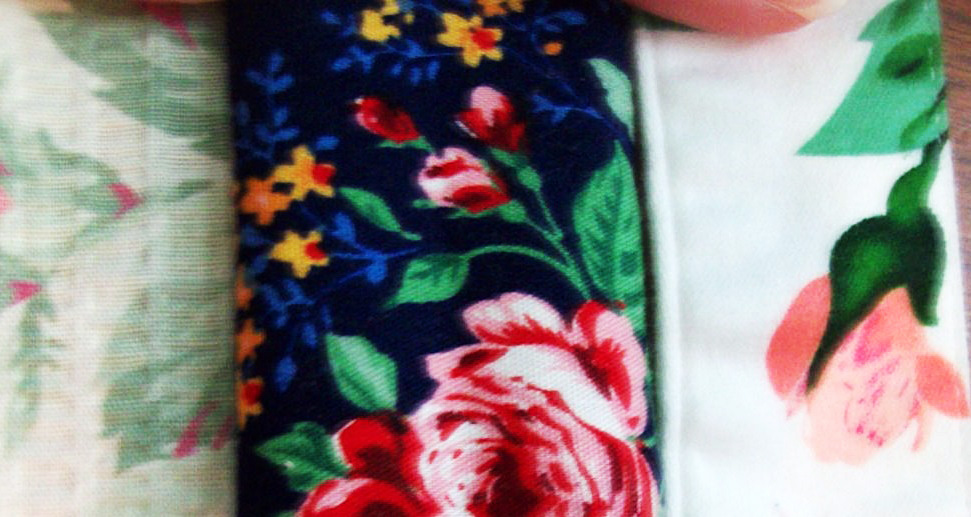
This isn’t the most complex of ideas, but there are three advantages in creating your own book covers. One, the project is so small that you could make book covers for all your textbooks in one day. That’s some quick school preparation! Two, you’re giving an extra layer of protection to your textbooks, and that lessens the wear and tear they’ll get throughout the year.

BooksThis could save you money in the long run since it could keep you from having to replace textbooks that have been damaged. And, third, you can pick your fabrics to make each book something way more personal than your standard textbook cover. Instead of beakers on your chemistry book, you could have prints from your favorite movie—and that could add a touch of brightness to your class every time you grab the book to head that way!
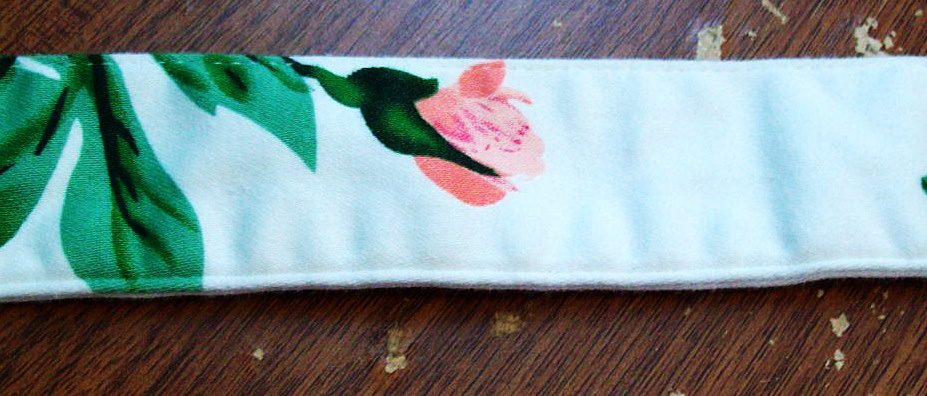
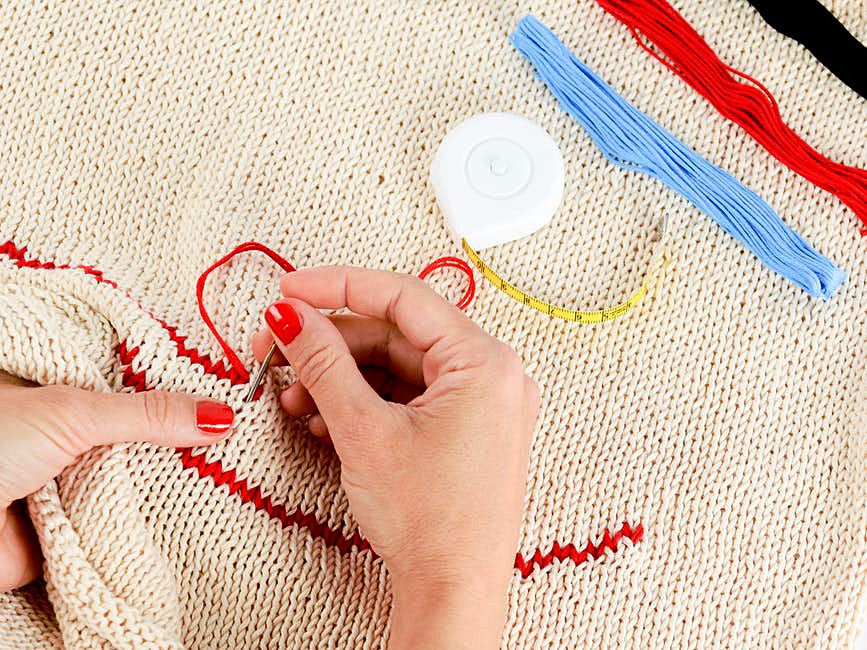
2. Bookmarks

This is the simplest idea on the list, but bookmarks can come in handy for keeping your place in the assigned literature classic or giving you a reminder of what chapter you need to read in your history textbook. You can spend less time on these than your book covers and use the same fabric to make sure your placeholders match the book you’re keeping your place in.
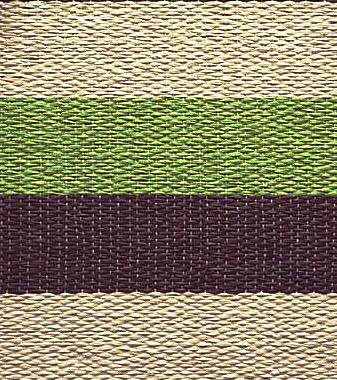
 Bookmarks

3. Pencil cases

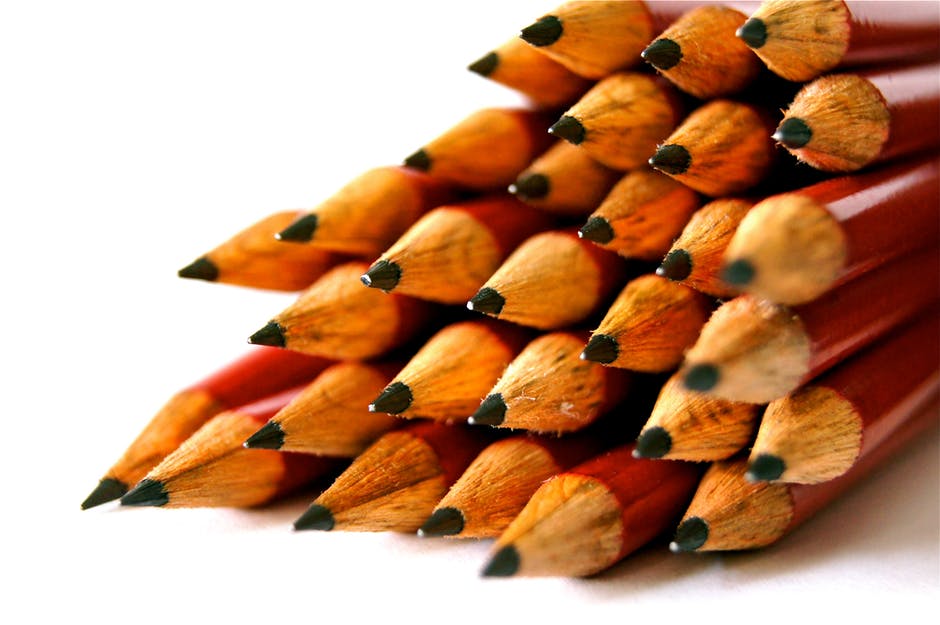
Some of the most essential school supplies are writing utensils—pens, pencils, markers… Something that’s an acceptable tool to write your papers, do your homework, and take your notes. Without them, you might be doomed to bum them from nearby classmates, search your home every time you have an assignment to do, or accept that your grade is going to take an unfortunate turn.

PencilsYou can use the same fabric once more on your pencil case so that you’re continuing your theme for your supplies, but you’ll need to add a zipper, button, or some other form of closing mechanism to keep those pencils from tumbling out. It’s a simple addition though for another chance to add that homemade quality to your school year.

4. Backpacks

You’re most definitely stepping up the complication factor if you choose to try your hand at a homemade backpack, especially if that backpack will come with a number of compartments. Still, your backpack is the core of your school shopping experience (the only sensible alternative argument would be in favor of your notebook), so by making it yourself, you’re putting a homemade stamp on your school supplies through this one element.

Backpack
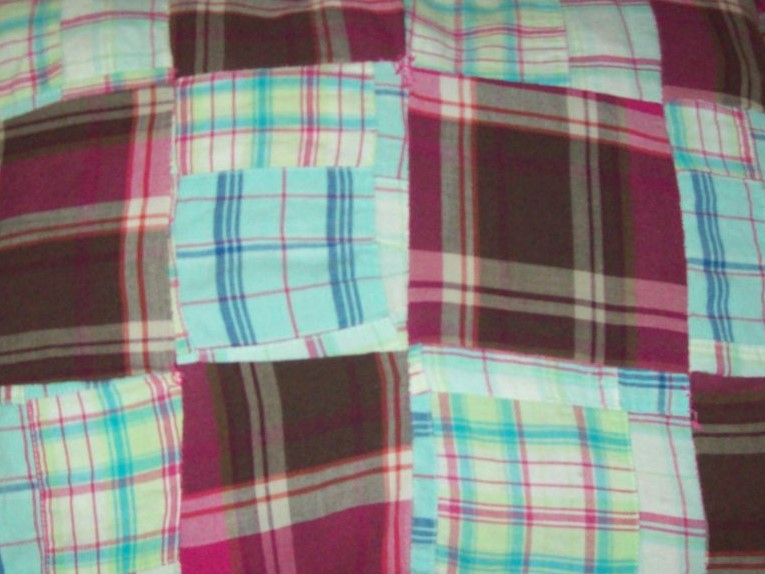
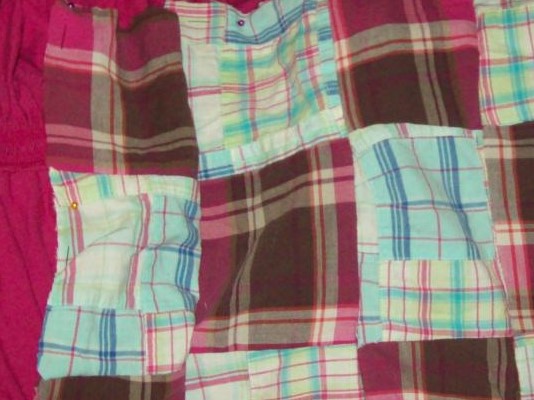
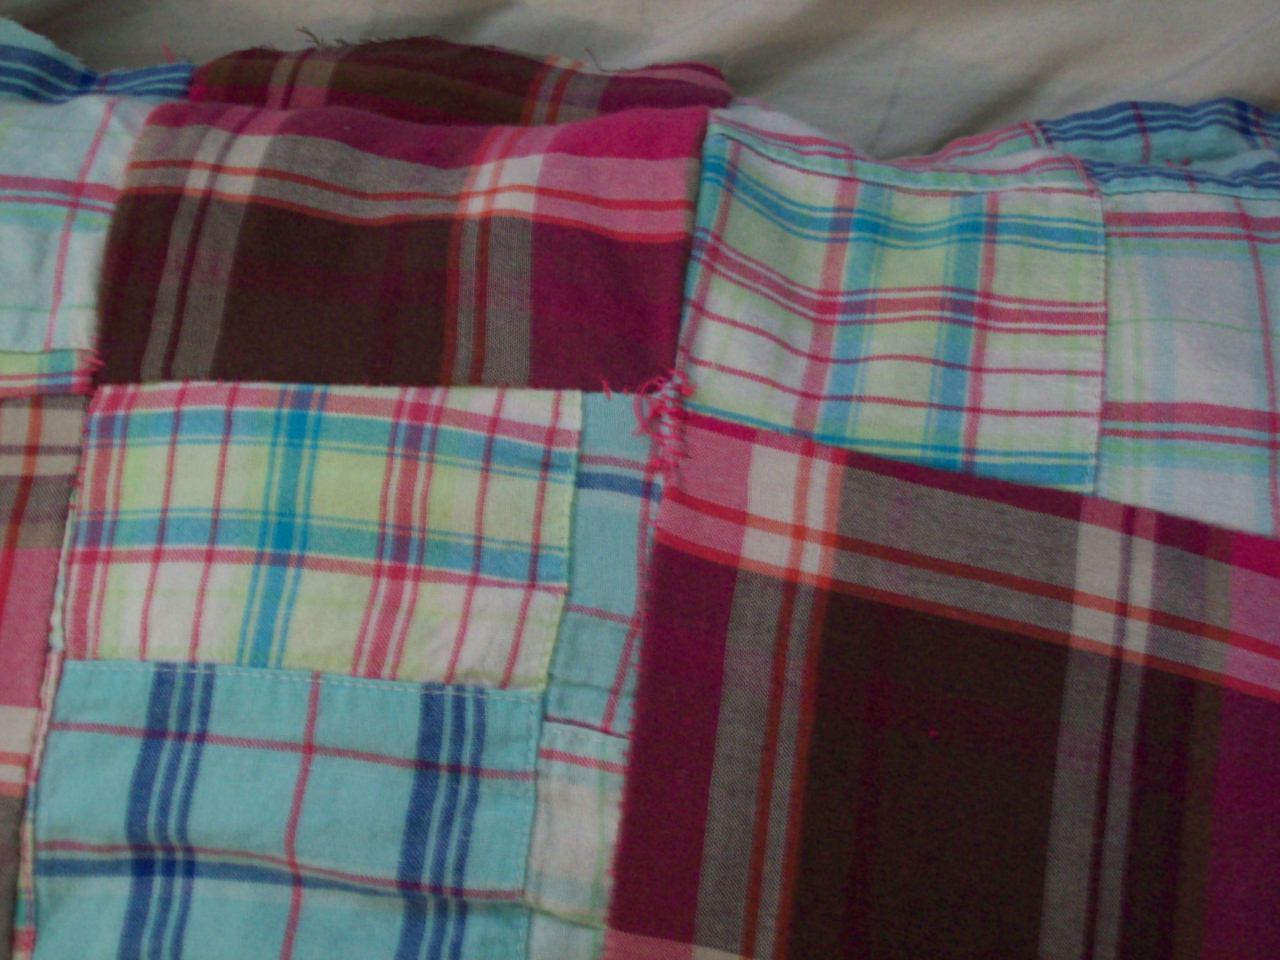
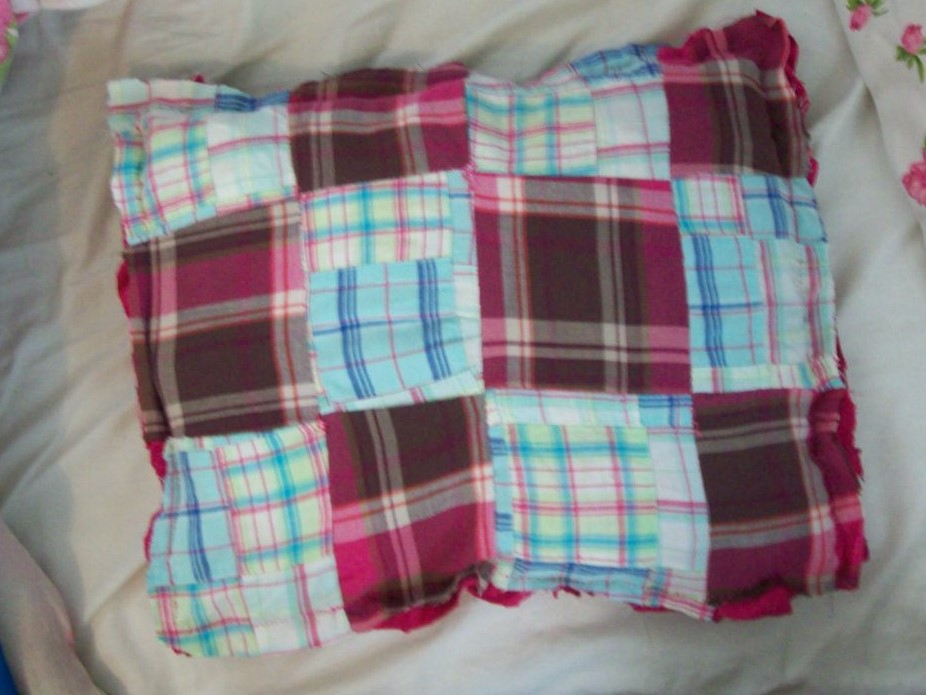
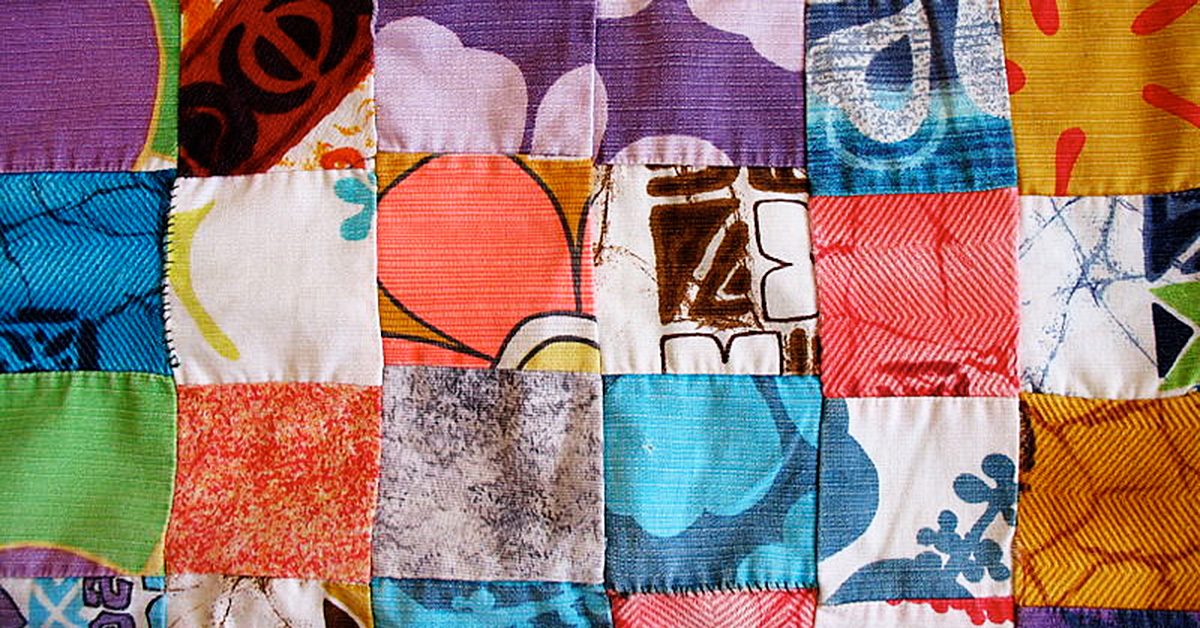
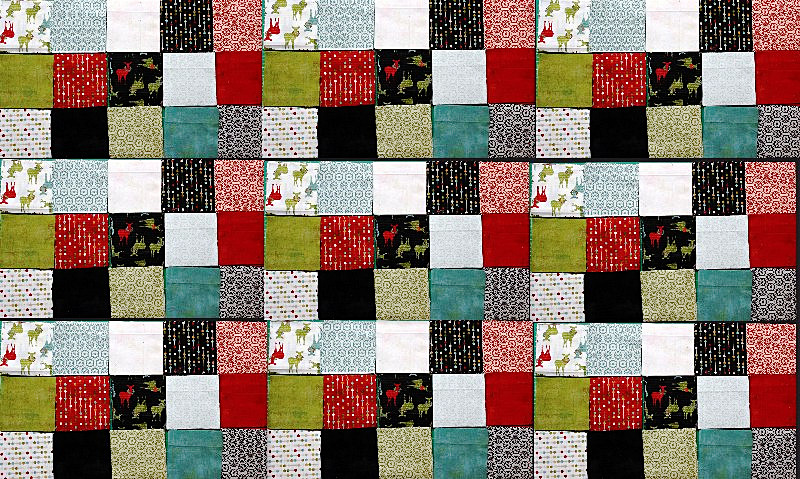
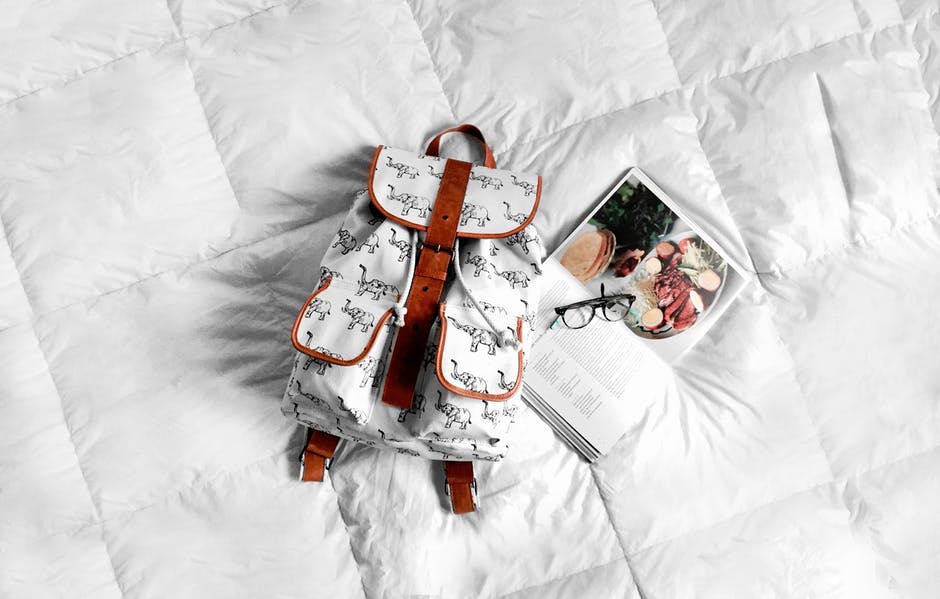
And you can keep your theme of fabric going with this choice by using the same or similar patterns as you did for your book accessories and pencil case! If you used different fabrics for the other supplies, you could make this one the culmination of them by using each and every fabric in some way on your backpack. It could be a patchwork feel or a planned-out strategy where each fabric gets its own compartment or section. Whether this will be your only homemade contribution to your school supplies or the central part of your homemade approach, choosing to make your own backpack for the upcoming school year could be the perfect project to wrap up your summer vacation.
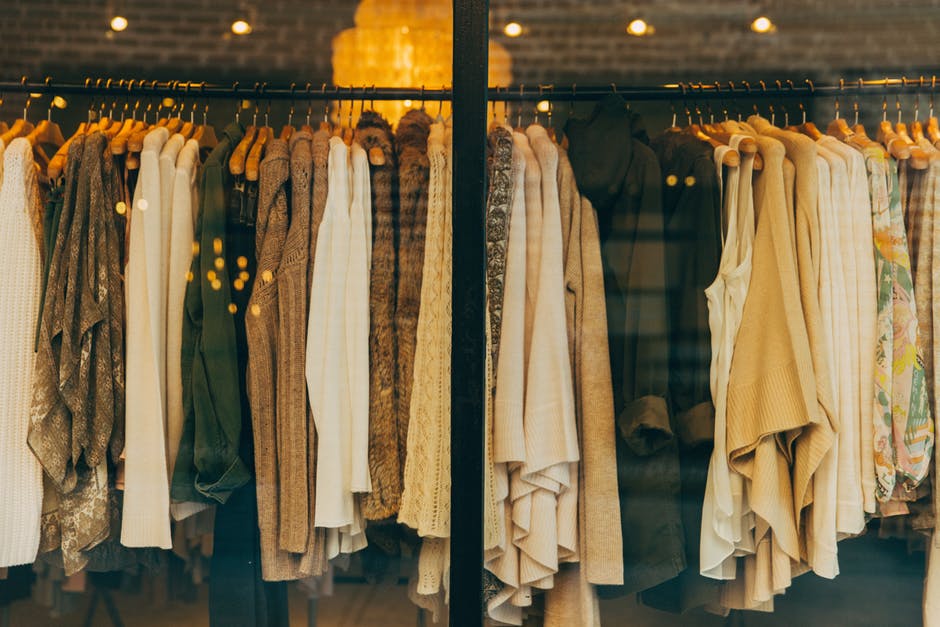
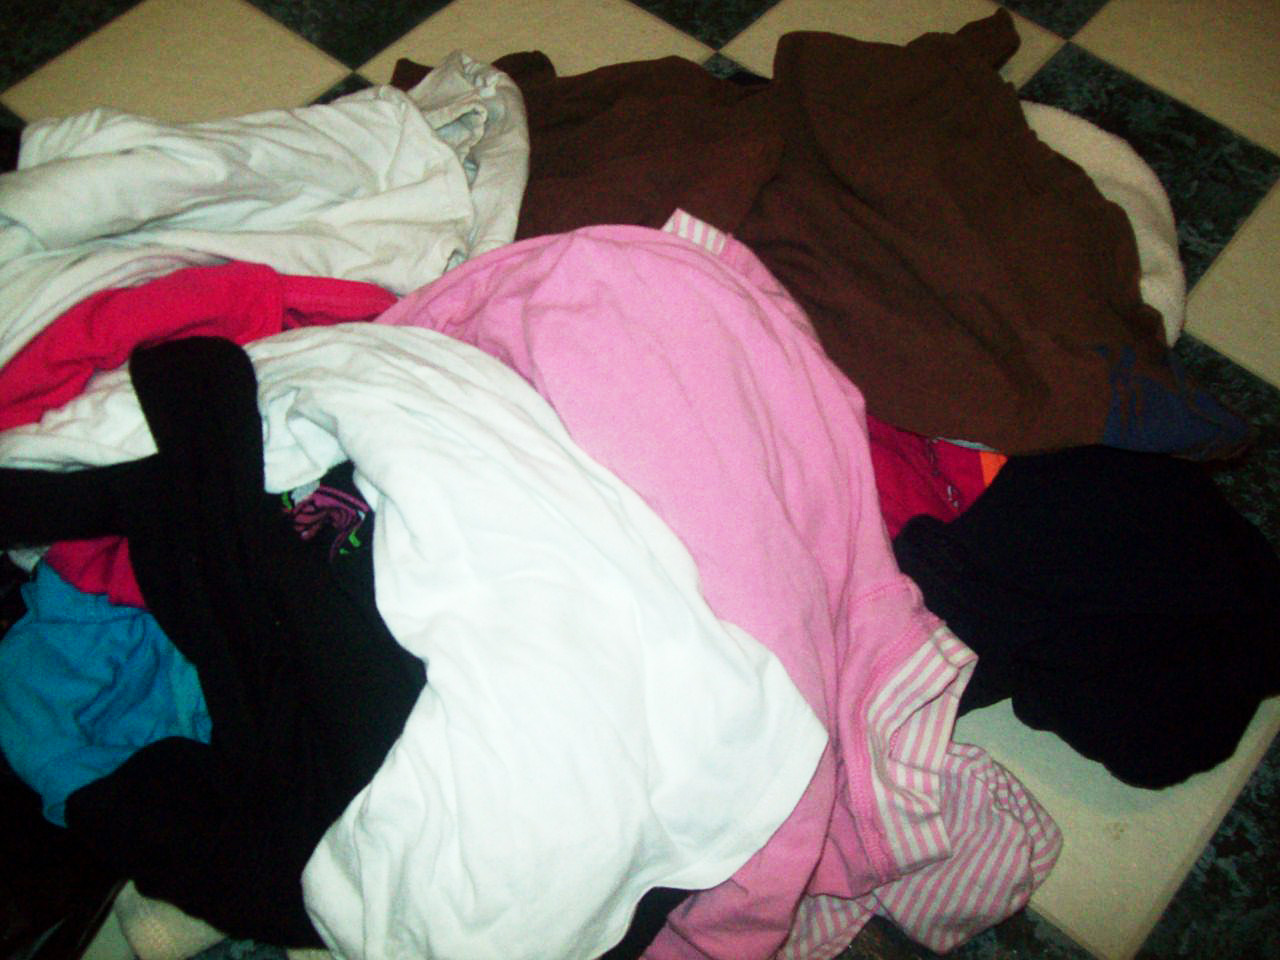
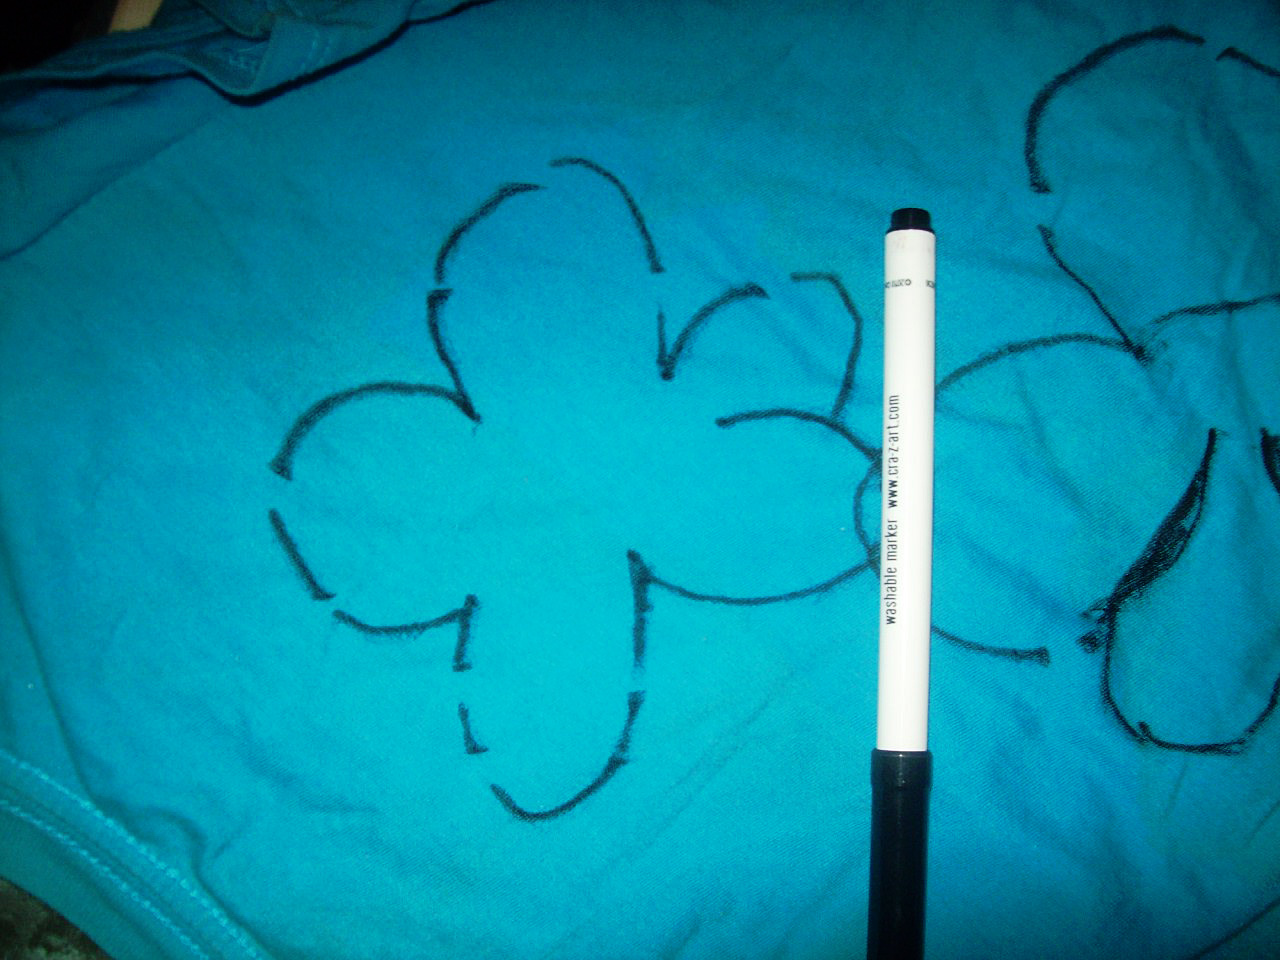
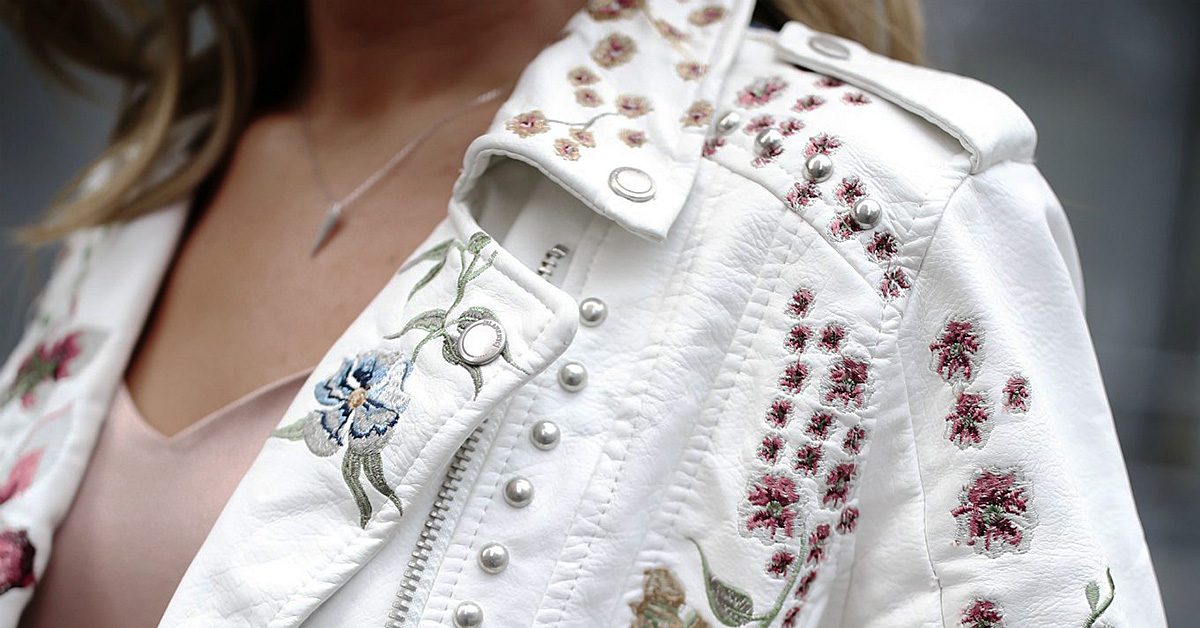
5. Clothes

Last but not least, you have the option of making your own outfit. Or two of them. Or three. Or sixteen. If you’d like, make your entire wardrobe—but if you do decide to take that route, you might want to get started ASAP. The school year is soon coming, and a wardrobe can be a time-consuming thing to make! Browse fabrics and patterns to find combinations that you can see yourself wearing, and get to sewing!Clothes

With these supplies ready to go, you’re equipped for a one-of-a-kind, homemade first day of school!

Picasso Products for Sewing

Picasso Products for Sewing

Sewing can be a precise art of measurements and strategies. But at times, it’s kind of fun to loosen the standards and try for something less typical—and the results can be quirky and intriguing! This is what I like to refer to as Picasso Sewing. The title is a bit misleading since there’s structure and definition to Picasso’s works, but the idea of odd elements that don’t necessarily fit together is a fair representation of what you could create if you try for a more lenient method of making your next sewing project.

For example, a Picasso throw pillow, which I recently did!

First, I chose fabrics that fit together without matching in the most conventional sense—two patterns that are both based on geometric shapes and lines of color.

Picture 1

The primary colors stand out from one another, but the blue fabric includes a similar pink shade to what’s on the pink. The most distinctive difference between these two fabrics though could be the pieced-together look of the blue fabric. Whereas the pink blocks are solid pieces, the blue ones were already a patchwork design since multiple geometric shapes form the overall design. The fabric choices essentially match in a shared pink color and a general foundation in geometry, but they’re different enough to create a mismatched look.

For the backing, I chose a different pink fabric that comes with elastic-esque lines of fabric.

Picture 2That elastic quality made this fabric a gamble since I didn’t know how the bunched areas would work when the front and back were sewn together, but remember that I was taking risks with this one!

Once I had my out-of-the-fox fabric selected, it was time to start piecing together the front part of my pillow. I chose to go with a patchwork design, but I was lenient with how I put the patches together—and even how I cut them. Basically, I cut out a piece of one fabric, then cut other fabric shapes that were similar, but not necessarily exact, in size. Once I had pieces that looked (to my eye) sensible for a patchwork project—an estimation of approximately 2-3 inches in either direction—I decided on the pattern those pieces would take and started sewing the blocks together.

This is another step where basic sewing strategy was put on a shelf to create something more Picasso than an average throw pillow. I didn’t pin the individual blocks together, and I tugged them so that they fit alongside their neighboring pieces essentially on whims. I just tried to get a good amount of space for each block of fabric, and I didn’t worry too much about making everything exact and organized.

The result was an interesting setup where the blocks were tilted and varied in size, and I love it!Picture 3

I did give a bit more thought to piecing the lines of blocks together by using a handful of straight pins, but the messy appearance still exists in this pillow!

I ended up adding a fourth row of blocks to get the pillow a little bigger (I seriously eye-balled and compared fabric blocks to get every measurement here), but after that, it was time to apply the backing. To do that, I was again unorganized in my methodology. I laid the top layer of the throw pillow on the backing material, then pinched the backing fabric enough to where there would be extra space between the layers for filling.

I only used less than a dozen straight pins to keep the layers of fabric in place as I sewed far enough from the edges of the top layer’s fabric to allow excess material on all sides.Picture 4Next, I sewed along all of those sides until there was one patch of open space left to insert the filling, then finished sewing the rest once the filling was inside. Since I had the elastic element to consider for the backing, at times, I had to allow bumps between stitches to make up for the excess fabric for all of this sewing detail.

After that, I’d intended to shred the edges to make this a raggedy throw pillow, but once I cut off the larger portions of the backing fabric, I found I already liked the raggedy look that the unclean edges brought to the product. So rather than rocking the boat by shredding the ends, I just cut off pieces that *needed* trimming—like excess thread or very shredded parts of the fabric.

There are two details about my process that I’ll mention in addition to this basic strategy. The first is what I used for filling. This is a creation that’s not intended to look or be sophisticated, so I used a series of old shirts to stuff into the pillow. If you’re going for something that’s more concerned with comfort, you might want to try for a more standard filling.

The other detail is that this process, since it ends with a ragged final product, can be forgiving for mistakes because it’s understood to look a little worn. For me, that came in handy because I didn’t leave enough fabric to completely link the patches in at least one spot, causing a gap. Since it’s okay for this pillow to look imperfect, I was able to sew up that spot without worrying that the thread would be seen, then add that thread-repair-look at a couple of other spots that didn’t need it.Picture 5The result seemed like a structural decision to bring that ragged quality to life rather an error in strategy.

The final product is a pillow that’s Picasso-like in its leaning and varied-sized blocks, and so very raggedy with its frayed ends and fake repairs. Had I gone strictly by the books, I might not have come up with something so imperfect looking—and I really would be missing out because I adore this pillow! Picture 6The moral of the story? Don’t be afraid to bring a little imprecision and a lot of Picasso to your sewing to create unique products! Sure, strategy is great, but loosening the guidelines in sewing can be awesome, too!

Having a Friend who Sews

Having a Friend who Sews

Some things just work better in pairs.

Some things just work better in pairs.

Some things just work better in pairs—like shoes, socks, friendship bracelets, and the Everly Brothers. Often though, even our pastimes can be enhanced by the addition of another human being. Going to the movies, as an example, is more fun with a friend to offer ridiculous comments to or to discuss the movie with after the credits roll. Another example would be hiking. It could be great for you to wander through nature while getting a workout, but if you have someone to share the experience with, that company provides another level of goodness.

Sewing, too, can benefit from the presence of another person, even if people often think of it like a solo task. Things like classes based on sewing show evidence of this since you’ll be learning—should you take one—in the midst of other people who are interested in the same craft, but the reasons behind sewing non-solo are applicable beyond the notion of gathering in dozens in a classroom. Truthfully, there are common, day-to-day rationales for having a sewing friend or two in your life that you could find useful even if you don’t want to leave your house for your projects. You can pick up your phone, call them, and invite them over for sewing assistance.

And that sewing assistance can come in three specific forms that we’ll cover in this post. Ready to dive in? Then let’s go!

Taking Measurements

You might find that getting your measurements on your own can be complicated.

You might find that getting your measurements on your own can be complicated.

If you’re the type of person who sews your own clothes, you might find that getting your measurements on your own can be complicated. If you try to measure from shoulder to shoulder, for instance, you pretty much have to lift at least one shoulder, and that can throw off your measurement. It helps then to have a second person around who can step in and help you. Now, sure, you can recruit whoever is around to help you get that shoulder measurement, but it’s still best to have that someone be a person who’s familiar with sewing.

The reason for that detail is because people who are accustomed to taking measurements won’t need an explanation about how to take the measurement. They’ll understand, if you want help with your waist measurement, that the sewing tape should be at the smallest part of your waist. The process is familiar, and they’re accustomed enough to know how tight the tape should be held as well as where the cut off is in regard to any kind of tape-overlap. That familiarity can make for not only an easier sewing experience, but also a more accurate one. A non-sewing friend might allow too much slack and cause your clothes to be too big. To go Goldilocks, the sewing friend might measure just right.

Sharing sewing supplies

Sharing is caring.

Sharing is caring.

Sure, you shouldn’t be the person who constantly asks to borrow things—particularly if you don’t return them. But if you’re in a situation where you’re friends with someone you share an interest with and both of you trust the other enough to loan supplies, this can be a very real benefit for you and the person your friends with. If you don’t have the right shade of blue in thread, maybe your friend has it! If your friend doesn’t have a specific sewing needle for a task, perhaps you have one! It’s a great back-and-forth situation where you’re being afforded the opportunity to have a go-to for supplies you need who’s just a phone call away.

This dips into shopping as well since shopping with your friend could help each of you be aware of what the other has in their supply for these sharing moments. Of course, this wouldn’t be the only reason to go shopping for sewing supplies together, but it’s a definite plus! Either way though, in addition to sharing the supplies, you can share the experience of finding the right supplies with a good friend—and what shopping trip isn’t more fun with a friend?!

Socializing

Brainstorm ideas to come up with the best projects you can make.

Brainstorm ideas to come up with the best projects you can make.

Any time you have an interest, it can be nice to have someone to talk to about that aspect of your life. Otherwise, you might find that you have nowhere to turn to discuss interesting or pressing matters in regard to the field. It’s like being an avid reader who finishes a really great book, but then has no one to talk to about that book. You have all of these thoughts, opinions, and reactions, and where exactly are you supposed to send them?

Sewing can be so similar because you pour so much of yourself and your time into your projects. It helps to have someone there to talk to about your progress, your confusions, or your plans. The process can help you brainstorm ideas to come up with the best projects you can make, and it can give you a place to offer your complications in a way where you can ease your tension. You might even get some insight about what to do to fix those complications rather than bottling them up until they potentially run you down so much that you throw in your sewing thread. This social quality can then better your sewing experiences, and it can also increase your odds of continuing your sewing endeavors. That makes it a definite advantage of having a friend who sews!

Bottom line? Don’t think of sewing as an exclusively solo gig! Having that sewing friend can make for a brighter, easier sewing experience—from shopping for supplies to putting together your projects. You might have to sign up for a class to find that friend, but trust me! They could be worth their weight in sewing thread!

Strip Piecing for a Postage Stamp Quilt

Strip Piecing for a Postage Stamp Quilt

It seems the more I dig into the world of quilting, the more things I find that I never knew about it in the first place. The brand of creativity is like a well of opportunities, or a garden that you can browse until you find the right flower to plant in your yard. Each project and possibility is its own type of craft, and the quilter has to figure out which of them is intriguing enough to try a hand at.

This idea is essentially what I’m doing for this blog when I explore new quilt types. I look at new possibilities, and when one catches my interest, I dig deeper!

For this blog post, that’s exactly what I’ll do for what’s known as a postage stamp quilt.

Postage stamp quilt

A postage stamp quilt.

A postage stamp quilt.

If you’re wondering what a postage stamp quilt is, it’s actually not that complicated of a style to explain! Think of a roll of postage stamps waiting to be applied to envelopes, and you’ll have a good grasp on what they can look like. It’s one small block of fabric after another, like the patchwork quilt I invested time in, but with much smaller pieces. In fact, that seems to be the main difference in the top layer of a postage stamp quilt and one for a general patchwork quilt if they’re both basic block formats. For the stamp quilt, the blocks are smaller—potentially only a couple of inches!

When I was first introduced to this concept, I was a little intimidated. The reason for that intimidation was that I know by experience how much time can be spent assembling the outer layer of a larger-block quilt (something closer to ten inches), so the idea of putting together pieces that are this small felt overwhelming. Taking the process one piece at a time would require a long, long time for me, and the strategy would be so focused on such a smaller area that it would almost have to be tedious. As intrigued as I was, I figured it would be a frustrating task!

Strip piecing

Then I did a bit more research, and I realized you don’t have to sew these pieces one at a time. Another strategy is to strip piece them together.

All strip piecing means is that, rather than focusing on one square block of fabric, you’re using longer sections to sew together  — rectangles in place of squares.

All strip piecing means is that, rather than focusing on one square block of fabric, you’re using longer sections to sew together
— rectangles in place of squares.

All strip piecing means is that, rather than focusing on one square block of fabric, you’re using longer sections to sew together—rectangles in place of squares. For example, if you choose to use two-inch blocks of fabric for your stamp blocks, make sure the width of each strip of fabric is two inches, but don’t worry about creating the two-inch length yet. Rather, keep those strips longer!

As one source pointed out, how long the strips are can depend on you, what you’re able to handle, and how long you can keep cutting in a straight line (Quilt Videos, 2016). If you can go from the top to the bottom of three feet of fabric, you can have three-foot strips of fabric to work with. But if you find that you tend to get shaky or swerve-prone with extended cutting, you might want to keep those strips smaller. For me, I probably wouldn’t go beyond ten or twelve inches, but if you’re a more advanced quilter, you can try for more.

Time to put these pieces together

Once you have your strips, line them up side-by-side and sew them together in a chain fashion, two strips at a time.

Once you have your strips, line them up side-by-side and sew them together in a chain fashion, two strips at a time.

Once you have your strips, line them up side-by-side and sew them together in a chain fashion, two strips at a time. Begin with your first two strips, sewing them along their long sides so that they’re linked with both of their primary images being showcased, and then do the same with one of those linked pieces and a new strip. Once you finish, you should have a series of fabrics connected in long strips that are small enough, width-wise, to embrace the postage stamp quality in a quilt.

Once you finish, you will have a series of fabrics connected in long strips.

Once you finish, you will have a series of fabrics connected in long strips.

From strips to squares

After you’ve sewn a number of strips together—again, it can depend on how much you’re comfortable with working on at a time—it’s time to make those rectangles into squares! If your fabric strips were two inches in width, measure and cut across your connected fabric strips at every two-inch interval from top to bottom, length-wise. At that point, you should have a series of new strips, though these will be made of a series of smaller blocks of fabric—as many blocks as fabric types that you used.

If your fabric strips were two inches in width, measure & cut across your connected fabric strips at every two-inch interval from top to bottom, length-wise.

If your fabric strips were two inches in width, measure & cut across your connected fabric strips at every two-inch interval from top to bottom, length-wise.

You should repeat this process through all of the fabric you plan to use for your quilt until all of it has been transformed into these multi-fabric strips. From there, it’s time to start piecing them together into the top layer of your quilt. All you need to do is arrange them together in a way that looks appealing to you until you reach the width and depth you were looking to achieve in your quilt.

All you need to do is arrange them together in a way that looks appealing.

All you need to do is arrange them together in a way that looks appealing.

The process might sound a bit complicated, but once you get the hang of it, you might be surprised at how quickly your stamp quilt comes together!


References
Quilt Videos. (2016, March 24). Quilt Monkey – Episode 301 – Easy, Strip Pieced Postage Stamp Quilt Block [Video File]. Retrieved from https://www.youtube.com/watch?v=j3N7al2V8C8
Witherby, S. (2011, October 27). Dead Simple Christmas Quilt mock up [Electronic Image]. Retrieved from https://www.flickr.com/photos/inkyswot/6285898784
Sewing for Independence

Sewing for Independence

June is wrapping up, which means that July is on the horizon. If you’re an American, that means Independence Day is right around the corner with its fireworks, watermelons, and recollections of the birth of our freedom. But along with those standard notions for the 4th of July, there’s also a sewing story to be found within the details of our nation’s birth. It’s a story you might be familiar with, and we’ll explore it a bit on this post.

Betsy Ross

Betsy Ross presenting her flag to George Washington & two other members of the Continental Congress.

Betsy Ross presenting her flag to George Washington & two other members of the Continental Congress.

Once upon a time in the 1700s, a widow—named Betsy Ross—who was trying to make ends meet by sewing and such was approached by none other than George Washington and two other members of the Continental Congress. Why? They wanted her to create a flag for the nation that was budding around them. It’s easy to write off this detail as unimportant since countries and states often have their own flags as standards, but when you dig deeper, you might find how significant this moment was in United States history.

“Don’t Tread on Me” flag.

“Don’t Tread on Me” flag.

Before this, not once since the colonists started struggling for freedom did they have one unifying flag. Rather, a number of flags were decorating their army, and that concept doesn’t spark ideas of unity—not to the level that one overall flag for an army can showcase. If one group is using a “Don’t Tread on Me” flag, and another is waving the “Liberty Tree” one, that’s division even on a subtle level. Through Ross’s work, there would be one flag to fly for all the Colonials in their push toward independence. All of them would be united under that one flag in contrast to the subtle division they’d experienced before.

“Liberty Tree” flag.

“Liberty Tree” flag.

Ross accepted that responsibility to create the nation’s flag, and the rest is history.

But let’s take a moment to consider what could’ve happened if the United States had lost the war. I’ve heard how the men who signed the Declaration of Independence were essentially signing their own death warrants if the British had prevailed, and while I’m not saying that 18th century soldiers would’ve executed Ross for her assistance in the rebellion, it’s hard to say what her consequences would have been. Would she have been imprisoned? Banished? Would she have become a social outcast? Maybe she would have lost her business—her means of supporting her children—because she agreed to take on that duty of sewing the nation’s first unified flag.

Betsy Ross risked everything to make the USA's first flag.

Betsy Ross risked everything to make the USA’s first flag.

I’d be surprised if Ross herself didn’t wonder these same things. Imagine the unease she would’ve felt, thinking that she could’ve lost her means of providing for her children, as an 18th century widow, for such a sewing detail in the war. She could’ve passed the prospect on, choosing instead to let someone else sew the nation’s flag—someone perhaps who wouldn’t have so much to lose.

But she didn’t

She agreed to be an active part of the nation’s struggle for independence, risking so much to let her talent bring the colonists that sign of unity. And now? Now, we have flags waving across the nation and a pledge that’s to be given to that flag. Children have been taught to honor and revere the flag because what began with a handful of Continental Congressmen and one upholsterer has come to symbolize the nation as a whole and every man and woman who’s given their life or blood to keep it striving.

Did Ross know that so much would come out of her sewing project? She likely hoped the colonists would prevail to build a free nation, but knowing that it would happen is different. Even if she had known about their upcoming victory, how could she have known how much that flag would come to mean to the generations of Americans that would come in later years?

The evolution of an American tradition.

The evolution of an American tradition.

The point is that sewing was a part of our nation’s beginning, and it was a substantial moment for the United States. For once, we had a unifying flag, regardless of how much it could have cost just to agree to thread a needle and start sewing on it. Ross took that chance, and to say that the product has been significant to our nation would be an understatement. Overall, sewing has impacted our nation, and it’s linked to the struggle that allows us to celebrate our nation’s day of independence.

Enjoy the fireworks

So for the Americans reading this, happy Independence Day!

For others, even if the 4th of July is just another day on your calendar, consider how important such a small sewing project was. Will one of us sew something that noteworthy? Probably not! But clearly, each sewing project can matter—whether on a personal or public level. Tackle them with passion, because we never know how everything will turn out.

Fabric for Filling Empty Wall Spaces

Fabric for Filling Empty Wall Spaces

Not so long ago, I had a series of plaques that I’d earned hanging on my wall above my bookshelf. Since then, the bookshelf was moved for the sake of rearranging my bedroom, and those same plaques were then hanging to the right side of my bed with a big space of emptiness below them. Now, because I had a concern about those plaques falling off the wall and onto the bed during the calm of a night’s sleep, I took them off of the wall altogether. And now?

Now, I have an even bigger empty space—one that exists from the ceiling to my bed.

Now, I have an even bigger empty space—one that exists from the ceiling to my bed.

Now, I have an even bigger empty space—one that exists from the ceiling to my bed.

Yawn

That’s boring. Very, very boring. It’s like my bedroom is incomplete, and I will potentially feel frustration over this until it’s covered and decorated as fully as the rest of the area is. So because I have such a distaste for the blankness of the wall, my mind has been perusing the possibilities as to what specifically could go on this space to fix the issue and therefore give me a more relaxed mentality in regard to this wall that’s so close to the right side of my bed.

My original idea for fixing my wall-is-too-empty issue was to hang a Marvel poster beside my bed, even though I know by experience that having a poster fall on you in the middle of the night can be a frightening experience. Why? Well, call me a child, but I still appreciate a good poster (and certain Marvel movies). It’s an easy fix that won’t give me a concussion if it falls at night, and it’s a cheap one if I buy the right poster. But then I got to thinking…

You see, I recently cleared out some clothes from the dresser, and if you’ve learned one thing about me through reading my posts on this blog, it could be that I’m cheap and like to make use of what I already have for fabric. So since I did that dresser-clearing, I have material right in my bedroom that can be used to create something to go on this too-empty wall to my right.

So since I did that dresser-clearing, I have material right in my bedroom that can be used to create something

So since I did that dresser-clearing, I have material right in my bedroom that can be used to create something

But what would that something be? That became the question, and through internet browsing, I’ve come up with two options I’d like to share with you.

Let’s brainstorm

The first of these possibilities is to create a wall quilt to hang there, one that’s a combination of the pieces of fabric that were banished from the dresser. Since I adore patchwork quilts, this option could be accomplished by the simple process of using similarly sized pieces of fabric for each block to compose something that’s bright and vivid—and an interesting touch to my wall décor. As I’ve covered patchwork quilts a number of times already on the blog, I won’t go into too much detail about how to make one. Just know that it’s a prospect, and time and effort could lead to a one-of-kind wall hanging to fix my problem through this method.

Beyond that though, I noticed a particular quilt idea that sparked an idea that moves away from the actual quilt theme. It was from a quilt that depicted a flower garden, and it occurred to me that the overall scene could be applied away from the quilt setting. How? You’d just need to assemble the pieces of the quilt project in separate formations and hang them on your wall instead of sewing them to the quilt. For instance, you could take a marker (use a fabric-friendly writing utensil!) and trace the patterns of flowers, butterflies, clouds, the sun, a house… Whatever you feel is appropriate for the scene you’re trying to showcase. Simple rectangles could be used to create a fence, or a combination of fabric types could come together to create something as intricate as a rosebush. Just imagine a hole fabric-created garden scene placed right on your wall!

Take a marker (use a fabric-friendly writing utensil!) & trace the patterns of flowers, butterflies, clouds, the sun, a house…

Take a marker (use a fabric-friendly writing utensil!) & trace the patterns of flowers, butterflies, clouds, the sun, a house…

In fact, this idea could be embraced for more than just using your fabric to cover up an empty space on your wall. You could use your old fabric to create holiday scenes, for example, for a sentimental touch to your decorations. If you only have red and white, you could make candy canes. Only blue? How about snowflakes?! A series of fabrics? Get to work on a gingerbread house! These individual pieces could be tiny projects that of themselves are beautiful and worth showing off, but when you bring them together, their appeal increases—a lot!

Fabric for Filling Empty Wall Spaces

Don’t overlook the prospect of constructing these tiny projects that come together for a bigger work of art! It’s like a quilt, but without the actual quilt part—which is a pretty interesting twist to me!

Tips for Dazzling up a Ring Bearer Pillow

Tips for Dazzling up a Ring Bearer Pillow

I can’t recall the first time I heard the phrase, “June bride,” but it’s something that’s stuck in my mind as the years have passed. While, to me, other months might present better options for a wedding (Sue me! I don’t like 90-degree weather!), June has somehow become what could arguably be the staple month for wedding ceremonies. Since we’ve entered that month, it seems fitting to target those ceremonies for a post or two. For this particular one, we’ll focus on a tiny wedding detail that can be handmade for that extra bit of sentimental value, and that’s the ring bearer pillow.

The ring bearer's pillow.

The ring bearer’s pillow.

For instructions on how to make a throw pillow in general, you can check out this link. But because pillows can be treated as such simple projects, I won’t discuss how to construct the actual pillow. Instead, I’ll concentrate on more decorative details in regard to the pillow’s appearance. These are aspects of the pillow that could come into play while you’re selecting fabrics and such—little concepts that you can do to construct something that stands out for your big day!

Choose your fabric wisely

The most important thing to consider for your ring bearer pillow is your fabric choice, and the most obvious option would fabric that has a bright white look to it. This matches the bride’s ensemble and showcases the brightness of the day, but if you want to go with something less traditional for your wedding, you might think a little outside of the box in regard to color.

You might think a little outside of the box in regard to color.

You might think a little outside of the box in regard to color.

For instance, I adore fairies in fiction and movies. If I were to have some kind of fairy garden theme to a wedding, it might make sense to use fabric options that are more creatively colored than basic white. Maybe a pale blue or a light green would work, or perhaps even a combination. It’s worth considering, overall, how your theme and wedding colors could be represented in the pillow for a unique look.

Fabric additions can be applied to the basic pillow structure to give it a more distinctive, lively look—things like lace, ribbon or tulle.

Fabric additions can be applied to the basic pillow structure to give it a more distinctive, lively look—things like lace, ribbon or tulle.

Time to accessorize!

You might also want to consider accessories for the ring bearer pillow, and I don’t just mean the rings that will be carried on it! Fabric additions can be applied to the basic pillow structure to give it a more distinctive, lively look—things like lace, ribbon or tulle. Again, you can go with the basic white, or you can better pair the accessories’ hues with your theme or wedding colors if doing so feels like the right option.

Not only can these accessory decisions make your ring bearer pillow stand out that much more, but they can also be used as ways to fix technical errors. If you sew lace around the ends of the pillow, as an example, you might find that a spot where your stitches weren’t that fantastic on the actual pillow can be covered by the lace. If you accidentally punch a smaller hole on the top of the fabric, you can make sure that ribbon you have meeting in the middle to create a bow covers the error. Essentially, while prettying up your ring bearer pillow with visual elements, you could improve its appearance as well by making your mistakes less visually obvious!

And in regard to those accessories, don’t limit your options to fabrics either! Sometimes the smallest trinkets and gems can push a normal-level work into more amazing territory, and things like gems speckled around your ring bearer pillow or a pin that looks like a heart can create a simple elegance that adds a level of sophistication to the project. Another similar idea would be to use sequins that could catch the light of the event and shimmer to again mimic the brightness of the ceremony. Each of these embellishments are options that, if used in the right amounts and ways, could lead to a ring bearer pillow worth talking about at the reception!

Structure is key

Structural details that you could vary would be the shape of the pillow - maybe use a heart, oval, or star shape.

Structural details that you could vary would be the shape of the pillow –
maybe use a heart, oval, or star shape.

Keep in mind that even the construction of the pillow could highlight a particular quality that you want to embrace in your wedding if you’re going for something more modern and less traditional. Structural details that you could vary would be the shape of the pillow—maybe use a heart, oval, or star shape—as well as the face of the pillow itself. Instead of thinking, “How can I decorate this simple pillow,” you could make the top of the pillow its own design that doesn’t need any décor at all because the design is the décor—like a large flower, made of fabric, that covers the top. These decisions are structural elements that could create the unique, one-of-a-kind ring bearer pillow that you’re searching for to spice up your wedding!

So to give a sentimental touch to your wedding, turn this traditional addition to the ceremony into something homemade, unique, and fitting! It could add a splash of perfection to an already perfect day!

The Basics of Cathedral Window Quilts

The Basics of Cathedral Window Quilts

The time has come to explore yet another quilt type, and this one seems a bit less known than your standard patchworks and rag quilts. In fact, until I was doing brainstorm-browsing for this post, I don’t recall having ever heard of this kind of quilt, but the style is noteworthy enough to merit looking into. Through repetition, pattern, and color, quilts of this variety can have an interesting look to them that makes them stand out in similar fashion to the architectural designs of their namesakes.

The type of quilt I’m referring to is a cathedral window quilt.

The type of quilt I’m referring to is a cathedral window quilt.

The type of quilt I’m referring to is a cathedral window quilt, and as distinctive as cathedrals themselves could prove, these sewing products can be straightforwardly identifiable once you know the traits to search for. Those traits, as with the artistic and structural wonder of cathedrals themselves, can catch the eye with their composition and beauty like few other quilt styles — in my opinion — are capable of doing. In this post, we’ll go through a list of typical characteristics that you can spot in a cathedral window quilt that provide evidence of its type so you can more easily identify one in a crowd of variously styled quilts. In particular, we’ll focus on four distinctive features of cathedral window quilts, starting with their…

These quilts are not necessarily known for bright coloring.

These quilts are not necessarily known for bright coloring.

Bold colors

These quilts are not necessarily known for bright coloring, but a good percentage of the fabric used in creating a work of this category could be very bold, like dark blues, greens, and reds that give their sections a real pop. Even with the cathedral window quilts that use more pastel-based colors, those color options are still varied and strong, and they could build centralized sparks of color in certain patterns. If you’re going to make a cathedral window quilt, be sure to include some very dynamic colors to give these defined and robust splashes of color throughout the product. These bits of color, to construct the right design, “are folded precisely and sewn with curves to create small windows,” and “folded blocks are added together until the quilt is the desired size.” This sounds very direct and uncomplicated, but what are those bold-colored fabric pieces added to? That would be…

The overall point though is that the juxtaposition of light & dark make each section stand out.

The overall point though is that the juxtaposition of light & dark make each section stand out.

White fabric

Along with varied colors, it’s also a good idea to snatch up some white fabric if you intend to make a cathedral window quilt. That white fabric added in contrast to the bold colors already mentioned helps to cement the notion of having stand-out sections of color on your quilt. Typically, the white fabric can completely surround portions of bold-colored fabric, but the reverse can be true as well if bold colors appear to surround the white fabric. The overall point though is that the juxtaposition of light and dark make each section stand out — the bold colors and the white sections — to result in a quilt that doesn’t necessarily have a single piece of it that isn’t remarkable and noteworthy.  The consequence is a repetitious design that follows a…

These quilts can employ very specific shapes in their overall design—ones that can be mimicked in pillows.

These quilts can employ very specific shapes in their overall design—ones that can be mimicked in pillows.

Definite pattern

Often, these quilts can employ very specific shapes in their overall design — ones that can be mimicked in pillows. Specifically, the bold colors are often in the shape of near-diamonds, but those diamonds’ sides invert inward to create a swooping motion along all four sides. That diamond-esque shape is surrounded by a circle — one that can be ringed — and those circles can overlap throughout the entirety of the project. Is this the only way that a cathedral window quilt can take shape? Well, it’s not set in concrete! But if you see this general pattern, you have very real evidence that you’re looking at a cathedral window quilt since the pattern is so common for the style. Another trademark is that it has…

If you neglect a layer of quilt, that’s a layer of quilt that isn’t available to strategically cover mistakes & such, so the work could feel more vulnerable.

If you neglect a layer of quilt, that’s a layer of quilt that isn’t available to strategically cover mistakes & such, so the work could feel more vulnerable.

No backing

That’s right! With this quilt variety, you can forego the backing detail since the “quilt blocks… stand alone as is” without that extra detail. Does that factor make for an easier project? Maybe not! If you neglect a layer of quilt, that’s a layer of quilt that isn’t available to strategically cover mistakes and such, so the work could feel more vulnerable. Once you get the hang of the process though and make the adjustment, it might actually lead to an easier quilting experience because “you simply iron down your edges and sew.” Considering the level of beauty that these quilts can achieve, it seems like a sensible prospect to push through the confusion of learning to construct a quilt without a backing in order to eventually fashion such a lovely and reportedly easy project.

With these guidelines in mind, you could be able to spot a standard cathedral window quilt among other quilt options with scarce effort. In fact, coming to that conclusion of quilt style could become almost instinct where you look at a product and say, “Yeah! That’s a cathedral window quilt!” since the appearance is so very individual — and lovely!

Working with Vinyl: Tips for a Beginner

Working with Vinyl: Tips for a Beginner

Imagine a summer day spent by the pool with your sunscreen on, your sunglasses perched on your nose, and a cup of your favorite drink beside you. A cool breeze blows by, and you can’t help but smile from your reclined position on your seat as you casually turn the page on the book you’ve been reading for the last half hour.

Then you set the book aside for the sake of refilling your drink — just when someone decides to do a cannonball into the swimming pool. The water flies upward and outward… and a huge splash lands right on your book. Suddenly, your poolside day of reading deteriorates with the knowledge that the book you were enjoying so very, very much has officially been subjected to the book-disease known as water damage.

This is not a good scenario for a book fan! In fact, it can put a damper on the rest of your poolside visit!

Splish splash

Create a waterproof book cover for relaxing day of reading by the pool.

Create a waterproof book cover for relaxing day of reading by the pool.

So how could this incident have been prevented? Well, you could’ve left the book at home, but there’s another possibility that would allow you that relaxing day of reading by the pool. That option is to create a waterproof book cover. You can find instructions for that concept here, but the step-by-step guide can lead to exploration if you want to properly create this book-protector.

That exploration centers around one important detail, and that’s the best approach for dealing with vinyl in regard to sewing. It is, after all, a much different texture and structure than more common possibilities like cotton and flannel, and if you want the best experience possible for putting together a vinyl-based book cover, looking into how it’s different and what to do about those differences can be beneficial.

Troubleshooting

It’s thick. While it’s not thick enough to be something that seems ridiculous to use, it’s thick enough to come with its own concerns. For instance, you might find that the needle you used to sew that cotton project doesn’t work very well for this vinyl concept. The thicker quality calls for something stronger to easily maneuver through the vinyl to create your book cover. According to one source, “[i]t’s best to use a needle designed for leather or vinyl…[like] Leather Needles from Schmetz” for the task so you don’t have to wrestle with your needle as you go — or maybe even ruin your needle because it bends under the pressure. If this is your first vinyl project, you might want to look for an applicable set of needles for the job!

You may want to add Wonder Clips to your to-buy list for when you’re browsing through the store for your vinyl-sufficient needles.

You may want to add Wonder Clips to your to-buy list for when you’re browsing through the store for your vinyl-sufficient needles.

It’s not pin-cushion friendly. While the tiny holes that pin cushions can leave don’t really make much of a difference in flannel, they can make a very big difference in vinyl since they’re much more pronounced! To combat that issue, you might want to add Wonder Clips to your to-buy list for when you’re browsing through the store for your vinyl-sufficient needles. These things can keep your project on track by holding things in place without forever scarring the vinyl!

“You can’t iron your vinyl flat.” If there’s something that’s a staple in preparing material for sewing, it could be to iron all of the wrinkles out beforehand. Since that strategy doesn’t really work for vinyl (it “could melt” under the iron!), it leaves the question of what a person can do that make sure everything is even before that first stitch happens. A simple solution would be to use your hairdryer on the vinyl, which will cause it to “flatten out nicely.” No bends, no damage, and no worries as you dive into making your stitches for your waterproof book cover!

A simple solution would be to use your hairdryer on the vinyl

A simple solution would be to use your hairdryer on the vinyl

It might not stay in place. One of the things I personally don’t like about using a silk fabric is that it’s so easy for it to slip out of form and throw off your pinning, cutting, and sewing. And, well, vinyl doesn’t seem to want to stay in place either because of its texture. While this might make it perfect for the waterproof detail, it complicates the sewing process just a bit! This complication though is no reason to throw in the towel for this project since painter’s tape can be used to hold the vinyl in place without damaging it at all. It’s an extra purchase for the project, but it can keep things neat and orderly as you go to create a better, easier-made product.

Use tissue paper to preventing sticking.

Use tissue paper to preventing sticking.

It might stick to your sewing machine. To my thinking, few things are more frustrating in the world of sewing than having material that won’t feed through your machine correctly, and since vinyl can stick, this could be a headache waiting to happen! It doesn’t have to ruin the experience though! You could use tissue paper on “the side [of the machine] that is having trouble” while you feed the vinyl through to keep it from touching that part of the machine, thus preventing the sticking. Once you’re finished, this tissue paper “will easily tear off” to become but a memory of a sewing hack you employed!

If you use these tips, tricks, and suggestions, you might find using vinyl is not so difficult that you have to remove it from your list of materials to use. And if you can use it, don’t hesitate in protecting that new paperback from the swimming pool splashes with its own book cover! It’s one step closer to that wonderful possibility of a summer vacation, poolside read!

Summer Trends: Embroidery

Summer Trends: Embroidery

Summer Vacation 2017 is upon us!

Summer Vacation 2017 is upon us!

Summer Vacation 2017 is upon us, and as could be the case for any season and time frame, it’s showing up with its own trends. There are a number of these that you can apply to your sewing, but the one that I primarily want to focus on is embroidery. According to one source, “[t]he biggest trend that is coming in 2017 is definitely embroidery,” which makes it a popular topic to explore and try your hand at. For me personally though, it isn’t my main focus in sewing, so there’s plenty of room for me to learn and grow within that category. What better way could I have to do those things than to explore and research for the sake of a new blog post?

Start at the beginning

Let’s start with the very basics, like what exactly embroidery is. In regard to the world of sewing, that definition has been given as the following: “Embroidery is ‘thread art’ used to embellish a garment, hat or some other product by adding a sewn pattern. Generally, this sewn pattern includes a design and can also include lettering and/or monograms.” If you find that a bit too far-fetched of a definition though, think of it like drawing artwork on a product or fabric. Just as you would take a marker, colored pencil, or crayon to create an image on paper, “thread or yarn” can be used in embroidery to build the picture you mean to make.

Clearly, embroidery has changed over the years, but the long-reach of this style of artwork speaks volumes to its appeal & application.

Clearly, embroidery has changed over the years, but the long-reach of this style of artwork speaks volumes to its appeal & application.

Embroidery, as it happens, is not a new concept either. It dates back to prehistoric times — “to Cro-Magnon days or 30,000 BC” — so prominently that “fossilized remains of heavily hand-stitched and decorated clothing, boots and a hat [have been] found.” Clearly, embroidery has changed over the years, but the long-reach of this style of artwork speaks volumes to its appeal and application. If it has remained for so many millennia and through the technological changes within the later centuries, it’s safe to say that it’s a topic and technique that has captured interest through the passage of time!

Your only limitation is your own imagination

One reason for that appeal is clear since, because of the many forms embroidery can take, the possibilities for design are almost limitless. If you want a picture of a flower, a bird, a house, a doughnut, or a dragon on your work, you can add any of the above — or whatever else you have in mind — so long as you don’t over-exceed your own abilities. If you can physically create it, you can do it! It’s important to note though that this is one area that merits consideration since if you try for something too large-scale on your first embroidery project, you could fall short and become discouraged with the whole process. When you start off with such a bad experience, it can be a psychological obstacle to overcome if you want to better yourself in the field. Keep in mind then where you are with embroidery, and choose projects that are fitting for your level.

If you can physically create it, you can do it!

If you can physically create it, you can do it!

In essence though, embroidery can be incredibly personal and project-specific. You don’t just have to rely on the fabric at your disposal to create a work that’s perfect for you and your purpose. If you want to sew a blanket for a friend’s baby shower, for instance, you could add to whatever adorable fabric you use for that work by personalizing it with the baby’s name. If you’re making some kind of wedding gift, you could add the wedding date right onto the material. That truly is a beauty of embroidery. Whatever you want, if you physically can do it, it’s an option — even if you have to use an embroidery pattern to make it happen!

Unlock your creativity & see where it takes you

Add to whatever adorable fabric you use by personalizing it with a name.

Add to whatever adorable fabric you use by personalizing it with a name.

Of course, this can be applied to your clothing, as is evidenced by the notion that “Gucci, Dolce & Gabbana and McQueen” have all been credited with embracing this trend. The level of creativity involved with this clothing idea, again, can’t be overstated because you can tailor your designs to what you have in mind. If you want a blue top with a colorful butterfly on the left shoulder, you could make that happen even if you can’t find it in stores.

Overall, I honestly don’t know if there’s a more creative way to make your own items unique, so if you want to create a piece that’s as yours as you can manage, you might want to step into the world of embroidery! It’s trendy this summer, and a number of the popular embroidery concepts are very spring/summer-inspired — like flowers and birds. All in all, if ever there was a perfect time to step into this creative category, it’s now!