Traditional vs. Modern Quilts - What’s the Difference?

Traditional vs. Modern Quilts – What’s the Difference?

Do you understand the differences between traditional and modern quilts?

Let’s look and see just what sets these different styles apart.

Traditional quilts

Traditional quilts are tried and true. Folks have been piecing and quilting these familiar designs for hundreds of years. Traditional patchwork designs have names: Log Cabin, Courthouse Steps, Nine-Patch, Dresden Plate.  There are thousands of these traditional patterns, and these are based on blocks and a grid.

Traditional vs Modern Quilts-What's the Difference?

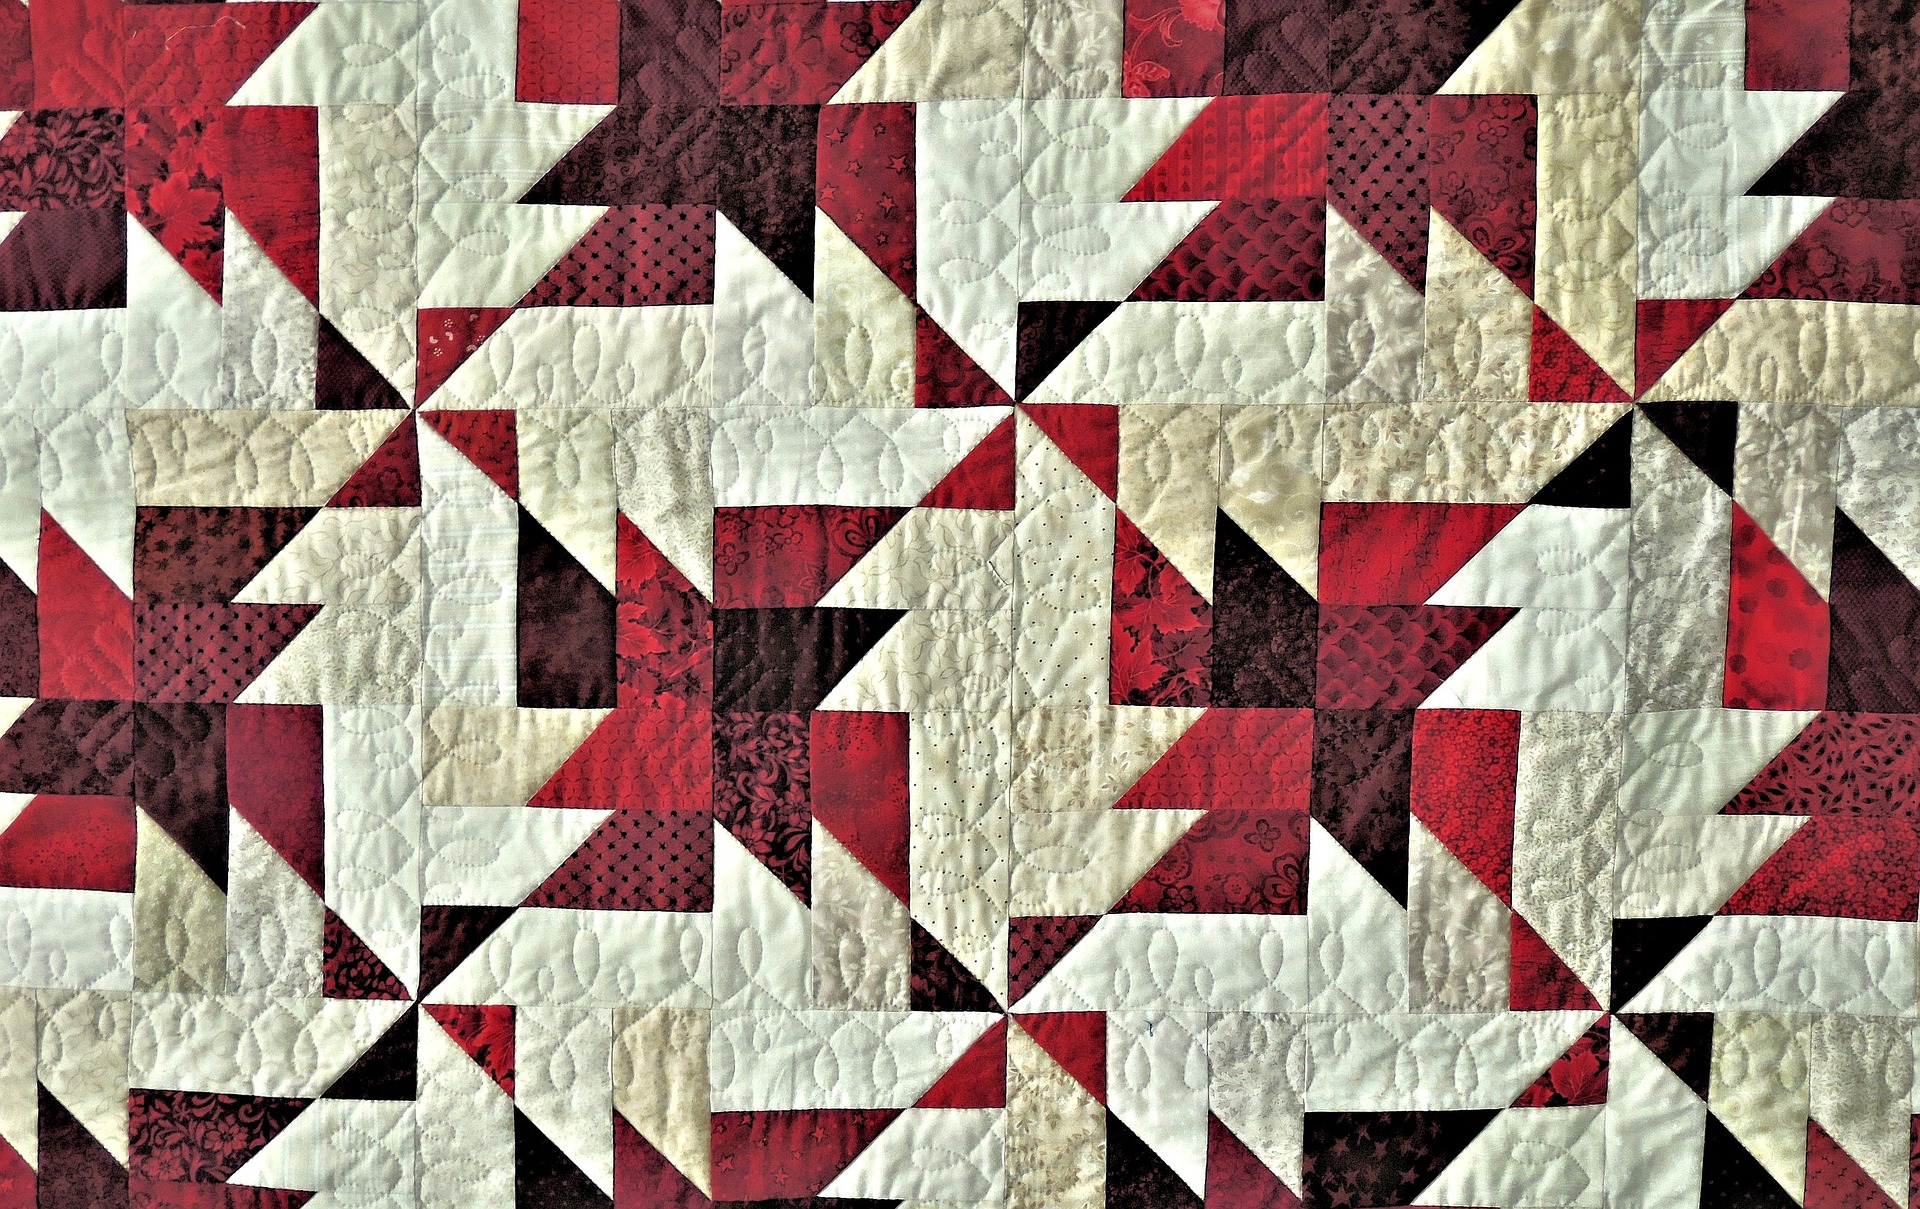
Traditional quilts use regularly repeating shapes and blocks, based on a grid.

Traditional patchwork can be simple or complex, but it is usually made up of many repetitions of the same block and orderly rows. These are frequently combined with uniform sashing between individual blocks and/or borders all around. They rely heavily on symmetry in both the patchwork and the quilting.

Traditional quilt patterns are still made and loved today, but we can say that these are our grandmothers’ quilts—and their grandmothers before them.

Traditional vs Modern Quilts- What's the Difference?

Modern quilts

As the name implies, modern quilts are something new. They are more experimental and rely less on rules and order.  Modern quilt designs began popping up in the last half of the twentieth century. But they really hit their stride just before the new millennium.

Modern quilts differ from traditional quilts in many ways. Traditional quilts rely on a grid of regularly repeating designs, symmetry, sashing, borders, often complicated patchwork, and simple quilting. In contrast, modern quilts go off the grid and use asymmetry, less fuss, minimalist designs, and a more improvisational style with unusual arrangements of blocks and settings.

Traditional vs Modern Qults- What's the Difference?

While there is a definite list of characteristics that categorize the modern quilt style, these are not rules. Most modern quilts will fulfill at least one but not usually all of them.  In general, modern quilt characteristics include a minimalist style; they emphasize negative space rather than intricate patchwork. They may feature bold colors and graphic designs that give high-contrast pop. And modern quilts often feature asymmetry and use unusual block placement and off-center motifs.

Traditional vs Modern Quilts- What's the Difference?

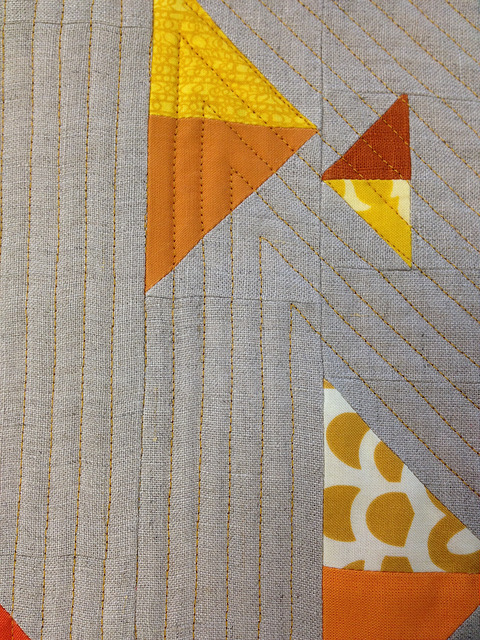
photo courtesy redheadwiththread

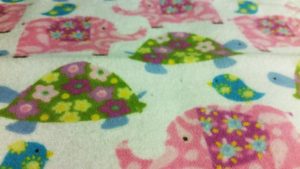
Modern colors and fabrics

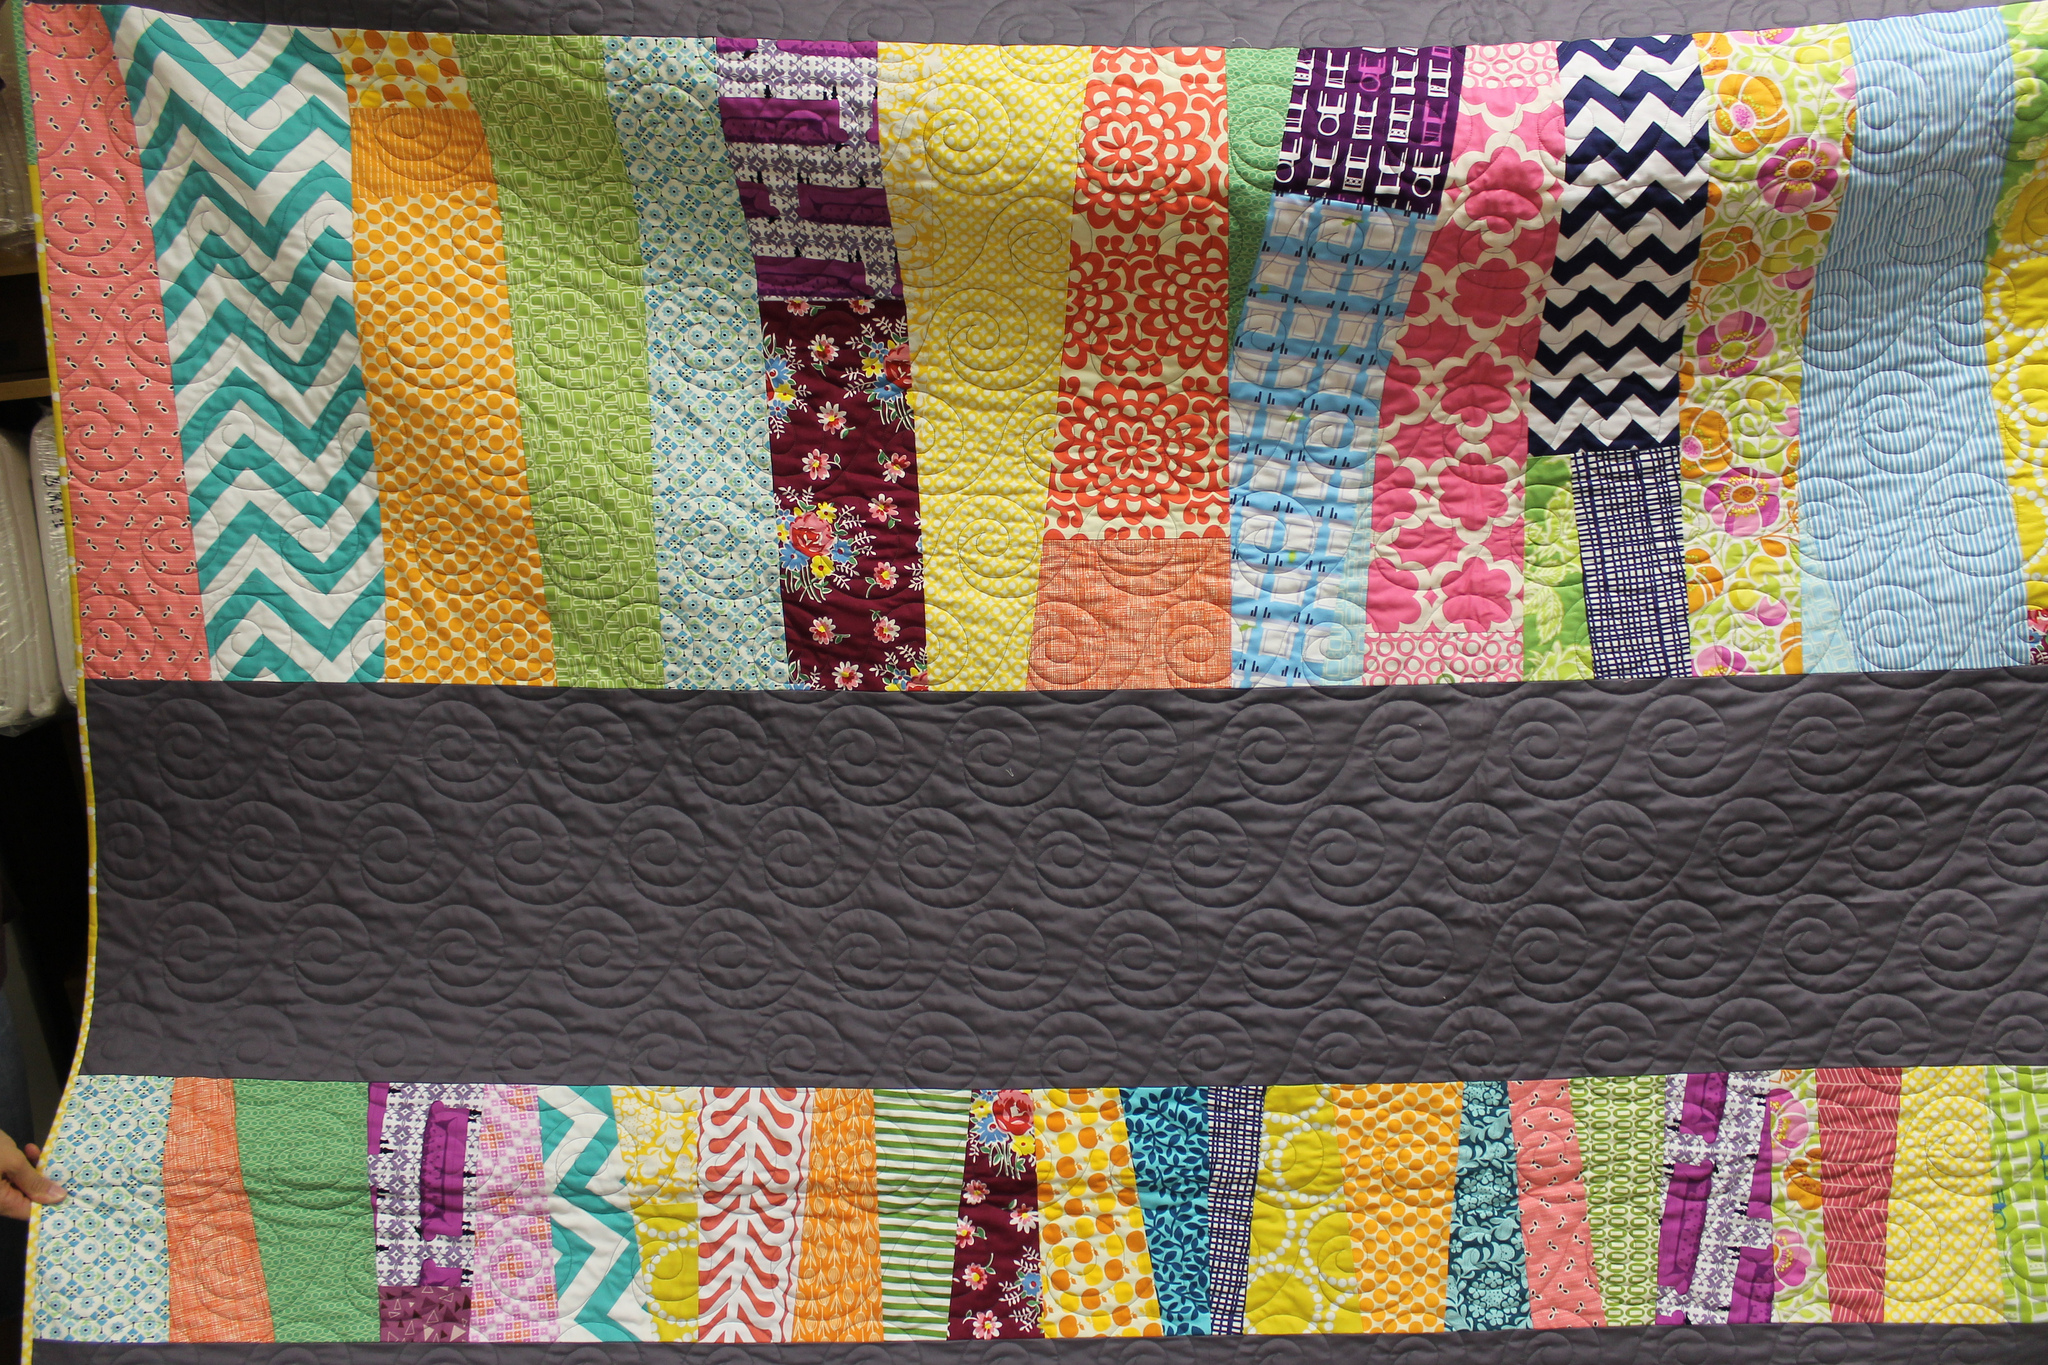
Colors in modern quilts tend to be bold. High contrast graphic designs are created with brightly colored solid fabrics and striking modern prints. These are used more sparingly than in the more familiar repeating patterns which march across so many traditional quilts.  The focus is on the bold modern fabrics, rather than fussy technique.

Traditional vs Modern Quilts- What's the Difference?

Bold colors make modern quilts pop

Negative space and dense, innovative quilting

Negative space features heavily in modern quilts.  In traditional quilting, the repeating patchwork is meant to stand out. So traditional quilters most often construct backgrounds from neutral, receding colors. But backgrounds in modern quilts are brighter and more expansive. Whites and grays are popular choices to bring these negative spaces forward.

All this negative space highlights asymmetrical, alternate grid, or graphic modern quilting.  Simple piecing contrasts with dense quilting in innovative designs. Whereas patchwork commands attention in traditional quilts; on modern quilts, the quilting more often stands out.

Traditional vs Modern Quilts- What's the Difference?

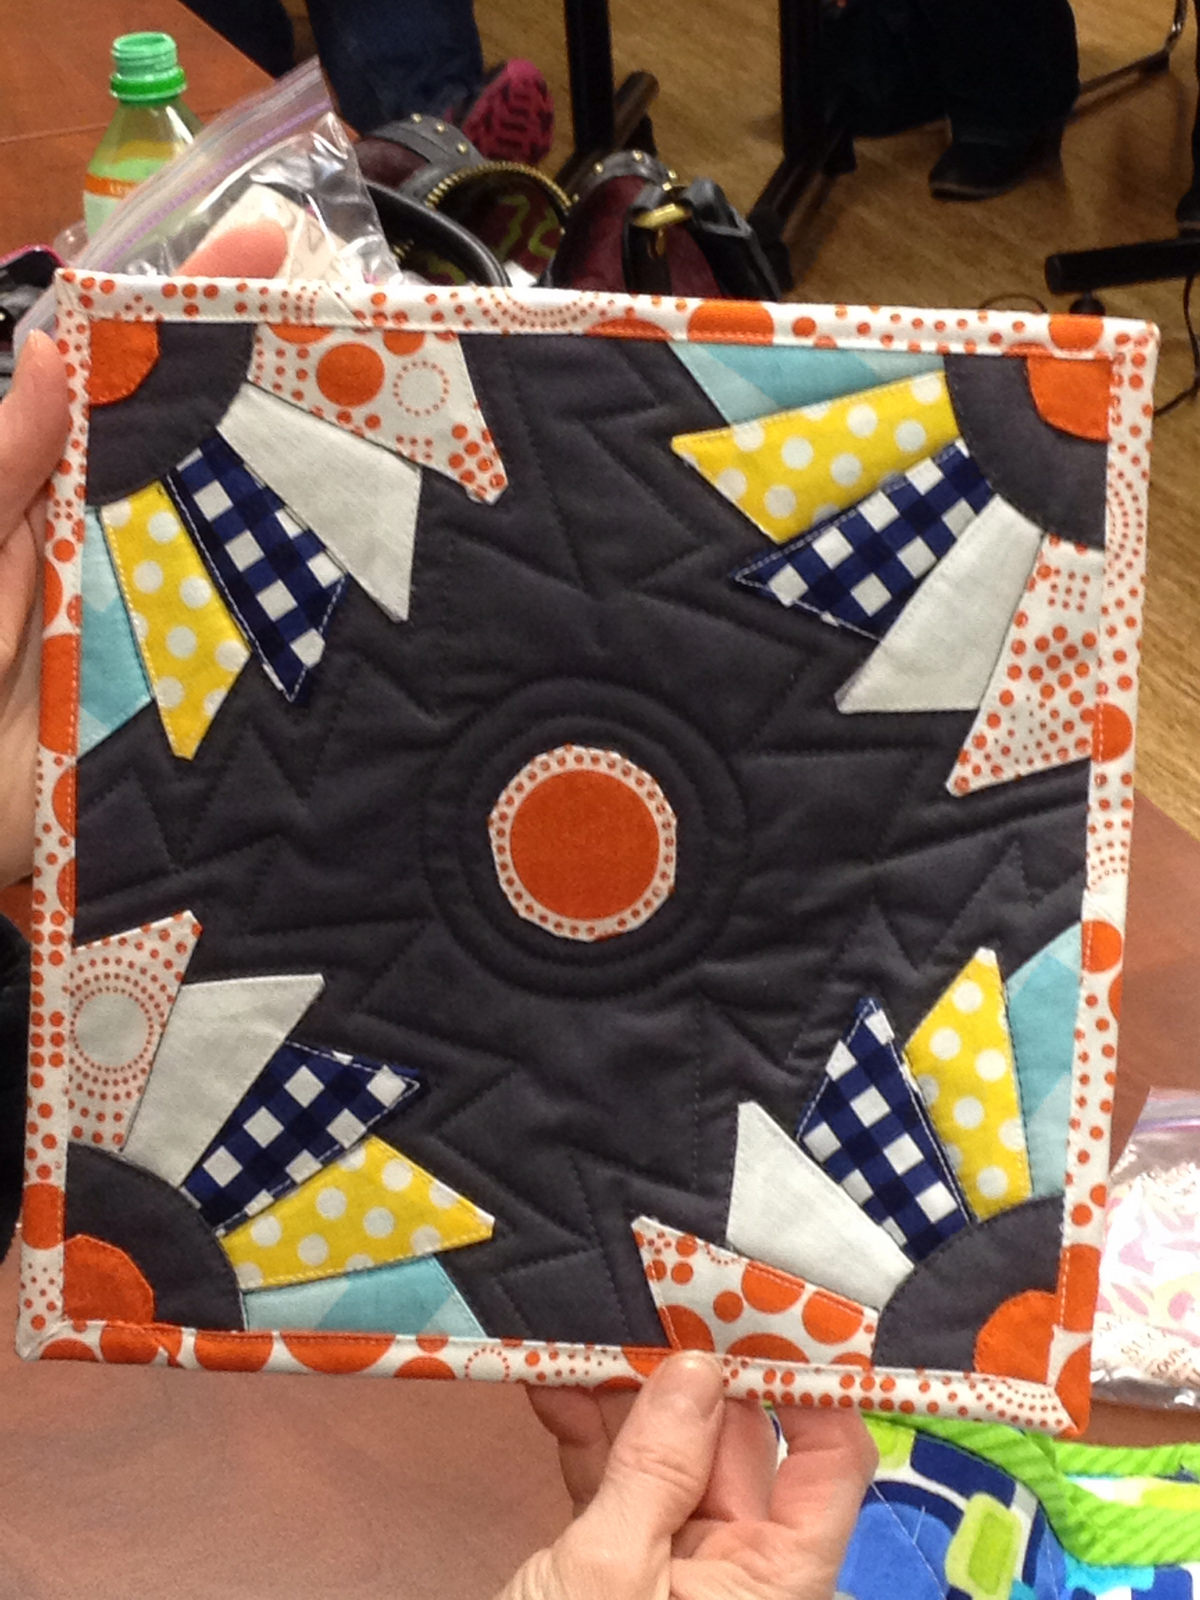
Zig-zag modern quilting

No rules quilting

Traditional quilting stitches may be straight and simple lines, such as with “stitch in the ditch” lines that follow piecing seams. Or they can be elaborate curliques and designs which are deliberately and symmetrically placed to line up with wide borders. They may even meander as free-motion stipples, but these must follow rules, and not cross each other.

Modern quilters are free to abandon all these rules. Modern quilting lines may cross to form geometric patterns, irregular curlicues, or any other design an imaginative quilter can dream up. Quilters can even combine many varied stitches and feature each separately to break up a large expanse of negative space into different sections, for example.

Traditional vs Modern Quilts- What's the Difference?

Another quilt by Columbus Modern Quilt Guild member DanaK

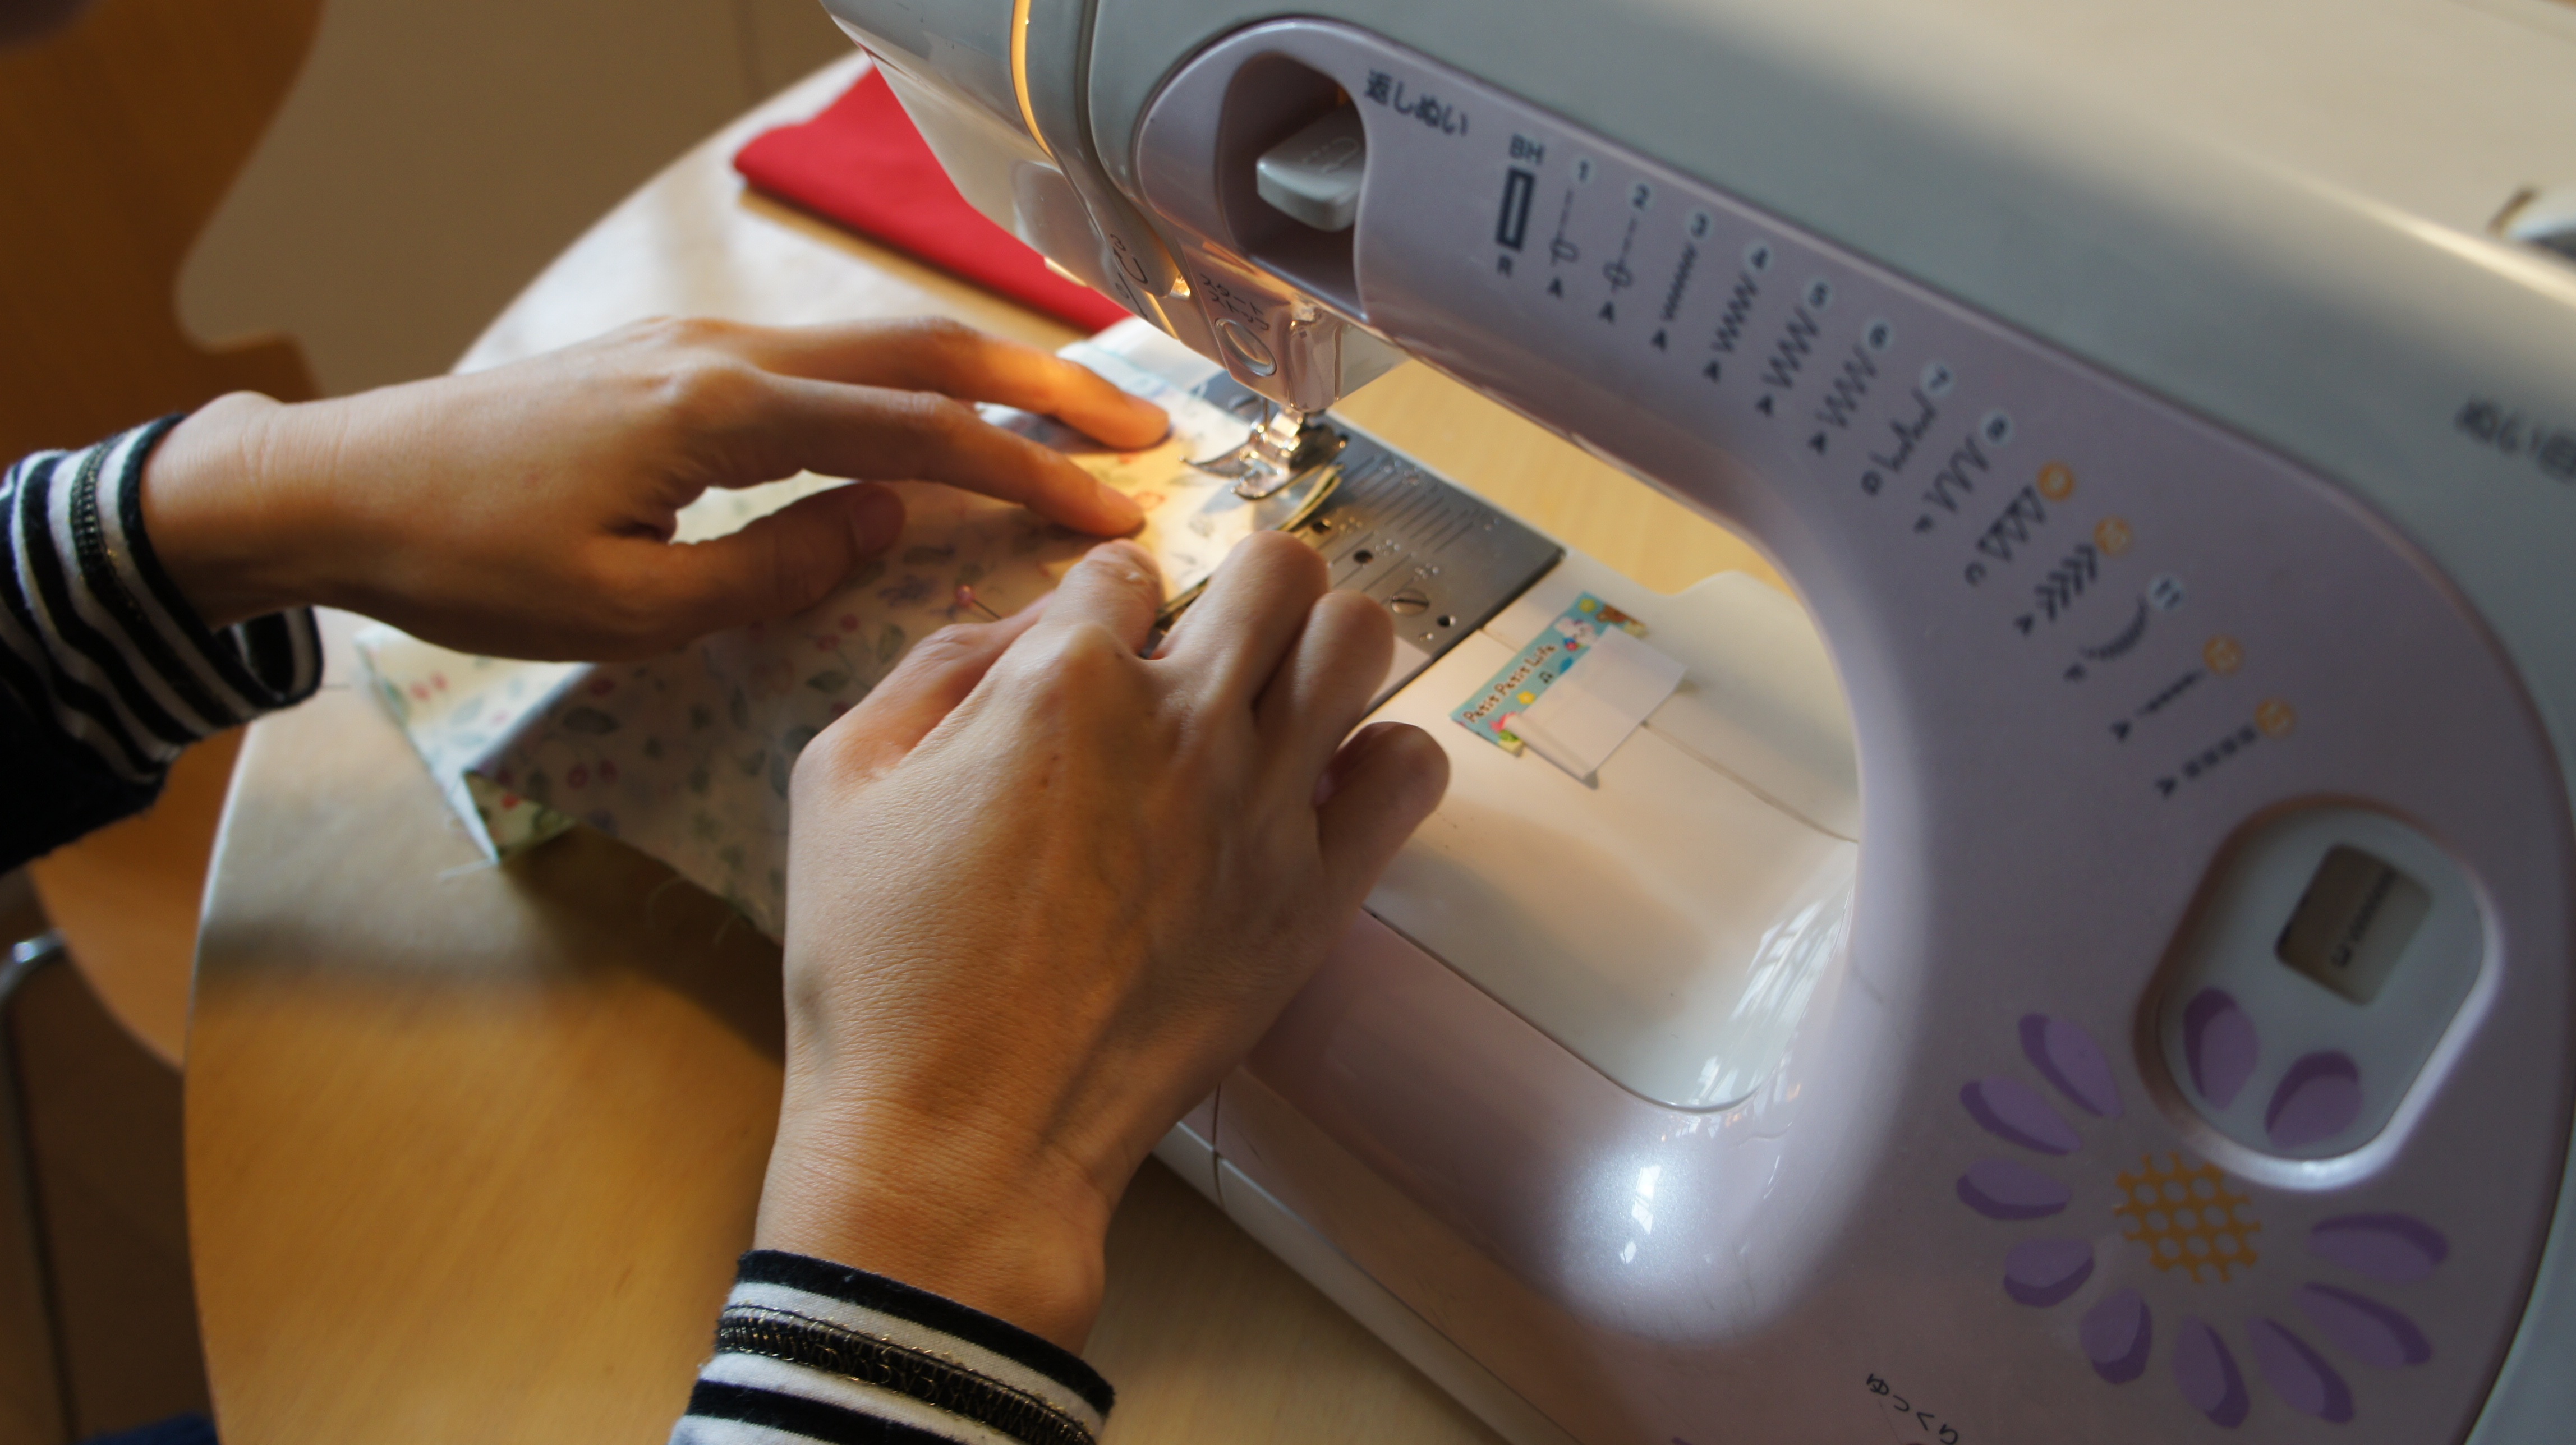
Free-motion quilting is one way to let loose and experiment with fun and free modern quilting. To quilt in the free motion style, use your darning foot. You can either lower your feed dogs to guide your fabric by hand, or you can leave your feed dogs up and just set your stitch length to zero. Either way works!

Leah Day, who teaches free-motion quilting online, challenged herself to create a new filler design every day for a year. And her Free-Motion Quilting Project blog is an excellent resource and inspiration.
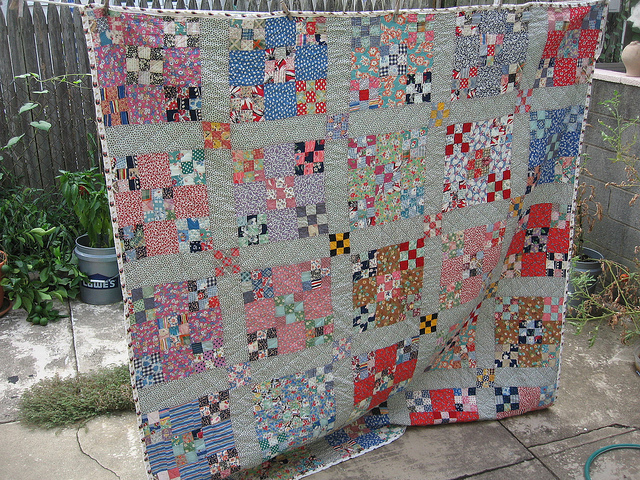
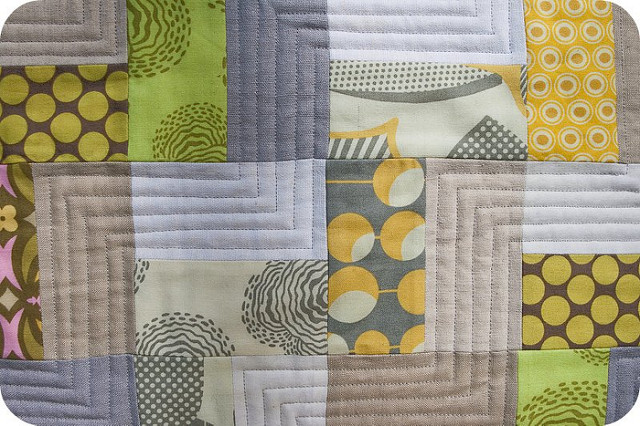
Off the grid layout

Patchwork in modern quilts can include off center or tessellated designs.  Modern quilts differ with much less reliance on uniform blocks and borders than is traditional and may feature irregular rows. Lack of borders and offset blocks create designs that continue beyond the quilt’s edge.  In general, both the patchwork and the quilting on modern quilts tends not to rely on a grid.

Traditional vs Modern Quilts- What's the Difference?

Example from Flickr user Gabrielle shows a modern, off-the-grid design

Modern quilts may make use of technology, such as computers for visualizing designs, and tools such as cutting machines or tessellating or other specialty rulers, to assist with cutting and design.

Traditional vs Modern Quils- What's the Difference?

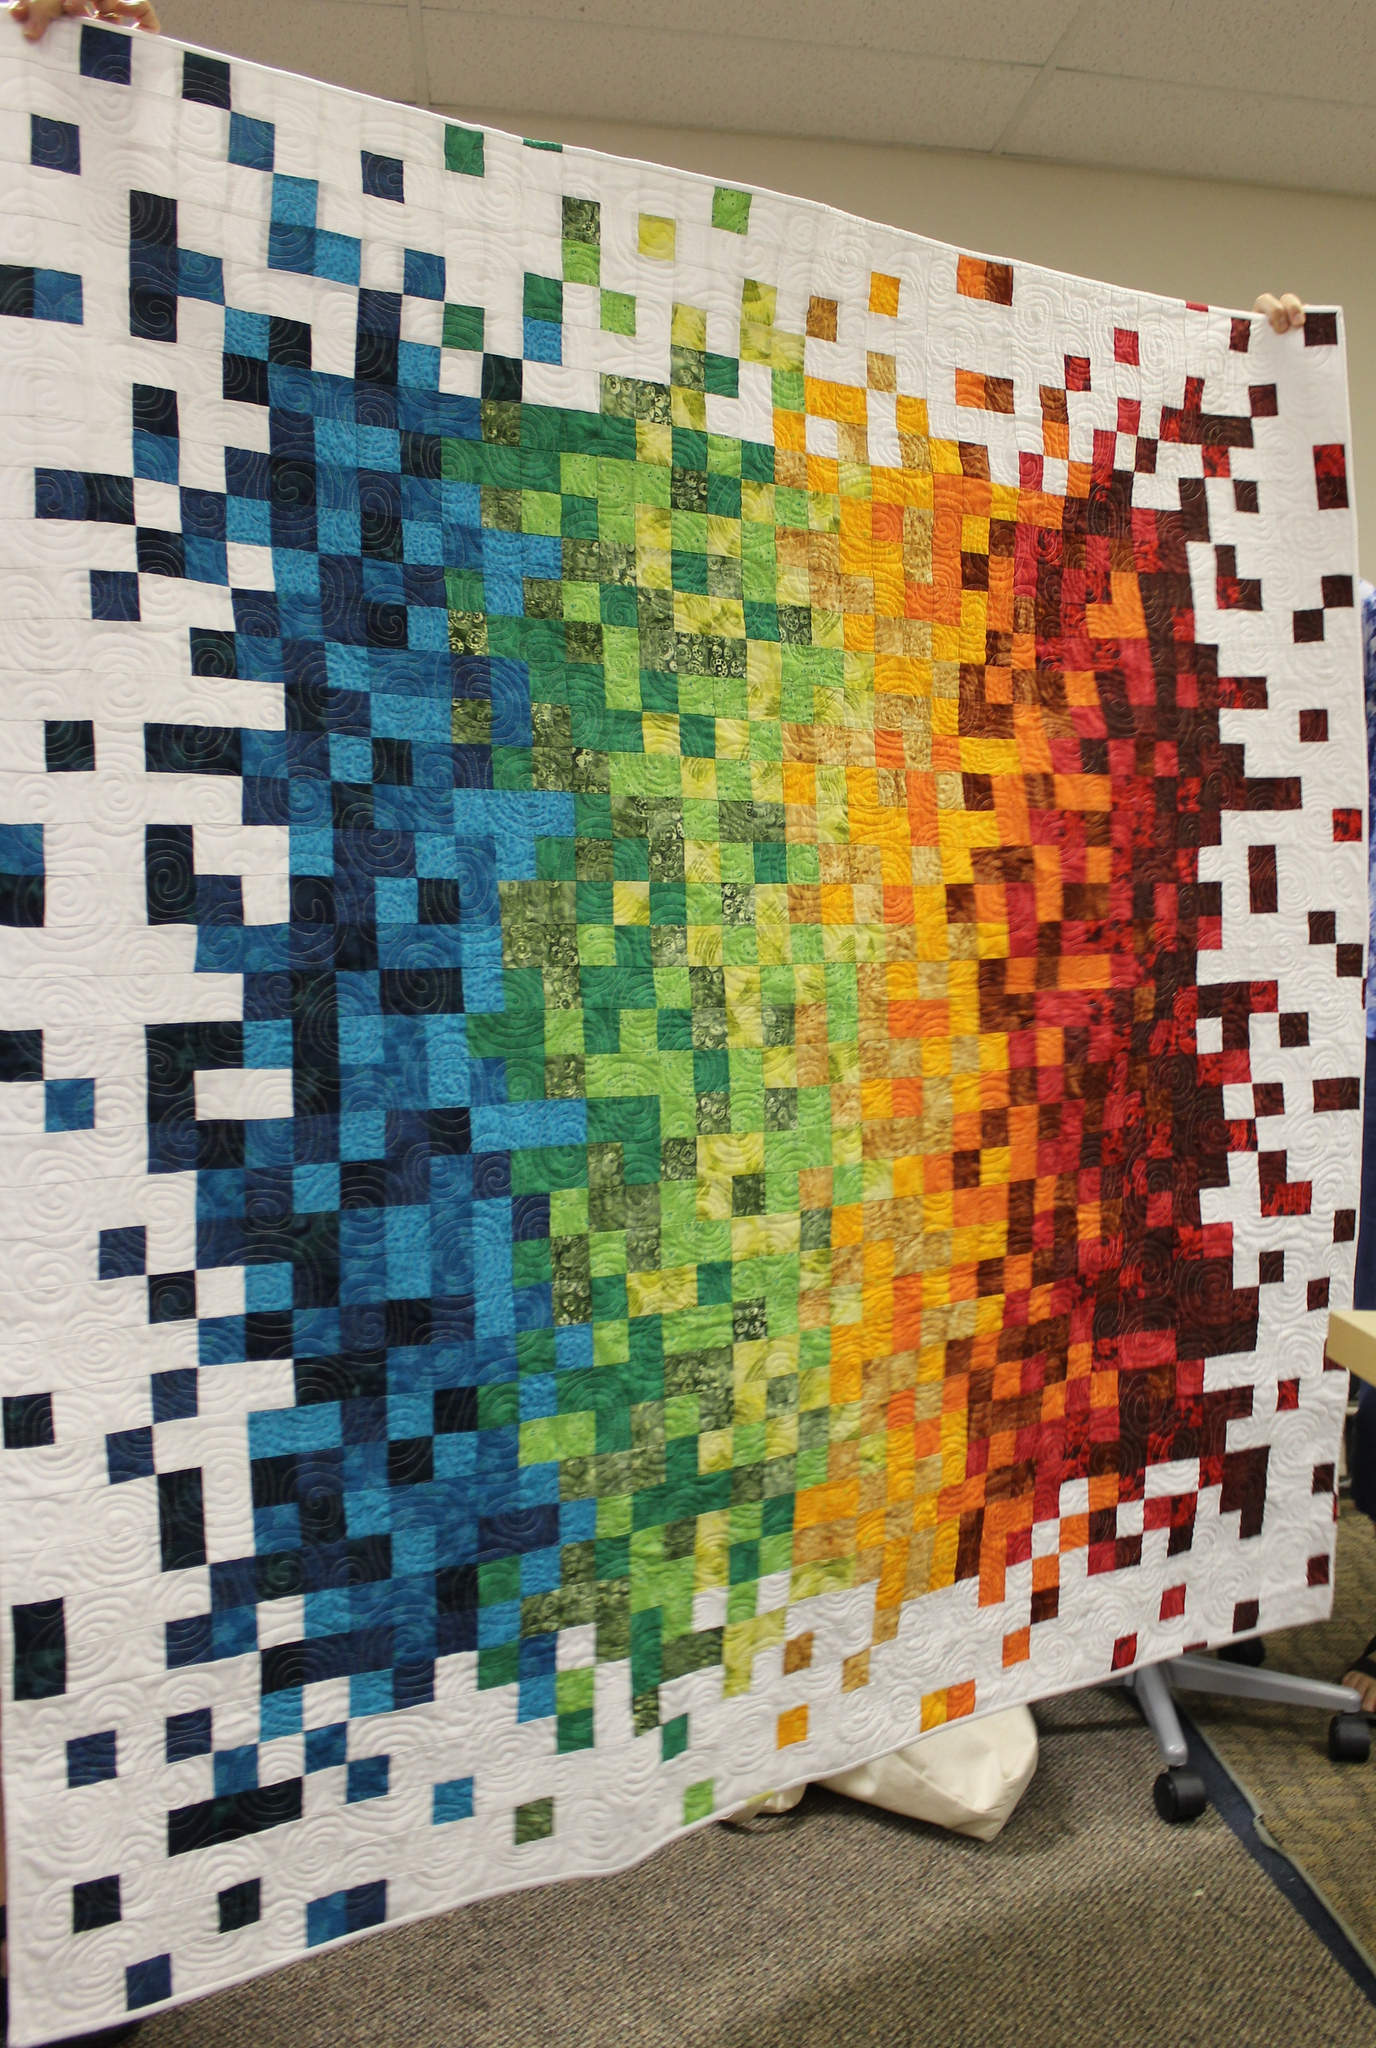
This quilt by Columbus Modern Quilt Guild member shows a fun take on pixelation.

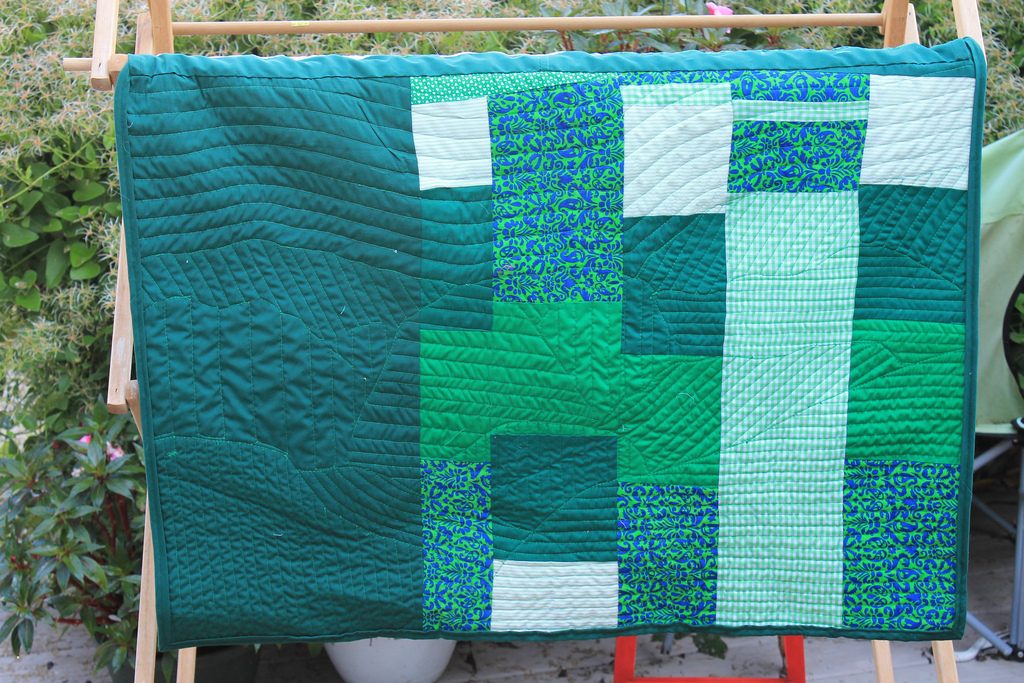
Hybrid design: modern traditionalism

You don’t have to choose between these two styles, however! Modern traditionalism is a hybrid of both. These quilts marry the improvisational freedom in design, piecing, and quilting of modern quilts with the traditional patchwork designs that connect us to the many generations of quilters before us.

A modern traditional quilt may shrink a traditional pattern and sprinkle these sparsely as isolated individuals amongst a wide expanse of negative space. Other modern treatments of traditional patchwork include combining patterns or enlarging blocks to a single design. A quilter may then feature such blocks this off center, for example.

Traditional vs Modern Quilts- What's the Difference?

Modern traditionalism features new settings for traditional blocks. Photo courtesy of Trillium Designs

Which style do you prefer? I love them all!

For more modern and modern traditional inspiration, check out the gallery at the Modern Quilt Guild.
Flickr images licensed under Collective Commons.
It's National Sewing Month!

It’s National Sewing Month!

As a writer, I was well aware there’s a National Novel Writing Month (NaNoWriMo) that happens in November. As a person who sews though, I had no idea there was a month dedicated to sewing, until this week. Imagine my surprise to find that not only does National Sewing Month exist, but it’s this month — September! Essentially, I found this detail out with less than a month left to officially celebrate, but I suppose learning late in the month is better than having to wait until next year to utilize the concept.

I was surprised as well that this status isn’t something that a random sewing fan made up. Rather, this is something that Ronald Reagan declared back in the 1980s. That’s right. This is a former president’s declaration, and it pretty much boggles my mind that something like a sewing month would be noted by a President of the United States. It seems solid evidence that the world of sewing is more far-reaching and popular than what I might have thought when I first dove into it.

Now that I’m aware — and maybe you are too because of this post — that this month is dedicated to sewing, the question arises about how to celebrate it. There are plenty of options to do so, but seeing as how over half of the month is already gone, whatever celebrating you do would have to be fairly quick-paced! Regardless, there are still ways to fit your celebration into your end-of-the-month schedule, like with these possibilities!

Make a quick project

While some sewing projects can take a long time to make, other projects can be done in a day or less — and these are great prospects at this point for celebrating National Sewing Month before it ends. This concept can vary depending on how fast you are with sewing. For instance, something like a quilt might be a project that one person can finish in a week while another person requires longer. A guiding factor for this possibility then is your own ability and time frame. If you can manage a bigger project, go for it! But if you feel more comfortable with something smaller, like a fabric coaster or throw pillow, choose one of those options. As long as you have enough time to wrap up the loose ends before October 1st, you’re in good shape!

A great idea for this project would be to work on a homemade gift that you can give someone later in the year for a Christmas present. This can give you space to craft that gift and an excuse to revel in a month dedicated to sewing. Win/win, right? If you’re looking for sewing projects, Sewing Machines Plus has free project ideas available here that you can browse through to find a National Sewing Month project.leaf-flower-petal-celebration-heart-food-1250761-pxhere.com

Take a sewing class

Sure, a number of programs that you can take have specific start and end times, and you can’t just decide for those options that you’re going to start a class right now. For other possibilities though, there’s room to maneuver, particularly if you take a class you can finish in a virtual setting with timed videos. Craftsy, for instance, has classes with videos of certain lengths, and if you schedule your time effectively, you can finish one of them by the end of the month.hand-needle-girl-woman-vintage-tool-706616-pxhere.com

One other option would be to start a program this month even though you know it’ll extend farther than the beginning of October. Penn Foster programs, as an example, can allow you that kind of freedom to simply decide to register for a class today and work your way through at a personal pace. It’ll extend beyond September, but September can still be the month that led to you making the choice to enroll.

Buy a new piece of equipment

If you want to treat this month as something worth celebrating, why not go all out and buy yourself a gift for the prospect? You could even extend the prospect outward by buying small sewing supplies for friends and family who enjoy sewing as much as you do, like new thread or fun pattern kits. This way, you can spread the enjoyment of National Sewing Month beyond your own personal collection.hand-sewing-sewing-machine-art-design-handicraft-759263-pxhere.com

That doesn’t mean you should feel bad about adding to your own sewing stash though, and there are plenty of ways to build your supplies in honor of the month. If you need a new sewing machine and can splurge just a bit, celebrate Sewing Month by bringing your dream sewing machine home. Check out Sewing Machine Plus’s site for possibilities on the matter!

Smaller details, like a new sewing kit or interesting fabric, can also be ways to celebrate the month if your budget won’t allow for a new sewing machine, and a few extra dollars can lead to a tiny contribution to your sewing supplies in honor of the month. If you can work even a new pack of straight pins into your budget, it’s a method of celebration!

In any event…

I feel a bit of camaraderie with my fellow sewing fans this month, given our shared interest that was valid enough for a president to declare a month for it.

So to these fellow craftsmen, happy National Sewing Month!

A Sewing Vacation

A Sewing Vacation

I need a vacation…

In the past week, I think I’ve said “I need a vacation” about a zillion times (yes, that’s a real number – not just a sewing measurement ʕ•ᴥ•ʔ). Ideally, I want the type of vacation where I’m not tied to technology. I want to check out from the world. Reading and sewing are high on the list of things I’d do during this much needed vacation. I’ve seen knitting cruises in the past and though I’m looking to get away from people right now, if a sewing cruise existed, I might be tempted.

sunset-86214_640

Fellow sewers and crafty people tend to be more fun and easier to get along with than the people I interact with regularly as a freelancer. Don’t get me wrong, I love my clients, I just need a break. As an introvert, extensive downtime is key to my survival.

Sewing is one of many ways I escape the stress and daily pressures of life, so you can understand why I’d be tempted with a sewing cruise. If any travel planners are among my faithful readers, here’s what I think it would look like. If you set one up through your travel agency, please reach out!

My ideal sewing vacation

My old singer is heavy, so if machines were provided, I’d be happy to use another machine for the duration of my trip. Also, I do like the cruise concept, even if it’s just around the coast line for a long weekend. In New England, Maine and Massachusetts both have boats that offer these type of trips. On the cruise ship, there’d be an area set up with sewing machines and the option to either choose a project offered by the trip organizers or bring one of our own.

As with any vacation, fabulous food to meet everyone’s dietary requirements and plenty of both alcoholic and non-alcoholic beverages are necessary. For living arrangements, standard rates for double rooms, of course, but I’d be willing to lay out some extra cash to have a single room and the break from people I’m looking for.

While it’s not necessarily something I’d be interested in, to keep the cruise exciting and fun for everyone, activities like speakers and classes would be excellent. By the time the ship arrivals back to port, we’d all have finished a fun project, enjoyed some serious relaxation, and maybe learned a little something and made some new friends.

What do you think? Would you go on a sewing vacation cruise?

French Alterations and a Wee Rant

French Alterations and a Wee Rant

French Alteration: Pinning a garment with a note about something you never intend to actually do – and no one ever knows or realizes!

At this point in my tailoring and patternmaking career, I tend to work with the same five or six designers. Mainly, because I enjoy working with them and our fitting styles and fitting room etiquette mesh.

“Fitting styles and fitting room etiquette?” you might ask, “I didn’t know that was a thing.”

Well, when it comes to TV and film fitting rooms, it is definitely a thing. I prefer to work with designers I know and respect because they, in turn, know and respect me. And, most importantly, they let me do my job. Which is to fit a garment on a specific person’s body.

Take it in

My fitting style is to survey the situation for a few minutes, to let the clothing settle on a person so I can see what it’s doing or what it wants to do. Then I go in and start pinning if I need to. Sometimes, I don’t need to, sometimes I can tell what needs to happen just by looking at it.

On the rare occasions these days when I work with someone who doesn’t know me very well, they often want me to rush right in and start pinning away before I’ve had a chance to actually look at things. Or, one of my big annoyances, they yank in the center back waist of a thing so the side seams are pulled all wonky and tell me I need to “take it in”.

Well, yes, it does need to be taken in, but not like that.

Fit preference

Sometimes they’ll even do this to a jacket without buttoning the front buttons, which means if I did take it in the amount they’ve grabbed, the jacket would never, ever, in a million years, be able to close.

I try to be as nice as possible and say, yes, I see that. Now, can you please let go so I can see what’s going on?

Costume Designers definitely have their own preferences when it comes to fit and hem lengths and stuff. I’m completely ok with that and will fit things how they like them fit but I’m not going to do something that will end up looking bad in the end (and for which, I’ll be the one who is blamed because, as in most things, people tend to blame the last person who touched a thing if something is wrong with said thing).

We tailors have this little term we use called a French Alteration. It’s when you pin something or write a note about something as if you’re going to do it but never actually do and no one ever knows or realizes.

Anyway, so back to fitting room etiquette. If there’s a designer in the room, I let them do all the talking and or schmoozing about how good something looks on someone. I just like to concentrate and do my job. Some tailors like to chat (which is perfectly cool if that’s your thing) but I like to listen to what the clothes are trying to tell me.

Brand fitting

One thing I’ve noticed about some designers is that they don’t always seem to understand that brands are cut differently and certain labels look better on certain people. Sometimes, you need to go through a whole slew of suit jackets to find the one that fits a specific body type the best. I can do pretty much any alteration but after a point its sort of foolish to spend a crazy amount of time altering a thing when you could possibly find a cut of jacket that works with minimal alterations. Like, if you need to shorten the body of a suit jacket, maybe you should buy a short (as in a 40short or something). Men’s suit jackets come in longs, regulars, and shorts for a reason. Use them.

I know I’ve mentioned this before but, one of my favorite designers to work for is Frank Fleming who, among all sorts of other things, is the Costume Designer for the show Power. Frank is the master at finding which suit brand and cut fits best on which actor. He can even usually tell which one is going to be best by just looking at an actor. I love that, ‘cause as much as I enjoy taking a suit jacket sleeve out, re-cutting the back and or shoulders and resetting the sleeve (not really), why not just start with a suit jacket that works on a specific body type and not do that?

I never went to school for costume design so I don’t know if they teach this little idea but, they should. It’s a huge time saver. And it really just makes sense.

DIY pillowcase for Sea to Summit Aeros Ultralight Pillow

Hero Sea To Summit Pillowcase

This past weekend my family went on an overnight backpacking trip near our home in the Eastern Sierra. When you are carrying all of your gear on your back you want your items to be as light as possible so I picked up this inflatable Sea To Summit Aeros Ultralight Pillow.

1

Of course I’ve never met a pillow that didn’t deserve a handmade pillowcase, so I set to work making one for this uniquely shaped fellow.

2

Fully inflated the pillow is approximately 16″ x 12″ x 4″ with an interior curve on the neck side and an exterior curve on the opposite side. The top and bottom edges are all rounded as well. I used matching fabric from the DIY bandana I sewed in this post and draped it over the pillow to see if it would fit.

Once I knew the fabric would fit, I turned the fabric wrong sides up and used pins to mark the four curved corners. Be careful, you don’t want to puncture your brand new backpacking pillow!

3

4

On the interior curve, I found the approximate center and cut the fabric up a ways.

5

Then I used pins to tighten up the fabric around the top of the curve.

6

Once everything looked right, I used a marker (but you could use a pencil if a marker would show through your fabric choice) and marked the corner seams and the portion of the interior curve I had pinned.

7

Then I used a sturdy ruler and placed it against the sides of the pillow, marking the approximate edge all the way around.

8

Carefully, I slipped the case off of the pillow, making sure not to disturb any of my pins. I only removed the pins corner by corner as I sewed following my marks.

9

For the interior curve, I sewed the small section I had pinned to cinch the fabric around the corner, then finger pressed the raw edges of both sides of cut fabric over twice and sewed a hem.

10

Here I took a moment to turn the pillowcase right side out and placed it over the pillow, just to double check my sizing. I would be adding elastic to bring the loose fabric under the case, but this was good to see before cutting the excess fabric off of the corners.

11

Once I knew it was correctly sized, I turned the pillow case wrong side out and trimmed off the excess fabric on the sewn corners.

12

Then I marked a 1″ hem all around the case using the line I’d created earlier as a guide.

13

At this moment I realized I didn’t have enough fabric on the side opposite where the neck would lie. I took a spare piece and sewed it onto that side, pressed the seam down, and then continued drawing my 1″ hem.

14

Once the 1″ hem was drawn I cut out the fabric. Now you could really see the shape of the case coming together.

15

I finger pressed the hem over ½” and then another ½” and sewed my hem as I folded and pressed.

16

Then it was time to finish the interior curve. I fit the pillow case on right side out and pinned each flap from the center so the fabric hugged each curve. I sewed the flaps.

17

Now it was time to add elastic. I used ¼” elastic.

18

When I had fully sewn around the hem, I drew the elastic across to a point on the opposite side of the pillow and sewed the elastic in place.

19

I then repeated on the opposite side with a separate piece of elastic, creating a crisscross pattern on the bottom of the pillow.

20

As long as you don’t sew the elastic too taught, you can absolutely slip the inflated pillow into the case. Take a few moments to work the case into the shape you’ve sewn and then flip it over to enjoy your handiwork.

21

For backpackers who weigh everything that goes in their pack, this pillowcase weighs 1.4 oz. Happy backpacking!

22

———————————————————————————–
Charlotte Kaufman is a writer and sewist in Mammoth Lakes, California. She specializes in marine and home interiors and continues to fall more and more in love with quilting. You can follow her at charlottekaufman.com.

Sewing for Harvey and Irma

September has REALLY been a month for Texas and Florida so far! Mother Nature has once again chosen to fill the lakes and streams, and even the streets and houses with her life sustaining water, wind and rain. Unfortunately, it has left many, many thousands of people stranded without power, water, food and many families with lost animals and family and worse than that, the roof over their heads is gone.

Such devastation is certainly overwhelming even to those with a strong purpose to ride out the storm. My prayers go out to all affected.

image1

Andrew

I was living in Florida through Hurricane Andrew, and it had to be was one of the most stressful events in my life. I was about 90 miles from Homestead, but the weather forecaster reports were very certain it would make landfall on my community. It did not, however, but the fear was still strong.

Also, in many areas of California, from time to time, dry land and fires ravish the wonderful trees and expensive homes. It simply occurs out of our control. We have to survive and rebuild.

As the reality of these catastrophes hit our homes, and friends and families, my heart hurts to see people’s possessions on the curbs of streets, ruined and wet and unsalvageable. But, there has been an awesome power of giving and helping and a true blessing to my fellow Texans and those in Florida.

How to help

So, to make this article a positive one, rather than a stark reality check, I have been brainstorming ways that one can make a difference to help these people in distress.

Of course, there are agencies that help people with the general necessities, such as water, and food, and shelter in these areas.

But.. most want donors to send cash. But with short notice to evacuate, many people with small children have little chance to gather baby things and comfort items for themselves and even their pets. They won’t have transportation to go shopping either in many cases until the water lowers enough to leave shelters.

I was happy to hear that pets were included in the evacuations; however, some were transported to separate shelters with other displaced pets. I hope their families will be able to retrieve them once they are able to return home or find a new home. But they need comfort too! After all, they are our families.

Anyway, I am researching companies that will take handmade clothes, blankets, hats, burp cloths and other things that I have made for my online shop. I have discovered several charitable agencies and particularly church groups, classes at schools, some women’s shelters, hospitals, even families of our neighbors who may be located in the Houston or Florida area. Check online for these groups. If there is not one, form one from your sewing circles and sewing class students!  Form a group and make small packages together. Include paper diapers, and other essentials, and a handmade toy perhaps.  Sew small things, make sweet surprises and you will make a huge difference for a family and their children.

“It takes a whole village to raise a child” – H.R. Clinton

Here are some suggestions that came to mind:

  • Small blankets
  • Bib cloths
  • Bibs
  • Snuggle blankets (small blankets with satin edging) or Minky fabric
  • Swaddles
  • Diapers
  • Dog mats and blankets – don’t leave them out! (Dallas Animal Shelter is temporarily boarding Houston animals)
  • Soft towels, perhaps small ones, sewn together
  • Soft flannel sheets for the crib
  • Sewn hats or capes
  • Small toys for babies (or dogs) made of soft, safe materials

Use fabric you find on sale, and then you can use other leftover scraps from previous projects (SewingMachinePlus.com now sells fabric in their brick and mortar store. One day, I hope to shop there).