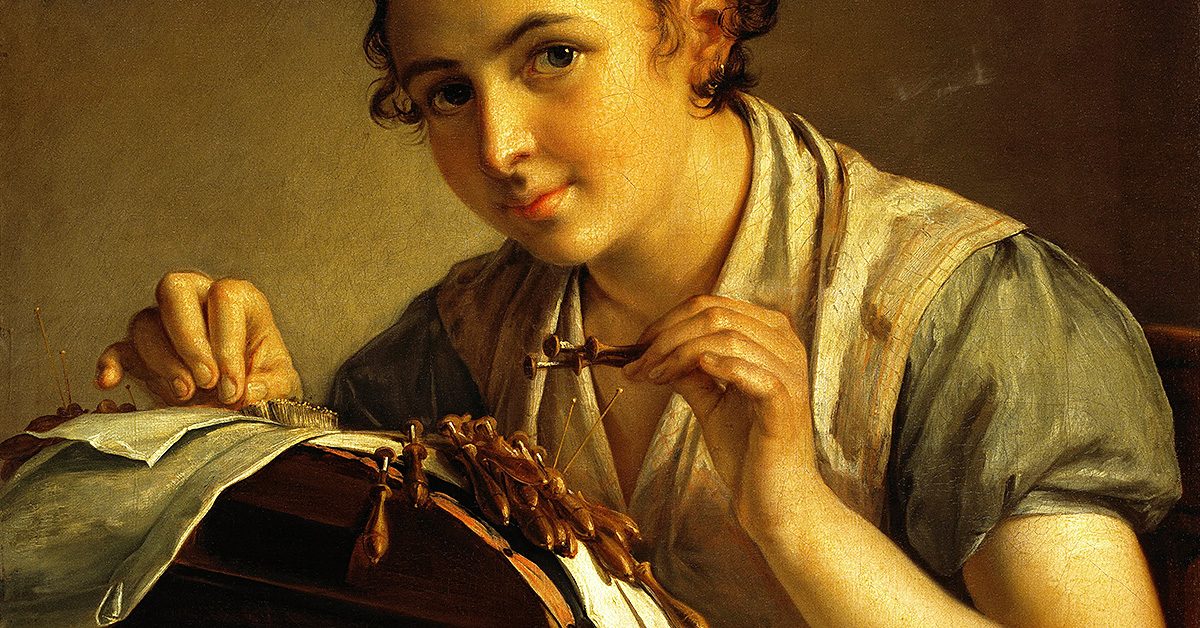
The Lace-Maker by Tropinin

The Lace-Maker by Tropinin

Once more, we’re turning to an artist’s rendering of a sewing topic for exploration and analysis, and this time, it’s coming with a couple of twists. Before we dive into those twists, let’s go ahead and introduce you to the painting that’s the focus of today’s post.

The Painting: The Lace-Maker

The Artist: Vasilii Andreevich Tropinin

The medium: Oil on canvas

The year: 1823

Picture 1

Masterpiece

This is an eye-catching piece, and one of the most immediate concepts that separate it from works that have already been explored on the blog can be noted in its title. The topic isn’t just sewing stitches or making repairs, but rather the very specific task of making lace, which might require different tools than general sewing. The woman in the painting isn’t using a regular needle, clearly, which provides a unique view into the world of sewing.Picture 4

In fact, this entire painting is varied from some of the ones that historically came before it since it’s showing an average woman tending to the lace’s creation rather than someone from high class (“Vasilii Andreevich Tropinin: The Lace-Maker,” n.d.). This woman looks like someone you might see working on a sewing project in the comfort of home, and that quality creates a similarity between the average viewer and the painted woman. You can relate to her because it’s so akin to your approach—sewing in your own home.

Both of these aspects are showcased specifically in the painting—the tools and the woman—through the triangular configuration that’s been noted on other artistic works. Within the triangle of focus, you have the woman and the tools she’s using, allowing your eye to primarily be drawn right to them.

Picture 6

It’s about the passion, not the project

It’s also worth noting that we don’t see much of the actual lace being made. We see the woman. We see her working. But the project is mostly facing toward her, so our view of it is limited. It can be interpreted that the lace-maker herself and the process of making the lace are, to the artist, more significant than the actual project.

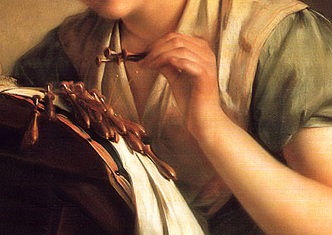
By extension, you could continue this logic to assume that the woman in the work is a beginner or early lace-maker, and that the process doesn’t need to be tarnished by seeing a newer lace-maker’s mistakes and missteps. This notion can be argued as mirrored in the idea that her hands look dainty as she tends to the process, which might lead the viewer to assume that she’s treading lightly into the field. She isn’t gripping the tool firmly, and the overall result can look like the carefulness and hesitance of a beginner.Picture 4
Personality and disposition

One could argue as well that the smile on her face is another detail that brings this new-lace-maker quality to life, as if the woman is happy to give this process a try and perhaps pleased with her progress. Unfortunately though, her face is the main spot where the argument could shift in favor of the woman being very secure in her craft, as if she’s done this again and again over the years. There’s no uncertain furrow in her brow or any lines of tension on her face like you might expect from someone struggling to get the hang of such an activity. Rather, she looks calm and relaxed, and that mind frame can be labeled as out of place for a new lace-maker being caught on canvas.

Picture 2

If you consider that detail—that her face is so free of lines of tension—the other elements can suddenly take a new turn as well. Maybe those hands aren’t dainty with hesitance. Maybe they’re loose from comfort with the process, like the casual grasp she has is enough to professionally finish the task. If you decide on this method of logic, the project being pointed toward the woman can mean that her comfort with the task is what’s supposed to be shown. You don’t need, from that point of view, to see the project. The woman is too at-ease with the process to be creating anything less than successful through her endeavors.

Light and shade

This notion of comfort can be seen in the lighting of the painting as well since, for the most part, everything is well-lit and in the spotlight. Other than the shady corners at the top, the space under the table, and the area underneath the platform the project is on, little is dark about this work. That sustained level of lighting speaks to an overall bright experience, and the similarity of color throughout adds to that calmness. No hue drastically sticks out, and other than the handful of dark places, nothing severely falls into the background in regard to those hues. Everything is neutral or placid enough in color to create an overall image of cohesion and balance.

With all of these elements combined, it’s sensible to interpret this as Tropinin’s attempt to showcase an average woman tending to a very specific task with so much expertise that she’s calm and tranquil throughout the experience. It’s a primarily bright experience that she feels comfort in, with little dynamism about the process due to her ease with the task while she works on a project that the viewer doesn’t need to see to know it will be a success.

References
“The Lace-Maker.” (n.d.). Russian Art Gallery. Retrieved from http://russianartgallery.org/famous/tropinin_lacemaker.htm
“Vasilii Andreevich Tropinin: The Lace Maker.” (n.d.). Rollins College. Retrieved from https://myweb.rollins.edu/aboguslawski/Ruspaint/troplace.html
DIY Drawstring Fabric Bag

DIY Drawstring Fabric Bag

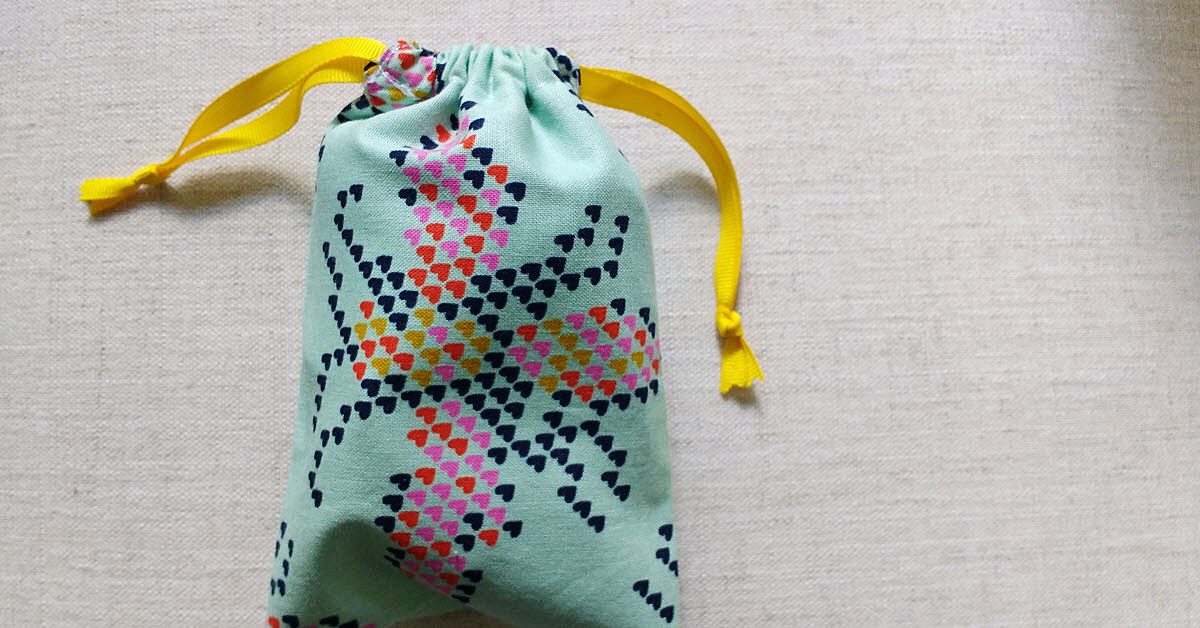
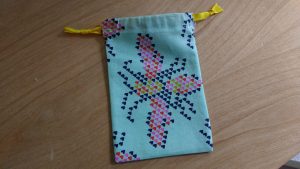
I use fabric drawstring bags to organize everything. My girls have a set I created for them for traveling; the bags hold their socks, underwear, and toys. I used a separate set for my own travels and also have a bag I use to transport my gym shoes in my backpack (so the shoes don’t get the interior of my bag dirty.)

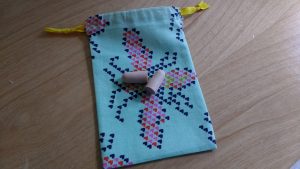
Any time I have a new need, I whip up a bag or some bags for the job. For this project, I wanted a small pouch to hold my ear plugs and eye mask. I’m a writer and I spend a lot of time writing in coffee shops and libraries (yes, sometimes libraries can be loud). And when I travel overnight, I also bring my sleep mask.

Don’t throw that away!

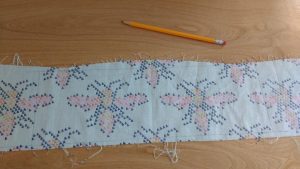
This is a piece of scrap fabric a girlfriend sent to me. “I bet you could use this,” she said. And she was right.

I drew a rectangle 15.5”x 5.5” (centering the pattern.)

2

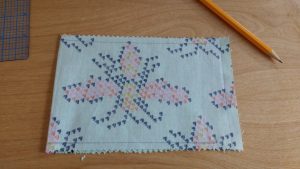
I cut out the long sides of the rectangle with pinking shears and regular fabric scissors on the shorter ends.

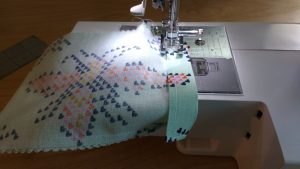
Next, I folded the fabric over, right sides together and drew a ¼” seam on each side. (If you can eyeball this, go ahead). The seam stops on each side 1.75” from the top. Start at the bottom and sew to that spot, back tacking at the end of the seam (on both sides.)

3

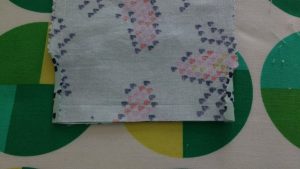
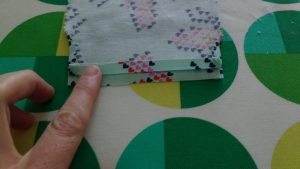
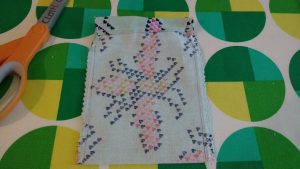
I snipped just a tiny bit on all four sides of the bag and then folded the seams in all four sides. First I finger pressed, then I ironed and starched them down.

4

Let’s straighten this out

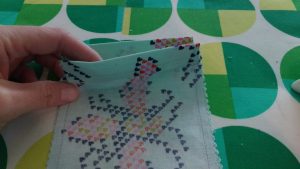
Next I folded the top of the front and back down ¼” inch and ironed and starched as well.

5

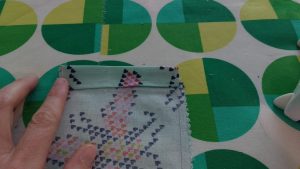
Now I did a supporting seam starting at the side seam and going around the top of the fabric to the other seam. Do this on both sides.

6

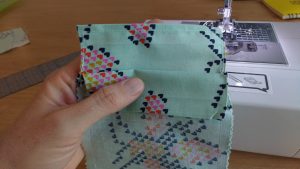
Now fold each top down to meet the top of the sewed side seam. You should see how the drawstring casings will be formed now. Iron and starch each folded side down.

7

8

Sew across each side from the side seam across to the other side seam. I used the stitching I did prior as a guide for where to sew. Make sure you don’t catch the other side of the bag while you sew.

9

Lovely! Look how nice it looks inside out. Imagine how great it will be when you turn it right sides out! First I zig zag stitch the sides and trim the bottom corners before turning.

10

Now to tie it all together…

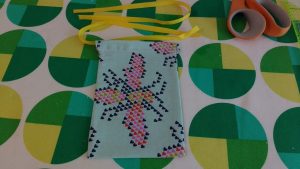
Whoohoo! Give it one more iron and starching to take it to the next level. Then measure out enough ribbon for a double drawstring.

11

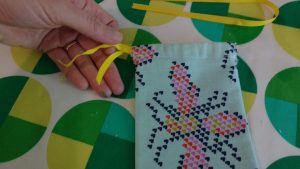
I used a safety pin to feed the ribbon through each side and around.

12

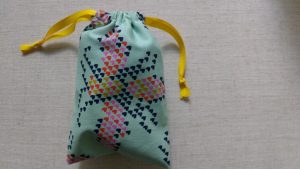
Tie a not on the end of each piece of ribbon, use pinking shears on the end of the ribbon, and you are finished!

13

This is perfect for slipping in my bag when I’m going out to write.

14

And my eye mask fits in beautifully too.

15

———————————————————————————–
Charlotte Kaufman is a writer and sewist in Mammoth Lakes, California. She specializes in marine and home interiors and continues to fall more and more in love with quilting. You can follow her at charlottekaufman.com.

Sewing With Voices

As is my custom, this weekend, I was out with the guys riding bikes up mountains and we got to talking about podcasts and television shows and books and stuff. One of them said he didn’t really ever have time to listen to podcasts and was surprised I had time to do so.

“I listen while I sew at work,” I said.

“Really? You can pay attention to both of those things at once?” he asked.

“Yes, I really can,” I answered. And I can.

Listen while you work

I hadn’t ever really thought about it before, though. I’ve always been able to listen to radio shows or audiobooks or podcasts while sewing. I’ve even been known to watch Netflix if I’m not in a super time crunch. By “watch”, I really mean listen to a show I’ve already seen and don’t have to pay that close attention to. Or something like Law and Order that you don’t need to see the whole thing to get the gist of. Or something really cheesy like The Ghost Whisperer that only requires half your brain, at best.

Long ago, when I worked at The Alley Theatre in Houston, TX, we’d listen to audio books on the shop stereo in the afternoon. It was actually a really cool way to “read” a book. Then we’d get into lengthy debates and discussions about whatever we were listening to. We had our own sewing book club down there in the costume shop.

Hammer time

My friend Kassandra and I used to watch the morning talk shows while we made costumes for the VH1 special on MC Hammer. And these days, if I’m at work and not in a fitting, I’m listening to something like This American Life, StarTalk , Stuff You Should Know, Undisclosed, Radiolab, Ear Hustle – my list goes on and on.

Every once in awhile I come across an article that claims that humans are, in general, unable to do more than one thing at once and anyone who says they are a multi-tasker is not being completely truthful. Usually, the author will then go on to explain that people can’t really concentrate on more than one thing at once, that its scientifically impossible.

Neil deGrasse Tyson

Neil deGrasse Tyson.

But I just don’t think that’s true. I can listen to Neil Degrasse Tyson talk about black holes and the speed of light and measure, cut, pin, and sew at the same time. I can even pattern or drape while listening to something. I guess because, at this point, a lot of what I do sewing-wise I’ve done countless times before so its kind of second nature and I don’t need my full concentration to do it correctly.

In contrast, though, I can’t talk on the phone while sewing and if someone has questions or needs to have a conversation with me, I have to stop what I’m doing (and its not just because I think its rude to not look someone in the eye when conversing). I have worked with people though, who seem to be able to video chat or skype while sewing. One of the ladies who worked for me on Boardwalk Empire was always skyping Russia.

Which reminds me of one particular day during Boardwalk. It was the afternoon and we were super busy. There was music on the background. We always had music on, just some Pandora station that we’d take turns choosing. Everyone was working away steadily on different projects, immersed in their own little worlds. I was patterning something, I don’t remember what, when I paused for a minute to look up and listen to the conversations going on in the shop.

There was one in Russian, another in Turkish, still another in French, a couple in English (obviously), one in Spanish and one in Arabic. It was all quite wonderful and made me really proud of the amazing diverse shop full of talented people I had around me.

And speaking of languages; that’s another thing you can do while sewing. You can listen to a language learning app or book.

I love that I can learn something new or get lost in someone else’s story while still creating something with my hands. I think it’s a wonderful ability to have, a gift even.

I think most of us who sew are true multi-taskers. (We’re pretty cool like that). I’d love to know what other people listen to or watch while working on projects.

I’m also in search of any new and interesting podcasts to listen to if you have any suggestions.

Happy sewing! (and listening).

One Day Sewing Projects

One Day Sewing Projects

one-day-sewing

Sometimes I don’t want a big sewing project. If I’m pressed for time or simply need to fill an afternoon or one day out of the weekend, I don’t necessarily want to start a project that will take days, weeks, or months to complete. Nor do I want the hassle and expense of shopping for supplies for a larger project. I just want to sew for a couple of hours and have something to show for it. If that’s ever happened to you, these sewing projects you can do in a day are the perfect solution.

Circle Skirt

Make this for yourself or your daughter…or making a matching mother/daughter pair. This circle skirt can be done in just a couple of hours and it’s perfect for whirling and twirling when it’s done. Unless you have large amounts of the same fabric on hand (cause you just buy fabrics you like when you see them, maybe?) you’ll need to hit the store for material. If you’ve got enough fabric on hand, you’re good to go.

Vendor Apron

Are you the one they ask to help out with bake sales, garage sales, and other school fund raisers? You need this vendor apron to keep your notepads, pens, and other supplies close at hand. It’s super simple to make with an old pillowcase or one you fell in love with at the thrift store and now need a use for. Make a bunch so the whole PTA will have one.

Trendy Fashion Tank

With this awesome pattern there’s no need to spend your hard earned money on brand name t-shirts and tanks. The trendy fashion tank is patterned after a popular JCrew top, but made by you. You’ll need jersey sheets or another source of that same material to make this pattern. Flat jersey sheets can be bought at discount stores for around $7, so it’s well worth the investment to make this shirt yourself.

Hair Bows

Not only do these work up fast, they’re a great way to use up your scraps. Hair bows never really go out of style, so make a bunch. Give them as gifts or sell them at craft fairs. Depending on the material you choose they can be vintage, modern, or anything in between. No matter what, they’re sure to be a hit!

The next time you’re looking for a quick project, try one of these projects. They take a day (or less in most cases) and leave you with a great finished piece, a feeling of accomplishment, and instant gratification. Many of these projects are also great for sew sewers since they can quickly see the results of their efforts.

Easy, Easier, Easiest Ways to Sew Baby Blankets

Easy, Easier, and Easiest Ways to Sew Baby Blankets

My favorite ways to sew baby blankets

Every baby needs blankets and these make wonderful gifts. There are lots of ways to sew baby blankets, but after making dozens over the years, both for my own babies and for gifts, I have settled on three basic ways that I prefer to make them. These three types of blankets are each useful in their own way, and any new parent will appreciate any one or all of these styles.

Baby quilts are easy to make!

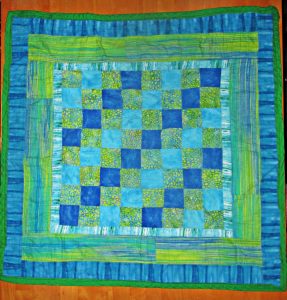
If you ever wanted to get into quilting, a baby quilt is a great place to start. Because baby quilts are small, you won’t have to wrestle with these on a regular sewing machine, as you might for a larger quilt. Start with a simple pattern which uses just squares or rectangles if this will be your first quilt.

Easy,Easier,and Easiest Ways to Sew Baby Blankets

This tiny baby quilt is wrinkled to high heaven because baby outgrew it years ago and I pulled it from a box to show you!

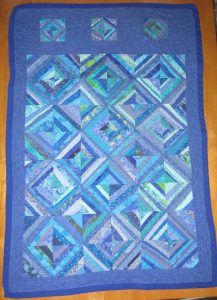
You can choose a quilt with many small pieces if you have plenty of time to finish the quilt before baby’s arrival. I made this blue strip pieced crib quilt while I was waiting for my youngest baby’s birth. This quilt is 100% easy, but it is not the speediest of quilt projects.

Easy, Easier, and Easiest Ways to Sew Baby Blankets

See link for tutorial for this quilt.

Bigger blocks make quicker quilts

If you’d like to make a baby quilt in a hurry, choose a design with fewer and larger blocks.  For a great example of a quick and easy baby quilt, check out Jera Brandvig’s Log Cabin baby quilt at Quilting in the Rain. Her project includes instructions for quilting as-you-go, and this is a particularly speedy method of quilt construction.

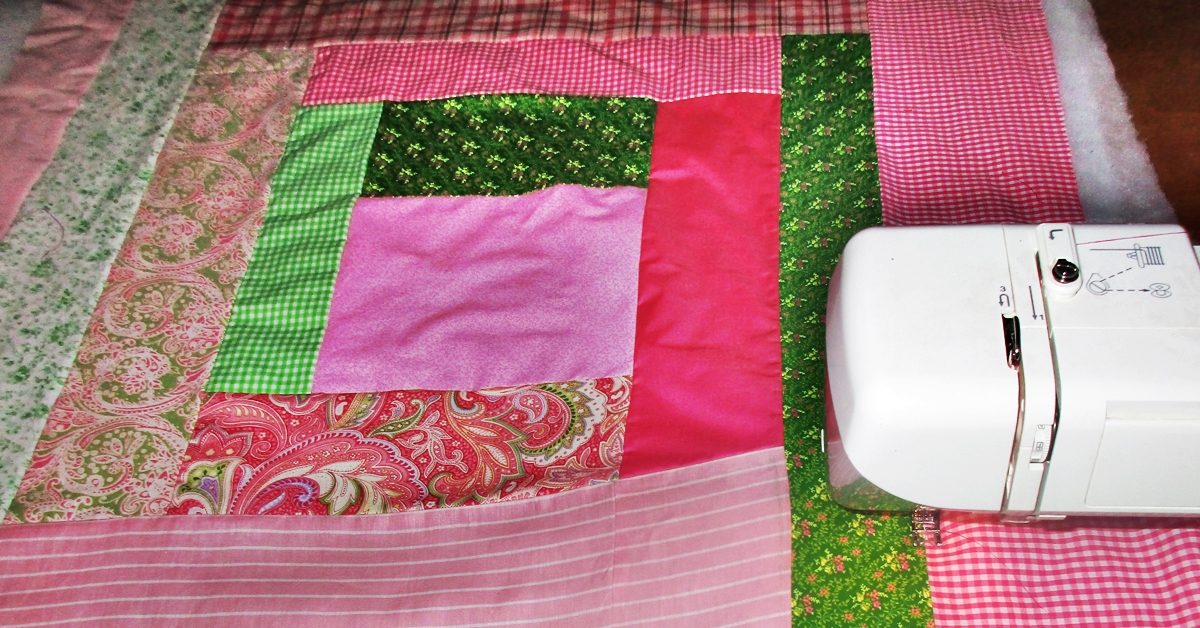
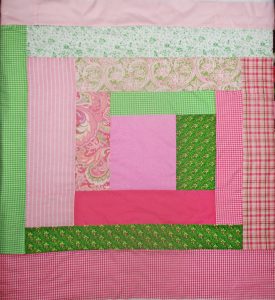
I used Jera’s idea for making one large log cabin rectangle to piece a baby quilt top this morning in about an hour. I didn’t use the quilt as-you-go method on this, however; I’m quilting it all at once using free motion quilting.

This one will be an oversized baby quilt with a super soft flannel backing. The larger size means she won’t outgrow it as fast and can enjoy it into childhood, too.

baby log cabin 1

With large pieces and no precise cutting or corners, this large baby quilt top came together really quickly.

Here’s more from me on making quick quilts. Baby quilts are easy, and if you want to make one, you should. Please don’t be afraid of making quilts, it’s fun!

Easy, Easier, and Easiest Ways to Sew Baby Blankets

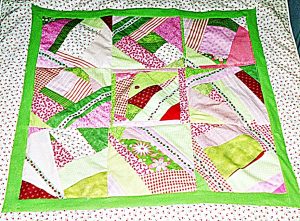
Crazy patchwork in large blocks makes an easy baby quilt, too.

An even easier way to sew baby blankets

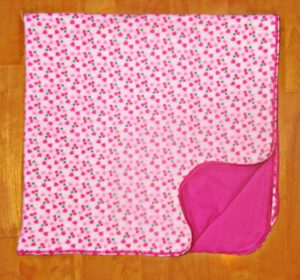
If you don’t have the time or trouble to spare for making a baby quilt, you can sew a soft and sweet reversible baby blanket in a fraction of the time it would take to make even a simple quilt.

Easy, Easier, Easiest Ways to Sew Baby Blankets

To do this, you need two same sized pieces of fabric. One yard square is a nice size, or you can make it larger, perhaps to fit a crib mattress (27″ x 52″, plus a few inches on all sides to hang over the sides). You will want at least one of these to be a soft flannel. I prefer to use flannel for both sides, but they are nice when made with quilter’s cotton on one side and flannel on the other, too.

Feel free to applique or embroider the front of one of the fabrics before assembly. This looks really sweet in the bottom corner.

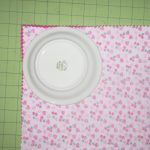
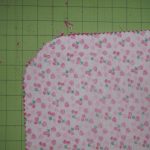
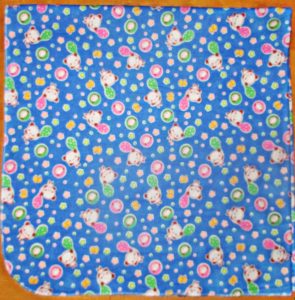
Cut the two fabrics to match and place them right sides together.  Then, using a dessert plate or saucer as a guide, curve the corners.

Easy, Easier, Easiest Ways to Sew Baby Blankets Easy, Easier, Easiest Ways to Sew Baby Blankets

Sew the two pieces together all the way around, except for an opening to turn. Turn right sides out and press. Then set your machine to make a wide, short zigzag stitch. I set mine with to a width of 5.0 and a length of 0.5. Zigzag around the edges of the blanket, about 1/8” from the edge. Be patient; stitching like this takes a lot longer than straight stitching does, so it will take quite a few minutes to go all the way around.
Or use binding instead

Another easy way to make this kind of double sided blanket is to layer the two fabrics wrong sides together and use bias binding all around to join them together.

I give these reversible blankets to every baby I know. Their mothers have often told me that these wind up being baby’s favorite blanket. My own boys liked these double sided flannel blankets so much that I made them to fit their beds.

Using a serger is the quickest and easiest way to sew baby blankets

Parents of babies who like to be swaddled will need lots of single layer receiving blankets. These are also nice to have in warmer weather and for on-the-go. I always kept at least one in the diaper bag and one in the car. They couldn’t be easier to make and take less than ten minutes, including cutting and pressing time.

Easiest Baby Blanket

Folded in fourths here to show the corner curve. These will fold down really small to fit in your diaper bag or even the glove box.

Simply cut one piece of flannel to your desired size (one yard square is my favorite size), curve the corners, and serge all around. I set my serger to its narrowest width overlock stitch.

If you are not comfortable serging around curves, then skip the curving of the corners. To do this, just serge four straight sides, burying the end of each chain under the beginning of the stitches on the next side. Then use a tapestry needle to bury the last thread chain under your previous serging.

If you don’t have a serger yet, this is one of many reasons you will want one. Here’s my recommendation for which one to buy.

It’s easy to sew baby blankets

You can sew a quick baby quilt, a soft double-sided blanket, and a single-layer receiving blanket (or several) all in the same day. These little projects are so satisfying that I bet, like me, you’ll want to sew some for every baby you know.

Happy sewing!

Sewing for a Living

Sewing for a Living

For the lucky people who discover early on what they want to do for a living, picking a career can be as easy as following interests. But sometimes, knowing your primary interest isn’t enough to form a decision on a career since you don’t know what in the world you could do in the field that would actually make you money. I mean, come on. I could love collecting quarter-machine stickers, but unless at least one of them become a collector’s item, what exactly am I going to do career-wise with that interest?Sewing1

You might have a similar struggle with sewing since it’s often treated as a hobby or a practical exercise, but as hesitant as you might be to try your hand at it for a living, you can absolutely earn money working in the sewing world. In fact, Sewing Machines Plus is currently hiring salespeople. Just sayin’.

If you’re looking for something a little different than a salesperson though, here are six career options that you can explore to make cash with your interest in sewing.

1. Be a seamstress. This might be the most obvious choice, so let’s go ahead and cover it! As a seamstress, you’ll have the opportunity to be the community go-to for sewing repairs, which works out well since certain people aren’t interested in making those repairs themselves! You can use your interest to earn money while helping out people with their clothing needs. Sound good?
2. Make clothes. On the same train of thought, you can make clothes to sell for people who don’t have the interest or skill to make these projects themselves. If you can construct something fancy, like a prom dress, you might find that you can make real money for weddings and dances by allowing people to have more input in their clothes designs than they can get by shopping retail. It might take time to prepare yourself for these kinds of tasks, but talk about the creativity involved with this one!Sewing5

3. Write. If you have interests in sewing and writing, this is a good fit! You might not find that perfect writing opportunity as soon as you start looking for it, but trust me when I say that a consistent effort in looking for freelance writing jobs can lead to some possibilities that are in line with non-writing interests. Fitness, education, and traveling are varied topics that you could find freelance offers for, and they’ll hopefully give you an idea of how assorted freelance subjects can be. It’s reasonable then to believe that someday a sewing-related possibility could come your way if you keep searching for it! You might even end up with a career writing regularly for a famous magazine that deals with sewing.

4. Own a shop. There’s variety in this option because your shop could be for a number of things. Maybe it’s exclusively to sell the clothes you make, or it might be a collection of community sewing projects all sold under one roof. Maybe you’re only interested in selling quilts, or baby supplies, or handmade home décor… Whatever your niche and however far your reach for merchandise, if you have the knack for running a business, this might be the career for you!Sewing2

5. Teach. If you search online *right now,* you could find job listings for tutors or teachers in the field of sewing. This makes sense since sewing beginners might breathe a little easier with someone there to guide them in their early projects and learning experiences. You might not even have to look online to get a chance at this type of job if you happen to know someone who wants to learn to sew. Then maybe one student leads to another, and perhaps one day you can have a full class of people waiting to learn about sewing. As a side note, if you’re technologically inclined, you might think of filming classes, making them look professional, and selling them as DVD’s through vendors. It might take a while for this to really take off, but that doesn’t mean it can’t happen!

6. Make Patterns. It’s entirely possible that you adore sewing, but you’re not overly interested in teaching the practice. Maybe your appreciation of the sewing process is primarily in the most technical aspects—like building patterns. If so, be aware that a pattern maker is a job possibility! You could land a job as a pattern maker for a designer or company to put ideas to paper, but honestly, what’s to stop you from creating your own designs, mapping out the patterns, presenting them in a professional manner, and selling them? In fact, this would be an interesting detail to add to that shop that was mentioned earlier! Either way, it’s possible to make money by making patterns!

And there you have it—six ways you could earn money by putting your love of sewing into a career choice. Some of these might be easier to attain, like a seamstress, but even the more obscure options can be done part-time to boost your income. Basically, you can make a living on your sewing!

Sewing Buddies

Sewing Buddies

Among my group of friends, I’m the only one that sews. We all figure it’s a skill that they’ll all turn to me for after the Zombie Apocalypse. Kidding! I am the only one who sews and it is a valuable skill, but since I don’t have a group of friends to sew with, I’ve made my own sewing buddies. Really, they’re just stuffed animals I’ve made, but they sit in my swing area and keep me company when the cats take off at the sound of the sewing machine. If you need some sewing buddies too, check out these cute stuffed animal patterns and make some for yourself.

soft-toy-2186249_1280

Stuffed Fox Sewing Pattern

Made from fleece, these little guys work up quickly and are loved by kids and adults. When finished, they’re about 15” tall and have the sweetest faces. I used buttons for the eyes and nose, since there aren’t young children playing with them in my house, but the applique idea is great for homes with kids. Make a girl one and a boy one so they can keep each other company.

Sock Monkey Pattern

I’m not sure why, but people seem to give me wild sox for birthday or Christmas gifts. I don’t wear crazy socks, never have. I re-gift them when I can, but that’s not always possible. So, this sock monkey sewing pattern is the perfect way to use those crazy socks and get myself a sewing buddy. Make two and they can cuddle with intertwined arms. Add some Velcro to their hands to keep the cuddle pose in place.

Fat Quarter Bunnies

I love these! So often when I’m at the fabric store, I see fat quarters and want to buy them, but typically, they’ll wind up sitting in my fabric stash, never used. These sweet bunnies are the perfect use for those fat quarters and they’re so cute in my sewing area.

Sock Dragon Sewing Pattern

Yet another awesome use for all those crazy socks I seem to get. The sock dragon is a bit more challenging than his cousin sock monkey, but it also uses an additional pair of socks! I love dragons, so having one, or several, in my sewing space is great company.

If you’re looking for some sewing buddies, these stuffed animal patterns are a great way to make some company for yourself. Try them and let me know what you think!

No Bridezillas Here

No Bridezillas Here

I’ve gotten a few inquiries lately to do wedding dress alterations and creations. Some tailors don’t like working on wedding dresses. They say brides are the most difficult customers there are. I don’t mind so much and, honestly, don’t find brides any more demanding than actors and actresses, which makes sense as brides are (and should be if that’s what they want) the stars of their own little wedding day movies.

Here comes the bride…

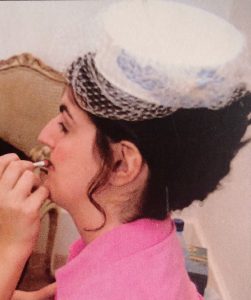
Classic pillbox.

Classic pillbox.

A lifetime ago, when I lived in Austin, TX, I did a lot of wedding dress alterations. I had a partnership with a bridal store there. The store referred all of its brides to me and I paid a small monthly fee to them for the referrals and use of their fitting rooms. On account of the University of Texas being in Austin, the city has a huge young adult population, many of whom get married there.

Most of the alterations were your straight forward hems, take in the side seams, add a bustle, kind of stuff. But a few them stick out in my mind, even all these years later, as being especially unique and fun to do.

One of my favorites was the girl who bought a dress with a tiered skirt. It was a relatively narrow skirt of about six 7” or so flat ruffled tiers that got slightly bigger as they got nearer to the hem. The dress was floor length but she wanted to be able to remove the bottom three tiers to make it knee length and easier to dance in once the reception rolled around. I bought a heavy duty separating zipper and hid it under the fabric tier that began just above her knee. It worked perfectly; you couldn’t tell it was there at all and she was able to easily zip off the bottom half of her dress skirt, like those hiking pants you can zip off the bottom of to make shorts. But a lot better.

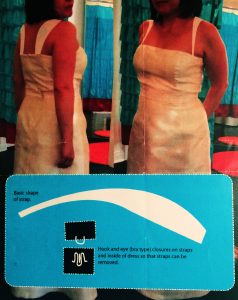
I also did a lot of adding straps to topless dresses. Topless dresses are always good in theory but not so much in many practical situations. One client, a computer graphics and design professional, even created her own unique strap shape she wanted me to build for her. I didn’t even have to make my own pattern!

Strap design.

Strap design.


Bridal hats

I made quite a few bridal hats too. Some of them were your classic covered pillbox shapes. A pillbox is really just an oval or circle with a 2 and a half to 3 inch band made from buckram and wire, then covered with fabric. A little trick to pillbox making I learned at the very beginning of my millinery career is to first cover the shape with a thin layer of baby flannel. Stitch it on as you would the fabric, then use Sobo glue to smooth and ‘mush’ the edges. This gives the hat a little bit of weight, softens the wire on the edges, and makes your outside layer (often a light weight silk if its bridal) look much smoother and nicer. Pull the baby flannel down and around the wire on the bottom edge and into the underside of the hat.

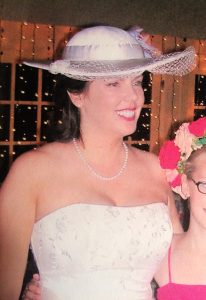
You can use this baby flannel technique to cover any buckram framed hat you make. I created this wide brimmed hat for another bride in Austin. You can see in the photo that the edge of the brim has some substance to it even though the silk covering it is fairly light weight. That’s because there’s baby flannel under there too. It just gives a hat a much more professional finish.

Wedding hat.

Wedding hat.


Another one of my favorite unique bridal embellishments was just the addition of a fun ruffle around the neckline. This is just your basic gathered ruffle collar but it made the dress one of a kind and added a lot of interest to the top of the dress.

Ruffle neckline.

Ruffle neckline.


And that’s the thing about brides from my experience; they just want their dress to be special and one of a kind. Many of them can’t afford to pay for a completely custom dress. But with some creativity, you can make most any wedding dress unique. And if you’re able to understand and do that, you’ll find that working with brides isn’t really all that difficult at all.

Keep Fabric and Thread Samples in Your Sewing Space

Keep Fabric and Thread Samples in Your Sewing Space

Hero Lead Image

Location is everything

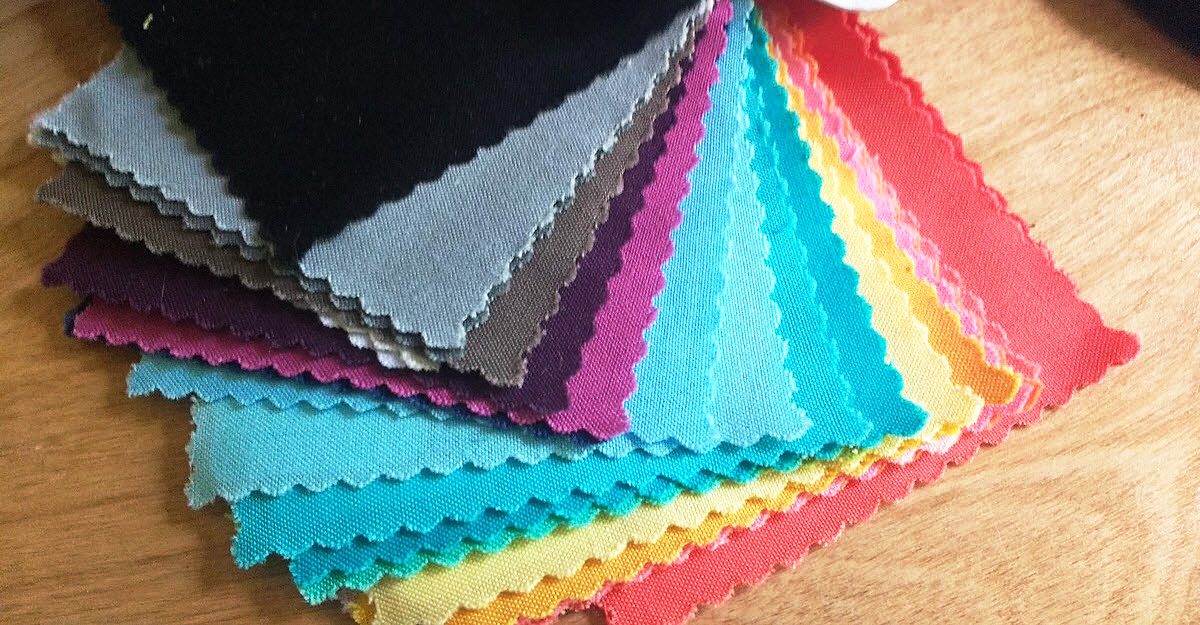
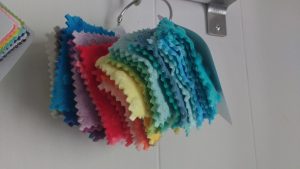
If you haven’t considered keeping samples of the fabrics and threads you work with on a frequent basis, I’m here for advocating that you start. I live in Mammoth Lakes, California, which is a small, out of the way town at 8,000ft altitude in the Eastern Sierra Mountains. The nearest sewing/fabric stores to me are a one hour drive south in Bishop, California. And If I want the convenience of larger, more well-known establishments, I have to drive 2.5 hours north to Carson City, Nevada. Needless to say, I do a lot of shopping online. This is my first argument for keeping a collection of samples in your sewing space. If you can’t readily get to a store, then being able to look at what you need and order online is a life saver.

1

Make exactly what they want

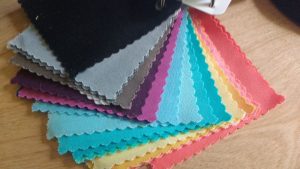
Sample swatches and cards are helpful for showing to both customers and friends and family that you may be sewing for. I try to never sew gifts as surprises. Sometimes I break this rule when I’m fairly certain the gift recipient will like what I’m making, but usually I don’t chance it. Why spend time and money on a handmade gift that someone may not like? I use my sample swatches of minky, for example, when I make gifts for my daughters or their friends. The kids can touch and feel the fabric, read the names of each color, and fall in love with the gift before it’s even finished.

2

How does it feel?

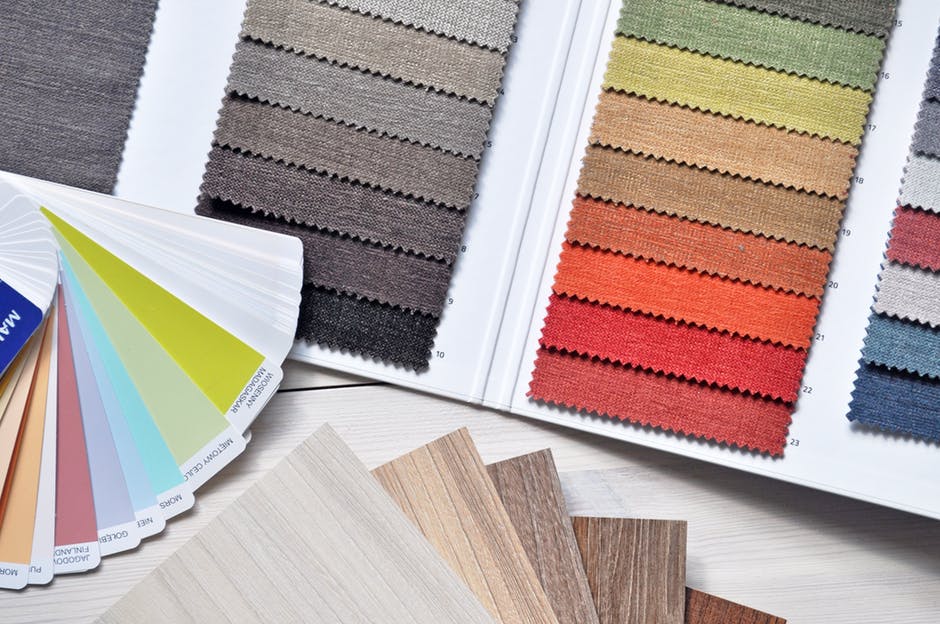
Speaking of feeling, many sewists I know don’t like to order fabric online because they like to feel the fabric in the store before buying. I understand where they’re coming from, but usually have to order online. Because of this, I’ve ordered samples of the brand of solids I like to use (Hawthorne Threads) because I already know how their fabric feels, looks, and washes. If you have a brand you love, look into getting sample cards or even buying charm packs of a line of fabric that you tend to buy over and over.

3

Samples versus supplies

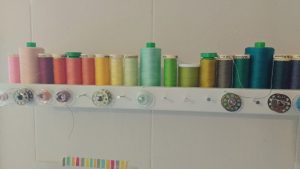
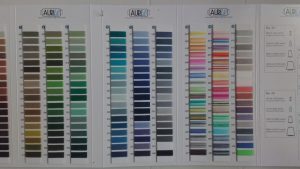
A supply can be a sample, but a sample can’t be a supply. I keep a lot of supplies on hand in my fabric stash and my thread wall and I often will check my supplies to see if they will work in an upcoming project as well. I can’t, however, keep EVERY color of thread on hand, nor can I buy ALL THE FABRIC, like I want to. When the colors I don’t already have on hand won’t work, then I turn to my thread sample card to see what I need to order.

4

What kind of samples do you keep on hand to make your sewing life easier?

———————————————————————————–
Charlotte Kaufman is a writer and sewist in Mammoth Lakes, California. She specializes in marine and home interiors and continues to fall more and more in love with quilting. You can follow her at charlottekaufman.com.
Back-to-School Sewing Projects

Back-to-School Sewing Projects

Summer vacation is coming to a close, and the upcoming school year is right around the corner! It’s time to take advantage of your final carefree days beside the pool, sneak in that final family trip, and start focusing on what you need to do to make sure you (or your kids) are READY for school to start again! For me, one of my favorite childhood things about summer wrapping up (maybe the only good thing about summer wrapping up) was school shopping. I loved picking out my notebook and backpack, and finding new clothes that I adore is still something I’m a fan of.Back to SchoolBut if you want to make your school preparations more personal, don’t overlook the possibility of going just a little homemade this year. There are definite perks in making your supplies, like being able to tailor the design to your own preferences and the comfort of knowing you (or your child) will be carrying one-of-a-kind school supplies on the first day of school.

So if you decide this is the right path for you or your child, here are some ideas for things you can make by hand and/or machine to prepare for the next school year.

1. Book Covers

This isn’t the most complex of ideas, but there are three advantages in creating your own book covers. One, the project is so small that you could make book covers for all your textbooks in one day. That’s some quick school preparation! Two, you’re giving an extra layer of protection to your textbooks, and that lessens the wear and tear they’ll get throughout the year.

BooksThis could save you money in the long run since it could keep you from having to replace textbooks that have been damaged. And, third, you can pick your fabrics to make each book something way more personal than your standard textbook cover. Instead of beakers on your chemistry book, you could have prints from your favorite movie—and that could add a touch of brightness to your class every time you grab the book to head that way!

2. Bookmarks

This is the simplest idea on the list, but bookmarks can come in handy for keeping your place in the assigned literature classic or giving you a reminder of what chapter you need to read in your history textbook. You can spend less time on these than your book covers and use the same fabric to make sure your placeholders match the book you’re keeping your place in. Bookmarks

3. Pencil cases

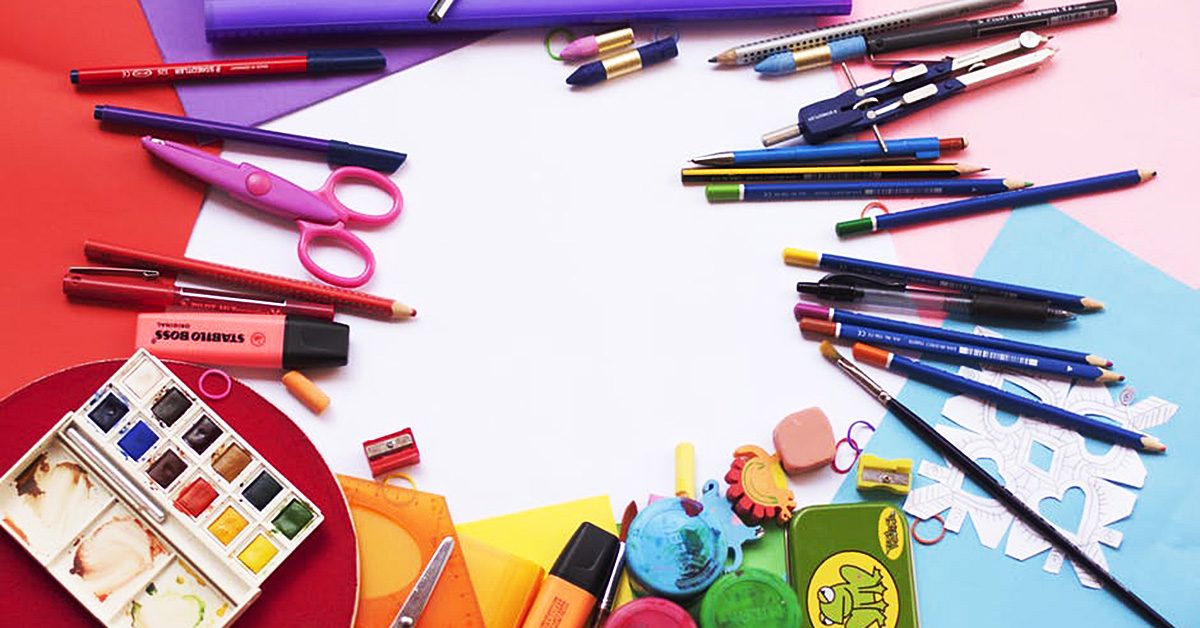
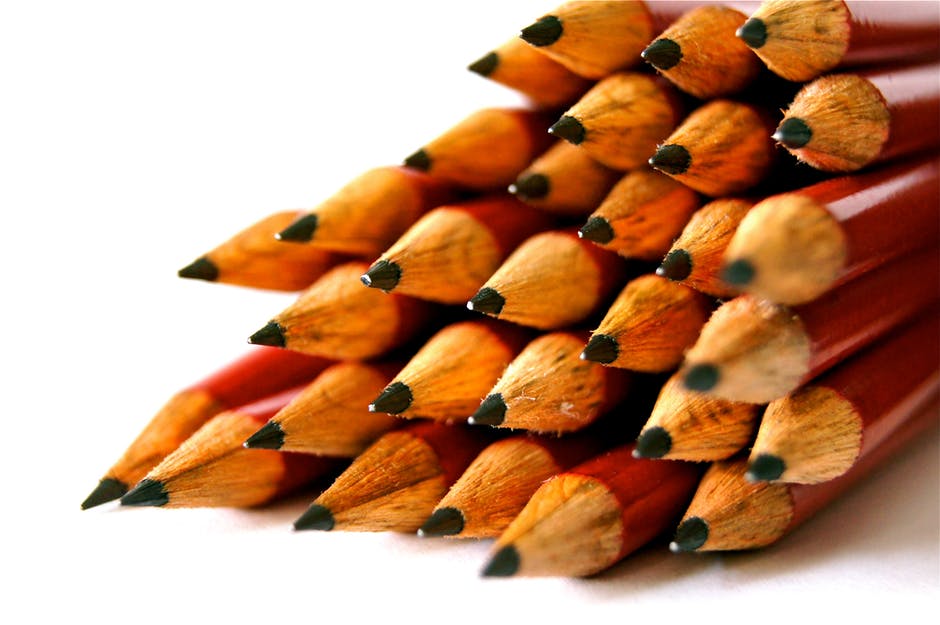
Some of the most essential school supplies are writing utensils—pens, pencils, markers… Something that’s an acceptable tool to write your papers, do your homework, and take your notes. Without them, you might be doomed to bum them from nearby classmates, search your home every time you have an assignment to do, or accept that your grade is going to take an unfortunate turn.

PencilsYou can use the same fabric once more on your pencil case so that you’re continuing your theme for your supplies, but you’ll need to add a zipper, button, or some other form of closing mechanism to keep those pencils from tumbling out. It’s a simple addition though for another chance to add that homemade quality to your school year.

4. Backpacks

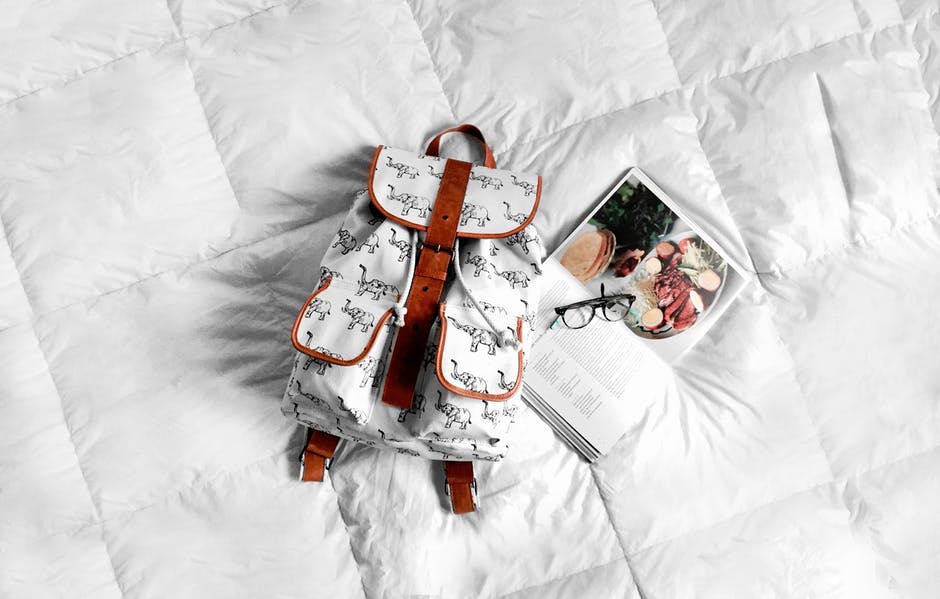
You’re most definitely stepping up the complication factor if you choose to try your hand at a homemade backpack, especially if that backpack will come with a number of compartments. Still, your backpack is the core of your school shopping experience (the only sensible alternative argument would be in favor of your notebook), so by making it yourself, you’re putting a homemade stamp on your school supplies through this one element.

BackpackAnd you can keep your theme of fabric going with this choice by using the same or similar patterns as you did for your book accessories and pencil case! If you used different fabrics for the other supplies, you could make this one the culmination of them by using each and every fabric in some way on your backpack. It could be a patchwork feel or a planned-out strategy where each fabric gets its own compartment or section. Whether this will be your only homemade contribution to your school supplies or the central part of your homemade approach, choosing to make your own backpack for the upcoming school year could be the perfect project to wrap up your summer vacation.

5. Clothes

Last but not least, you have the option of making your own outfit. Or two of them. Or three. Or sixteen. If you’d like, make your entire wardrobe—but if you do decide to take that route, you might want to get started ASAP. The school year is soon coming, and a wardrobe can be a time-consuming thing to make! Browse fabrics and patterns to find combinations that you can see yourself wearing, and get to sewing!Clothes

With these supplies ready to go, you’re equipped for a one-of-a-kind, homemade first day of school!