Back-to-School Sewing Projects

Back-to-School Sewing Projects

Summer vacation is coming to a close, and the upcoming school year is right around the corner! It’s time to take advantage of your final carefree days beside the pool, sneak in that final family trip, and start focusing on what you need to do to make sure you (or your kids) are READY for school to start again! For me, one of my favorite childhood things about summer wrapping up (maybe the only good thing about summer wrapping up) was school shopping. I loved picking out my notebook and backpack, and finding new clothes that I adore is still something I’m a fan of.Back to SchoolBut if you want to make your school preparations more personal, don’t overlook the possibility of going just a little homemade this year. There are definite perks in making your supplies, like being able to tailor the design to your own preferences and the comfort of knowing you (or your child) will be carrying one-of-a-kind school supplies on the first day of school.

So if you decide this is the right path for you or your child, here are some ideas for things you can make by hand and/or machine to prepare for the next school year.

1. Book Covers

This isn’t the most complex of ideas, but there are three advantages in creating your own book covers. One, the project is so small that you could make book covers for all your textbooks in one day. That’s some quick school preparation! Two, you’re giving an extra layer of protection to your textbooks, and that lessens the wear and tear they’ll get throughout the year.

BooksThis could save you money in the long run since it could keep you from having to replace textbooks that have been damaged. And, third, you can pick your fabrics to make each book something way more personal than your standard textbook cover. Instead of beakers on your chemistry book, you could have prints from your favorite movie—and that could add a touch of brightness to your class every time you grab the book to head that way!

2. Bookmarks

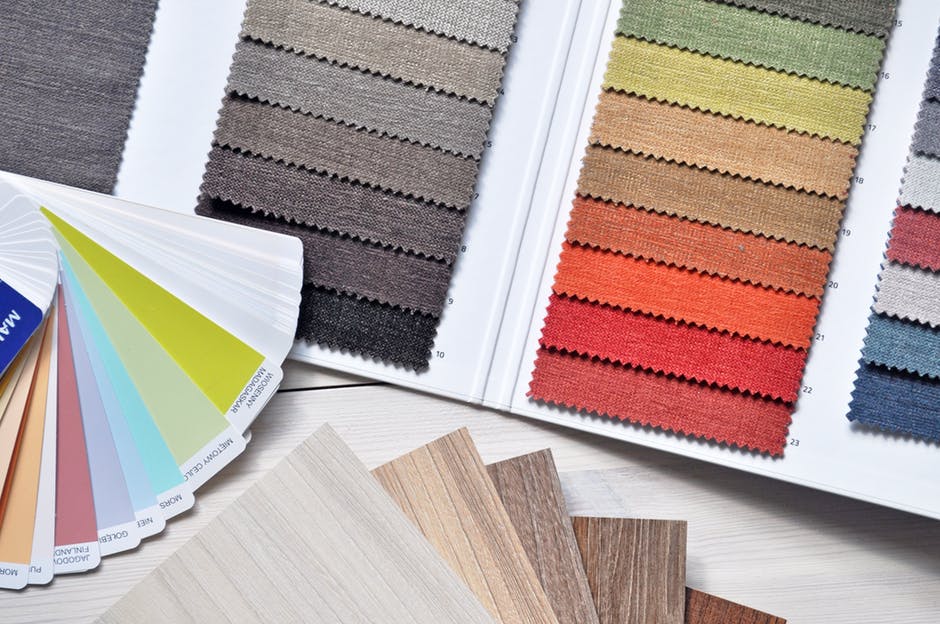
This is the simplest idea on the list, but bookmarks can come in handy for keeping your place in the assigned literature classic or giving you a reminder of what chapter you need to read in your history textbook. You can spend less time on these than your book covers and use the same fabric to make sure your placeholders match the book you’re keeping your place in. Bookmarks
3. Pencil cases

Some of the most essential school supplies are writing utensils—pens, pencils, markers… Something that’s an acceptable tool to write your papers, do your homework, and take your notes. Without them, you might be doomed to bum them from nearby classmates, search your home every time you have an assignment to do, or accept that your grade is going to take an unfortunate turn.
PencilsYou can use the same fabric once more on your pencil case so that you’re continuing your theme for your supplies, but you’ll need to add a zipper, button, or some other form of closing mechanism to keep those pencils from tumbling out. It’s a simple addition though for another chance to add that homemade quality to your school year.

4. Backpacks

You’re most definitely stepping up the complication factor if you choose to try your hand at a homemade backpack, especially if that backpack will come with a number of compartments. Still, your backpack is the core of your school shopping experience (the only sensible alternative argument would be in favor of your notebook), so by making it yourself, you’re putting a homemade stamp on your school supplies through this one element.
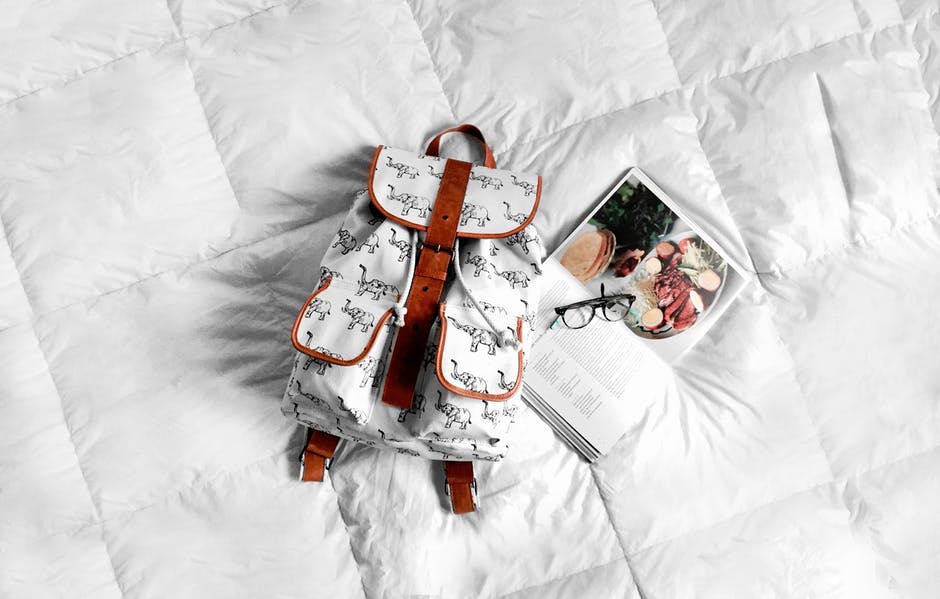
BackpackAnd you can keep your theme of fabric going with this choice by using the same or similar patterns as you did for your book accessories and pencil case! If you used different fabrics for the other supplies, you could make this one the culmination of them by using each and every fabric in some way on your backpack. It could be a patchwork feel or a planned-out strategy where each fabric gets its own compartment or section. Whether this will be your only homemade contribution to your school supplies or the central part of your homemade approach, choosing to make your own backpack for the upcoming school year could be the perfect project to wrap up your summer vacation.

5. Clothes

Last but not least, you have the option of making your own outfit. Or two of them. Or three. Or sixteen. If you’d like, make your entire wardrobe—but if you do decide to take that route, you might want to get started ASAP. The school year is soon coming, and a wardrobe can be a time-consuming thing to make! Browse fabrics and patterns to find combinations that you can see yourself wearing, and get to sewing!Clothes
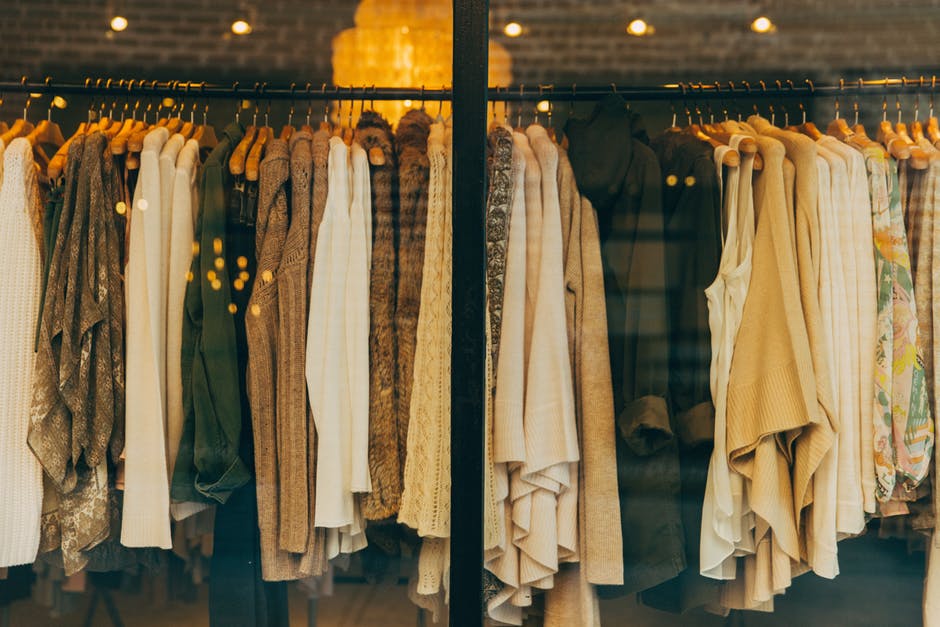
With these supplies ready to go, you’re equipped for a one-of-a-kind, homemade first day of school!

Sewing Themed Books

Sewing Themed Books

I don’t know about where you live, but in New England, we’ve had a lot of storms this summer. Thankfully, we haven’t lost power. But we’ve been stuck inside quite a bit. That means there’s been lots of time to sew! So much time, in fact, I’m out of projects! Horrors! Has that ever happened to you? It’s left me feeling a bit adrift. There’s another storm going on as I write this and I’m looking at my sewing machine with desire and my heart and no idea what to make. Even my scrap stash is pretty depleted. Boo! So, I’m going to read sewing themed books and mysteries instead! Here’s some of my favorites!

coffee-2446645_640

Southern Sewing Circle Mystery Series

Main character, Victoria “Tori” Sinclair is a transplant to Sweet Briar, SC. She joins the sewing circle and takes a job as head library. The series currently runs to 12 books and it’s highly likely that author Elizabeth Lynn Casey will keep them coming! With all the storms we’ve been having, I can curl up with a cup of tea and finish all 12 books this summer!

Magical Dress Making Series

Texas hospitality, a haunted dress shop and a Manhattan fashion designer. All the elements of a great story! Book six of this series by Melissa Bourbon was released in 2015. Hopefully the rain will stop and I won’t be completely done with the series before she releases the next one!

Deadly Notions Mystery Series

No sewing project is complete without the perfect notions. Turns out, no sewing mystery series is complete without them either! Cate Price weaves tales of Daisy and her husband Joe living in Pennsylvania. Joe renovates their house while Daisy has found her calling working at a quaint shop that sells sewing bits and bobs, antiques and jewelry. Book number three was released in 2015. With the rain raging, I might get through all of these just this week!

At least by reading about sewing I won’t feel like my sewing machine is missing me too much! What are some of your favorite sewing themed books?

Buying Carpets and Books in Pakistan

Buying Carpets and Books in Pakistan

I have a confession to make. A month or so ago when in Pakistan, I bought a $1500.00 carpet. Now, before you think that that is an inordinately high price for a carpet, I just want to say that it’s a handmade Kazakh rug. And I talked the store owner down from his original price of $4000.00, which I think is a pretty admirable demonstration of bargaining skills.

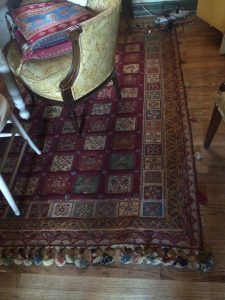
The carpet is a large one, four feet wide by six feet long. It’s made up of a bunch of four-inch squares with intricate multiple geometric and realistic images. It’s also a dimensional rug, having raised yarn borders around the squares. Bulbous tassels adorn the sides. The colors are all muted tans, yellows, golds, burgundies, greens, and blues. Piot, who was at the carpet store with me, said it looked like a rug meant for royalty. I definitely agree.

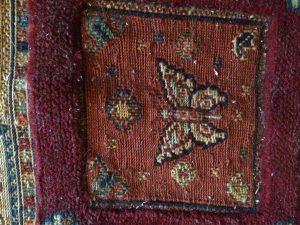
closeup of one of the squares

closeup of one of the squares

A brief history of Kazakh rugs:

Kazakh, originally a tribal name, is now a town, river and district in Azerbaijan. Carpets made by Kazakhs often feature coarse, long pile and dramatic colors and designs (all of which my carpet has in spades). Using Turkish knots, they’re generally made by Turkic nomads who are now settled. Today, lots of new Kazakh carpets are made in Pakistan inspired by old Caucasian designs. They use yarn dyed from natural vegetable dyes.

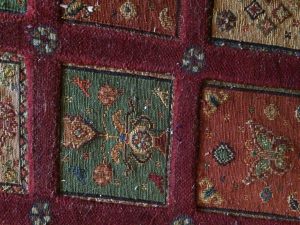
Detail of my carpet.

Detail of my carpet.

In Pakistan, you can also find Afghan rugs made by refugees who now reside there. During occupation by the Soviet Union between 1979 and 1992, close to one million Afghans fled their homeland and ended up in Pakistan and Iran. Afghan rugs are known to be durable and well made. They reflect the heritage of a cottage-based industry passed on through generations. Different qualities of pile carpets are available including felted wool ones called Namads, flat non-pile woven rugs called Kilims, and pile and knotted ones made from cotton, silk, and wool. It can take six to nine months to make a hand knotted carpet. When you think of it like that, $1500.00 doesn’t seem so high of a price.

You may be wondering how I managed to negotiate my price down to an amount more than 50% less than the original quoted price. The answer is pretty easy. I was completely prepared to leave the store without buying the carpet. The owner played that game where he asked how much I wanted to pay and had me write it down. I did. And then I refused to budge. He tried to cajole and guilt me into agreeing to a higher amount but I just kept saying no. Finally, our little group of four, gathered up our things and started to walk out the door. At this point, he finally said yes to my $1500.00 and the carpet was mine.

I bought my carpet at Afghan Carpet on School Road in Islamabad. If you are ever there, I encourage you to go visit them in person. They have a very large selection and serve some excellent tea. And they’re always up for a good strong negotiator.

My carpet at home in Harlem.

My carpet at home in Harlem.

This isn’t necessarily sewing related but, Afghan Carpet is down the street from one of the world’s largest bookstores (yes, that’s right, in Islamabad) called Saed’s Book Bank. The store is three stories and 42,000 square feet. They display around 200,000 titles and stock more than four million books throughout its five warehouses. You can literally find most anything there. Saed carries Cosmo and Heavy Metal Magazine, as well as books about Islam and Richard Dawkin’s atheist treatise, The God Delusion. You can find books on Catholicism and queer studies, an English translation of the Quran, maps and travel books, and novels by pretty much any English or American author you can think of. The store is a truly fantastic and amazing place to visit, especially when you consider that it sells predominantly books written in English in a country where that is most people’s second language. The New York Times published a wonderful article a few years ago about the store if you’re interested in reading more.

This is also my little way of saying that people are never wholly their governments and places are often not as scary as most media reports would lead you to believe. And there is truth and beauty and wonderful people wherever you travel, if you take the time to look for it.

Picasso Products for Sewing

Picasso Products for Sewing

Sewing can be a precise art of measurements and strategies. But at times, it’s kind of fun to loosen the standards and try for something less typical—and the results can be quirky and intriguing! This is what I like to refer to as Picasso Sewing. The title is a bit misleading since there’s structure and definition to Picasso’s works, but the idea of odd elements that don’t necessarily fit together is a fair representation of what you could create if you try for a more lenient method of making your next sewing project.

For example, a Picasso throw pillow, which I recently did!

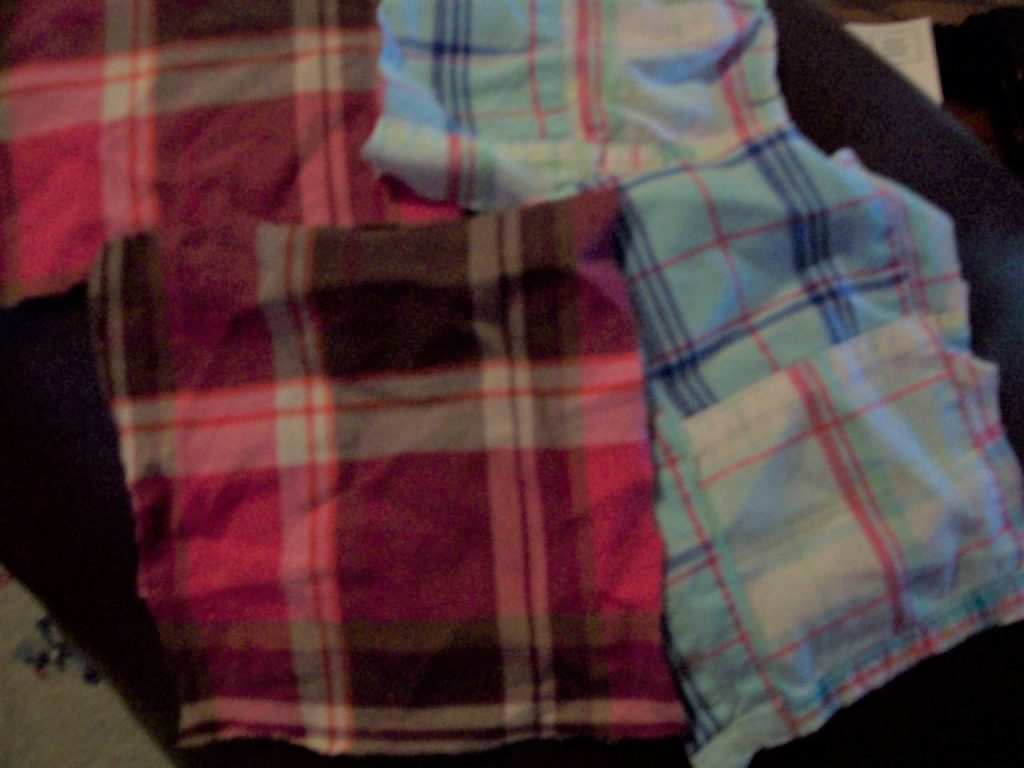
First, I chose fabrics that fit together without matching in the most conventional sense—two patterns that are both based on geometric shapes and lines of color.

Picture 1

The primary colors stand out from one another, but the blue fabric includes a similar pink shade to what’s on the pink. The most distinctive difference between these two fabrics though could be the pieced-together look of the blue fabric. Whereas the pink blocks are solid pieces, the blue ones were already a patchwork design since multiple geometric shapes form the overall design. The fabric choices essentially match in a shared pink color and a general foundation in geometry, but they’re different enough to create a mismatched look.

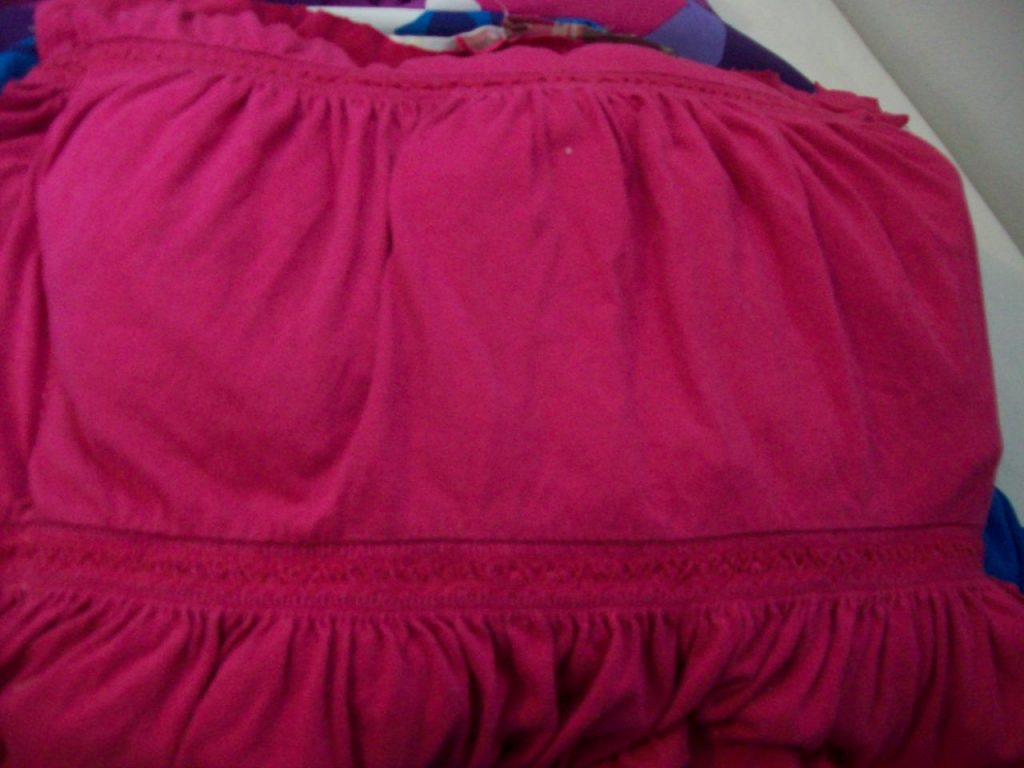
For the backing, I chose a different pink fabric that comes with elastic-esque lines of fabric.

Picture 2That elastic quality made this fabric a gamble since I didn’t know how the bunched areas would work when the front and back were sewn together, but remember that I was taking risks with this one!

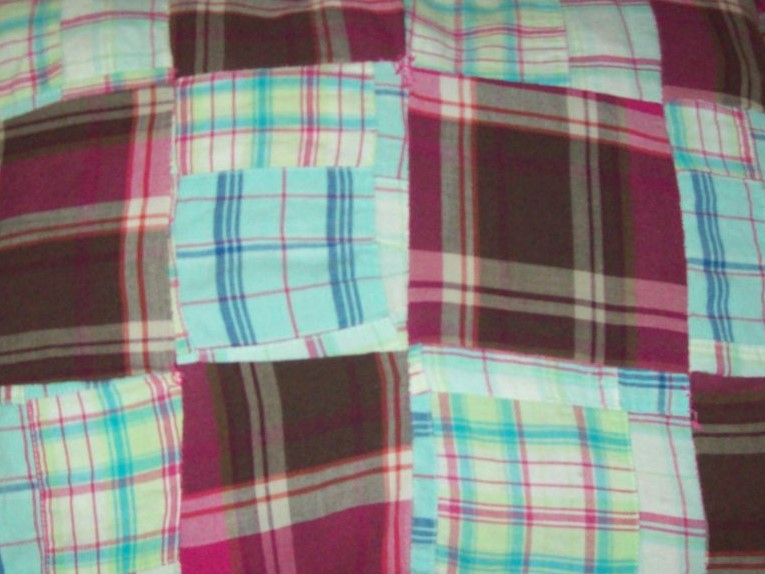
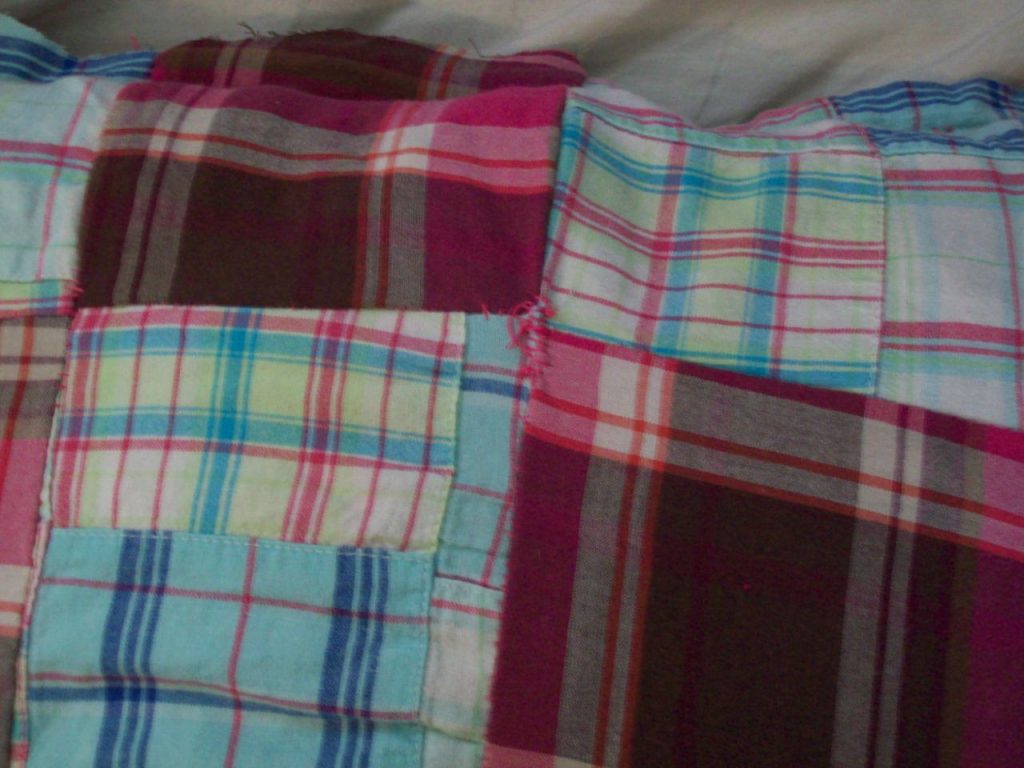
Once I had my out-of-the-fox fabric selected, it was time to start piecing together the front part of my pillow. I chose to go with a patchwork design, but I was lenient with how I put the patches together—and even how I cut them. Basically, I cut out a piece of one fabric, then cut other fabric shapes that were similar, but not necessarily exact, in size. Once I had pieces that looked (to my eye) sensible for a patchwork project—an estimation of approximately 2-3 inches in either direction—I decided on the pattern those pieces would take and started sewing the blocks together.

This is another step where basic sewing strategy was put on a shelf to create something more Picasso than an average throw pillow. I didn’t pin the individual blocks together, and I tugged them so that they fit alongside their neighboring pieces essentially on whims. I just tried to get a good amount of space for each block of fabric, and I didn’t worry too much about making everything exact and organized.

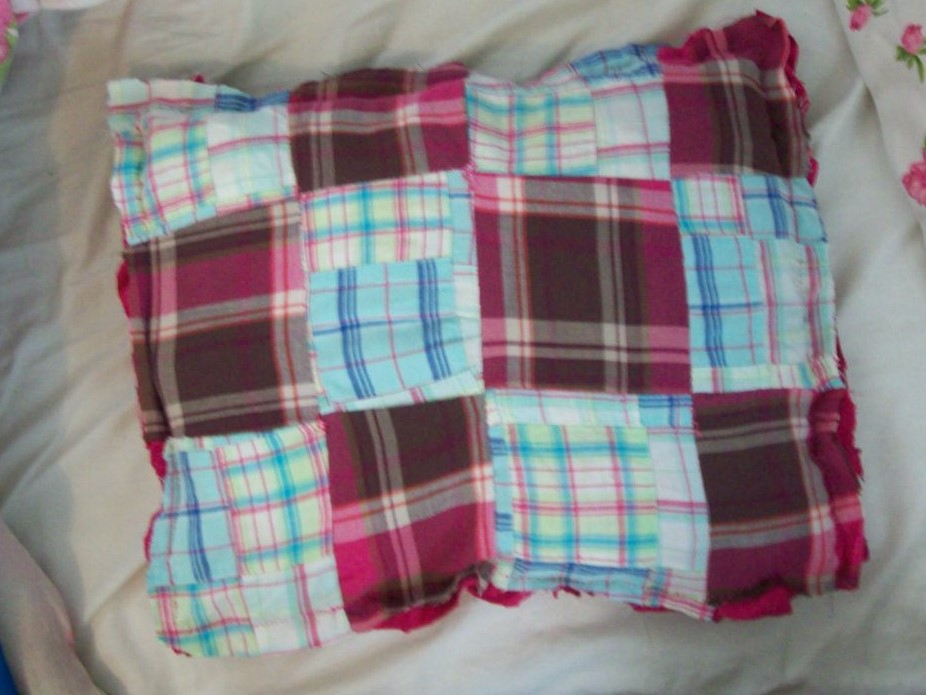
The result was an interesting setup where the blocks were tilted and varied in size, and I love it!Picture 3

I did give a bit more thought to piecing the lines of blocks together by using a handful of straight pins, but the messy appearance still exists in this pillow!

I ended up adding a fourth row of blocks to get the pillow a little bigger (I seriously eye-balled and compared fabric blocks to get every measurement here), but after that, it was time to apply the backing. To do that, I was again unorganized in my methodology. I laid the top layer of the throw pillow on the backing material, then pinched the backing fabric enough to where there would be extra space between the layers for filling.

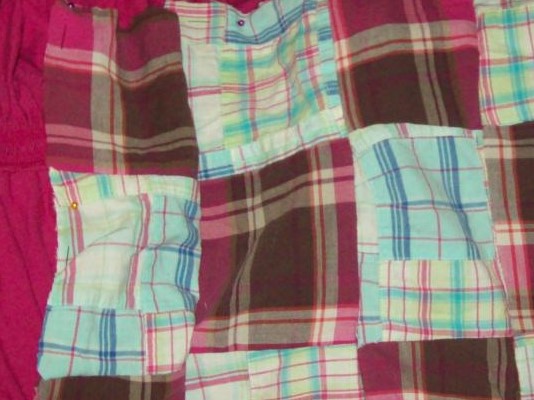
I only used less than a dozen straight pins to keep the layers of fabric in place as I sewed far enough from the edges of the top layer’s fabric to allow excess material on all sides.Picture 4Next, I sewed along all of those sides until there was one patch of open space left to insert the filling, then finished sewing the rest once the filling was inside. Since I had the elastic element to consider for the backing, at times, I had to allow bumps between stitches to make up for the excess fabric for all of this sewing detail.

After that, I’d intended to shred the edges to make this a raggedy throw pillow, but once I cut off the larger portions of the backing fabric, I found I already liked the raggedy look that the unclean edges brought to the product. So rather than rocking the boat by shredding the ends, I just cut off pieces that *needed* trimming—like excess thread or very shredded parts of the fabric.

There are two details about my process that I’ll mention in addition to this basic strategy. The first is what I used for filling. This is a creation that’s not intended to look or be sophisticated, so I used a series of old shirts to stuff into the pillow. If you’re going for something that’s more concerned with comfort, you might want to try for a more standard filling.

The other detail is that this process, since it ends with a ragged final product, can be forgiving for mistakes because it’s understood to look a little worn. For me, that came in handy because I didn’t leave enough fabric to completely link the patches in at least one spot, causing a gap. Since it’s okay for this pillow to look imperfect, I was able to sew up that spot without worrying that the thread would be seen, then add that thread-repair-look at a couple of other spots that didn’t need it.Picture 5The result seemed like a structural decision to bring that ragged quality to life rather an error in strategy.

The final product is a pillow that’s Picasso-like in its leaning and varied-sized blocks, and so very raggedy with its frayed ends and fake repairs. Had I gone strictly by the books, I might not have come up with something so imperfect looking—and I really would be missing out because I adore this pillow! Picture 6The moral of the story? Don’t be afraid to bring a little imprecision and a lot of Picasso to your sewing to create unique products! Sure, strategy is great, but loosening the guidelines in sewing can be awesome, too!

Sewing Through a Crisis

Sewing Through a Crisis

Like me, I’m sure many of you find sewing to be a relaxing, calming activity. Something about the personal space it affords along with focusing on the details of your project instead of whatever else may be going on is a great relief. When life gets to be too much, I often retreat to my sewing space. It makes sense, then, that when a personal or professional crisis occurs, I’d sew my way through it.

Freelance work

Being a freelancer is a walk on the line between comfort and professional crisis. Not all clients communicate well and sometimes they make changes which impact my income. In some cases, they give me no warning and leave me in panic mode trying to replace the money I made writing for them. As you can imagine, this is stressful. It feels like a crisis.

Crisis mode!

Crisis mode!

Yes, I work hard to replace the income. I spend time seeking new clients, asking existing ones for referrals and going to networking events. But in between these efforts, to keep my sanity in check and my professional demeanor in place, I sew.

I sew anything. It doesn’t have to be a project I’m excited about. In fact, in these moments, it’s often better if it’s something I’m not planning to wear for a special event. That way, I won’t feel any internal pressure to make it come out perfectly.

Scrappy solutions

I sew fabric scraps in my stash pile together to make funky shapes and patterns. Sometimes they get made into a pillow or another decorative piece. Sometimes they don’t. The point isn’t to create a masterpiece. The point is to calm my mind and emotions. It’s to keep me focused and reasonably calm, despite the professional crisis of losing a client and the need to quickly replace the income.

An hour of sewing at lunch gives me the inner peace I need to spend the rest of the day working hard looking for new clients without the grip of anxiety grabbing me at every step.

When you’re facing a crisis, personal or professional, try sewing your way through it. You might just find you’re better able to cope and be the person you, and your loved ones, need you to be.

Fix Your Own Pants

Fix Your Own Pants

As many of you probably know, I work as a tailor and pattern maker for film and television in New York City. I don’t always work on the same show or at the same studio. I’m also, now that I’m old(er) a bit more particular about what projects I say yes to and who I work with.

I’ve got a few fitting related pet peeves like, for instance, when a dress comes back from the fitting room with a note that simply reads: Drop in a Lining or the ever infamous and popular: Take in as pinned (if I didn’t pin it myself). These are just minor annoyances though, compared to the phenomenon of people from other departments (accounting, grip, director, props, whatever) showing up in my sewing space – without ever having met me before – and asking if I can just fix their pants or take in this skirt.

Frustration

First of all, no. I can’t just anything because (1) I’m actually working on something for the show we’re both doing and (2) I don’t want to. Especially if your pants fix involves a worn out crotch (and even if it doesn’t). I don’t randomly show up in the accounting office and ask someone to add my receipts together when they get a chance, or ask one of the props people to rewire an old lamp I bought at the last set dressing sale, or ask the director of photography to take some pictures of me for my tinder profile or something because I’m just not talented enough to take my own. (I’m kidding about the tinder profile thing). And I certainly don’t throw in some disclaimer like I always wished I learned how to take a proper photo.

You’ve got to know when its time to let a thing go.

Sometimes the person will preface their ask with so and so (insert the name of someone else in my department) told me I should ask you. This is even more perturbing if that someone else hasn’t actually sent a text or something asking me if it’s ok to send that person over to me to ask a favor.

It’s not me – it’s you

Fix Your Own Pants

It’s not that I mind doing favors. I really don’t. I do favors for people I like and know all the time. I’ll even do favors for people who I don’t know if they ask nicely and genuinely – and especially if they offer to compensate me in some way (beer!). But if you show up with some blue cotton harem pants with a thread bare bottom that you want repaired when I’m in the middle of cutting down the neckline of a velvet top that is needed on set in about twenty minutes and the first thing out of your mouth is X told me I could have you to do this I’m never going to do it. Your sad pair of pants is going to hang on my work rack until this show wraps.

Why? Because you, whoever you are, you didn’t tell me your name or what you do on this little show of ours, and I’m quite certain that the only person who can have me do anything is the Costume Designer. So, there’s that. Second, if the back of your pants is worn out in the butt area, it might just be time to buy a new pair of pants. You’ve got to know when its time to let a thing go. Seriously, why would you think that someone you don’t even know would want to be that up close and personal with that particular area of your clothing?? I don’t care if they’re clean and, yes, I’ve taken in a countless number of center backs for actors but I’m getting paid to do that. The crotch of your pants? Um, no.

A healthy dose of humility

I personally would be embarrassed to take my worn threadbare butt pants to someone I didn’t know to fix. I honestly don’t understand it. Maybe someone could shed some light on this for me?

I think what upsets me the most about this type of favor-asking is the assumption that I’m not busy doing something else that is important for the show. It’s as if people think I’m just hanging round twiddling my thumbs just waiting for someone to turn up with their personal alteration request so I can sew something.

Anyway. Rant over. I’m going to go upstairs now and see if the accounting department can get an early start on my taxes for next year. I’m sure they’re not doing anything else of importance.

What’s your big sewing related rant?

Bunk Bed Privacy Curtains

Bunk Bed Privacy Curtains (part 2)

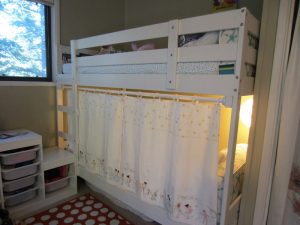
Last fall I wrote a post about the bunk bed privacy curtains I created for my youngest daughter for her bottom bunk.

Last fall I wrote a post about the bunk bed privacy curtains I created for my youngest daughter for her bottom bunk. You can read that post here.

They turned out amazingly well; here’s a picture.

They turned out amazingly well; here’s a picture.

They turned out amazingly well; here’s a picture.

It’s only fair…

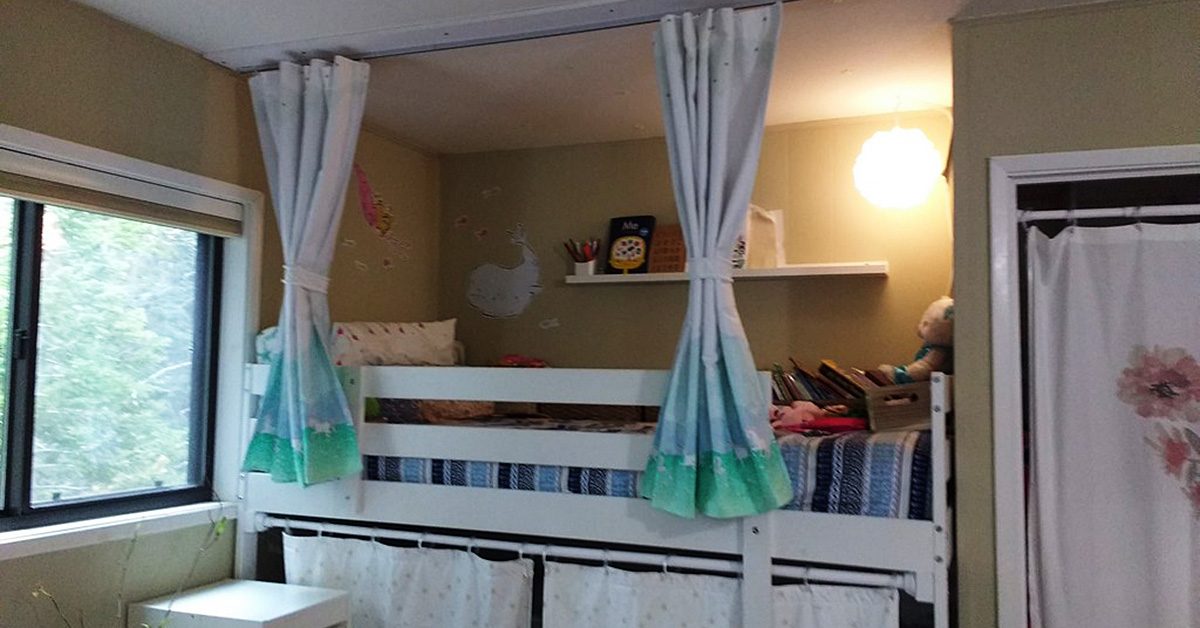
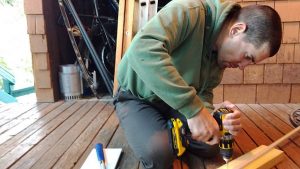
I also promised my older daughter, who sleeps on the top bunk, that I’d make her a pair too. Her curtains, I knew, would take a lot more work. First I bought ceiling curtain track and used a hacksaw to cut it to size. Then I asked my husband to drill in the holes for the screws.

While he worked on the track, I painted a thin board white to match their ceiling. We attached the track to one side of the board and then attached the board to the ceiling, drilling holes in the side of the board that didn’t have the track, right into a stud in the ceiling.

Drilling holes in the side of the board that didn’t have the track, right into a stud in the ceiling.

Drilling holes in the side of the board that didn’t have the track, right into a stud in the ceiling.

Unicorns and stars

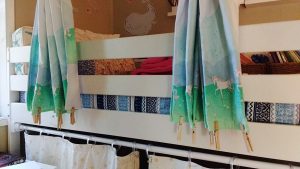
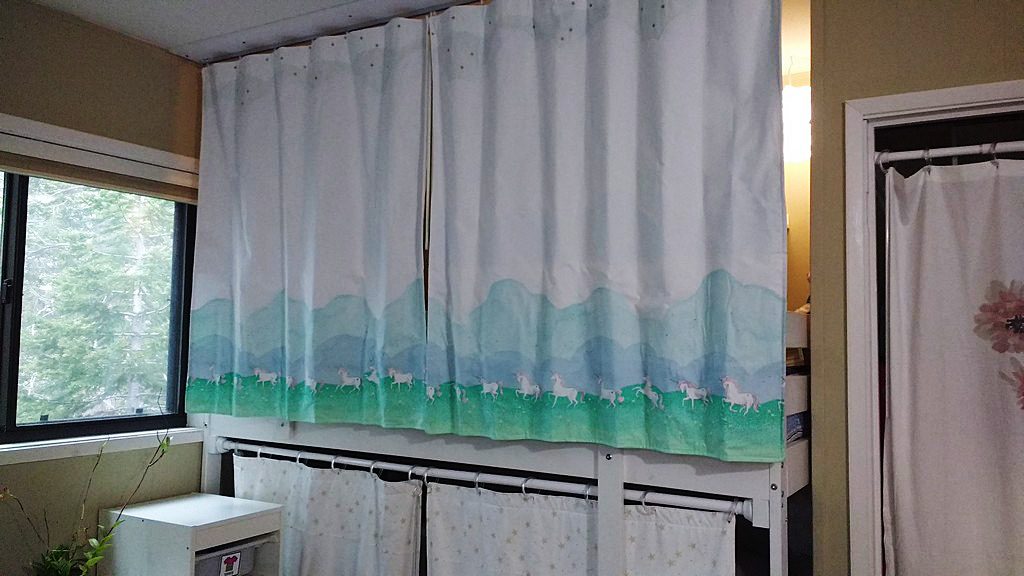
Next up was the curtains themselves. She said she wanted ‘unicorns and stars,’ and for a theme like that you can always count on Sarah Jane Fabrics for something good. The only problem was the space the curtains took up was much larger than the width of a yard of fabric.

Undeterred, I cut the clouds and the stars from the grass and the unicorns and did the math on how to baste the fabric onto white canvas fabric to elongate the scene.

Undeterred, I cut the clouds and the stars from the grass and the unicorns & did the math on how to baste the fabric onto white canvas fabric to elongate the scene.

Undeterred, I cut the clouds and the stars from the grass and the unicorns & did the math on how to baste the fabric onto white canvas fabric to elongate the scene.

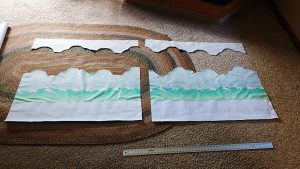
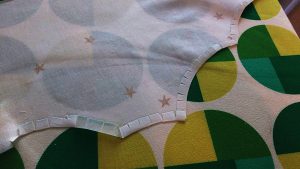
I painstakingly snipped around the curves of the clouds and the grass on the bottom and top pieces and then finger folded them over and ironed. I used starch to help the little pieces stay down. This was time consuming because I had to do it for four panels (two front, two back) and the top and bottom pieces of all four.

I love it when a plan comes together

My trouble paid off however.

My trouble paid off however.

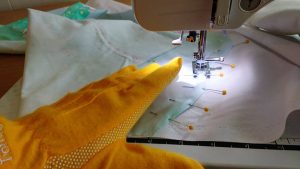
My trouble paid off however. I diligently pinned the pieces to the main panel fabric of the top and bottom curtains and then sewed them in place with a decorative stitch.

I diligently pinned the pieces to the main panel fabric of the top & bottom curtains & then sewed them in place with a decorative stitch.

I diligently pinned the pieces to the main panel fabric of the top & bottom curtains & then sewed them in place with a decorative stitch.

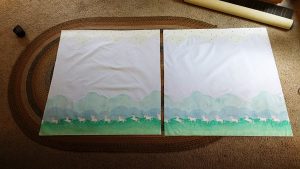
Here are the two front panels. Gorgeous, no?

Here are the two front panels. Gorgeous, no?

Here are the two front panels. Gorgeous, no?

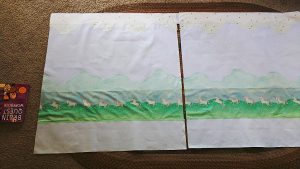
For the back panels, I raised the grass & unicorns up higher and added a strip of white on the bottom so the unicorns wouldn’t be hidden from my daughter’s view by the bunkbed railing.

For the back panels, I raised the grass & unicorns up higher and added a strip of white on the bottom so the unicorns wouldn’t be hidden from my daughter’s view by the bunkbed railing.

For the back panels, I raised the grass & unicorns up higher and added a strip of white on the bottom so the unicorns wouldn’t be hidden from my daughter’s view by the bunkbed railing.

Putting it all together

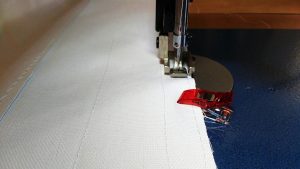
On the back panel, I then sewed drapery tape to the top of each panel. Then I sandwiched the top and bottom panels, right-sides facing, and sewed them together. Next I turned the panels and pressed everything neat and flat. I finished by top stitching the panels, and the opening where I’d turned them, closed.

On the back panel, I then sewed drapery tape to the top of each panel.

On the back panel, I then sewed drapery tape to the top of each panel.

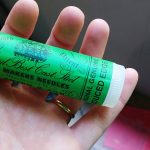
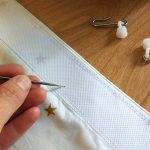
Now it was time to puncture some holes in the drapery tape so I could add the hooks that feed into the curtain tracks. For this, I used my handheld sailmaker needles to pierce a hole in the tape but not through to the front of the fabric.


And voila! The curtains fed onto the track perfectly. But I wasn’t done yet.

For this, I used my handheld sailmaker needles to pierce a hole in the tape but not through to the front of the fabric.

For this, I used my handheld sailmaker needles to pierce a hole in the tape but not through to the front of the fabric.

Train your curtains

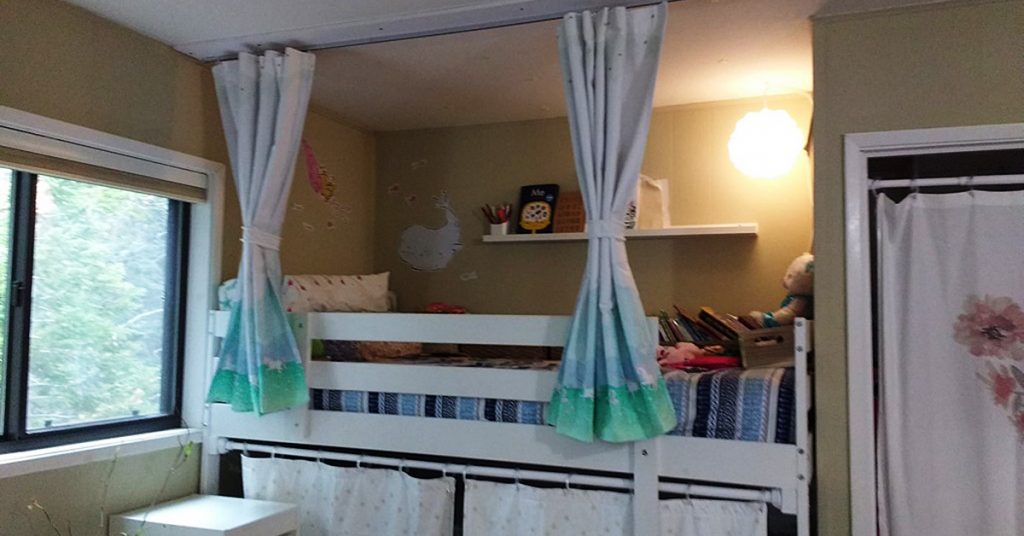
My daughter wanted to be able to block out the light of the night lights we use in the room, but also wanted to easily be able to open and shut the curtains too. I took the time to carefully fold the curtains into the bunched position, using ribbon and clothespins to maintain them in that shape while I sewed curtain tie backs. I call this ‘training’ my curtains.


I took the time to carefully fold the curtains into the bunched position, using ribbon & clothespins to maintain them in that shape while I sewed curtain tie backs.

I took the time to carefully fold the curtains into the bunched position, using ribbon & clothespins to maintain them in that shape while I sewed curtain tie backs.

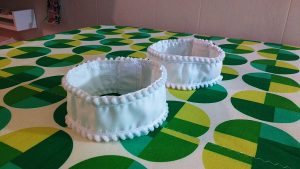
Then I sewed two curtain tie backs and added some mini pompoms for a bit of whimsy.

Then I sewed two curtain tie backs & added some mini pompoms for a bit of whimsy.

Then I sewed two curtain tie backs & added some mini pompoms for a bit of whimsy.

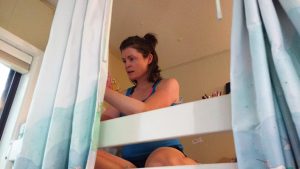
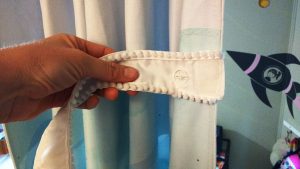
I knew that my daughter would lose them if I didn’t think of a way to keep the tie backs attached to the curtains so I sewed a buttonhole onto each tie back (you can read my post about how to sew buttonholes here). Next I climbed up into her bed and hand sewed a button onto the back panel of each curtain.

Then I connected the tie backs to the curtains via the button hole. Now she can bunch the curtains to open them, wrapping the tie back around them and securing them with the Velcro I sewed on the tie backs. And when she wants to close them for privacy or to shut out the light, she just releases the Velcro and the tie backs remain attached to the curtains.

When she wants to close them for privacy or to shut out the light, she just releases the Velcro & the tie backs remain attached to the curtains.

When she wants to close them for privacy or to shut out the light, she just releases the Velcro & the tie backs remain attached to the curtains.

And I have a very happy six year old! Have you made your own bunk bed curtains? Tell us about it in comments!


———————————————————————————–
Charlotte Kaufman is a writer and sewist in Mammoth Lakes, California. She specializes in marine and home interiors and continues to fall more and more in love with quilting. You can follow her at charlottekaufman.com.
Tutorial: 3 Ideas for Using Japanese Bento Bags

Tutorial: 3 Ways to Sew Japanese Bento Bags

Bento bags, AKA azuma bukuro

Bento bags are a popular Japanese style of bag, more properly called azuma bukuro (or fukuro. Bukuro and fukuru are different pronunciations of the same word, which is a blend of two words that translate to “good fortune” and “bag.” Azuma is the historical name for the eastern region in Japan now known as Kanto and Tohoku).

These are also sometimes called Japanese market bags, triangle bags, even origami bags, although there are other styles called origami bags, too.

I discovered bento bags a few weeks ago myself, and I am so glad that I did, because these are incredibly useful. I told you in January that I planned to sew for Christmas in July, and I’ve actually been doing this since June. So I’ve been making lots of bento bags as wrappings for the gifts I am sewing now. And for my own personal and household use, too.

There are different ways to sew bento bags. Whichever method you use, they end up the same shape. It is useful to know how to make these both ways, though, so that you can use scraps to make them. You might choose one way over the other depending on what size fabric scrap you have.

How to sew bento bags from rectangles

To make a bento bag from rectangles, you need two same sized rectangles that are three times as long as they are wide. Your rectangles could be 5″ x 15″ for a small bento bag, 6″ x 18″, 7″ x 21″, 8″ x 24″, 9″ x 27″, or any size, as long as it is three times as long as it wide.

Choose most any fabric you like to make these. Use 2 layers of cotton or linen for a soft and relaxed bag, or try denim or canvas for a sturdier bag that holds its shape well.

One rectangle will be the outside of your bento bag; the other is the lining. Align these with right sides together and sew around all four sides, leaving an opening for turning. Turn, press, and sew this opening closed.

Now place this lined rectangle with the outer fabric on top, and fold into thirds, with the lining fabric folded over the front. Sew two seams attaching each outer third of the rectangle to the center at opposite ends.

Then, sew across the two outer corners of the bag to box the corners. The shape and size of the bag will differ depending on how deeply you box these corners. Or you can choose not to box them at all.

Turn right side out and your first bento bag sewn from rectangles is complete. I’m betting you will make many more.

rectangle bentos

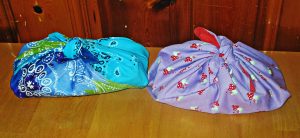
I made these bento bags from rectangles.

Sew bento bags from squares or triangles

There a couple of different ways to construct these from squares and triangles. Here are two slightly different variations on one method:

Take two same sized squares of fabric. They could be the same fabric for a bag with outsides and linings the same, or two different fabrics for a bag that will show both fabrics on both sides. If you want to use this method to make a bag with one fabric showing on the outside and one other fabric for the lining, you will need to first cut a square of each fabric in half diagonally and start the next step with four triangles rather than two squares.

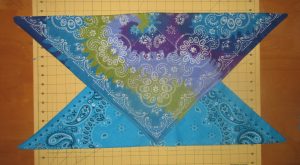
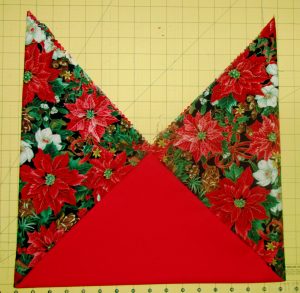
Now you will either fold your squares in half diagonally with right sides together to form right triangles, or lay two different triangles right sides together, if you cut them as described above. Sew these together with an opening. Turn triangles right sides out, press, and sew the opening closed.

Then lay one triangle on top of the other at the right angles, forming a square where they overlap. Sew down along the edges of this square.

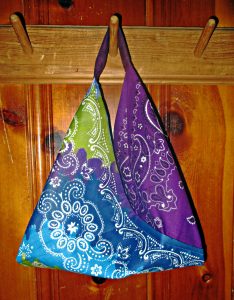
bandana bento

Overlap triangles at the 90 degree angles,and sew the square these form.

Now fold bag with right sides together and sew along both side seams. Box the corners and turn right sides out.

One More Way

Yet another way to make these is to start with three same sized squares, or six for a lined bag. You can use smaller scrap squares for this method than you can for the previous method, since this way uses more of them.

Sew two sides of one square to two sides of another square. Then sew two sides of the third square to the other two sides of the middle square.

You could line these as in the above methods, by sewing outer and lining squares right sides together and turning. Make three of these lined squares and then sew together.

This one is made from three squares. I'll make the lining the same way & sew the two together.

This one is made from three squares. I’ll make the lining the same way & sew the two together.

Or you could sew the bag and lining pieces separately, forming two bags. Then put them right sides together and sew, leaving an opening. Turn, press,and stitch opening closed. Sewing it this way creates a reversible bag, by the way.

What to do with bento bags

Now you know a few different ways to sew bento bags. You can probably think of plenty of things to do with them on your own, but here are quite a few ideas from me for how to make use of these handy bags.

Gift bags

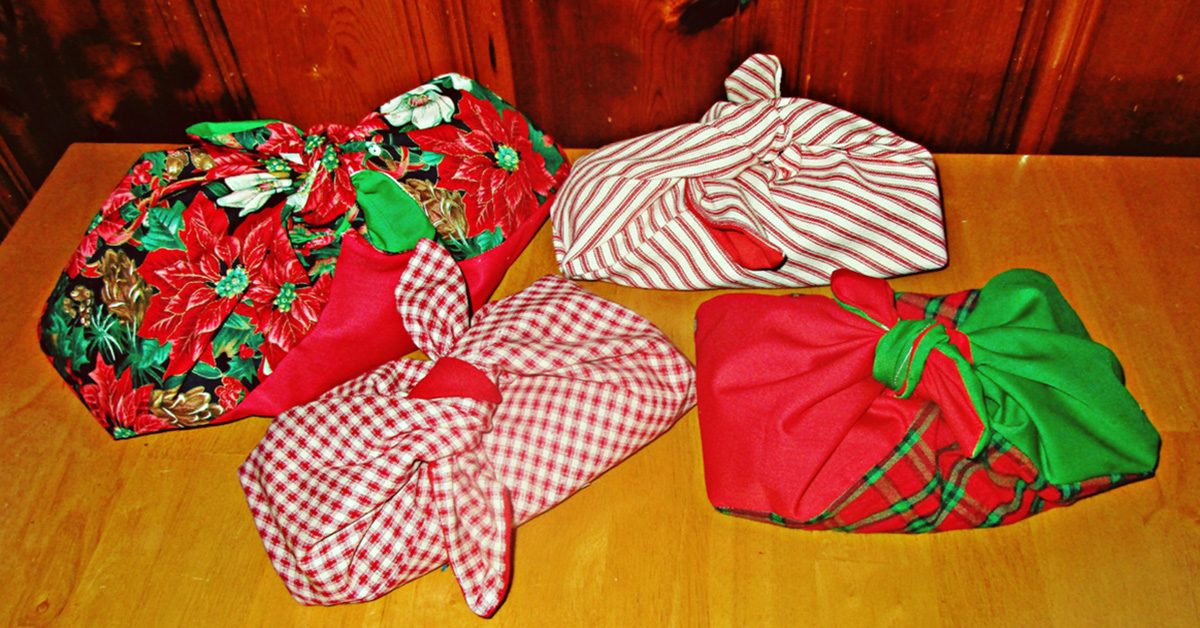
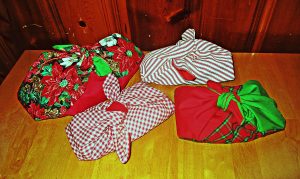
These make “re-useful” wrappings because rather than just being a fabric gift bag, the recipient can then use it for some handy purpose like any of the ideas below.

Lunch sack

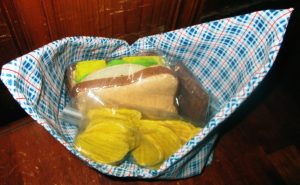
I first found out about these bags when I saw an anime character on TV using one to carry her bento boxed lunch. You can use these to carry your lunch as a pretty package whether you also use a bento box or not.

Your lunch will taste much better than this felt example lunch! Just tie bag closed to carry.

Your lunch will taste much better than this felt example lunch! Just tie bag closed to carry.

Bread basket and cloth all-in-one

I’m thinking they are perfect for wrapping loaves of bread as gifts, and these can go straight to the table for serving the bread and keeping it covered, too

Grab and go sack

For pencils, yarn or knitting supplies, small patchwork pieces, works-in-progress: anything you need to keep together and carry along.

Sort-able storage

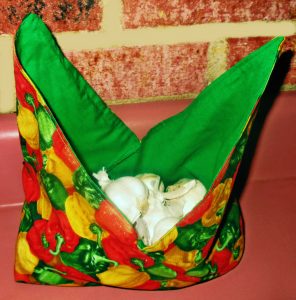
Make a set for sorting nails or other hardware; fabric, scraps, or trim; cords, wires, or anything else. I plan to make a rainbow set for myself to sort small pieces of fabric and scraps by color. This could be a solution for organizing tools, a kitchen junk drawer, or bead and jewelry supplies collection, too.

Basket / bin

You can make these with interfacing or even quilted for sturdiness. Especially when these are small, they will nicely stand up and hold things on a bureau, desk, counter, or table. Or stand one in a dresser drawer or cabinet.

Harvest bucket

Sew another strip of fabric to connect the two ends and it becomes a handy tool for harvesting your garden.

Produce bags

For separating fruits and vegetables on the counter or to use while shopping. Unlike many reusable bags, bento bags are easily machine washable.

Use them to harvest or store produce.

Use them to harvest or store produce.

Purse or shopping bag

Sew a strip for a handle and carry a bento bag, small or large, as a casual purse or a shopping bag.

Make a strap by sewing a wide or two narrow rectangles into a tube, then tuck raw ends under & insert the ends of your bento bag, then sew.

Make a strap by sewing a wide or two narrow rectangles into a tube, then tuck raw ends under & insert the ends of your bento bag, then sew.

Add to this list by sharing your ideas for how you will use these in the comments below. Happy sewing!
Sew a DIY Sunbrella Table Cloth with Insul-Brite

Sew a DIY Sunbrella Table Cloth with Insul-Brite

I would need a place to serve the hot lasagnas we had ordered.

I would need a place to serve the hot lasagnas we had ordered.

This weekend I hosted 17 women at my home for a women’s writing workshop with bestselling author, Amy Ferris. We had lunch each day and we ate outside on my lower deck. Lunch was catered and I knew I would need a place to serve the hot lasagnas we had ordered.

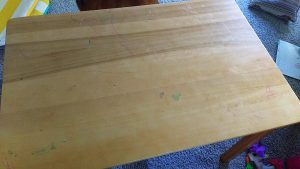
Enter my daughter’s art table: I thought it would be perfect for staging food on the deck but it’s covered in marks and squiggles and I didn’t want hot food to hurt its surface. I’ve been on a role using up my Sunbrella stash (you can read about the outdoor Sunbrella pillows I recently made here and here.) So I dug into my Sunbrella stash again.

Enter my daughter’s art table.

Enter my daughter’s art table.

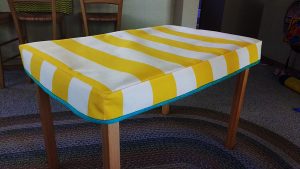
This wide striped yellow Sunbrella fabric was a perfect choice. Sunbrella is water resistant and stain resistant. I also had some Insul-Brite batting in my stash too. Insul-Brite is amazing and is what home sewers use to make DIY pot holders and ironing boards.

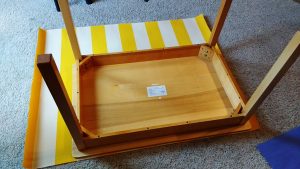
To get started, I turned the table over and used it to make a pattern on the fabric.

This wide striped yellow Sunbrella fabric was a perfect choice.

This wide striped yellow Sunbrella fabric was a perfect choice.

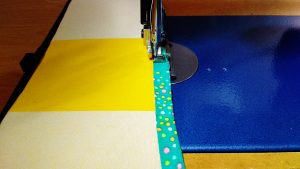
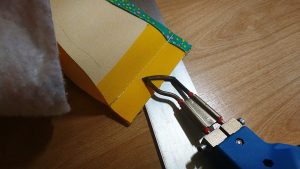
I used a ½” seam around the pattern. I also only had one yard of the fabric so on the remaining portion I had to do some math to make sure I had enough left to make strips for the sides of the table cloth. I figured out that I could do three strips at 4.25” each. I cut out the tablecloth top and the strips with a hot knife.

I used a ½” seam around the pattern.

I used a ½” seam around the pattern.

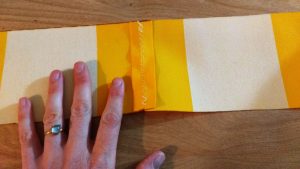
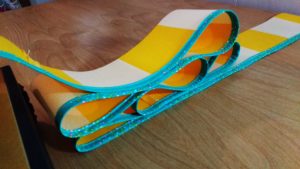
Next I joined the three strips together, opening the seams and finishing them with a zig zag stitch to help keep the joins as flat as possible.

Next I joined the three strips together.

Next I joined the three strips together.

I really wanted to add pom pom trim but I didn’t have enough to go around the table cloth so I used some of this handmade trim I had from a quilt I made earlier.

I used some of this handmade trim I had from a quilt I made earlier.

I used some of this handmade trim I had from a quilt I made earlier.

How beautiful is that?

How beautiful is that?

How beautiful is that?

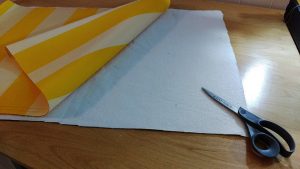
Now that the side fabric had the trim attached, I busted out the Insul-Brite. You want to put the shinier side of the fabric toward the heat source. I cut out a piece that was slightly larger on all sides of the top of the tablecloth.

I cut out a piece that was slightly larger on all sides of the top of the tablecloth.

I cut out a piece that was slightly larger on all sides of the top of the tablecloth.

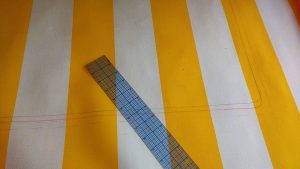
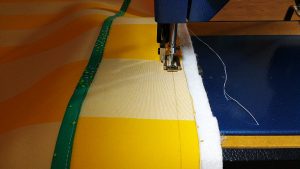
To attach the side piece to the top I made a sandwich of first the Insul-Brite, and then the Sunbrella top. The side piece went on top of the table cloth top, right sides together. Before I started I drew a ½” seam on the side piece so I knew I was sewing correctly to the pattern I’d created for the tablecloth top.

Before I started I drew a ½" seam on the side piece so I knew I was sewing correctly to the pattern I’d created for the tablecloth top.

Before I started I drew a ½” seam on the side piece so I knew I was sewing correctly to the pattern I’d created for the tablecloth top.

Cut snips into the fabric as you go around the corners.

Cut snips into the fabric as you go around the corners.

Cut snips into the fabric as you go around the corners.

When you get close to the other end of the trim, pull it off of the machine, join the two pieces and fold them back and forth, marking where they should be sewn together.


When you have those marks, bring the top over to your machine and sew the join on the side piece.

When you have those marks, bring the top over to your machine & sew the join on the side piece.

When you have those marks, bring the top over to your machine & sew the join on the side piece.

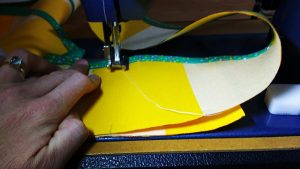
Use your hot knife to trim the join. Then sew the rest of the side piece down to the tablecloth.

Use your hot knife to trim the join.

Use your hot knife to trim the join.

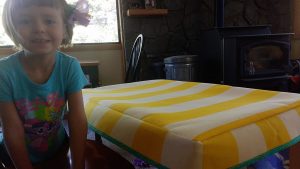
Next I tried it on the table to make sure I had it correctly sized. I had not yet trimmed any excess Insul-Brite. Here you can see both my darling daughter and that the tablecloth fits. What it is missing is topstitching. Topstitching is magical, not just for the finishing touch it gives but because it helps give support and structure.

Here you can see both my darling daughter & that the tablecloth fits.

Here you can see both my darling daughter & that the tablecloth fits.

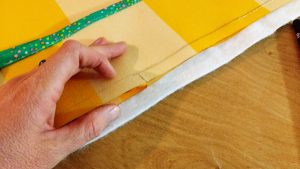
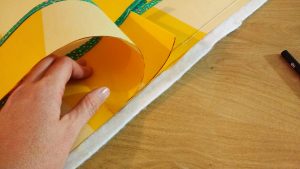
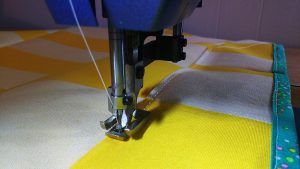
I chose to topstitch on the side piece versus the top and fold the Insul-Brite down toward the sides.

I chose to topstitch on the side piece versus the top & fold the Insul-Brite down toward the sides.

I chose to topstitch on the side piece versus the top & fold the Insul-Brite down toward the sides.

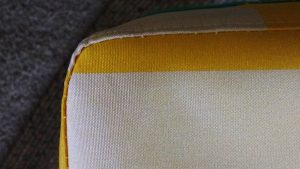
That nice, clean line is exactly what will take this project to the next level.

That nice, clean line is exactly what will take this project to the next level.

That nice, clean line is exactly what will take this project to the next level.

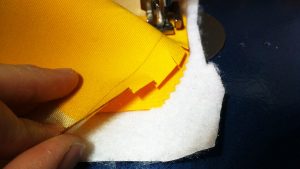
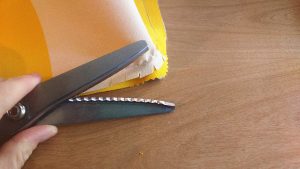
Finally, I trimmed the Insul-Brite to match up with the seams and then used pinking shears on the corners where I had made snips to help prevent fraying.

I trimmed the Insul-Brite to match up with the seams & then used pinking shears on the corners where I had made snips to help prevent fraying.

I trimmed the Insul-Brite to match up with the seams & then used pinking shears on the corners where I had made snips to help prevent fraying.

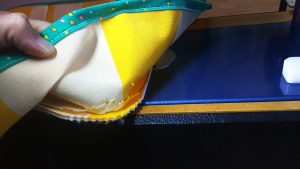
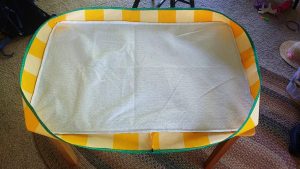
Here’s what the finished piece looks like on the underneath.

Here’s what the finished piece looks like on the underneath.

Here’s what the finished piece looks like on the underneath.

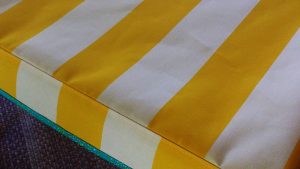
Flipped over and on the table, you can see how much more snugly the tablecloth fits because of the topstitching.

Flipped over & on the table, you can see how much more snugly the tablecloth fits because of the topstitching.

Flipped over & on the table, you can see how much more snugly the tablecloth fits because of the topstitching.

How darling is this?

How darling is this?

How darling is this?

This is a quick pic of it inside.

This is a quick pic of it inside.

This is a quick pic of it inside.

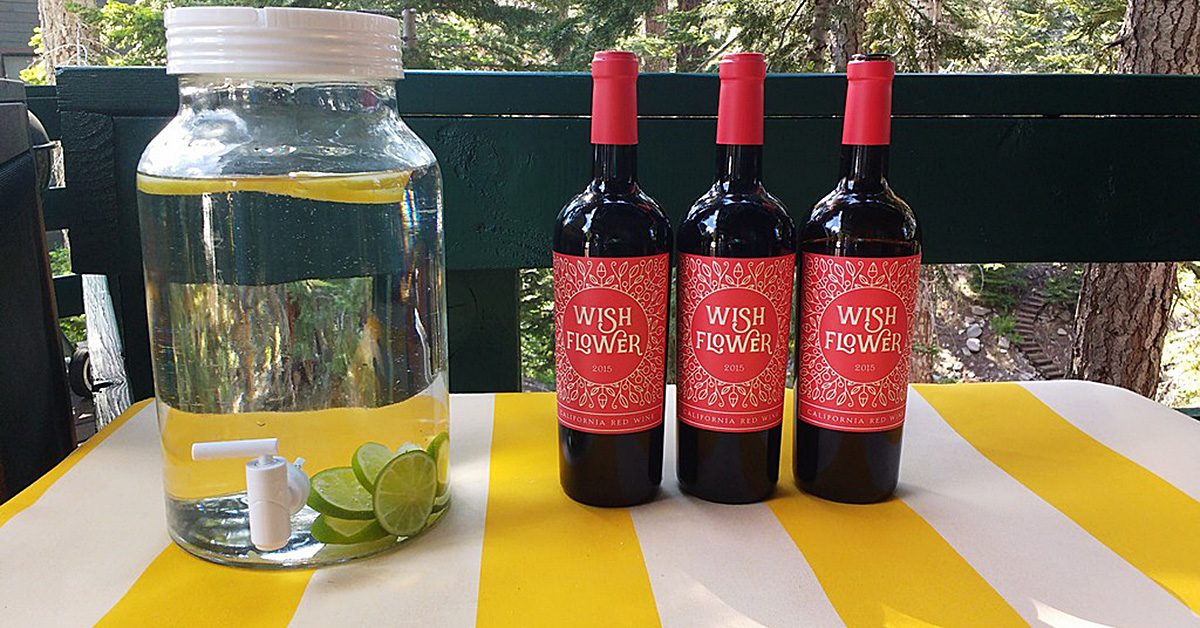
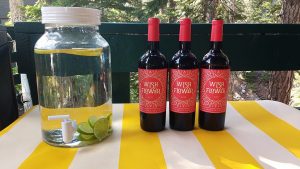
And at last, my idea worked out great on the deck where I served lasagna for my guests and later, cheese and wine. I love it when a project works out!

I love it when a project works out!

I love it when a project works out!

———————————————————————————–
Charlotte Kaufman is a writer and sewist in Mammoth Lakes, California. She specializes in marine and home interiors and continues to fall more and more in love with quilting. You can follow her at charlottekaufman.com.
Having a Friend who Sews

Having a Friend who Sews

Some things just work better in pairs.

Some things just work better in pairs.

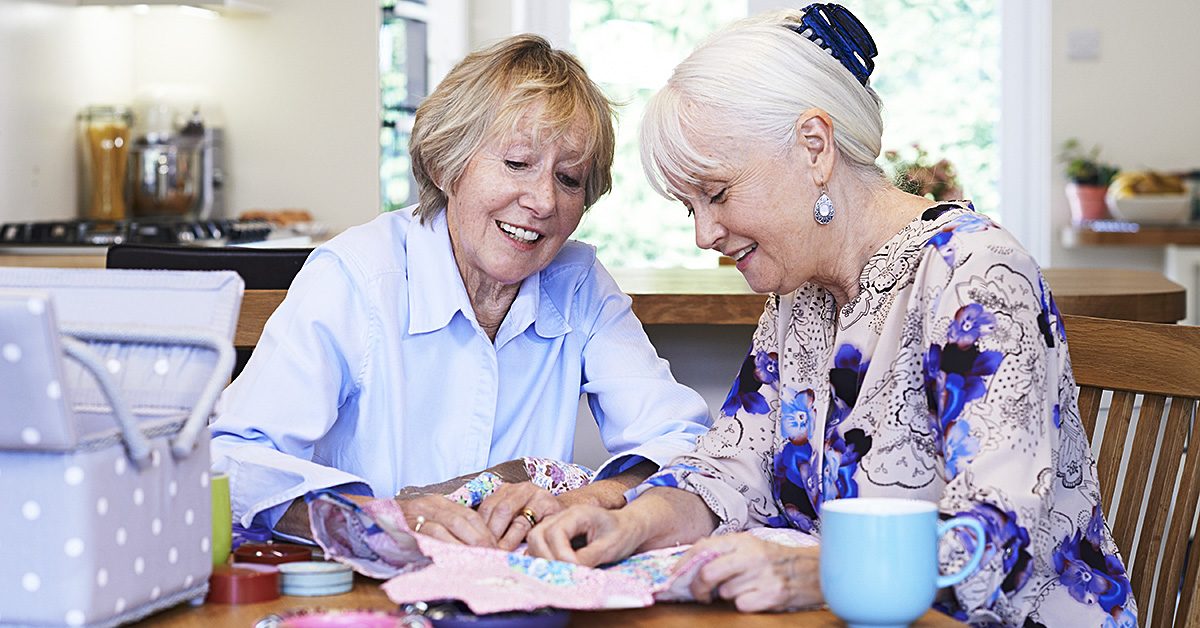
Some things just work better in pairs—like shoes, socks, friendship bracelets, and the Everly Brothers. Often though, even our pastimes can be enhanced by the addition of another human being. Going to the movies, as an example, is more fun with a friend to offer ridiculous comments to or to discuss the movie with after the credits roll. Another example would be hiking. It could be great for you to wander through nature while getting a workout, but if you have someone to share the experience with, that company provides another level of goodness.

Sewing, too, can benefit from the presence of another person, even if people often think of it like a solo task. Things like classes based on sewing show evidence of this since you’ll be learning—should you take one—in the midst of other people who are interested in the same craft, but the reasons behind sewing non-solo are applicable beyond the notion of gathering in dozens in a classroom. Truthfully, there are common, day-to-day rationales for having a sewing friend or two in your life that you could find useful even if you don’t want to leave your house for your projects. You can pick up your phone, call them, and invite them over for sewing assistance.

And that sewing assistance can come in three specific forms that we’ll cover in this post. Ready to dive in? Then let’s go!

Taking Measurements

You might find that getting your measurements on your own can be complicated.

You might find that getting your measurements on your own can be complicated.

If you’re the type of person who sews your own clothes, you might find that getting your measurements on your own can be complicated. If you try to measure from shoulder to shoulder, for instance, you pretty much have to lift at least one shoulder, and that can throw off your measurement. It helps then to have a second person around who can step in and help you. Now, sure, you can recruit whoever is around to help you get that shoulder measurement, but it’s still best to have that someone be a person who’s familiar with sewing.

The reason for that detail is because people who are accustomed to taking measurements won’t need an explanation about how to take the measurement. They’ll understand, if you want help with your waist measurement, that the sewing tape should be at the smallest part of your waist. The process is familiar, and they’re accustomed enough to know how tight the tape should be held as well as where the cut off is in regard to any kind of tape-overlap. That familiarity can make for not only an easier sewing experience, but also a more accurate one. A non-sewing friend might allow too much slack and cause your clothes to be too big. To go Goldilocks, the sewing friend might measure just right.

Sharing sewing supplies

Sharing is caring.

Sharing is caring.

Sure, you shouldn’t be the person who constantly asks to borrow things—particularly if you don’t return them. But if you’re in a situation where you’re friends with someone you share an interest with and both of you trust the other enough to loan supplies, this can be a very real benefit for you and the person your friends with. If you don’t have the right shade of blue in thread, maybe your friend has it! If your friend doesn’t have a specific sewing needle for a task, perhaps you have one! It’s a great back-and-forth situation where you’re being afforded the opportunity to have a go-to for supplies you need who’s just a phone call away.

This dips into shopping as well since shopping with your friend could help each of you be aware of what the other has in their supply for these sharing moments. Of course, this wouldn’t be the only reason to go shopping for sewing supplies together, but it’s a definite plus! Either way though, in addition to sharing the supplies, you can share the experience of finding the right supplies with a good friend—and what shopping trip isn’t more fun with a friend?!

Socializing

Brainstorm ideas to come up with the best projects you can make.

Brainstorm ideas to come up with the best projects you can make.

Any time you have an interest, it can be nice to have someone to talk to about that aspect of your life. Otherwise, you might find that you have nowhere to turn to discuss interesting or pressing matters in regard to the field. It’s like being an avid reader who finishes a really great book, but then has no one to talk to about that book. You have all of these thoughts, opinions, and reactions, and where exactly are you supposed to send them?

Sewing can be so similar because you pour so much of yourself and your time into your projects. It helps to have someone there to talk to about your progress, your confusions, or your plans. The process can help you brainstorm ideas to come up with the best projects you can make, and it can give you a place to offer your complications in a way where you can ease your tension. You might even get some insight about what to do to fix those complications rather than bottling them up until they potentially run you down so much that you throw in your sewing thread. This social quality can then better your sewing experiences, and it can also increase your odds of continuing your sewing endeavors. That makes it a definite advantage of having a friend who sews!

Bottom line? Don’t think of sewing as an exclusively solo gig! Having that sewing friend can make for a brighter, easier sewing experience—from shopping for supplies to putting together your projects. You might have to sign up for a class to find that friend, but trust me! They could be worth their weight in sewing thread!