FREE Shipping on orders $49 and up.

Most orders are processed and shipped same day. Orders placed on Friday after 3pm, Saturday, or Sunday are processed on Monday. Processing and shipping does not take place on weekends or holidays.
Within the continental United States (the contiguous 48 states), Shipping is FREE to customers on orders over $49. Orders being shipped to Hawaii, Alaska, Canada, APO's, FPO's and DPO's are not eligible for free shipping. Also, the free shipping policy does not apply to large or heavy items that require special shipping methods such as assembled industrial sewing machines and some sewing cabinets.

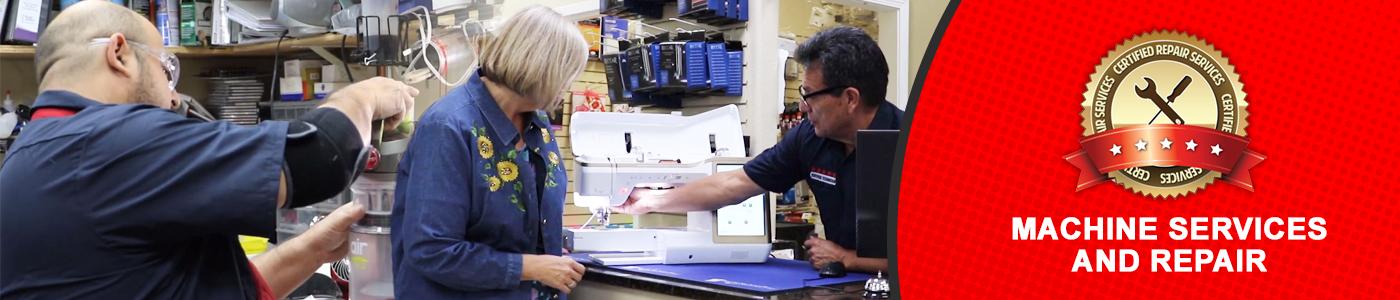
SewingMachinesPlus.com - Frequently Asked Sewing Machine and Vacuum Repair Solutions
Troubleshooter
Here are some common solutions and maintenance techniques you can perform on your own machine that are relatively easy to do and may fix what ever issue you are having with your machine.

Check that your machine is correctly threaded, both on the top and the bobbin threads
Even if youre sure you did it right, go back and check again. The machine must be threaded exactly as your instruction manual says. If you don't have your instruction manual, you can search for it on our website or use google to find the exact manual for your machine. Most of the manuals can be found in the product description of our machines, but we also have a list here: Manuals List
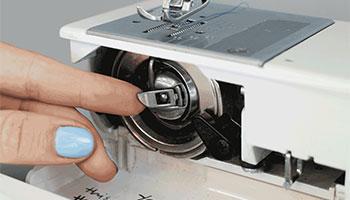
Check your needle plate or bobbin case to remove any lint
Remove your needle plate/throat plate and your bobbin case and clean out any lint, threads, doughnut crumbs, or other debris. Even a tiny wad of lint can cause some major problems, especially with the more sensitive computerized machines made today. Another good place to check for thread and lint is the head of your machine, where the take-up lever and light usually is. Sometimes threads get wrapped around the take-up lever and can cause issues, so be sure to clean everything thoroughly.

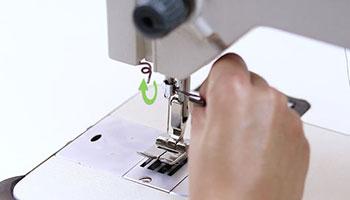
Check the condition of your needle
Needles do wear out after the hundreds of thousands of times they pierce your fabric. Also, a needle only needs to be slightly bent to cause all kinds of horrific problems. If in doubt, try a new needle in your machine and see if that fixes the problem.

Make sure you are using the right kind of needle and thread for your fabric
Not all needles are made the same and certain needles were made to handle different types of fabric or thread. Check our needle guide to ensure you are using the right needle here: Needle Guide
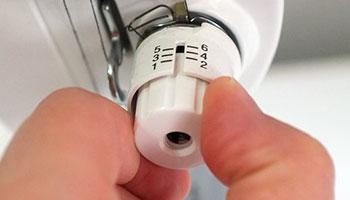
Check your tension settings
Check your tension settings and see if you need something different for your particular project. Each fabric is unique, so its a good idea to test some stitches on a scrap to find the tension you need.
It may not always be a timing issue
Lots of sewers (and even a few mechanics) will blame timing for problems that really have other causes. However more often then not, they realize it wasn't a timing issue at all. Nonetheless, you can test to see if it is a timing issue by finding a step by step guide on Youtube. Our own video guide coming soon.
Frequently Diagnosed Sewing Machine Problems
| Problem | Cause | Fix |
|---|---|---|
| Shredding thread | Burrs/rough spots in thread path. Improper hook to needle clearance. | Polish burrs/rough spots. Adjust hook clearance to specs. |
| Breaking thread | Upper tension out of calibration. Burrs/rough spots in thread path. | Calibrate upper tension to specs. Polish burrs/rough spots. |
| Thread nesting | Problem with upper tension assembly | Repair/recalibration upper tension assembly. Polish burrs/rough spots. |
| Skipping stitches | Burrs/rough spots in thread path. Improper hook to needle clearance. | Polish burrs/rough spots. Adjust hook clearance to specs. |
| Not feeding fabric | Broken feed drive gear/bound up linkage. | Replace gear/unbind linkage. |
| Will not form stitch | Out of time. | Re-time hook. |
| Will not power up | Wiring/electrical problem. | Possible circuit board/electronic component problem. Bad Electrical outlet in house. Tripped Circuit Breaker in house. |
If all else fails, you can always still call our technicians to help guide you through a repair or send your machine over to have one of our expert technicians resolve the issue and service your machine. We do recommend that you get your sewing or embroidery machine serviced every 12 months. Through normal use, lint, thread and broken needles can collect in the needle bar, hook and feed mechanisms, causing problems ranging from noise to more serious problems that can stop the machine from functioning. Heavy to moderate use can also remove oil on moving parts that the machine needs to operate smoothly. A small piece of thread in the tension unit will make it necessary for cleaning and recalibration of the tension.
Sewing machines that have been stored or been sitting for long periods of time will need to be tuned up before use. Even sitting in the closet, the oil in the machine can and will dry out which will lock up parts and potentially lead to further damage of the machine.
To speak to one of our experienced technicians, you can call our internet and phone HQ or if you're local, you can speak to a technician in one of our on site retail locations:
Internet & Phone HQ
800-401-8151Monday-Friday: 6:00 am - 6:00 pm PST
Saturday: 9:00 am - 4:00 pm PST
Frequently Diagnosed Vacuum Cleaner Problems
My Vacuum Won't Turn On!
Is it plugged in?
Of course, its plugged in. Youre not stupid. Sometimes an outlet in your house just stops working, though. And even if all of your outlets work, sometimes they require a light switch to be flipped on in order to deliver power. Thats frustrating, but weve all been there.
Test your on-off switch.
Test your on-off switch with an ohmmeter, multimeter, or other continuity checker. Theyre super cheap. You should invest in one to keep around the house, anyway. Heres a great guide on how to use a multimeter. How to use a multimeter.
It's getting power, but the motor doesn't run.
If its getting power, but the motor doesnt run, the problem probably lies with the motor itself. If the motor can get power, make sure the motor shaft can turn freely without obstruction. Heres a quick refresher on how your vacuum cleaner works and what various parts of the motor look like.
Motor is getting power, but still not running
If the motor is getting power, turning freely, and still not running, you probably need to visit a professional or find a replacement motor. We do offer professional repairs for bigger problems such as this. Check here to see what type of services we offer: Vacuum Cleaner Repair
Back to questionsMy Vacuum Won't Stay On!
Yuck. Thats the worst. Theres nothing like getting your hopes up with that loud, glorious vacuum cleaner sound and then having your good mood annihilated as the vacuums bold roar reduces itself to a whimper.
It's probably overheating.
If it turns on, but wont stay on, chances are your vacuum cleaner is getting too hot. Unplug your vacuum, wait for a little while (consult your manual if youre not sure how long,) and then check for obstructions. If it still dies out, you might need to replace a small thermal fuse. Your local vacuum store can sell you the fuse (theyre cheap!) and help you replace it.
Back to questionsMy Vacuum Doesn't Suck Like It Used To!
Thats no good! This is probably the most common vacuum cleaner ailment. When your vacuum cleaner cant achieve proper suction, the solution is generally easy.
Empty the bag or chamber.
This is the first step and youve probably already done it, but you can never be too sure.
Your height setting might be wrong.
If your vacuums height setting is too high for the floor youre trying to vacuum, it wont do a great job. Use the bare floor setting for tile or wood and adjust upwards accordingly. A deep carpet setting wont help you much with a hardwood floor.
Check the filters.
If your vacuums air or exhaust filter is clogged, it probably wont do much sucking. Clean or replace your air and/or exhaust filter. Viola!
Check your hose.
If your vacuum cleaners hose is plugged up, it cant do its only job. If you think something is obstructing your hose, remove it from the vacuum. Then straighten it out, shine a flashlight through one end and see if any light shines through the other side. If not, use a blunt object to try to dislodge whatever is blocking the airflow, just be careful so you dont damage or tear your hose.
Check your brush roll.
Is it spinning? If its not, it might just be over-encumbered by hair. Anyone who has pets or children and spouses with long hair will encounter this, eventually. Fortunately, weve already compiled a list of vacuum hacks, including an easy way to clean your brush roll.
If your brush roll is clean, but still isn't spinning, you probably have a belt problem.
Dont panic. It happens all the time. Its probably the most common problem we see with vacuum cleaners. Belts arent too expensive, and they usually arent too hard to replace. Replacing a vacuum belt can be done by anyone at home. You can find follow along guides on Youtube. Our own video guide coming soon.
Back to questionsMy Vacuum Smells Terrible!
Have you ever used an old vacuum cleaner that just stinks up a room when you turn it on? Its pretty gross, right? No one wants that.
When your vacuum cleaner smells like burning rubber.
This is probably because you belt is slipping, or you ran over something that stalled the brush roll monetarily that cause the belt to slip. Your belt could just be stretched out from wear and is slipping. Put a new belt on. Replacing a belt is easier than you think. Scroll above a bit to watch how you can replace your vacuum belt by yourself.
Empty the bag or canister.
You may have done this already, but just in case you haven't; make sure to empty out your vacuum to make sure the smell isn't coming from all the dirt you sucked up.
Check you air and exhaust filter.
Again, you may have already done this, but it's best to always make sure. Clean or replace your air or exhaust filters to see if that's where the smell is from.
Back to questionsMy Vacuum Is Leaving Debris Behind!
Well, thats annoying. This is a less severe symptom of most of the problems in the previous section. It just means your vacuum is producing some suction, but somethings stopping it from doing its best possible sucking.
Your bag or canister might be full.
Empty out your bag or canister to make sure your vacuum cleaner has space to contain all the dirt it's sucking up.
Check your brush.
Clean your brush roll and its bearings. If your brush is just a lumbering cylinder of lint and hair, its not going to do a great job.
If it's not a brush problem, it's possibly a belt problem.
Belts might be broken or too stretched out. They also tend to fall off from time to time. Check for videos on how to replace the belt or consult a professional. Our own video guide coming soon.
Back to questionsMy Vacuum Is Extra Noisy!
Most vacuum cleaners are loud enough to make their presence known. We like to think of it as a boisterous hello. When your vacuum cleaner makes extra noise, though, that usually indicates trouble in paradise.
Check your hose for obstructions
When an object cant quite make it through the noise, it can make some weird noises once the suction starts. If this is your problem, its an easy fix.
Check your belts.
Again, belt problems are the most common problems. When belts arent attached or are on their way out, they can cry out for attention with some truly heinous noises. As usual, replacing a vacuum belt is super easy with guides on how to do it on Youtube. Our own video guide coming soon.
If it's not your hose or your belts, your motor is probably on the way out.
Motors get extra noisy before they give up for good. If you feel this is the case, then that's where we can jump in and save your vacuum as we offer vacuum repair services for big problems like this. Check Here to see the services we offer for either upright or canister vacuum cleaners.
Back to questions