Authentic Japanese Boro, Boro Mending and Boro-Inspired Patchwork

Authentic Japanese Boro, Boro Mending and Boro-Inspired Patchwork

I have recently been fascinated with the historic Japanese textiles known as boro.

Authentic Japanese Boro, Boro Mending, and Boro-Inspired Patchwork

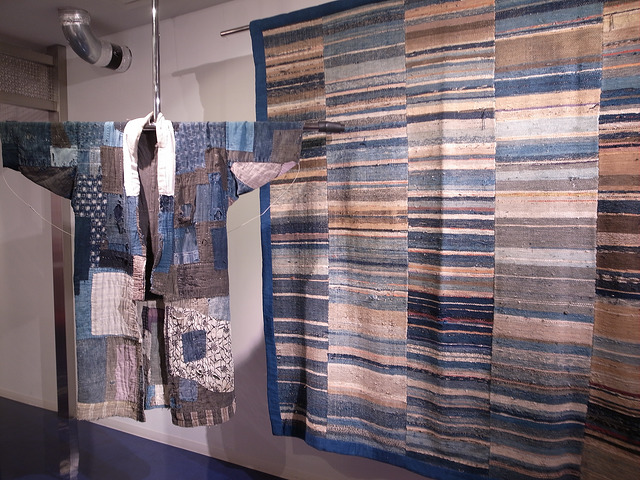
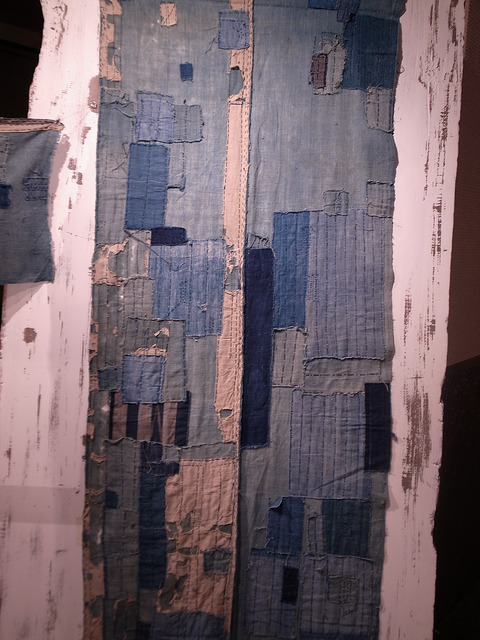
Boro exhibit at the Amuse Museum in Tokyo

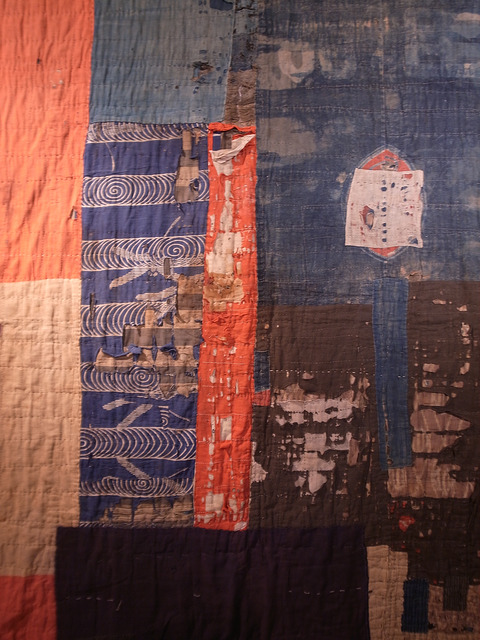
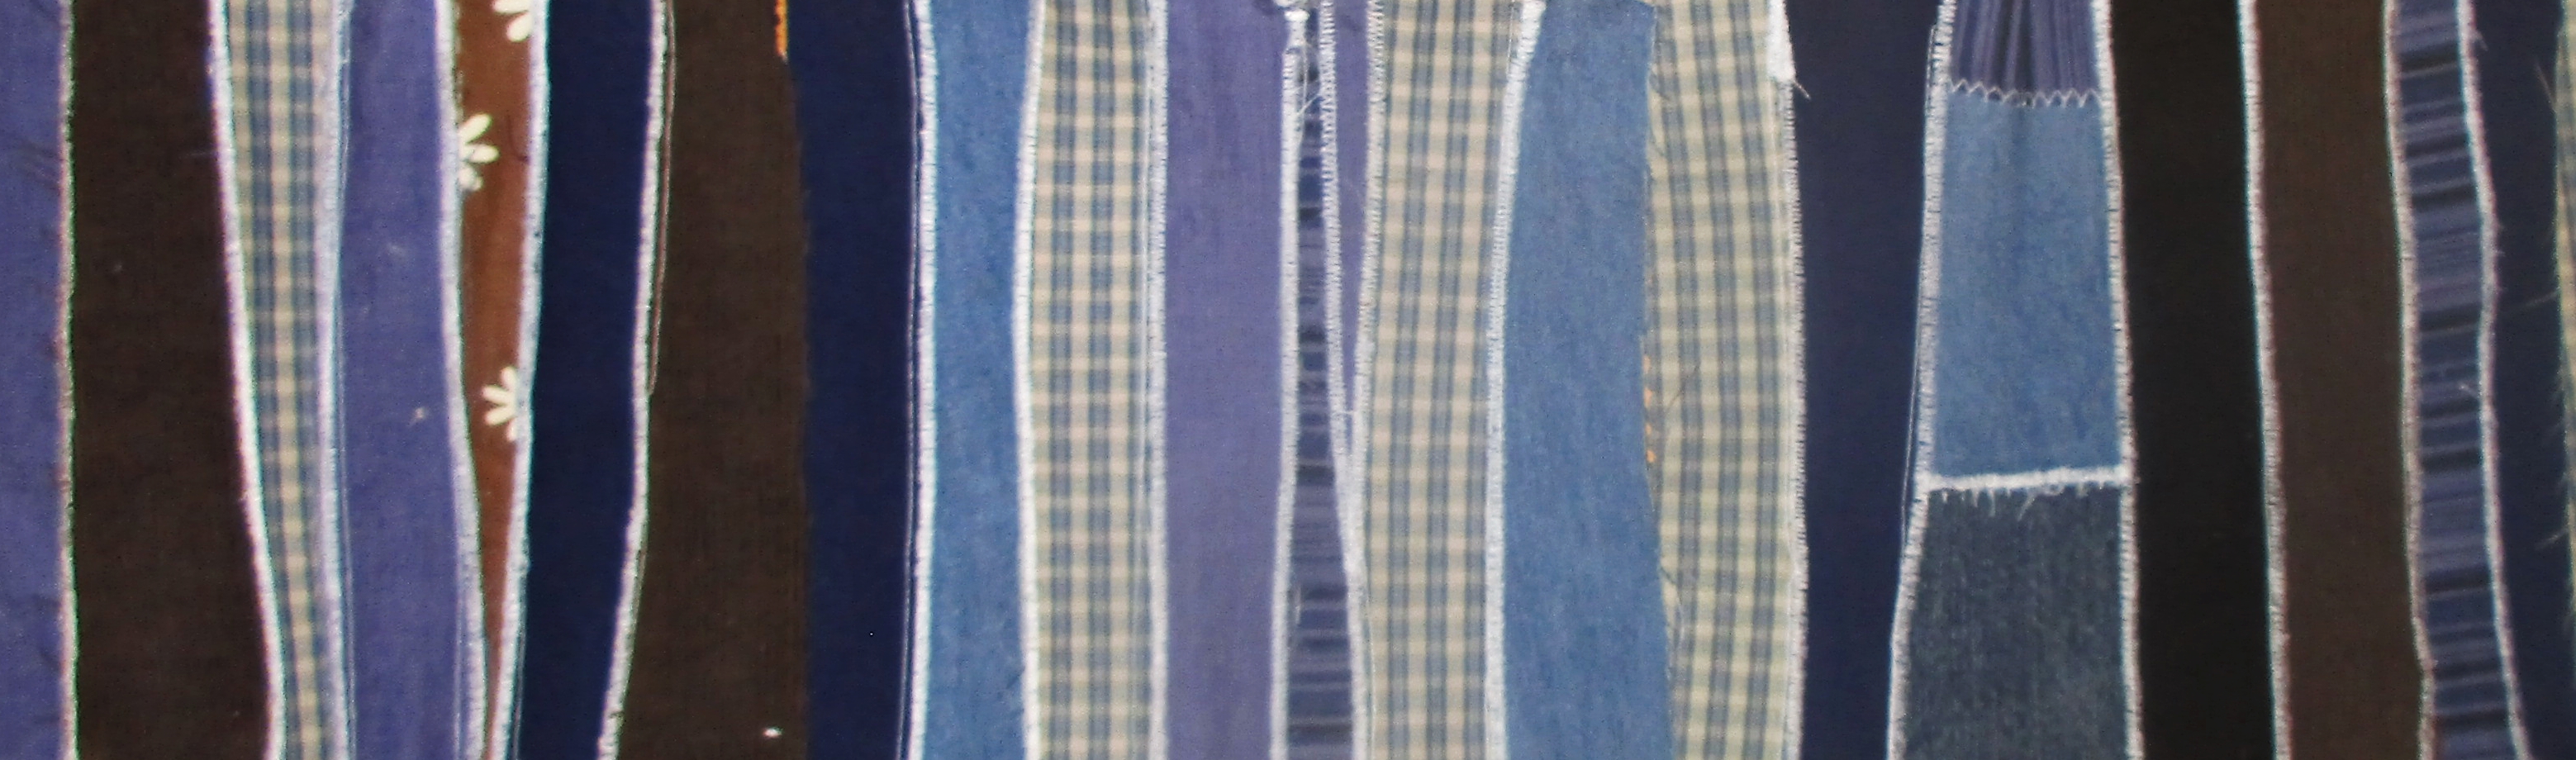
Authentic Japanese boro

Boro means, literally, “tatters.” These were made by repurposing carefully saved garment pieces and other handspun and indigo-dyed fabrics. They were sewn together as a patchwork built up from many layers providing extra warmth.

Authentic Japanese Boro, Boro Mending,and Boro-Inspired Patchwork

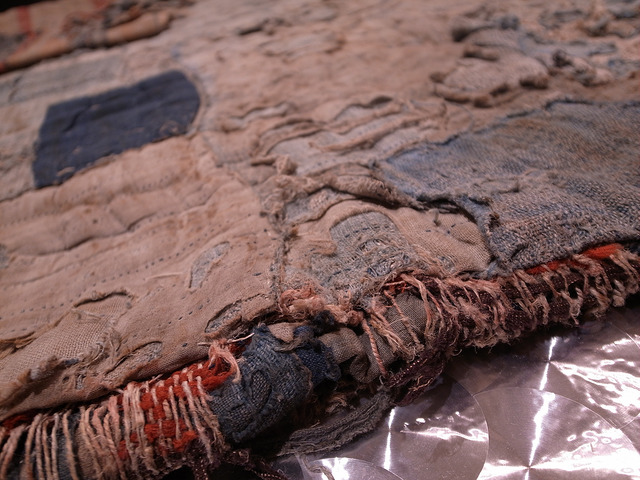
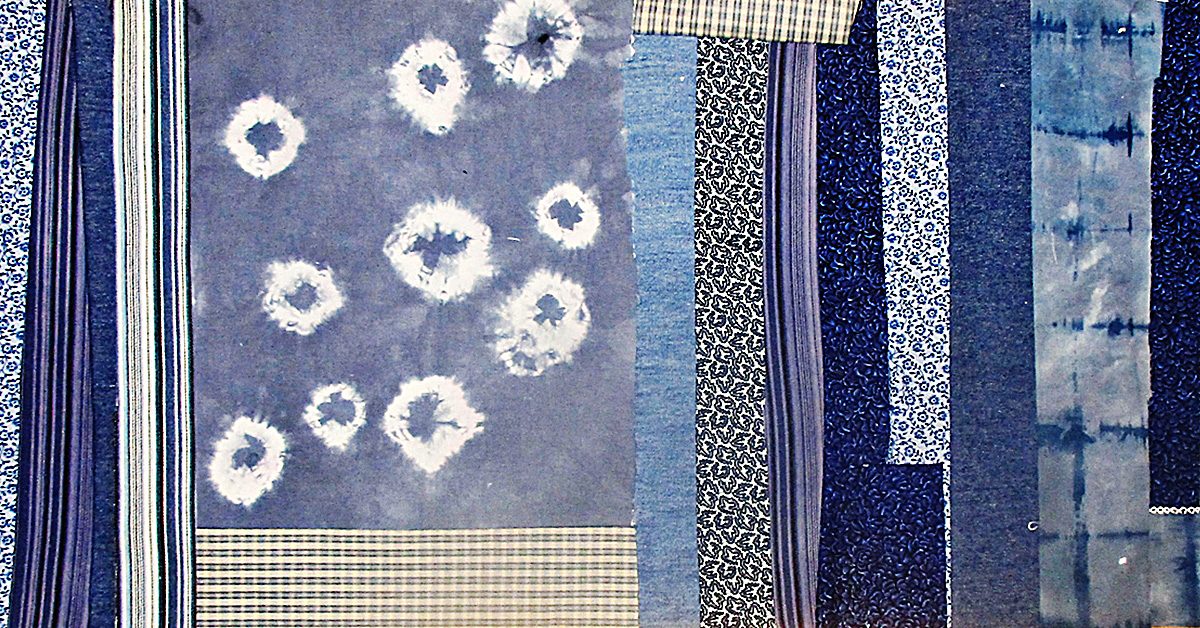
The example below was dyed using a simple shibori technique. I showed several ways to do shibori dying here recently.

Authentic Japanese Boro, Boro Mending,and Boro-Inspired Patchwork

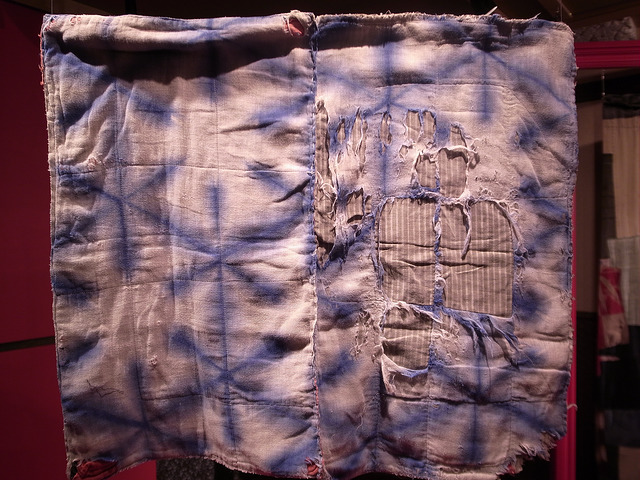
If this example were still in use, it would have been patched with another fabric over the tattered right middle section.

The Japanese used these unique textiles for utilitarian items such as futon covers, field clothing, sheets, and more. Including the interesting relics known as donja or yogi. These curious boromono were quilts constructed in a kimono shape and worn by parents and children together while sleeping.

Authentic Japanese Boro, Boro Mending,and Boro-Inspired Patchwork


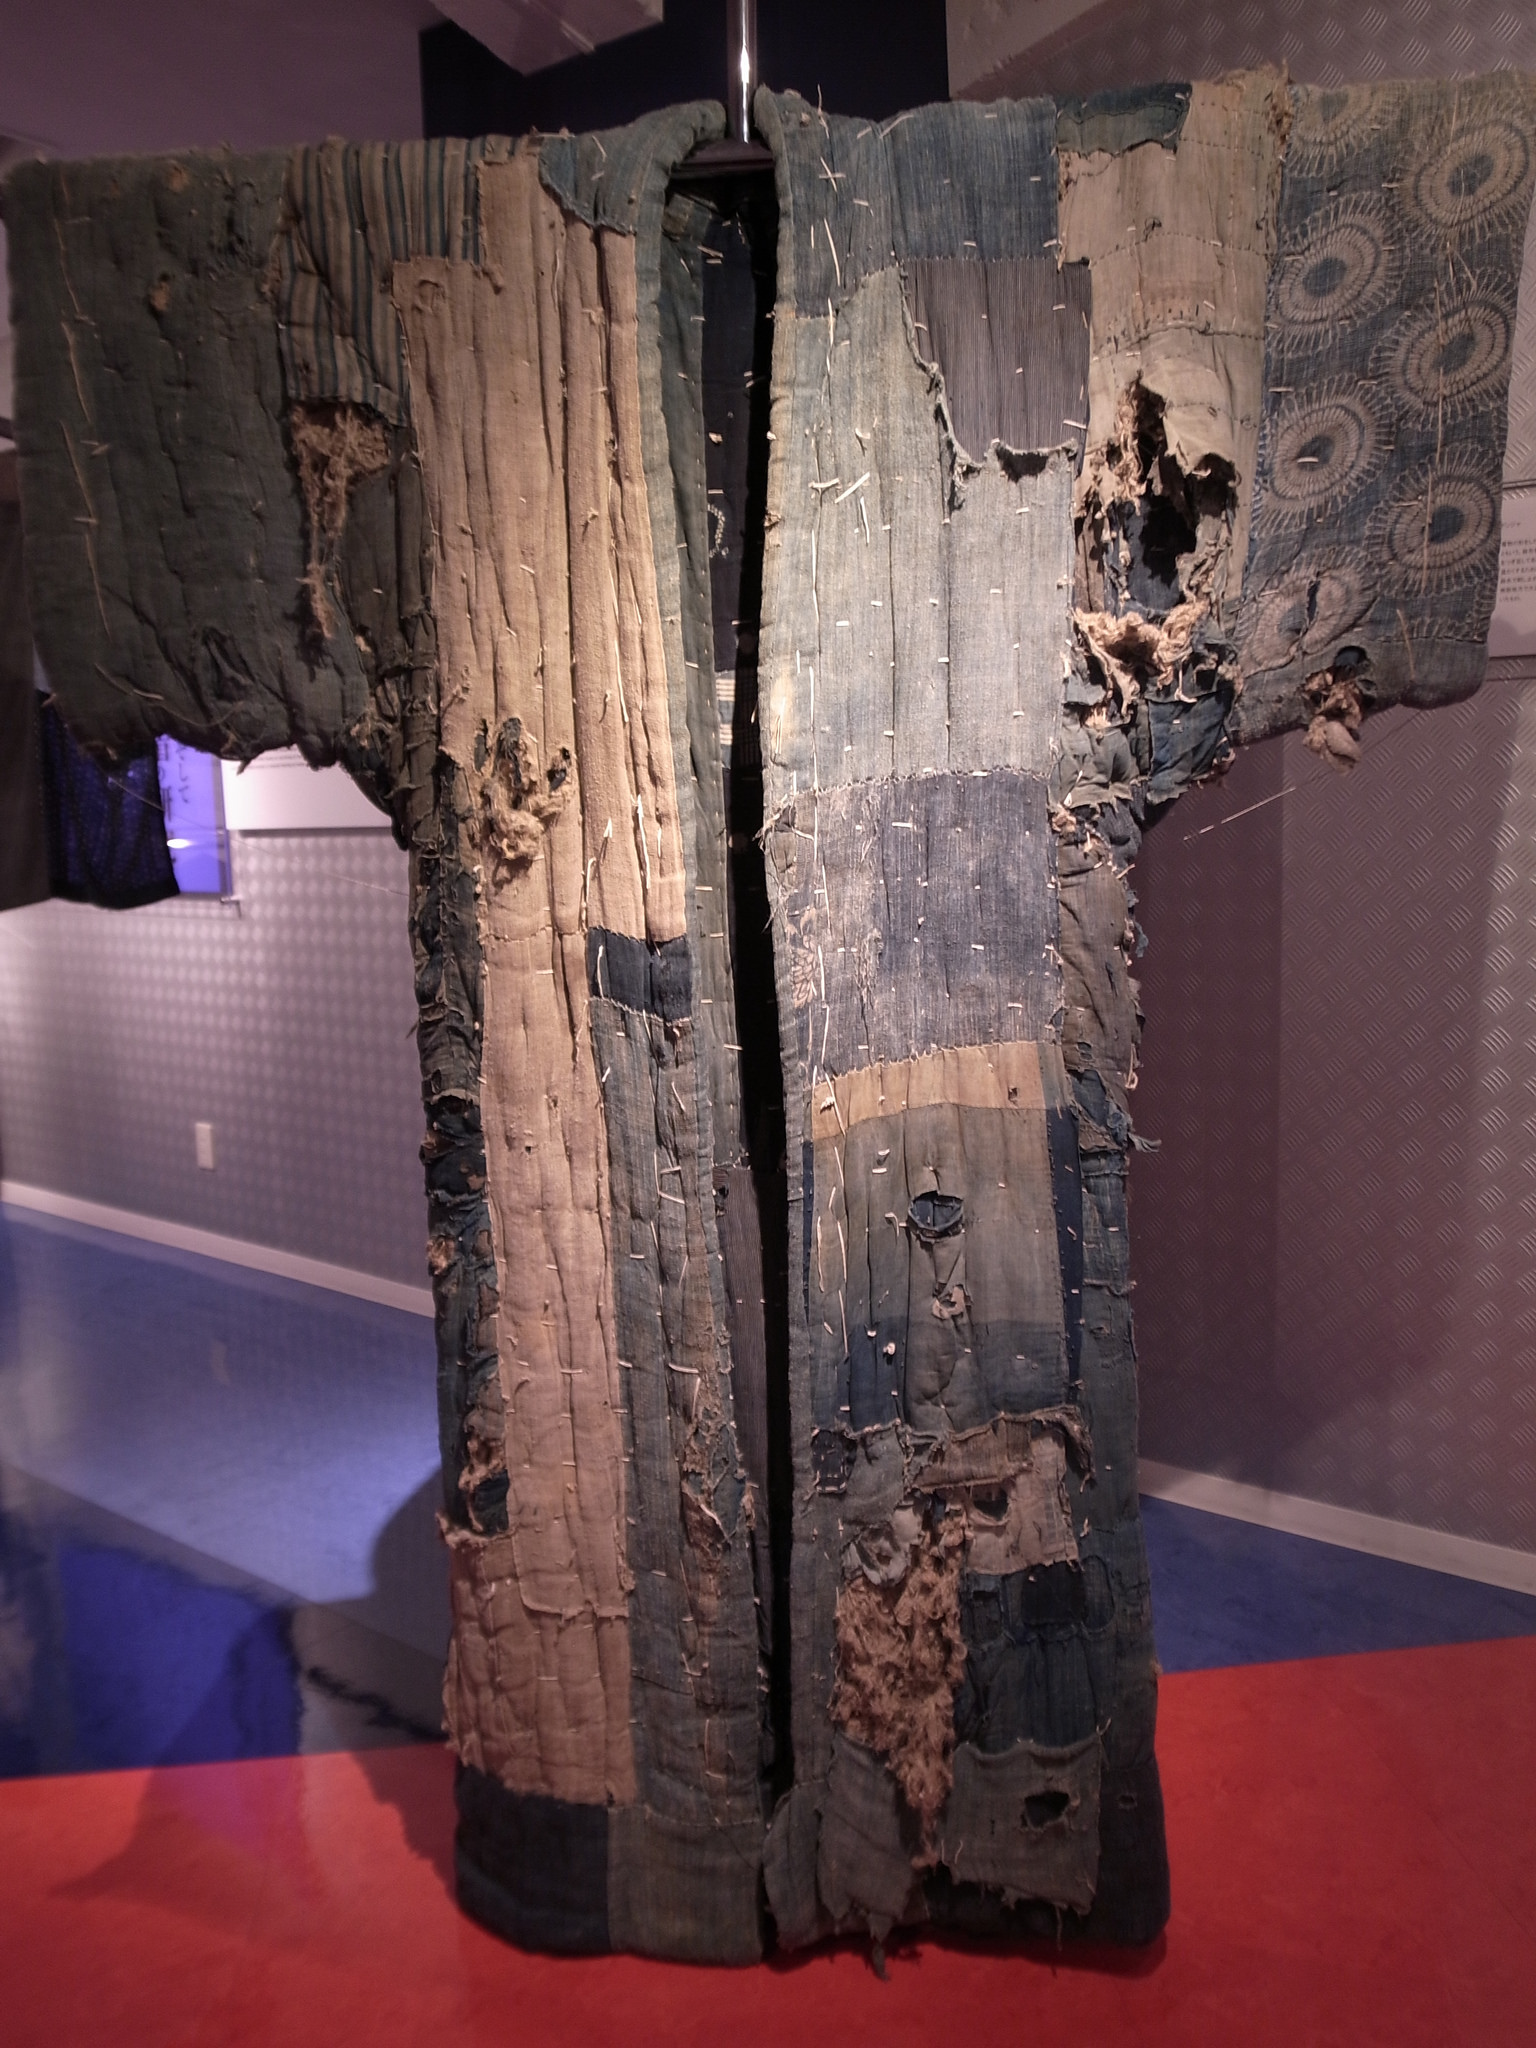
Makers used careful patching and sometimes intricate stitching to craft these textiles, mending the same item many times over many generations.

Boro origins

This accidental art form was born of necessity in Northern Japan. Peasants started making them during the Edo (1603-1868) period. Japan was closed to trade and under sumptuary laws at this time. These laws restricted clothing choices for the lower classes and forbade silk, bright colors, and large patterns.

Authentic Japanese Boro, Boro Mending,and Boro-Inspired Patchwork

In addition, as explained by Kat Siddle in the August 2016 issue of Seamwork Magazine:

“Industrialized fabric production didn’t reach Japan until the 1870s. Cotton, linen and hemp were spun, woven, and dyed by hand. Cloth was a precious resource that represented huge amounts of labor, and even scraps had value. Even after mechanized mills were built near Osaka, the fabric produced there was too expensive for many people to afford, and they continued to weave their own yardage for clothing and household items. Cotton was particularly scarce in northern Japan, where it was too cold for it to grow.”

So peasants pieced and patched their indigo-dyed fabrics and saved every usable scrap of cotton for reuse in these boro items and garments.

Generations of history

Since these pieces include fabrics saved and repaired over many generations, each piece is rich with family history and memories. The homespun and indigo-dyed patchwork acquired a specific patina with age and antique boro cloths can be awe-inspiring when seen up close and in person today.

Authentic Japanese Boro, Boro Mending, and Boro-Inspired Patchwork

This special and breathtaking beauty and historical significance takes several generations and a great many years to develop. So you could say that it is not possible to create new, authentic boro today- at least, not without also waiting about a hundred years!

Sashiko stitching

Authentic Japanese Boro, Boro Mending,and Boro-Inspired Patchwork

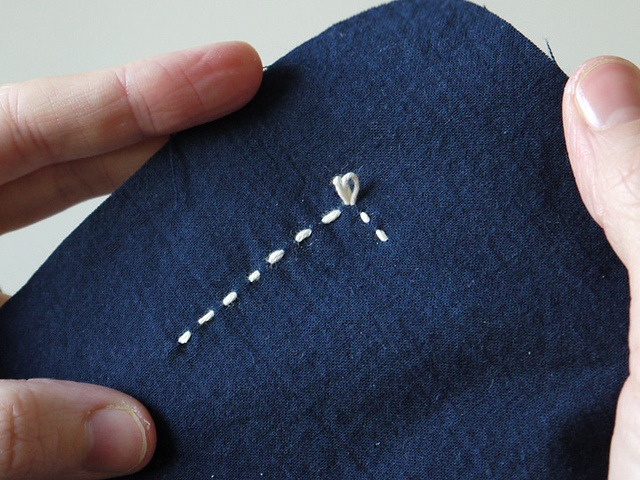
photo courtesy Sake Puppets

Japanese ladies began carefully piecing homespun and indigo-dyed natural fabrics together into boro during the Edo period using the distinctive and decorative stitches that later became known as sashiko. This art is still practiced today.

To work sashiko, you need a long needle and thick thread. You can order sashiko needles and sashiko thread from Japan, but if you don’t want to wait for long-distance shipping, you can make do with a long cotton darning needle.

Authentic Japanese Boro, Boro Mending, and Boro-Inspired Patchwork

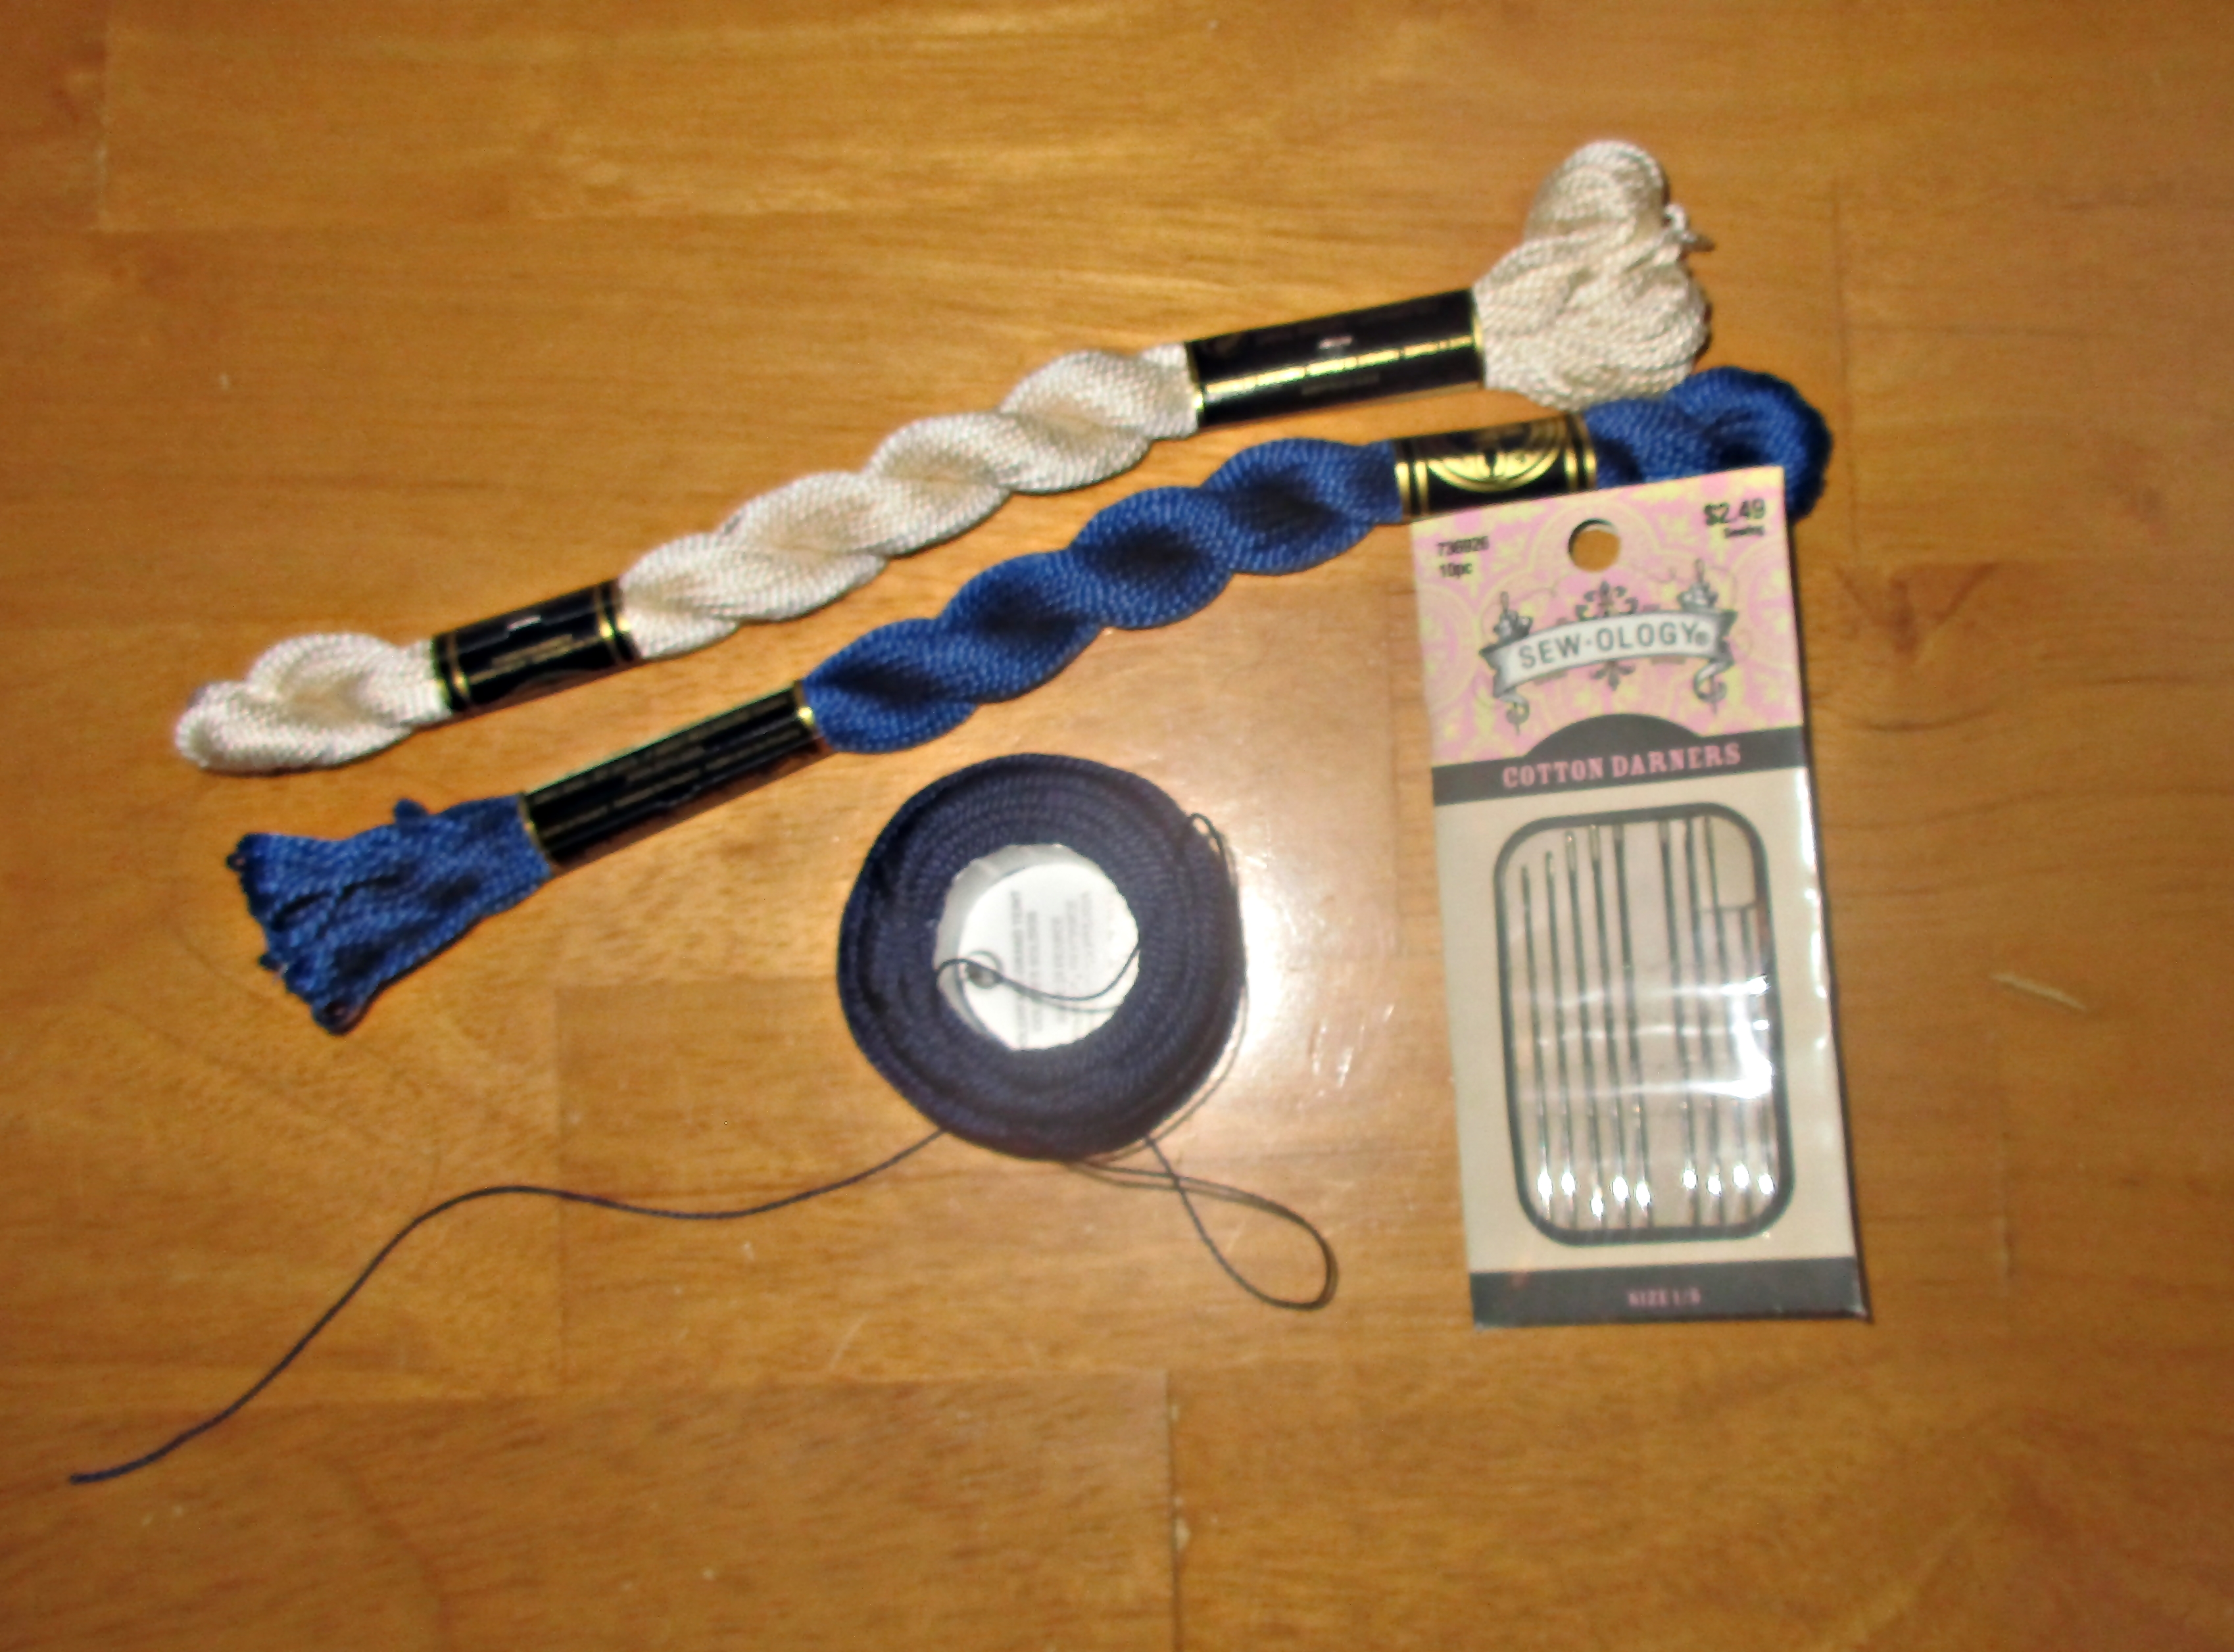
To substitute for sashiko thread, try perle cotton, which DMC makes in several thicknesses, both on spools and in skeins. Or you can just use regular embroidery floss.

Sashiko stitching can be as simple as straight and long running stitches, or it can be challenging and complex. It can be sparse or dense. There are many traditional patterns to choose from. But sashiko allows individual creativity, and you can invent your own sashiko patterns, too. Here’s a tutorial from Sake Puppets to help you.

Authentic Japanese Boro, Boro Mending,and Boro-Inspired Patchwork

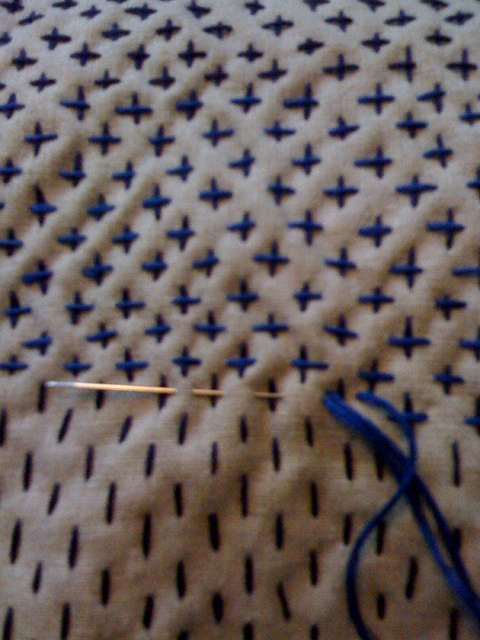
Simple crossed sashiko stitches, photo courtesy GinaPina

Authentic Japanese Boro, Boro Mending, and Boro-Inspired Patchwork

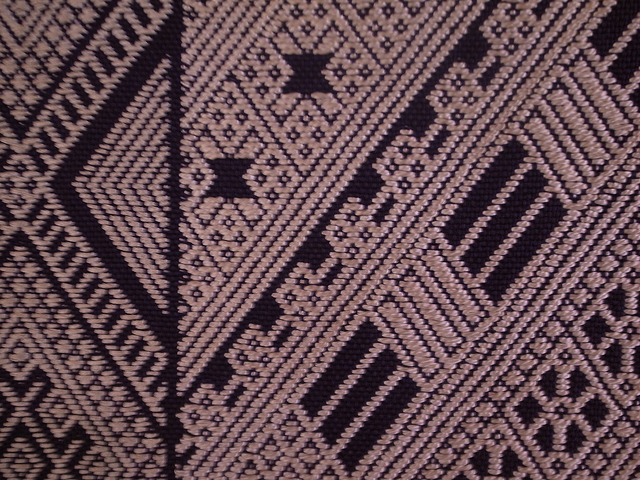
This antique piece at the Amuse Museum in Tokyo is a wonderfully dense and detailed example of sashiko stitching.

Boro mending

You can borrow from boro and use this style of mending today. Boro-inspired mending uses the same techniques and shares the same sentiment of mottainai, or “too good to waste.”

Authentic Japanese Boro, Boro Mending,and Boro-Inspired Patchwork

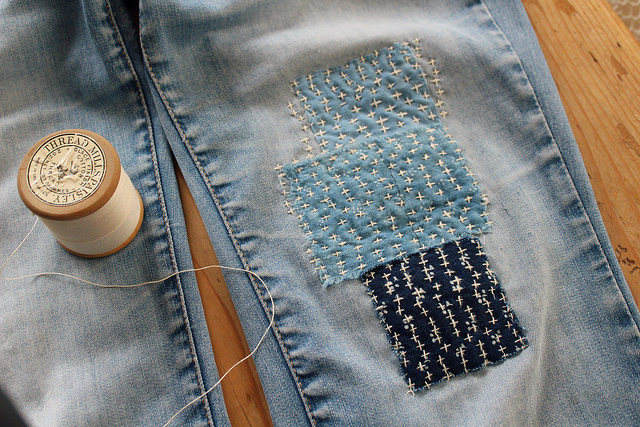
Boro mended jeans and photo by Heather, via Flickr

Boro jeans mending is currently popular right now, thanks in part to Ralph Lauren and other fashion designers who have featured several boro-inspired denim collections within the last decade. So if you have any torn jeans, you can use boro techniques to mend them into something more stylish. Here’s a nice tutorial that will help you to do this.

Feel free to feature your boro patches on either the inside or outside of your jeans; they look interesting and stylish done either way. Also, don’t limit yourself to jeans; you can use boro mending to repair canvas shoes, a bag, jacket, hat, or any other item of clothing you choose.

Authentic Japanese Boro, Boro Mending, and Boro-Inspired Patchwork

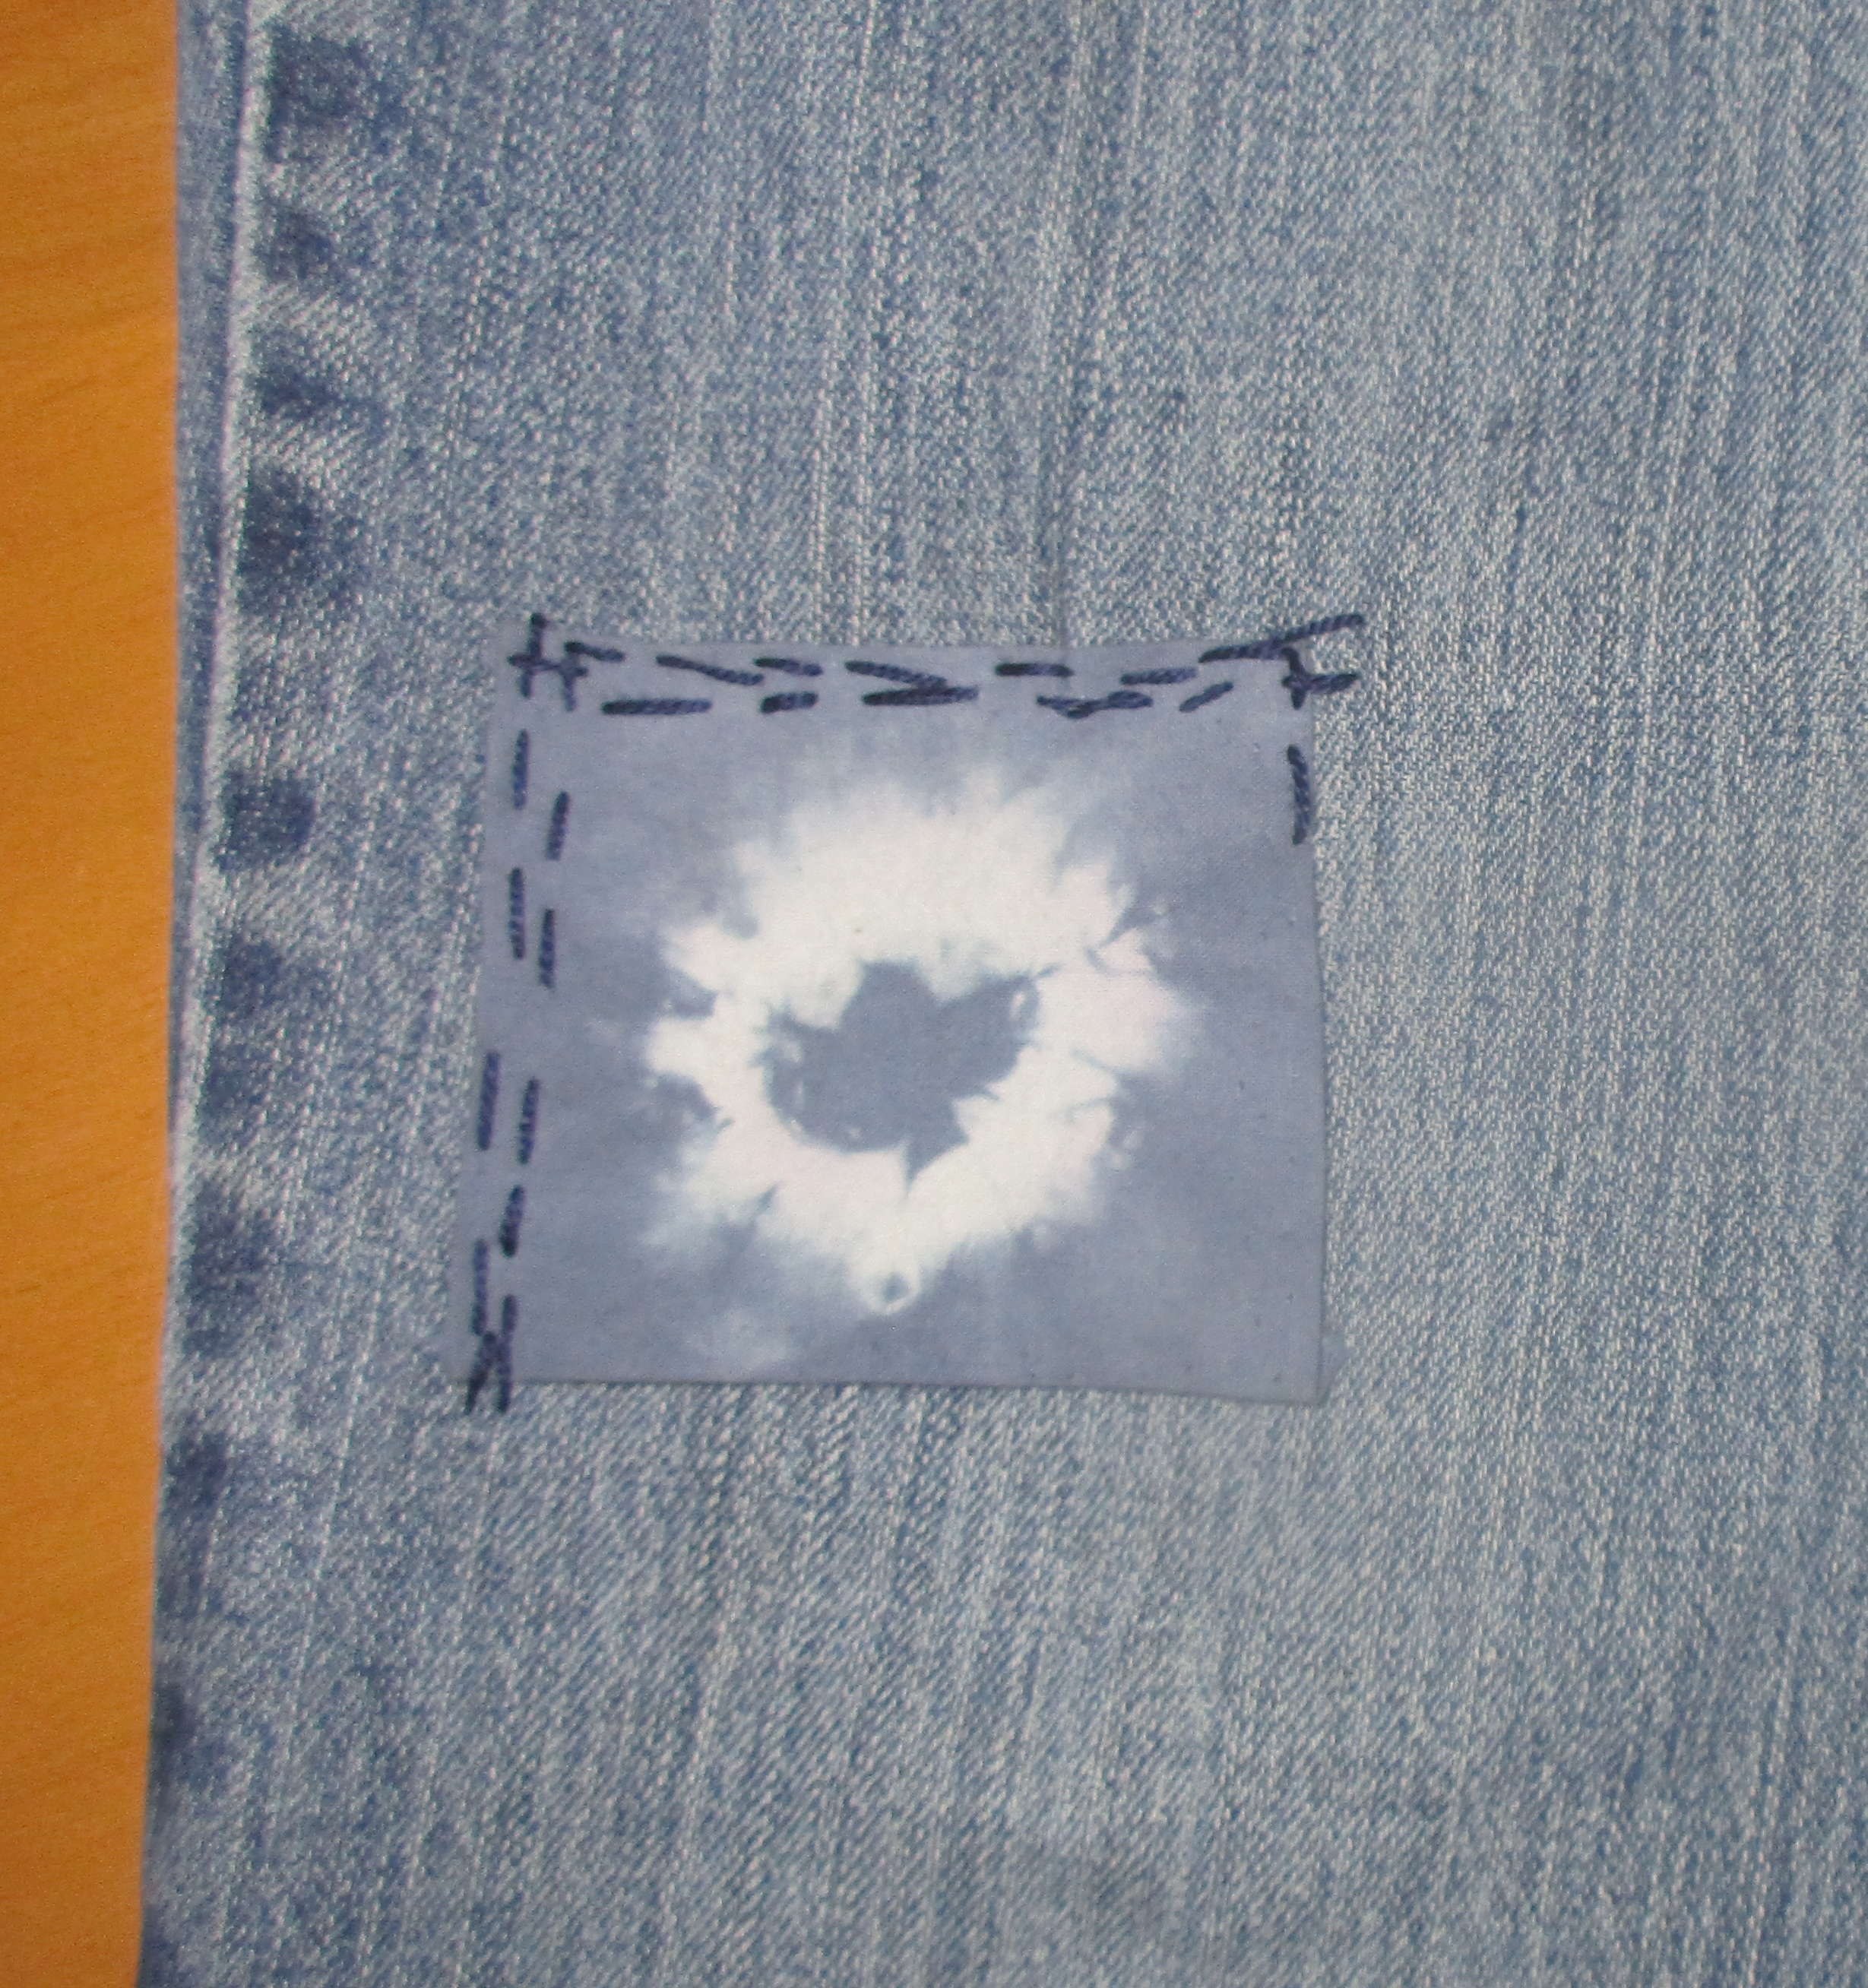
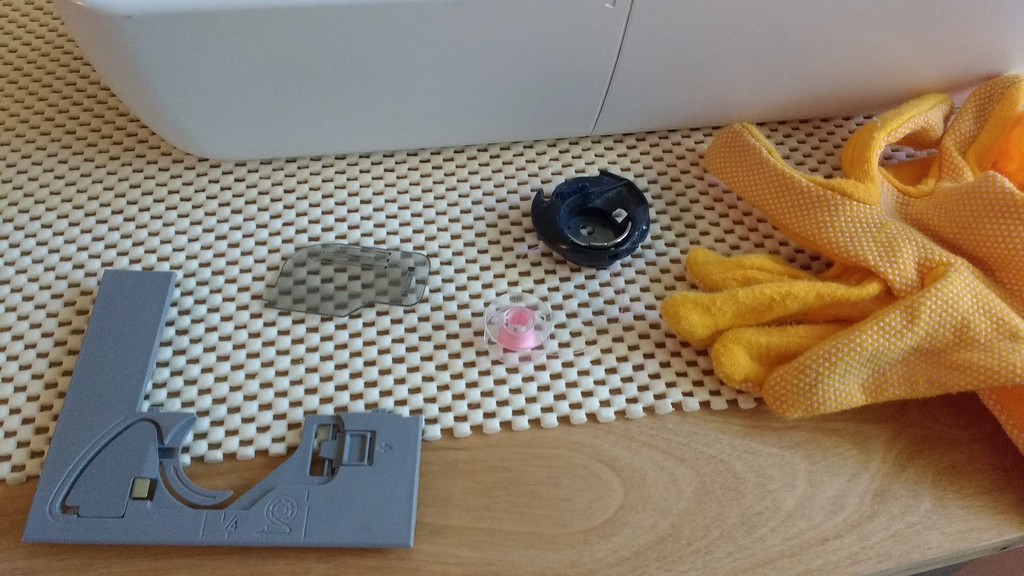
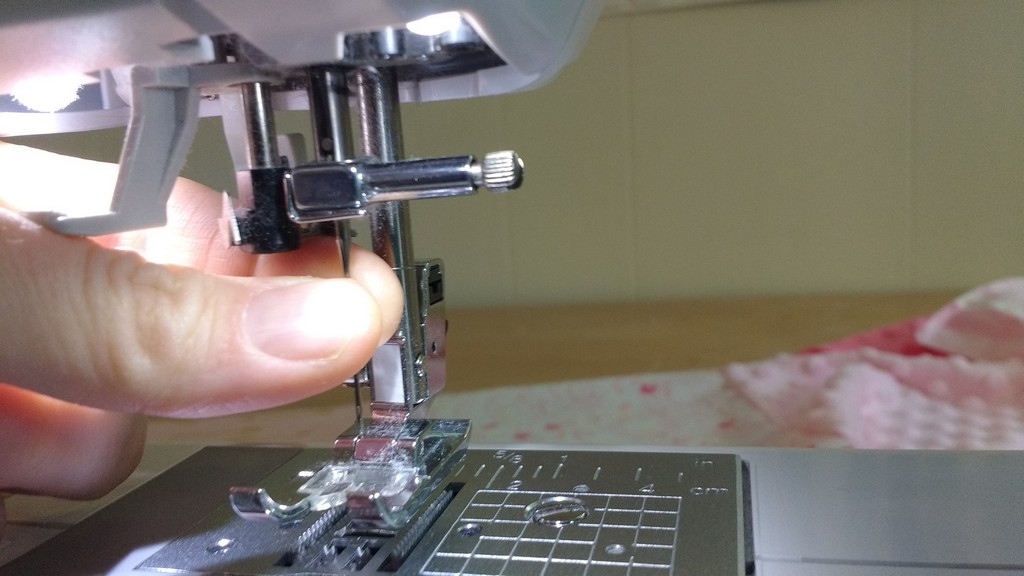
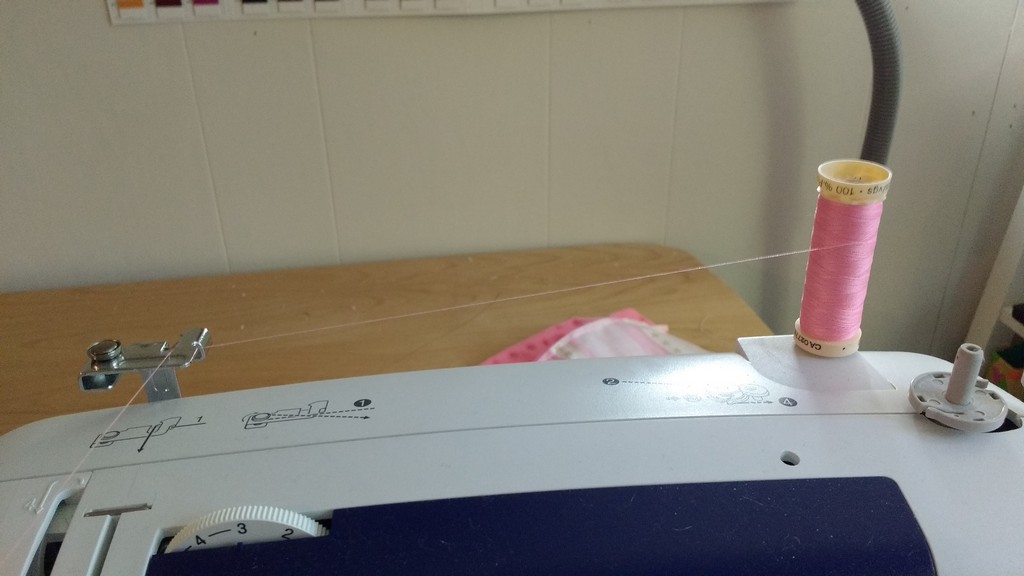
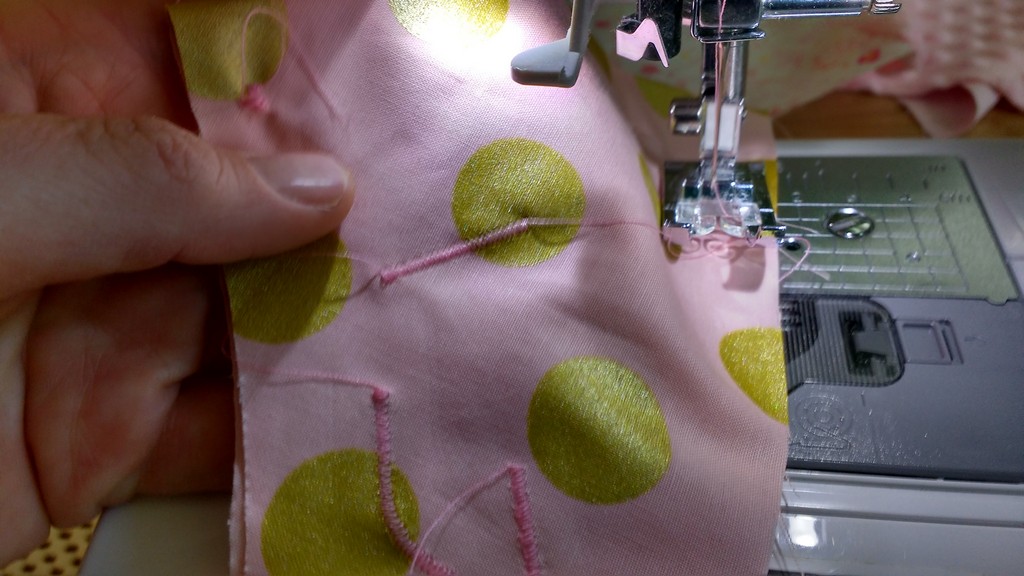
It’s not quite as easy as you’d think it would be. I’m not happy with these stitches at all and will rip them out and try again!

Boro-inspired patchwork

Yoshiko Wada, who popularized shibori in America, wrote an entire book about boro. I think that she would disagree with the notion that you can’t make new boro today.

She says that she uses the term “to define a new aesthetic and to bring new meaning to an alternative creative process, e.g., darning = healing, meditative action = marking time, reuse/repair = recording history. “Boro” represents the transformation of inconsequential material to something precious and valuable… This type of imperfect beauty possesses a power that resonates with people almost like an emotional barometer. It points to an alternative value of “beauty” slowly coming to surface in our social consciousness.”

In any case, you can certainly make boro-inspired patchwork now.

Authentic Japanese Boro, Boro Mending,and Boro-Inspired Patchwork

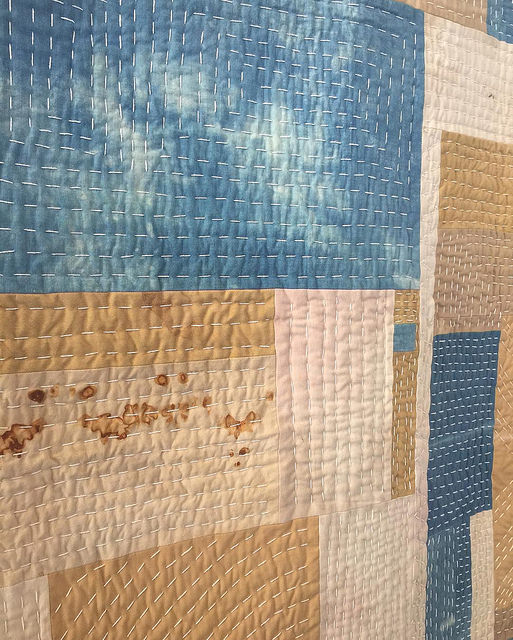
This modern day version of a boro quilt, photographed by GinaPina and made by Vessel Quilts, achieves an antiqued and authentic look through the use of rust and indigo dyes.

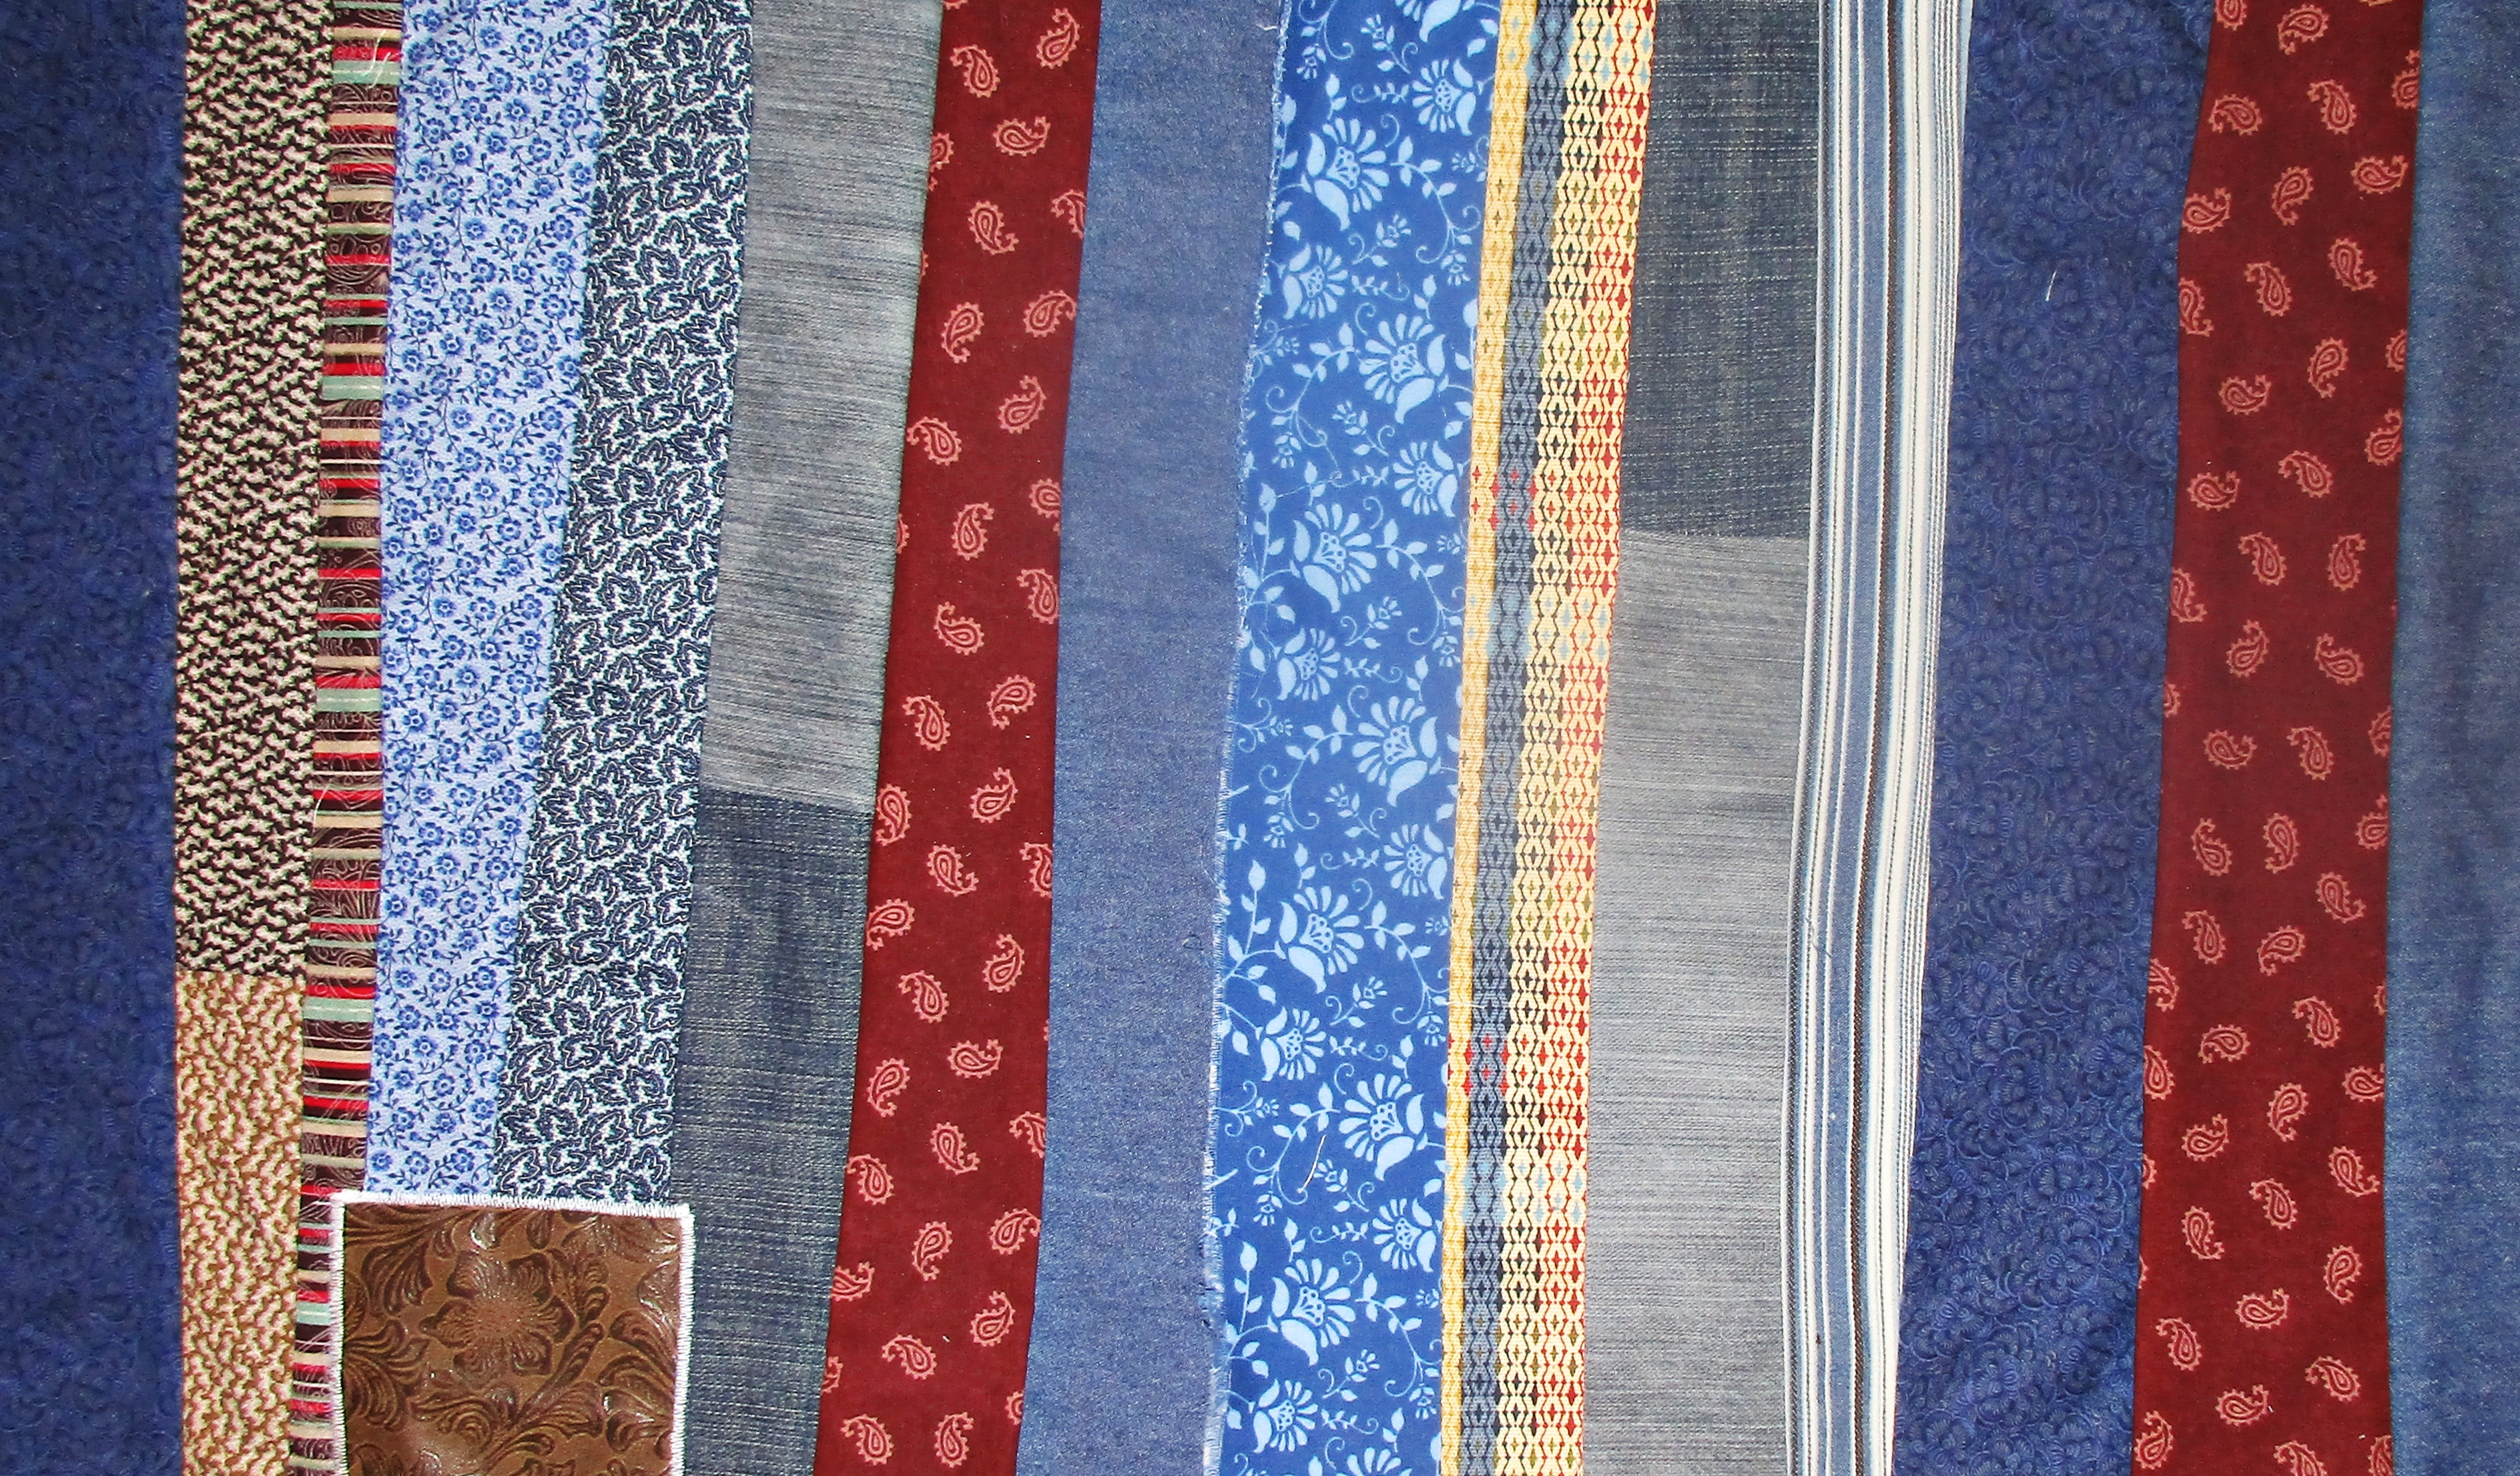
Choosing your palette

In making your own, you can choose to limit yourself to the authentic original palette of indigo-dyed natural fabrics.

Authentic Japanese Boro, Boro Mending, and Boro-Inspired Patchwork

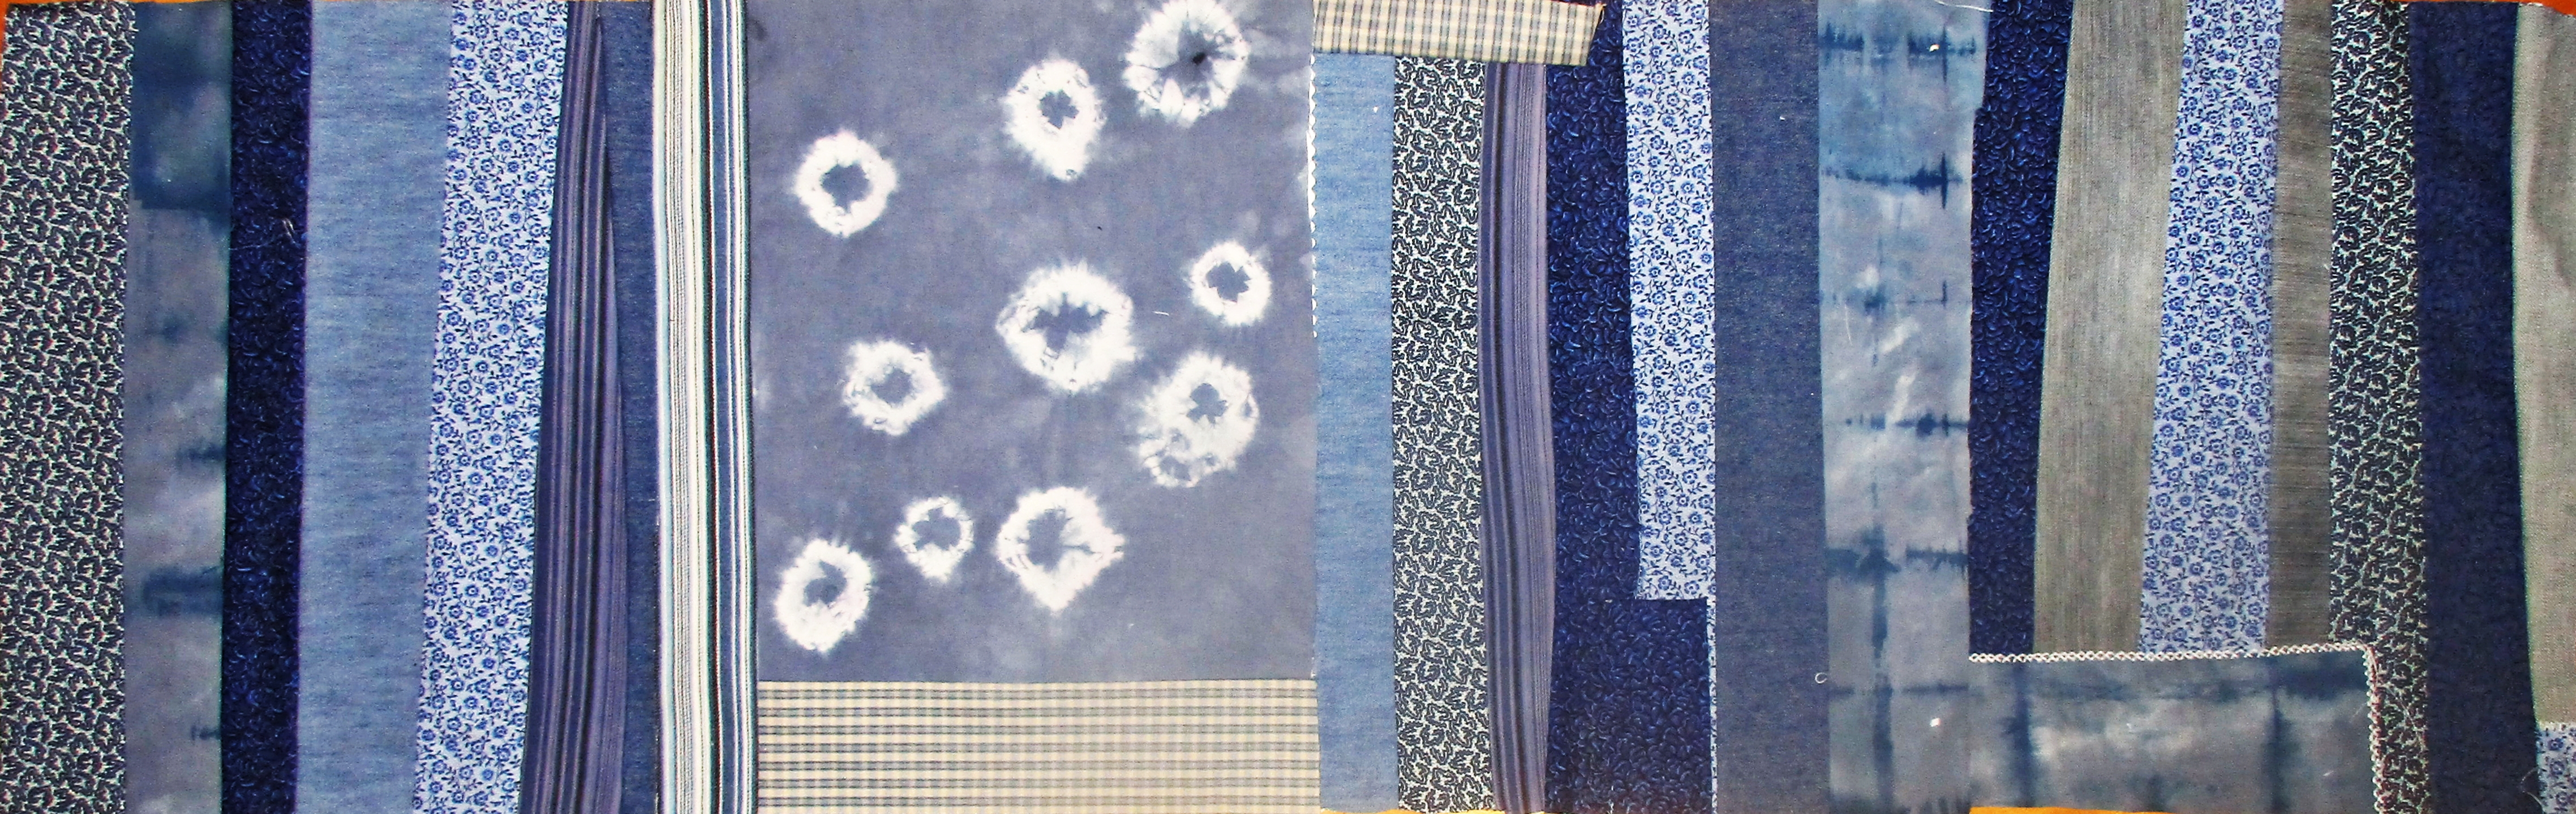
Or you can add in more neutrals, browns, blacks, or even a few reds for an extra pop of color.

Authentic Japanese Boro, Boro Mending, and Boro-Inspired Patchwork

Machine sashiko

If hand stitching isn’t your thing, you can construct boro-inspired patchwork the same way you would make strip patchwork. Then you can embellish with machine stitching over these seams, using a simple zigzag or a more decorative stitch. You could even get amazing and more authentic looking results if you invest in a Baby Lock Sashiko sewing machine.

What will you make?

You could make a boro-inspired quilt, a pillow or cushion, or a small or large boro bag.

Authentic Japanese Boro, Boro Mending,and Boro-Inspired Patchwork

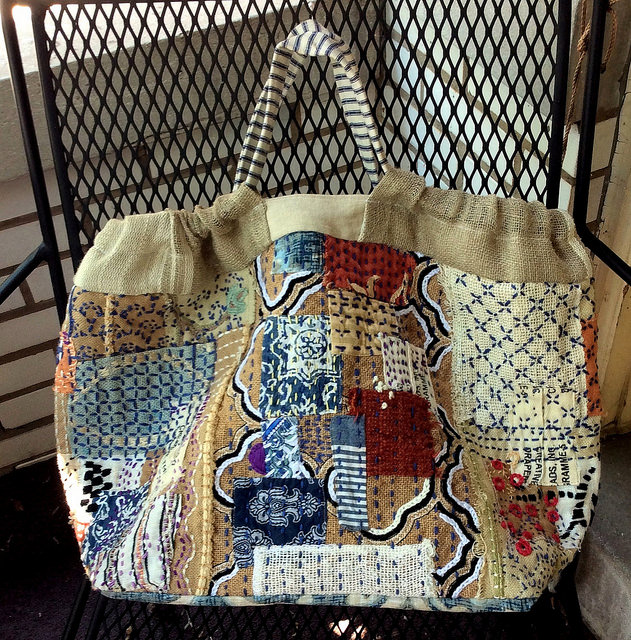
Boro bag with sashiko stitching by Jacque Davis

Authentic Japanese Boro, Boro Mending, and Boro-Inspired Patchwork

You could echo boro’s traditional uses by making a futon cover or coat. Or construct part of or an entire garment from your modern boro patchwork. Here’s my boro board on Pinterest, too, in case you’d like more info, inspiration, and ideas than I could fit into this post.

Authentic Japanese Boro, Boro Mending, and Boro-Inspired Patchwork

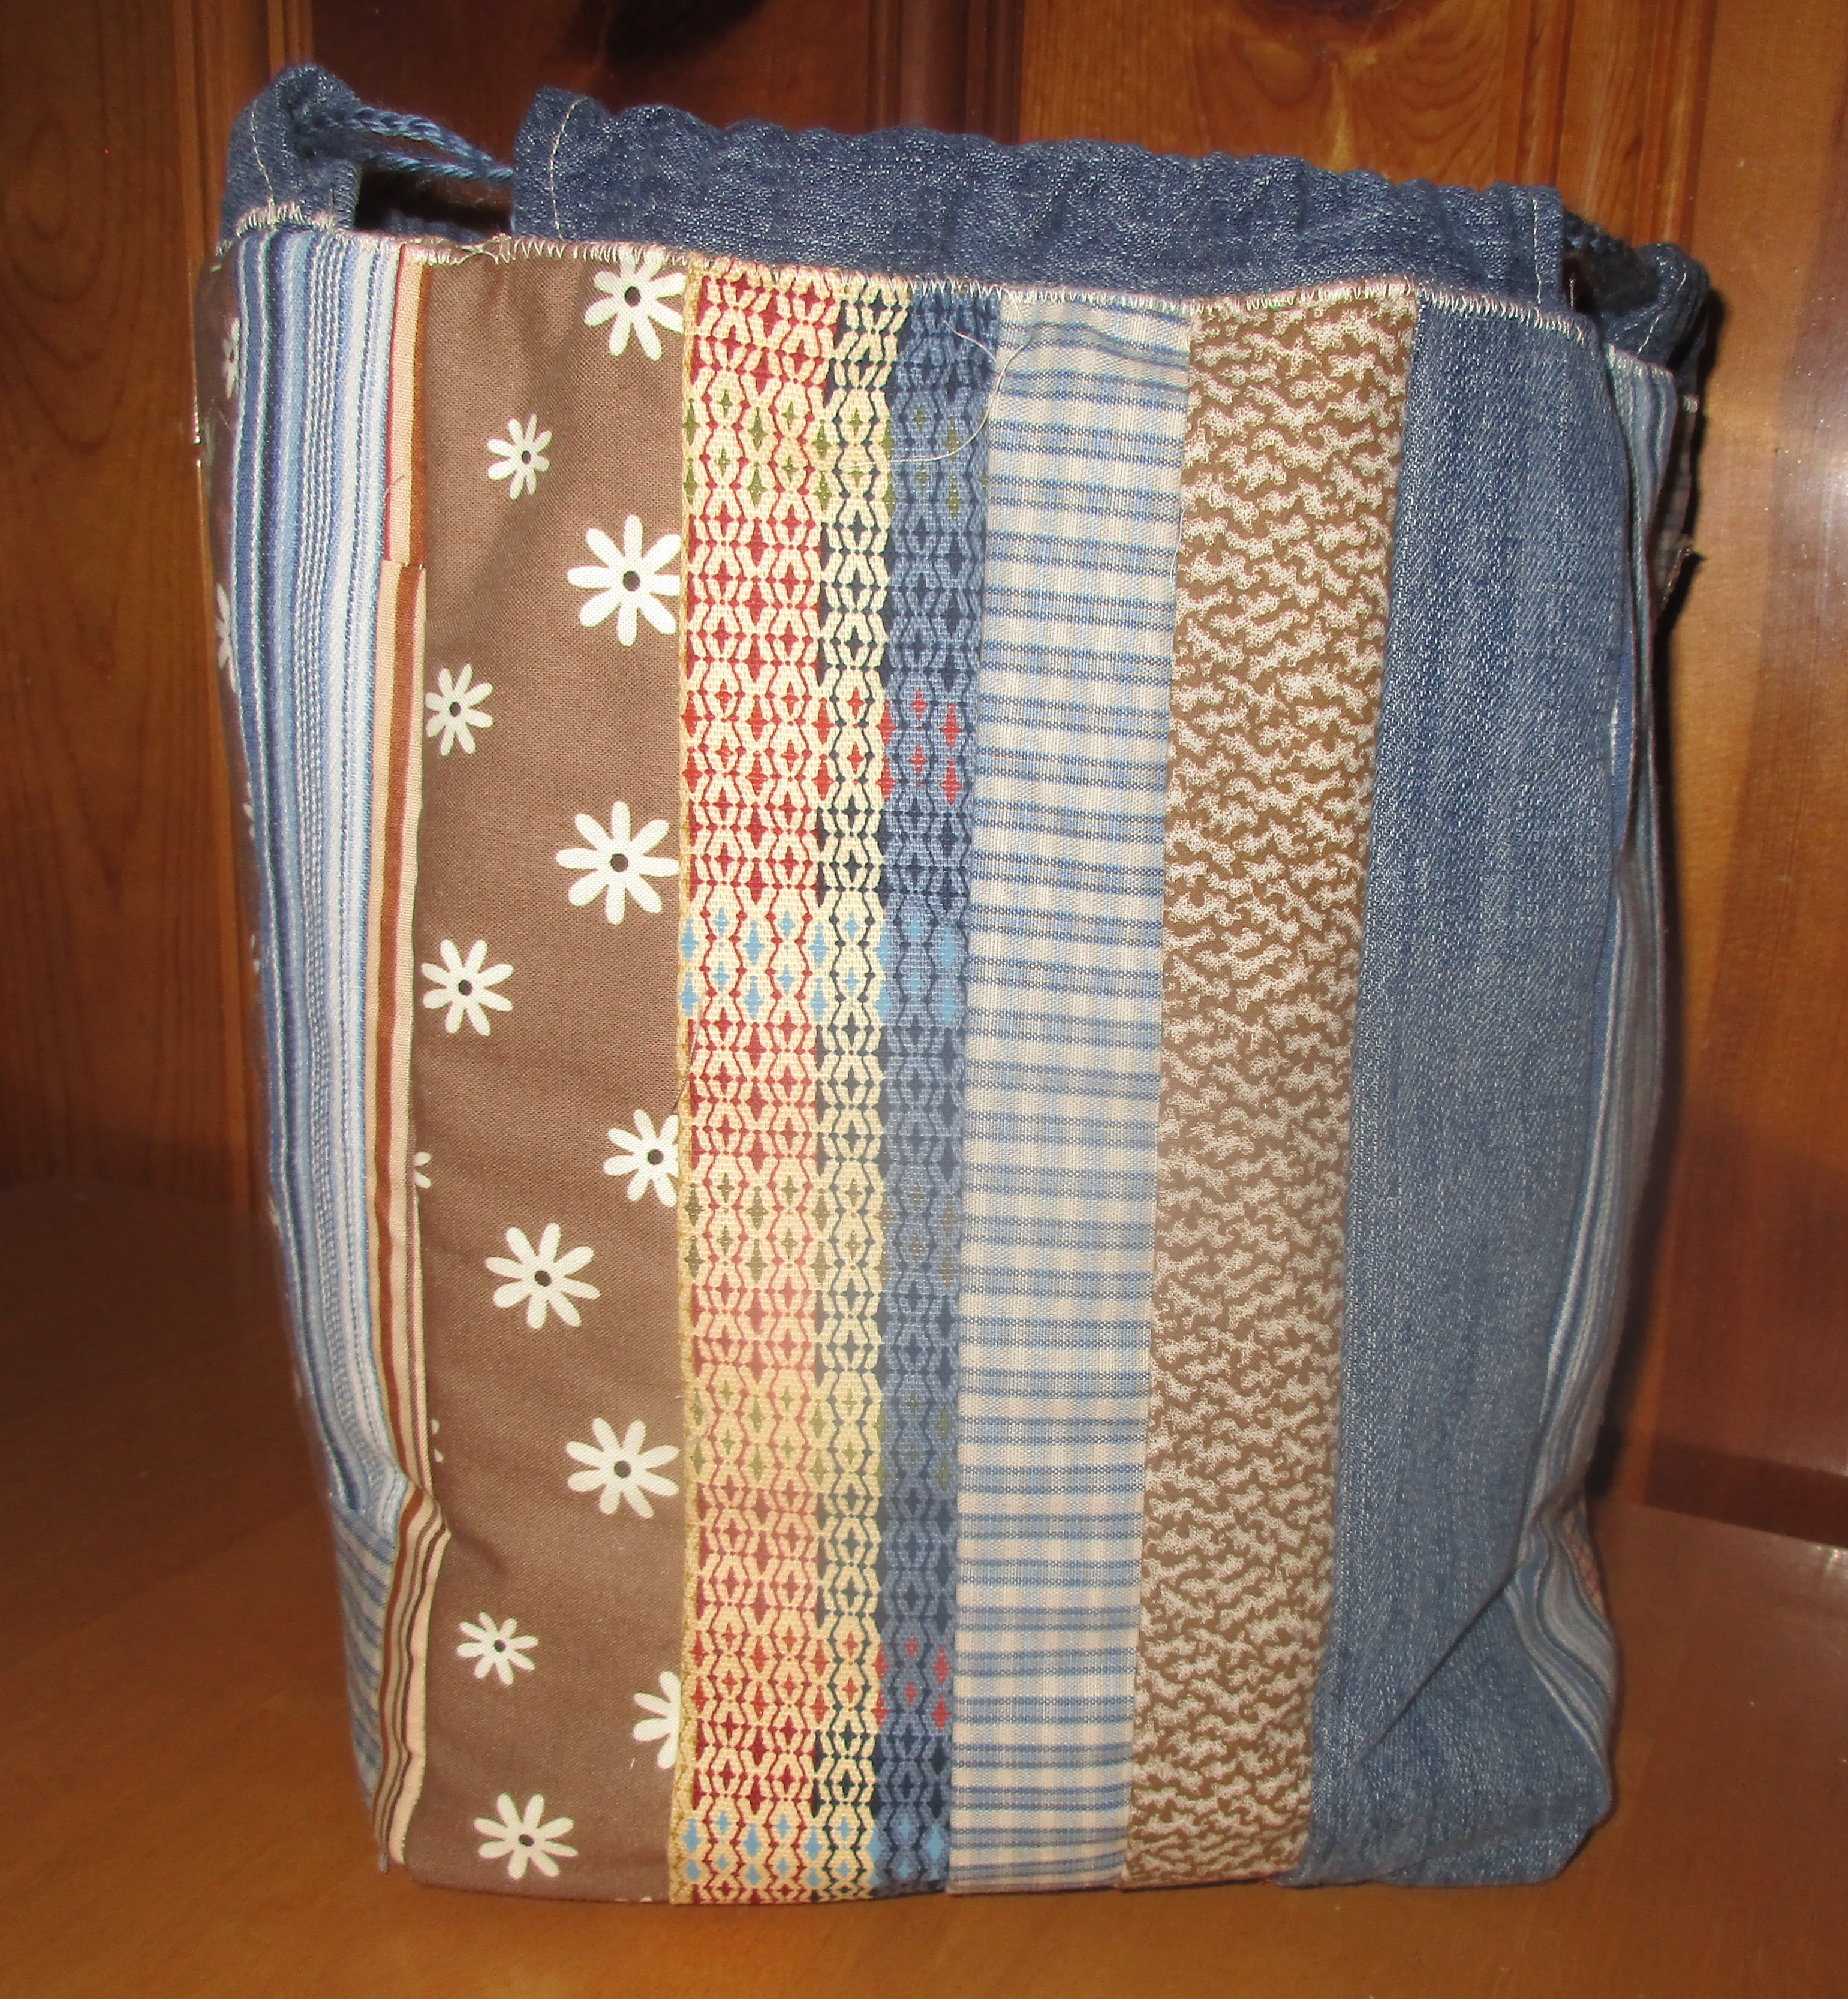
I made the pieces pictured above to sew a small kinchaku drawstring bag. I also think this kind of patchwork would look great as a bento, or azuma bukuro, bag. Both of these linked projects would be quick, useful, and satisfying ways to play with and use boro-inspired patchwork.

I’ll show you what I’ll make from my other panels soon. In the meantime, if you are even half as intrigued by this textile art as I am, then I recommend that you experiment and play with it because it’s fun! Happy sewing!

Thanks to na0905 for taking photos of the Boro exhibit at the amazing Amuse Museum in Tokyo, and for sharing these at Flickr with the lovely Creative Commons license. Thanks to GinaPina, Heather, and Jacque Davis for making their photos available this way, too.

Cleaning Your Sewing Machine

Cleaning Your Sewing Machine

Clean Machine Lead

Keeping your sewing machine clean is an important part of producing beautiful things with fabric and thread. After enough projects, there will be an accumulation of fluff from thread and fabric in the inner workings of your machine. If you leave that to accumulate for too long, your machine will start to perform poorly.

Anytime I start to get skipped stitches or a sluggish machine I think back and ask myself when the last time was I cleaned it; it was usually too long ago.

Read the manual

I talk a lot about getting to know your manual. I’ve put little sticky notes all over mine so I can quickly find what I’m looking for. Get your out manual (or locate a PDF online) and go to the section on ‘How to clean your machine.’

1

Some machines will tell you to oil certain parts. Others won’t. My top advice is to always follow the manufacturer’s recommendations on cleaning.

For my Brother cs6000i I need to remove the bobbin cover on the needle plate cover.

2

Then I follow the instructions to remove the needle plate cover itself.

3

Next I remove the bobbin case.

4

Vacuums and cotton swabs

Now I have unfettered access and can get to cleaning. Step one, vacuum!

5

I also use cotton swabs to gather up the fuzz that my vacuum can’t reach.

6

Look at all that fabric and thread fuzz!

7

Once the inside of the machine is clean, you need to also clean the parts you removed.

8

After you’ve reassembled the parts you’ve removed, I also suggest changing out to a new needle. It’s better to start fresh and new after a cleaning.

9

Re-thread in your desired color.

10

Now do some practice stitches. Here you can see how clean my embroidery stitch looks after cleaning my machine and switching out to a new needle.

11

With a clean machine I was able to do some beautiful embroidery for a friendship quilt I’m making.

12

Happy cleaning and happy sewing!

———————————————————————————–
Charlotte Kaufman is a writer and sewist in Mammoth Lakes, California. She specializes in marine and home interiors and continues to fall more and more in love with quilting. You can follow her at charlottekaufman.com.
Should Your Child Learn to Sew on a Machine or by Hand?

Should Your Child Learn to Sew on a Machine or by Hand?

Recently, more or less, my oldest niece has shown an interest in Chess, and it’s been a learning experience for me as well as I play games with her. Given how little I knew about Chess going in, honestly, I almost had to learn something along the way, but we’re both growing as players—which is fairly awesome. She’s come a long way from the girl who played with a toy phone in the kitchen floor, and now, she’s exploring more advanced hobbies.Sewing and Chess

Chess, as it happens, is just one of the latest. She’s also tried making stepping stones, baking, and sewing.

Once upon a time…

Sewing, like you might have guessed, is the topic of this particular post since once upon a time she found herself wanting to explore the territory as a hobby. That hobby was encouraged when she got a toy sewing machine, but what I assumed would be the case turned out to be accurate. Those toy machines aren’t good strategies to teach your children how to sew. Even with all of the hours that I’d spent sewing, I couldn’t get the toy to work right, and I ended up encouraging her to just forget the machine and sew by hand. That strategy actually led to her progressing a bit, and it turned out better than if I’d left her alone to the machine.

But that brings up an interesting question. Sure, this toy wasn’t a good machine for my niece to learn sewing, but what about a real machine? Essentially, which is the better strategy to teach your children to sew: on a machine or by hand?Sewing with Kids

By hand

The answer, to me, is two-fold. If you want your child to finish an early project on a more individual basis, the sewing by hand method works better because there’s less chance for injury while working alone. Sure, the child might stick themselves with a needle, but it won’t be with the force and repetition that a machine can deliver. This would make the overall process safer, and even though you might argue that it could slow the project’s completion, keep in mind that if you were dealing with a child on a machine, you probably wouldn’t get the full speed that’s possible through using the machine because of safety and the child’s hesitance during the learning process.Sewing by Hand

Children can learn concepts that can benefit them later in life through this by-hand process, like how to tie off the thread or make consistent stitch sizes, and they’re doing so with less chance of serious injury. Still though, keep in mind that any needle can cause injury, so always supervise and only allow the child to try sewing in this method if they’re old enough—and mature enough—to handle it.

By machine

If you want your child to be at their safest rather than their most individual, it might be a good idea, believe it or not, to break out the sewing machine since the needle stays in the same vicinity during the process. Regardless, guidelines for these early sewing machine moments should definitely be in place to lessen the chance of serious injury. Although other people probably disagree, as an example, if my niece (who’s 12 now) sat down with full control of a machine and fed the fabric through, I’d be paranoid that she’d accidentally get her fingers caught under the needle because she’s never tried it.Sewing by Machine

There is a way to combat this complication, fortunately, and that’s a guideline to only allow your child to do certain things on the machine—as in either work the pedal or the feed the fabric through. This way, while your child is smaller, they can focus their attention on learning how the speed of the machine works through operating the pedal without getting near the needle. Once your child is older, you can switch places and let them feed the fabric through while you’re in charge of the pedal to make sure the fabric feeds slowly enough for their fingers to be in the right places every time the needles comes down. This keeps the child from learning to feed the fabric through at a too-fast pace and lessens the chance of injury. That’s a good combination to pass on sewing to your kids!Sewing Generations

If you choose not to decide – you still have made a choice

Basically, there’s room for both hand sewing and machine sewing. To make the call, you should consider child’s needs and capabilities, and always—always—think of safety first. Always supervise and guide your child through the process, whether it’s more individual-centered through a by-hand method or tag-team through dividing the sewing machine labor. If you plan these things right though, your child can blossom in the sewing world, and the roots to their success can trace back to these moments you shared over their early interests.

Sewing Projects to Prep for Winter

Sewing Projects to Prep for Winter

Where I live, it’s unseasonably warm at the moment, but we all know winter is on the way. Yes, first we’ll experience the glory and brilliant colors of fall, but those crisp days will quickly give way to cold, snowy winters. Now is the time when I and my neighbors begin to prepare for the near-hibernation that will get us through the winter. Much of this involves prepping our homes to retain the heat. There are several sewing projects that help with this task – and make it more fun!

window-265406_640

Draft dodgers

When the cool weather arrives, it’s easy to feel the drafts underneath doors. Even with weather stripping, not all doors form a tight seal against the elements. Sewing a draft dodger is easy and keeps the cold weather out of the house. I use my scrap pile to find a long enough piece of fabric and sew it in a long tube that will be high enough to cover the base of the door. Then stuff it with polyfill or beads. You can even add some ambiance by adding pine, lavender, or other aromatics before sewing it closed. If you’re feeling silly, create a cat, puppy or other furry friend face to attach to the outside.

Thick curtains

It’s common in this area for people to hang quilts over their windows to keep the heat in and the cold air out. While I understand the logic, I dislike blocking the natural light. Winter is dark enough without blocking windows. Instead, sew some thick curtains that can be tacked or pinned around the window sill and frame. This will still keep the drafts out, but will also allow light in. Burlap or linen backing on a material that matches your décor, perhaps with quilting in between, can work quite well.

Bedding

Personally, I love curling up under blankets in the winter so creating a fabulous, thick blanket for my bed is incredibly fun. I’m not a quilter, though if you are, making one that’s extra warm for winter would be immensely fun. Since I’m not, I have a great time finding fun fleece fabrics that coordinate with the rest of my bed linens and adding edging to them.

With these sewing projects, I know I’ll be warm and cozy this winter. If you’re in a cold area also, try them out and see how much warmer your home is this year.

What I Do At Work: Part XX

The TV business is uglier than most things. It is normally perceived as some kind of cruel and shallow money trench … a long plastic hallway where thieves and pimps run free and good men die like dogs…

– Hunter S. Thompson

I’ve had a couple extremely busy and rather annoying weeks at work. This past week, I altered somewhere close to twenty-five suits. That’s twenty-five suits while also doing a ridiculous number of fittings and a whole slew of other alterations as well. None of that is necessarily annoying on its own. What is annoying is when people aren’t good at scheduling and neglect to take into account the time it’ll take to complete an alteration.

As a TV and film tailor, I’m often the one who has a particular garment last, right before it goes off to set for an actor to wear. Which means, if someone didn’t schedule a fitting early enough or if they showed up late to a fitting, or they forgot about a fitting altogether, I’m the one who is under the gun. And I’m also the one who’ll get blamed if the clothes aren’t ready on time. Seems rather silly but that’s the way things normally work (no one ever said the film and TV business was a pretty or fair place).

As Hunter S. Thompson said, "The TV business is uglier than most things. It is normally perceived as some kind of cruel and shallow money trench through the heart of the journalism industry, a long plastic hallway where thieves and pimps run free and good men die like dogs, for no good reason."

As Hunter S. Thompson said, “The TV business is uglier than most things. It is normally perceived as some kind of cruel and shallow money trench through the heart of the journalism industry, a long plastic hallway where thieves and pimps run free and good men die like dogs, for no good reason.”

Often when I tell people that I work on television shows and movies, they say something like, “Oh that must be so much fun!” I suppose it has its moments but after the couple weeks I’ve just had, none of those moments seem all that fun.

So what can be done when you find yourself in work situations that are less than ideal? Here’s a short list of the things I do, or at least try to do when things are chaotic and disorganized around me.

Ask lots and lots of questions

 If I’m in a fitting and I know the actor is scheduled to work the next day and the designers are putting multiple outfits on him, I ask things like, “So, this is what he’s wearing tomorrow?” or “For the courtroom scene, he should wear this?”

The only way you’ll be able to ask lots of questions, is if you read all the paperwork. Which leads to the next thing on the list (which perhaps should be the first thing…)

Read all the scheduling paperwork production puts out

For every episode, the assistant directors put out a schedule called a One Liner. A One Liner is organized by shoot day, starting with shoot day one. It lists every scene to be shot that day, and which actors are in that scene. Every actor in a show is assigned a cast number and that’s how they’re listed on the One Liner. At the end (or beginning) of the One liner, all the characters are listed in numerical order so you don’t have to know off the top of your head what number each actor is. It’s called a One Liner because the scene descriptions are traditionally one line.

You probably already know this but, tv shows and movies are not shot in the order of what you see as the final product. Also, remember that sometimes things change at the last minute. Double check everything. Read the daily call sheet. Check in with the Wardrobe Supervisor to make sure they have everything they need for the next day.

Some TV and film tailors rely on the Wardrobe Supervisor or Costume Designer to let them know what garments to complete when. I like to be a lot more proactive than that, mainly because I hate last minute, “Oh I forgot I needed this tomorrow. Can you alter this before you leave?”

These types of requests at the end of a ten hour day can often be avoided if you’re informed about the schedule and who works the next day and ask questions early on. People get tired and overwhelmed and forget things (I do sometimes, too!) but one thing I dislike a lot is when someone else’s forgetfulness or disorganization means I have to stay at work late. Because, believe me, most Costume Designers, after dropping a big late afternoon alteration in your lap, aren’t going to hang around at work with you while complete it.

So, I just try and stay super organized and prevent those types of situations. Also…

Know when to say no

This is always difficult for me (and likely for most people) but, if a designer puts, say,  a suit jacket on an actor that doesn’t fit him in the shoulders (and it’s a contemporary suit they just purchased in a store), the answer to, “Can you move the sleeves?” is, “I can but it’ll look a lot better if you buy a suit in the proper size. And we really don’t have time for that extensive of an alteration.”

Same goes for men’s shirts that don’t fit correctly in the neck. Buy a shirt in the proper neck size.

There are a lot of things I like about the film and television business but, one of the things I don’t, is the delusion that making TV shows is akin to something as important as curing cancer or launching rocket ships. TV is great and all but, it’s not world and peril stuff.

Which is always something worth remembering.