Oui, Oui – A Sheer Evening Bolero With French Seams

Oui, Oui – A Sheer Evening Bolero With French Seams

When the weather gets warmer, weddings and graduation party announcements arrive. This means strapless dresses, tanks, low necklines and open backs that get chilly in air conditioning and cool nights. An evening bolero or cropped jacket sewn with sheer fabric is a terrific solution: Small and light, you can fold it into your purse when the dance floor calls and pull it out again for a walk in the moonlight. Plus you can brag about your sewing skills to anyone who compliments your look.

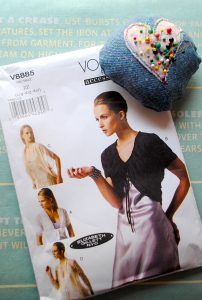
What could be more evening elegant than a bolero by Vogue?

What could be more evening elegant than a bolero by Vogue?

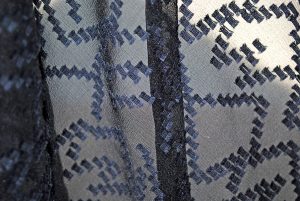
Lace, chiffon, silk voile, and layered tulle are good choices for an evening jacket, but working with delicate fabric often requires French seaming, a couture technique that hides ragged edges and stray threads that would otherwise show through and destroy the elegant effect. The pattern I chose for my bolero, Vogue 8885/View C, required only one French seam (and only one big piece to cut), so I dared give it a try. In my sewing stash I found a few yards of black chiffon from Mood Fabrics. I’d fallen in love with its zigzagging details on a January evening when I’d been strolling their aisles. In retrospect, black wasn’t a good color choice for a first French seam attempt. A light color would have been easier to see and sew precisely.

After cutting the pattern piece – a gigantic parallelogram – with a one-half inch seam allowance and transferring marks with white tracing paper, I was ready to attempt my début French seam. Here’s how it works:

  1. The first step in sewing a French seam is to put the wrong sides of the fabric together. You must disregard the worry you’re sewing on the incorrect side. You are sewing on the incorrect side. Sew just one-quarter inch from the cutting line, then trim close to stitching.

    French seams hide ragged edges and stray threads.

    French seams hide ragged edges and stray threads.

  2. With low heat, press the seam to one side. Then flip to the wrong side. You will see the “right” side of the seam on the wrong side. This is normal, so don’t panic.
  3. Fold the fabric along the seam and stitch again at one-half inch. This hides the seam inside another seam. The new seam is on the wrong side as it should be. Press the French seam to one side. That’s all there is to it!
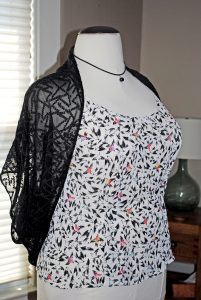
A sheer black bolero compliments a camisole.

A sheer black bolero compliments a camisole.

With the French seam complete, I had to finish other aspects of the bolero such as stitching a narrow hem along the edges. For this I used a rolled hem foot that came with my Singer Quantum Stylist. Rolling the hem is fun once you get the hang of it and the results are astonishingly professional. If you don’t have a rolled hem foot, you can buy one at sewing shops or online at Sewingmachinesplus.com. I also had to stitch along the back of the bolero and gather a section by pulling along the bobbin thread. The chiffon was uncooperative – I should have used a longer stitch length to make it easier. As a last step, I joined the center back section together to create “sleeves.” Doing this caused the French seam to present itself in a diagonal direction through the back, which looks pretty cool.

As the final step, I tried it on! The loose fit looks a little better on my dress form (her name is Aretha) than it does on me, so here’s Aretha:

I’m happy with the bolero, but I’m curious about some of the other views included with Vogue 8885. It looks like a few yards of lace and more French seams are in my future. Here’s to Paris . . .

DIY - Bias Tape with a Bias Tape Maker Tool

10 Steps to Making & Sewing Bias Tape

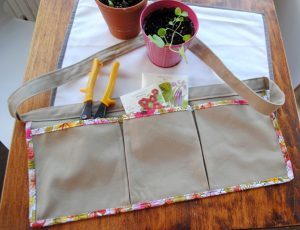
Gardening Apron, pattern from “Sewing for All Seasons” by Susan Beal.

Gardening Apron, pattern from “Sewing for All Seasons” by Susan Beal.

You might appreciate a well-stocked sewing shop, but don’t you get bored with the limited choices for bias and binding tape? The standard spectrum of hues leaves little room for imaginative and interesting ideas.

If you’re sure the best binding for your project isn’t on the notions shelf, consider making it yourself. Although it’s possible to create tape with only an iron and your fingers, the process will go more smoothly and be more fun with a special tool called a bias tape maker. These little aluminum color-coded gadgets are sold at most sewing shops, including Sewingmachinesplus.com. They come in widths ranging from two inches all the way down to one-quarter inch and can be purchased individually or as a set. Save the instructions that come with the tool—you’ll need its measurement guide when cutting strips.

With a small tool that costs under $10, you can conquer the bias tape bores.

My curiosity about homemade tape led me to Susan Beal’s book “Sewing for All Seasons,” where I found a pattern for a canvas gardening apron made with DIY binding tape. My tape edging was folded from a poplin just slighter lighter than the canvas used for the apron body. I used a three-quarter-inch bias tape maker by Clover, and I even have some tape left over for a matching hat.

When making your own projects with DIY tape,
follow these 10 steps:

  1. Select similar fabrics. Cut swatches from your stash and consider how each would work as either the tape or the body fabric. As a general rule, your tape should be the same weight or just slightly lighter than the body fabric. Avoid using silky fabrics because you’ll have trouble keeping the tape in place when sewing. Also avoid transparent or translucent material that will show seams and frayed edges.
  2. Determine measurements. Refer to your pattern’s specifications – what size bias or binding is required? Use the guide that comes with your tool to determine how wide your strips should be in order to achieve the proper finished size. For example, if you need three-quarter-inch binding, your strip width (for medium weight fabric) would be one and three-eights. Make sure you have the right size bias-making tool for the size you need.
  3. Measure and cut your strips. If your tape will be sewn around curved edges, such as with a circle-shaped potholder or Christmas tree skirt, your strips should be cut on the bias (at a 45-degree angle against the fabric grain). If your project is made of only straight lines like the gardening apron in the photos, you can cut strips horizontally from selvage to selvage.
  4. Prepare the strips. If your pattern requires many yards of tape, you can sew long strips together with a three-quarter-inch seam allowance. Open and gently press the seam before using the tool.

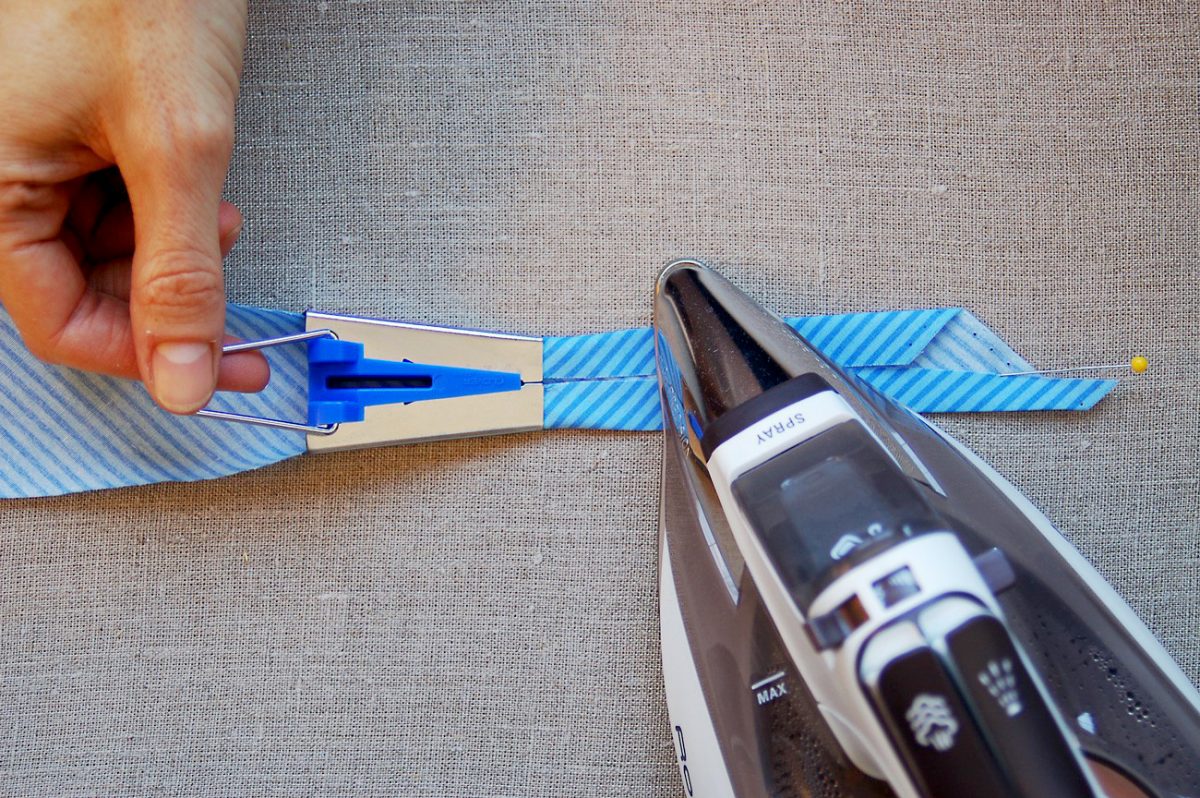
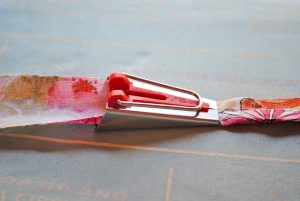
    Run the strips through the tool to create perfectly folded tape.

    Run the strips through the tool to create perfectly folded tape.

  5. Press perfectly. Use an iron at the appropriate setting for your fabric to flatten the tape as you pull it though the tool. Take your time and use your fingers to hold the tape in position before applying steam. Store the finished tape so it doesn’t lose shape when you’re working on other aspects of the project.
  6. Check your machine’s needle and thread. You’ll be sewing through many layers, so make sure your needle is up to the challenge. Likewise, consider your thread color. A thread that looks good with the body fabric might not look as good when sewn into your bias tape.
  7. Pin the tape into position. Use plenty of pins with the head accessible in the direction you plan to sew. Use small pins that won’t distort the shape of your project. The flatter, the better. In some cases, you might want to baste the tape into place.

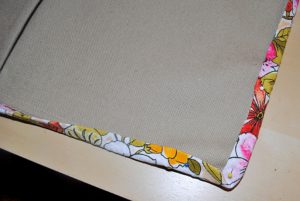
    Create a folded angle at corners.

    Create a folded angle at corners.

  8. Be careful at corners. Fold the tape at an angle, making sure it doesn’t slip. When sewing on the machine, sew one half of the corner and stop to pivot the project to the other direction before beginning again. Do not rush—take your time and concentrate on keeping the tape in place.
  9. Cut with caution. If your pattern asks you to cut the tape at particular points, don’t cut exactly flush to the body fabric. Leave a millimeter or two in case the next part of the process pulls your tape more taut than expected.
  10. Press gently. Resist the temptation to vigorously iron the tape after it’s sewn on. Give the project some time to settle into its seams, then use light steam to gently coax out lumps and wrinkles.

With a small tool that costs under $10, you can conquer the bias tape bores. New doors open with tape made from abstract prints, solids, florals, and plaids. A fancy or patterned bias edge against a plain fabric is a fun and interesting take on cosmetic bags, T-shirts, placemats, table runners or blanket edges. Make your own tape and take your project from OK to extraordinary.


DIY Tutorial - Striped Tote

DIY Tutorial – Striped Tote

Stacey’s Stitches

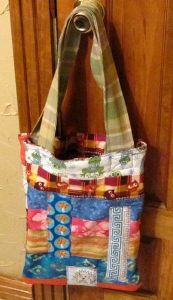
DIY - The Striped Tote

DIY – The Striped Tote

Level: Beginner
Time to Complete: In A Weekend
Machine: Singer Advance
Sewn By Machine – 1/4 in. straight stitch

I’ve suddenly found myself traipsing to multiple appointments on a regular basis. After dropping an important file in the middle of a parking lot on a windy day, I decided I needed one simple tote for carrying any and everything. Thus the Striped Tote was born 🙂

Let your imagination breathe personality into every stitch!

Materials:

  • 2 — 19 in. x 15 in. Inside fabric lining
  • 2 — 19 in. x 15 in. Cotton Batting
  • 14 — 15 in. x 4 in. Misc. horizontal fabric strips (amount is flexible depending on size and position of strips)
  • 4 — 3 in. x 6 in. Vertical fabric strips
  • 2 — 4in. x 30 in. Handles, preferably strong, durable fabric
  • 2 — Accent pieces, any size or shape

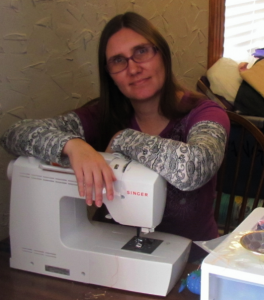
    Hi all! I'm Stacey Martinez :)

    Hi all! I’m Stacey Martinez 🙂 I love to design fun, imaginative custom items for my active, crazy family. Bright colors and beautiful fabrics sing “Stacey, Stitch Me!”

IMPORTANT:
**Wash all fabric prior to sewing to avoid shrinkage of the finished product.
**Ironing recommended before sewing and after each step. Makes fabric easier to sew and adds a professional look to the end product.

  1. Measure and cut all fabric and batting. I used Warm White batting but thin fusible works just as well.
  2. Pin and sew (1/4 in. with regular straight stitch) inside lining and batting insides together. Side shouldn’t matter for batting but make sure lining is facing inside. Leave a gap in the top for pulling fabric right side out. Repeat for other side of bag as well. Pull fabric right side out for both sides. Leave top holes open, they will be stitched later.
    • **Tip** Cut off the corners before turning right side out. This makes the corners easier to form.
  3. Pin and sew at 1/4″ all fabric strips together for each side of the bag. Iron all seams.
  4. Pin and sew with the front side (strip side) and the inside lining together for both sides of the bag. Make sure front sides are right side together. Leave an opening on the top of both sides to pull the material through. Leave top holes open, they will be stitched later.
  5. Pull the fabric out to right side out on both sides. Iron.
  6. Fold and sew 1/8 in. around four vertical strips and two accent pieces with regular straight stitch.
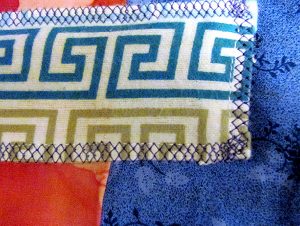
  7. Pin two vertical strips and one accent piece on each side of bag. Sew with any fancy stitch of choice, with any thread color of choice. I used the Honeycomb stitch since it looks intricate and can be used for edging. I used purple as my accent stitch because I wanted the stitching to stand out, not blend in.
    Sew accent stripes and other pieces after all side layers have been sewn together and pulled right side out.

    Sew accent stripes and other pieces after all side layers have been sewn together and pulled right side out.

    • **Tip** Sewing accent stripes and other pieces after all side layers have been sewn together and pulled right side out accomplishes one important feature: This ensures that all 3 layers are stitched together more thoroughly and prevent material slippage during constant use or after a few washes. This simple step helps the tote keep shape and strength much longer.
  8. Sew the top edge of each bag side with the same accent stitch and thread color.
  9. Pin the two sides outside facing together. Iron. The material will be much thicker with so many layers coming together. Ironing helps flatten down all the layers for easier sewing. I also switched to a 100/16 denim needle to handle the extra thickness.
  10. Sew three sides together, leaving the open. Pull right side out.
  11. Fold tote handles in half, sew right sides together (using straight stitch). Sew only one end. Leave the other end open. Pull the handles right side out using the open end.
  12. Iron handles and sew around all four sides, sewing the open end closed in the process.

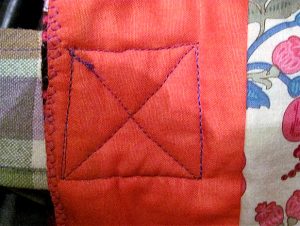
    Attach handles to tote, using this X design.

    Attach handles to tote, using this X design.

  13. Attach handles to tote, using this X design. The X design creates a stronger stitch often used so handles on totes and purses easily handle more weight.

Throw what you need in your new tote and take off!