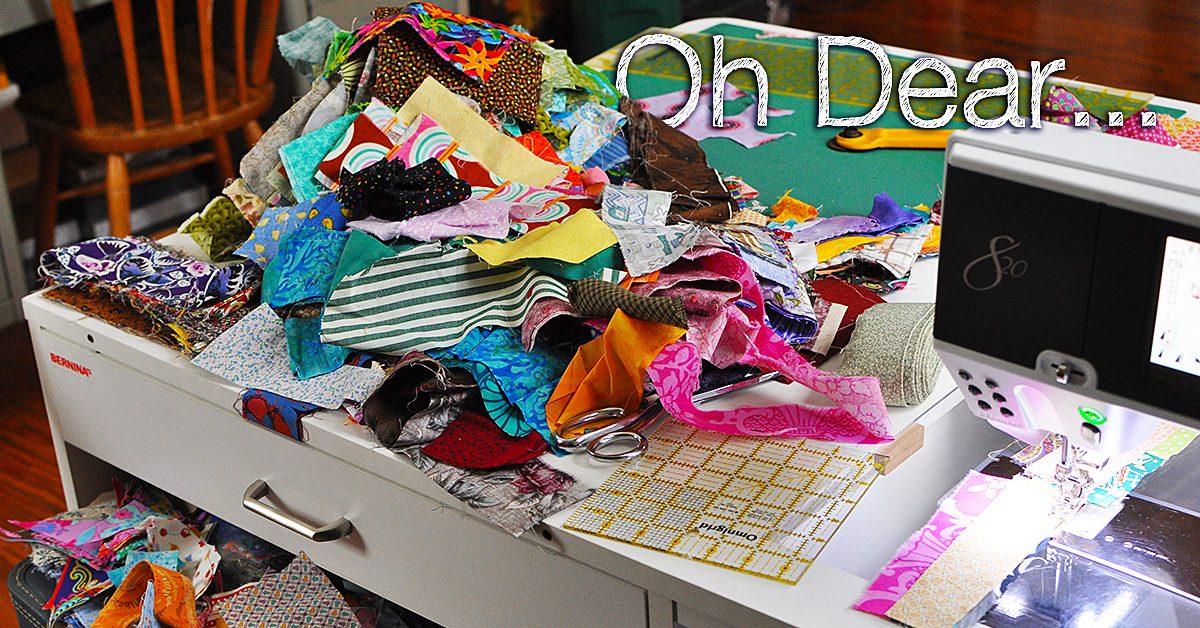
It only took me six months, but I finally organized my fabric scraps after our move.
It only took me six months, but I finally organized my fabric scraps after our move to this new town and new house. When we made the move, I dumped my two huge bins of scraps into a few shopping bags and tucked them away until this glorious moment when they would not only be sorted, but have a place to reside.
Bits and pieces
Why should one keep & organize fabric scraps?
Why should one keep and organize fabric scraps? Here are some reasons to consider.
Fabric is expensive. Long sized strips, and smaller pieces can be reused for a vast amount of projects. The internet is a trove of fabric scrap project ideas.
Out of sight, out of mind. The reverse of this is true as well. When you have your scraps visible, you are much more likely to use them and be aware of what you have available.
Have a favorite color? It probably shows in the types of fabric you buy. Take a look at your pile of scraps and try to use up more of that color before you buy a few more yards.
Many people cut their scraps to standard sizes. If you have a size of fabric you constantly seem to go to, make your life easier by making your own pre-cuts out of scraps.
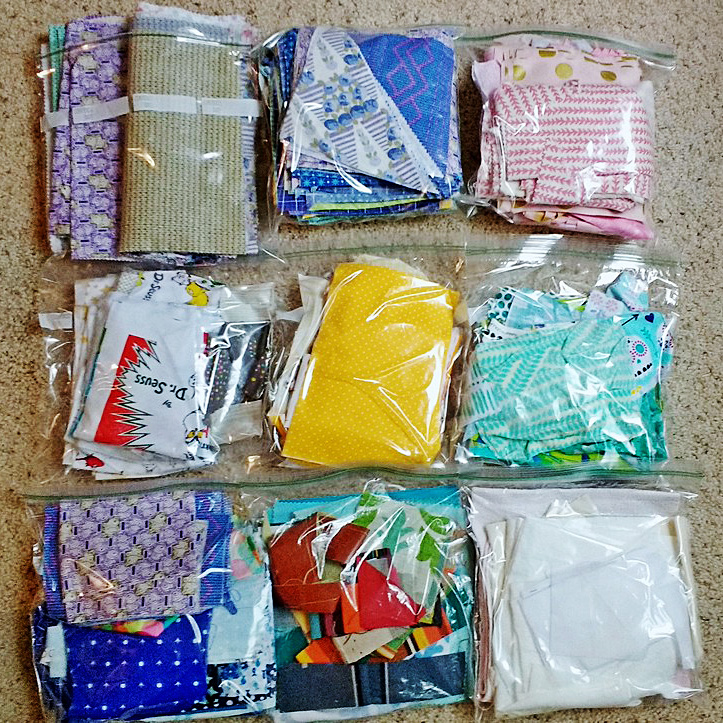
Scrap bags
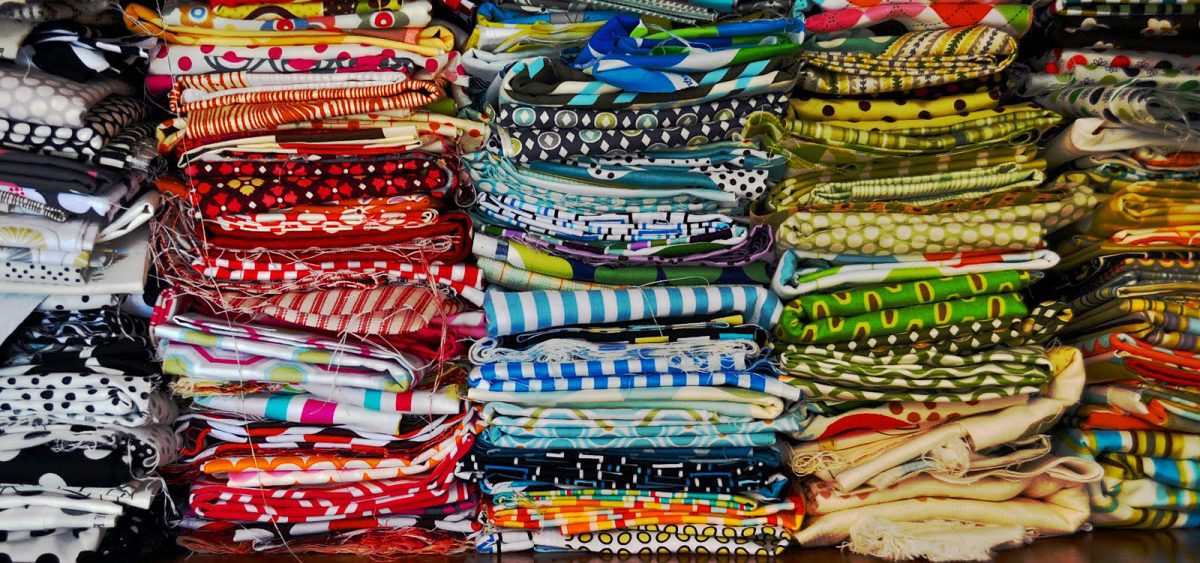
I ultimately made 9 bags of folded scraps.
I ultimately made 9 bags of folded scraps. They included the following (from left to right):
All of my precut Layer Cakes (10” x 10” squares)
All of my other-sized precuts
Pinks
Whites
Yellows, tans and oranges
Greens, teals and aquas
Blues and purples
Heavy duty fabric scraps (canvas, Sunbrella, etc)
Utility fabric scraps (batting, white out fabric, mesh, etc.)
One of these things is not like the others…
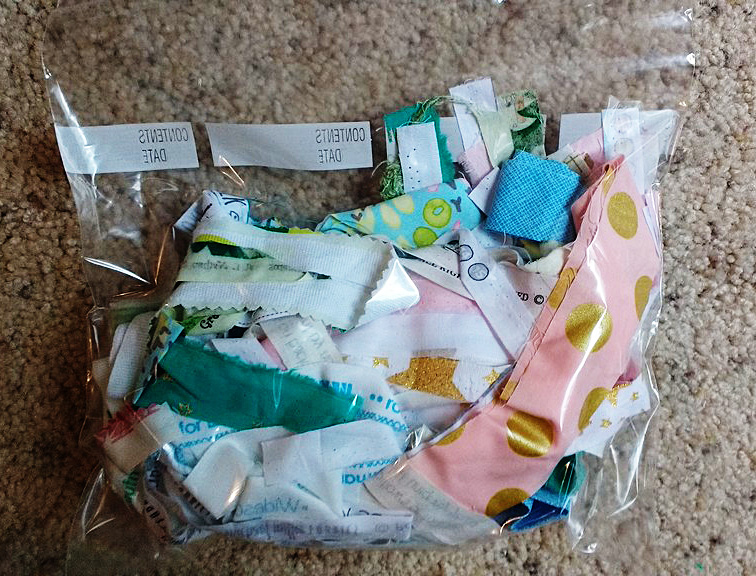
Bag #10 holds all of my selvage edges & very thin strips of fabric.
There is also a 10th bag (but it didn’t fit well in the group photo above). This holds all of my selvage edges and very thin strips of fabric. I have a huge wish list of projects to make from selvage edges. Perhaps I’ll write a post soon showing you the world of possibility with saving those thin strips!
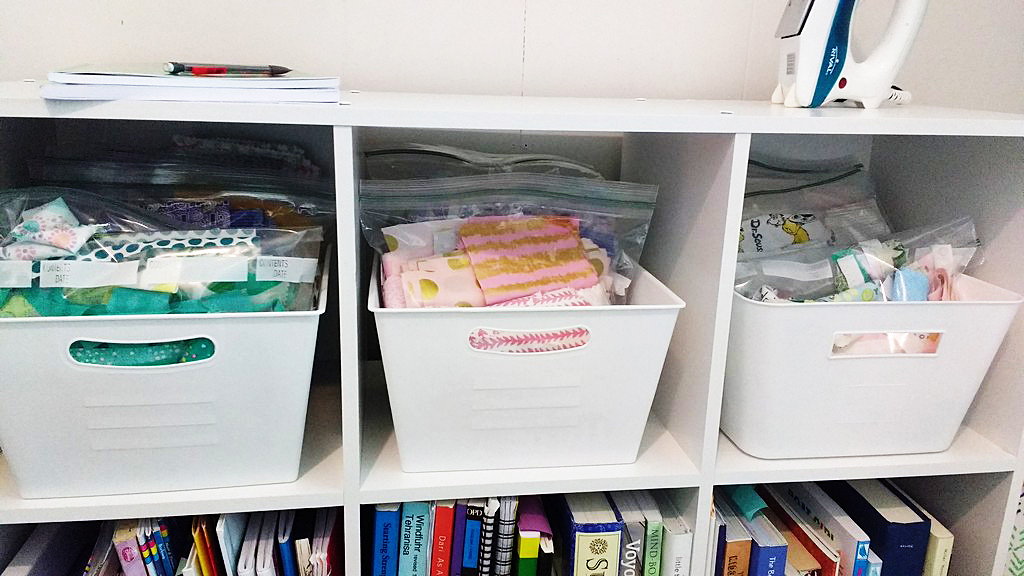
A place of and for my own making
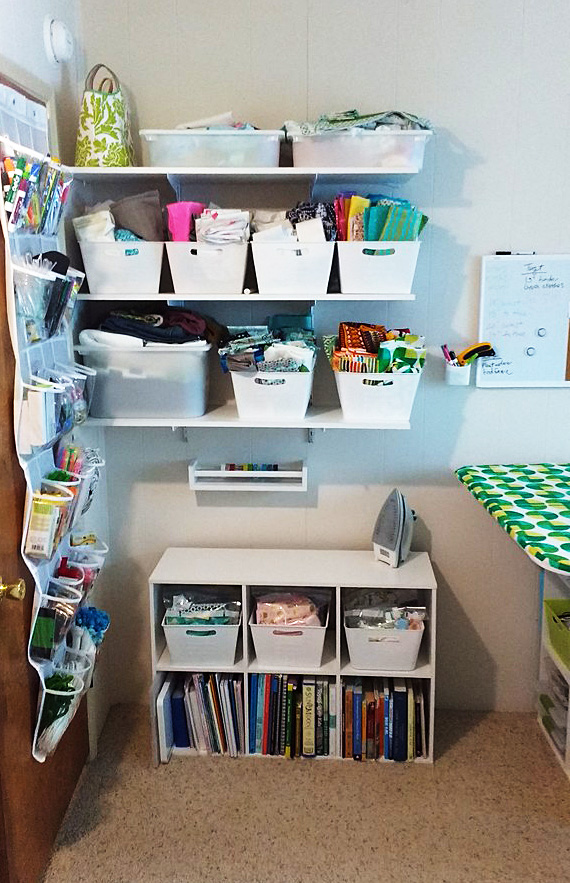
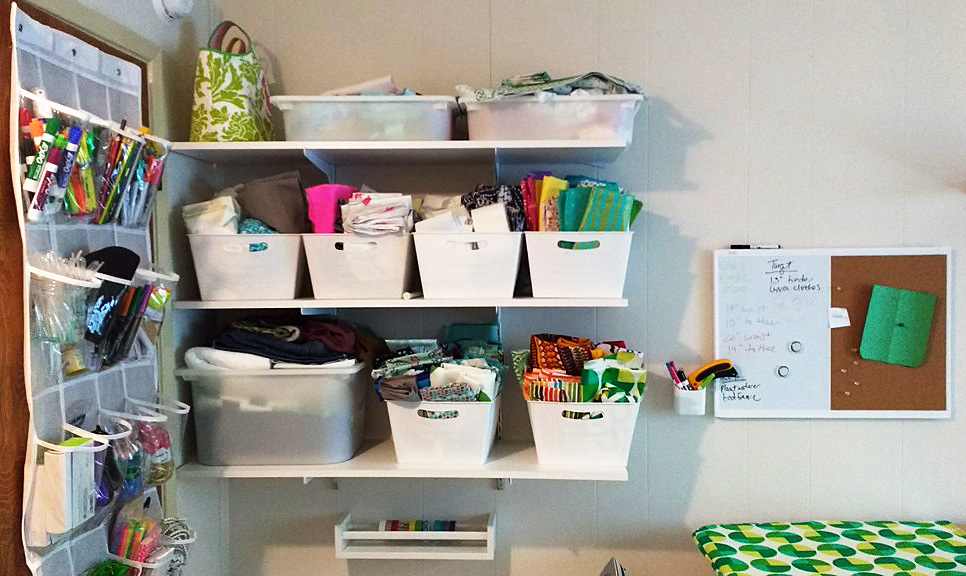
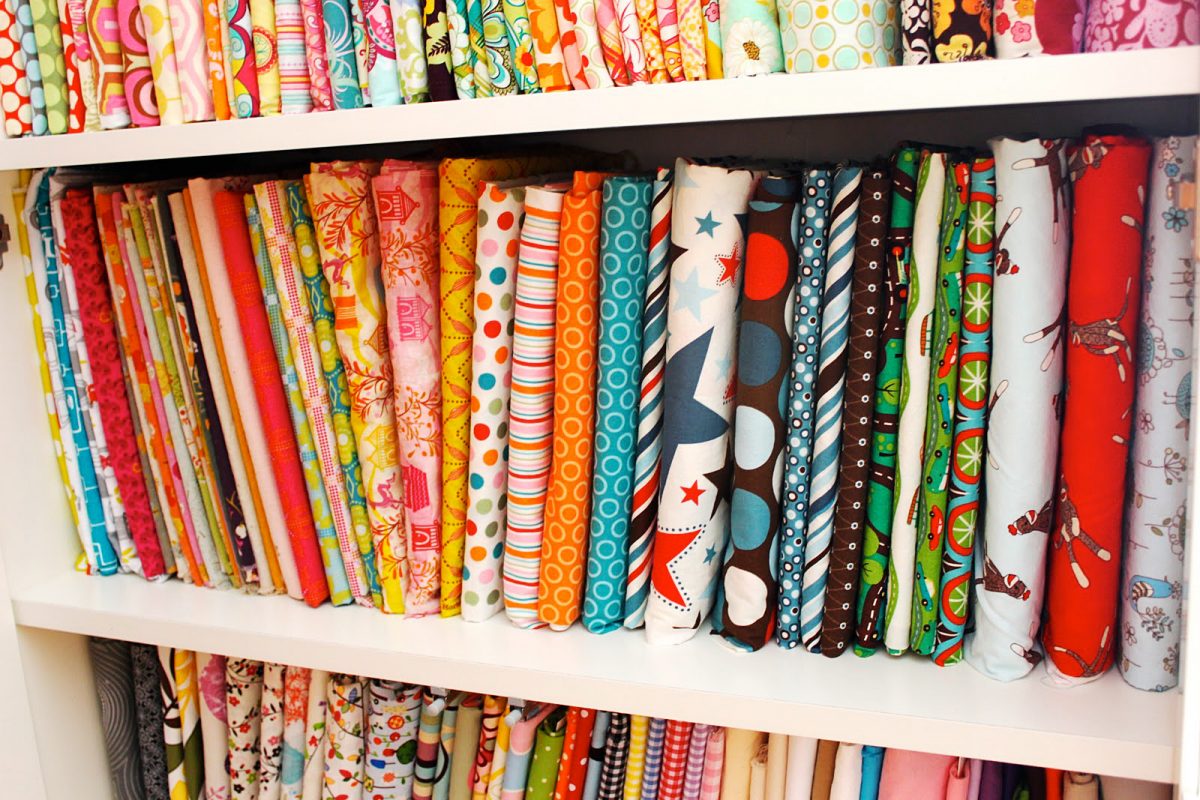
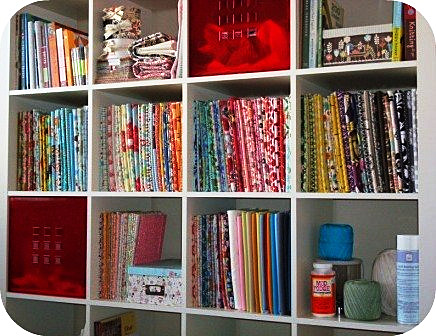
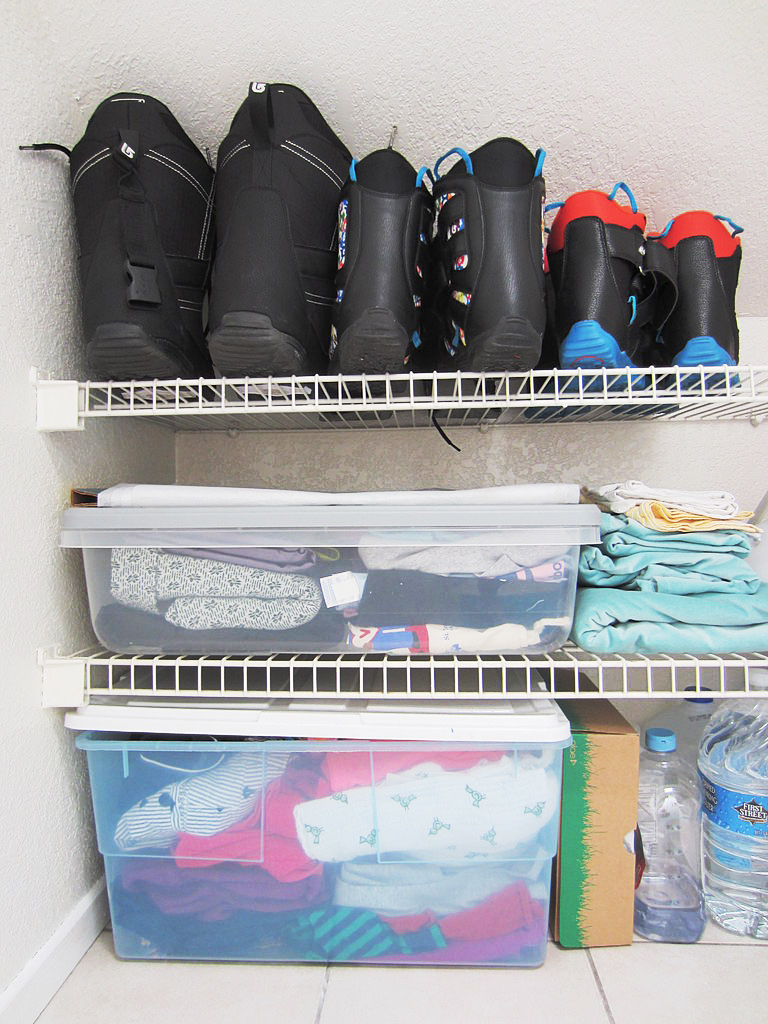
Welcome to my fabric corner.
This is my fabric corner. The upper shelves hold my larger stash of fabrics, so pieces that are a fat quarter size or larger. The lower shelves hold my iron on top, and my fabric scraps in the bins below.
Dirty little secret: I just tuck larger pieces in wherever I find room.
I’d love to tell you that I have my larger pieces organized in some kind of fancy way, but I really don’t. I just tuck them in wherever I find room.
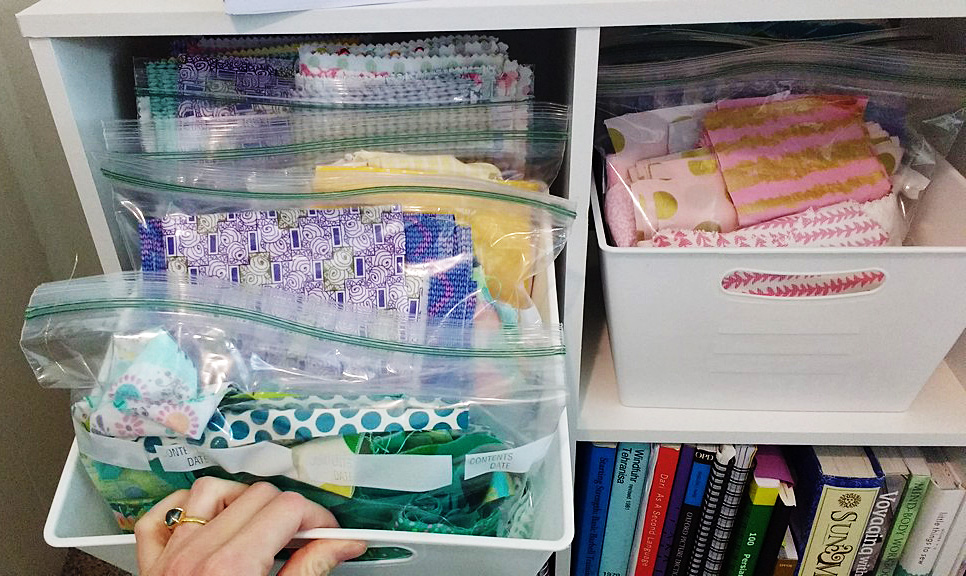
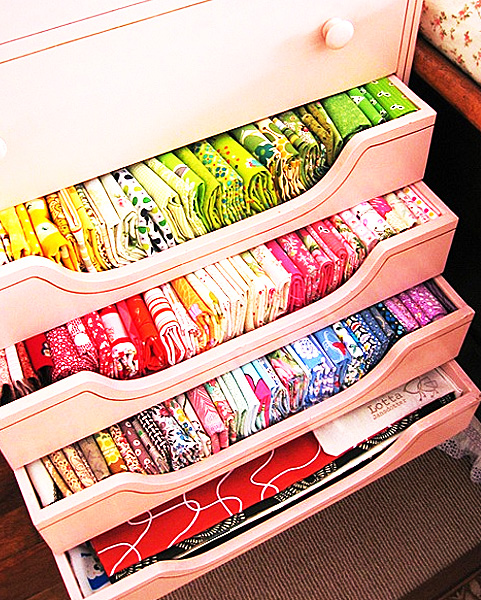
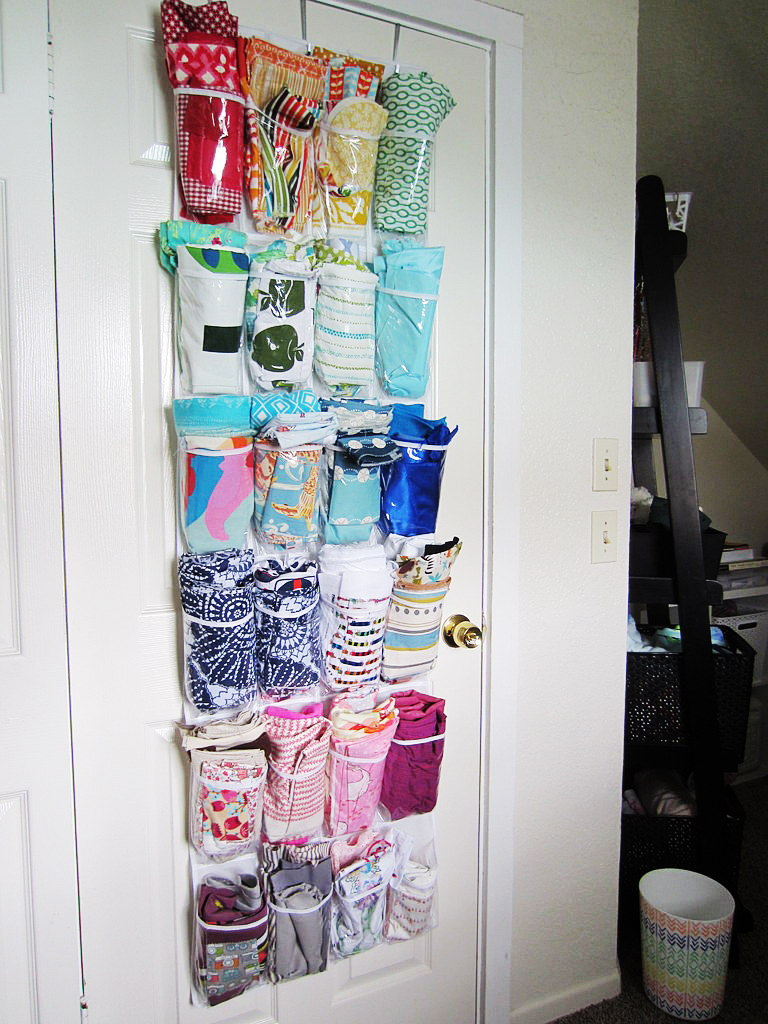
Behold! A place for everything & everything in its place.
Can you see how lovely the organization of these scraps is? The easy access and keeping them visible by my work space means I’m often including them in my daydreaming when it comes to new sewing projects.
Do you store your fabric scraps? If so, tell us where or how you do!
———————————————————————————– Charlotte Kaufman is a writer and sewist in Mammoth Lakes, California. She specializes in marine and home interiors and continues to fall more and more in love with quilting. You can follow her at charlottekaufman.com.
Sewing room organizing can be a constant battle. That’s because creative folks make lots of things, including what my dear calls “creative explosions.” I just call these big messes. You know what I mean: quilt trimmings & other scraps on the floor, piles of fabric or other supplies on the table, idea books scattered about, bins & boxes pulled out with their contents askew and similar messes.
I battled this kind of mess for years. But I seem to have finally developed the skill of keeping order in my creative room. For example, the days between Christmas and New Year have historically been sewing room organizing time for me. But last year after Christmas, I was surprised when I realized I didn’t have any sewing room organizing to do. In years past, I have worked busily making gifts, moving from one project to the next, and letting messes pile up around me until the holiday passed.
I can’t stand to do that anymore. Instead, I clean up thoroughly after every project, before moving to the next. Since learning to do this, and by vigilantly following a few other rules that I have discovered which help to ensure order, I have enjoyed my creative pursuits more than ever before. I think these sewing room organizing rules will help you, too, if you haven’t discovered them for yourself yet.
Whether you need to clean up after your own creative explosions or you want to prevent their occurrence in the first place, keep these rules in mind.
Sewing room organizing rule one: machines first
It might not sound like sewing room organizing, but the very first thing to do is to give all of your machines a thorough cleaning. This is the most important task in cleaning up messes in the sewing room.
If your floor is littered with threads and clippings, I guarantee your machines have similar build-up inside. And continuing to sew with a dirty machine will cause it to break! So get your chosen brush and sweep and clean every machine in your room really well.
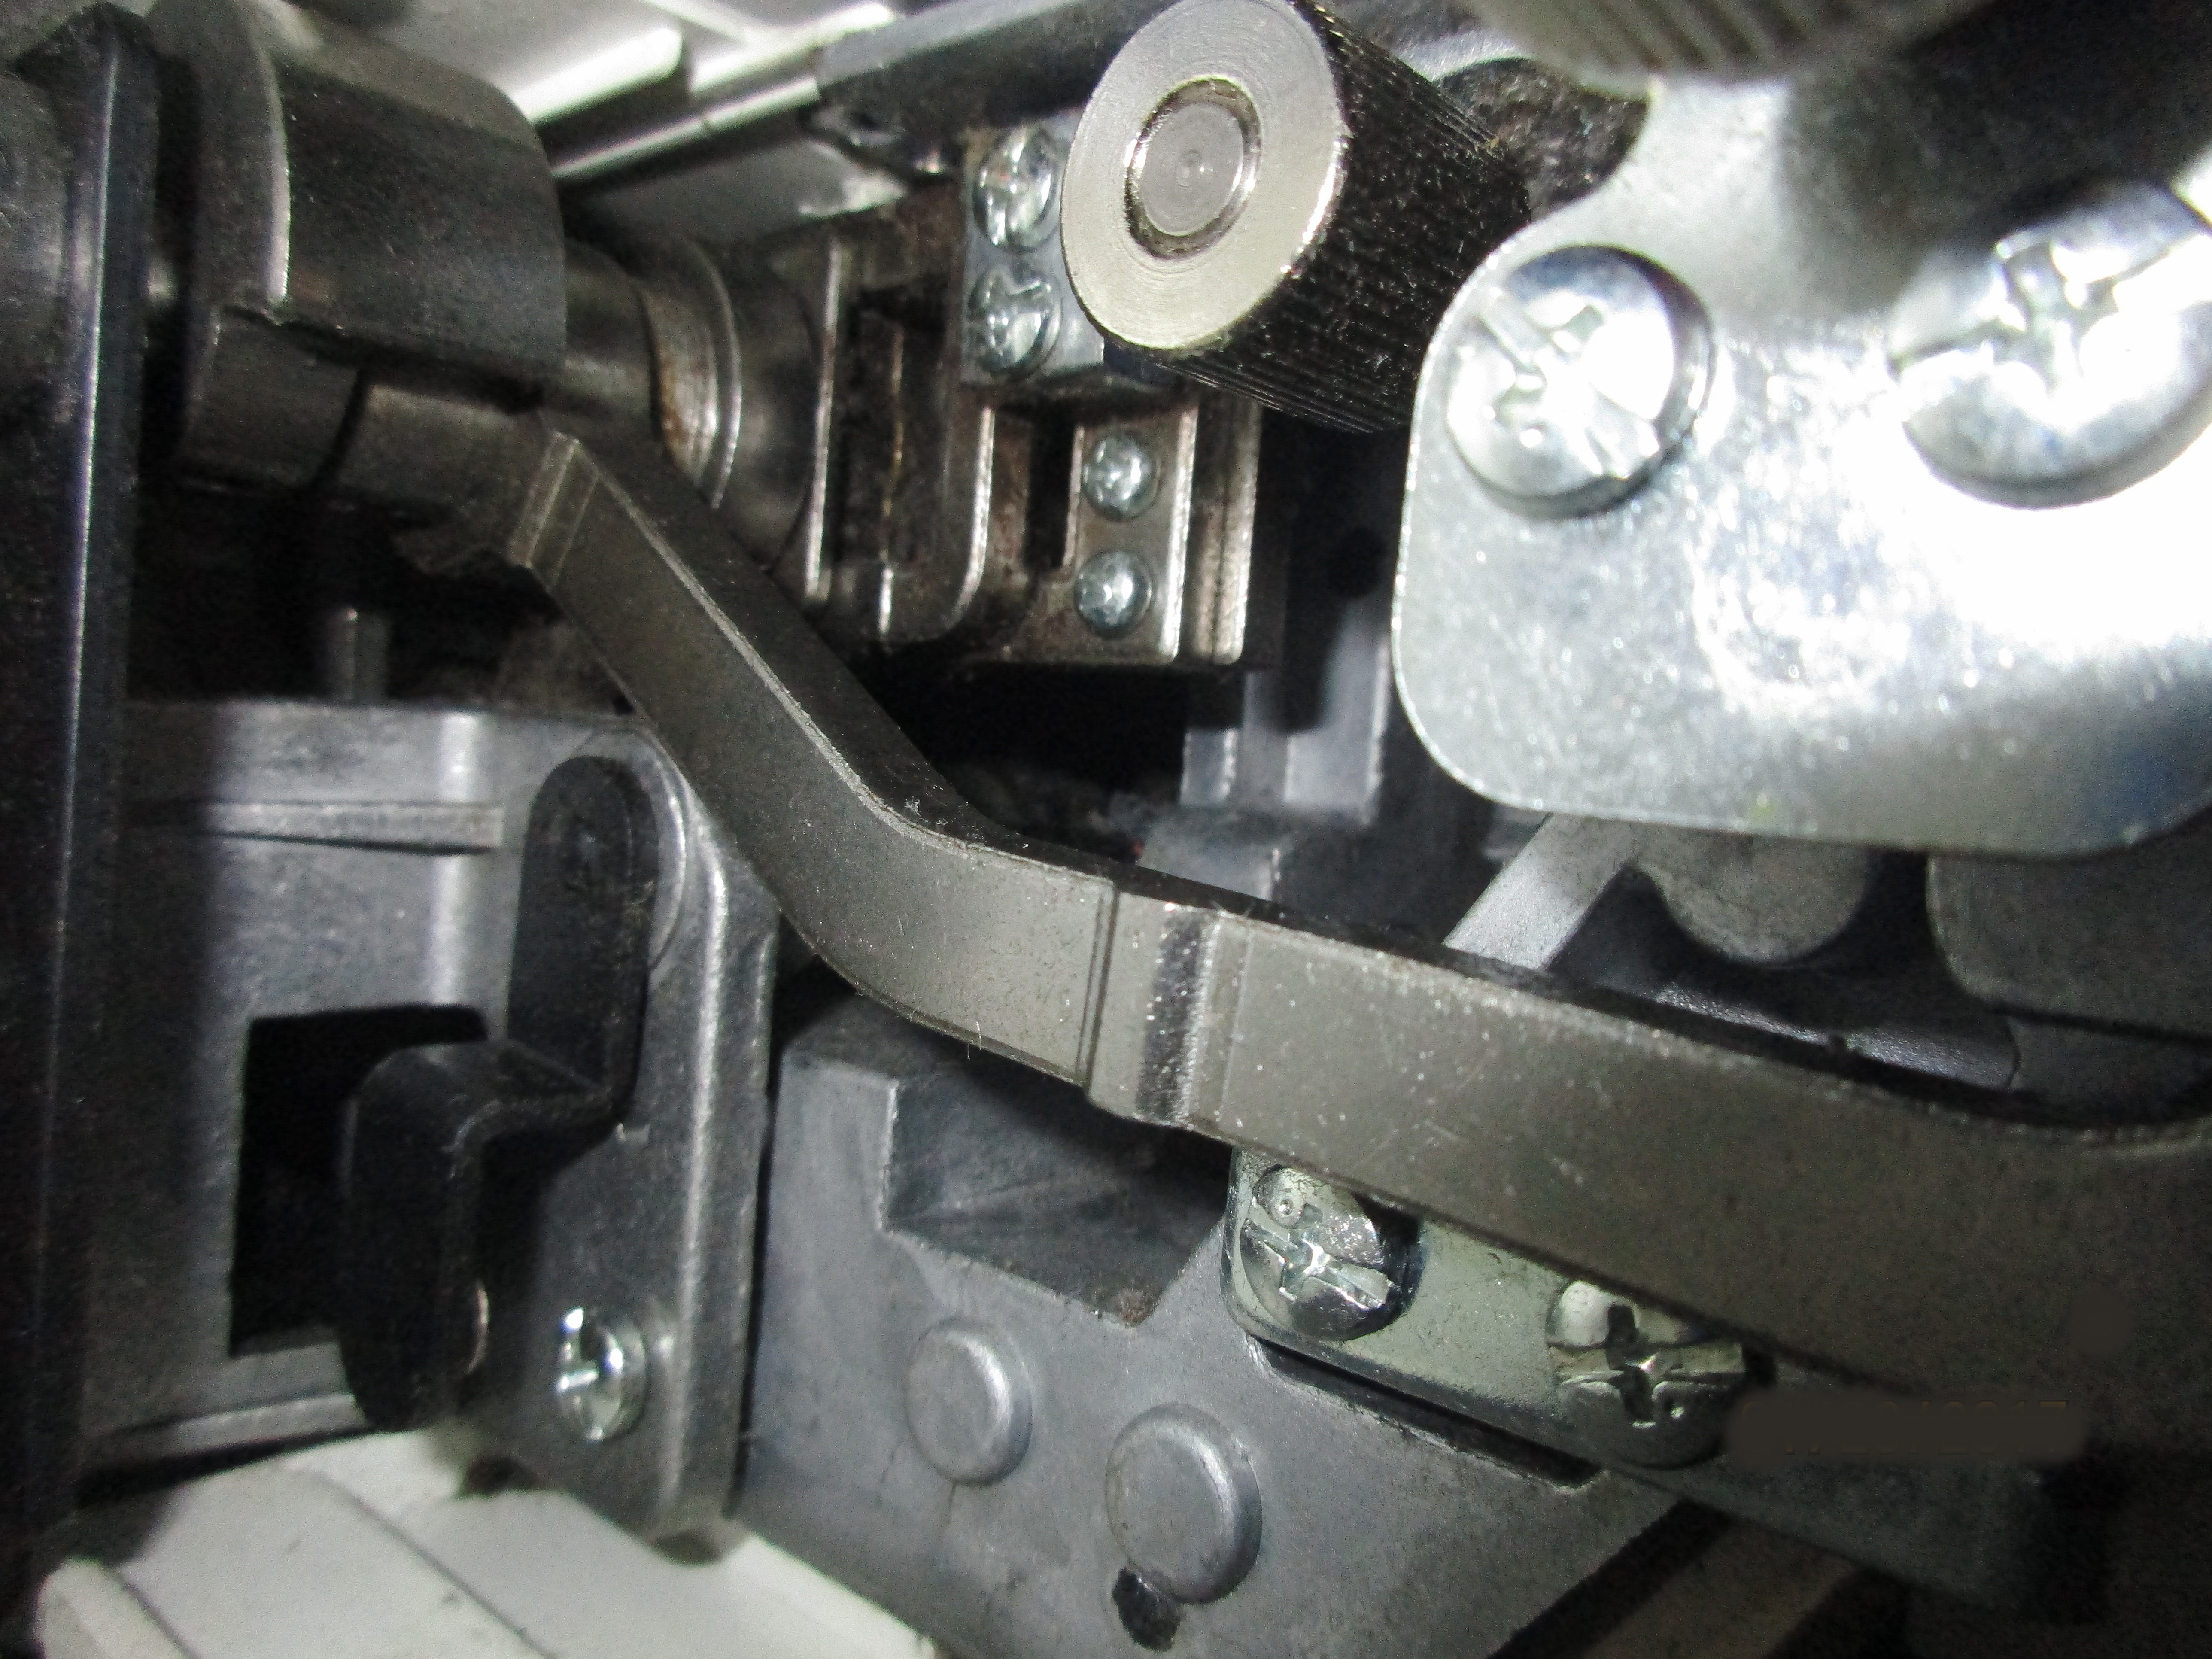
It’s easy to miss a spot.
Keeping machines clean
For sewing machines, remove the bobbin casings and take particular care in cleaning out inside and behind these. For sergers, sweep out every nook and cranny. When you think you’ve gotten it clean, sweep it out again. It’s easy to miss multiple spots. You can spend a lot of time sweeping out a serger repeatedly, and still not get it completely clean. Unless you have a magic tool, that is. The best thing you can buy to ensure a longer life for your machines is a tiny vacuum attachment to help get them really clean.
Always cover your machines to prevent unnecessary build up of dirt or dust when these are not in use. If your machine did not come with a hardcover, you can sew a pretty one yourself.
After cleaning, oil your mechanical-only machines according to their user manuals. Don’t oil your computerized or electronic machines at home; take them to Sewing Machines Plus or your local repair shop for yearly maintenance. Go ahead and take them in now so this will be done. If you cannot be without them right now, schedule this on your calendar to be handled as soon as possible. If you neglect your machine maintenance you will regret it. For future reference, a good plan to avoid being without your machines when you need them is to send them out for maintenance while you are on vacation.
Sewing room organizing rules 2 & 3:
Have ample workspaces
Keep them clear
After your machines, the most important things to consider in sewing room organizing are your workspaces. It is not possible to work efficiently without ample space. If you are using more than one machine, such as a sewing machine, a serger and a coverstitch or embroidery machine, you need enough space to have them all set up. You also need table space for cutting and layout.
It is best to have the largest table that will comfortably fit in your room in order to provide ample space for working. I have a kitchen table in my room that I keep clear for cutting, and separate desks for my machines. I reconfigure machine placement depending on the project, however. When I am working on a bed sized quilt, I place my machine on the big table, so it can support the quilt. Having multiple workstations enables flexibility.
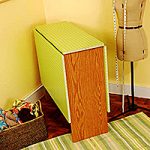
The Arrow Pixie cutting table doesn’t take up much space when folded compactly.
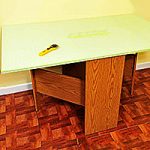
Keep tabletops clear.
If your sewing room lacks enough space to house such a large table, Sewing Machines Plus has an excellent option for you to consider. The Arrow Pixie cutting table doesn’t take up much space when folded compactly, but opens to provide table space for both cutting and sewing. It even has measurement guides and comes with a cutting board. It’s super cute, too.
Keep tables clear!
Ample work space will do you no good if they are covered with unfinished projects, supplies, or irrelevant items. My favorite rule for making sure that my creative space stays organized and is always ready for working is to keep all work spaces clear. I do not allow myself to store any items on top of my table top or desks, other than machines, of course. But because I reconfigure my machine placement according to what I am working on, I prefer to store most of them, covered, on shelves.
This way, you can keep your table and desks clean and shining, waiting for you to make something new whenever it suits you.
Other rules to remember
There are several other rules that have helped me to keep my sewing room neat and organized. Following these rules will help to keep your room working well for you, too.
You can’t organize clutter; keep unnecessary items out of your room.
Be creative with storage. For example, to maximize working space in my sewing room, I use an antique wardrobe and chest of drawers in the next room. The beauty of these storage pieces blends nicely with my family room décor. These happily hold my fabric, trims and notions, and other less often used items, such as my looms. Here are some DIY projects for creative storage solutions which will work inside the sewing room.
Keep like things together. Rather than storing tools all over the place, use a bin or other storage solution to keep these neatly together. The same goes for thread, notions, and etc.
Let the fabric live at the store. I am no longer tempted by fabric clearance sales and refuse to buy fabric to stash. I have learned that stashed fabric steals time, space, and money, so I do not buy any without a particular project in mind. Pretty quilter cottons are the only exception I make to this rule, as I know for sure that I will put these to use. Be a savvy shopper and take advantage of sales for stocking items you must have and will use. For example, I only buy white and neutral thread, and also cotton batting, when it is on sale.
Finish what you start. It is easy to get excited about new projects, but for keeping order, it is much more sensible to complete each project before starting another.
Do you have any other useful rules for keeping order in your sewing room? If you do, please add a comment and share it with us.
As I wind down in the steps for making my quilt, I’m finding that I have fabric scraps left over from the endeavor that I really don’t want to toss. One of the problems though is that I have a very lacking fabric storage setup. In fact, it consists of stuffing fabric into a remarkably unprofessional Hello Kitty pail (Note: I don’t even like Hello Kitty). Once that happens, I put the pail into my closet. Since said closet kind of overflows at times, the method is even more lacking than it would otherwise be.
I want to keep this fabric, but I’d like to have a better strategy of doing so. That idea had me browsing some possibilities online, and some of the options I saw were pretty basic.
Simple Solutions
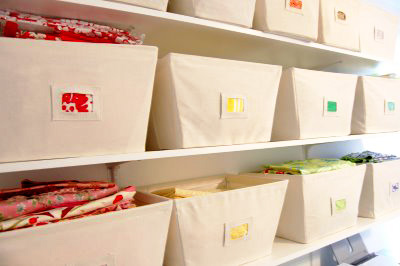
For instance, clear storage bins or canvas bins.
For instance, clear storage bins or canvas bins. While these are simple and efficient ideas for keeping my fabric in order, the truth of the matter is that they’re also, at the moment, things that would probably end up getting stashed away in my closet. As one of the qualms is that my fabric is stored in my closet, neither option fixes that detail.
At least, not alone. If I had a method of storing those bins out in the open, they’d work fine. In any event, the insufficiency could certainly lead to more searching in regard to the best (complete) fabric storage option.
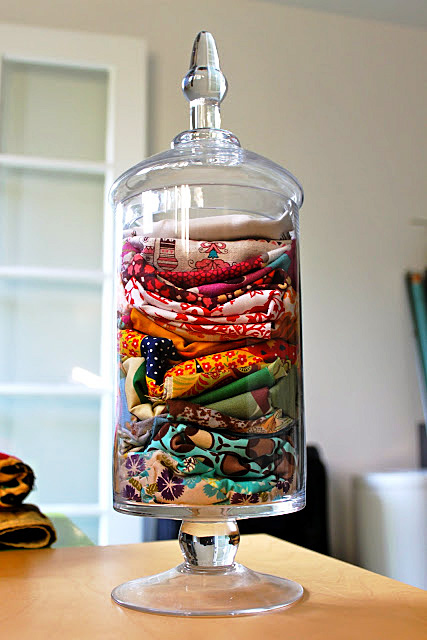
The most fitting right now is the notion of keeping excess fabric pieces in a jar.
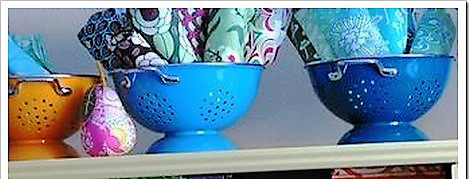
So during my search, did I have find the perfect one? That might be a complex question since I’m not sure there is a perfect one, but I did find some that are worth mentioning. The most fitting right now is the notion of keeping excess fabric pieces in a jar. I’m not sure I’d ever considered using my extra fabric in a way that actually makes it decorative even before I use it for a sewing project, but I like this concept. Most of the fabric that I have remaining is block-ish, and that smallness of leftovers seems spot-on for the store-in-a-jar method. All I’d have to do is get a jar, fold up my scraps nicely, and let the storage add accent to a room before the pieces potentially add accent to a future project. A similar idea is to store those scraps in kitchen bowls or strainers, like you can find here, or maybe a flower vase.
A similar idea is to store those scraps in kitchen bowls or strainers, like you can find here, or maybe a flower vase.
One is to take the drawers out of a dresser, & once the furniture has been treated so that it looks finished and ready, fabric can be stashed where the drawers used to be.
Two of the more intriguing fabric storage options I found might be more suitable for a time when/if I have more room and/or extra cash. One is to take the drawers out of a dresser, and once the furniture has been treated so that it looks finished and ready, fabric can be stashed where the drawers used to be.I adore this idea, but it’s a project itself! Be aware though that if you don’t want to go through all the sanding and painting to prepare the furniture, you could still use a dresser, drawers intact.
Be aware though that if you don’t want to go through all the sanding and painting to prepare the furniture, you could still use a dresser, drawers intact.
Another option is this square shelf idea that hangs on the wall. This one is particularly of interest if, like me, your bedroom, sewing room, etc. is already pretty full of furniture. When that’s the case, going upward seems like a reasonable option, and that’s exactly what this shelf would do! Being the nerd I am, this square setup appeals to me more than a different shelf idea might because it’s comic-book-ish, but that’s not to say that squares are the only possibility for this method. In fact, you might find that you have some kind of old furniture around your house that can be repurposed for this prospect — like a headboard. There might be plenty of possibilities if you spread your imagination to find them!
Another option is this square shelf idea that hangs on the wall.
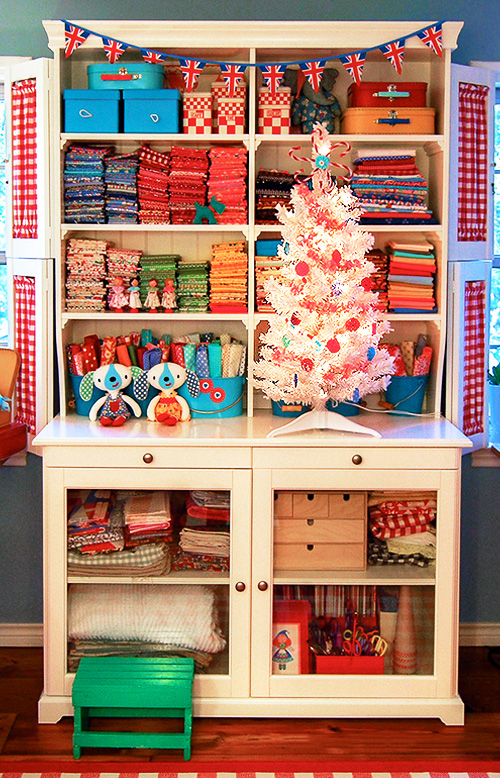
Another option is a lot simpler, but might cost more — and that’s to buy a piece of furniture that’s specifically for this purpose. This hutch, for instance, makes a wonderful and aesthetically pleasing storage area for fabric, and other than price and space, I wouldn’t hesitate to have one of these in my home.
This hutch makes a wonderful storage area for fabric, and other than price & space, I wouldn’t hesitate to have one of these in my home.
But as breathtaking as these furniture options are, the truth of the matter is that I’ll probably have to start with something easier and more money-friendly. Given that the majority of my current fabric collection is scraps and/or block-ish pieces, my best bet for advancement might be the jar or strainer method, which I’m okay with!
Still, someday, that hutch, that shelf, or that dresser would be a wonderful addition to my sewing life!
This is post one of a three part series on storing your fabric. Post two (how to store your works in progress) and post three (how to store your fabric scraps) are coming soon.
I keep my deep-storage and heirloom fabrics stored in a bin. Fabrics I’ll use soon are simply folded neatly awaiting their use.
How do you store your fabric stash? I have seen some of the most creative ways while perusing through Pinterest, everything from tucked in the drawers of a dresser, folded neatly on the top of a bunk bed, or deftly displayed in KITCHEN, yes kitchen, cabinets. Who needs to eat when you have beautiful fabric to sustain your soul anyway?
No matter which way you decide to organize your fabric, you will need to keep several things in mind.
My works in progress are kept in a tall bin and labeled so I know where to easily find them.
Store Covered
If you decide to store your fabric in bins, consider using plastic instead of paper, or file boxes, or baskets. Keeping your fabric covered will better protect it but consider using a plastic container with tiny holes (or creating tiny holes) to allow the fabric to breathe and to prevent synthetics from yellowing.
Tape a cedar block inside the container to help prevent moths and other insects from taking up residence.
Store away from sunlight to prevent fabric from fading.
My lovely stash. I do take the time to dust off the fabric about twice a month.
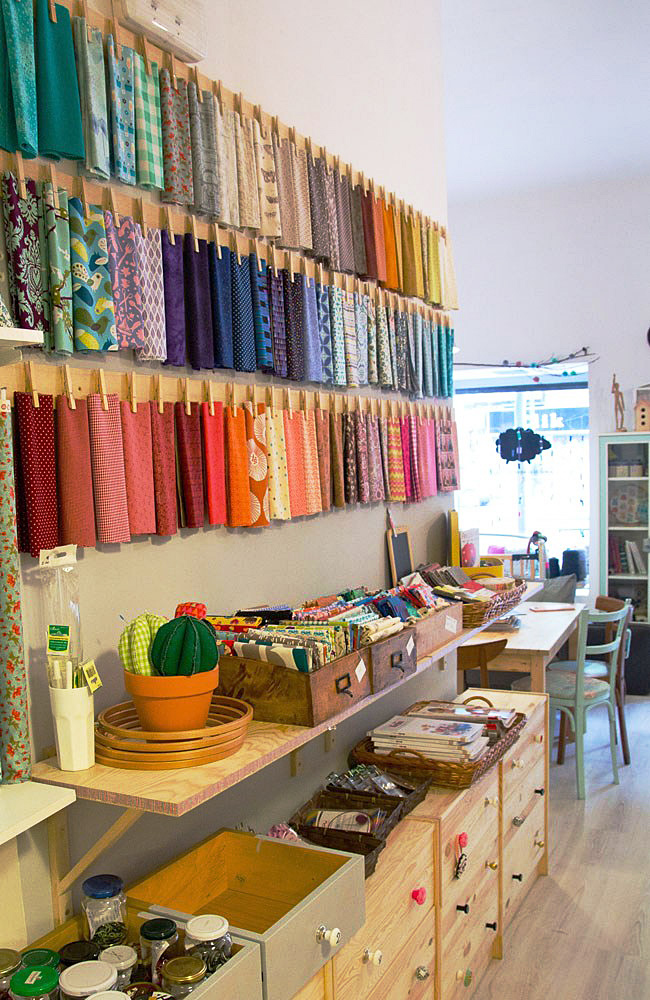
Display It
I love the quick access that openly displayed fabric offers. However make sure to keep fabric away from direct sunlight.
Dust! Your fabric will accumulate dust if displayed or left in the open. Keep it tidy with a frequent dusting or airing out.
Keep it clean – little children love to touch and play with fabric and even some adults can’t help but reach up and touch gorgeous fabric. Be aware of where you display your fabric and how frequently it may be handled by people whose fingers could leave it soiled.
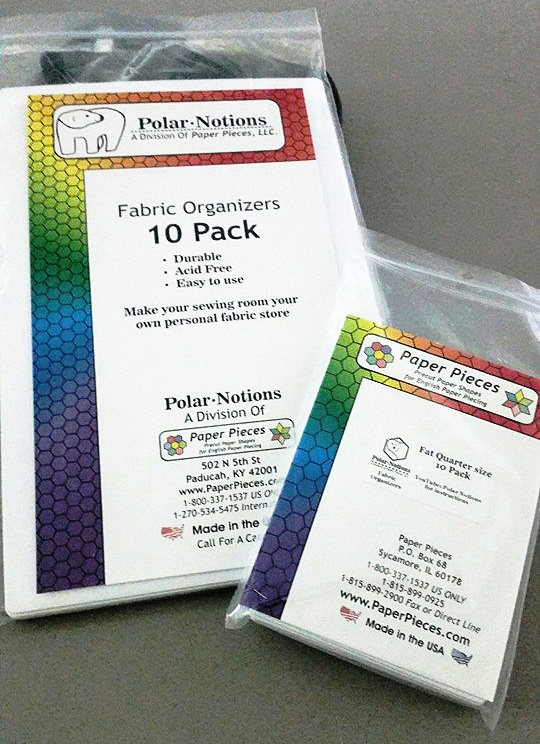
I just discovered these puppies and as soon as we move to our new home and I start working on my sewing room, I plan on ordering some to start wrapping and displaying my stash. Unlike fabric-store pieces of cardboard, these organizers are sturdy and acid-free. Storing fabric wrapped around cardboard will eventually discolor your fabric since cardboard is not acid-free.
The sad result of what happens when you use regular cardboard to organize your fabric.
I’ve found two brands that offer this acid-free option. Polar Notion’s boards are made from plastic and The Fabric Organizer’s boards are made from an acid-free corrugated cardboard. Both look fantastic.
Think about which product would suit your needs and your stash better.
The larger Polar Notion holds up to 15 yards of wrapped fabric and the smaller one is perfect for fat quarters and smaller pieces of fabric. The Fabric Organizer’s large size holds up to 10 yards. It is also cheaper than Polar Notions. Think about which product would suit your needs and your stash better.
Do you have a favorite method of storing your fabric? Let us know how you do it in the comments below.
Charlotte Kaufman is a writer and sewist in San Diego, California. She specializes in marine and home interiors and continues to fall more and more in love with quilting. You can follow her at charlottekaufman.com.
I don’t know about you, but I love to save time and room, especially when it comes to my sewing space. One of the best ways to save time when you are preparing or working on a sewing project is organization. I find it so much easier to move from one step to next when everything is not scattered all over the place. With that being said, I have a helpful organization tip about storing your pattern pieces.
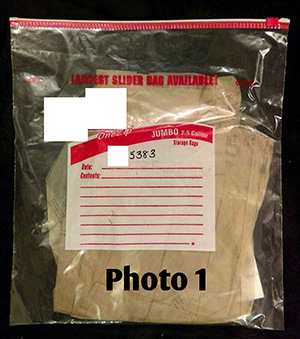
I prefer the slider bags, but the snap bags work just as well.
Have you ever opened your sewing pattern and taken out the beautiful folded paper pattern inside of it? Doesn’t look it look neat and tidy?! Well, have you tried to refold the paper pattern once it has been unfolded and put it back into that same pattern pack? Or even worse, have you tried to refold it once you have cut out the pattern pieces you need for project? Those of you who have successfully refolded your paper pattern and neatly placed it back into its package…well done!!! I think you are amazing magicians with wonderful refolding powers.
Sadly, for the rest of us (me included), it is a painful and tedious task (say that three times fast) to get the paper back into the pack. However, I have a found a solution that works great. All you need are permanent markers and plastic storage or freezer bags. I prefer the slider bags (see photo 1), but the snap bags work just as well. For one of my patterns, I used a 2.5-gallon jumbo slider bag because the pattern pieces were very large. You can adjust the size of your storage or freezer bag based on the size of your pattern pieces.
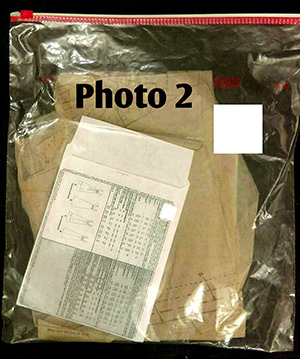
Place the pattern package in the bag with the paper pattern pieces (photo 2) in order to keep them all together.
There are two ways that you can store your pattern pieces. The first way is to only cut out the pieces from the paper pattern that you will use for your sewing project. Then with remaining pattern paper, you can simply fold it to make it smaller and put it into the storage or freezer bag without having to make the shape precise in order to fit into the bag. The second way is to cut out all of the pieces found on the paper pattern and store them in the slider or snap plastic bag. The second way will also save you cutting time later should you decide to use the additional pattern pieces from the same sewing pattern for a future project. I also like to place the pattern package in the bag with the paper pattern pieces (photo 2) in order to keep them all together, especially because the pattern package contains fabric measurements and finished garment measurements that you may need to refer to in order to prepare for your sewing project.
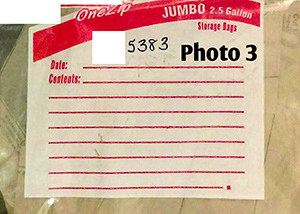
Once you have your paper pattern and package in the bag, I would suggest using a permanent marker to label the bag with the corresponding pattern number (photo 3).
Use a permanent marker to label the bag with the corresponding pattern number.
Side note:If the paper pattern pieces do not have the pattern number printed on it, mark the number on the pieces themselves so you will know to which pattern package and bag they belong. Write the number in a place on the pattern pieces that does not interfere with the pattern markings.
The bonus of using the storage or freezer bag is that it also provides you with space to make notes right on the bag. If you have, for example, a fabric idea or found an easier way to put the pattern together why you were sewing, you can simply put a note or reminder on the bag without having to mark all over the pattern or the pattern package. So there you have it…a simple and inexpensive way to organize your paper pieces without all that refolding hassle. Sewing is fun so do not let refolding and refitting take the joy away from you.