Fabric Inspiration Autumn

Fabric Inspiration Autumn

September is almost over. I always say, “When the kids go back to school, it is almost Christmas!” Time just flies the last quarter of the year. Holiday planning starts now! It is time to design and find fabric for our holiday projects for our homes and thoughtful gifts for others during the last months of 2017.

Autumn is a second spring when every leaf is a flower. - Albert Camus

Autumn is a second spring when every leaf is a flower.
– Albert Camus

Personally, the earlier I order fabric for holiday projects, the more I enjoy doing them. Holiday sewing is a great way to show your creative side and the options are so many. Fond memories of handmade things are always fun. Someday all the decorations at my house will be hand made.

Fall brings cooler weather, sweaters, handmade comfy scarves and jackets and an occasional whiff of burning wood from neighboring houses (hopefully my own).

I love fall. I love warm, dark colors and a soft quilt or blanket to cuddle up in while watching those great football games. Especially if I can sit in the stadium! Cool weather and cinnamon colors beckons me to sew cozy things! How about you?

Today, I am offering inspiration for you to follow my passion for fabric. Its great news!! Trust me!

SewingMachinesPlus.com has begun providing fabric online and in their brick and mortar store in California. If you haven’t yet looked on their website, you need to!

Let’s get going!

First visit www.sewingmachinesplus.com & on the Search Bar at the top, enter “fabric”. You can also visit the fabric page here.

Since I enjoy shopping for sewing, my desire is to fly to California and visit this mega-store in person, to see their highly rated products and experience their friendly employees and customer service, but for now, I want to preview a few things with you that I really like! Hopefully, you will be inspired to place an order for sewing products for your stash or to get a head start on the season of giving!

The first fabric I saw, and promptly ordered was:

Stonehenge Gradations Chips – The color is Bright Iron Ore. A quality fabric made by Northcutt and has colorations like stone.
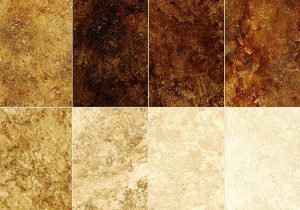
A beautiful package of (forty two) 10 x 10 inch precut squares in Browns, Golds, Cream and gradient neutral colors which look like different pieces of colored stone.

A beautiful package of (forty two) 10 x 10 inch precut squares in Browns, Golds, Cream and gradient neutral colors which look like different pieces of colored stone.

A beautiful package of (forty two) 10 x 10 inch precut squares in Browns, Golds, Cream and gradient neutral colors which look like different pieces of colored stone. This was a perfect choice for me as I have designed our new home in neutral browns, cream and beiges. This reminds of of swirling marble or granite and a harmonious accent to neutral décor.

I am thinking about a table runner or napkins for our dining room table right in time for autumn dinner guests or anytime of the year paired with the appropriate colors for that season.

Burgundy shades with the creams for late winter events.

Burgundy shades with the creams for late winter events.

Or pair with the same brand in Burgundy shades with the creams for late winter events. Drumroll! Picture please!

There are (forty two) five inch squares in this package. I suggest perhaps 2 or more packages depending on the size of the project. Look for the Brights- Amethyst and Lagoon Colors as well. Fabuloso!! Rich looking colors!

Precuts are done in different sizes by the manufacturer and sometimes the shop and work great in many applications. Since they are already cut, it helps considerably when putting together projects.

For a larger taste of these pre- cuts that can go together in perfect harmony, go ahead and visit the website. Take note of all the various cuts that are available in other fabric designs. Pick the ones you love! Ask the experts about yardage on the ones you really like (I have to ask that question myself). And then, comment on my blog and tell me what appeals to you. Make the project and send us a picture. We would love to see what you make!

I’m going full circle for a while. I have ordered the fabric, started designing and will hopefully share with you what turns out to be a great addition to my handmade collection! Dream, design, shop and create!

Having a creative life is: sew good!!

Speaking of tastes, I just received a call from my husband *who is upstairs organizing his man cave*. It’s the usual question at 5:00 p.m Friday night, i.e. what’s for dinner!

Take care dears. See you again soon!

Happy Spring! The Joy of Warmer Weather and Beautiful Flowers

Happy Spring! The Joy of Warmer Weather and Beautiful Flowers

Hi! Good to see you again!

Hi! Good to see you again!

Today, I wanted to share what I have been doing these days. It know it has been awhile since I wrote, however, I have been away from my favorite past time for other “pressing matters” (i.e. ironing hubby’s shirts, not quilt squares) and other important tasks!

Scrappy leftovers

I have an enormous collection of scraps in my sewing studio. Since I have been reorganizing in preparation to move our home, I have to make a strong effort to release some things I have collected to make packing a little easier. Well, packing is never easy, but psychologically, it forces you to consider the value of all the things you think you absolutely needed to have, right? And also, without saying, it alerts you to some of the things you want to make this hobby more efficient. No wonder it takes forever to pack and with sewing, I always think if I throw it away, I will want it later. Tough decisions, aren’t they?

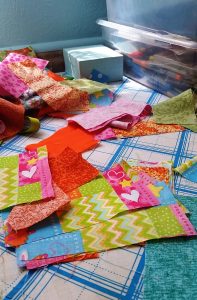
So, I started with a pile of disorganized scraps, which I have previously cut for something else, some time ago. I don’t even remember what I had in mind at the time, but I need to throw them away or use them. This is just part of the large amount of fabric and bright colors I have to work with.

This is just part of the large amount of fabric & bright colors I have to work with.

This is just part of the large amount of fabric & bright colors I have to work with.

Improv isn’t only for comedians

Recently, I have been learning about “improvisational” sewing. It is interesting to me because I like doing things that are unique to my creativity. However, it takes you out of your comfort zone. The experts say, it reveals your creative side by working with no specific pattern, no color guidelines, no measurements, just picking up random pieces of fabric, basically scraps, and sewing them together without a pattern. It reminds me of the dreaded “improvisational” speeches required in college speech classes.

I know there are many patterns and helpful information about quilting that give exact instructions and even kits that you can complete. So, this is an adventure to test your creativity for sure.

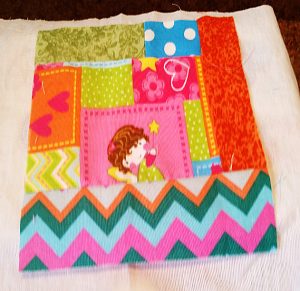
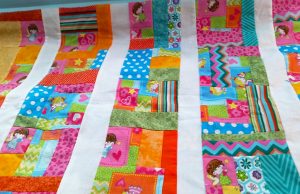
So, now I have my scraps and the easiest way to explain how this came together is: I took a medium sized scrap, and added to others to make an approximate square about 7 x 6 inches. I didn’t measure at all, just found several squares which had in this case, a little girl with a magic wand. I used the “fairy girl” as my focal fabric.

It was not too difficult because the pattern of the fabric was already woven like patchwork.

It was not too difficult because the pattern of the fabric was already woven like patchwork.

It was not too difficult because the pattern of the fabric was already woven like patchwork.

So, I just added like-colored fabric to make an extension of the pattern. No true measurements, pieces were just trimmed to fit inside the square, and the princess would appear somewhere on each one. I used the square as a template and compared the rest to the template, and then trimmed them to be the same size as close as possible. NOW… Comes my favorite friend in the WORLD while quilting! My IRON! And I need a NEW ONE at that (please refer to great wishlist choices from SewingMachinesPlus.com).

Finishing touches

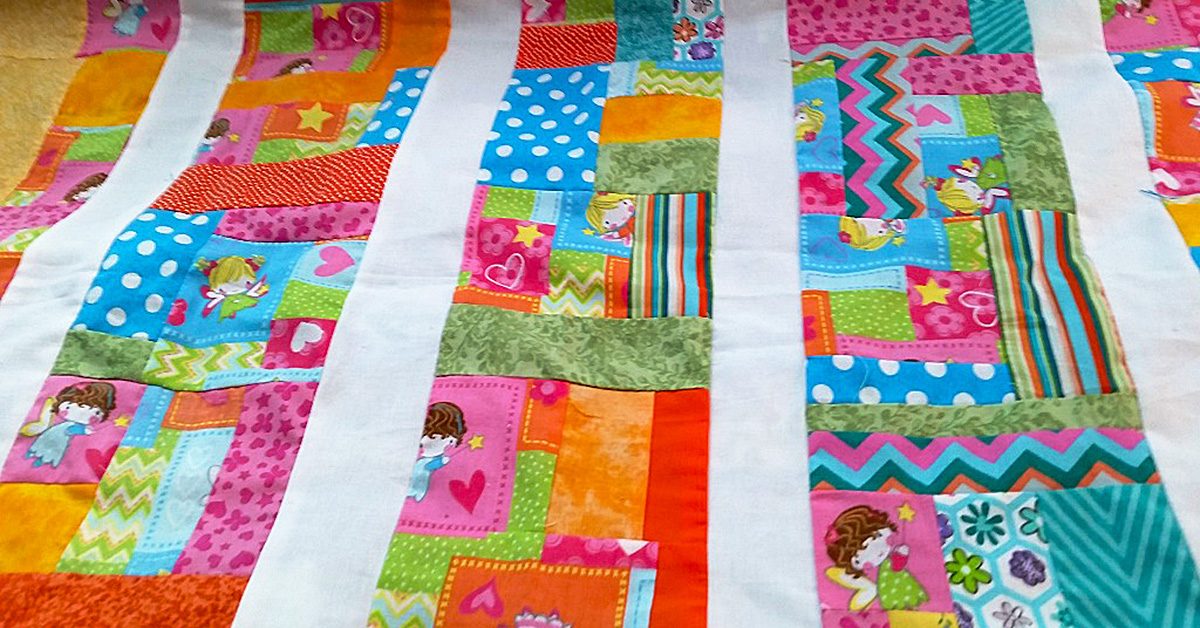
So finally, I was feeling pretty good about how my unplanned, off the top of my head, quilt top was coming along. So I sewed the pieces together in 5 rows and 5 squares each. Then added white jelly roll strips between each row of 5. I had to trim it only a little to make it a true measurement all around.

“Improvise” a cheerful quilt or smaller project & smell the beauty of your creation this spring.

“Improvise” a cheerful quilt or smaller project & smell the beauty of your creation this spring.

I still need to finish the border, batting and binding, but here’s what it looks like now. It was really fun to do, because I didn’t know how it would turn out. I should say I learned that I need solid color between busy patterns to give a quilt top a cohesive, unified look so each quilt patch is recognizable from the next. Do you mix plain fabric among many different prints?

I think you would enjoy this truly personal form of expression with fabric.

“Improvise” a cheerful quilt or smaller project and smell the beauty of your creation this spring.

Better yet, know that even without a plan, or a pattern, you can turn scraps into something as personal as you are! Then, please reply to this blog with pictures. I would love to see them. Until next time, when I will tell you about how I am repurposing handmade flannel wash clothes into a sweet little blanket and stitched without a seam. Carpe diem!

Scrap-Fabric Keychain!

Scrap-Fabric Keychain!

If there’s one thing I’m interested in regarding sewing, it’s finding new ways to use my leftover fabric. In fact, if you’ve been keeping up with my posts (I won’t hate you forever because you haven’t! Honest!), it’s a concept that’s been explored already. But I still have fabric at my disposal, so the idea of how to use those pieces continues as a subject worth looking into.

So, for today’s post, I’m going to give you yet another way to use your leftover fabric — even if that leftover fabric is fairly small! Need proof? The project I’ll use for an example was made out of ONE fabric block that was less than ten inches in either direction. Sound good? Then let’s dive into this project, which for the record, is a keychain!

What you’ll need:

  • One fabric block. The size varies depending on what shape you want to make your keychain — and what size you want your keychain to be — but you don’t need anything over 10″ x 10″. Also, remember that flimsy fabric might not keep your keychain shape too well, so try something that’s sturdy — maybe even felt.
  • Key ring. It isn’t really a keychain if you can’t hang a key on it!
  • Sewing essentials like needle, thread, and straight pins, as usual!

What you’ll do:

Step One:  Choose your fabric, keeping in mind the guidelines about size and texture. You should also note that your shapes for your keychain will only be so big, so you should consider that size. If your final goal is a one-inch shape, for instance, you should pick a fabric that’ll look good when cut down to that size. I changed my fabric choice on this detail because with my initial decision, I would’ve potentially had part of a flower, a whole lot of plain color, or scattered bits that didn’t really look that fantastic to me. It might be something you want to consider as well!

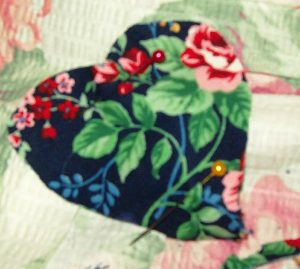
I changed my fabric choice on this detail because with my initial decision, I would’ve potentially had part of a flower, a whole lot of plain color, or scattered bits that didn’t really look that fantastic to me.

I changed my fabric choice on this detail because with my initial decision, I would’ve potentially had part of a flower, a whole lot of plain color, or scattered bits that didn’t really look that fantastic to me.

Also, decide what shape you want your keychain to be. For me, I went with a heart because it was simple and traditional, but there are plenty of other options. Once you know your shape, you can create a stencil, or use an existing stencil, to make sure your fabric is going to be cut in the right way.

Cut it out

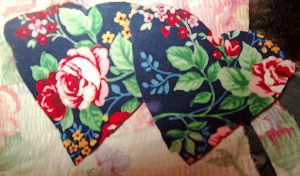
Step Two: Cut out your shapes! This was a perk to choosing a heart because you can make one by only cutting one side of the heart, as many of us might have learned in childhood. I don’t need to cut both sides if I fold the fabric in half, and I ended up only having to make that folded cut once for both sides of my keychain by folding the fabric into fourths. That way, with one swooping I-want-a-heart-shape cut, I got two bits of fabric that admittedly needed a bit of tailoring, but were good starting places for my heart.

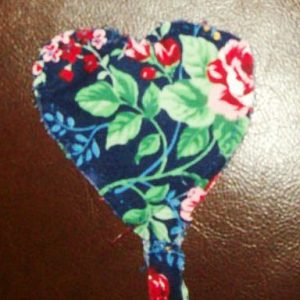
With 1 swooping I-want-a-heart-shape cut, I got 2 bits of fabric that admittedly needed a bit of tailoring, but were good starting places for my heart.

With 1 swooping I-want-a-heart-shape cut, I got 2 bits of fabric that admittedly needed a bit of tailoring, but were good starting places for my heart.

Whether you find a simple method to make both pieces at once or use a stencil, cut two shapes out of the block of fabric — one for the keychain’s front side and one for the back. Make sure they’re even enough so that too much excess material doesn’t show on either side and that you’ve accomplished cutting the shape you wanted — or at least one you can live with! Also, remember to cut a line of fabric that is a couple of inches long and wide enough to suit your purpose (maybe ¼”). This will be your loop to put the keyring through. NOTE: These numbers can vary depending on what size you want your keychain to be!

Step Three: Once your shapes are cut and trimmed, it’s time to start planning your sewing. Even though this is a small project, it could still pay to have straight pins keeping your work in place, so you might want to break out a couple! Be sure before you pin or sew that your main fabric pieces are together with their patterned sides facing outward, and don’t forget to fold that additional line of fabric and place the tips of both ends between the two shapes.

Be sure before you pin or sew that your main fabric pieces are together with their patterned sides facing outward.

Be sure before you pin or sew that your main fabric pieces are together with their patterned sides facing outward.

Put a ring on it

You might think about going ahead and adding your keyring here as well so that you don’t have to put your fabric through the stress of being twisted through the keyring. To do that, you’d just need to loop the line of fabric through the ring before you pin it between the shaped fabric pieces for sewing.

Step Four: Sew! Since this is a keychain, the process won’t take long! And be sure to cut off the excess thread when you finish!

Sew! Since this is a keychain, the process won’t take long!

Sew! Since this is a keychain, the process won’t take long!

Step Five: Hang a key on it and enjoy!

Blending Interests with Hobbies

Last time, I wrote about the art bug biting, and I’d like to continue with that theme this week. Why? Because when he does bite, it’s relevant to uncover what form of the virus you were infected with, and any particular interest you can bring into that hobby or artistic area.

Everyone isn’t involved with every artistic pursuit just because he or she was bitten by said art bug. Whereas one person might be a wonderful painter, another might excel at photography. One person who is awesome at sketching might be terrible at music, while a musician might not be able to draw a believable landscape. For this post, I’ll refer to this as the Artistic Division of Labor, or ADOL. Sound good? Okay!

ADOL can be driven by skill, in that someone might simply have a talent for a specific division. Maybe someone has been good at sculpting since his or her Play-Doh years, and that skill has grown in the years that followed. If such is the case, it wouldn’t be too surprising to find that said person was well-known among family and friends for that ability.

In other situations, eventual interest might lead to artistic pursuits, and that interest might be something a person has to explore to define. If that doesn’t make sense, hang on! I’m about to give you a real-world example—from my own life!

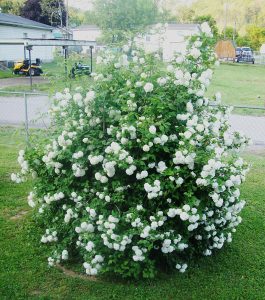
The inspirational snowball bush. So many flowers!

The inspirational snowball bush. So many flowers!

I remember picking flowers when I was younger, though they were admittedly mostly (if not completely) wildflowers. As far as actual gardening goes, one or two of the adults close to me at the time had some kind of flowers planted in a more deliberate fashion than renegade weeds springing up. Even now, my mom has this snowball bush in her front yard, which is flower-ish enough to make this post, and pretty enough when it’s in-bloom to catch my interest. Either way—whether wild or chosen—flowers were a part of my childhood, and I decided I was going to try my hand at flower gardening not too long ago. I got flowers from a store, planted them, watered them, and let them grow. And they were doing okay!

But I eventually realized I wasn’t interested enough in the gardening prospect to tend to it as much as a garden should ideally be cared for. Honestly, I don’t know that I watered the flowers at all after that initial amount, and there was little to no chance I was going to trim weeds away from them. At some point, I was told the weeds around them were moving—something that could be bad when you live in territory that has copperheads and rattlesnakes—so goodbye, flowers.

So far, what this situation amounts to is that I had a childhood interest that became an artsy pursuit I actually had the ability to see through, but didn’t have the focus to continue. The result of this predicament might seem simple: I could just give up on my flower-interest and try other ideas for artistic endeavors. The trouble though is that I still like flowers, even if I don’t have the desire to keep a garden healthy and catered to.

A possible solution then would be more along the lines of what I said earlier in this post. I could explore the topic to see if there was any flower-related ADOL that could hold my interest.

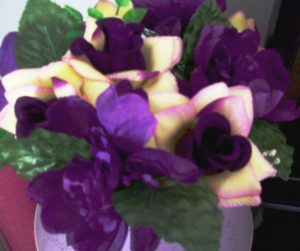
As I said in last week’s post, I tried my hand at floral arranging, and that was a fairly decent win for me. Overall, it was an ADOL I was kind of okay at, and one that could hold my interest enough to keep me involved with it. The idea has led into constructing floral arrangements for display outside of the house, as well as around-the-house projects that catch my eye. For instance, a broken down lamp could potentially use a little prettying up!

Is that a busted lamp? Or a new vase...

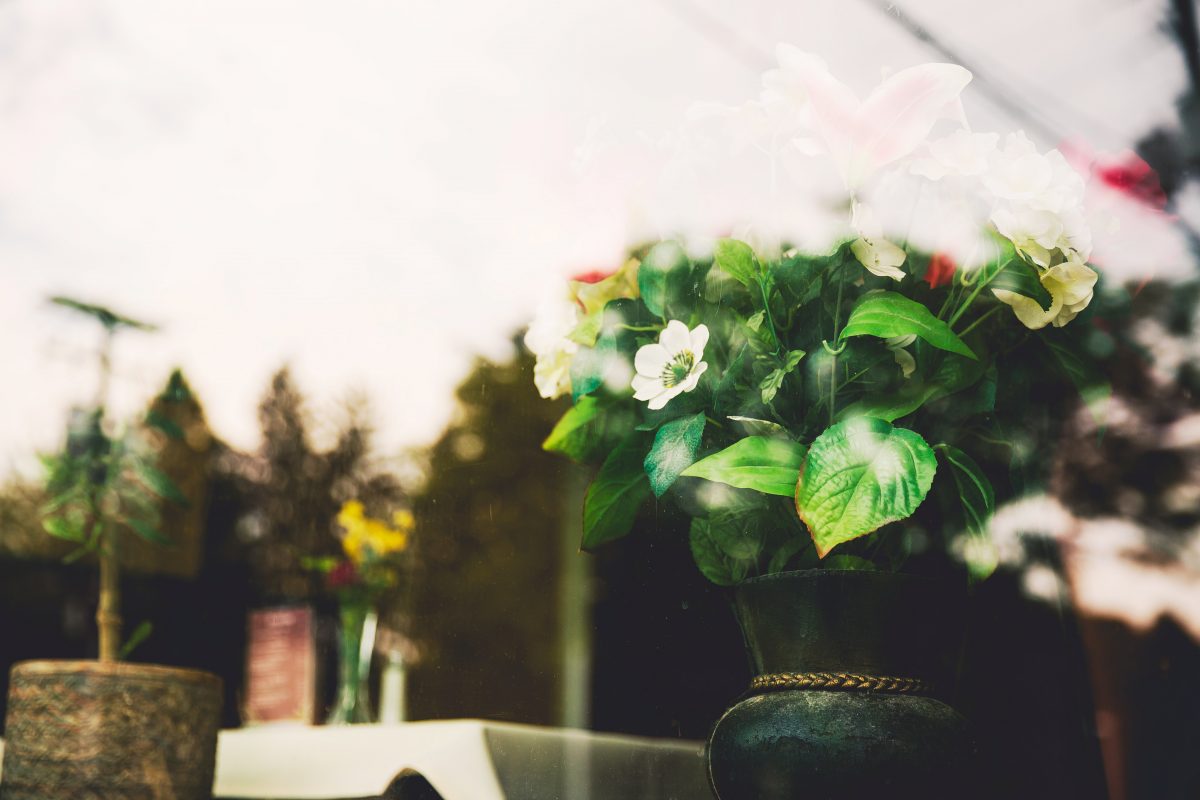
Is that a busted lamp? Or a new vase…

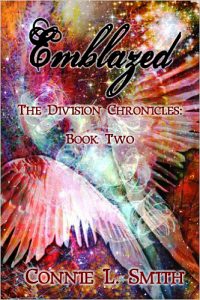
But that’s a pretty specific category, and if flowers are a particular interest of mine, that idea could surface in an ADOL that isn’t specifically built around floral arrangements and gardening. And they have! In fact, flowers have become a part of two of my primary ADOL pursuits: writing, and sewing/quilting. With writing, more than one set of lyrics I’ve written has incorporated flower and/or garden themes, including a song that a character of mine sings to his girl in Emblazed.

More than one set of lyrics I’ve written has incorporated flower and/or garden themes.

More than one set of lyrics I’ve written has incorporated flower and/or garden themes.

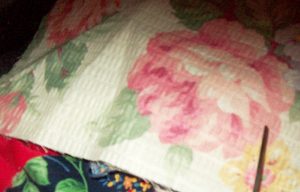
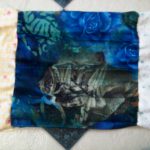
More importantly for this blog, floral options are available in sewing/quilting patterns, and of course there’s a number of fabrics that a person can buy with floral designs—which is okay with me! In fact, my current quilting project has had a floral arrangement design to it, in that every piece that’s been sewn on it so far has been a pattern that has some form of floral quality to it. The overall design, when all is said and done, will be floral-related from top to bottom (minus a potential border and back-overlap).

My current quilting project has had a floral arrangement design to it.

My current quilting project has had a floral arrangement design to it.

All in all, I may not have had the focus or interest to keep a flower garden going, but the world of art is so vast that there are plenty of ADOLs out there to try, and enough room to explore within each to come up with ways to utilize interests that maybe weren’t committed enough to make into their own hobbies.

Bottom line: If you’ve been bitten by the art bug, explore to find your ADOLs, and you can find ways to bring your interests into those ADOLs — even if they seem more fitting for another. For the flower-admirer who doesn’t garden, paint pictures! Make floral quilts! Do floral arrangements! Sculpt a flower! There are options to blend your interests into your art, if you look for them!