Shibori Techniques, Tips, and Projects

Shibori Tie-Dye Techniques, DIY Tips, and Projects

What is Shibori?

Bound resist dye methods, which we know as tie-dye, have been around almost as long as civilization itself. Many cultures have contributed techniques to this ancient craft. Perhaps none have contributed as widely as the Japanese, who began developing their methods, known as shibori, as early as the 8th century.

Shibori Tie-Dye Techniques, DIY Tips, and Projects

Shibori Techniques

"<yoastmark

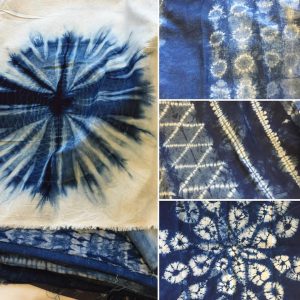
Shibori traditionally uses natural dyes, most often indigo. Dyers pleat, sew, tie, bind, or even wrap the fabric around a pole. Let’s look at these different methods now:

Arashi

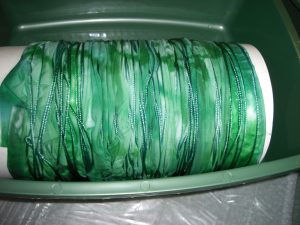
With the arashi method of shibori, dyers wind a long and narrow piece of kimono cloth diagonally around a pole, then scrunch the fabric tightly together and bind with thread. This method produces a pattern reminiscent of rain, hence the name, which means “storm.”

Arashi shibori

Arashi shibori made with wide pvc pipe in place of a pole

Itajime

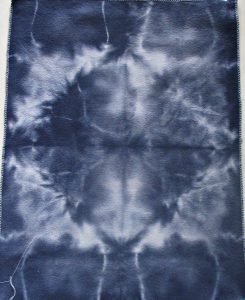
For itajime, or shape-resist, shibori, the cloth is first folded, then pressed between blocks of wood and secured with clamps or ties. The wood resists the dye and leaves a repeating pattern on the finished cloth. Shapes can be simple, such as square or rectangular blocks, triangular, or more elaborate, with wood shapes cut into various free form designs.

Kanoko

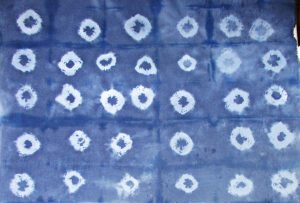
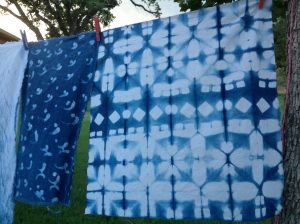
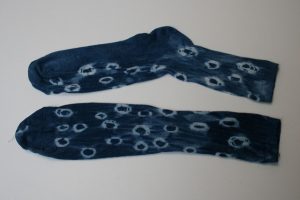
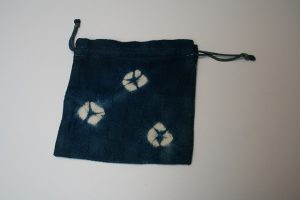
If you’ve ever tie-dyed before, you’ve likely practiced kanoko shibori methods without even knowing it. These are the familiar tied designs such as bull’s eyes and repeating circular or other motifs. Dyers make these designs by tying off sections of fabric, often including pebbles, popcorn kernels, coins, or other found objects repeatedly or randomly throughout the fabric.

Kumo

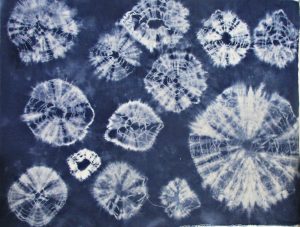
Kumo shibori is a pleated and bound method that creates spiderlike veining and circular designs. Dyers pull the fabric into peaks, twist or pleat, then bind with thread. Kumo designs may be any size, with small, repeating, all-over patterns or just one large kumo to cover an entire piece.

Shibori Tie-Dye Techniques, DIY Tips and Projects

Kumo shibori

Miura

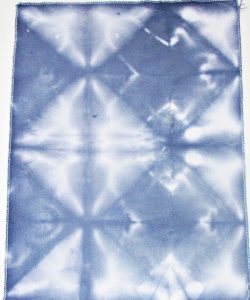
In miura shibori, the thread is not tied at all. Rather, thread is simply wrapped, usually twice, with thread. Tension holds the entire piece together. Because this method is easier and can be accomplished with the help of machinery, it was perhaps the most historically used method for producing shibori designs. This method most often uses hooks to draw up tiny sections of fabric, which are individually wrapped.
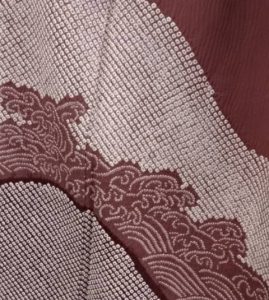
Kimono, from the collection of Gentry Klossing, with finely detailed miura and nui shiboro

Kimono, from the collection of Gentry Klossing, with finely detailed miura (the diamonds) and nui (the waves) shiboro

Nui

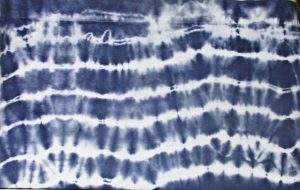
Nui shibori uses stitching, either by hand or machine, rather than tying, to create designs.  From simple running stitches which gather and pleat, to flowers or other intricately stitched designs, nui shibori runs the gamut from super easy to unbelievably complex.

DIY Shibori Tips

shibori agistadler

photo courtesy of AgiStadler, Flickr

Shibori traditionally uses natural dyes, especially indigo. Jacquard makes an easy-to-use, pre-reduced, indigo dying kit, for a great price, too.  If you go this route, use a 5-gallon or larger bucket or plastic bin with a lid. Set this up and plan to dye outside for the sake of mess management. This dye kit will color a lot of fabric and will last 5 days when covered, so you can plan to spread the project over several days.

Or use any hot-water dye

You can also use synthetic dyes to achieve a shibori look, but be sure to use the kind prepared with a hot water dye bath. Natural dyes are immersion dyes, and so any synthetic dye you use should be this kind, too. Don’t use the popular squirt-to-apply types of dyes for your shibori projects.

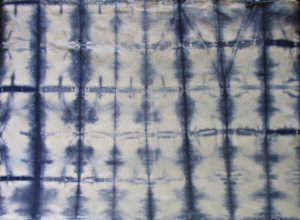
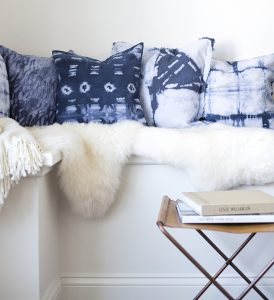
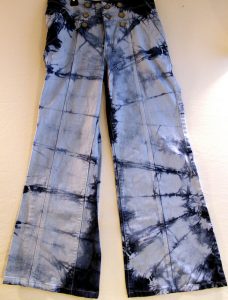
I used a synthetic denim blue color dye bath in my stainless steel kitchen sink to achieve a softer blue for my batch of shibori pictured in this post. To get a darker and more authentic indigo color, you can mix denim and navy. Sarah Gibson from Room for Tuesday suggests mixing one bottle of Rit denim with half a bottle of Rit navy. Her pillows dyed in this bath look great!

Pillow project at Room for Tuesday

Pillow project at Room for Tuesday

Important DIY tips:

  • Wear gloves! Otherwise you’ll likely find it impossible to get the blue/black dye off your hands and, especially, fingernails. Besides being unsightly, this is not good because dyes are toxic chemicals which you’d rather not absorb into your system!
  • Take your time preparing the fabric. And have all fabric fully prepared for the dye bath BEFORE you start to prepare it. I rushed when tying the beans to make my kanoko circles and made a mess with my grid design! Take your time, do not hurry.
  • Rinse items individually until the water runs completely clear, then untie. If you don’t rinse completely before removing ties, your designs will turn out less crisp.

Easy shibori projects

Shibori is fun and you will enjoy it most if you start with simple techniques. Kanoko, Kumo, and Itajime are particularly beginner-friendly methods to use. You can shibori dye any item of white or off-white natural fiber fabric, such as cotton. You can even dye synthetic fabrics, as long as you choose a dye formulated for synthetics. I noticed Rit makes these now.

You can easily dye T-shirts, skirts, pillows and pillowcases, socks, scarves, and small fabric pieces in your kitchen sink. Sheets, curtain panels, and fabric yardage are easy to dye, too, though you may want to use a tub larger than your sink for these.

shibori altnoun shibori lisa dusseault shibori lisadusseault

I’m planning to use the fat quarters and long strips that I dyed today to make either a patchwork skirt and a top or a dress. I might make that project a tutorial for another post soon.

Have fun!

Shibori is fun, with near endless choices to explore. Unwrapping your dyed and rinsed shibori pieces to see the finished designs is as exciting as opening a real gift. Play with dye and have fun with it!

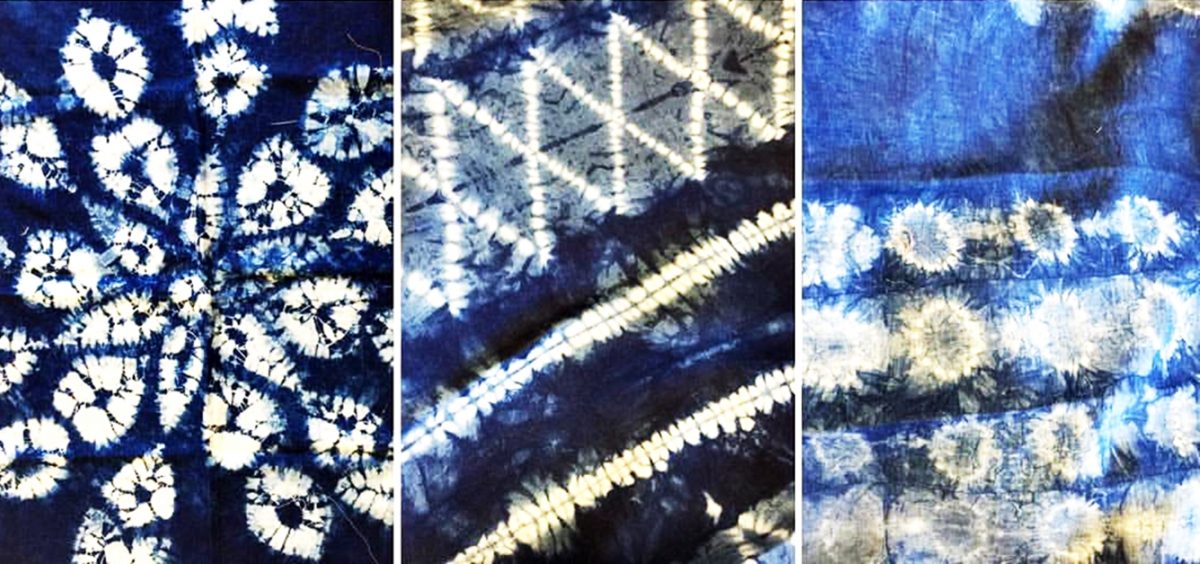
Flickr images licensed under the Creative Commons license.
Tutorial: More Kinchaku Japanese Drawstring Bags

Tutorial: More Kinchaku Japanese Drawstring Bags

We made lotus shaped kinchaku drawstring bags here on the blog a couple of weeks ago. I told you then that there are other ways to make kinchaku, too. So let’s look at these now.

Kinchaku are purse or lunch sized drawstring pouches. They were traditionally made with chirimen, which are kimono fabrics. They are most often made with a round or square bottom.And they are and were extremely popular with ladies in Japan, both now and in history.

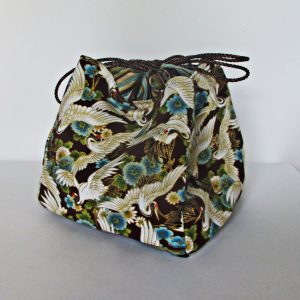
I didn’t have any chirimen fabric, but I did have a piece of Robert Kaufman Tranquility fabric with a crane motif and hints of gold shimmer.

kinchaku tutorial

Square kinchaku, fabric by Robert Kaufman

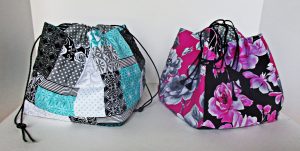
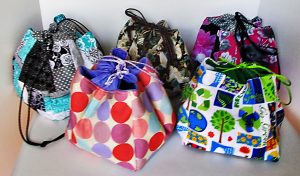
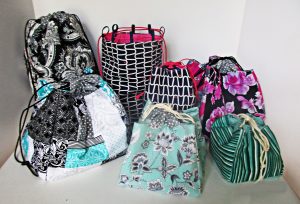
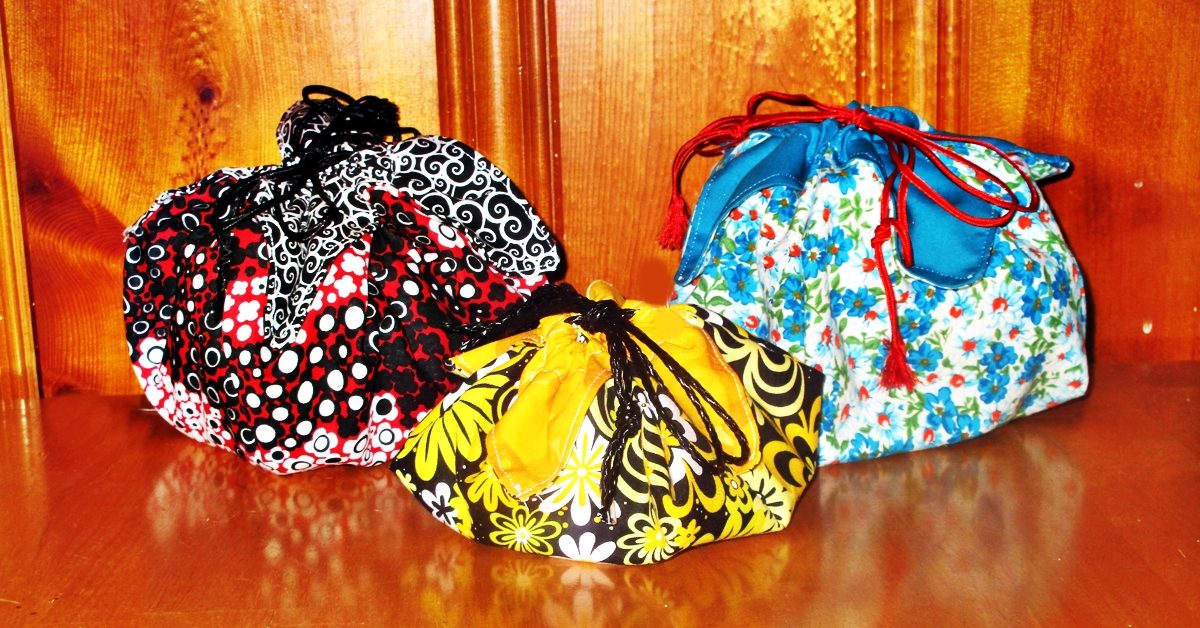
I started with this Japanese inspired print, and then I made these in all sorts of other prints, too.

kinchaku Japanese bag tutorial by Millie Green

These are reversible, by the way, when you make them the way I’m showing you.

How to sew kinchaku

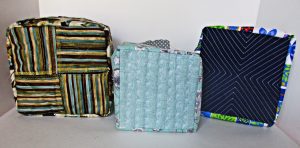
You can make your kinchaku with a square  or a round bottom.

Kinchaku tutorial by Millie Green

Small kinchaku made from five and six-inch squares

You can make them any size that you like.  Use three or four inch squares and add pockets inside to make a small pouch for carrying jewelry. Or use eight or nine inch squares to make a large purse. I think seven and a half inch squares are the perfect size for lunch bags.

I made one that’s ten inches all around, but once you make these that large or bigger, then they become komebukuro. We’ll save those for another post.

Make them sturdy

You will want to prepare your fabric squares before sewing these together in order to create a nice sturdy bag. You have choices here, and I recommend you make your choice based on the wise old principle of using what you have.

Prepare your squares using any combination of:

  • Batting and backing
  • Fusible fleece
  • Midweight interfacing
  • Heavyweight interfacing
  • Felt
  • Canvas
  • Duck
  • Denim

I like to use fusible fleece on five of the squares and midweight interfacing or sturdy duck or denim for the other five. Felt works nicely in place of fusible fleece.

For canvas, felt, or anything other than fusible type interfacing, you can baste the sturdier fabric to the back of a lighter weight cotton if you are using this for your outer fabric. To baste, just sew these together with a scant 1/8” inch allowance all around.

Or make a miniature “quilt sandwich” by layering your outer fabric over a layer of wadding (batting) and a backing square. Then quilt these together. You can have fun with this and do some fancy or decorative quilting. Or you can keep it simple.

Kinchaku tutorial by Millie Green

I had some fun quilting on the outer base square for these kinchaku.

You can add pockets to some or all of the lining squares, too. Do this now, after you interface the pieces and before you sew them together.

Of course you should feel free to construct your fabric pieces by patchwork. Simple four-patch works nicely here, or use your imagination and go wild.

large kinchaku

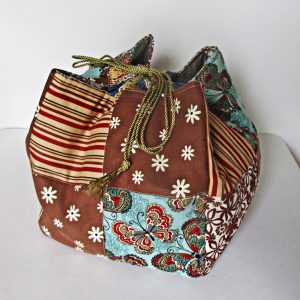
Ten inch square bags (made here from four- patched five-and-a-half inch squares) are a great size for a project bag for knitting or other take-along crafts.

To make square kinchaku

Kinchaku sewing tutorial

You will need five squares of outer fabric and five lining fabric squares, prepared (as discussed above).

For the exterior, I like to use a contrasting square, possibly of the lining fabric, for the bottom piece. In this case, I cut four of the outer fabric and six of the lining.

Take the bottom piece, and sew the other four pieces to the four sides of this bottom square,right sides together,  starting and stopping a seam allowance width from the edges.

Then, sew these four squares to each other, creating the side seams. Now use your fingers and eyes to check and make sure there are no openings in these seams. Fix this now if you missed any spaces.  You can turn it right sides out and look at it now if you want. Then repeat with the remaining five squares.

Skip to the next section to finish your square kinchaku.

To make round kinchaku

Round kinchaku tutorial

You need two circles for the outer and lining bottoms, and a piece of each fabric that is as tall as you’d like your round kinchaku to be by the circumference of your circle, plus seam allowance. You can use a compass or trace a dish or other round object to make your circles.

Prepare your fabrics as discussed above. Then, simply sew the other piece right sides together around the circle and then sew the side seam. It’s easy to sew the circle, just go slowly and carefully guide your fabric to keep your seam allowance uniform.

You can clip little slits in the seam allowance all around if you like, but if your seam allowance is narrow you won’t need to clip much if at all. Check the bottom and side seam with your eyes and fingers to make sure everything is connected and you didn’t accidentally miss a spot. It is easy to fix these mistakes now. Turn right sides out, if you like. Then repeat for the lining piece and base.

To make the drawstring casing

For either square or round kinchaku, you have options in constructing your drawstring casing.

You can make tabs from matching or contrasting fabric, grosgrain or other ribbon, or bias binding. You can make several evenly spaced  tabs or just choose one wide tab centered on each of the four sides.

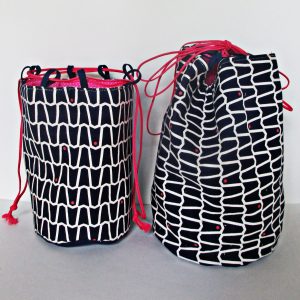
I like to use contrasting fabric. To make the tabs like I have done for most of the kinchaku pictured here, cut four same sized rectangles. Cut them between three and four inches wide by a length that is anywhere between one-third and five-sixths of the width of your squares. Turn and press a narrow hem on all the short sides, then sew these down. Now fold along the long edge, and center it along the top edge of one of the squares with the raw edges of the folded rectangle aligned with the raw edges of the square. Baste down with a one-eighth inch seam allowance. Repeat for the other three tabs.

You could do the same thing with shorter squares rather than rectangles and space two or three tabs along each square. If you use narrow bias binding, cord, or ribbon, you will want to use more tabs.

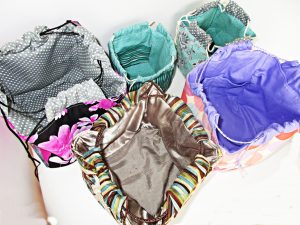
You can use contrasting fabric, even satin for the lining, and add pockets if you choose.

You can use contrasting fabric, even satin for the lining, and add pockets if you choose.

To finish your kinchaku

Place the inside and outside bag pieces right sides together, with the casing or tabs sandwiched between the two layers. Sew together, leaving an opening big enough to turn. Turn right sides out. Pull the tabs and push the lining down into the bag.

Sew the opening closed and continue top-stitching all the way around the top of the bag. Pull down on the lining and straighten the top seam as you sew.

Now thread a cord or ribbon through all tabs and tie the ends together. Then thread another cord of the same length starting and ending on the opposite side of where you started and ended the first cord. Tie the second drawstring and your bag is complete. You can tie the cords in a bow or use them as handles to carry your bag.

These are addictive

kinchaku tutorial

I can’t stop making these bags! They go together so quickly and are so cute and sturdy; sewing them is addictive. That’s good because these will make great gifts. Try this quick easy project and I bet you can’t make just one either.

Happy sewing!

Easy, Easier, Easiest Ways to Sew Baby Blankets

Easy, Easier, and Easiest Ways to Sew Baby Blankets

My favorite ways to sew baby blankets

Every baby needs blankets and these make wonderful gifts. There are lots of ways to sew baby blankets, but after making dozens over the years, both for my own babies and for gifts, I have settled on three basic ways that I prefer to make them. These three types of blankets are each useful in their own way, and any new parent will appreciate any one or all of these styles.

Baby quilts are easy to make!

If you ever wanted to get into quilting, a baby quilt is a great place to start. Because baby quilts are small, you won’t have to wrestle with these on a regular sewing machine, as you might for a larger quilt. Start with a simple pattern which uses just squares or rectangles if this will be your first quilt.

Easy,Easier,and Easiest Ways to Sew Baby Blankets

This tiny baby quilt is wrinkled to high heaven because baby outgrew it years ago and I pulled it from a box to show you!

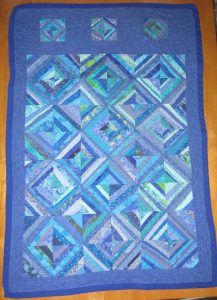
You can choose a quilt with many small pieces if you have plenty of time to finish the quilt before baby’s arrival. I made this blue strip pieced crib quilt while I was waiting for my youngest baby’s birth. This quilt is 100% easy, but it is not the speediest of quilt projects.

Easy, Easier, and Easiest Ways to Sew Baby Blankets

See link for tutorial for this quilt.

Bigger blocks make quicker quilts

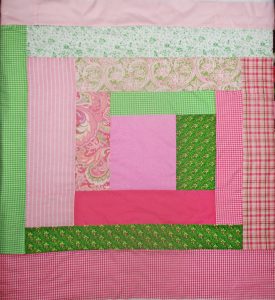
If you’d like to make a baby quilt in a hurry, choose a design with fewer and larger blocks.  For a great example of a quick and easy baby quilt, check out Jera Brandvig’s Log Cabin baby quilt at Quilting in the Rain. Her project includes instructions for quilting as-you-go, and this is a particularly speedy method of quilt construction.

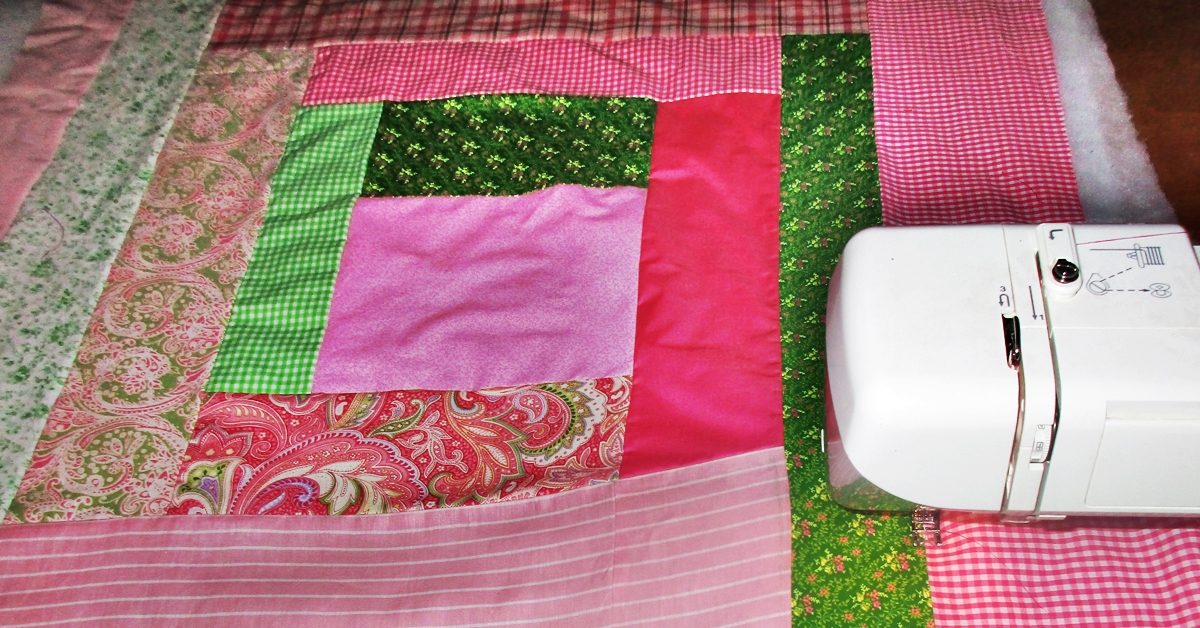
I used Jera’s idea for making one large log cabin rectangle to piece a baby quilt top this morning in about an hour. I didn’t use the quilt as-you-go method on this, however; I’m quilting it all at once using free motion quilting.

This one will be an oversized baby quilt with a super soft flannel backing. The larger size means she won’t outgrow it as fast and can enjoy it into childhood, too.

baby log cabin 1

With large pieces and no precise cutting or corners, this large baby quilt top came together really quickly.

Here’s more from me on making quick quilts. Baby quilts are easy, and if you want to make one, you should. Please don’t be afraid of making quilts, it’s fun!

Easy, Easier, and Easiest Ways to Sew Baby Blankets

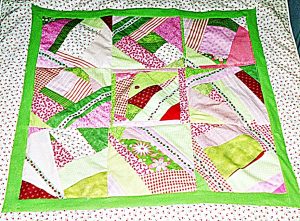
Crazy patchwork in large blocks makes an easy baby quilt, too.

An even easier way to sew baby blankets

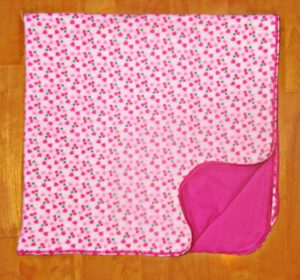
If you don’t have the time or trouble to spare for making a baby quilt, you can sew a soft and sweet reversible baby blanket in a fraction of the time it would take to make even a simple quilt.

Easy, Easier, Easiest Ways to Sew Baby Blankets

To do this, you need two same sized pieces of fabric. One yard square is a nice size, or you can make it larger, perhaps to fit a crib mattress (27″ x 52″, plus a few inches on all sides to hang over the sides). You will want at least one of these to be a soft flannel. I prefer to use flannel for both sides, but they are nice when made with quilter’s cotton on one side and flannel on the other, too.

Feel free to applique or embroider the front of one of the fabrics before assembly. This looks really sweet in the bottom corner.

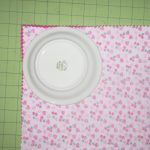
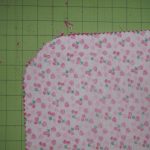
Cut the two fabrics to match and place them right sides together.  Then, using a dessert plate or saucer as a guide, curve the corners.

Easy, Easier, Easiest Ways to Sew Baby Blankets Easy, Easier, Easiest Ways to Sew Baby Blankets

Sew the two pieces together all the way around, except for an opening to turn. Turn right sides out and press. Then set your machine to make a wide, short zigzag stitch. I set mine with to a width of 5.0 and a length of 0.5. Zigzag around the edges of the blanket, about 1/8” from the edge. Be patient; stitching like this takes a lot longer than straight stitching does, so it will take quite a few minutes to go all the way around.

Or use binding instead

Another easy way to make this kind of double sided blanket is to layer the two fabrics wrong sides together and use bias binding all around to join them together.

I give these reversible blankets to every baby I know. Their mothers have often told me that these wind up being baby’s favorite blanket. My own boys liked these double sided flannel blankets so much that I made them to fit their beds.

Using a serger is the quickest and easiest way to sew baby blankets

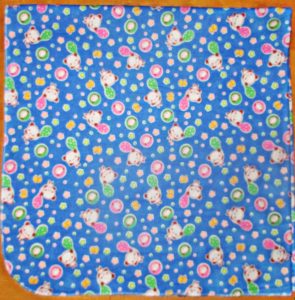
Parents of babies who like to be swaddled will need lots of single layer receiving blankets. These are also nice to have in warmer weather and for on-the-go. I always kept at least one in the diaper bag and one in the car. They couldn’t be easier to make and take less than ten minutes, including cutting and pressing time.

Easiest Baby Blanket

Folded in fourths here to show the corner curve. These will fold down really small to fit in your diaper bag or even the glove box.

Simply cut one piece of flannel to your desired size (one yard square is my favorite size), curve the corners, and serge all around. I set my serger to its narrowest width overlock stitch.

If you are not comfortable serging around curves, then skip the curving of the corners. To do this, just serge four straight sides, burying the end of each chain under the beginning of the stitches on the next side. Then use a tapestry needle to bury the last thread chain under your previous serging.

If you don’t have a serger yet, this is one of many reasons you will want one. Here’s my recommendation for which one to buy.

It’s easy to sew baby blankets

You can sew a quick baby quilt, a soft double-sided blanket, and a single-layer receiving blanket (or several) all in the same day. These little projects are so satisfying that I bet, like me, you’ll want to sew some for every baby you know.

Happy sewing!

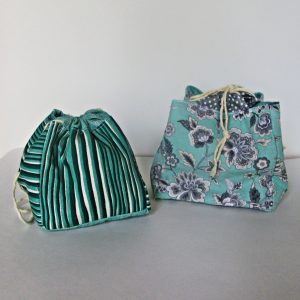
Lotus drawstring pouch make great gift bags.

Lotus Drawstring Pouch Gift Bags and Purse Tutorial

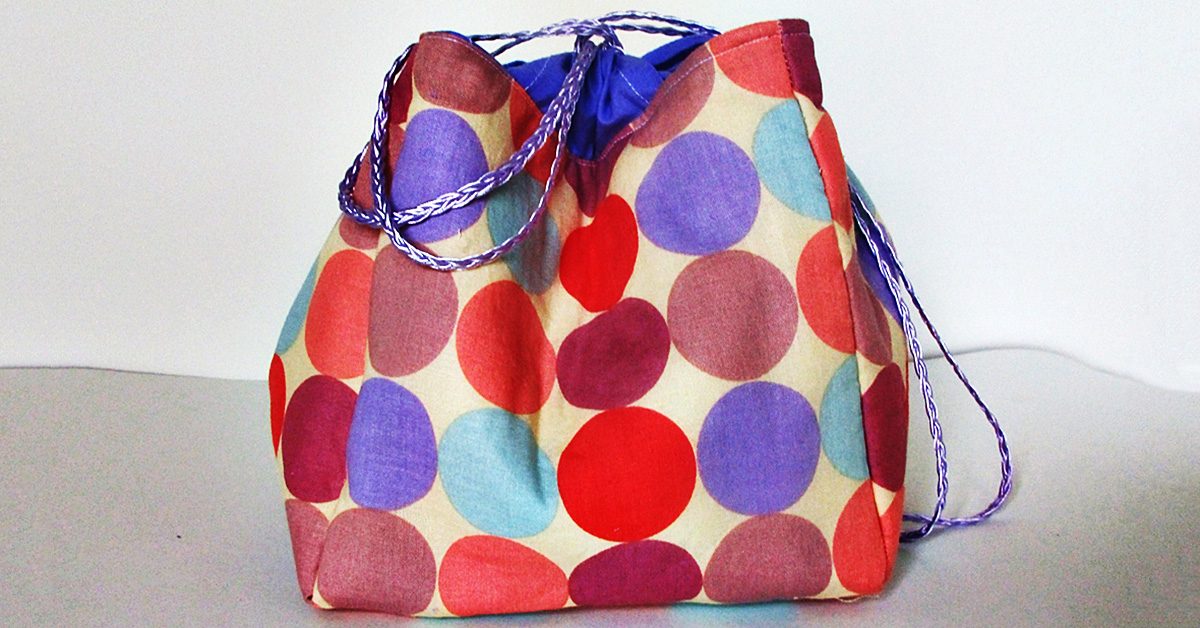
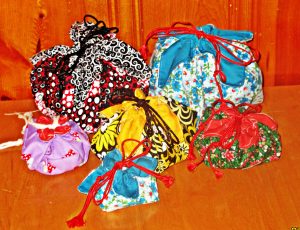
Lotus bags are a pretty Japanese style of drawstring pouch

We started looking at Japanese style bags last week, when I showed several ways to sew azuma bukuro, or bento bags. I mentioned that bento bags make great gift bags, but these are not the only style of Japanese bag that works well for this purpose. This week, let’s look at an even prettier way to make an origami style reusable gift wrap bag, this time a lotus shaped drawstring pouch.

Use them for gift bags and more

With such a pretty wrapper, even a humble gift becomes wow-worthy. Present a hostess or friend with one of these drawstring pouches you custom created to suit their style, and fill it with just cookies, candies, even a candle, to transform such consumable gifts into something memorable and continually useful.

Lotus bags make a lovely gift of candy.

Lotus bags make a lovely gift of candy.

I made a small one from a poinsettia print to both wrap and store the poinsettia flower pins I made as holiday gifts. Besides gift wrap, these pretty bags with their handy drawstring handles can be used as a purse, to carry lunch, as project bags for holding knitting supplies or a patchwork project on the go, or for travel organizers, to carry jewelry or cosmetics.

These would make sweet favors for a bride to share with her bridal party, baby shower gifts, stocking stuffers, goody bags, and more. You could even make one from satin, lace, or bead it to make a gorgeous purse for evening or for a bride.

If I had boy and girl children and I sent them to school, I’d make bento bags for the boys and pretty drawstring pouches like these for the girls.  I bet you can think of more uses for them, too.

The best thing about these pretty pouches is that they are incredibly easy to sew; you can make one in just a few minutes.

How to sew a lotus drawstring pouch:

You will need 2 same sized squares of fabric, one for the outside of the bag, and one for the lining. You will also need 2 pieces of cord, ribbon, or yarn for the drawstrings.

Use any size of square to make these. An 18” square makes a nice medium sized drawstring pouch. To make a bag large enough to carry lunch, I suggest using squares that are at least 20”. A 10” square is nice for a small pouch for travel or a small gift. I have made these smaller, with 8” squares, to make a tiny drawstring pouch for giving handmade jewelry. And I’ve made one much larger, too. I reused a baby wblanket I made long ago for one of my boys to make an extra large drawstring pouch for a scraps bag. It’s also fun to make these like a tiny quilt, using a small piece of patchwork for the outside square.

Small pouch to hold a gift of handmade bracelets and earrings, made from 8" squares.

Small pouch to hold a gift of handmade bracelets and earrings, made from 8″ squares.

You might like to affix fusible fleece or interfacing to one of your squares if you are making a larger lotus bag or one to use as a lunch bag or purse.

Place the two fabric squares right sides together and sew around all four sides, leaving an opening for turning. Clip the corners, turn right side out, and press. Then topstitch to close the opening, continuing the topstitching all the way around the square.

Fold up the corners

Now lay the finished square on your table with the exterior fabric facing up. Fold the four corners of the square back to show the lining fabric. I fold these back three, four, or five inches, depending on the size of the bag.

Make sure all four corners are folded back evenly.

You can use your ruler and cutting mat to be sure all sides are even. Pin these in place, then sew a straight line across each of these corner folds, 5/8” from the fold. This creates the channels for the drawstring.

Place the folded edge at the 5/8" mark on your machine, and sew straight across.

Place the folded edge at the 5/8″ mark on your machine, and sew straight across.

Now sew the bag together

The next step is to sew the four seams that will transform the lined fabric into a bag. Start on any side, and fold the straight edge between two corner folds in half, with the outside fabric facing together. Sew this short seam on the lining side, beginning your seam just beneath the drawstring channel you previously sewed. In other words, don’t sew all the way, or you will not be able to pull your drawstring through. Do this on all four sides. I like to use a 2/8 inch seam here, but you can make this wider, if you like. Just be sure to sew all four sides using the same seam allowance, whatever it is.

You can turn your bag right side out now if you’d like to create a flat, square bottomed bag with corners that jut out. Or you can choose to box the corners.

To box the corners

You can box the corners by either sewing straight across the four corner seams like this:

lotus4

Or you can sew a seam from top to bottom, creating an upright triangle, like this:

lotus5

Now turn right side out.

Insert the drawstring

Cut two same sized lengths of cord, narrow ribbon, twine, or yarn. For all but the smallest of drawstring pouch, I cut both to the length of my arm from shoulder to fingertip. I cut them a bit shorter for tiny bags.

Attach the cord to a bodkin or safety pin, then insert it through all four flaps of the bag. Then tie the two ends of this cord together. If you like, you can add some beads to the ends of your cord before tying.

Now take the other cord and use your bodkin to insert it at the opposite side of the bag from where you inserted the first cord. Pass this one through all four flaps as well, add beads or not, then tie both ends of this cord together. Now you can pull both cords to pull your drawstring pouch closed and open.

If the drawstring pouch is for gifting, you can tie the cords into a bow.

This drawstring pouch is only one way to make a kinchaku

When carried, a Japanese drawstring pouch is called kinchaku. However, this is only one of many styles and ways to make kinchaku. We’ll look at other ways to sew kinchaku here soon, too.

This style, the lotus bag, is a particularly pretty shape of drawstring pouch that can be used in many ways. Perfect for gift bags, they are so easy to make and so pretty that you’ll want to make at least a few. This is a great way to use up scraps while making a useful project.  Won’t you like to make some today?

Easy to sew lotus drawstring pouch make great gift bags.

Happy sewing!

Sew Easy Fabric Flower Pins for Bags, Hats, Hair, Gifts and More

Sew Easy Fabric Flower Pins for Bags, Hats, Hair, Gifts and More

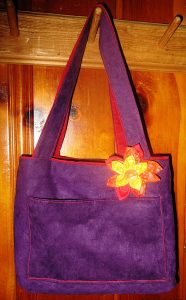
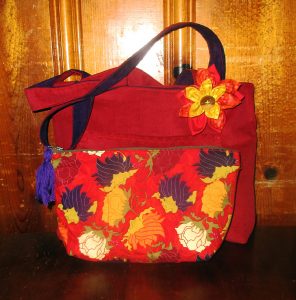
I wanted to make a fabric flower pin to dress up and bring together the complementary colors on a reversible tote bag I made for my mother-in-law’s Christmas gift.

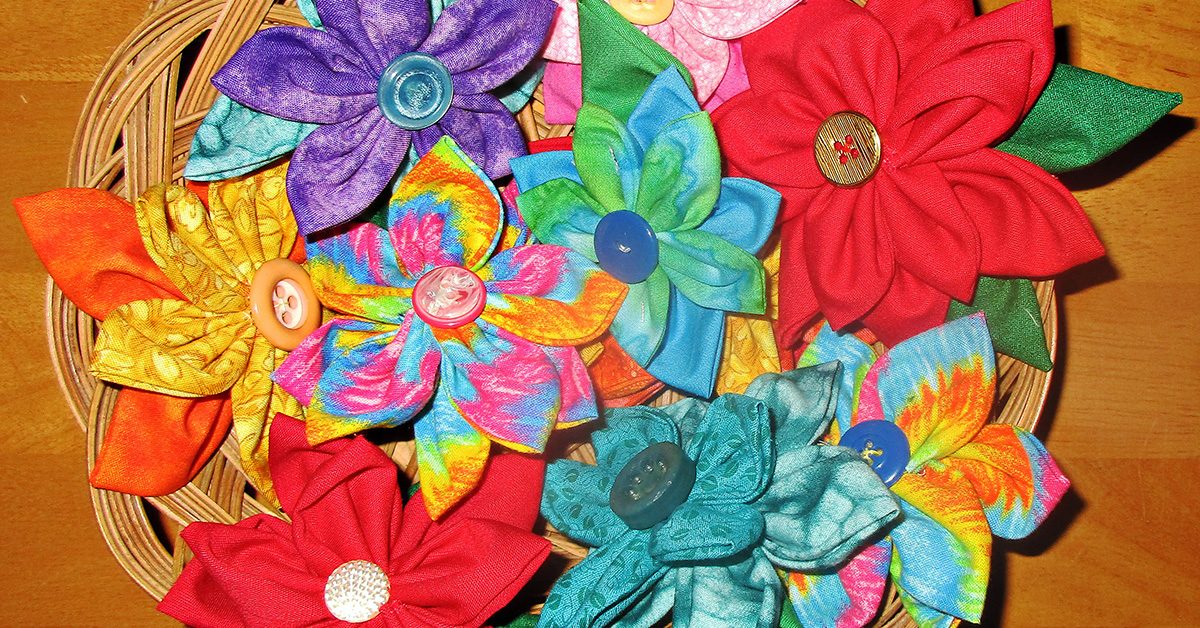
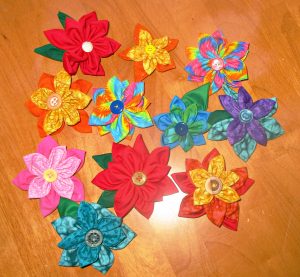
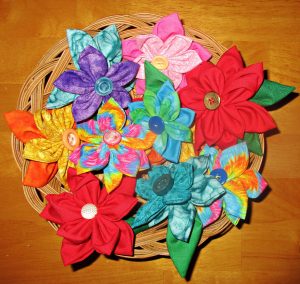
Yes, I’m getting a head start on my Christmas making now. And that’s why, when I loved the flower I made for her bag, I kept going and made a bunch of these pretty flowers. I kept my favorite of the bunch for my hair, and the rest are for gifts.

I kept my favorite of the bunch for my hair, & the rest are for gifts.

You could sew these directly onto a ponytail elastic, barrette, headband, clip, clothing, or bag, but I opted to make them more versatile by sewing them onto small brooch pins, which I can then pin on my hair elastic, hat, or bag.

Who can make a flower?

While making these, I had a sweet memory of my great grandmother, Lucy, who was a Sunday school teacher and loved nothing more than hearing children sing.  Of all the songs she taught us, my favorite was always this one:

“Oh, who can make a flower?

I’m sure I can’t, can you?

Oh, who can make a flower?

Only God, it’s true.”

While these aren’t the real thing, I sure felt happy while creating these fabric flowers and thinking of this old song and Grandmother Lucy. I hope you enjoy making them, too.

How to sew fabric flower pins

To make these double flowers, you need ten or twelve circles of fabric, a strong hand needle, thread, and a button for the flower center. You may cut five circles each of two different sized circles, or you can use all same sized circles. You may choose to cut seven rather than five for the bottom layer; these will be the larger circles if you are using two sizes.

If you would like to make leaves, cut these from slightly larger circles than you used for your largest flower petals.

You can cut your circles using an Accuquilt Go, a compass, or with the help of an Olfa circle rotary cutter.

You can also make your circles by tracing around a glass or other round object. I traced and then cut my circles several layers at a time. I used several sizes of mug and glassware and made my flowers in a few different sizes.

Sew by hand

Once you have your circles cut out, you can sit and sew them. This little project is sewn entirely by hand, and so is a great opportunity to sit and watch TV, or to have something to do while sitting in a waiting room or traveling as a passenger.

Thread a needle with a long, double length of thread. What I mean is, thread the needle and then tie the two thread ends together at the end. Then, take your first circle and fold it in half, wrong sides together, and then in half again, forming a quarter circle.

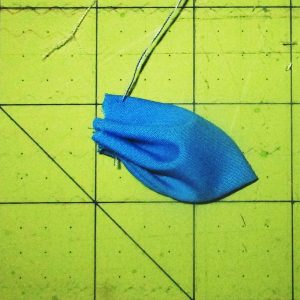
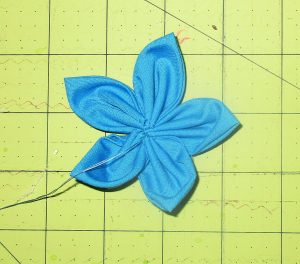
Sew a long running stitch through all four layers of the curved edge. Then pull the thread taut to gather the petal and repeat with the next petal. After you have sewn and gathered five petals, pull thread to tightly gather and sew the last petal you gathered to the first one of the five.

Sew the last petal to the first, then neaten center.

Sew the last petal to the first, then neaten center.

Continue to sew the raw centers of the petals tightly to each other, to tighten and neaten the inner edge of the flower center. Do this on both sides, then tie and cut your thread. You can set this flower aside for now.

Wash, rinse, repeat

Now sew another flower, perhaps using a different sized circle. Once you have both, sew them together with the smaller flower on top. If you’d like to add one or a couple leaves, do that now.

I made my leaves slightly differently than the flower petals. Instead of folding the green circles into quarter circles, I folded the circles in half, and then thirds. Then I sewed them with less gathers than the flower petals. Sew the leaves onto the back of the bottom flower layer.

Choose a matching or contrasting button or use a bit of embroidery for the flower center. Sew the button down through both layers of fabric flower.

Then sew the whole thing to a brooch pin, hair elastic, bag, or anything else. Small brooch pins work best, in my opinion, as these can then easily pin across a ponytail elastic or even a small barrette, not to mention on bags, lapels, hats, and etc.

Poinsettia pins

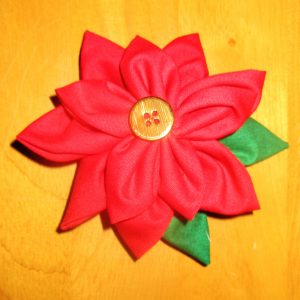
You can sew both flower layers from red fabric and make these into poinsettias. These will be useful during the holiday season. I plan to make small gifts of brooch pins at least, but I can think of lots of other ways to use these for holiday decorations and gifts, and I think I’ll be making a lot more of these fabric flowers in red.

You can sew both flower layers from red fabric & make these into poinsettias.

You can sew both flower layers from red fabric & make these into poinsettias.

Enjoy making them

I hope they will bring joy when I give them as gifts.

I hope they will bring joy when I give them as gifts.

I felt joyful making these and I hope they will bring joy when I give them as gifts. Whether you make just one fabric flower or a basket full, I hope you will enjoy making these as much as I did. Happy sewing!

Sew a Small Purse Tutorial: Tiny Tasseled Tote

Here’s my own design for a small purse tutorial.

Small purse tutorial.

Small purse tutorial.

This elegantly simple bag is incredibly easy to sew and offers endless opportunities for embellishment.  It is tiny as totes go, but as a small purse it is offers plenty of space for all your essentials, with room to spare.  It features an outside pocket big enough for your phone or sunglasses, and two inner pockets, one sized for your ID and debit card.

I really wish I had an embroidery machine; if I did I would completely cover this small bag with colorful embroidery. Since I don’t, I decided to make mine understated and casual in all one color and with minimum embellishment.  I think this denim blue corduroy is nearly a neutral color and I know it will go with much of my wardrobe.

I want to buy some silk cord to make the tassel and make a bag like this in a dressier fabric, too. Keep tuned to this blog, as I will soon share another small purse tutorial for a variation on this bag that is a lot of fun to make, too.

Without further ado, here’s this small purse tutorial, suitable for beginner sewists:

Tiny tasseled tote small purse tutorial

You need fabric for the bag body and lining, a little bit of interfacing, and yarn for the strap and tassel.

Cutting instructions

Cut:

  • 2 bag body pieces (main fabric) 7.5″ by 9″
  • 2 bag lining pieces (second fabric) 7.5″ by 9″
  • (optional) 2 interfacing pieces  7″ by 8.5″
  • (optional) 1 interfacing piece 4.5″ by 8″
  • 2 main fabric pieces 5″ by 7″
  • 2 pieces second fabric 5″ by 7″
  • 1 piece second fabric 6″ by 9″

Step one is optional – interface or quilt

If you choose to add interfacing to your bag, do it now. Because my outer fabric was corduroy and the quilter cotton lining fabric less sturdy, I chose to interface the back of my lining fabric (7.5″ by 9″ inch rectangles).  If you use quilter cotton or other lightweight fabric for the outside of your purse, then interface that instead.  Also apply interfacing to one of the 5″ by 8.5″ rectangles.

Another option is to forego interfacing and quilt one layer of your bag, either the outside or the lining. Just quilt these now, before we move on to construction.

Make the outside pocket

Take one 5″ by 7″ piece of your main fabric, and a matching piece of the lining fabric and align these right sides together. Sew around all four sides, leaving an opening of at least 2″ to turn right sides out. Clip the corners, turn, and press.

Now fold over the top about half an inch, press, and topstitch. I chose to press mine with the lining fabric forward, to show a bit of contrast on the outside of this otherwise plain blue bag. You can fold towards the inside though, if you’d rather not show off your lining fabric on the outside of your purse.

Center the pocket on one of the bag body 7.5″ by 9″ rectangles, with the hem you just sewed at the top of the bag. Sew the sides and bottom of the pocket to the bag body piece about 1/8″ from the pockets edges.

Make the inside pockets

Take the 6″ by 9″ lining fabric, and fold it right sides together to make a rectangle 4.5″ by 6″. Sew with a ¼ inch seam allowance along all three open sides, leaving an opening of at least 2″ for turning. Turn right sides out, press, and top stitch the opening closed.

Now fold one short edge of this finished rectangle upwards about 2 inches and press this fold line well. Then, center this pocket on one of the 7.5″ by 9″ bag lining rectangles, and sew the bottom and sides down on the lining fabric.

Inside pocket image.

Inside pocket image.

Sew the bag body and lining

Now take the two main fabric rectangles and put them right sides together.  Make sure the outside pocket is facing with the opening pointing up, then sew the side and bottom seams.

Then repeat for the bag lining pieces, again making sure the pocket opening is facing up before sewing the sides and bottom together. Set both bag and lining aside.

Make the tassel

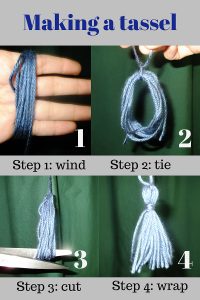
Wrap yarn around the four outstretched fingers of hand about ten times. Tie the yarn together at the top of these loops with a short piece of yarn, then cut through all the loops at the bottom. Take another piece of yarn and wrap it around and around the strands, about half an inch from where you tied the yarn together at the top, then tie. Voila, a tassel!

How to tie a tassel.

How to tie a tassel.

Make the flap

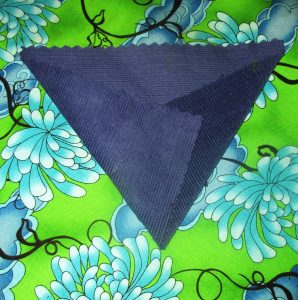
Take one of the 5″ by 7″ pieces to your ironing board and place it right side down, aligned with the long edges horizontal and the short edges vertical. Then fold the bottom corners upward to make a point in the middle and press these fold lines well.

Tassel bag point image.

Tassel bag point image.

Then, cut along these pressed lines to make a triangle shaped piece for the flap. Cut a lining rectangle piece to match, too. Now, go back to your ironing board with these pieces. Fold  one of the edges you just cut to form the triangle back ¼ inch and crease this well with your iron. Repeat on the second triangle.

Tassel bag point crease image.

Tassel bag point crease image.

Now place the two triangles right sides together and sew together along the opposite side of the triangle from the side that you just creased. Clip the seam allowance from the triangle point, turn right sides out, align the creased seams you previously pressed, and press again.

Now insert the two short yarn tails from where you tied the yarn together at the very top of your tassel into the triangle point. Topstitch along the seam you just sewed, then topstitch to sew the side with the pressed seams closed, too, being sure to catch the yarn at the top of the tassel inside the seam.

The third side of the triangle flap remains open. Align this open edge with the top edge of the back side of your bag body, right sides together, and sew right along the edge to baste these pieces together.

Make your strap

To make the yarn strap, use 9 pieces of yarn about 4 feet long. Use 3 strands each to make three long braids, then braid these three all together. Secure ends by tying with another piece of yarn. Or opt to use ribbon or make a long fabric strap instead, if you prefer.

Final assembly

Take your main bag body and your bag lining body and insert one inside the other, with right sides together. The flap should be between the two bag bodies. Now place your strap inside, also between the two bag bodies, aligning each end with the side seams.

Use the free arm on your machine, and sew these together, leaving an opening to turn. You will sew the backside with the flap and the straps, and leave the opening in the front. Turn right sides out and push the lining side into the bag body. Now fold the edges of the opening inward, topstitch this opening closed, and you are done.

It’s reversible

Technically, this bag is reversible. Although, if I were going to reverse this bag, I would change the construction of the inner pocket. I wouldn’t want a debit card pocket on the outside of my bag. To do this, just omit the step of folding the inside pocket up to create the card pocket. Sew it on as a larger patch pocket instead, the same as you did for the outside pocket.

I hope you use this small purse tutorial to make one, too. What fabric will you use? How will you embellish yours?

Sew a Rice Pack Whole Body Heating Pad

How to Sew a Rice Pack Whole Body Heating Pad

How to Sew a Rice Pack Whole Body Heating Pad

You can sew a rice pack heating pad to any size at all.

The first one I ever made was a rectangle maybe about four by six inches. Okay, maybe it was a little bigger than that, but in use, it turned out to be silly small and I wanted a larger one.

I have made smaller rice packs that serve a neat purpose, though.

These make sweet pocket warmers when stuffed with rice.

These make sweet pocket warmers when stuffed with rice.

For a heating pad, bigger is better. So I made a large one with a folded kitchen towel and a big bag of rice, and this was a helpful friend for some time.

But have you ever wanted a full body hugging heating pad? I have, every month for some time now. I have wanted one to wrap around my tummy, and my dear and I have both wished for something bigger for pains in the neck and shoulders, too.

So I bought a huge bag of rice in bulk and decided to finally sew a rice pack heating pad big enough to wrap around.

So I bought a huge bag of rice in bulk & decided to finally sew a rice pack heating pad big enough to wrap around.

So I bought a huge bag of rice in bulk & decided to finally sew a rice pack heating pad big enough to wrap around.

Here’s how I made it:

Materials

  • 2/3 yd sturdy fabric
  • 20 cups rice

Of course you need a sewing machine, thread, scissors and/or a rotary cutter and mat.

Step one

Fold the fabric for your heating pad in half so that it makes a long rectangle approximately 44 inches (it will likely be shorter than 44 inches after pre-washing your fabric) by 12 inches, and press.

Then, make a narrow hem along both of the long (~44”) edges. Or you can serge along these edges with your serger.

Step two

Now fold it again, with right sides together. Sew along both short edges. Leave the long end open.

Of course you can serge these seams, too.

Clip the corners, and turn right sides out.

Step three

Now you are going to measure and then sew four lines of stitching to section the rectangle into five sections. These lines will run parallel to the end seams you just sewed.

I found the middle, then measured four inches out from there on either side, and marked my first two lines to create the middle section. Then I measured eight inches out from each of these to create the other sections.

Sew these lines from the bottom but end them approximately 3/4 inch before you reach the top.

Step four

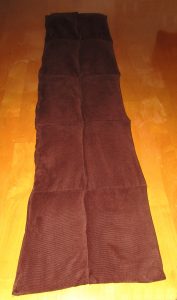
And there is your whole body heating pad, which will wrap all around like a warm & heavy hug when you need it.

And there is your whole body heating pad, which will wrap all around like a warm & heavy hug when you need it.

Scoop two cups of rice into each opening.  Hold the bag and be sure all the rice flows to the very bottom of the pockets.

Now, sew a long line, parallel to the open edges, to bisect the five sections into ten.

Step five

Scoop two more cups of rice into each of the remaining five sections.

Then you can sew the long opening closed. I turned this over and sewed it down again to make this seam stronger, too.

If you want to be extra careful to prevent the rice from spilling out while you sew, then take the extra time to baste the long opening closed with quilter’s safety pins.

And there is your whole body heating pad, which will wrap all around like a warm and heavy hug when you need it.

To use:

Microwave the heat pad to warm. Microwave ovens vary a lot, so you will have to determine for yourself how long you should heat yours. Five minutes seems about right for mine, but be careful not to burn yourself.

Remove the pad from the microwave, shake it up a bit and evenly distribute the heat. Wrap it around your tummy, your shoulders, even your legs. Or lie down and use the whole length along your back from top to bottom.  And feel better soon!

Quick Sewing Projects: Last Minute Gifts

Quick Sewing Projects: Last Minute Gifts

Having a list of favorite quick sewing projects can be a big help when you need to give gifts.  As I write this, Christmas is only a week away. So any fabric gifts added to the list now must be quick sewing projects. Here are some last minute gifts to sew that are easy and fun to make when there isn’t a lot of time.

Last minute gifts to sew for kids

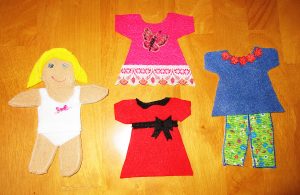
Felt “Paper” Doll Set

I made this set in a big hurry today. This doll is for a toddler, that’s why I made such a simplistic shape. I would like to make another set when I am not in such a real rush because of having to write a blog post, too. I bet this first doll has a much prettier sister born as soon as I’m done writing this post!
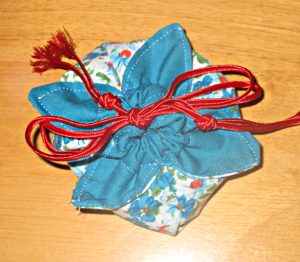
Felt sticks to felt and works perfectly for making "paper" dolls.

Felt sticks to felt and works perfectly for making “paper” dolls.

Felt Crown

You can whip up a felt crown in minutes. I made a traditional looking King’s crown for my boys’ dress up bin last year and that thing has seen a lot of play. Here is another easy way to make one that includes appliqué and looks more like a Queen’s crown.

Car Carrier

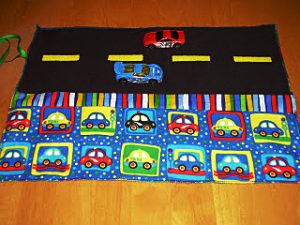
This car caddy saved my sanity many times, particularly in restaurants. I saved a lot of time when I made ours by just using the serger around the edges, rather than sewing and turning this project. I used rainbow variegated thread, and this finish held up fine even though it was used by two boys for several years. They both loved this toy. Here’s a tutorial for a car caddy that is similar to ours.

Car roll.

Car roll.

Last minute gifts to sew for ladies and girls

Headbands

There are lots of ways to make headbands, and most of them are easy. I love these which are reversible, and have an elasticized back. Making them this way is even quicker, and a good way to use scraps of special trim or embroidered ribbon. Or you could cover a plastic headband with fabric. Here is a tutorial for an easy, five-minute fabric flower you could use to embellish a plain headband.

Infinity Scarf

Infinity Scarves are extremely easy to make. Here’s a tutorial.

Easy Purses

For something simple and straightforward to sew in a hurry, try this adorable and reversible mini messenger bag from Crazy Little Projects. This small cross-body bag works for both ladies and little girls.  Another option for a pretty purse that won’t take you long to make is this darling fold over clutch at Flamingo Toes.

Pincushion

Here is my tutorial for my favorite pincushion, which is generously sized and features a felt flower, it’s both easy and quick to make up.

Rice Pack Heat Pads

These make a nice gift for everyone, but ladies in particular will really appreciate them, since they are great for soothing monthly pains. They are also awesome for pains in the neck and shoulders. I like to make them from a pretty tea towel folded lengthwise. I stir a dropper full of lavender oil into the dried rice first, this releases a relaxing scent every time it is heated. You can also freeze these, in which case they are wonderful for easing headaches.

Last minute kitchen gifts to sew

Potholders

These are fun because they are so easy. Make one like a tiny quilt by following this precious patchwork pattern from Moda Bakeshop. If there’s no time for patchwork, here’s a different kind of potholder design that’s really quick and cute, too.

Trivet

There are not many quick sewing projects that are faster than making a simple trivet. It doesn’t have to look simple, though; here is a quick pattern for a pretty patchwork trivet that can use your tiniest scraps. This can also be made from single fabrics instead of patchwork to save time.

Bowl Cover

I wish I had seen this bowl cover project before now and made some of these for me. I will, for sure. One of these would be a beautiful gift for a party hostess. You could bring an appetizer in a pretty or plain bowl covered with one of these, and let the hostess keep the bowl and the cover. These would be really nice to have for picnics or backyard barbecues.

Napkins

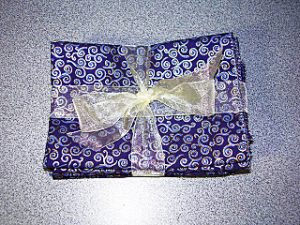
Paper towels are wasteful, and cloth napkins save trees. That is why napkin sets are one of my favorite gifts to make. These are super fast to sew if you have a serger. If you don’t, it will take a little longer, since you will have to hem all four sides. This looks nicest if you miter the corners. You could choose linen, flannel, even novelty cottons; if you are using a serger, narrow ribbed knit is a great choice for everyday napkins. I made this festive set as a hostess gift for a New Year’s Eve party.

Napkins.

Last minute gifts to sew for anyone

Flannel Scarf

Make two cozy soft scarves from two yards of flannel shirting. Fold the flannel lengthwise, press, and cut down the fold. For each scarf, double turn and sew a narrow hem down each long side. Then sew across the short ends an inch or so from the edge of the fabric. This line of stitching will allow the fabric to fray a bit at the ends, but stop it from fraying when it frays to this line. You’ll have to wash it a couple of times to start the fraying, but once it starts, you can pull at it a bit to move it along.

Earbuds Pouch

This is the one quick sewing project gift that I still have left on my list. I see my son untangling his earbuds from his pocket every day, so I think he will appreciate one of these pouches. I know this will be a fast project, so there is plenty of time left to get this crossed off my list.

Pocket Tissue Holder and Sanitizer Cozy

A pocket tissue holder is a perfect small gift that fits with the quick sewing projects theme. You could add another pocket to stash a small hand sanitizer with the Kleenex, or try this tutorial for a sanitizer cozy to give along with the tissue holder.

Last minute gifts for pets

Don’t forget Fido or Fluffy! It’s easy to whip up something for furry friends in a hurry, thankfully. I like sewing fleece stuffed bones for easy dog gifts. Here is a link to some other fast, easy ways of making dog toys, and here are ideas for quick sewing projects for kitties.
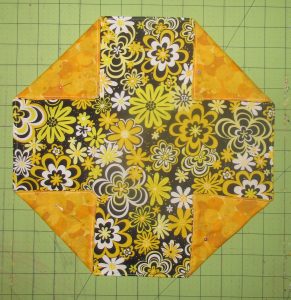
Fleece bones.

Fleece bones.

I hope you find plenty of time to get everything on your list done without any stress! Happy Holidays.