


SIMPLY CHOOSE YOUR MACHINE THEN ADD YOUR ESSENTIALS PACKAGE VIA DROP DOWN MENU, THEN ADD TO CART. IT'S THAT EASY!


Buy any sewing machine and add the Sewing Essentials Package for only $99!
- EverSewn Rotary Cutter 45mm
- Nifty Notions Glass Head Pins 200pc
- Scissor Spot Magnetic Holder
- EverSewn 24 Assorted Hand Needles
- EverSewn Foldable Cutting Mat 12 in x 18 in
- EverSewn 6 in x 12 in Ruler
- EverSewn Tape Meaure 60 in
- Fabric Scissor 8.5in Singer
- Mundial Gold Stork Scissor
- Magnetic Pin Cushion - heart
- Schmetz Universal 5-pk Assortment


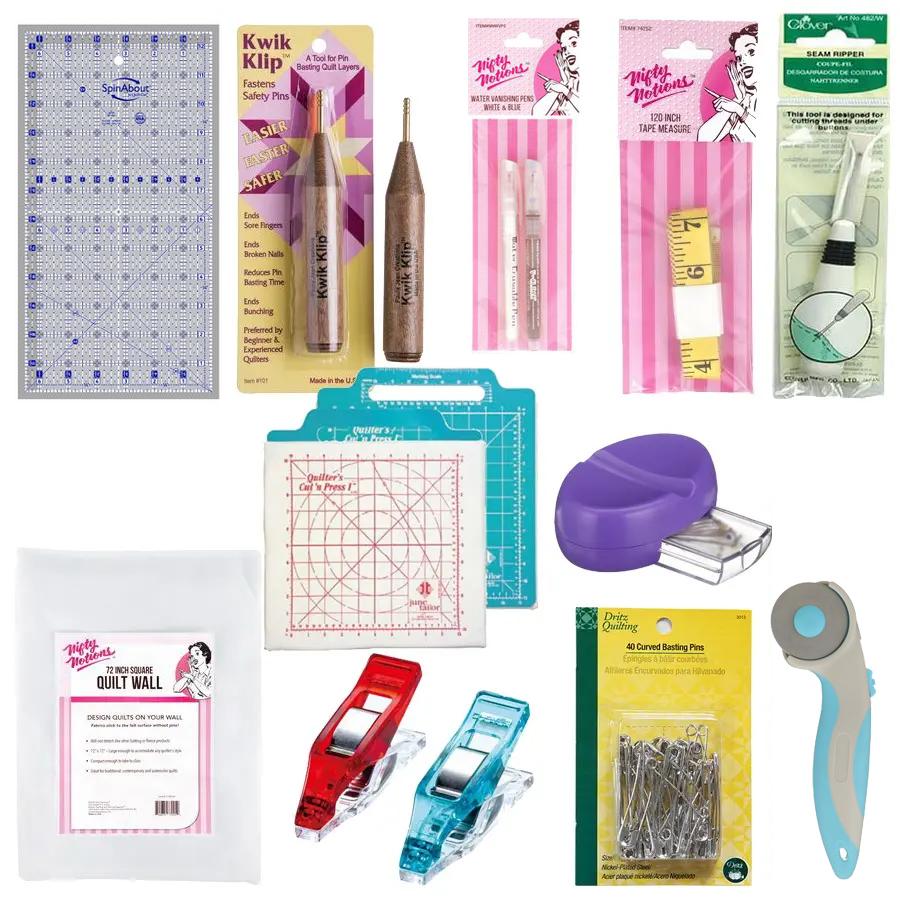
Buy any quilting machine and add the Quilting Essentials Package for only $149!
- 45mm Rotary Cutter
- Kwik Klip
- Water Vanishing Pen 2ct
- Tape Measure 120in
- Quilt Wall 72in Square
- Mini Wonder Clips 20 pcs
- White Seam Ripper
- Curved Basting Pin 2in
- SpinAbout 6.5 in x 12.5 in Rectangle Ruler
- Cut 'n Press | 11"x11" Grid
- Magnetic Pin Cushion
- CutRite Bind Up Template
- HandiGrabber


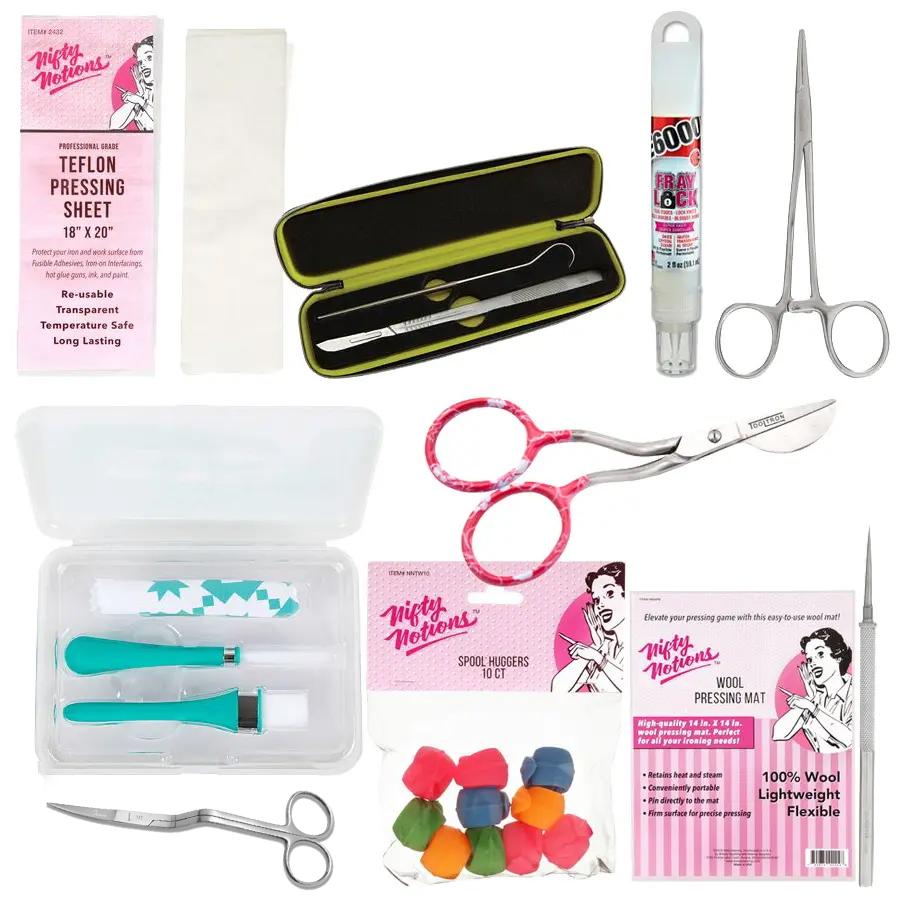
Buy any embroidery machine and add the Embroidery Essentials Package for only $149!
- Teflon Pressing Sh 20in x 18in
- Bird's Nest Tool Kit
- E6000 FrayLock 2oz bottle
- Oh Sew Clean Brush and ClothS Set
- Double Curved Embroidery Scissors
- Hemostat 5.5in
- Safety Stilleto 6 in
- Spool Huggers 10ct
- Wool Pressing Mat 14 X 14
- 4 in. Applique Embroidery Scissor


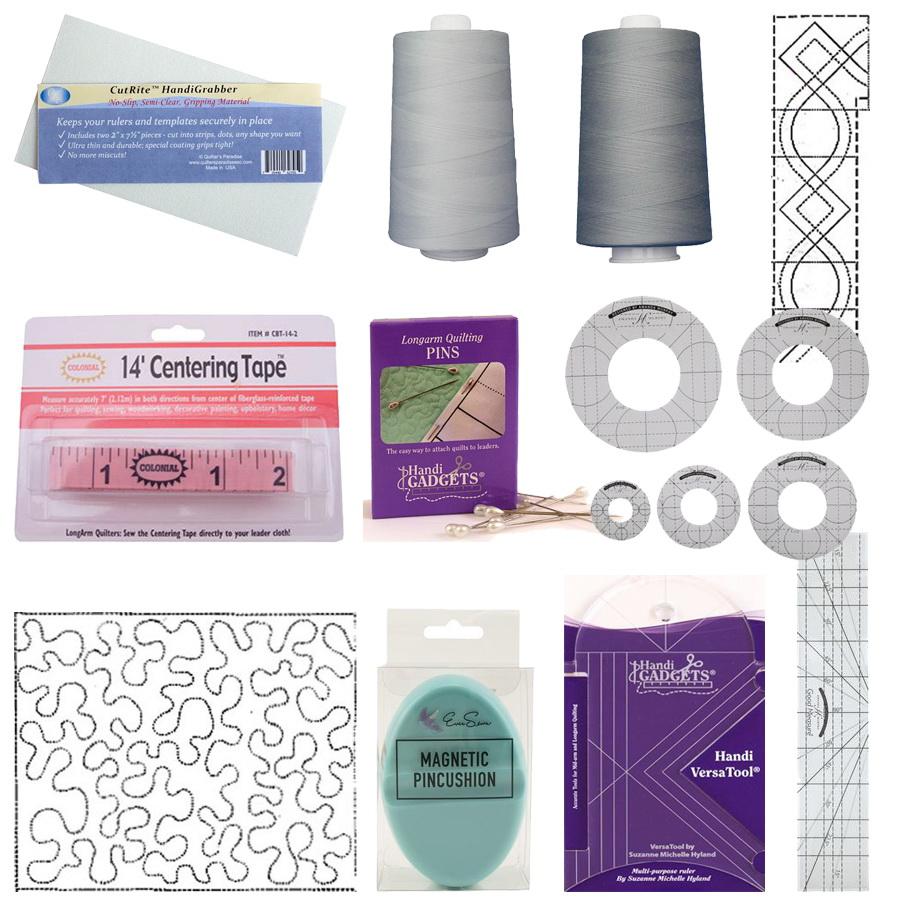
Buy any Long arm Machine and add the Lon garm Essentials Package for only $199!
- OMNI Poly 40wt 6000yd BRIGHT WHITE
- OMNI Poly 40wt 6000yd SILVER
- Borders Made Easy 3in
- 9.5in Small Stipples Made Easy
- Centering Tape
- EverSewn Magnetic Pin Catcher
- Longarm Quilting Pins
- Handi Versa Tool Ruler
- Good Measure Amanda Murphy Every Angle 1pc
- Good Measure Amanda Murphy Circle Set 5pc
- CutRite HandiGrabber

Start Your Application
In a few short steps you could own the machine of your dreams with convenient monthly payments and promotional financing. Completing the application will tell you how much credit Synchrony will extend to you. You are not charged until you place an order with SewingMachinesPlus.com.
Just follow these steps during checkout:
- Enter your Synchrony Financial account or card information. (You can apply online at that point if you don't have one already)
- Fill out our shipping and billing information fields.
- Agree to Synchrony Financial's terms and conditions.
- That's it! You will receive more information regarding your purchase through your email.