Shibori Techniques, Tips, and Projects

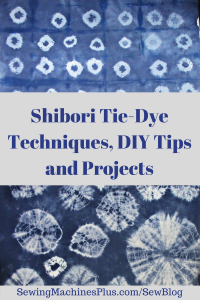
Shibori Tie-Dye Techniques, DIY Tips, and Projects

What is Shibori?

Bound resist dye methods, which we know as tie-dye, have been around almost as long as civilization itself. Many cultures have contributed techniques to this ancient craft. Perhaps none have contributed as widely as the Japanese, who began developing their methods, known as shibori, as early as the 8th century.

Shibori Tie-Dye Techniques, DIY Tips, and Projects

Shibori Techniques

"<yoastmark

Shibori traditionally uses natural dyes, most often indigo. Dyers pleat, sew, tie, bind, or even wrap the fabric around a pole. Let’s look at these different methods now:

Arashi

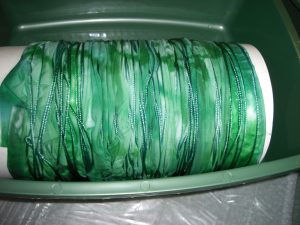
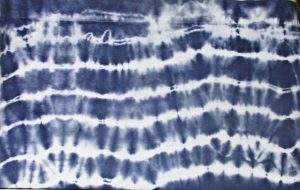
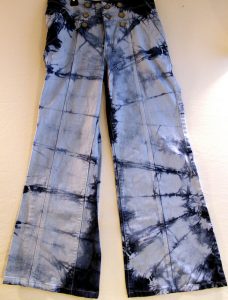
With the arashi method of shibori, dyers wind a long and narrow piece of kimono cloth diagonally around a pole, then scrunch the fabric tightly together and bind with thread. This method produces a pattern reminiscent of rain, hence the name, which means “storm.”

Arashi shibori

Arashi shibori made with wide pvc pipe in place of a pole

Itajime

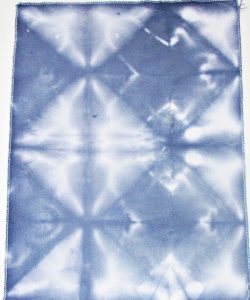
For itajime, or shape-resist, shibori, the cloth is first folded, then pressed between blocks of wood and secured with clamps or ties. The wood resists the dye and leaves a repeating pattern on the finished cloth. Shapes can be simple, such as square or rectangular blocks, triangular, or more elaborate, with wood shapes cut into various free form designs.

Kanoko

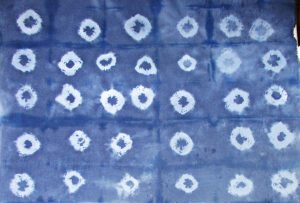
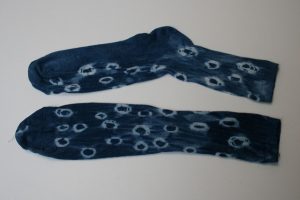
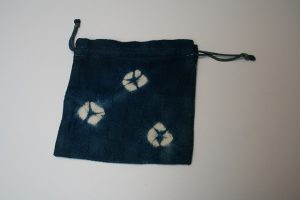
If you’ve ever tie-dyed before, you’ve likely practiced kanoko shibori methods without even knowing it. These are the familiar tied designs such as bull’s eyes and repeating circular or other motifs. Dyers make these designs by tying off sections of fabric, often including pebbles, popcorn kernels, coins, or other found objects repeatedly or randomly throughout the fabric.

Kumo

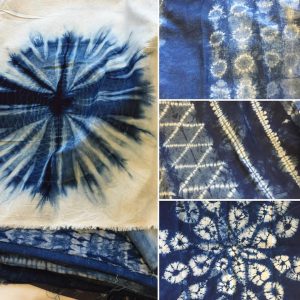
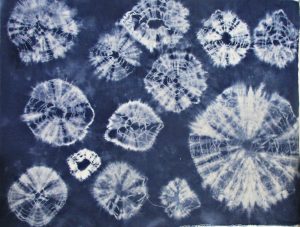
Kumo shibori is a pleated and bound method that creates spiderlike veining and circular designs. Dyers pull the fabric into peaks, twist or pleat, then bind with thread. Kumo designs may be any size, with small, repeating, all-over patterns or just one large kumo to cover an entire piece.

Shibori Tie-Dye Techniques, DIY Tips and Projects

Kumo shibori

Miura

In miura shibori, the thread is not tied at all. Rather, thread is simply wrapped, usually twice, with thread. Tension holds the entire piece together. Because this method is easier and can be accomplished with the help of machinery, it was perhaps the most historically used method for producing shibori designs. This method most often uses hooks to draw up tiny sections of fabric, which are individually wrapped.
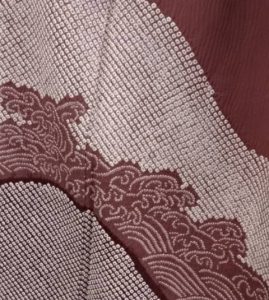
Kimono, from the collection of Gentry Klossing, with finely detailed miura and nui shiboro

Kimono, from the collection of Gentry Klossing, with finely detailed miura (the diamonds) and nui (the waves) shiboro

Nui

Nui shibori uses stitching, either by hand or machine, rather than tying, to create designs.  From simple running stitches which gather and pleat, to flowers or other intricately stitched designs, nui shibori runs the gamut from super easy to unbelievably complex.

DIY Shibori Tips

shibori agistadler

photo courtesy of AgiStadler, Flickr

Shibori traditionally uses natural dyes, especially indigo. Jacquard makes an easy-to-use, pre-reduced, indigo dying kit, for a great price, too.  If you go this route, use a 5-gallon or larger bucket or plastic bin with a lid. Set this up and plan to dye outside for the sake of mess management. This dye kit will color a lot of fabric and will last 5 days when covered, so you can plan to spread the project over several days.

Or use any hot-water dye

You can also use synthetic dyes to achieve a shibori look, but be sure to use the kind prepared with a hot water dye bath. Natural dyes are immersion dyes, and so any synthetic dye you use should be this kind, too. Don’t use the popular squirt-to-apply types of dyes for your shibori projects.

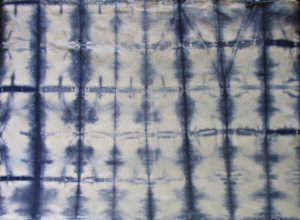
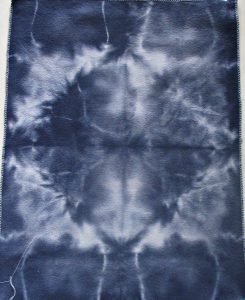
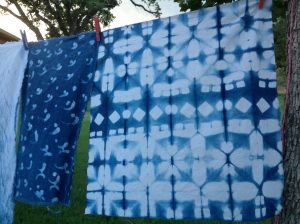
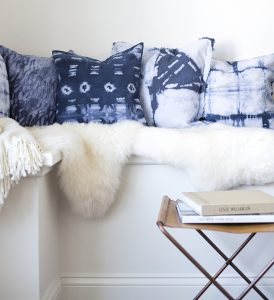
I used a synthetic denim blue color dye bath in my stainless steel kitchen sink to achieve a softer blue for my batch of shibori pictured in this post. To get a darker and more authentic indigo color, you can mix denim and navy. Sarah Gibson from Room for Tuesday suggests mixing one bottle of Rit denim with half a bottle of Rit navy. Her pillows dyed in this bath look great!

Pillow project at Room for Tuesday

Pillow project at Room for Tuesday

Important DIY tips:

  • Wear gloves! Otherwise you’ll likely find it impossible to get the blue/black dye off your hands and, especially, fingernails. Besides being unsightly, this is not good because dyes are toxic chemicals which you’d rather not absorb into your system!
  • Take your time preparing the fabric. And have all fabric fully prepared for the dye bath BEFORE you start to prepare it. I rushed when tying the beans to make my kanoko circles and made a mess with my grid design! Take your time, do not hurry.
  • Rinse items individually until the water runs completely clear, then untie. If you don’t rinse completely before removing ties, your designs will turn out less crisp.

Easy shibori projects

Shibori is fun and you will enjoy it most if you start with simple techniques. Kanoko, Kumo, and Itajime are particularly beginner-friendly methods to use. You can shibori dye any item of white or off-white natural fiber fabric, such as cotton. You can even dye synthetic fabrics, as long as you choose a dye formulated for synthetics. I noticed Rit makes these now.

You can easily dye T-shirts, skirts, pillows and pillowcases, socks, scarves, and small fabric pieces in your kitchen sink. Sheets, curtain panels, and fabric yardage are easy to dye, too, though you may want to use a tub larger than your sink for these.

shibori altnoun shibori lisa dusseault shibori lisadusseault

I’m planning to use the fat quarters and long strips that I dyed today to make either a patchwork skirt and a top or a dress. I might make that project a tutorial for another post soon.

Have fun!

Shibori is fun, with near endless choices to explore. Unwrapping your dyed and rinsed shibori pieces to see the finished designs is as exciting as opening a real gift. Play with dye and have fun with it!

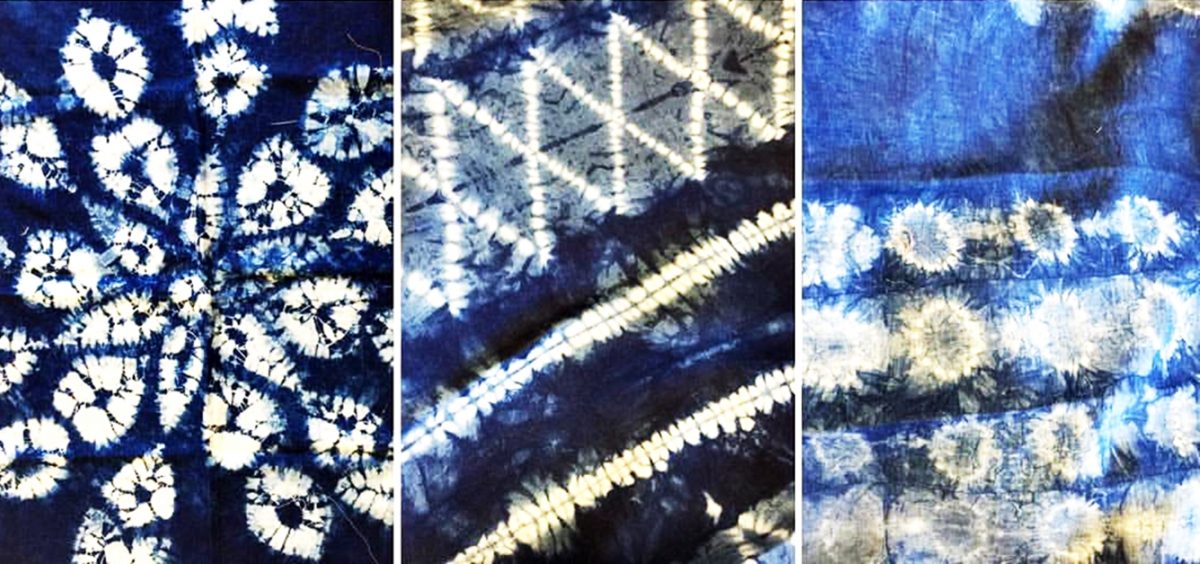
Flickr images licensed under the Creative Commons license.

The Basics Photo Quilts

Once again, we come to the point on this blog where it’s reasonable to look into a new quilt type. The reason for this specific interest for this post is because I happened to figure out that making a certain type of quilt is a lot less difficult than I expected. In fact, I’m toying with the option of making one of these for a Christmas present this year.

But I’m getting ahead of myself. First, let’s look at the quilt type I’m referring to, and then we’ll go into the ease and benefits of making one.

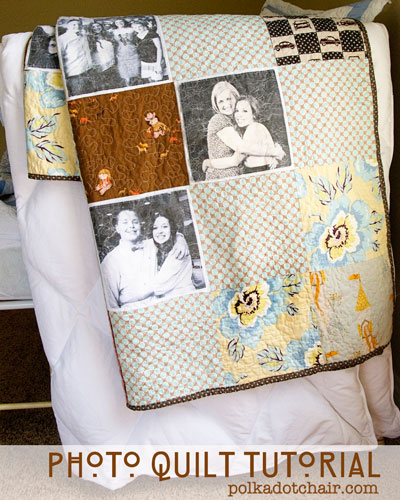
The type of quilt in question is a photo quilt, and it gets its name in the way you might expect—it includes photographs in its design. Now, you can order a printed throw like this through a store, but if you’re going to own or gift something that’s as sentimental as a series of personal photographs, it makes sense to add in that additional personal touch of sewing it yourself.Picture 1

Up until recently, I never realized how simple this prospect could be because I couldn’t grasp how printed photographs made their way to a quilt—unless, of course, you bought the quilt that way. As it turns out, the process is actually simple. You can treat it like a general patchwork quilt—so long as you have printable fabric at your fingertips.

With that one addition to your sewing supplies, you can browse through your pictures to find the perfect ones for your project.Picture 3

If you’re going to create a photo quilt for a wedding gift, for instance, concentrate on images of the right couple together. Once you find enough fitting photographs for the prospect, scan them if you only have print copies and get to printing on that fabric! From there, you’ll need to rinse it and iron it to keep the ink from ruining in the wash or bleeding where you don’t want it to go. You can find those details here.

You can pick and choose other fabrics that complement the theme and look of the images to build the rest of the quilt, and you can tend to the trimming and sizing of the photo blocks in the same manner that you would any other fabric style. Essentially, you’re doing nothing differently expect printing and preparing some of your fabric rather than purchasing all of the fabrics already printed.Picture 1

This is a simple prospect, but it’s a wonderful idea to add personalization to quilts for your own home, for a nursery, for a gift… The process shows care because you searched for the right pictures and because you took the time to piece everything together yourself rather than run to a store to have it printed for you. In a world so technologically advanced, this is one of the ways to use technology to bring a personal quality to something homemade.

Remember that the fabric you pair your photographs with can add value to your work in that they can carry out a particular theme that you’re going for. If you’re creating a graduation quilt (like in the link provided) and you want to showcase all of the graduate’s high school friends for a keepsake to take to collage, choosing fabrics that represent their school’s colors or mascot would be useful, as would ones that reflect typical graduation items—like caps or diplomas.Picture 1

For a Mother’s Day present, you could consider what your mom’s favorite colors and items are and use them for inspiration in regard to other fabric choices. If she adores light blue and lilac, pairing the photographs with those hues can add a level of care to the overall product since it’s another bit of evidence that you know the recipient well enough to pattern the design for them.

You could also use these for your own purposes as well, such as printing off photographs from your trip to Rome or Venice for a European-themed work that showcases the pictures you took during your stay. Even a moment that might seem trivial could be represented through one of these quilts, like the first time you baked with your children. Just take enough photographs to commemorate the experience, then pair your printed photographs with colors that reflect the baked goods you created together. It’s a big way to remember in detail such a small moment.Picture 1

Overall, I’m very much interested in trying my hand at this quilt type, and you can expect updates as I go through the process of trying to construct one. It’s so personal, and I look forward to testing the waters on the matter—especially to see how well the ink stays in place through my own personal experience.

Have any of you ever tried a photo quilt? Suggestions? Let me know!

Make a Set of Sheets from a Duvet Cover

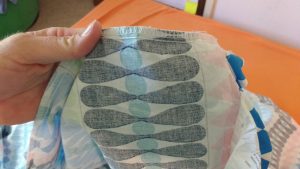
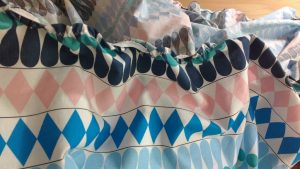
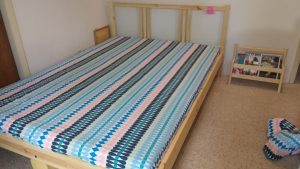
I’m a huge fan of custom bedding. In this post I’d like to show you how to turn a duvet cover into a set of fitted bed sheets. You will need a duvet cover that is the size of your mattress or larger. Our mattress is a queen and so is this duvet cover from Ikea. First, I prewashed the cover and then turned it inside out.

2

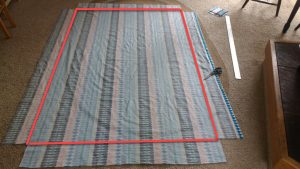
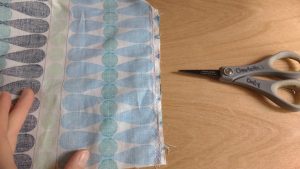
I don’t waste time trying to unpick the seams of the covers. I take my scissors and simply cut off all the seams around the three sides that are sewn.

3

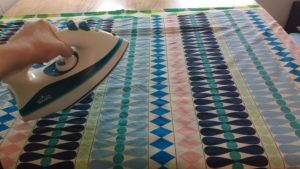
Iron the large rectangular piece of fabric that you’ve created by chopping away the seams.

4

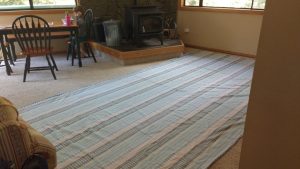
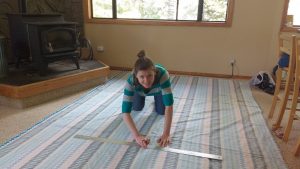
You should have a nicely ironed and very long piece of fabric now. Turn to your mattress and find its length and width. My mattress is a custom size. It’ dimensions are 53” x 75”.

The width is 4”. I add an extra 2” for a fitted sheet to wrap under the mattress and an additional 1” for seams (½” plus ½” for turning). To find the total length and width I need for a fitted sheet then, I add 7” + (width or length) + 7” = total width or length needed. In my case I needed a large rectangle 67” x 89”.

5

First I mark the shorter side of the sheet and cut the long strip of extra fabric away. Then I mark the length of the first sheet and then the length of the second sheet. For the second sheet you will often be a few inches short. If this happens I take fabric from the long side piece I discarded and sew it onto the ends to elongate it.

6

Now cut out 7” squares (or whatever your measurement is which will depend on the depth of your mattress). If you did your math right, the rectangle formed between those cut out squares will equal the same length/width as your mattress.

If you want to make the second sheet right away, then sew any fabric you need to make it long enough, and then repeat the process, cutting out the 7” squares. I made two fitted sheets because we don’t use top sheets but you could make the second sheet a top sheet.

7

Take your fabric to your sewing machines and sew the corners together. I sew first a straight stitch and then finish with a zig zag. Do this for all four corners.

8

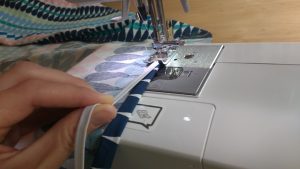
There are many ways to finish the edges of a fitted sheet. I like to finger fold over the fabric by ½” then another ½”, then place the elastic on top. I move that over to the machine and begin sewing a zig zag stitch.

9

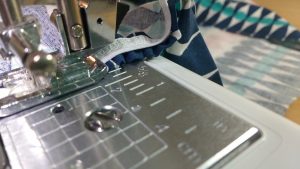
Once I’ve secured the elastic, I begin to hold it taught (but too tightly) and sew around the entire sheet this way. I finger fold over the fabric, hold the elastic taught, sew and repeat over and over until I’ve made it completely around.

10

Soon the seams will look like this as you keep working.

11

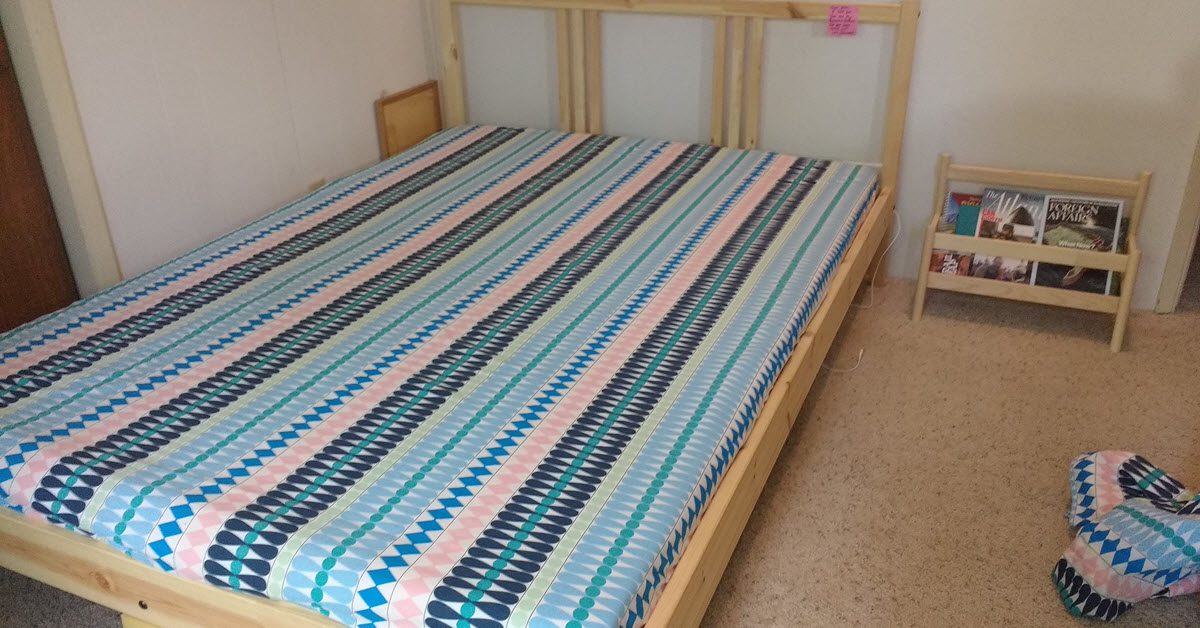
And here’s what it will look like when you are done.

12

Take it over to the bed and try it out. If you’ve done your math right, and not pulled your elastic too tightly, it will fit like a dream. Make the other sheet now and you’ll have a spare.

13

———————————————————————————–
Charlotte Kaufman is a writer and sewist in Mammoth Lakes, California. She specializes in marine and home interiors and continues to fall more and more in love with quilting. You can follow her at charlottekaufman.com.