Cleaning Your Sewing Machine

Cleaning Your Sewing Machine

Clean Machine Lead

Keeping your sewing machine clean is an important part of producing beautiful things with fabric and thread. After enough projects, there will be an accumulation of fluff from thread and fabric in the inner workings of your machine. If you leave that to accumulate for too long, your machine will start to perform poorly.

Anytime I start to get skipped stitches or a sluggish machine I think back and ask myself when the last time was I cleaned it; it was usually too long ago.

Read the manual

I talk a lot about getting to know your manual. I’ve put little sticky notes all over mine so I can quickly find what I’m looking for. Get your out manual (or locate a PDF online) and go to the section on ‘How to clean your machine.’

1

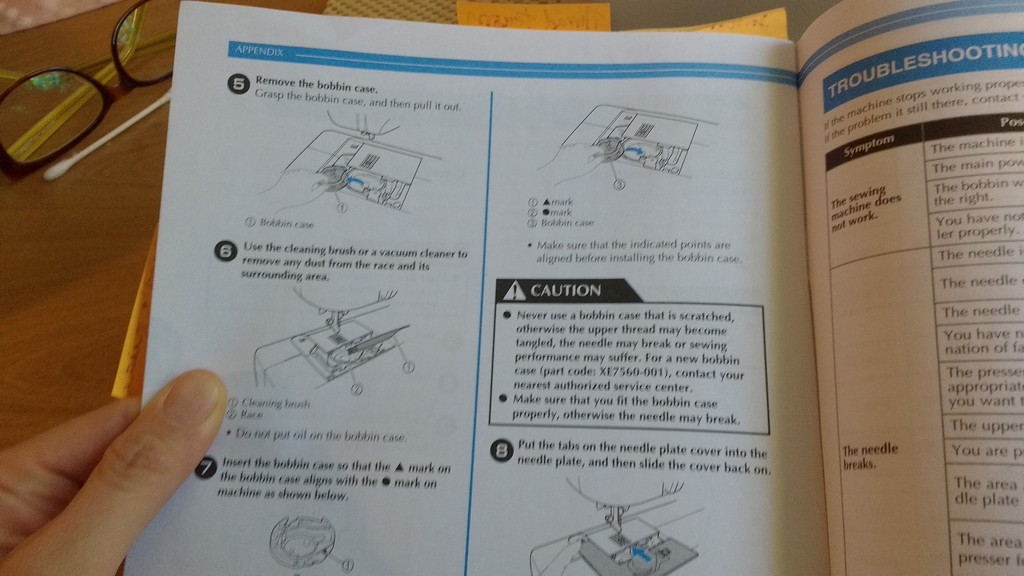
Some machines will tell you to oil certain parts. Others won’t. My top advice is to always follow the manufacturer’s recommendations on cleaning.

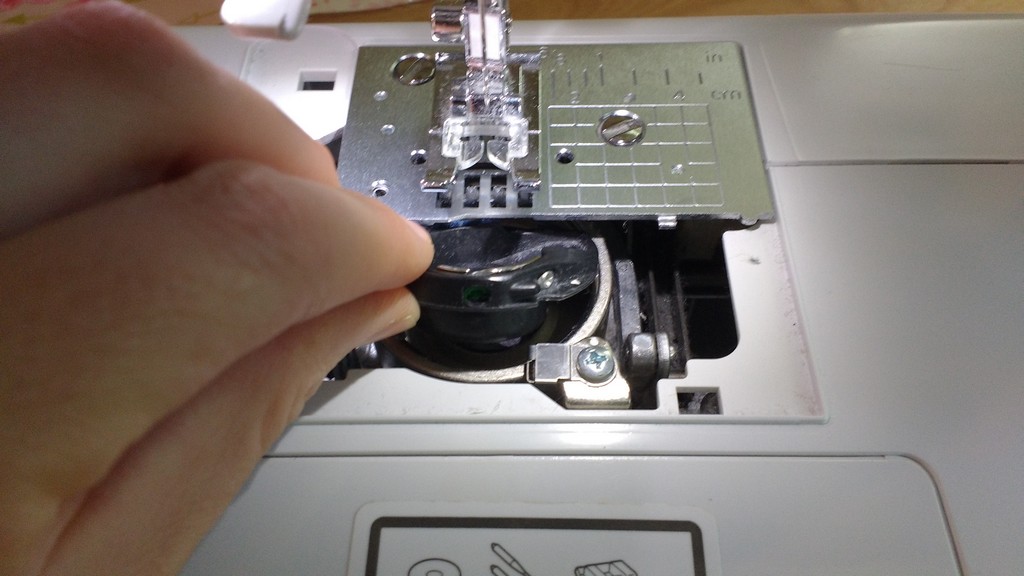
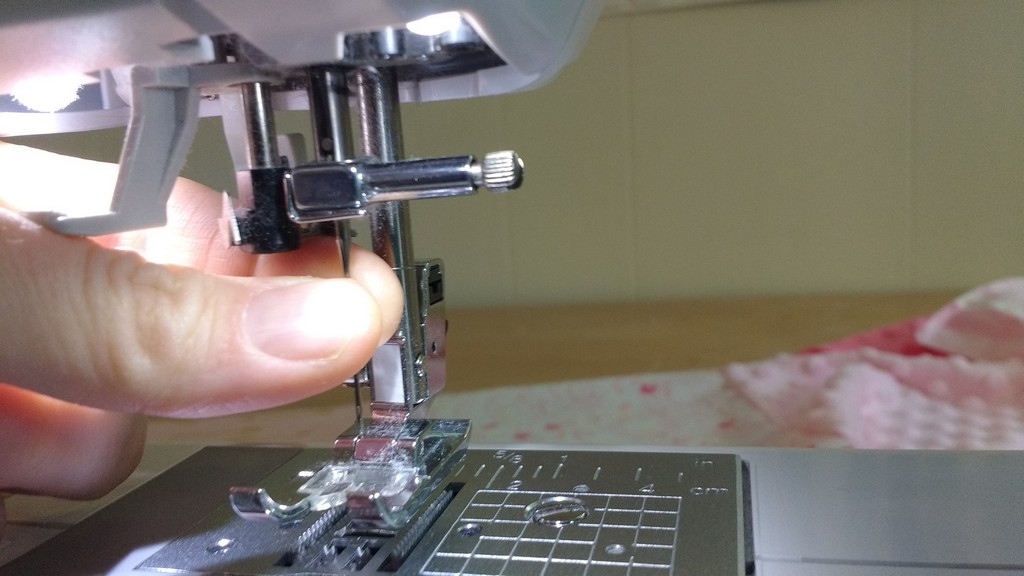
For my Brother cs6000i I need to remove the bobbin cover on the needle plate cover.

2

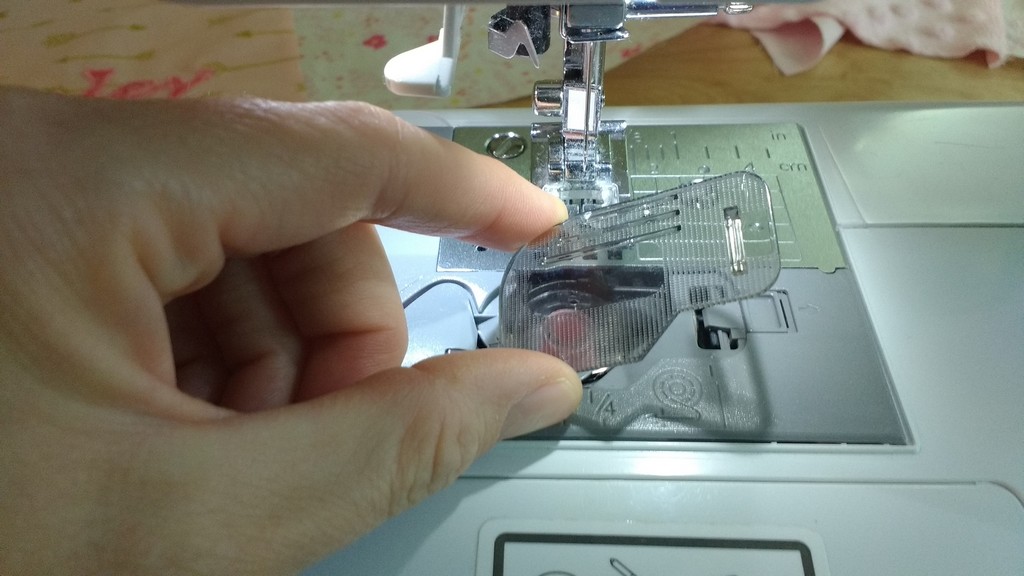
Then I follow the instructions to remove the needle plate cover itself.

3

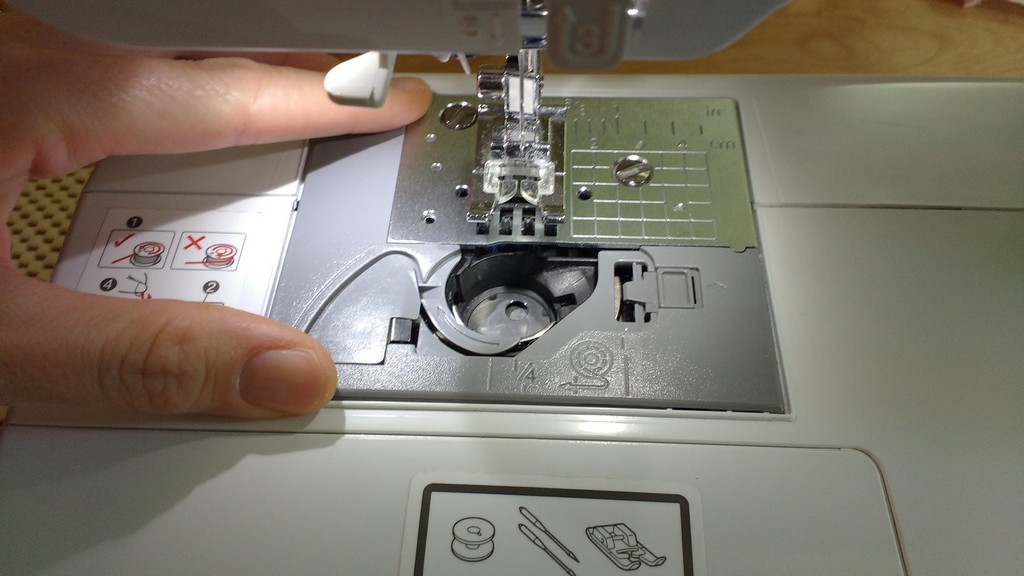
Next I remove the bobbin case.

4

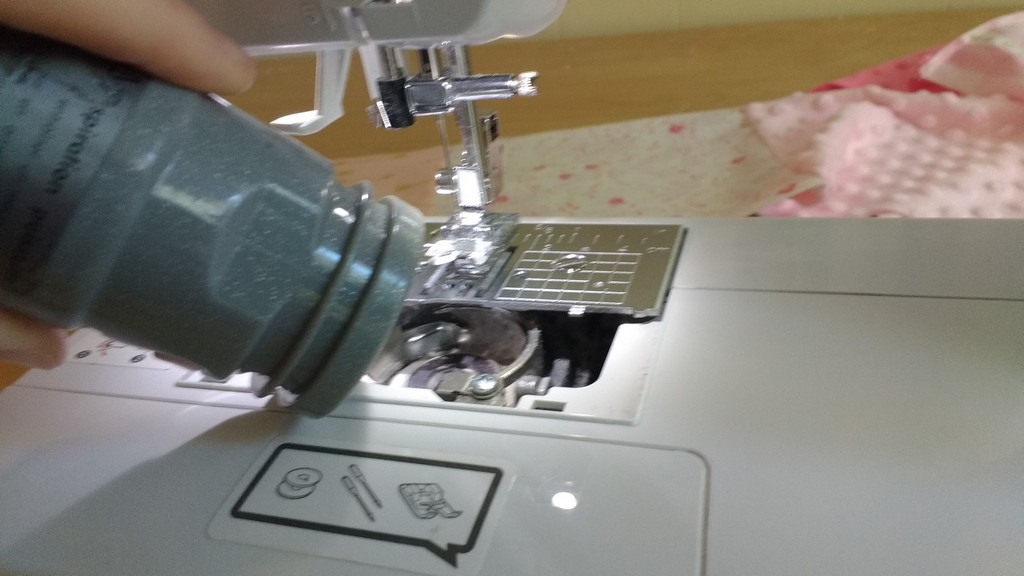
Vacuums and cotton swabs

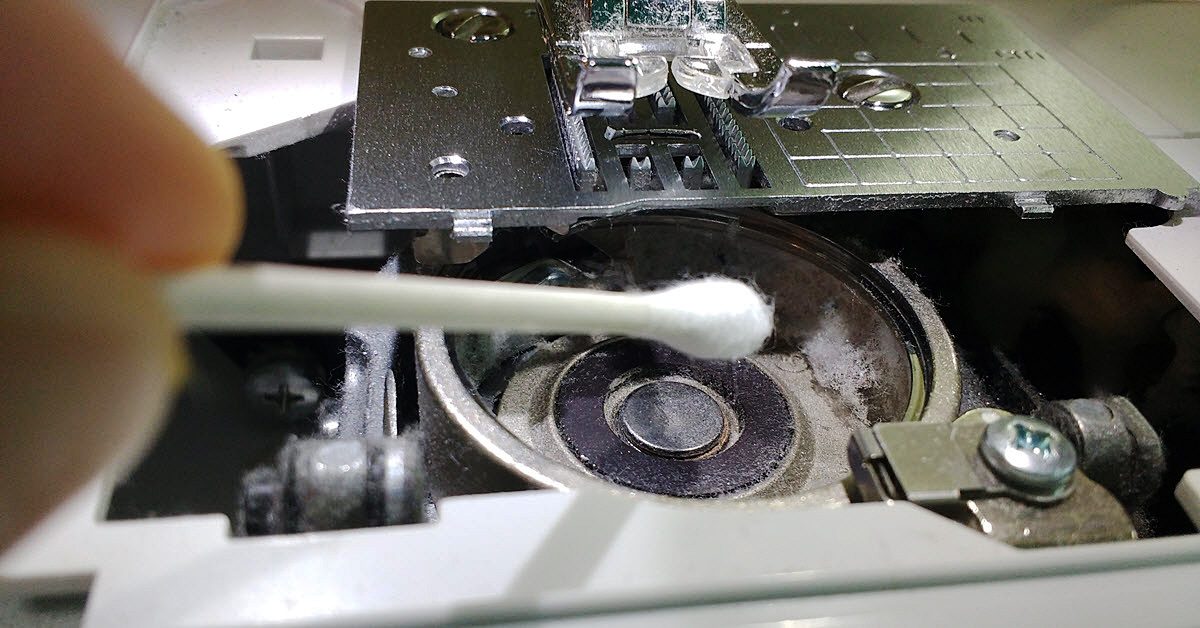
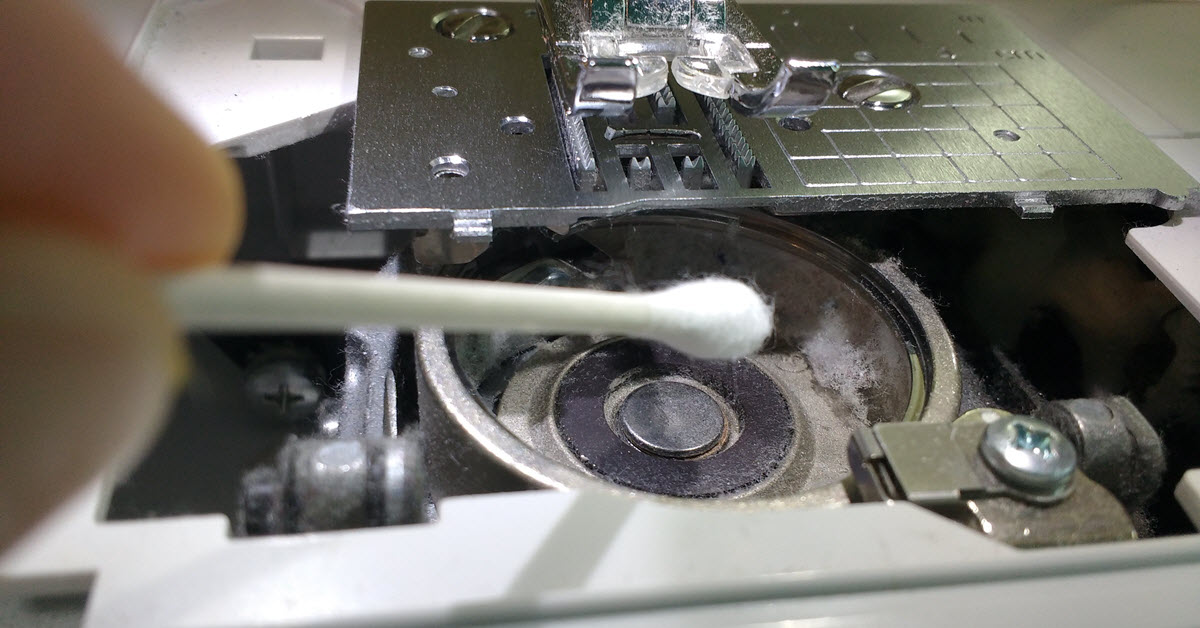
Now I have unfettered access and can get to cleaning. Step one, vacuum!

5

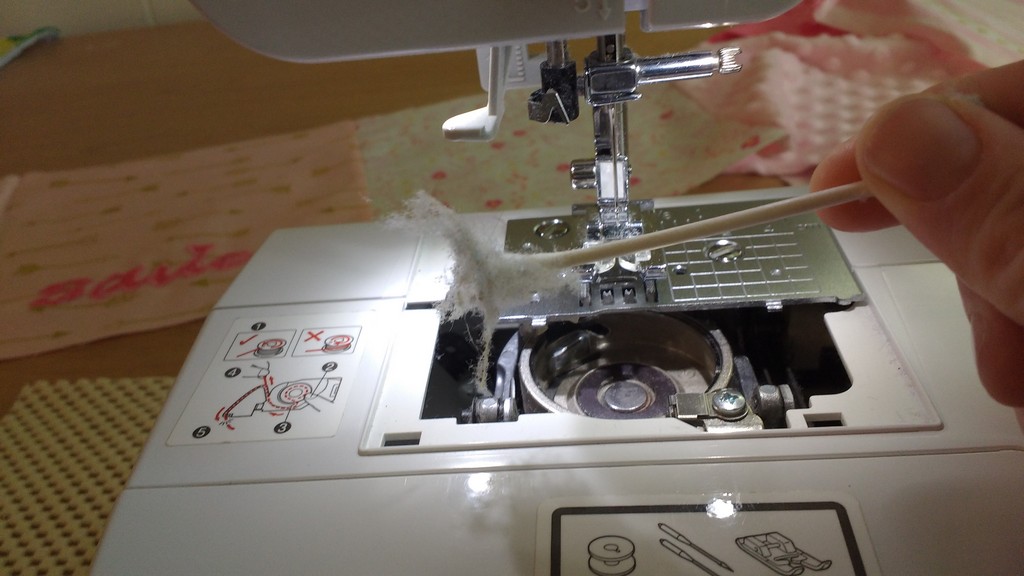
I also use cotton swabs to gather up the fuzz that my vacuum can’t reach.

6

Look at all that fabric and thread fuzz!

7

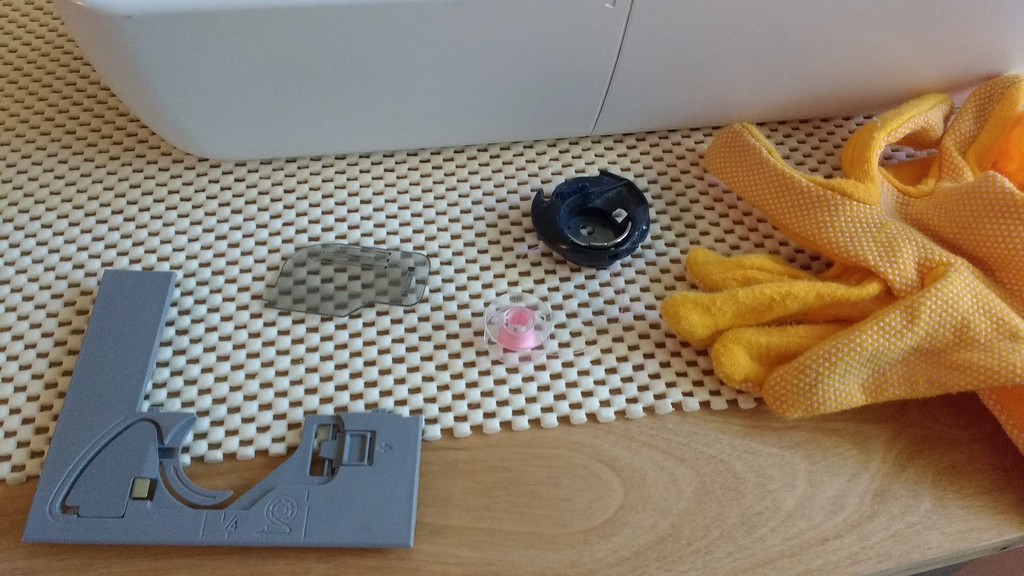
Once the inside of the machine is clean, you need to also clean the parts you removed.

8

After you’ve reassembled the parts you’ve removed, I also suggest changing out to a new needle. It’s better to start fresh and new after a cleaning.

9

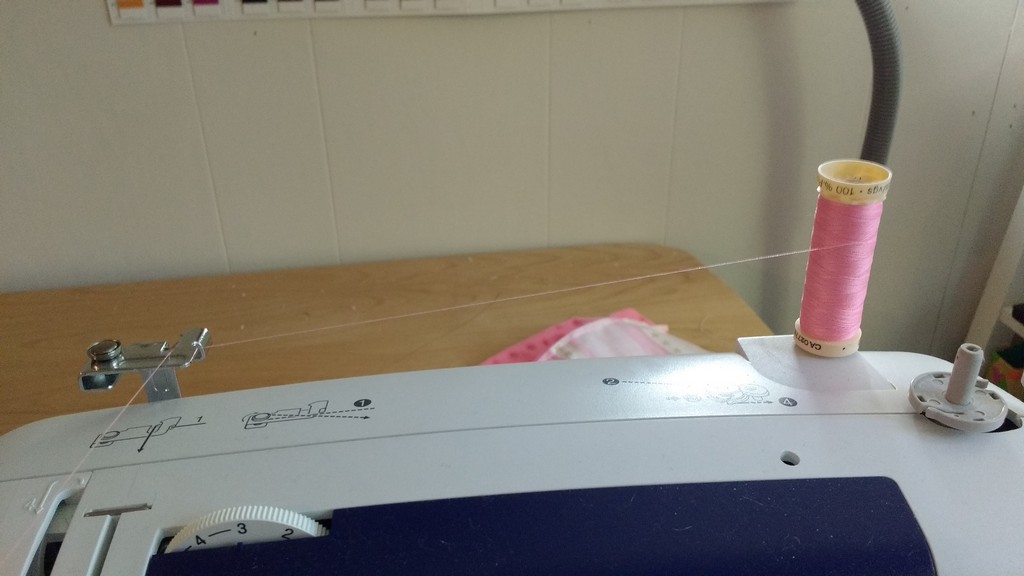
Re-thread in your desired color.

10

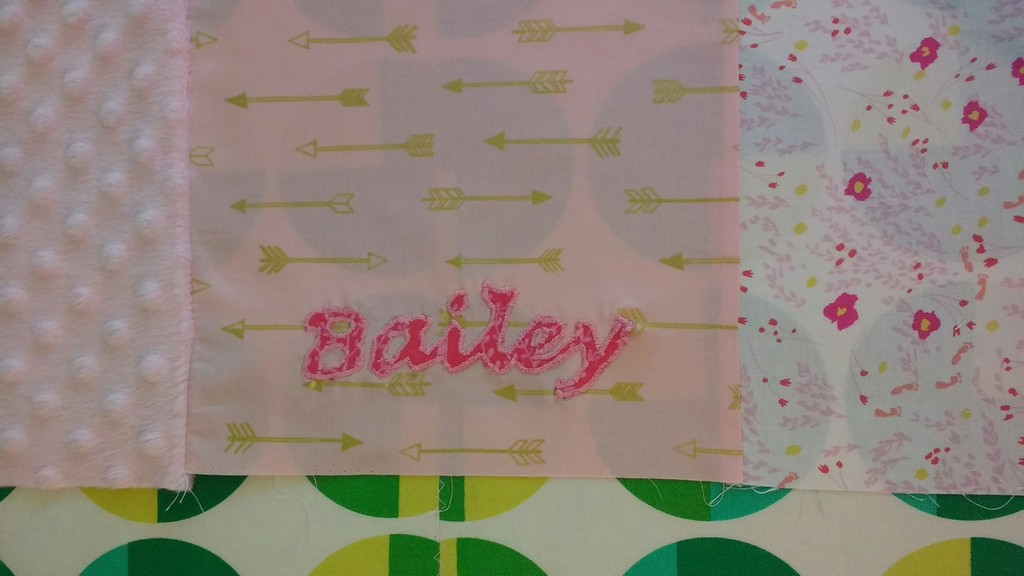
Now do some practice stitches. Here you can see how clean my embroidery stitch looks after cleaning my machine and switching out to a new needle.

11

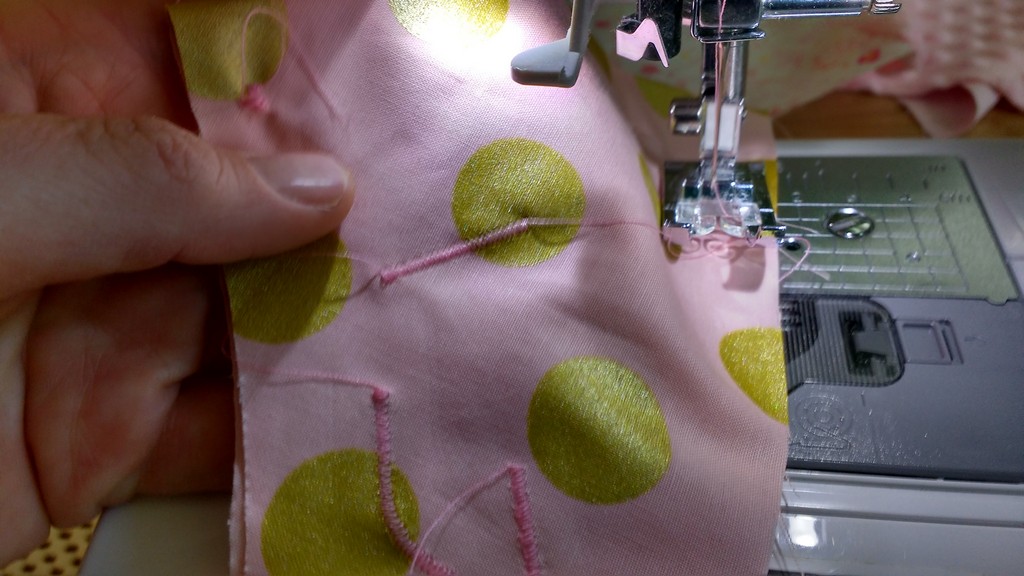
With a clean machine I was able to do some beautiful embroidery for a friendship quilt I’m making.

12

Happy cleaning and happy sewing!

———————————————————————————–
Charlotte Kaufman is a writer and sewist in Mammoth Lakes, California. She specializes in marine and home interiors and continues to fall more and more in love with quilting. You can follow her at charlottekaufman.com.
Fast and Easy Way to Hem Pants

Fast and Easy Way to Hem Pants

My fast and easy way to hem jeans & pants.

My fast and easy way to hem jeans & pants.

I’m barely over 5’ tall. It used to be that clothing companies made pants in “short” lengths to accommodate people of my stature. More and more often now, though, I’m finding that clothing companies, particularly jeans producers, make pants in “regular” and “tall.” I’m not sure why they think all the short (or as I prefer to call it, concentrated awesome) people no longer need pants, but there you have it. As you can imagine, this leaves me with the choice of either patching jeans and pants until there’s nothing left to them, or buying clothes that are too long and hemming them. Hemming something I’ve paid money for ticks me off, so I want to get it done and over with quickly. I developed a fast and easy way to hem jeans and pants.

First

Find a pair of pants that are a length you like. These will act as your template or guide. Lay them flat and smooth. If possible, I suggest pinning them down to keep them flat. Next, turn the pair of pants you’re going to hem inside out. Lay them on top of the pants that are the correct length.

Let’s begin

Choose a place on the leg of the pants where you’ll be okay with seeing a line. I often opt for the upper thigh. In that spot, pull the leg of the pants that are too long up, gathering the extra fabric in a straight fold that goes around the entire leg as you go. When the pants are the right length, pin this fold so that it comes directly out from the leg itself. Do this on both legs.

Almost done…

Sew around the fold to create your shortened pants, then cut off the extra fabric. Whip stitch around the cut edge for extra strength in the seam and reassurance that it won’t split apart while you’re wearing your new pants. Again, do the same thing on both legs.

Viola!

Hemmed pants, perfect for your height – no measuring or marking required. This is one of my favorite “sewing cheats” because it’s so quick and helps me buy pants and jeans affordably, even clothing companies no longer feel the need to cater to people my size. Give it a try next time you need to hem pants and let me know what you think!