DIY Plaid Christmas Tree Skirt with Satin Binding

DIY Plaid Christmas Tree Skirt with Satin Binding

DIY Plaid Christmas Tree Skirt with Satin Binding

I’ve always adored the classic look of plaids during the holidays. And plaid combined with satin is just lovely. We recently moved to a new house and I’ve been doing Christmas on a budget this year. I knew I wanted a plaid Christmas tree skirt but also knew I needed to be frugal. Here’s how I accomplished both.

Fabric first!

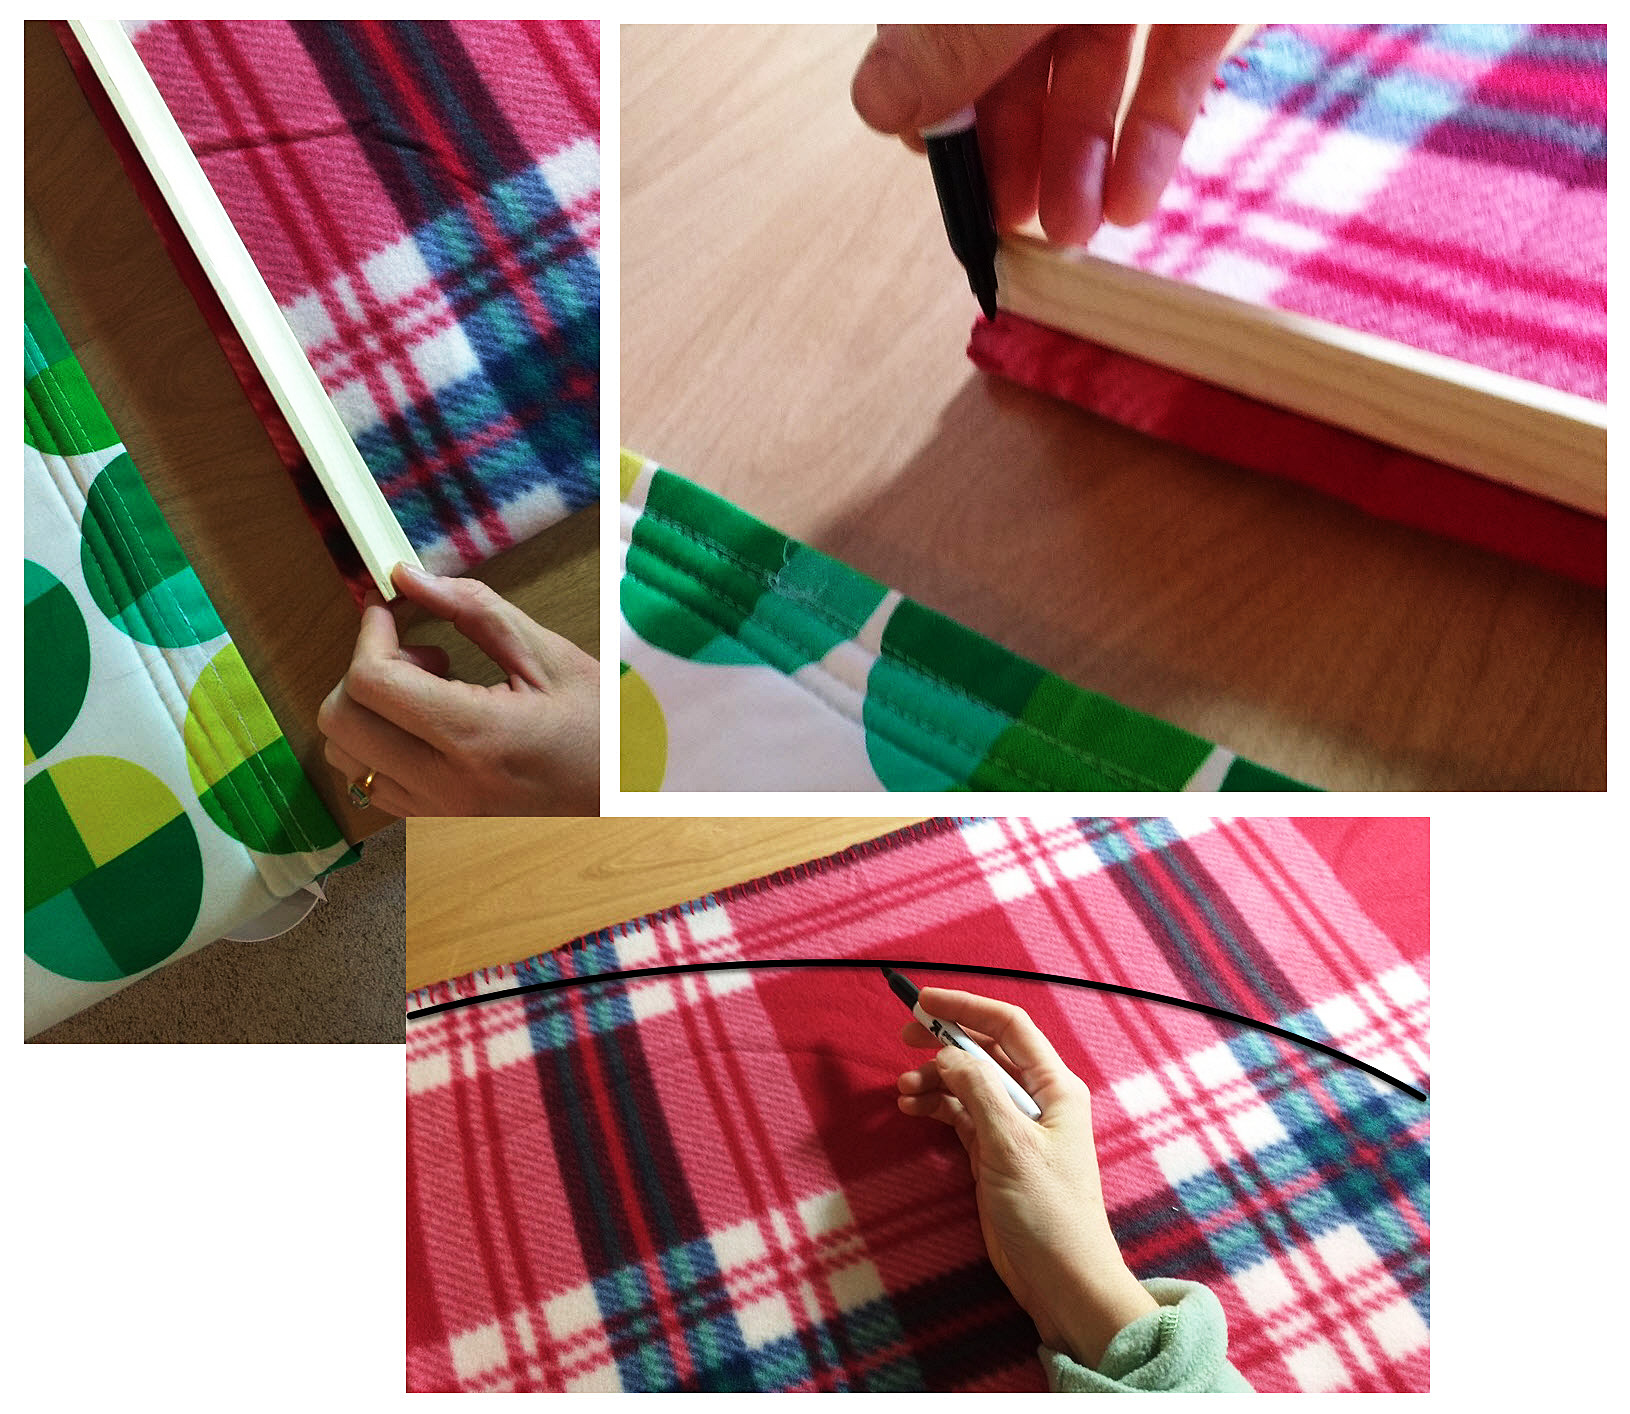
I picked up this plaid fleece throw blanket at K-Mart for $1.99. To create a perfect circle, I folded the blanket into quarters and then measured the shorter height of the rectangle it formed. On this blanket, that was 28″. I, randomly, had a stick that measured exactly 28″. You could do this with a long ruler, or just measure out the length you need on any stick or piece of wood and do the same.

DIY Plaid Christmas Tree Skirt with Satin Binding

Once you’ve marked the length on both sides of the rectangle, hold the stick at the corner of the folded blanket, and then draw an arc from point to point, moving only the top of the stick.

Making the cut

DIY Plaid Christmas Tree Skirt with Satin Binding

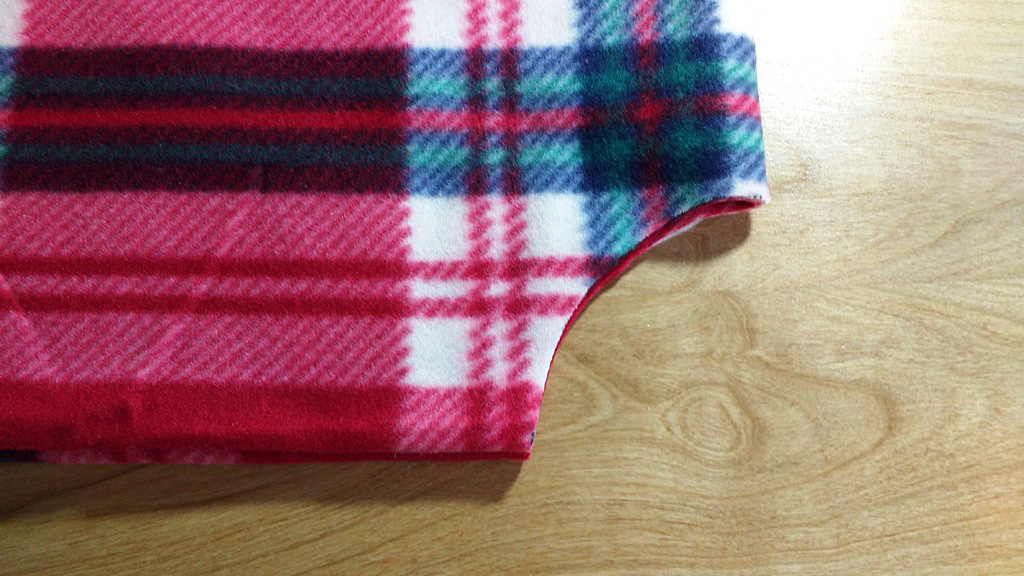
Now cut out that lovely quarter circle. Before you unfold the blanket, cut out the interior circle (the part that will wrap around the trunk of the tree.) To do this, determine your desired circumference, which will allow you to find the diameter, and thus the radius. If you need the formulas, they are: d = C/π and r = D/2

DIY Plaid Christmas Tree Skirt Satin Binding

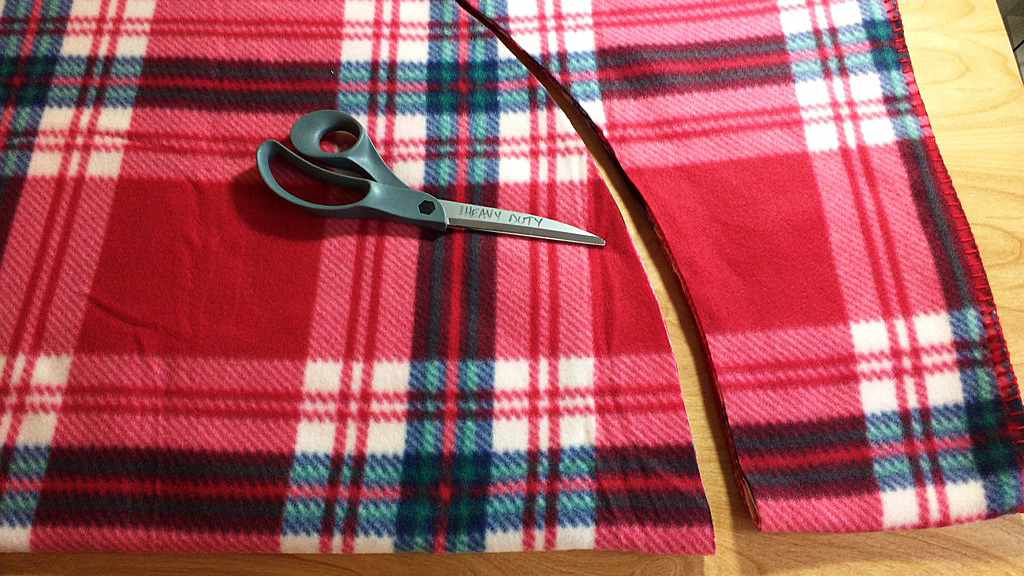
Once you know your radius, do the same thing you did to mark out the larger arc but this time at the corner where the blanket is folded into quarters.

DIY Plaid Christmas Tree Skirt Satin Binding

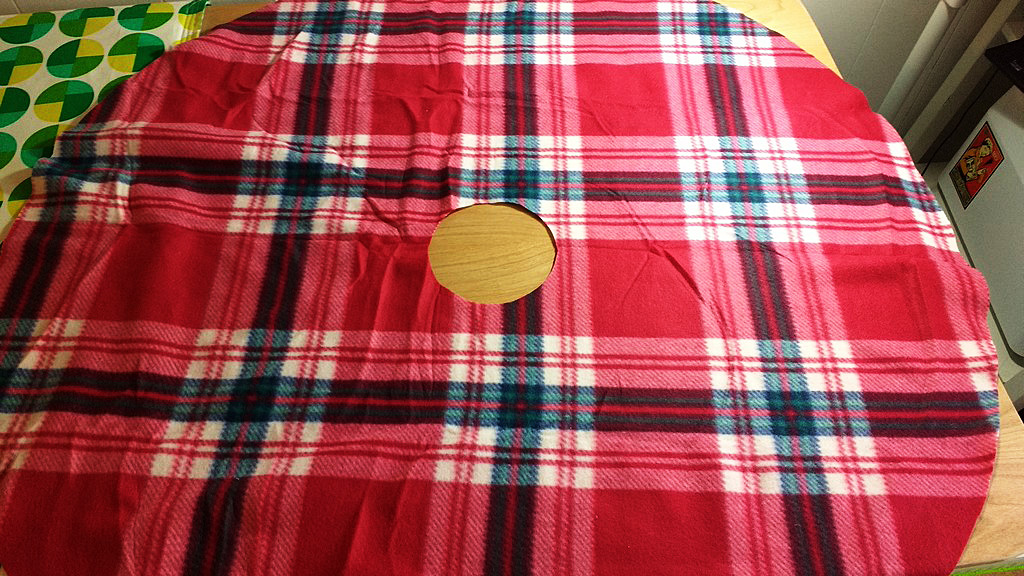
Wash away those wrinkles

At this point I unfolded everything but the fleece was far too wrinkly. One of the great things about fleece is that it doesn’t fray, so I took the opportunity to wash a few of my daughters’ blankets and threw them, and this tree skirt, into the wash on the cold, delicate cycle. I added white vinegar as fabric softener, and then dried on low. It significantly reduced the wrinkles of the fleece.

DIY Plaid Christmas Tree Skirt Satin Binding

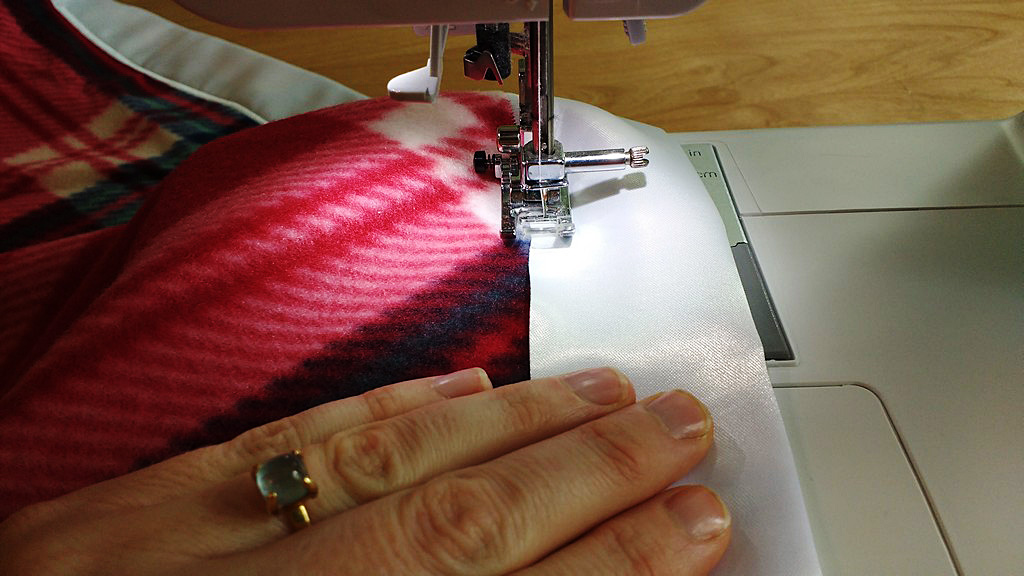
Binding it all together

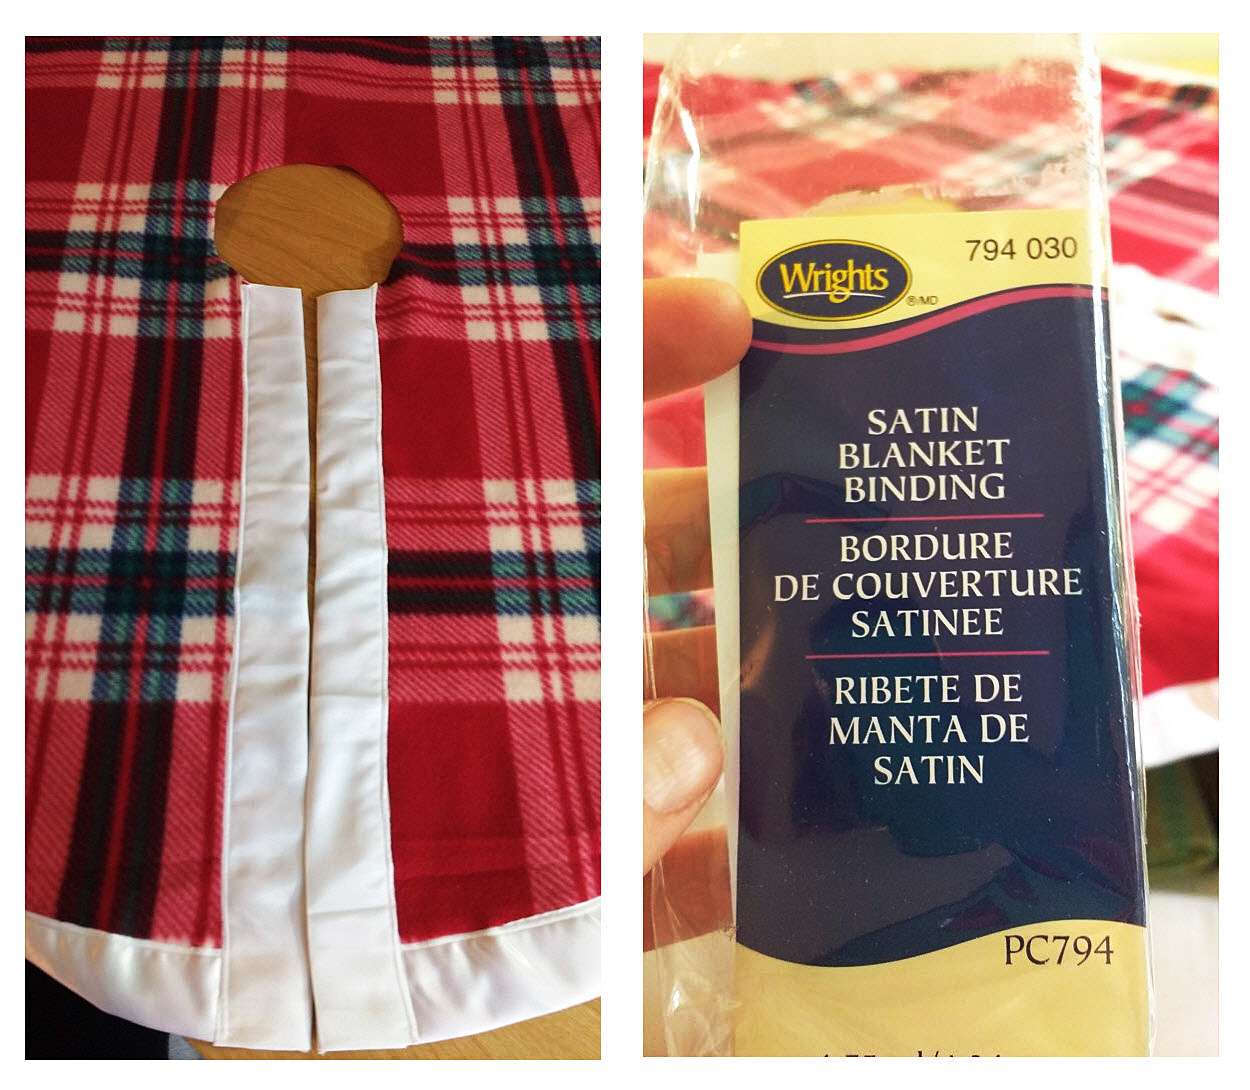
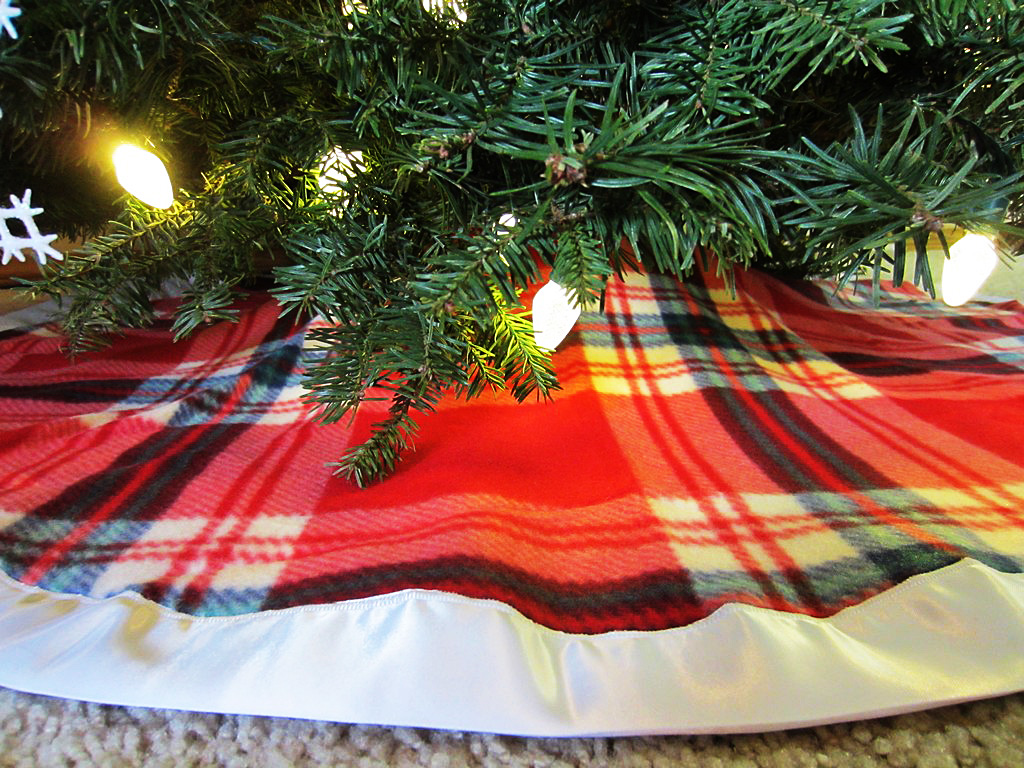
For a tree skirt that is 56″ wide like mine, you will need two packages of satin binding. I used a satin applique stitch and worked my way around the skirt. Pre-packaged satin blanket binding is NOT cut on the bias, so you will need to pay careful attention as you go around the curve of the skirt.

DIY Plaid Christmas Tree Skirt Satin Binding

Some skirt tutorials will tell you to cut a line up to the interior circle before you add binding; I like to cut my line afterwards.

DIY Plaid Christmas Tree Skirt Satin Binding

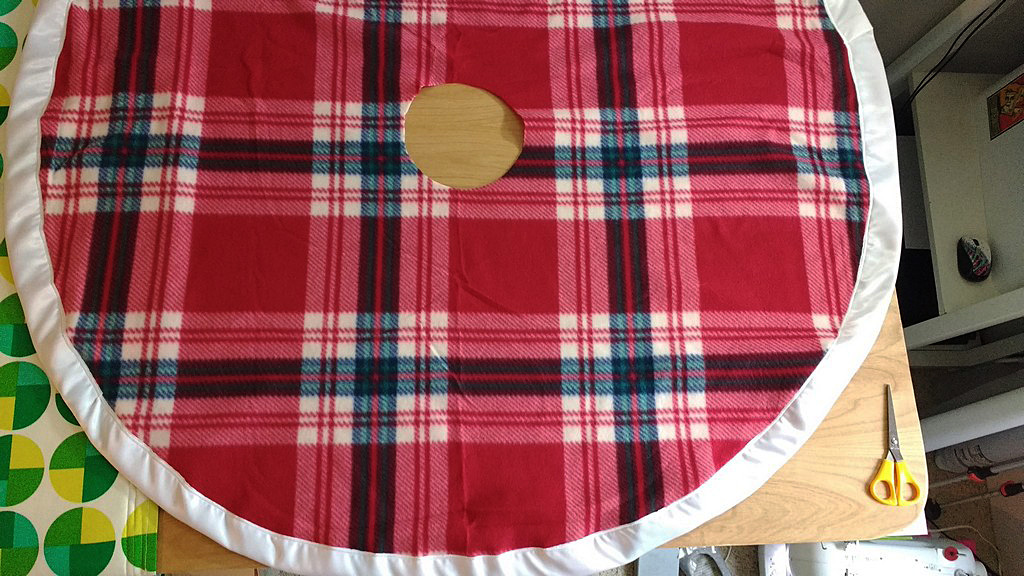
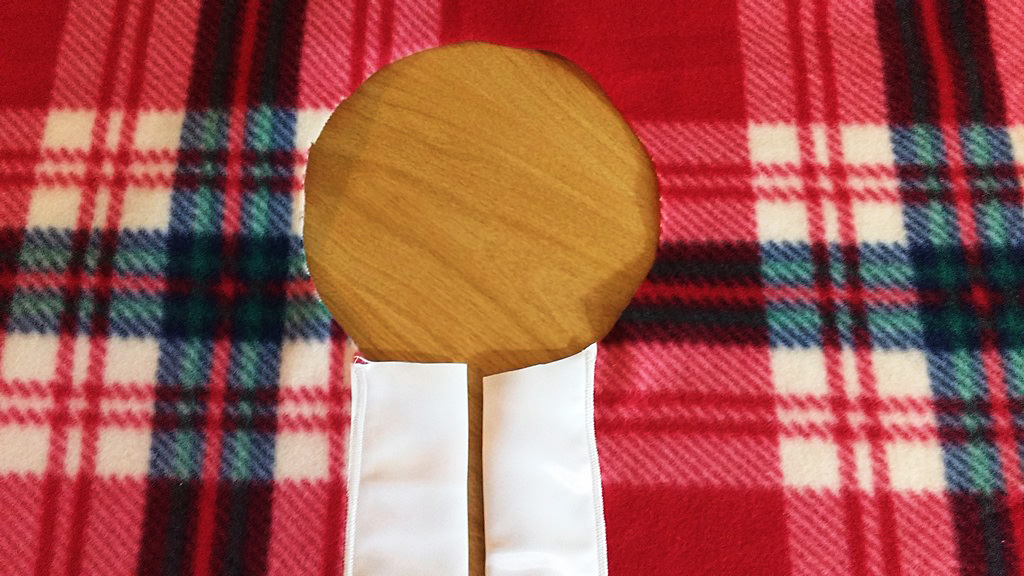
Looking at the fabric, I followed the lines of the plaid to cut a straight line from the outside of the skirt to the inside and then used more of the satin binding to trim each edge.

DIY Plaid Christmas Tree Skirt Satin Binding

Welcome to the inner circle

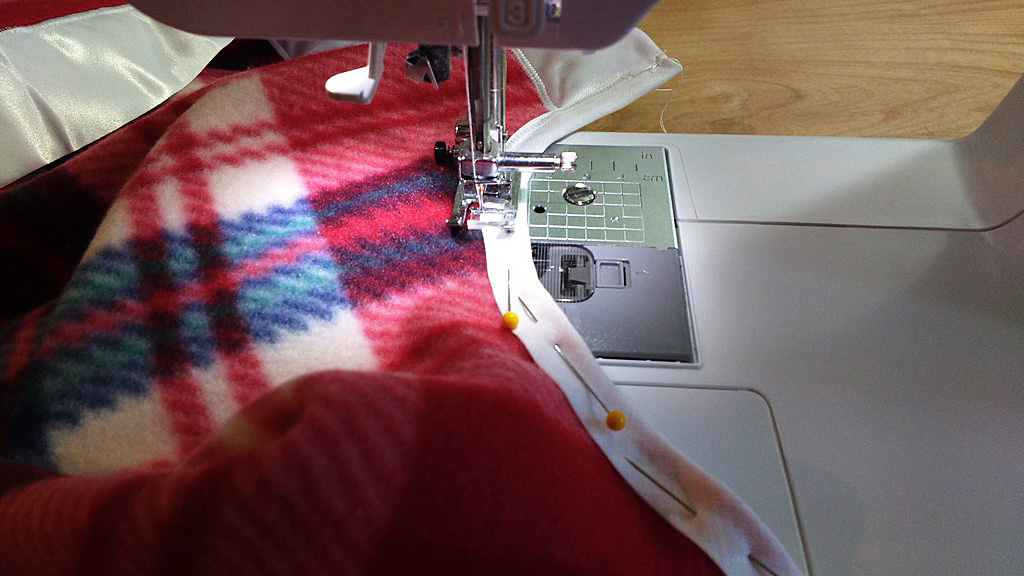
When it comes time to bind the interior circle, do yourself a huge favor and switch to binding that is cut on the bias. When fabric is cut on the bias it is much easier to curve it, which makes binding circles, especially interior circles tremendously easier.

DIY Plaid Christmas Tree Skirt Satin Binding

Here I switched to prepackaged white bias binding and though pinning is not my favorite, thing, for this project I pinned everything carefully in place.

DIY Plaid Christmas Tree Skirt Satin Binding

Pro tip: think ahead before you pin and place your pins in the direction that you sew. This will it easier to pull them out as you go around the circle.
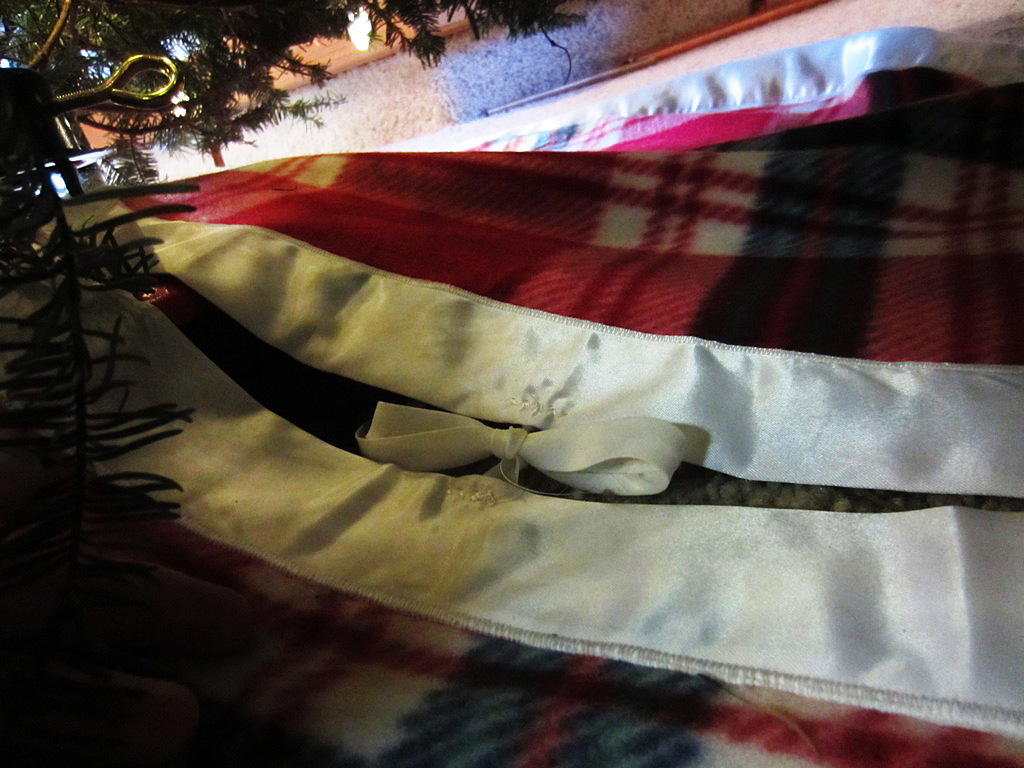
DIY Plaid Christmas Tree Skirt Satin Binding

Tie it off

Lastly, don’t forget the ties! I used four pieces of the binding tape that I used on the interior circle to create ties, two at the top of the circle, and two 12 inches down the cut edges.

DIY Plaid Christmas Tree Skirt Satin Binding

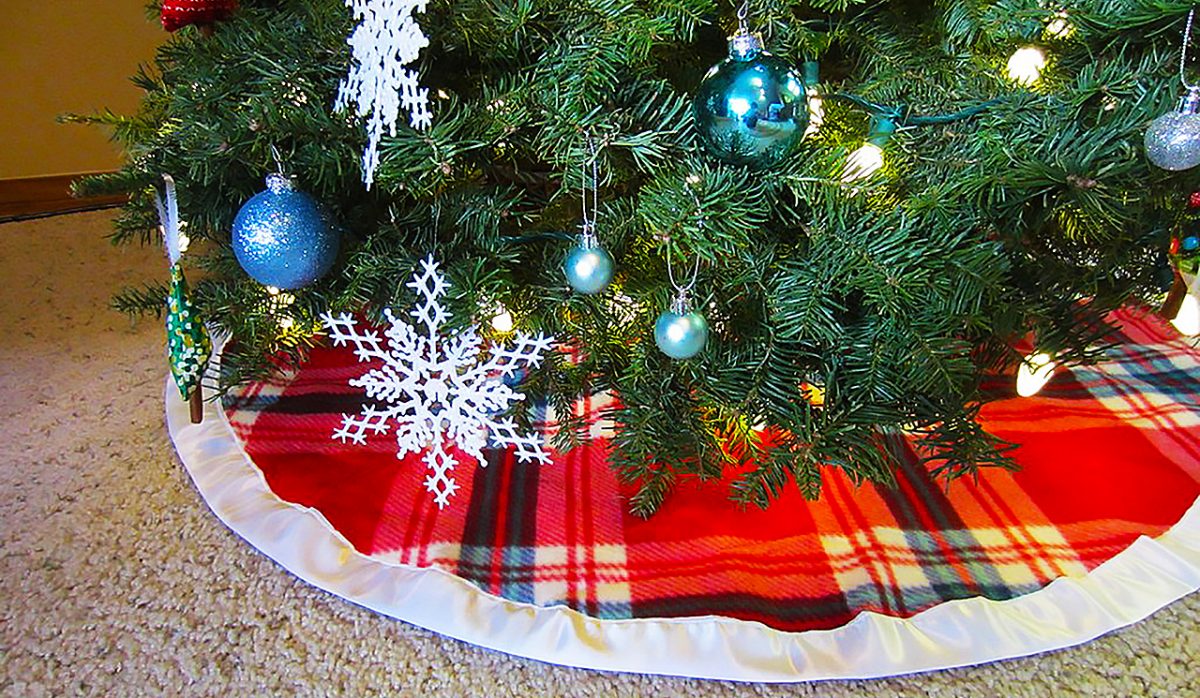
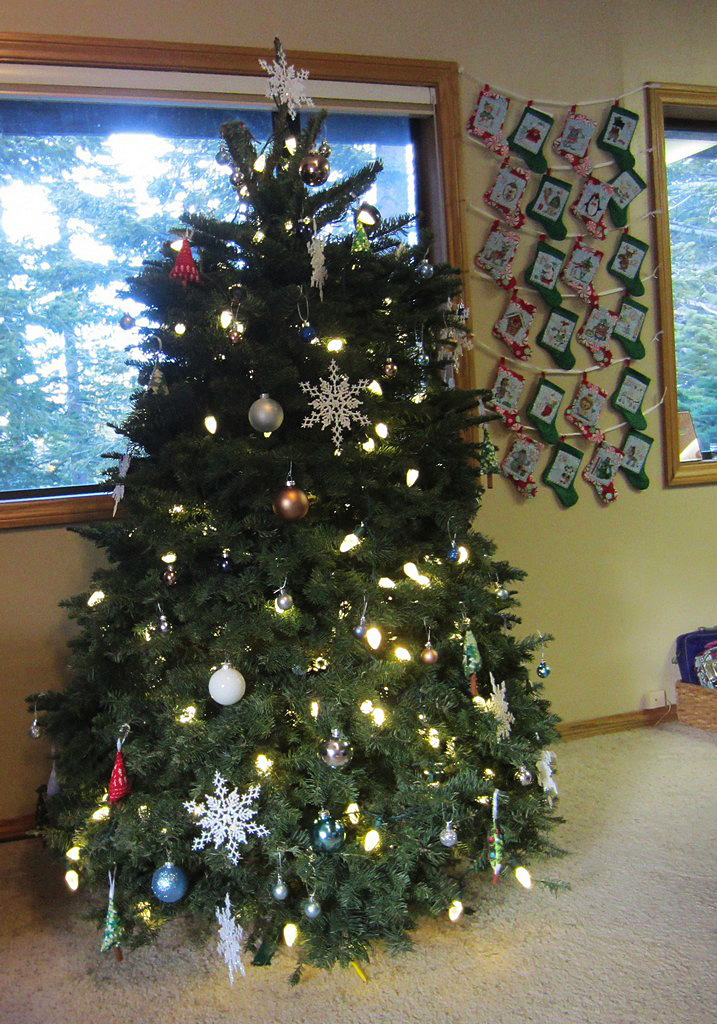
Here is my tree before the plaid tree skirt.

DIY Plaid Christmas Tree Skirt Satin Binding

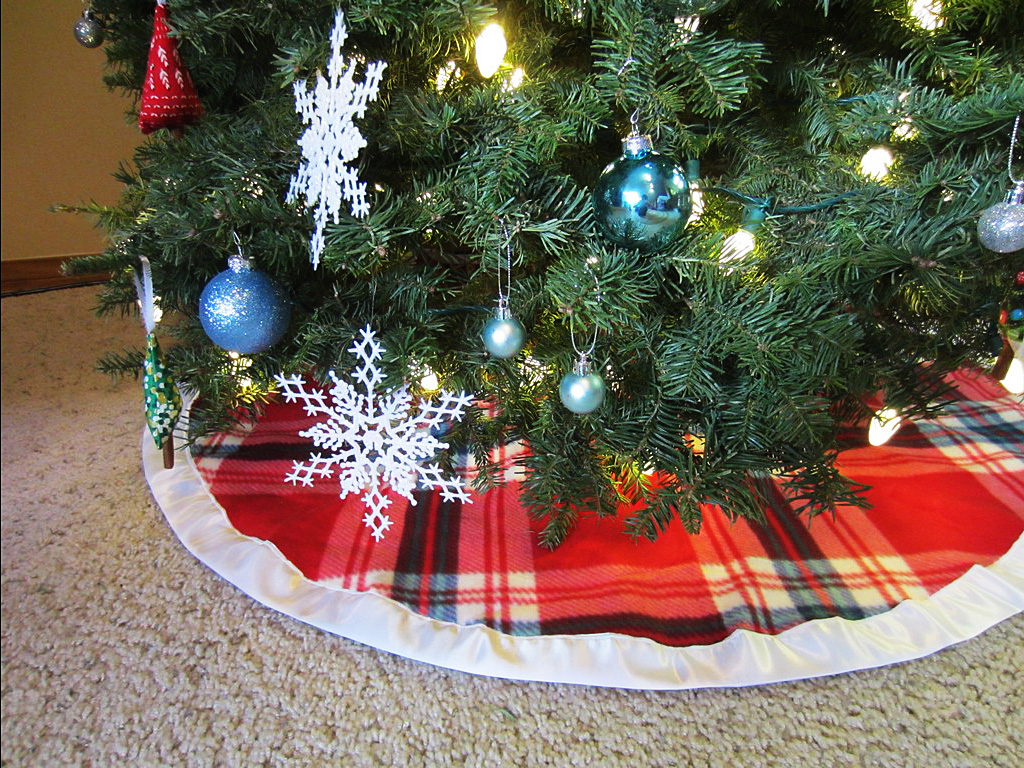
And voilà, the finished product!

DIY Plaid Christmas Tree Skirt Satin Binding

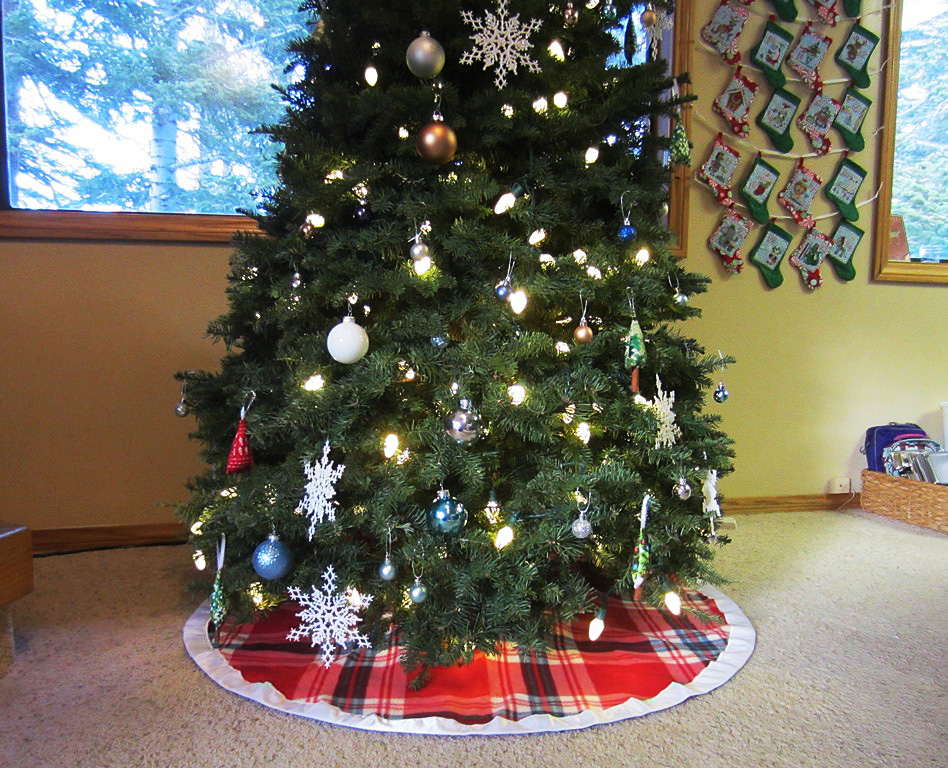
The combo of fleece, plaid, and satin just warms my heart.

DIY Plaid Christmas Tree Skirt Satin Binding

What are you DIYing this holiday season? Let us know and happy sewing!

—————————–
Charlotte Kaufman is a writer and sewist in Mammoth Lakes, California. She specializes in marine and home interiors and continues to fall more and more in love with quilting. You can follow her at charlottekaufman.com.
Tree Skirts and Fabric Blocks

Tree Skirts and Fabric Blocks

I’ve had planned indoor picnics with my nieces for the sake of Valentine’s Day and Halloween.

I’ve had planned indoor picnics with my nieces for the sake of Valentine’s Day and Halloween.

Christmas is even closer than it was when my last blog about homemade, sewn gifts was posted, so it seems fitting to keep with the holiday vibe! Whether or not I mentioned this earlier, I’m a fan of holidays to the point that I’ve had planned indoor picnics with my nieces for the sake of Valentine’s Day and Halloween, so don’t be too surprised if you see a good number of holiday topics when the big ones roll around!

I’ve been browsing online to try and find an interesting Christmas project to check out, and I came across a concept that is really fitting this season: a tree skirt. You see, we have one, but we changed Christmas stockings this year. The new ones aren’t the best of matches to the old tree skirt, so we’re currently going tree-skirt-less for the sake of coordination. Basically, the idea of constructing a tree skirt is a logical notion for a Christmas project this year!

Let’s decorate!

I just use pieces of material one piece per section.

I’ve come across more than one option including a fancy scalloped one that caught my eye, but being the patchwork girl that I am, I was more drawn to a patchwork-looking design. As easy as the overall pattern might seem to some, the idea of creating my own blocks with multiple patterns is a bit daunting to me. Usually, I just use pieces of material—one piece per section—and I don’t know that I’ve ever tried to piece together my own block. For that reason, it seems reasonable to do some research before potentially diving into the process. As I’ve said before, doing research can make a sewing process smoother, and should I try this, I want it to go smoothly!

And maybe certain readers are in the same boat with me on this one—interested in moving into elaborate blocks, but unskilled in the technique. If so, keep reading! I’m going to hand over some general ideas that I’ve found that could help with the process!

Where to start…

Tip #1: Press your material! This is a simple step, though one that can easily go overlooked. Even if you want to just jump into constructing your project, taking the time to level out the fabric you’ll use can help in making sure things line up as they should. So before you sew the first stitch, break out that iron!

Pressing is also something to keep in mind during the process when you sew fabric together. If you connect two blocks of fabric, press that seam! As you connect more material, your blocks will be less likely to have random bumps or puffy spots because the act of pressing as you go will ideally have smoothed out troublesome areas before additional pieces get locked in. That kind of consistency—no puffiness where it shouldn’t be—can create uniformity. You can even get pressing sprays to help solidify the effect!

Around the block

Tip #2: Learn the basics of block patterns! Are you planning a four patch product? Nine patch? It helps to think about those concepts before you start piecing your product so you can plan the design and get an idea of how you’re going to structure your work. This might be particularly true if you’re planning a five patch product since basic mathematics will let you know that such a pattern does not divide evenly by two! There’s a technique for each of these blocks, and being aware of those techniques can help you through the process. You can find out more about those pattern options here.

Crazy square block.

Crazy square block.

Once you get comfortable with the more traditional and beginner-friendly possibilities, maybe you can work your way into something less typical, like a “Crazy square block” of material.

Color theory

The color wheel.

The color wheel.

Tip #3: Get to know your color options! One site recommends the use of the color wheel, and I think this strategy might be a good one. While aesthetics might be subjective, decisions on color are still something to take seriously before you begin stitching. This, I think, could be particularly true when you’re creating your own block from a series of fabrics. Instead of just having 50 or so segments of color on one product—one per block—you could end up with various colors per block, which leads into a whole lot of color-consideration territory!

If you want to go with a cool tone, for instance, how easily could you do a nine patch product with different variations of color per block—one for greens, one for blues… That example is a perfect illustration of why knowing your colors could be so important. If you don’t know too many shades of cool colors, you might not have the background knowledge that would help you create the cool color, nine patch work. Basically, if you want a cohesive final product of multiple fabrics per block, think about those colors while you consider your fabrics!

Measure twice, cut once

Tip #4: Be exact with your measurements! This one might be a bit obvious—or really obvious—but it’s worth noting. Not only should you make sure your blocks are consistent in size for the best possibility of a final product, but you should make sure the individual sections of the block are measured accurately. Doing so could keep embarrassing things from happening—like running out of fabric in your squares before you get to the end of a block or having excess. Either mistake could lead to the overall product looking off because every block wouldn’t have the same mistakes. If you want uniformity throughout, measure!

Even if Christmas is too close for this concept to result in a 2016 tree skirt, this is still something I can keep in mind for next year. In fact, new goal!

~ Make a home-sewn tree skirt. ~

I wonder if 2017 – me will hate all of these goals I’m tossing her way? If so, maybe she can appreciate it if there’s a by-hand product decorating the bottom of the tree next year!

Inspiring Christmas Tree Patchwork Projects

Inspiring Christmas Tree Patchwork Projects

Christmas Tree Patchwork is interesting because there are so many different ways to make trees. They can be made using simple or more elaborate designs and can be laid out in many different ways. I’ve scoured the internet to collect all the best blocks and designs for many different ways to make a holiday or Yuletide tree or trees using patchwork. Let these designs inspire you to create something new this year for your home or a gift.  This collection includes:

  • Easy Christmas Tree Patchwork Blocks
  • Single Tree Quilt Designs
  • Abstract Christmas Tree Patchwork
  • Modern Tree Quilt Designs
  • Other Christmas Tree Patchwork Projects

 Easy Christmas Tree Patchwork Blocks

Photo credits: Diary of a Quilter (top left); Happy Quilting Melissa (top right); ChezStitches (bottom left); Ellison Lane (bottom right).

Photo credits: Diary of a Quilter (top left); Happy Quilting Melissa (top right); ChezStitches (bottom left); Ellison Lane (bottom right).

These patterns and design ideas use different ideas to construct the tree blocks, but they all produce quilts with a whole lot or forest of trees. Every one of these designs is easy to piece and quilt.

Patchwork Forest by Amy Smart at Diary of a Quilter is my choice for the holiday quilt to make this year. I just love this easy design and the quirky trees that are not all the same.

These crazy patch trees are arranged into the shape of a larger tree for a different arrangement of the many trees theme.

This Easy Christmas Tree Patchwork Block Tutorial at ChezStitches shows a totally different but equally easy way to piece trees, using mirrored triangles joined back to back.

This way to make strip pieced trees adds more fabric variety within each tree. You can play with this to achieve bedecking and bedazzlement and simulate trimmed trees.

Single Patchwork Christmas Tree Quilts

These quilt designs feature a single tree.

Photo Credits: Quilting at About.com (top left); Treasures-n-Textures (top right); Material Girl Quilts (middle left); Hoffman Fabrics (middle right); McCall's Quilting (bottom left); Waterwheel House Quilt Shop (bottom right).

Photo Credits: Quilting at About.com (top left); Treasures-n-Textures (top right); Material Girl Quilts (middle left); Hoffman Fabrics (middle right); McCall’s Quilting (bottom left); Waterwheel House Quilt Shop (bottom right).

This tutorial for a single Christmas Tree Patchwork design is as easy as it gets.

I’m inspired by this Emma’s Tree design to use reds and gold squares for twinkle and tree trim when following the About.com pattern above.

Here is a different single Christmas Tree Patchwork design constructed from triangles. I love the metallics for the background fabrics on this, and the easy quilting of the individual triangles.

Here’s another triangle Christmas Tree Patchwork, this one built from equilateral triangles, at Hoffman Fabrics.

O Tannenbaum is Christmas Tree Patchwork made from Log Cabin style blocks. This free miniature quilt pattern from McCall’s includes a star on top and presents underneath the tree.

This design, suggested by Moose Creek  Quilting, can serve in lieu of a real or artificial tree. The pattern includes sewing 25 red buttons to hang tiny patchwork or other ornaments you sew yourself. I love this version of this pattern that was made by Waterwheel House Quilting Studio using Kaffe Fassett fabrics.

Abstract and Modern Christmas Tree Patchwork Quilts

These designs are a little different, reflecting a more modern or abstract feel.

Photo credits: May Chappell (top left); Jacey Craft (top right); Ann Kelle (bottom left); Moda Bakeshop (bottom right).

Photo credits: May Chappell (top left); Jacey Craft (top right); Ann Kelle (bottom left); Moda Bakeshop (bottom right).

This Mod Tree Wall Hanging by May Chappell makes me think of a Christmas Tree farm.

Another design with a tree farm vibe is Happy Trees Mini Quilt. Jacey named this one Happy Trees because it reminds her of dear Bob Ross and his “happy little trees.”

This modern Christmas Tree Patchwork quilt by Ann Kelle shows another kind of happy trees, this time with colorful, trimmed trees in an abstract triangle design.

The Oh, Christmas Tree Quilt by Amy Rivera for Moda Bakeshop is a completely different take on Christmas tree patchwork. It looks sophisticated but is easy to pull off. This quilt is extra fun because it calls for a charm pack to use for the colorful patchwork strips.

Other Christmas Tree Patchwork Projects

Patchwork Tree Skirt

Every quilter needs a patchwork tree skirt. If you haven’t made yours yet, check out this full step-by-step video tutorial from the fat quarter shop. This beautiful tree skirt is made from a jelly roll of fabrics.

[youtube https://www.youtube.com/watch?v=YLGr2YsKoGE]

Here are the rulers needed for this tree skirt project.

Photo credits: A Quilting Life, top; She Can Quilt, bottom.

Photo credits: A Quilting Life, top; She Can Quilt, bottom.

Christmas Tree Patchwork Pillow

I love the border and construction of this pillow that uses still another Christmas Tree Patchwork design. You could make a forest of trees using this design and turn it into another quilt, if you wanted to. But I think a pretty patchwork pillow is a lovely bit of holiday cheer for any sofa or chair.

Christmas Tree Patchwork Ornaments

These Christmas Tree Patchwork ornaments are a super small project. Makea bunch of these for your tree, or they will make precious present toppers. You could tie one on to dress up gifts you give this year. I love this project because it uses such tiny scraps.

I hope these Christmas Tree Patchwork projects have inspired you and that you’ll make one patchwork tree or many this holiday season. Which one of these fun designs do you like the best?