One of the most classic Disney movies is Cinderella, the 1950’s cartoon version of the popular fairy tale. In this story, we see Cinderella go from being a young girl who loses her mother and has to live with an unloving step-family to a woman who’s optimistic enough to take a chance by going to a fancy ball and catching the prince’s eye.
Every detail about this story line isn’t perfect—if she’s Prince Charming’s love, why can’t he recognize her without this shoe business?—but it’s still a staple for a lot of people in regard to movies they adored as children.
For a person who grows to appreciate sewing, the film can have another level of intrigue because sewing is a part of the story. Before the Fairy Godmother comes by to provide Cinderella her glittering, beautiful gown, she goes through the process of planning her own dress, which will be constructed from tools and materials within her home. The actual dressmaking happens at the hands of a team of friendly rodents once they realize Cinderella is too busy to finish the project herself, and the musical scene connected to their sewing is one of the most recognizable ones from Disney.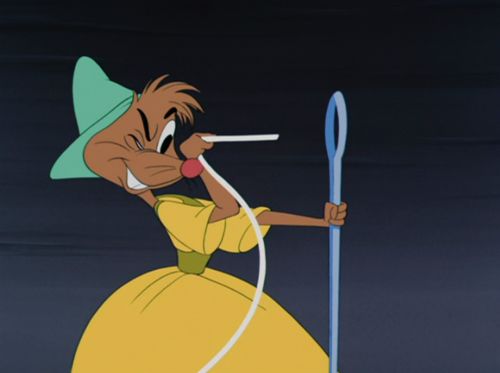
Beyond those aspects of familiarity and youth, there’s unique sewing advice happening within that dressmaking scene that you could apply to sewing endeavors. All it takes is a little consideration and a bit of imagination to find those gems of guidance within the lighthearted scenes of sewing.
For instance, these mice have applicable tools at their disposal to see this dress come to life. There’s no machine in sight, but you do see other sewing essentials, like needle, thread, scissors, and chalk, all of which can at least be representations of things that are useful for sewing. The chalk, as an example, can be replaced by soluble pencils to trace your cutting lines, and like the bulky chalk the mice are using, you can wash out the remnants later. With that strategy, you’re making sure you’re sewing in a more precise way without forever damaging the fabric. Good strategy, mice!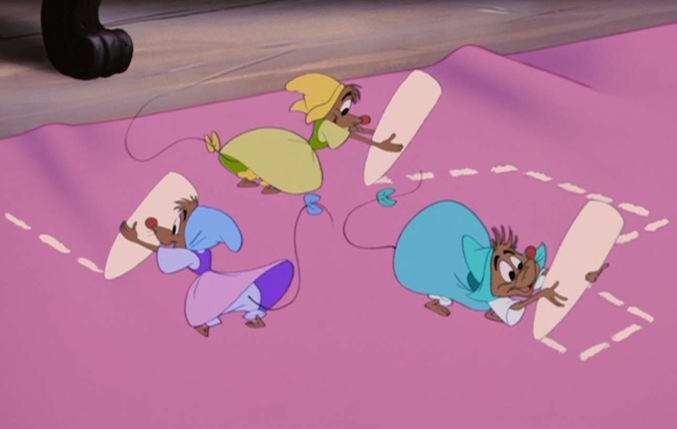
As the dress is being assembled through pulley systems and such, the mice have a dress form setup to keep the fabric in its most natural wearing position. This detail cannot be overstated if you’re going to sew clothing like Cinderella’s dress because it makes you able to see the dress as it should be rather than bunching it up or expanding it unnaturally on a flat surface. You can tell how the dress will look, and you could prevent a time or two of accidentally sewing your dress sides together in the wrong places. Like the mice, make sure you have that form for these purposes!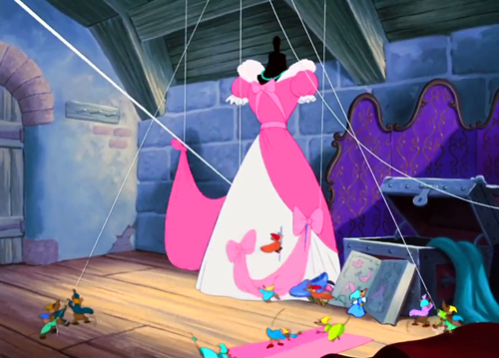
Unfortunately, though, the mice didn’t quite get everything right, and it makes sense to note those things as well. For example, you probably want to use a better method of organizing your supplies than a simple wicker basket that you can dive into. Even if you’re just tossing all of your supplies into a container like this and reaching in to gather what you need, if your organization is lacking, you could end up getting a sewing needle or straight pin in your hand. For the mice, this is particularly bad since the needle is about as tall as they are, but even for human-sized sewing fans, a straight pin in the hand can hurt!
For this reason, you should consider organizing your sewing utensils better than our Cinderella mice friends! Use different containers for different items, have shelves to display them, use chest drawers to keep them stored… Whatever your strategy, do yourself the favor of not piling everything into one area that’s dooming you to minor injury!
One more detail the mice get wrong is how simple they make assembling this dress seem. Sure, they employ pulleys that you probably won’t work with, but let’s be honest. Cinderella simply points out a picture in a book that she wants her dress to look like and gives very basic instructions about what needs to be done, and the mice infer all of the in-between information even though there are no measurements listed at all in the book.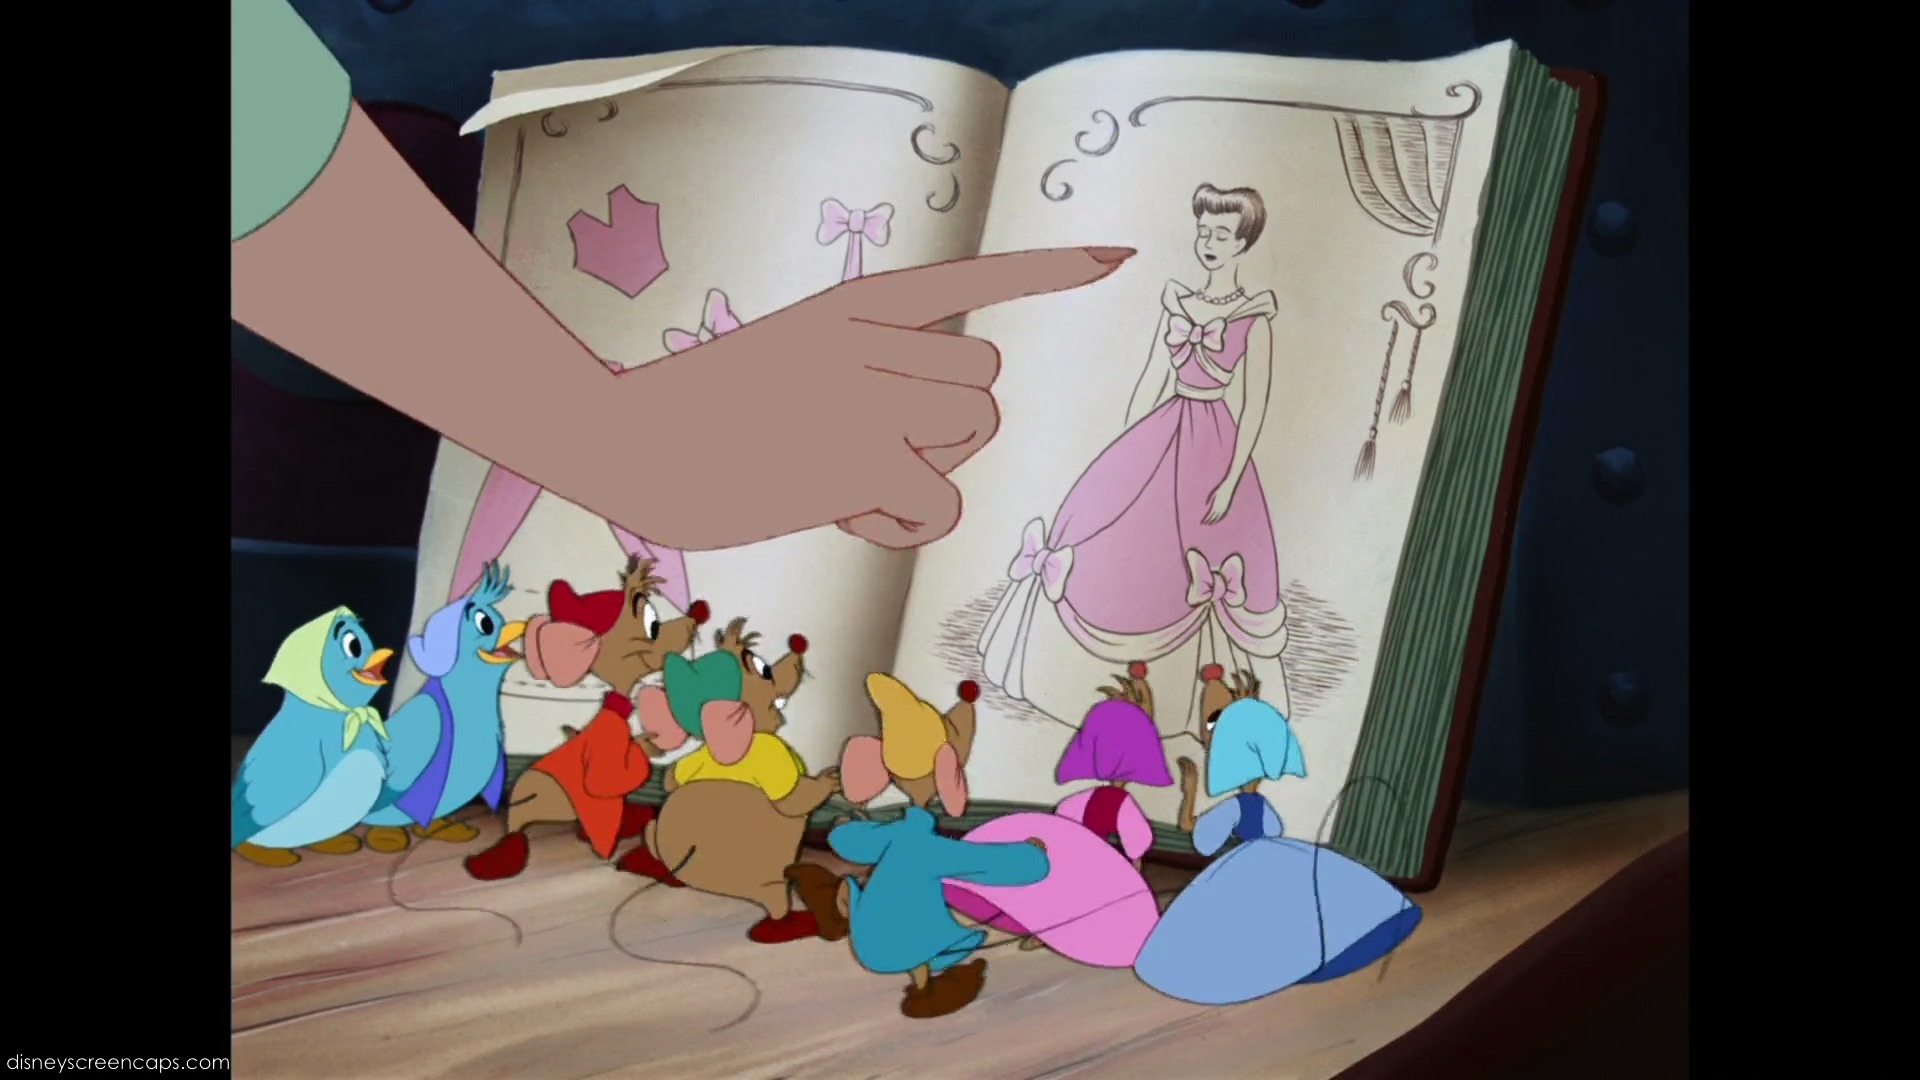
Fortunately for the mice, the foundation of this dress is already assembled since Cinderella is intending to alter something that she already has—another good tip from the mice: use what’s around you!—but if you take this at face value, the process is too simple. Without having measurements, at least, you could be setting yourself up to fail.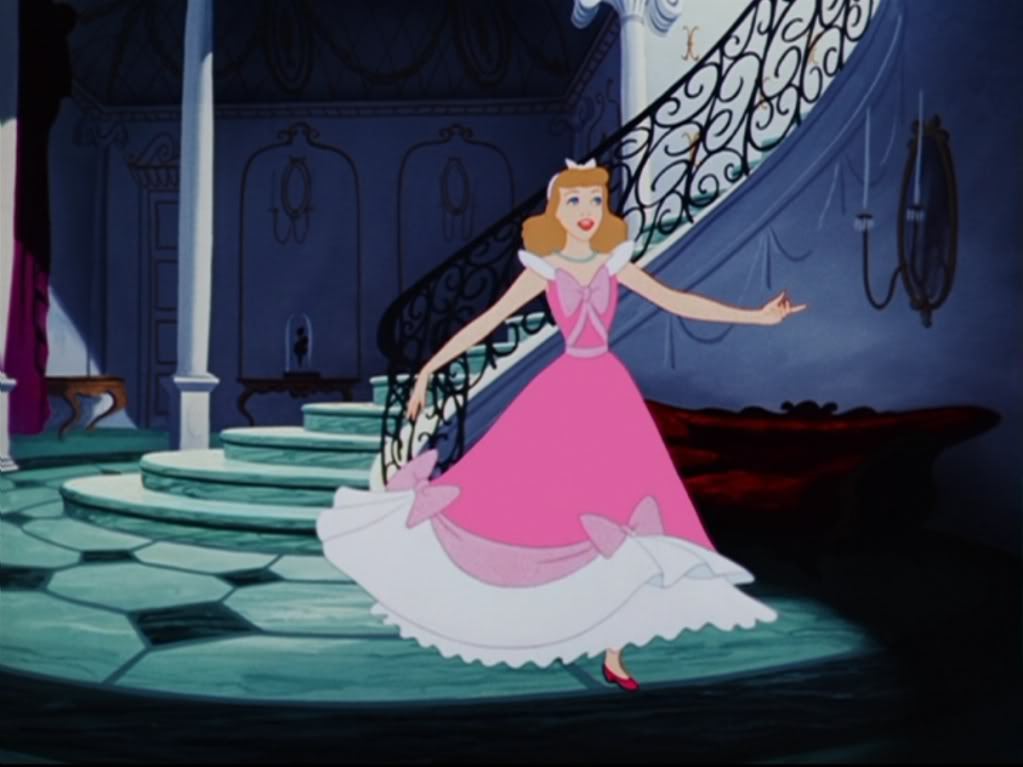
So rather than just picking a picture, use a pattern or at least take the measurements of the person who’s supposed to wear the finished product. Remember, after all, that the dress Cinderella intends to alter is her mother’s—not hers. There could’ve easily needed to be some redefining done to make it fit Cinderella just right, and the mice take a risk by not being more specific. On this, don’t be like the mice! Be measure-specific!
In the end, while the mice got some things very right and some things pretty wrong, it’s a catchy scene with an upbeat song that embraces sewing in a youthful manner. So, embrace the mice’s optimism, apply their useful techniques, and learn from what they did wrong.