How to Store Your Fabric Stash

How to Store Your Fabric Stash

This is post one of a three part series on storing your fabric. Post two (how to store your works in progress) and post three (how to store your fabric scraps) are coming soon.
This is post one of a three part series on storing your fabric. Post two (how to store your works in progress) and post three (how to store your fabric scraps) are coming soon.

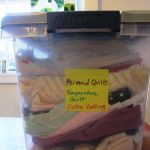
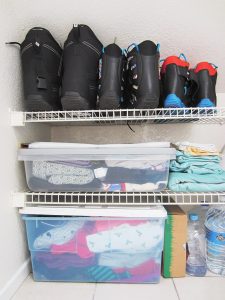
I keep my deep-storage and heirloom fabrics stored in a bin. Fabrics I'll use soon are simply folded neatly awaiting their use.

I keep my deep-storage and heirloom fabrics stored in a bin. Fabrics I’ll use soon are simply folded neatly awaiting their use.

How do you store your fabric stash? I have seen some of the most creative ways while perusing through Pinterest, everything from tucked in the drawers of a dresser, folded neatly on the top of a bunk bed, or deftly displayed in KITCHEN, yes kitchen, cabinets. Who needs to eat when you have beautiful fabric to sustain your soul anyway?

No matter which way you decide to organize your fabric, you will need to keep several things in mind.

My works in progress are kept in a tall bin and labeled so I know where to easily find them.

My works in progress are kept in a tall bin and labeled so I know where to easily find them.

Store Covered

  1. If you decide to store your fabric in bins, consider using plastic instead of paper, or file boxes, or baskets. Keeping your fabric covered will better protect it but consider using a plastic container with tiny holes (or creating tiny holes) to allow the fabric to breathe and to prevent synthetics from yellowing.
  2. Tape a cedar block inside the container to help prevent moths and other insects from taking up residence.
  3. Store away from sunlight to prevent fabric from fading.

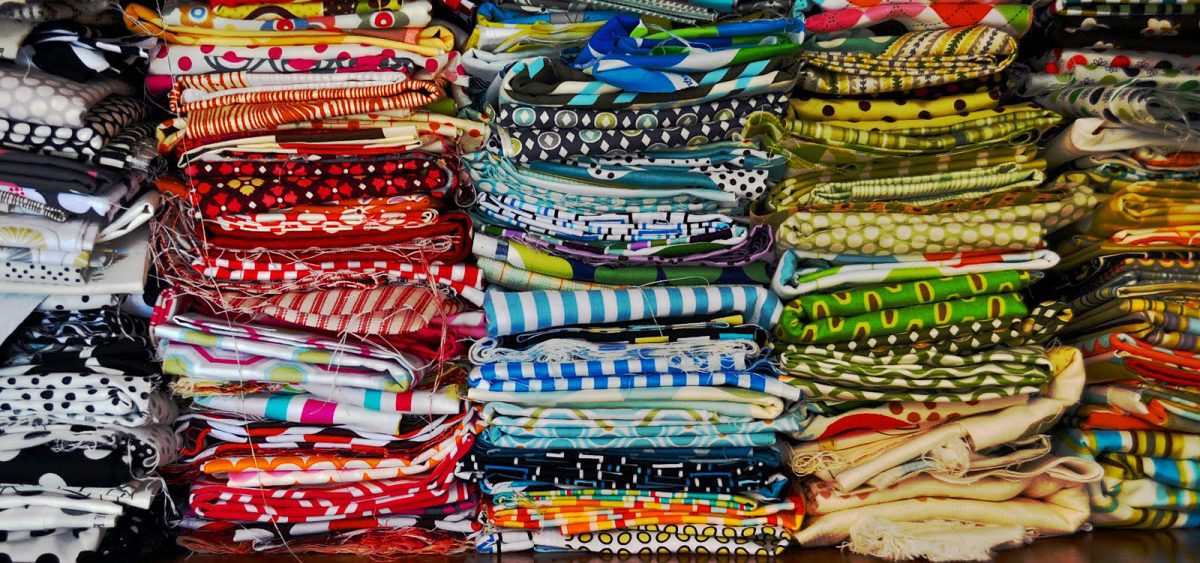
    My lovely stash. I do take the time to dust off the fabric about twice a month.

    My lovely stash. I do take the time to dust off the fabric about twice a month.

Display It

  1. I love the quick access that openly displayed fabric offers. However make sure to keep fabric away from direct sunlight.
  2. Dust! Your fabric will accumulate dust if displayed or left in the open. Keep it tidy with a frequent dusting or airing out.
  3. Keep it clean – little children love to touch and play with fabric and even some adults can’t help but reach up and touch gorgeous fabric. Be aware of where you display your fabric and how frequently it may be handled by people whose fingers could leave it soiled.
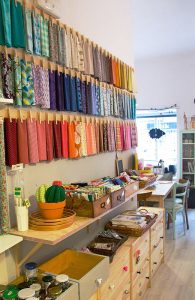
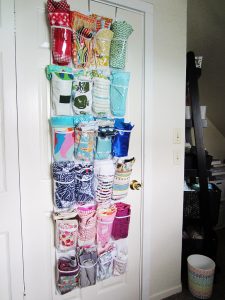
Fabric on display via MuyMolon.com.

Fabric on display via MuyMolon.com.

Additional Methods

  1. Color coded – perhaps the most method of organizing is a stash is by color. This is how I do it!
  2. By Designer or Project – some people also keep their stashes stored by Designer or even projects in progress.
  3. By Size – big, medium, little, tiny. Sometimes storing or displaying by size is also helpful.
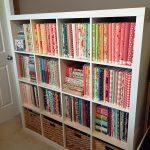
    Fabric organized and wrapped around Polar Notion's organizers.

    Fabric organized and wrapped around Polar Notion’s organizers.

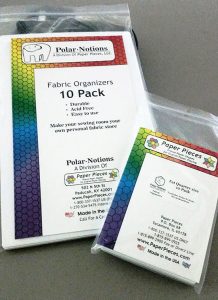
Standout Idea: Acid-Free Fabric Organizers

I just discovered these puppies and as soon as we move to our new home and I start working on my sewing room, I plan on ordering some to start wrapping and displaying my stash. Unlike fabric-store pieces of cardboard, these organizers are sturdy and acid-free. Storing fabric wrapped around cardboard will eventually discolor your fabric since cardboard is not acid-free.

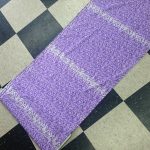
The sad result of what happens when you use regular cardboard to organize your fabric.

The sad result of what happens when you use regular cardboard to organize your fabric.

I’ve found two brands that offer this acid-free option. Polar Notion’s boards are made from plastic and The Fabric Organizer’s boards are made from an acid-free corrugated cardboard. Both look fantastic.

Think about which product would suit your needs and your stash better.

Think about which product would suit your needs and your stash better.

The larger Polar Notion holds up to 15 yards of wrapped fabric and the smaller one is perfect for fat quarters and smaller pieces of fabric.  The Fabric Organizer’s large size holds up to 10 yards. It is also cheaper than Polar Notions. Think about which product would suit your needs and your stash better.

Do you have a favorite method of storing your fabric? Let us know how you do it in the comments below.

Charlotte Kaufman is a writer and sewist in San Diego, California. She specializes in marine and home interiors and continues to fall more and more in love with quilting. You can follow her at charlottekaufman.com.

Pressing Forward – A New Idea

Pressing Forward – A New Idea

As I was organizing my new sewing room, I thought about what components I could use to make sewing organized and efficient. Sewing is my favorite part but keeping things in order can become a challenge.

Sewing is my favorite part but keeping things in order can become a challenge.

Sewing is my favorite part but keeping things in order can become a challenge.

Of course, quilting takes a few more supplies that some hobbies, but I was thinking specifically about how I can make the pressing of quilt squares and fabric as part of my desk area rather than an ironing board and standing each time I had to press.

I made an ironing table on my counter top which has an insulated pad so I could sew and turn my chair to iron. It works fairly well but needs to be adjusted at times, as the pad wriggles around, and I thought there has to be something better.

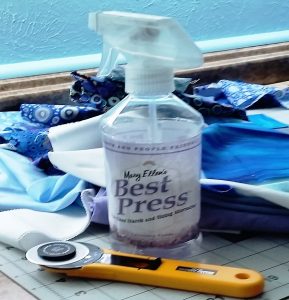
I have to say that ironing is NOT my favorite past time with all the laundry we have, but somehow when I am making quilt squares, it is not too cumbersome. I use a fabric stabilizer when I iron that smells nice when it is heated so it, it gives me ambition to sew my squares and press them neatly to look professional as I go along. I have been thinking that an investment in a Home Pressing system will be beneficial.

Thinking back, actually, when I was a little girl, my Mom had what she called a “Mangle” Iron. I have not seen those again until recently in this website. I always wanted to help her press the sheets and pillow cases and my Dad’s handkerchiefs when she set up the what seemed to be an “ancient” machine. In fact, this type of machine was first used to wring out clothes by washer women beginning in 1843. Mom had hers in the late 1950’s, and used it often.

Sheets, tea towels, table cloths and fabric scraps would be so easy to run through the iron and save time to enable more sewing.

So, with that in mind, I have been researching Pressing Systems. I have come across some great reviews on the Magic Steam Press ESP2 Electronic Iron, and the Miele B990E Rotary Ironing Board. Check out the other brands here as well. The first is a small table model and the second is a rotary iron on a stand capable of ironing most everything. This is easy to use by sitting and makes ironing a breeze! Just be careful about the buttons and zippers, please!

I think these models would be particular good for bonding interfacings and stabilizers to fabric and to make quilt squares, totes, curtain panels and much more. Sheets, tea towels, table cloths and fabric scraps would be so easy to run through the iron and save time to enable more sewing.

Check out the irons on this website, and consider using a Pressing System for your sewing and ironing needs.

The reviews are helpful to see how valuable and what a time saver these systems are.

My next purchase will be to order for one of these products. With time saved and beautifully pressed quilts and clothes, it is an investment well worth the money with energy to spare! Press forward, and enjoy ironing! See you next time!

DIY Tutorial - Striped Tote

DIY Tutorial – Striped Tote

Stacey’s Stitches

DIY - The Striped Tote

DIY – The Striped Tote

Level: Beginner
Time to Complete: In A Weekend
Machine: Singer Advance
Sewn By Machine – 1/4 in. straight stitch

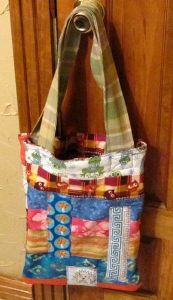
I’ve suddenly found myself traipsing to multiple appointments on a regular basis. After dropping an important file in the middle of a parking lot on a windy day, I decided I needed one simple tote for carrying any and everything. Thus the Striped Tote was born 🙂

Let your imagination breathe personality into every stitch!

Materials:

  • 2 — 19 in. x 15 in. Inside fabric lining
  • 2 — 19 in. x 15 in. Cotton Batting
  • 14 — 15 in. x 4 in. Misc. horizontal fabric strips (amount is flexible depending on size and position of strips)
  • 4 — 3 in. x 6 in. Vertical fabric strips
  • 2 — 4in. x 30 in. Handles, preferably strong, durable fabric
  • 2 — Accent pieces, any size or shape

    Hi all! I'm Stacey Martinez :)

    Hi all! I’m Stacey Martinez 🙂 I love to design fun, imaginative custom items for my active, crazy family. Bright colors and beautiful fabrics sing “Stacey, Stitch Me!”

IMPORTANT:
**Wash all fabric prior to sewing to avoid shrinkage of the finished product.
**Ironing recommended before sewing and after each step. Makes fabric easier to sew and adds a professional look to the end product.

  1. Measure and cut all fabric and batting. I used Warm White batting but thin fusible works just as well.
  2. Pin and sew (1/4 in. with regular straight stitch) inside lining and batting insides together. Side shouldn’t matter for batting but make sure lining is facing inside. Leave a gap in the top for pulling fabric right side out. Repeat for other side of bag as well. Pull fabric right side out for both sides. Leave top holes open, they will be stitched later.
    • **Tip** Cut off the corners before turning right side out. This makes the corners easier to form.
  3. Pin and sew at 1/4″ all fabric strips together for each side of the bag. Iron all seams.
  4. Pin and sew with the front side (strip side) and the inside lining together for both sides of the bag. Make sure front sides are right side together. Leave an opening on the top of both sides to pull the material through. Leave top holes open, they will be stitched later.
  5. Pull the fabric out to right side out on both sides. Iron.
  6. Fold and sew 1/8 in. around four vertical strips and two accent pieces with regular straight stitch.
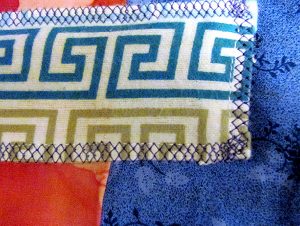
  7. Pin two vertical strips and one accent piece on each side of bag. Sew with any fancy stitch of choice, with any thread color of choice. I used the Honeycomb stitch since it looks intricate and can be used for edging. I used purple as my accent stitch because I wanted the stitching to stand out, not blend in.
    Sew accent stripes and other pieces after all side layers have been sewn together and pulled right side out.

    Sew accent stripes and other pieces after all side layers have been sewn together and pulled right side out.

    • **Tip** Sewing accent stripes and other pieces after all side layers have been sewn together and pulled right side out accomplishes one important feature: This ensures that all 3 layers are stitched together more thoroughly and prevent material slippage during constant use or after a few washes. This simple step helps the tote keep shape and strength much longer.
  8. Sew the top edge of each bag side with the same accent stitch and thread color.
  9. Pin the two sides outside facing together. Iron. The material will be much thicker with so many layers coming together. Ironing helps flatten down all the layers for easier sewing. I also switched to a 100/16 denim needle to handle the extra thickness.
  10. Sew three sides together, leaving the open. Pull right side out.
  11. Fold tote handles in half, sew right sides together (using straight stitch). Sew only one end. Leave the other end open. Pull the handles right side out using the open end.
  12. Iron handles and sew around all four sides, sewing the open end closed in the process.

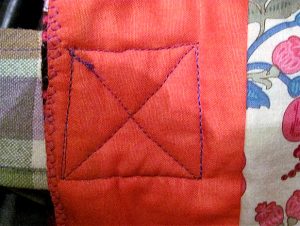
    Attach handles to tote, using this X design.

    Attach handles to tote, using this X design.

  13. Attach handles to tote, using this X design. The X design creates a stronger stitch often used so handles on totes and purses easily handle more weight.

Throw what you need in your new tote and take off!