Happy Spring! The Joy of Warmer Weather and Beautiful Flowers

Happy Spring! The Joy of Warmer Weather and Beautiful Flowers

Hi! Good to see you again!

Hi! Good to see you again!

Today, I wanted to share what I have been doing these days. It know it has been awhile since I wrote, however, I have been away from my favorite past time for other “pressing matters” (i.e. ironing hubby’s shirts, not quilt squares) and other important tasks!

Scrappy leftovers

I have an enormous collection of scraps in my sewing studio. Since I have been reorganizing in preparation to move our home, I have to make a strong effort to release some things I have collected to make packing a little easier. Well, packing is never easy, but psychologically, it forces you to consider the value of all the things you think you absolutely needed to have, right? And also, without saying, it alerts you to some of the things you want to make this hobby more efficient. No wonder it takes forever to pack and with sewing, I always think if I throw it away, I will want it later. Tough decisions, aren’t they?

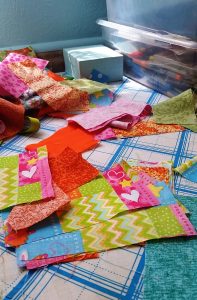
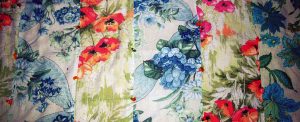
So, I started with a pile of disorganized scraps, which I have previously cut for something else, some time ago. I don’t even remember what I had in mind at the time, but I need to throw them away or use them. This is just part of the large amount of fabric and bright colors I have to work with.

This is just part of the large amount of fabric & bright colors I have to work with.

This is just part of the large amount of fabric & bright colors I have to work with.

Improv isn’t only for comedians

Recently, I have been learning about “improvisational” sewing. It is interesting to me because I like doing things that are unique to my creativity. However, it takes you out of your comfort zone. The experts say, it reveals your creative side by working with no specific pattern, no color guidelines, no measurements, just picking up random pieces of fabric, basically scraps, and sewing them together without a pattern. It reminds me of the dreaded “improvisational” speeches required in college speech classes.

I know there are many patterns and helpful information about quilting that give exact instructions and even kits that you can complete. So, this is an adventure to test your creativity for sure.

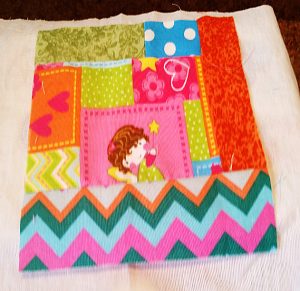
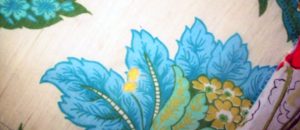
So, now I have my scraps and the easiest way to explain how this came together is: I took a medium sized scrap, and added to others to make an approximate square about 7 x 6 inches. I didn’t measure at all, just found several squares which had in this case, a little girl with a magic wand. I used the “fairy girl” as my focal fabric.

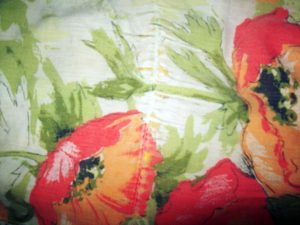
It was not too difficult because the pattern of the fabric was already woven like patchwork.

It was not too difficult because the pattern of the fabric was already woven like patchwork.

It was not too difficult because the pattern of the fabric was already woven like patchwork.

So, I just added like-colored fabric to make an extension of the pattern. No true measurements, pieces were just trimmed to fit inside the square, and the princess would appear somewhere on each one. I used the square as a template and compared the rest to the template, and then trimmed them to be the same size as close as possible. NOW… Comes my favorite friend in the WORLD while quilting! My IRON! And I need a NEW ONE at that (please refer to great wishlist choices from SewingMachinesPlus.com).

Finishing touches

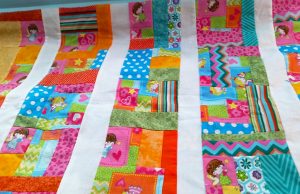
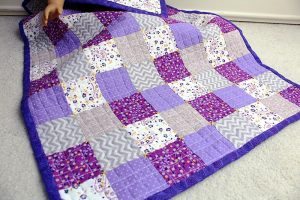
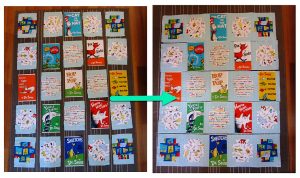
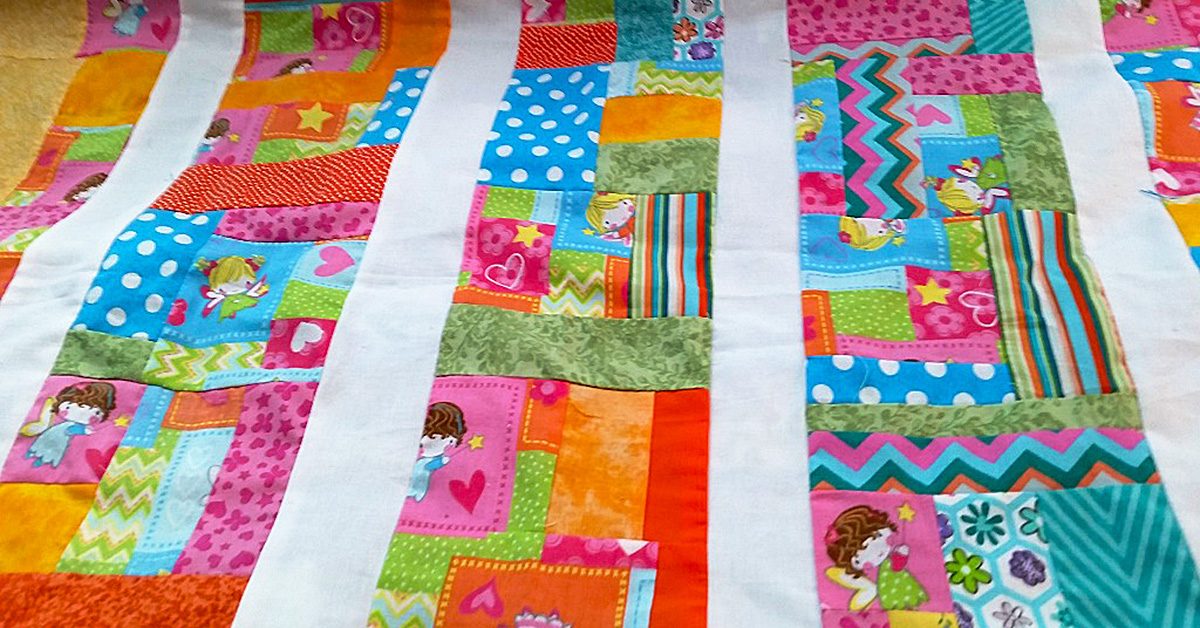
So finally, I was feeling pretty good about how my unplanned, off the top of my head, quilt top was coming along. So I sewed the pieces together in 5 rows and 5 squares each. Then added white jelly roll strips between each row of 5. I had to trim it only a little to make it a true measurement all around.

“Improvise” a cheerful quilt or smaller project & smell the beauty of your creation this spring.

“Improvise” a cheerful quilt or smaller project & smell the beauty of your creation this spring.

I still need to finish the border, batting and binding, but here’s what it looks like now. It was really fun to do, because I didn’t know how it would turn out. I should say I learned that I need solid color between busy patterns to give a quilt top a cohesive, unified look so each quilt patch is recognizable from the next. Do you mix plain fabric among many different prints?

I think you would enjoy this truly personal form of expression with fabric.

“Improvise” a cheerful quilt or smaller project and smell the beauty of your creation this spring.

Better yet, know that even without a plan, or a pattern, you can turn scraps into something as personal as you are! Then, please reply to this blog with pictures. I would love to see them. Until next time, when I will tell you about how I am repurposing handmade flannel wash clothes into a sweet little blanket and stitched without a seam. Carpe diem!

Tell-Tale Traits of a Primitive Quilt

Tell-Tale Traits of a Primitive Quilt

As I step further into the world of sewing, I find that there’s plenty of information out there that I didn’t even know to look for. My primary focus in sewing has been patchwork designs, and I definitely continue to hold a passion in regard to that style of work. I’d love to have a patchwork purse, patchwork clothing, patchwork pillows…

My primary focus in sewing has been patchwork designs, & I definitely continue to hold a passion in regard to that style of work.

My primary focus in sewing has been patchwork designs, & I definitely continue to hold a passion in regard to that style of work.

But I’m not sure I fully realized how many other avenues there are to plan out a quilt before I started looking, and those are details that can be interesting finds! Some of them, though, require a bit of an explanation to truly understand what a quilt of that nature is, and this post will explore one of those types in particular.

Once upon a time

I was in a social media marketing program where, for two of the classes, I had to keep a blog for a business. For one course, I used my author career as the business. For the other, I created a could-someday-be-real quilt company. It was fine, by the way, for the company to not actually be real in the current world!

The idea was that we were to explore marketing concepts through the blog and end up with a marketing plan — at least generally — by the end of the semester. During that quilt-company semester, I came across the idea of a primitive quilt, which was a fairly new phrase to me. At the time, I focused mostly on the social media presence of one particular company, but I find myself now thinking on what exactly a primitive quilt is.

During that quilt-company semester, I came across the idea of a primitive quilt, which was a fairly new phrase to me.

During that quilt-company semester, I came across the idea of a primitive quilt, which was a fairly new phrase to me.

If I claim to be quilter, after all, it might help to know the basic terminology!

After research and consideration of a number of quilts with the label of “primitive,” I offer you a number of details that help to make a primitive quilt… Well, primitive! Note: These are commonalities — not necessarily requirements through and through!

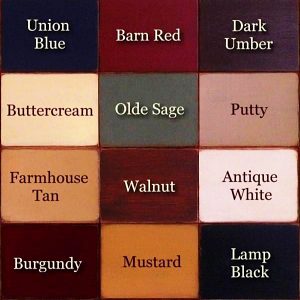
A primitive quilt will make use of neutral colors, though things like dark red & dark blue can make appearances.

A primitive quilt will make use of neutral colors, though things like dark red & dark blue can make appearances.

Basic Coloring

By this, I don’t mean a color-equivalent to no-artificial-flavoring! I mean that the colors are typically more straightforward than neon oranges and vivid pinks. Instead, a primitive quilt will make use of neutral colors, though things like dark red and dark blue can make appearances. These quilts often employ the colors that you might think of when words like “rustic” come to mind — which rationalizes why red and blue are used in regard to red barns and blue skies. In the end, if you plan on making a primitive quilt, you might want to keep the lime green fabric stored away for another project!

Simple Fabric Patterns

Like the coloring, the fabrics, too, are less elaborate than what might be common for a more vividly styled work. Typically, patterns — rather than fabrics — steal the focus in primitive quilts, so no fabric should be so busy or stand-out that it takes attention above and beyond the level of the quilt pattern as a whole. For this, solid colors or very simple patterns on your fabric are your best bet for forming your primitive quilt.

Basic Shapes

Don’t fancy it up!

Don’t fancy it up!

While the overall quilt might have a remarkably interesting visual in regard to its structure, the pieces of fabric that make up that visual are often based on the simplest of designs, like triangles, squares, and rectangles. This doesn’t mean that only geometric shapes can be used for your quilt though! Other shapes can come into play, but make sure to keep them simple to provide that outdated appearance that’s so synonymous with the rustic, primitive design. Think to yourself what the simplest method of delivering an object or shape is — don’t fancy it up!—and you could have the right look!

Empty space

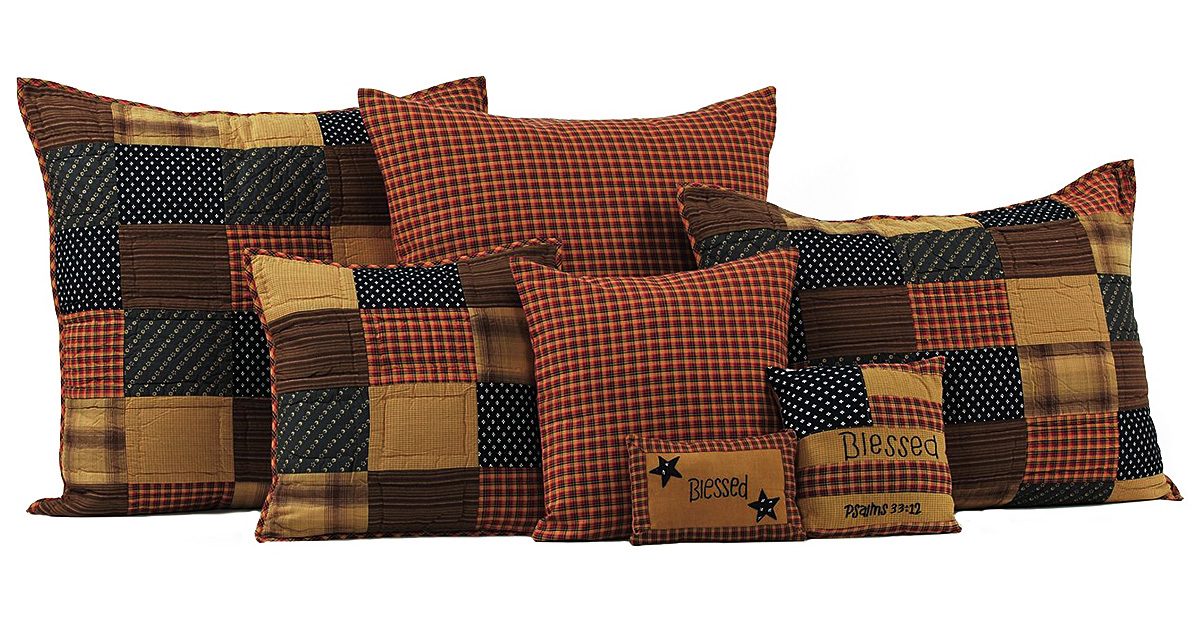
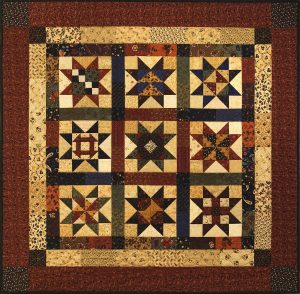
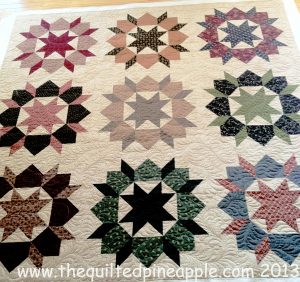
The patterns for primitive quilts are structured, but those empty spaces between the distinct pattern formations can be just as organized. Now, this isn’t necessarily the case for every quilt! It’s not unheard of though for darker, geometric patterns of multiple fabrics to be separated by pieces of lighter fabric that are larger than any individual dark piece. It creates an overall repetition to the quilt, and the result is an almost soothing effect in that the contrast softens the appearance to something calming and steady. As I said, this tactic might be more pronounced in some primitive quilts than others, but don’t be shocked if you notice it fairly often for quilts of this style.

Geometric patterns of multiple fabrics to be separated by pieces of lighter fabric that are larger than any individual dark piece.

Geometric patterns of multiple fabrics to be separated by pieces of lighter fabric that are larger than any individual dark piece.

If you keep these things in mind, you’re on your way to planning a primitive quilt!


References:
Alcorn, J. (2014, September 10). What Is Primitive Home Decor? Retrieved from: https://www.primitivestarquiltshop.com/blogs/quilt-shop-gathering-place/24406593-what-is-primitive-home-decor
Craftsy. (2017, April 24). Can You Spot a Primitive Quilt? Retrieved from https://www.craftsy.com/blog/2017/04/primitive-fabric/
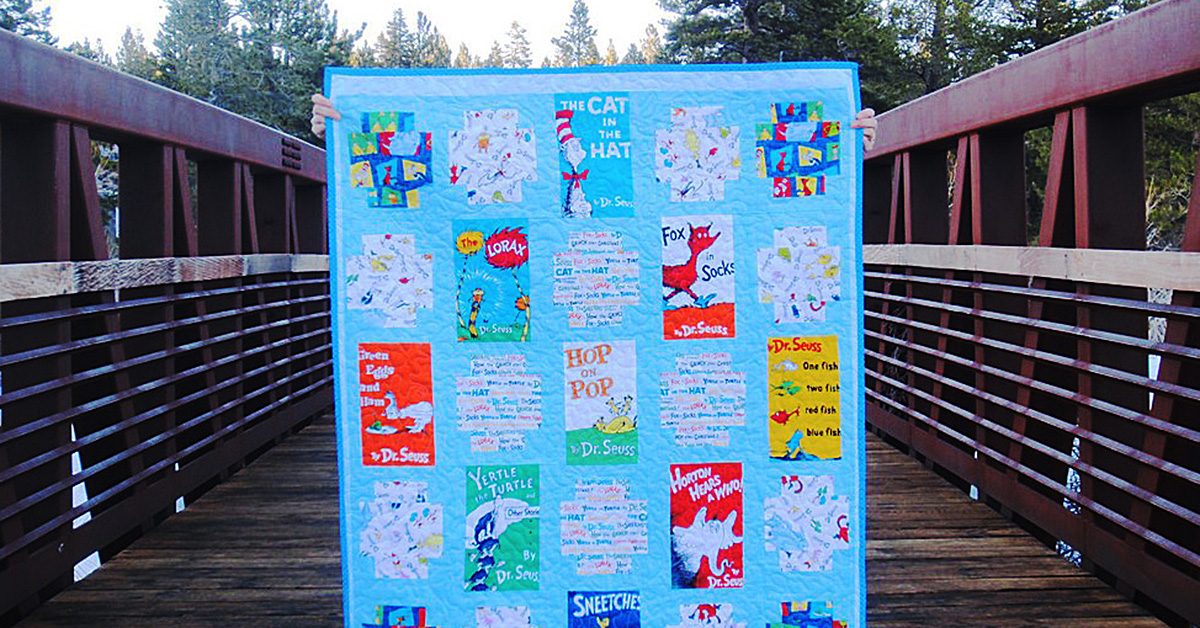
Dr. Seuss Quilt

Dr. Seuss Quilt

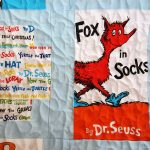
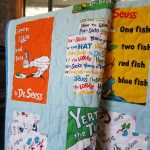
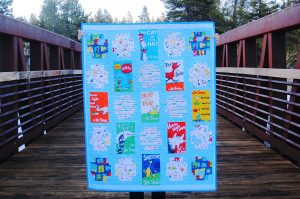
Have you ever bought a quilt kit? I buy them sometimes when the inspiration strikes, or when I’m looking for the convenience of having all the fabric I need for a pattern already provided for me. This kit came out in 2015 and is called Celebrate Seuss by Robert Kaufman Fabrics.

This kit came out in 2015 & is called Celebrate Seuss by Robert Kaufman Fabrics.

This kit came out in 2015 & is called Celebrate Seuss by Robert Kaufman Fabrics.

Start Cutting

Quilt kits do NOT mean that the fabric is precut into the shapes you need. Nope. They’ll send the amount of fabric you need but you will need to cut everything to size before you start sewing.

Quilt kits do NOT mean that the fabric is precut into the shapes you need.

Quilt kits do NOT mean that the fabric is precut into the shapes you need.

I actually started this kit last spring in San Diego. First I got all the individual blocks set up and then put them into rows. Once the rows were sewn into a full panel, I packed this project away. It wasn’t until almost 12 months later that I was ready to finish it.

Once the rows were sewn into a full panel, I packed this project away.

Once the rows were sewn into a full panel, I packed this project away.

Make your Project Your Own

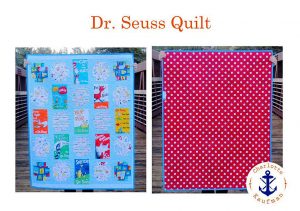
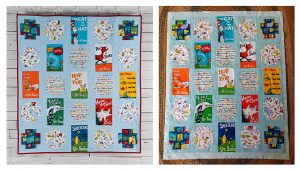
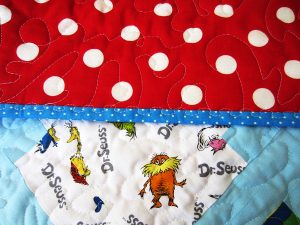
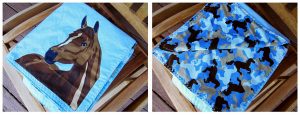
On the left you’ll see the finished photo advertised in the kit. Do you notice how the top and bottom center column run directly into the binding? That drove me crazy, so I amended the pattern. I added a 2” strip of blue polka dot fabric to the top and bottom and a 1” strip of the same fabric to the left and right.

See the right photo? Much better, no? I feel like the whole quilt is better framed.

Lesson learned

It’s okay to deviate from a pattern and a kit. Make your project your own.

Make your project your own.

Make your project your own.

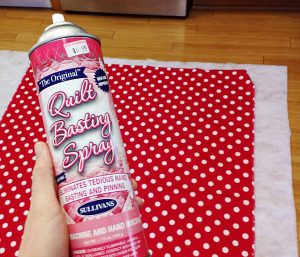
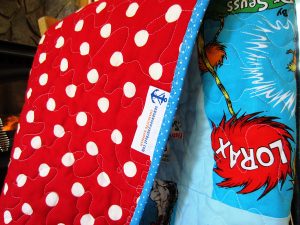
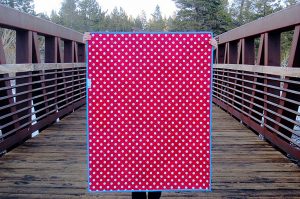
For the back fabric I went with a classic, large white polka dot on red that was very much in keeping with Dr. Seuss’ style.

For the back fabric I went with a classic, large white polka dot on red.

For the back fabric I went with a classic, large white polka dot on red.

Method of Quilting

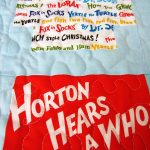
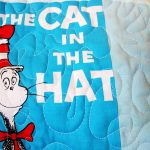
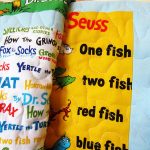
I’m extremely proud of the free motion quilting (FMQ) I did on this quilt. After years of being afraid to try FMQ, I’ve finally embraced the methodology. It took watching a lot of YouTube video tutorials and a lot of practice, but I’m very happy with the results. I used a relaxed, free-motion, jigsaw pattern for this quilt.

After years of being afraid to try FMQ, I’ve finally embraced the methodology.

After years of being afraid to try FMQ, I’ve finally embraced the methodology.

Binding Your Quilt

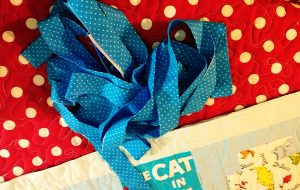
Another way I deviated from the kit was in choosing a different fabric for the binding then what they provided. The true-red colored fabric they sent clashed with the classic orange-red Dr. Seuss colors in the front panel. Instead I chose a cornflower blue and white polka dot fabric.

I chose a cornflower blue & white polka dot fabric.

I chose a cornflower blue & white polka dot fabric.

There a numerous ways to bind a quilt. I would suggest learning several methods. I made a 2.75” strip of fabric and then ironed that strip in half and sewed the binding onto the back of the quilt first. I pressed it away from the seam (towards the outside of the quilt) and then pressed it around over the front of the quilt. My 4 year old handed me my favorite red Wonderclips as I clipped the binding in place around the front.

https://www.sewingmachinesplus.com/brew-cl3156.php

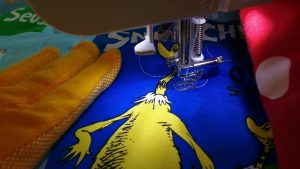
I used a decorative stitch to sew the binding to the front.

I used a decorative stitch to sew the binding to the front.

I used a decorative stitch to sew the binding to the front. Machine sewing your binding is faster and more secure than hand sewing and I recommend it if you know the quilt will get heavy use and washes or be used by children.

When adding your binding, don’t forget to sew in your quilt tag if you have one.

Don’t forget to sew in your quilt tag if you have one.

Don’t forget to sew in your quilt tag if you have one.


All in the Details

Here are close ups of the finished quilt and my free motion stitching. SewingMachinesPlus.com has an amazing assortment of sewing machines that do free motion quilting. Check out their machines here:

https://www.sewingmachinesplus.com/domestic-sewing-machines.php


Grand Finale

Taking some final pictures of your finished quilts is worth your effort. Think of how much time you put into each quilt and then grant yourself enough time to wait for the right, natural lighting and find a beautiful location to memorialize your quilts.

A Good Cause

Although it will be hard to part ways, this quilt is being donated to a fundraiser for our local elementary school. Have you ever donated your work to a good cause?

This kit came out in 2015 & is called Celebrate Seuss by Robert Kaufman Fabrics.

Have you ever donated your work to a good cause?

———————————————————————————–
Charlotte Kaufman is a writer and sewist in Mammoth Lakes, California. She specializes in marine and home interiors and continues to fall more and more in love with quilting. You can follow her at charlottekaufman.com.
Sewing Project Kits: Weighing the Pros and Cons

Sewing Project Kits: Weighing the Pros and Cons

Like many things in life, sewing has a series of ways it can be done that could be different for each individual person. Once upon a time, I covered one of those details in my post about how to press your seams, and there are plenty of other ways that preference can sway the way a person sews.

Weighing the pros & cons of sewing project kits.

Weighing the pros & cons of sewing project kits.

This week, I found myself considering one of those preference details, and that involves pre-assembled kits for sewing projects. Some people might love these kits for their sewing craftiness, and others might feel that the kits come with more negative details than positive. So, as you might’ve guessed, this is the subject for today’s post: Weighing the pros and cons of sewing project kits.

Pros:

If you choose the right kit, you can have the fabric & pattern that you need to create an impressive project at your fingertips just by making this one purchase.

If you choose the right kit, you can have the fabric & pattern that you need to create an impressive project at your fingertips just by making this one purchase.

If you choose the right kit, you can have the fabric and pattern that you need to create an impressive project at your fingertips just by making this one purchase. That’s most of the project-specific details in one package, minus things like thread and general sewing requirements. All in all, these are really convenient in that regard!

You can see an example of your finished project goal before you start. In fact, you can browse project kits until you find one you feel is perfect for your taste and purpose, and you’ll have the fabric to replicate the picture without having to piece together the appearance for yourself. I can’t tell you the number of times I’ve seen a project online that I wanted to be able to create, but something as simple as not knowing or being able to find the right fabric can lead to a very different final product. The idea that a pre-assembled kit can cut out that possibility is worth thinking over.

Some of these project kits can be fairly cheap. I’ve found some online for around or under $20—which isn’t that pricey if they come with fabric. Other options can be pricier, but if you stick within your budget, you could find a project kit that doesn’t break your bank account. Even if they are pricier, it’s worth considering how much buying the individual pieces for the projects would be without the kits since the prices might still be reasonable under that kind of inspection.

Cons:

These kits can lessen your input in projects.

These kits can lessen your input in projects.

These kits can lessen your input in projects. While providing the fabric can be a pro, as I said before, it’s also a potential con if you want a project that’s more yours than the sewing kit allows. Maybe you want a gym bag like the kit shows, but you’d rather have star-print fabric than what was provided. If that’s the case, then you’d probably do better searching for a free or cheap pattern and buying your own fabric. In that scenario, even $20 could be a bit much to pay.

The process could be so specific that it doesn’t really challenge an advanced sewing enthusiast. I find the same notion to be true in regard to pre-cut blocks of fabric. If too much work is done for you, you might not be pushing yourself to grow in your craft. Like with a number of other details in life, you have to give yourself space to grow if you want to improve. If everything is given to you pre-ready for assembling, you’re cheating yourself out of bettering your own preparation skills.

Costly regrets

If you have the wrong fabric, after all, you can’t necessarily create the project you intended.

If you have the wrong fabric, after all, you can’t necessarily create the project you intended.

I’ve seen at least one review of a project kit where someone complained that the sent fabric didn’t match up perfectly to what was on the project kit image. I can’t say for sure if this is the case, and even it is, all kits wouldn’t automatically come with the same flaw. Still, it’s worth noting that at times, this could be an issue that makes the kit less impressive than expected. If you have the wrong fabric, after all, you can’t necessarily create the project you intended. Additionally, if the fabric you do receive is so against your taste that you have to replace it, then we’re back to point #1 on the cons list because removing the fabric from the kit lowers its value to where the price could be too much. Who wants to pay for a kit that’s supposed to include fabric, then have to buy extra fabric? Not me!

Given though that con #3 is based on a review that I can’t prove or disprove, I still feel like trying one of these project kits could be worth the money for a person who’s new to sewing, or at least new to sewing a specific product. I’d love to try to sew a purse, for instance, but it’s something I’ve never done. Using a kit could ease me through my first purse and help me get some familiarity with the process before I step into the world of purse-sewing more on my own.

So, I guess my thoughts now are that these sewing kits can be great for beginners, but those with more sewing experience might find them too simple and dictated to fully embrace.

Would you agree or disagree with those assessments? Are you pro-project kit? Let me know in a comment!

Cactus & Succulent Fabrics for You to Love

Cactus and Succulent Fabrics for You to Love

California’s deserts are super blooming right now thanks to a long and wet winter. While we still have over 15 feet of snow in the ground here in Mammoth Lakes, California, I am not immune to dreaming of spring and the beauty of a flowering desert.

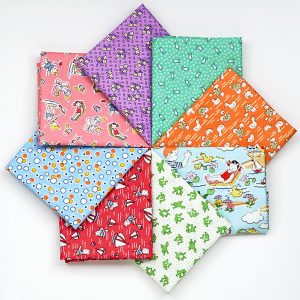
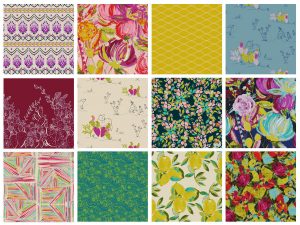
With that in mind, I give you NINE fabric lines featuring cacti, succulents, and the beauty of the high and low deserts.

Desert blooms

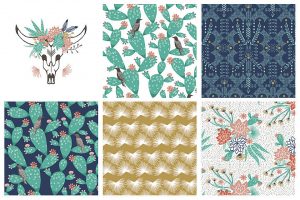
First we start with Rae Ritchie’s debut collection, Desert Bloom.

First we start with Rae Ritchie’s debut collection, Desert Bloom.

First we start with Rae Ritchie’s debut collection, Desert Bloom.

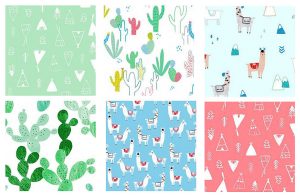
Lovely llamas

If you are looking for something with a little more ‘prickly’ whimsy, check out No Drama Llama by Dear Stella House Designer.

If you are looking for something with a little more ‘prickly’ whimsy, check out No Drama Llama by Dear Stella House Designer.

If you are looking for something with a little more ‘prickly’ whimsy, check out No Drama Llama by Dear Stella House Designer.

Not satisfied with the selection of llamas above? Don’t fret, here are more Lovely Llamas by Michael Miller.

Not satisfied with the selection of llamas above? Don’t fret, here are more Lovely Llamas by Michael Miller.

Not satisfied with the selection of llamas above? Don’t fret, here are more Lovely Llamas by Michael Miller.

California dreaming

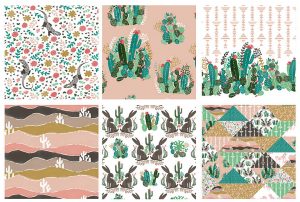
Hawthorne Thread’s Palm Springs line brings us deep into California with cacti, lizards, geometry, and the sweeping vistas of a desert skyline.

Hawthorne Thread’s Palm Springs line brings us deep into California with cacti, lizards, geometry & the sweeping vistas of a desert skyline.

Hawthorne Thread’s Palm Springs line brings us deep into California with cacti, lizards, geometry & the sweeping vistas of a desert skyline.

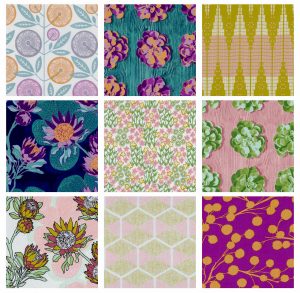
Joel Dewberry’s Cali Mod fabric continues with the California theme. He absolutely knocks it out of the park with images of succulents that look like a Warhol painting, and vibrant and metallic colors combined.

He absolutely knocks it out of the park with images of succulents that look like a Warhol painting, and vibrant & metallic colors combined.

He absolutely knocks it out of the park with images of succulents that look like a Warhol painting, and vibrant & metallic colors combined.

Back into the desert

The next two lines are both by Hawthorne Threads and they each coordinate with the other, as well as with Palm Springs above. Here you have Mojave by Hawthorne Threads.

Here you have Mojave by Hawthorne Threads.

Here you have Mojave by Hawthorne Threads.

And this is Coyote, also by Hawthorne Threads. They basically have the market cornered on any type of desert, cacti, or succulent-themed fabric you could want. The motifs make me want to sew a super lightweight quilt and wrap myself in it on a porch somewhere in Joshua Tree as I watch the sunset.

The motifs make me want to sew a super lightweight quilt & wrap myself in it on a porch somewhere in Joshua Tree as I watch the sunset.

The motifs make me want to sew a super lightweight quilt & wrap myself in it on a porch somewhere in Joshua Tree as I watch the sunset.

Heading to Arizona

Bari J. Ackerman’s fabric line, Sage, moves us from the California deserts to her home state of Arizona. These fabrics are individually works of arts, together, they are really visually stunning. The maximalist floral and fruit prints combined with repetitive patterns, bright colors, cacti, and desert animals render me incapable of picking a favorite fabric. I love and want them all!

I love & want them all!

I love & want them all!

Succulence

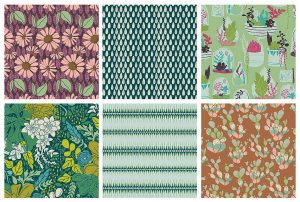
Lastly you have Bonnie Christine and Art Gallery Fabric’s Succulence line. The only plants I can keep alive are succulents; it’s nearly impossible to kill them. They thrive in amazing conditions. Bonnie has paid homage to this amazing ability to survive with even tiny amounts of water in this retro-inspired line of succulent fabrics.

Lastly you have Bonnie Christine & Art Gallery Fabric’s Succulence line.

Lastly you have Bonnie Christine & Art Gallery Fabric’s Succulence line.

Did I miss any? Do you have any other favorite cacti, succulent, or desert-inspired fabrics you love? Let us know about them in comments!

———————————————————————————–
Charlotte Kaufman is a writer and sewist in Mammoth Lakes, California. She specializes in marine and home interiors and continues to fall more and more in love with quilting. You can follow her at charlottekaufman.com.
Scrap-Fabric Keychain!

Scrap-Fabric Keychain!

If there’s one thing I’m interested in regarding sewing, it’s finding new ways to use my leftover fabric. In fact, if you’ve been keeping up with my posts (I won’t hate you forever because you haven’t! Honest!), it’s a concept that’s been explored already. But I still have fabric at my disposal, so the idea of how to use those pieces continues as a subject worth looking into.

So, for today’s post, I’m going to give you yet another way to use your leftover fabric — even if that leftover fabric is fairly small! Need proof? The project I’ll use for an example was made out of ONE fabric block that was less than ten inches in either direction. Sound good? Then let’s dive into this project, which for the record, is a keychain!

What you’ll need:

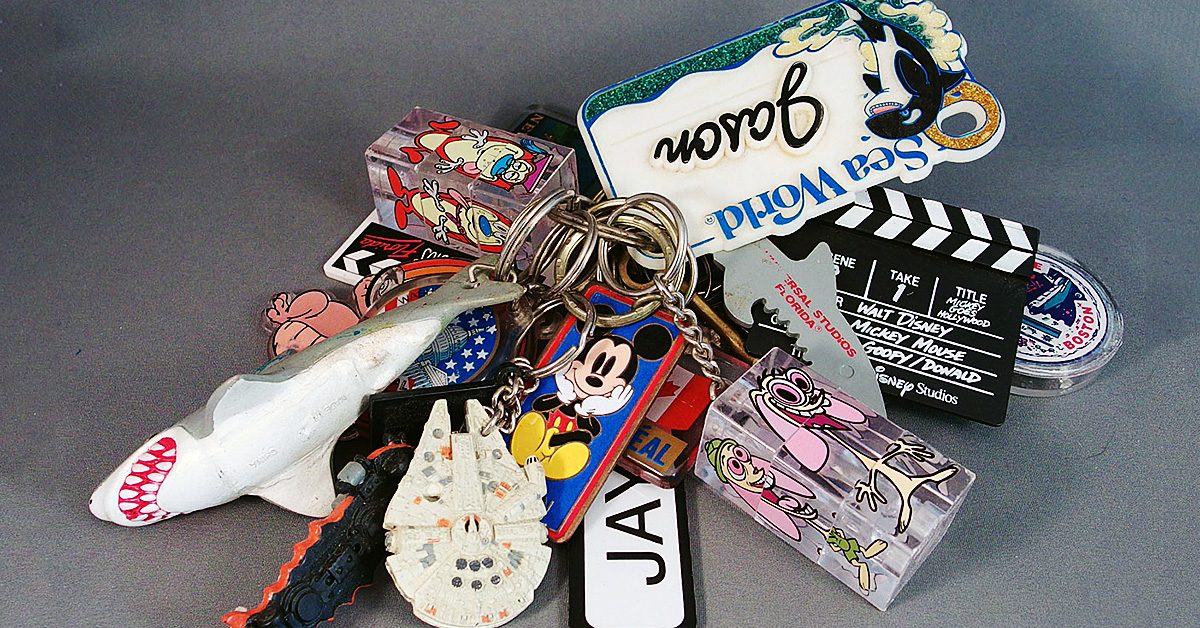
  • One fabric block. The size varies depending on what shape you want to make your keychain — and what size you want your keychain to be — but you don’t need anything over 10″ x 10″. Also, remember that flimsy fabric might not keep your keychain shape too well, so try something that’s sturdy — maybe even felt.
  • Key ring. It isn’t really a keychain if you can’t hang a key on it!
  • Sewing essentials like needle, thread, and straight pins, as usual!

What you’ll do:

Step One:  Choose your fabric, keeping in mind the guidelines about size and texture. You should also note that your shapes for your keychain will only be so big, so you should consider that size. If your final goal is a one-inch shape, for instance, you should pick a fabric that’ll look good when cut down to that size. I changed my fabric choice on this detail because with my initial decision, I would’ve potentially had part of a flower, a whole lot of plain color, or scattered bits that didn’t really look that fantastic to me. It might be something you want to consider as well!

I changed my fabric choice on this detail because with my initial decision, I would’ve potentially had part of a flower, a whole lot of plain color, or scattered bits that didn’t really look that fantastic to me.

I changed my fabric choice on this detail because with my initial decision, I would’ve potentially had part of a flower, a whole lot of plain color, or scattered bits that didn’t really look that fantastic to me.

Also, decide what shape you want your keychain to be. For me, I went with a heart because it was simple and traditional, but there are plenty of other options. Once you know your shape, you can create a stencil, or use an existing stencil, to make sure your fabric is going to be cut in the right way.

Cut it out

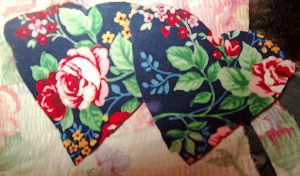
Step Two: Cut out your shapes! This was a perk to choosing a heart because you can make one by only cutting one side of the heart, as many of us might have learned in childhood. I don’t need to cut both sides if I fold the fabric in half, and I ended up only having to make that folded cut once for both sides of my keychain by folding the fabric into fourths. That way, with one swooping I-want-a-heart-shape cut, I got two bits of fabric that admittedly needed a bit of tailoring, but were good starting places for my heart.

With 1 swooping I-want-a-heart-shape cut, I got 2 bits of fabric that admittedly needed a bit of tailoring, but were good starting places for my heart.

With 1 swooping I-want-a-heart-shape cut, I got 2 bits of fabric that admittedly needed a bit of tailoring, but were good starting places for my heart.

Whether you find a simple method to make both pieces at once or use a stencil, cut two shapes out of the block of fabric — one for the keychain’s front side and one for the back. Make sure they’re even enough so that too much excess material doesn’t show on either side and that you’ve accomplished cutting the shape you wanted — or at least one you can live with! Also, remember to cut a line of fabric that is a couple of inches long and wide enough to suit your purpose (maybe ¼”). This will be your loop to put the keyring through. NOTE: These numbers can vary depending on what size you want your keychain to be!

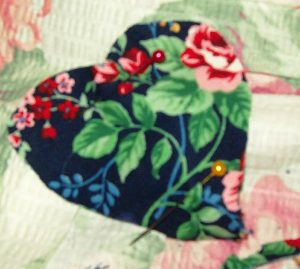
Step Three: Once your shapes are cut and trimmed, it’s time to start planning your sewing. Even though this is a small project, it could still pay to have straight pins keeping your work in place, so you might want to break out a couple! Be sure before you pin or sew that your main fabric pieces are together with their patterned sides facing outward, and don’t forget to fold that additional line of fabric and place the tips of both ends between the two shapes.

Be sure before you pin or sew that your main fabric pieces are together with their patterned sides facing outward.

Be sure before you pin or sew that your main fabric pieces are together with their patterned sides facing outward.

Put a ring on it

You might think about going ahead and adding your keyring here as well so that you don’t have to put your fabric through the stress of being twisted through the keyring. To do that, you’d just need to loop the line of fabric through the ring before you pin it between the shaped fabric pieces for sewing.

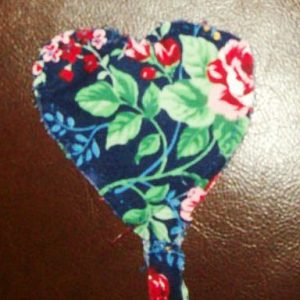
Step Four: Sew! Since this is a keychain, the process won’t take long! And be sure to cut off the excess thread when you finish!

Sew! Since this is a keychain, the process won’t take long!

Sew! Since this is a keychain, the process won’t take long!

Step Five: Hang a key on it and enjoy!

Basics of Quilt Maintenance

Maintenance. It can be a big deal in home, car and… quilt upkeep. That’s right. Just like letting your car go well beyond its oil change moment can snowball into a vehicle that isn’t budging without a major repair bill, not maintaining a quilt in the proper way could result in a sentimental treasure that’s good for little else than — maybe — scrap material. Sure, your quilt might not cost as much as, say, an engine to replace, but there’s more value in something handmade than a dollar sign. Maybe it was a wedding gift from a relative or a crib accessory that your mother started making before you slept your first night in said crib. Those types of belongings can have a lot of worth, so preserving them might be a big deal.

Wear, tear & time

Don’t break your own heart by letting this kind of damage happen to something close to it!

Don’t break your own heart by letting this kind of damage happen to something close to it!

One of the most important details about this preservation is to keep an eye on the products on a regular basis since smaller complications that come from wear, tear and time could be much easier to repair than those that have been expanding for some time. Other important details are to know how to fix the damage and determining if the damage is even fixable. As an example for these aspects, I’ll use a quilt that has some sentimental value to me, but a lack of maintenance has taken its toll. Don’t break your own heart by letting this kind of damage happen to something close to it!

Damage control

Let’s examine this first spot of damage, shall we?

Let’s examine this first spot of damage, shall we?

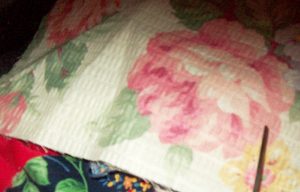
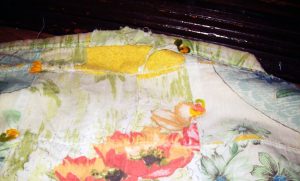
Let’s examine this first spot of damage, shall we? It looks fairly simple with just two simple holes in the top layer of fabric, so if I begin this examination with the basic question of whether or not it’s fixable, the answer would be yes! The smaller sizes here would allow a little bit of embellishment — maybe a patch — to be placed directly over the damaged area. Since this is a quilt that has a floral design, I could add something like a butterfly there so that it looks like it’s landing on the flower. Sure, it changes the design a bit, but it fits and is corrective. This issue, it seems, was detected in time!

Do away with the fray

The material is showing wear & tear around the seams and that’s not very surprising!

The material is showing wear & tear around the seams and that’s not very surprising!

Now, let’s try this one. The material is showing wear and tear around the seams and that’s not very surprising! The damage does extend a bit beyond the immediate area surrounding the seam, but it still seems to stem from that one line where the thread is running through. So, is it fixable? Yes! All I would need to do is add a border around the block to cover the issue, and if I did that for every block, the strategy would be replicated throughout so that this block wouldn’t look out of place. Again, it would change the design of the quilt, but not in a way that would necessarily make it look odd. I could match the border to the colors already present, and the addition could actually create a popping look for each block.

To fix or not to fix

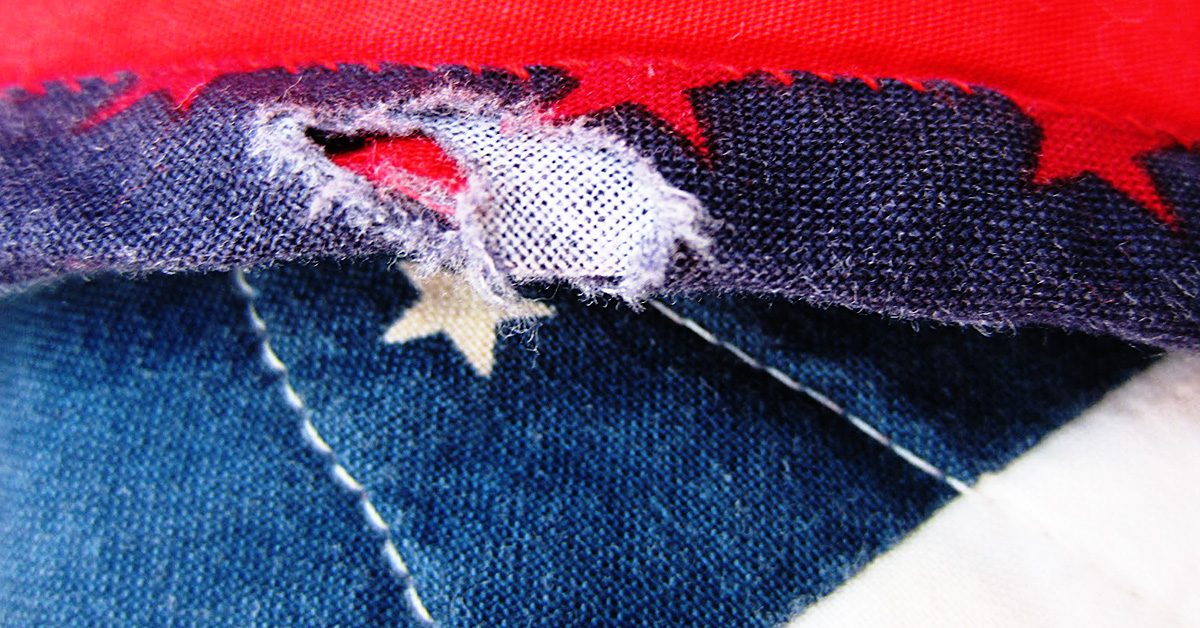
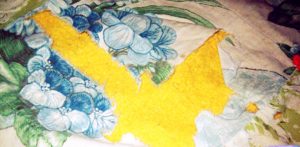
This one is shredded, & the top layer isn’t covering as much material as it did in the prior pictures. But is it fixable? Believe it or not, yes!

This one is shredded, & the top layer isn’t covering as much material as it did in the prior pictures. But is it fixable? Believe it or not, yes!

How about this one? Well, the damage here is much more drastic than a simple tearing from stitching or tiny holes in the fabric. Instead, this looks more shredded, and the top layer isn’t covering as much material as it did in the prior pictures. But is it fixable? Believe it or not, yes! Since this area is at the end of the quilt, changing the size of the quilt could work. I would need to cut off enough material on this side of the quilt so that the damaged territory is done away with and redo the border work. It’s not as easy of a fix as sewing on a butterfly embellishment, and the appearance of the quilt would definitely be altered by the smaller territory. But, if pressed, this would be a fix!

Too far gone?

The fabric became too worn, whether from use, washing, time, or some other variable, & without the proper methods to fix the problem, it spread.

The fabric became too worn, whether from use, washing, time, or some other variable, & without the proper methods to fix the problem, it spread.

Now, we get to this one. Here, this looks as if the fabric became too worn, whether from use, washing, time, or some other variable, and without the proper methods to fix the problem, it spread. Of course, there could be another explanation for it. Perhaps someone ripped it, and the damage grew. Whatever the reason, the faulted block is in the midst of the quilt, and this fabric probably won’t go together at this point. This one, dear readers, doesn’t seem to be strategically fixable. In my defense, this damage could have happened before I got into sewing, but if I’d paid attention and caught a small hole in the fabric, I could have embellished it. If there was a tiny rip, I could’ve stitched it. As it stands though, the only ways I can see to fix this would be to add on an embellishment that would be too large to look natural or change the entire block — which would throw off the pattern of the quilt. This one, it seems, has gone too far.

And this is precisely why you should keep an eye out for damage! If you catch the smaller problems, you can fix them. If you let them escalate, you could be looking at a ruined quilt. So to preserve your works, keep tabs on them and — through borders, embellishments, and adjustments — tend to those issues as they show up!

Must Have Sewing Notions and Supplies

Must Have Sewing Notions and Supplies

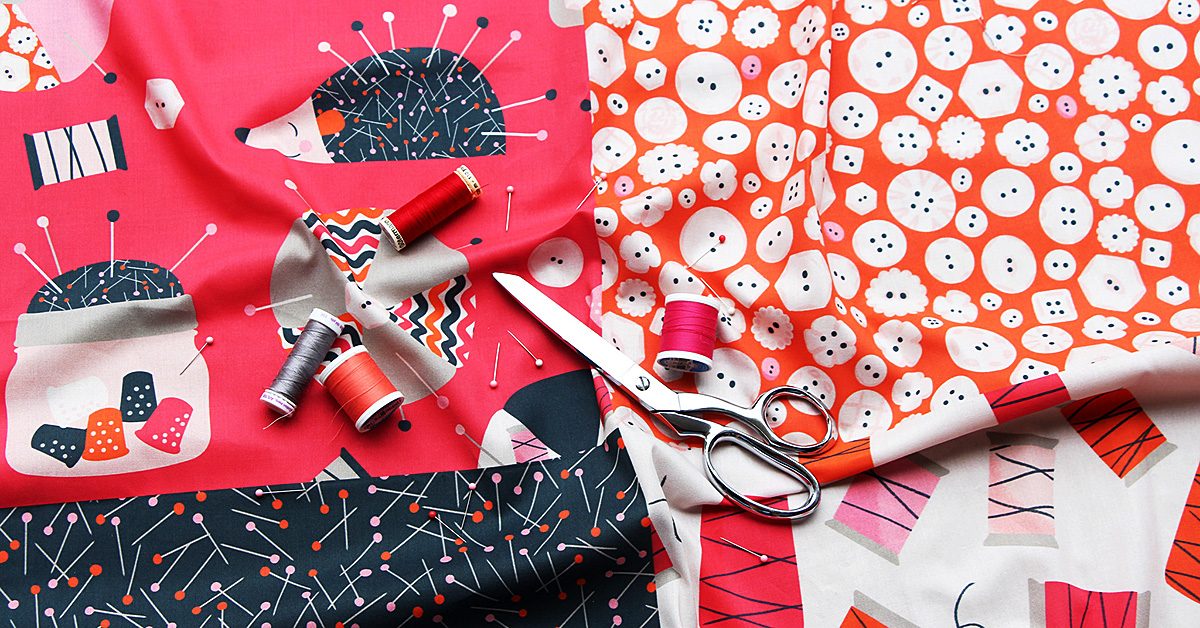
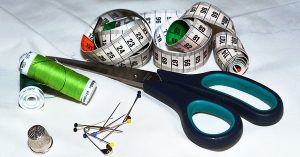
Last week, I told you about my dream sewing room furniture. This week, I want to share with you my must have sewing supplies. And no, I don’t actually own all of them since I don’t yet have that dream sewing room. Call this my dream sewing supplies list, I guess.

Must Have Sewing Notions and Supplies

Dress Form

I adore making cute summer sundresses. Right now, I measure myself, cut along what I hope are the right lines in the pattern and hem it by hanging the dress on closet hanger. Not ideal, but so far at least, they’ve all come out fine. I’d love a dress form though so I could check the fit and make minor tweaks and modifications as I go. I’m kind of between dress form sizes right now, so I’d have to make a call on which size to get – or if money was really no object, just get both!

Amazing Sewing Scissors

Alright, so I do have a pair of fabric scissors. I couldn’t consider myself a sewer if I didn’t. But I don’t love them. The handles are hard plastic and someone (not naming any names) used them to cut paper at some point, which kind of screwed up the cutting surface. I’d really love a pair of fabric scissors with a softer handle, especially since breaking my right hand last year. Even better, the ones I linked to have a purple handle! That’s my favorite color. Definitely on my sewing supplies wish list.

How about you?

Long Ruler

I don’t necessarily need to cut long, straight lines making sundresses, but I do need to measure long stretches of fabric to line up pattern pieces. Right now, I use a soft measuring tape. I pin it down on one side and pull it taut to measure. It’s not ideal, but it gets the job done. A yard stick or long ruler would go a long way towards making measuring easier.

What’s on your sewing supplies wish list? Sewing Machines Plus probably has it! Check out the website and let yourself dream.

Leftover Fabric: The Toss Across Edition

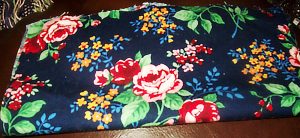
I think I’ve mentioned before that I have quite a bit of fabric leftover from the top layer of my quilt, right? Well, I do, and it’s interesting to come up with practical, usable projects that could give that fabric a purpose. This week, I did exactly that, and I’m going to share the idea that was a two-fold win for me: Using a little bit of fabric and creating something that I had a genuine reason for making.

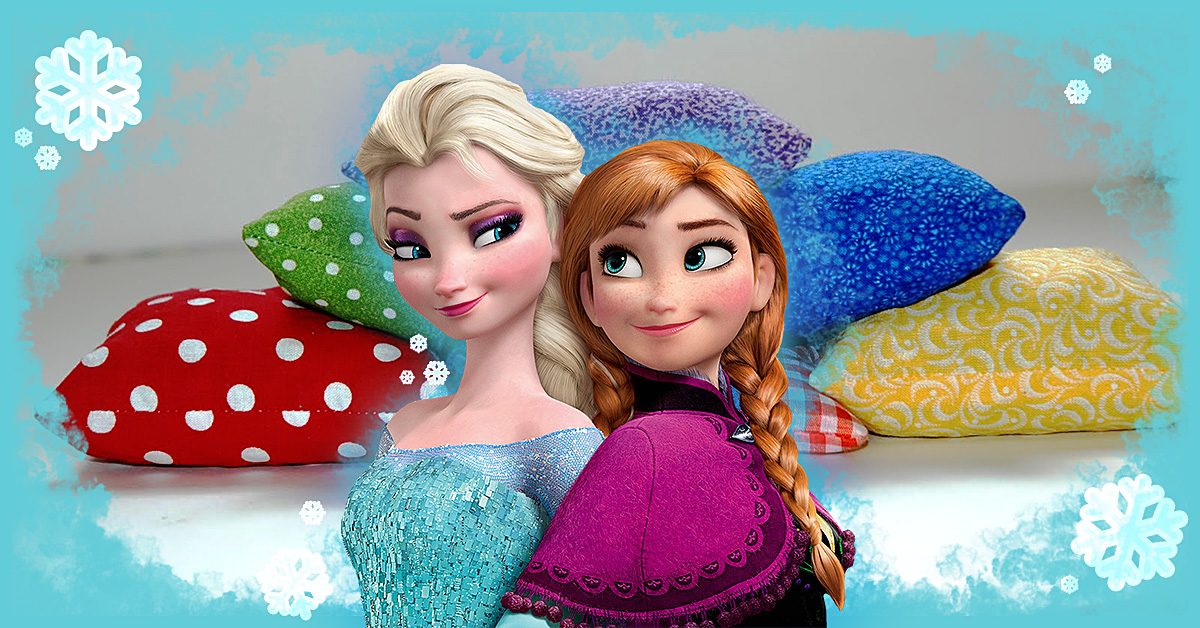
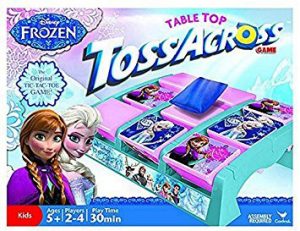
Frozen Toss Across set , and it comes with simple blue throwing bags.

Frozen Toss Across set , and it comes with simple blue throwing bags.

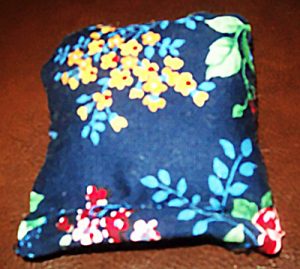
So, my niece has this Frozen Toss Across set , and it comes with simple blue throwing bags. The idea is to tic-tac-toe with Anna or Elsa (whichever character you are) to win, but the thing is that we currently only have three throwing bags out of the original set that we can use. What that boils down to is that the two of us would play the game one toss at a time, and we’d have to keep going over to the board to retrieve the bags for the next round. Sure, it’s doable, but it isn’t as convenient as only having to go bag-retrieving every third toss or so!

Get resourceful

Yesterday, it occurred to me that I have small pieces of material and fewer throwing bags than we used to have. Why not use some of that fabric to make new throwing bags?

It’s a simple idea, and the process was fairly to-the-point. All I needed beyond the sewing essentials of fabric, needles, thread, and pins was something to fill up the bag, which I honestly had to think on for a while — maybe until I was ready to fill the throwing bag. I thought about trying small rocks, but I was sewing at night. Since I didn’t want to wait until morning to finish my trial sewing bag or go rock hunting at night, I needed another option. At some point, it dawned on me that I have blue sand that could work, but you might find something just as fitting for the purpose around your house. Just think a little outside of the box, and the fillings might take shape!

Time to begin

I took one of the pieces of fabric & folded it in half since the fabric size was nearly ideal to make two separate throwing bags.

I took one of the pieces of fabric & folded it in half since the fabric size was nearly ideal to make two separate throwing bags.

Now that we have the list of supplies, it’s time to get into how all of them came together into a Toss Across throwing bag. First, I took one of the pieces of fabric and folded it in half since the fabric size was nearly ideal to make two separate throwing bags. These bags needed to be small enough to flip spaces on the board, after all! Once I cut the fabric in half, I again cut it in the opposite direction so that what started as one piece of material was now four individual pieces — two for each throwing bag.

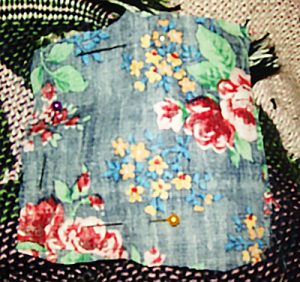
Luckily, these are small products, so I only needed about three pins to hold them!
Luckily, these are small products, so I only needed about three pins to hold them!

Then it was time to pin them. Luckily, these are small products, so I only needed about three pins to hold them! I took two pieces of the fabric and placed them together so that their printed sides were facing one another and pinned them on three sides to hold them steady. Note: This is also a good time to trim off any excess fabric on the ends if they’re terribly uneven with one another, though these seams will be inside the bag anyway. You don’t have to be too careful to make things perfect!
From there, it was time to sew, which was a pretty straightforward process! Three sides needed to be closed up completely, but I needed to keep that fourth side open to fill the sewing bag before I closed it as well. I simply sewed one side, then the next, and then the next. Then, it was time to flip the bag so that the printed fabric was now on the outside and add in what I decided would be blue sand to fill it. Again though, you can try a different tactic to fill the throwing bag — sand, beads, etc.

You can try a different tactics to fill the throwing bag — sand, beads, etc.

You can try a different tactics to fill the throwing bag — sand, beads, etc.

Be sure though while you’re filling the throwing bag that you don’t fill it too full. It’s important that it’s weighty enough to be able to turn one of the Toss Across spaces, but if it’s too full, you might have a hard time sewing that final side together. As it happens, I ended up towing the line, so for future projects, I might use a little less filling!

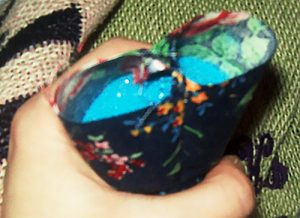
Once I’d finished with the filling, I sewed that final line together. I did this by folding the edges inward, kind of like I was wrapping a present, then folded the line downward to pin it in place. After that, I just had to sew what I’d pinned and cut the thread.

I did this by folding the edges inward, kind of like I was wrapping a present, then folded the line downward to pin it in place.

I did this by folding the edges inward, kind of like I was wrapping a present, then folded the line downward to pin it in place.

I have plenty of fabric to keep making these, but already with this one bag, I’ve evened up the throwing bag numbers so we can play two rounds at a time!

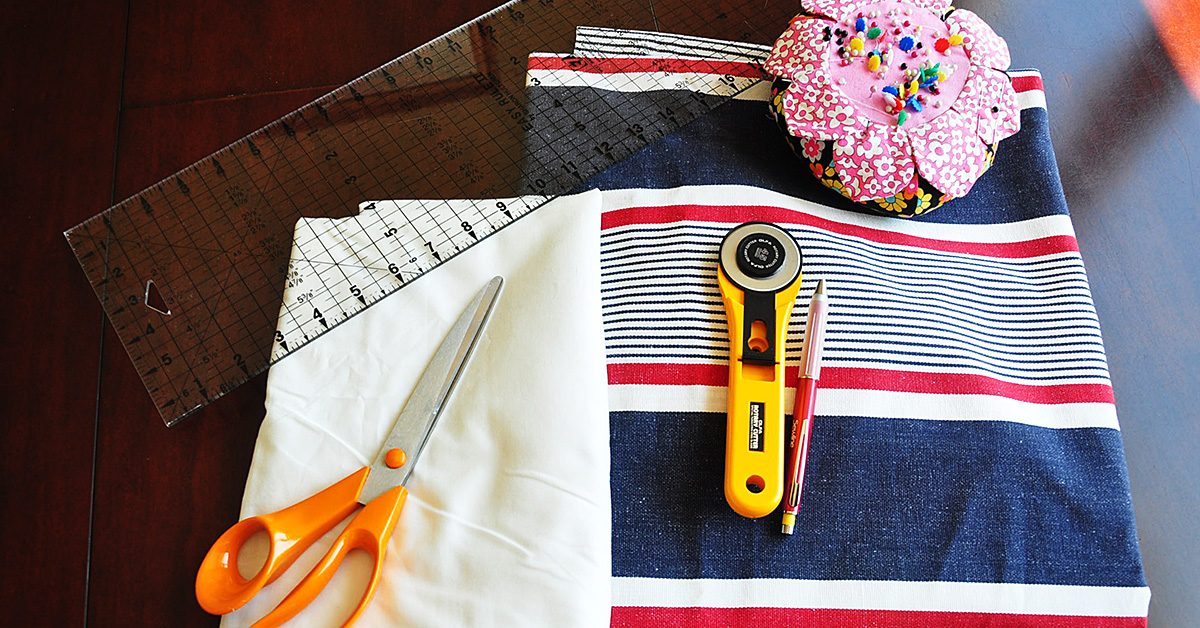
Do NOT iron minky directly!

Tips for Sewing with Minky Fabric (Cuddle or Plush Fabric)

Tips for Sewing with Minky Fabric (Cuddle or Plush Fabric)

I know a lot of people that shy away from sewing or quilting with minky but I’m here to tell you that minky is not the bogey-woman some people make it out to be, as long as you follow some important tips to make your sewing with it a success.

1. Pre-washing is not needed. Well, at least for the minky that is. Plush fabrics are made from polyester so they don’t shrink. If you’ll be pairing with fabrics that do shrink, then pre-wash the other fabrics in advance.

Minky bumps

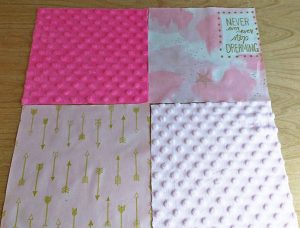
2. Nap! Minky has a nap. Nap is the raised or fuzzy/bumpy parts you find on certain fabric (think velvet). If you brush your hand one way on minky, it will be soft, if you brush it the other way, it will be rougher. Take the direction of the nap into the consideration when cutting out your project.

Take the direction of the nap into the consideration when cutting out your project.

Take the direction of the nap into the consideration when cutting out your project.

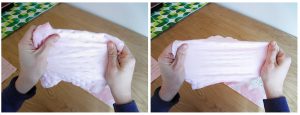
3. Minky can STRETCH! But only from one direction. Take a piece of the fabric you are working with and stretch it one direction and then the other. You’ll find the stretchy side very quickly. I make sure to not ever leave my hole for turning on the super stretchy side.

Minky can STRETCH! But only from one direction.

Minky can STRETCH! But only from one direction.

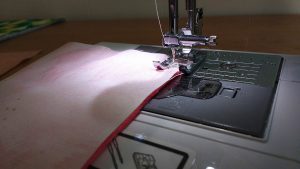
4. Use the right needle and correct sewing foot. A lot of guides will recommend a universal needle size of 12. I prefer size 14, but find what works for you. Additionally, if you have a walking foot, use it! If you are too lazy to use your walking foot (or don’t have one), I find minky sews better when you place it on the bottom and the regular fabric on the top.

Use a walking foot. I find minky sews better when you place it on the bottom and the regular fabric on the top.

Use a walking foot. I find minky sews better when you place it on the bottom and the regular fabric on the top.

5. Seam allowance and stitch length – I tend to give myself more room with minky and usually use a 1/2” seam allowance. I also use a longer stitch length, around 4.

6. DO NOT IRON MINKY DIRECTLY. It will melt. I promise you. You need to even be careful ironing with another fabric placed on top as pressing too hard or with too much heat will ruin the nap or little bumps of the minky underneath.

7. Pins, clips and washable basting spray or this Wash-A-Way Wonder Tape are your friends with minky. Use them excessively and you’ll get much better results.

https://www.sewingmachinesplus.com/tacony-BT14.php

Pins, clips and washable basting spray or this Wash-A-Way Wonder Tape are your friends with minky.

Pins, clips and washable basting spray or this Wash-A-Way Wonder Tape are your friends with minky.

8. Top stitch!! Top stitching minky will really help to remove bulk, keep the seams in line and make your project look more professional.

Top stitching minky will really help to remove bulk, keep the seams in line and make your project look more professional.

Top stitching minky will really help to remove bulk, keep the seams in line and make your project look more professional.

9. Use a rotary cutter and a vacuum. Rotary cutters help make very exact cuts with minky. I also suggest having your vacuum nearby to clean up after cutting and to clean out your machine as you sew. SewingMachinesPlus.com has a variety of vacuum cleaners for your sewing room.

https://www.sewingmachinesplus.com/tacony-fb-gim.php

10. Practice! You’ll get better the more you use it. Soon, you’ll be wondering what all the fuss is about when others say they shy away from sewing with plush fabrics.

Do you have any tips for making sewing with cuddle fabrics a success? Let us know what works for you in comments!

———————————————————————————–
Charlotte Kaufman is a writer and sewist in Mammoth Lakes, California. She specializes in marine and home interiors and continues to fall more and more in love with quilting. You can follow her at charlottekaufman.com.