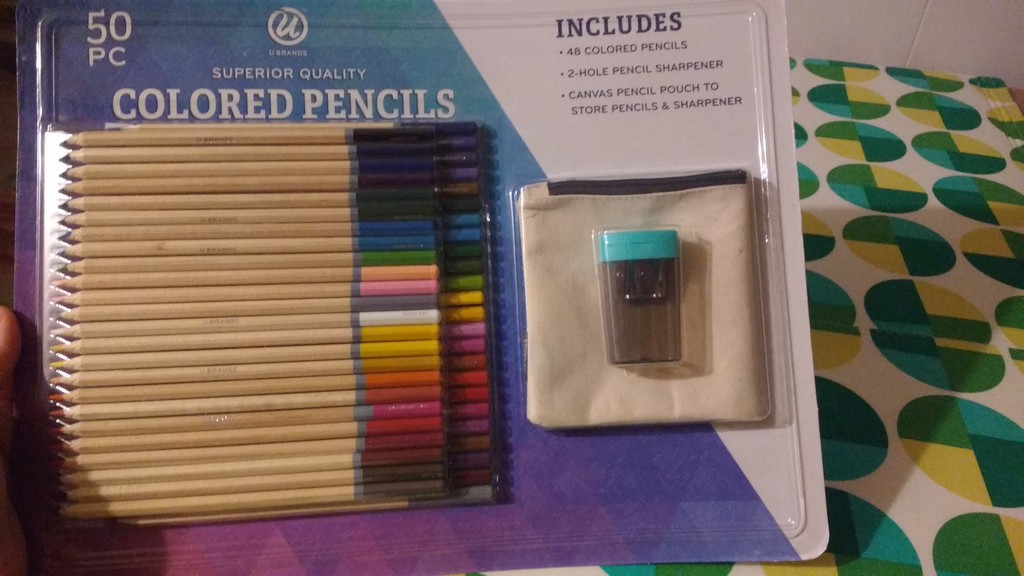
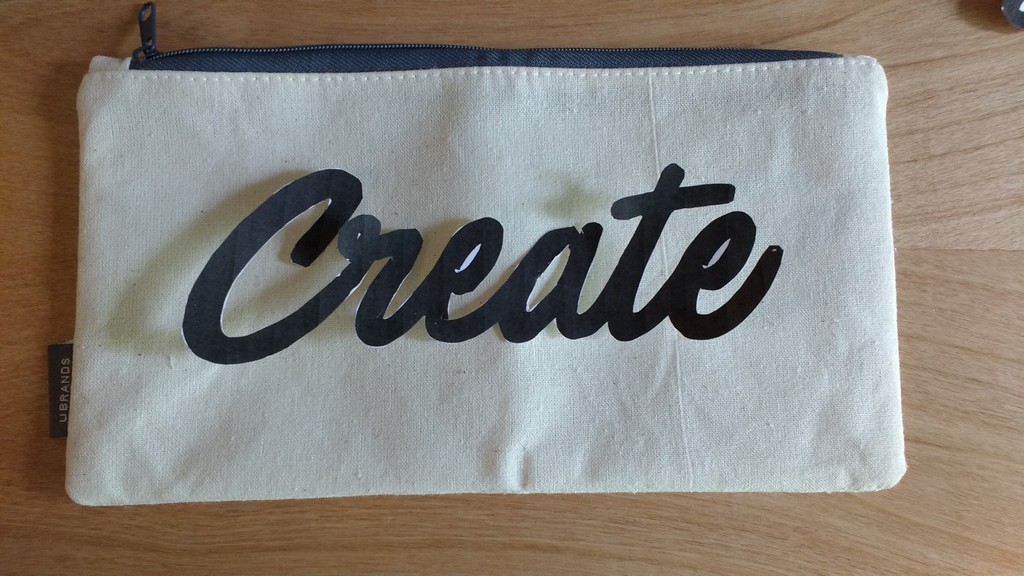
Recently I saw this set at Costco that includes 50 colored pencils, a pencil sharpener and a plain zippered pouch. I nabbed two but I think I’ll go back and grab some more because I turned them into something cool and I want to do it again.
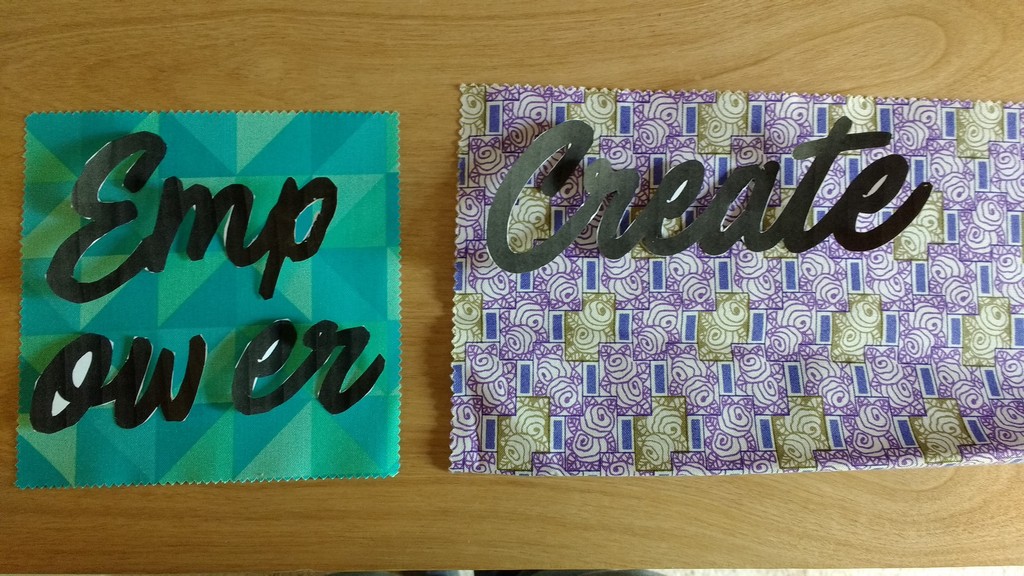
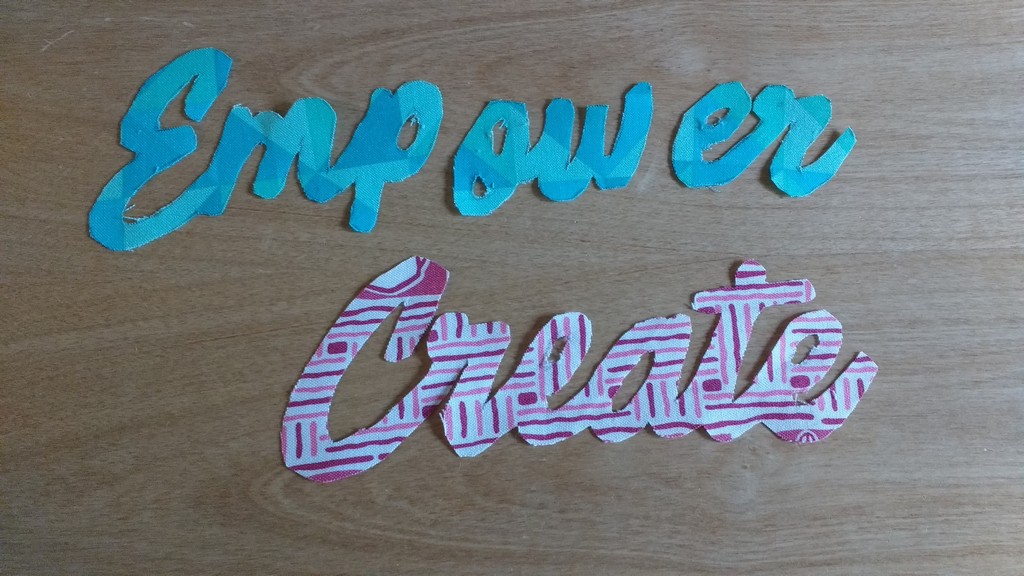
Here’s what I did. I printed out two words, one for each case, and then used them as patterns to draw the words onto fabric. The font is a free font I downloaded from dafont.com called Painted Paradise.
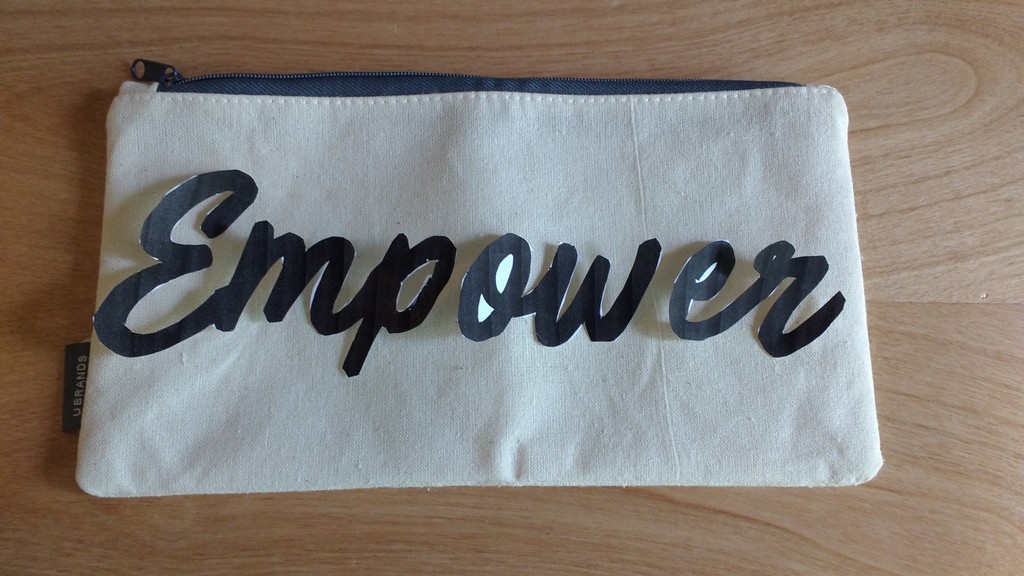
Empower printed out in three sections and I was able to place them on a charm square from my fabric stash. Create printed out as one word so I used a layer cake precut for it.
I used a freshly sharpened pencil and held the paper down as I traced.
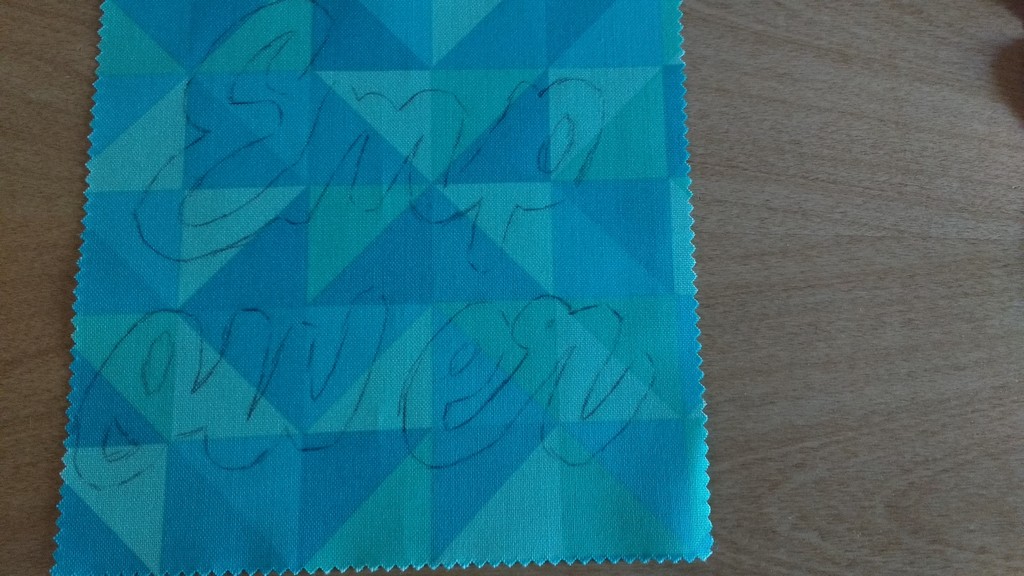
For this fabric, it was easier to flip the words upside down and draw on the backside of the fabric (I eventually chose a pink fabric instead of the purple you see above).
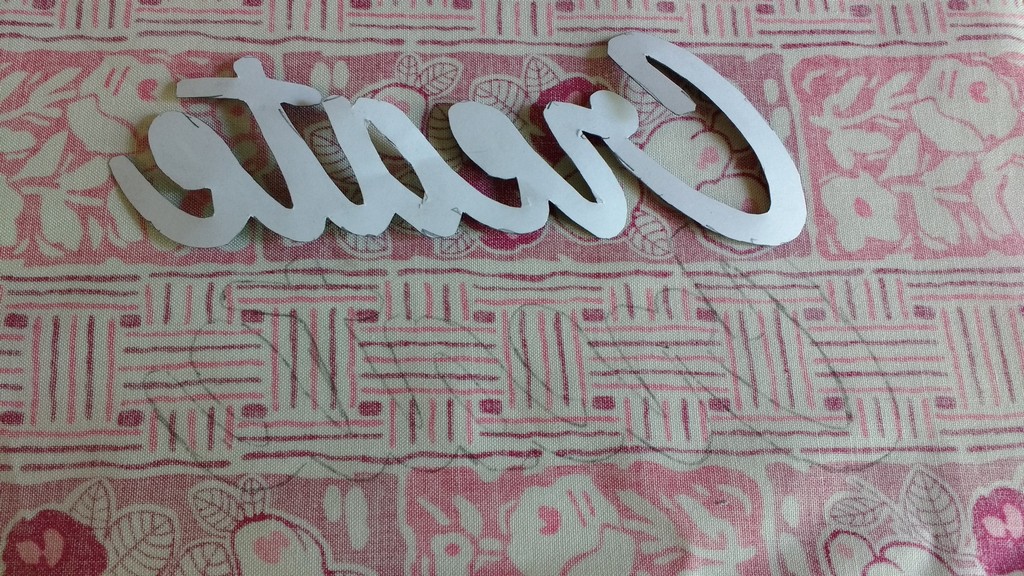
Use some sharp scissors, and patience, and cut out the words.
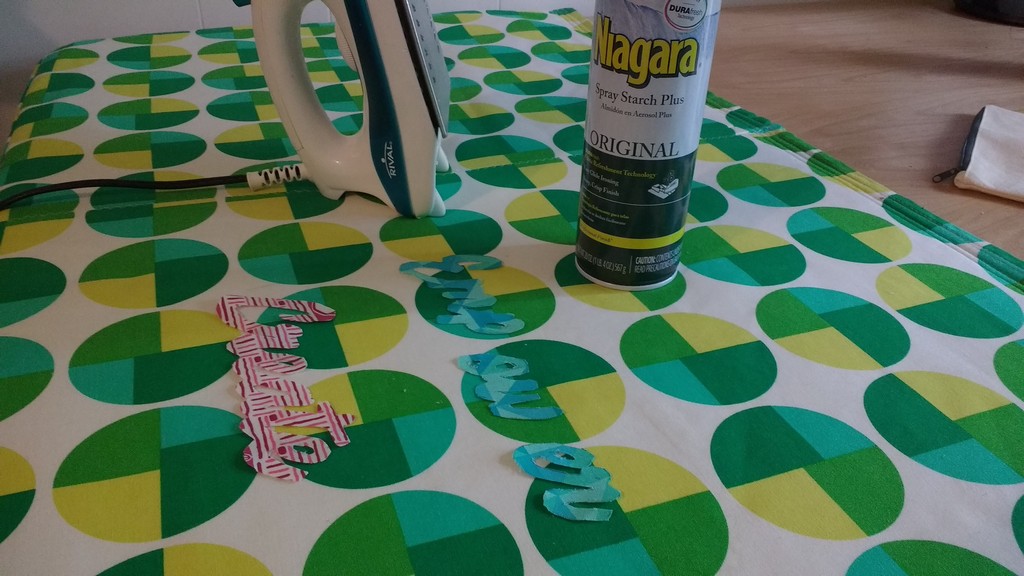
I ironed and starched the words to get them very crisp.
Next up: taking out the seams of the pencil case. This actually went pretty fast as I ran my seam ripper along the serged seams and then opened the fabric and pulled out the inner seams.
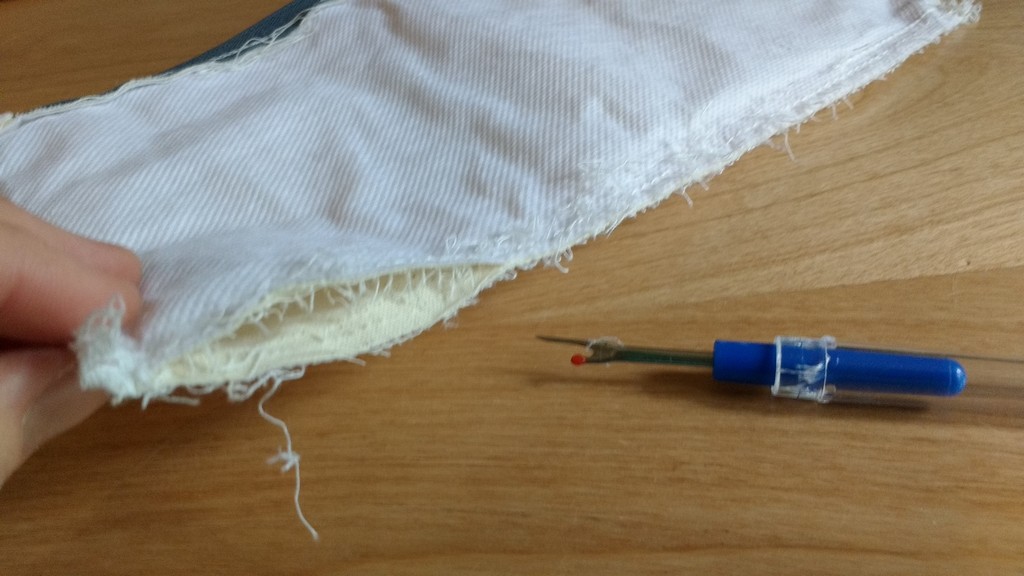
I did this to both cases and then took a moment to pull out as many of the remaining threads as possible to create a clean working space on the fabric (and my table).

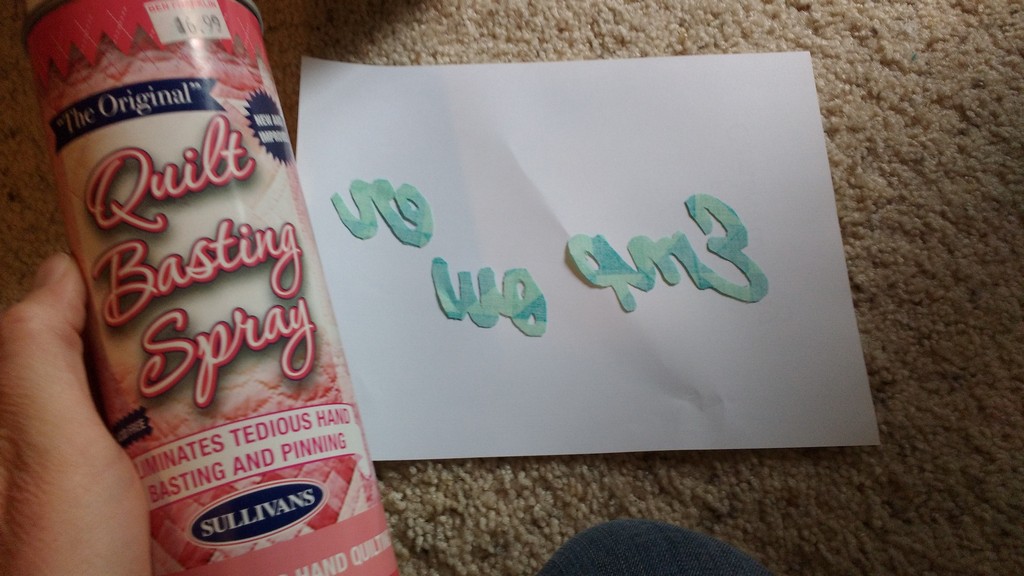
This is my handy quilt basting spray. I placed the words wrong sides up on a piece of paper and then sprayed fabric glue on them. Then I positioned the words on each pencil case where I wanted them.
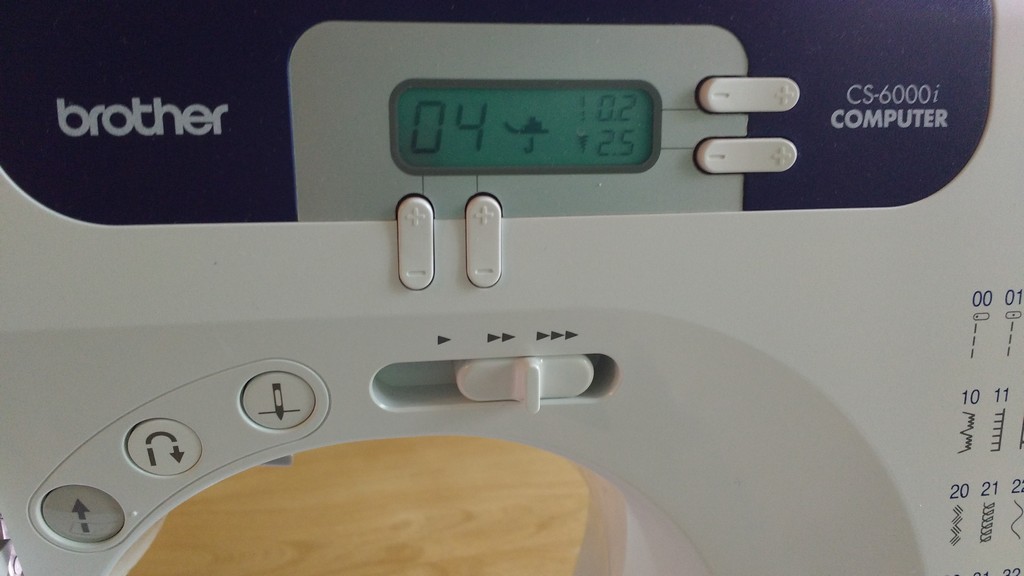
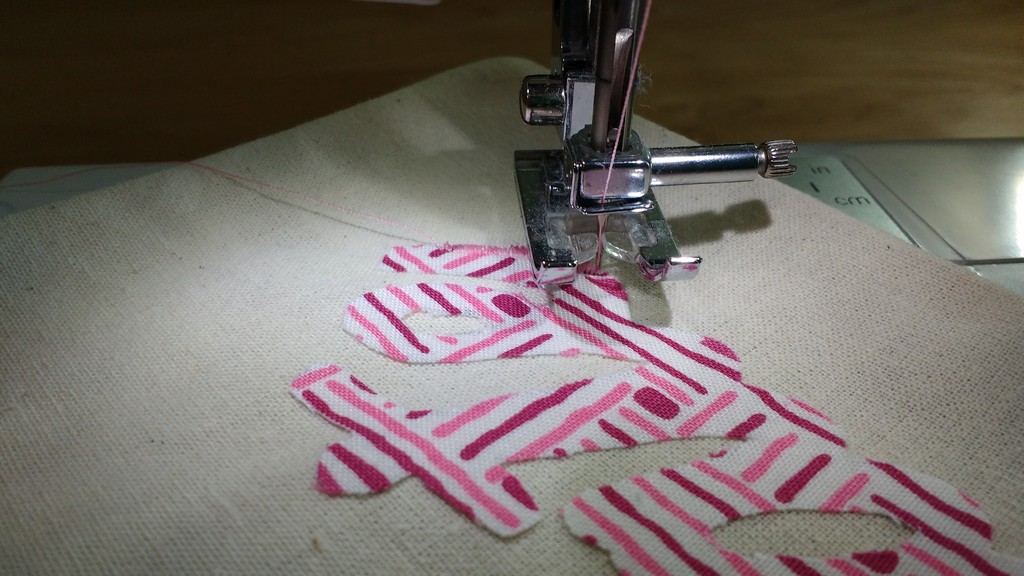
My plan was to basically embroider the words onto one side of the pencil cases. I learned a great embroidery stitch, called a satin stitch, on my machine. You create this look by selecting a zig zag stitch and then reducing the stitch length to almost zero. You can play with the numbers/look to find what you like.
I practiced on some scrap fabric and then got to work.
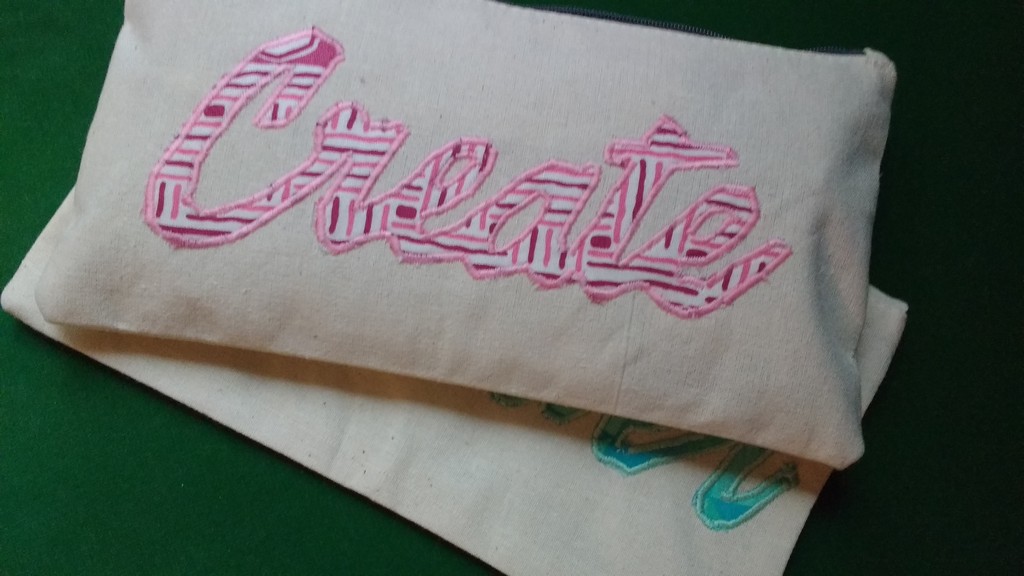
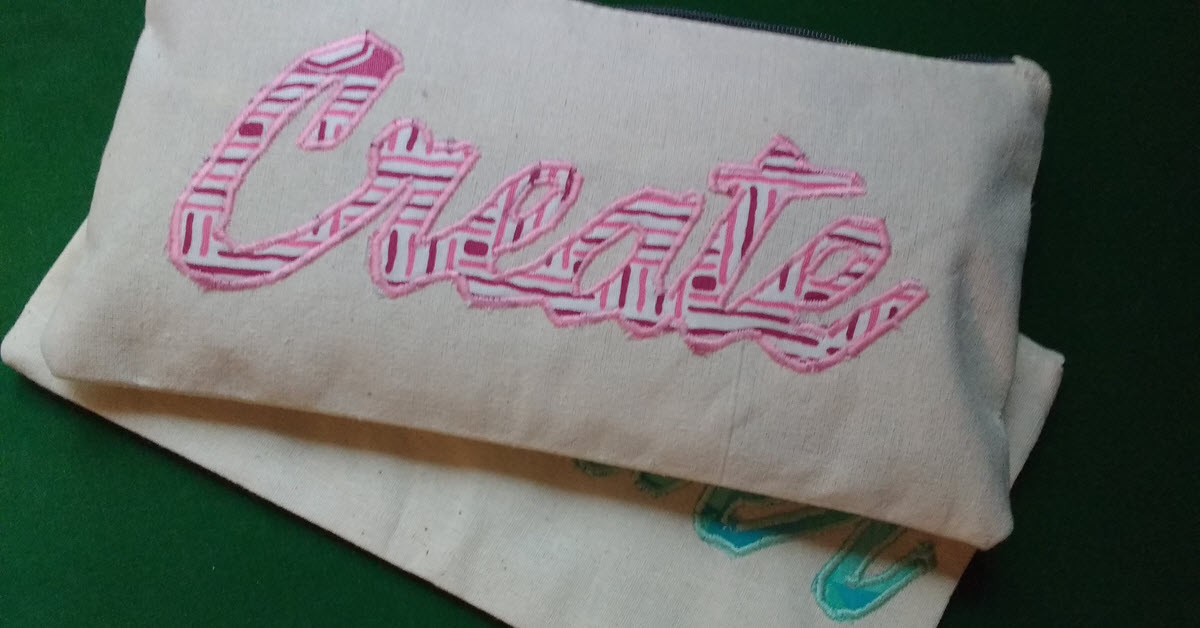
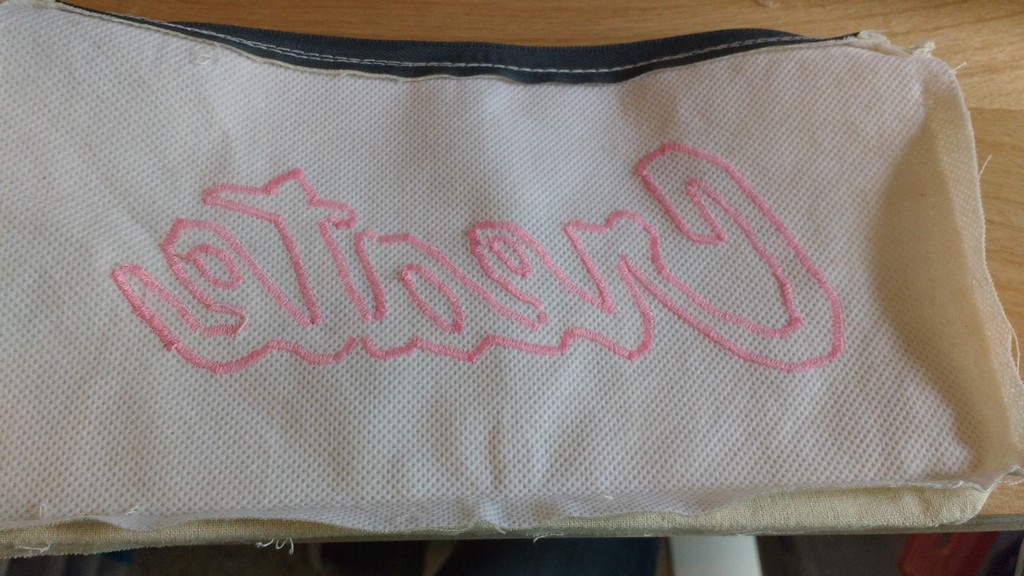
Here’s what it looked like from the back when I was done. It even looks cool inside out!
After I finished embroidering each case, I pinned each one closed and resewed the cases back up. Then I turned the cases right side out, pressed them, and look at these beauties!
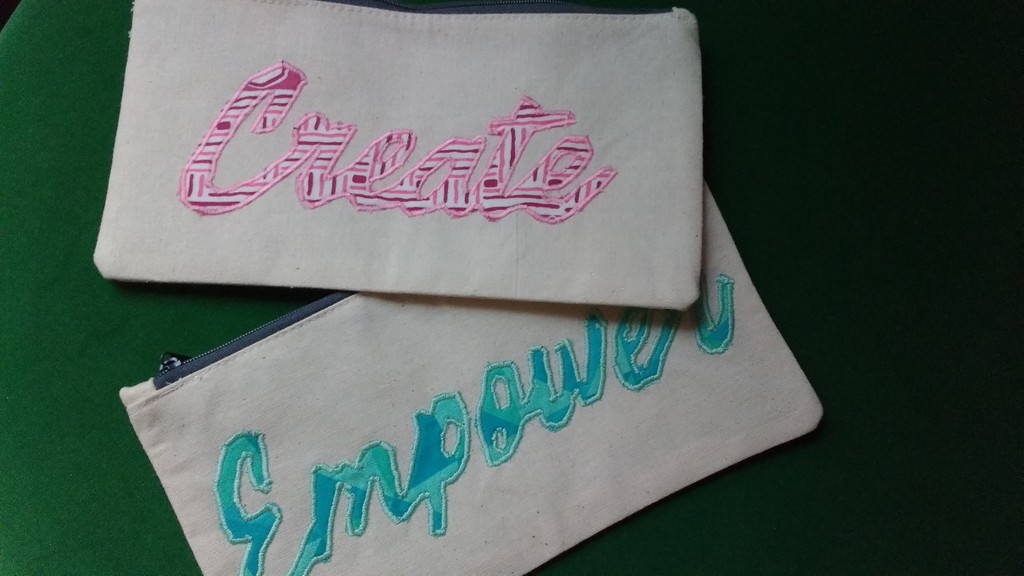
The Create case is for me. It’s rare I make something for myself and I’ve been in a really creative mood lately so I thought it appropriate. The Empower case is for my friend, Kate, who empowers other women. I definitely think I’ll be making more of these personalized cases in the future.