Sewing Through a Crisis

Sewing Through a Crisis

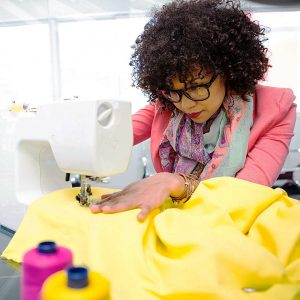
Like me, I’m sure many of you find sewing to be a relaxing, calming activity. Something about the personal space it affords along with focusing on the details of your project instead of whatever else may be going on is a great relief. When life gets to be too much, I often retreat to my sewing space. It makes sense, then, that when a personal or professional crisis occurs, I’d sew my way through it.

Freelance work

Being a freelancer is a walk on the line between comfort and professional crisis. Not all clients communicate well and sometimes they make changes which impact my income. In some cases, they give me no warning and leave me in panic mode trying to replace the money I made writing for them. As you can imagine, this is stressful. It feels like a crisis.

Crisis mode!

Crisis mode!

Yes, I work hard to replace the income. I spend time seeking new clients, asking existing ones for referrals and going to networking events. But in between these efforts, to keep my sanity in check and my professional demeanor in place, I sew.

I sew anything. It doesn’t have to be a project I’m excited about. In fact, in these moments, it’s often better if it’s something I’m not planning to wear for a special event. That way, I won’t feel any internal pressure to make it come out perfectly.

Scrappy solutions

I sew fabric scraps in my stash pile together to make funky shapes and patterns. Sometimes they get made into a pillow or another decorative piece. Sometimes they don’t. The point isn’t to create a masterpiece. The point is to calm my mind and emotions. It’s to keep me focused and reasonably calm, despite the professional crisis of losing a client and the need to quickly replace the income.

An hour of sewing at lunch gives me the inner peace I need to spend the rest of the day working hard looking for new clients without the grip of anxiety grabbing me at every step.

When you’re facing a crisis, personal or professional, try sewing your way through it. You might just find you’re better able to cope and be the person you, and your loved ones, need you to be.

Having a Friend who Sews

Having a Friend who Sews

Some things just work better in pairs.

Some things just work better in pairs.

Some things just work better in pairs—like shoes, socks, friendship bracelets, and the Everly Brothers. Often though, even our pastimes can be enhanced by the addition of another human being. Going to the movies, as an example, is more fun with a friend to offer ridiculous comments to or to discuss the movie with after the credits roll. Another example would be hiking. It could be great for you to wander through nature while getting a workout, but if you have someone to share the experience with, that company provides another level of goodness.

Sewing, too, can benefit from the presence of another person, even if people often think of it like a solo task. Things like classes based on sewing show evidence of this since you’ll be learning—should you take one—in the midst of other people who are interested in the same craft, but the reasons behind sewing non-solo are applicable beyond the notion of gathering in dozens in a classroom. Truthfully, there are common, day-to-day rationales for having a sewing friend or two in your life that you could find useful even if you don’t want to leave your house for your projects. You can pick up your phone, call them, and invite them over for sewing assistance.

And that sewing assistance can come in three specific forms that we’ll cover in this post. Ready to dive in? Then let’s go!

Taking Measurements

You might find that getting your measurements on your own can be complicated.

You might find that getting your measurements on your own can be complicated.

If you’re the type of person who sews your own clothes, you might find that getting your measurements on your own can be complicated. If you try to measure from shoulder to shoulder, for instance, you pretty much have to lift at least one shoulder, and that can throw off your measurement. It helps then to have a second person around who can step in and help you. Now, sure, you can recruit whoever is around to help you get that shoulder measurement, but it’s still best to have that someone be a person who’s familiar with sewing.

The reason for that detail is because people who are accustomed to taking measurements won’t need an explanation about how to take the measurement. They’ll understand, if you want help with your waist measurement, that the sewing tape should be at the smallest part of your waist. The process is familiar, and they’re accustomed enough to know how tight the tape should be held as well as where the cut off is in regard to any kind of tape-overlap. That familiarity can make for not only an easier sewing experience, but also a more accurate one. A non-sewing friend might allow too much slack and cause your clothes to be too big. To go Goldilocks, the sewing friend might measure just right.

Sharing sewing supplies

Sharing is caring.

Sharing is caring.

Sure, you shouldn’t be the person who constantly asks to borrow things—particularly if you don’t return them. But if you’re in a situation where you’re friends with someone you share an interest with and both of you trust the other enough to loan supplies, this can be a very real benefit for you and the person your friends with. If you don’t have the right shade of blue in thread, maybe your friend has it! If your friend doesn’t have a specific sewing needle for a task, perhaps you have one! It’s a great back-and-forth situation where you’re being afforded the opportunity to have a go-to for supplies you need who’s just a phone call away.

This dips into shopping as well since shopping with your friend could help each of you be aware of what the other has in their supply for these sharing moments. Of course, this wouldn’t be the only reason to go shopping for sewing supplies together, but it’s a definite plus! Either way though, in addition to sharing the supplies, you can share the experience of finding the right supplies with a good friend—and what shopping trip isn’t more fun with a friend?!

Socializing

Brainstorm ideas to come up with the best projects you can make.

Brainstorm ideas to come up with the best projects you can make.

Any time you have an interest, it can be nice to have someone to talk to about that aspect of your life. Otherwise, you might find that you have nowhere to turn to discuss interesting or pressing matters in regard to the field. It’s like being an avid reader who finishes a really great book, but then has no one to talk to about that book. You have all of these thoughts, opinions, and reactions, and where exactly are you supposed to send them?

Sewing can be so similar because you pour so much of yourself and your time into your projects. It helps to have someone there to talk to about your progress, your confusions, or your plans. The process can help you brainstorm ideas to come up with the best projects you can make, and it can give you a place to offer your complications in a way where you can ease your tension. You might even get some insight about what to do to fix those complications rather than bottling them up until they potentially run you down so much that you throw in your sewing thread. This social quality can then better your sewing experiences, and it can also increase your odds of continuing your sewing endeavors. That makes it a definite advantage of having a friend who sews!

Bottom line? Don’t think of sewing as an exclusively solo gig! Having that sewing friend can make for a brighter, easier sewing experience—from shopping for supplies to putting together your projects. You might have to sign up for a class to find that friend, but trust me! They could be worth their weight in sewing thread!

Getting Through a Sewing Lull

Getting Through a Sewing Lull

Tell me if this sounds familiar. You’re a little bored. You’d love to work on a sewing project, but you’re also in between projects. You don’t have any events coming up and you don’t have the urge to create something new for your wardrobe, or anyone else’s. I call this a sewing lull. In my freelance writing and book writing careers, I sometimes experience the same thing. Over the years, I’ve found some techniques to get through those lull periods without going stir crazy from boredom.

Go Back to Your Joy

Go Back to Your Joy

Why did you start sewing in the first place? Was it to make something specific or was it simply because it was a skill you wanted to learn? Think about what gives you the most joy when you sew. For me, it’s one of two things: either wearing something I’ve made and getting complimented on it or giving something I made to someone and seeing their joy. Tap into what you love about sewing. Then…

Expand Your Repertoire

If you’re like me, you usually have a few favorite things to make. Use your sewing lull to expand your repertoire. If you usually make clothes, try making a stuff toy or blanket. Maybe go really big and learn a completely different sewing skill, like quilting or embroidery. As long as it taps into the reason(s) you started sewing, love sewing, in the first place, you’ll have a winner.

Run with Scissors

Okay, don’t really run with scissors. It’s dangerous.

Okay, don’t really run with scissors. It’s dangerous.

Okay, don’t really do this. It’s dangerous. What I mean is step outside your comfort zone, disregard what usually holds you back and leap into a new sewing skill, project or technique without taking time to talk yourself out of it. Maybe there’s something you’ve been wanting to try for years, but your pragmatic side has been holding you back. This sewing lull is the perfect time to throw caution to the wind and give it a shot.

I find these three things get me through any lull, sewing or writing, and I learn some new things along the way. At the same time, it also helps me reconnect with why I love what I do – we all need that reminder sometimes, right.

Tips for Dazzling up a Ring Bearer Pillow

Tips for Dazzling up a Ring Bearer Pillow

I can’t recall the first time I heard the phrase, “June bride,” but it’s something that’s stuck in my mind as the years have passed. While, to me, other months might present better options for a wedding (Sue me! I don’t like 90-degree weather!), June has somehow become what could arguably be the staple month for wedding ceremonies. Since we’ve entered that month, it seems fitting to target those ceremonies for a post or two. For this particular one, we’ll focus on a tiny wedding detail that can be handmade for that extra bit of sentimental value, and that’s the ring bearer pillow.

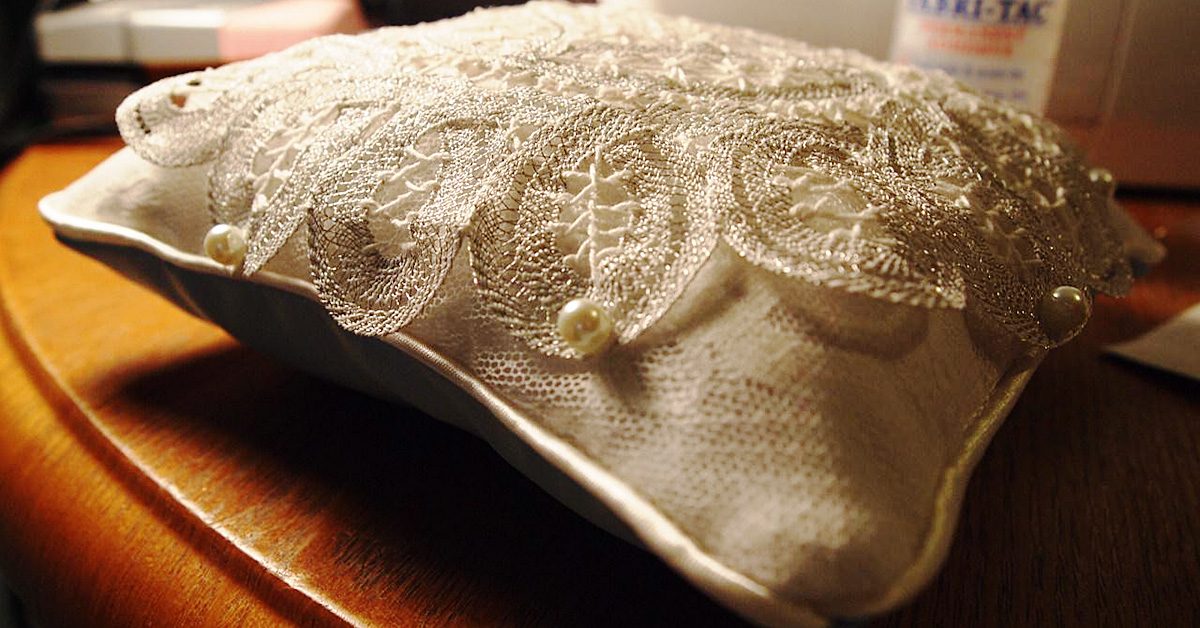
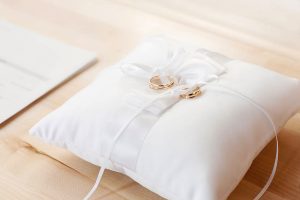
The ring bearer's pillow.

The ring bearer’s pillow.

For instructions on how to make a throw pillow in general, you can check out this link. But because pillows can be treated as such simple projects, I won’t discuss how to construct the actual pillow. Instead, I’ll concentrate on more decorative details in regard to the pillow’s appearance. These are aspects of the pillow that could come into play while you’re selecting fabrics and such—little concepts that you can do to construct something that stands out for your big day!

Choose your fabric wisely

The most important thing to consider for your ring bearer pillow is your fabric choice, and the most obvious option would fabric that has a bright white look to it. This matches the bride’s ensemble and showcases the brightness of the day, but if you want to go with something less traditional for your wedding, you might think a little outside of the box in regard to color.

You might think a little outside of the box in regard to color.

You might think a little outside of the box in regard to color.

For instance, I adore fairies in fiction and movies. If I were to have some kind of fairy garden theme to a wedding, it might make sense to use fabric options that are more creatively colored than basic white. Maybe a pale blue or a light green would work, or perhaps even a combination. It’s worth considering, overall, how your theme and wedding colors could be represented in the pillow for a unique look.

Fabric additions can be applied to the basic pillow structure to give it a more distinctive, lively look—things like lace, ribbon or tulle.

Fabric additions can be applied to the basic pillow structure to give it a more distinctive, lively look—things like lace, ribbon or tulle.

Time to accessorize!

You might also want to consider accessories for the ring bearer pillow, and I don’t just mean the rings that will be carried on it! Fabric additions can be applied to the basic pillow structure to give it a more distinctive, lively look—things like lace, ribbon or tulle. Again, you can go with the basic white, or you can better pair the accessories’ hues with your theme or wedding colors if doing so feels like the right option.

Not only can these accessory decisions make your ring bearer pillow stand out that much more, but they can also be used as ways to fix technical errors. If you sew lace around the ends of the pillow, as an example, you might find that a spot where your stitches weren’t that fantastic on the actual pillow can be covered by the lace. If you accidentally punch a smaller hole on the top of the fabric, you can make sure that ribbon you have meeting in the middle to create a bow covers the error. Essentially, while prettying up your ring bearer pillow with visual elements, you could improve its appearance as well by making your mistakes less visually obvious!

And in regard to those accessories, don’t limit your options to fabrics either! Sometimes the smallest trinkets and gems can push a normal-level work into more amazing territory, and things like gems speckled around your ring bearer pillow or a pin that looks like a heart can create a simple elegance that adds a level of sophistication to the project. Another similar idea would be to use sequins that could catch the light of the event and shimmer to again mimic the brightness of the ceremony. Each of these embellishments are options that, if used in the right amounts and ways, could lead to a ring bearer pillow worth talking about at the reception!

Structure is key

Structural details that you could vary would be the shape of the pillow - maybe use a heart, oval, or star shape.

Structural details that you could vary would be the shape of the pillow –
maybe use a heart, oval, or star shape.

Keep in mind that even the construction of the pillow could highlight a particular quality that you want to embrace in your wedding if you’re going for something more modern and less traditional. Structural details that you could vary would be the shape of the pillow—maybe use a heart, oval, or star shape—as well as the face of the pillow itself. Instead of thinking, “How can I decorate this simple pillow,” you could make the top of the pillow its own design that doesn’t need any décor at all because the design is the décor—like a large flower, made of fabric, that covers the top. These decisions are structural elements that could create the unique, one-of-a-kind ring bearer pillow that you’re searching for to spice up your wedding!

So to give a sentimental touch to your wedding, turn this traditional addition to the ceremony into something homemade, unique, and fitting! It could add a splash of perfection to an already perfect day!

Fancy-Up a T-Shirt

Fancy-Up a T-Shirt

Fancy-Up a T-Shirt

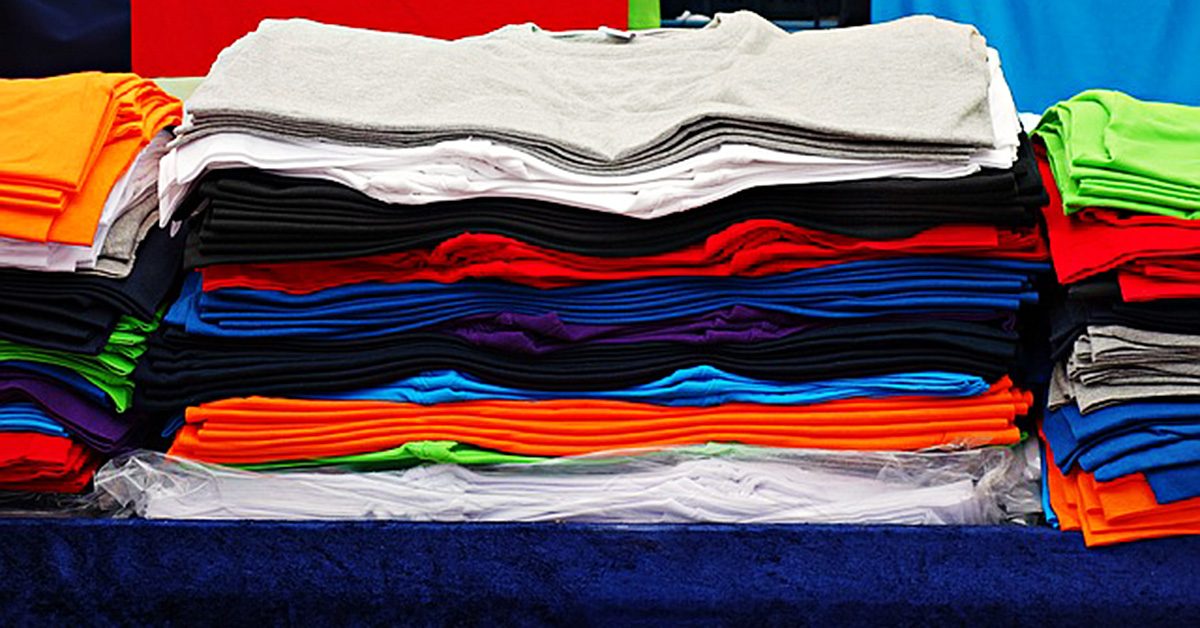
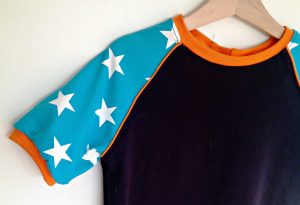
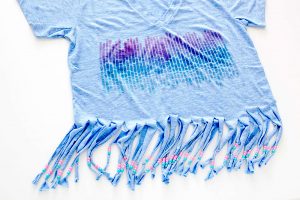
If you’re anything like me, when you find a t-shirt that fits well and is comfortable, you buy a bunch of them in a bunch of colors. Next time you do this, buy at least one more in a duplicate color. That t-shirt becomes the base for creating a fancy t-shirt that shows of your personal style. Build off it using items like lace, patches, fabric scraps, piping and beads. Or try your hand at embroidery.

Lace

There are a couple of ways to use lace on a t-shirt. You can use full pieces of it to create a collar or edging on the sleeves or bottom. If that’s a little too vintage for you, try cutting apart lace and sewing parts of the design on the shoulder, sleeves, hem or around the neckline.

There are a couple of ways to use lace on a t-shirt.

There are a couple of ways to use lace on a t-shirt.

Patches

I’m a big fan of patches. Browse through your local craft store and find some that you really like. Place them on the sleeves, shoulders or bodice of your t-shirt to create the look you want. Even if they’re iron patches, I advise you to sew them on using either your machine or hand stitching.

I’m a big fan of patches.

I’m a big fan of patches.

Fabric scraps

Use these in a similar fashion as store bought patches. It’s a great way to use up some of your fabric stash while creating a funky, country t-shirt look. I recommend sewing the edges under to prevent fraying, unless you’re going for that look. Using a fabric marker in combination with fabric scraps can add to the country-chic look.

Use these in a similar fashion as store bought patches.

Use these in a similar fashion as store bought patches.

Piping

I love using piping around the bottom of the shirt and sleeves, but there are other options too. You can create a military look using piping on the shoulders or add some funk to the bodice. Get creative and use colors that contrast from the t-shirt color.

Get creative & use colors that contrast from the t-shirt color.

Get creative & use colors that contrast from the t-shirt color.

Beads

You can do a lot with beads on your t-shirt.

You can do a lot with beads on your t-shirt.

You can do a lot with beads on your t-shirt. They look great as a faux necklace around the neckline or along the edges of the sleeves or bottom of the shirt. Another option is to create a design on the front of back of your shirt using beads. I suggest using a washable marker or pencil to draw out the design before placing the beads.

Whether you use one or many of these techniques, you’ll wind up with a t-shirt that expresses your sense of style. They’re great in combination or alone. A t-shirt with even one of these creative additions would cost quite a bit in a store. Doing it yourself is both fun and cost effective. Give it a try and see what you come up with.

Vintage Chic Embroidery Class in June

Vintage Chic Embroidery Class in June

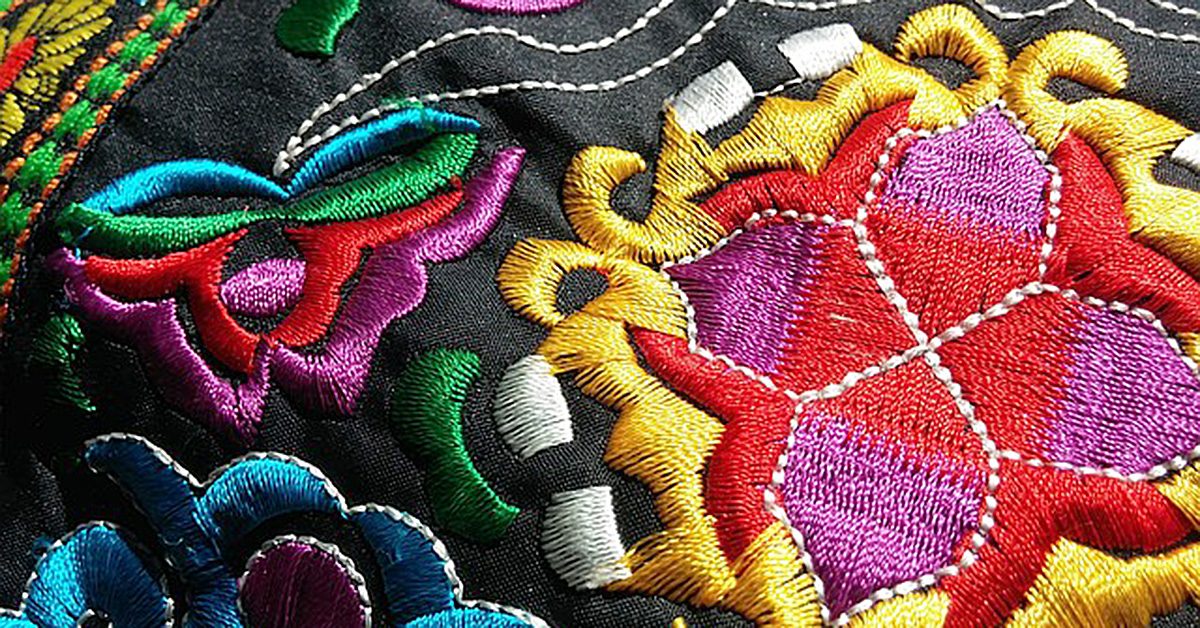
Do you have memories of embroidery work your gram used to do? Maybe you’ve still got an item or two of clothing that she embroidered for you. These vintage embroidery designs are coming back into fashion. If you’ve been trying to recreate this look with your embroidery machine and haven’t had much luck, this upcoming class is for you!

Apparel

Vintage embroidery looks great on men’s and women’s clothing, children’s wear and home décor and accessories. Once you master the technique, you’ll be embroidering everything you can get your hands on.

What to Expect in Class

Vintage Chic Embroidery Class in June

Vintage Chic Embroidery Class in June

This four-hour class includes both lecture and interactive components. You’ll learn how to use the Vintage Software to create beautiful designs on anything you can image. You’ll play with colors and textures to create completely unique results. Learning the DIME way, you’ll master flawless borders. And you’ll learn the secrets behind embroidering on prints, nubby fabrics like knit work, and smooth fabrics like satins and sateens.

Not enough? How about also learning to with heavy thread and matte finishes? All this included for just $29. When you register online (here)  you’ll receive five specially digitized Vintage embroidery designs and get a free goody bag in class!

Register today to save your seat: http://www.inspiredbydime.com/events/sewing-machine-plus-vintage-chic-june-2017/

When is this Awesome Embroidery Class?

We’re glad you asked! The amazing Donna Siler is teaching this class on June 9 and June 10. Both days the class runs from 10am to 2pm. Four-hours of your time will have you embroidering vintage designs like a pro! Classes are held at our shop at 713 Center Drive in San Marcos, CA.

Don’t miss your chance to learn Vintage embroidery. The software makes it easy and this class gives you everything you need to know to create vintage designs on any fabric. They’re so fashionable now, your family and friends will want you to personalize their clothes and home décor.

Can I Take my Sewing Machine on an Airplane?

Can I Take my Sewing Machine on an Airplane?

I’ve been doing a good job this summer of satiating (at least a bit!) my ever-present wanderlust.

I’ve been doing a good job this summer of satiating (at least a bit!) my ever-present wanderlust.

I’ve been doing a good job this summer of satiating (at least a bit!) my ever-present wanderlust. I’ve been to the Dead Sea and the Red Sea and stood in the middle of the desert in Jordan. I’ve wandered down into the depths of a pyramid in Giza and hiked to the top of Mount Sinai.

Today, I’m preparing for a cycling trip to the Karakoram Mountains in Pakistan – during which we’re going to visit the local school and women’s sewing centre in Chirah (a vocational training project supported by the Red Spokes LVCF charity). You can read more about the center here. Red Spokes is also the company that’s organizing the cycling tour I’m about to embark on. If you happen to be interested in that, you can read about it here.

I’m super excited about both the cycling part and getting to visit the sewing center and will definitely try and spend some time communicating with the women there and learning about their lives and what sewing means to them.

Right now though, I’m exhausted after finally managing to (I think) get my bike packed up so it’ll survive both the TSA and the baggage handlers. (Wish me, or rather, my bike, luck).

Wrestling with my bicycle and bike bag this morning got me thinking about flying with sewing machines.

Can I Take my Sewing Machine on an Airplane?

Can I Take my Sewing Machine on an Airplane?

When sewing machines fly

When sewing machines fly

It’s been quite a few years since I’ve flown with a machine in tow. I think the last time I did was almost 8 years ago – and security measures weren’t as strict as they are now. I had the machine packed in a rolling suitcase and I recall that I gate checked it with JetBlue. You can also buy great sewing machine specific bags to transport your machine: https://www.sewingmachinesplus.com/trolley-category.php

The important thing to remember though is to remove the needle and any other sharp tools if you’re going to bring as carry-on luggage.

A quick search on the TSA website does indeed confirm that you can bring a sewing machine in your carry on or checked bags.

The Sharp Objects List states that you can also bring knitting, crochet, and sewing needles and safety pins in your carry on but, scissors must be less than 4″ from the pivot point (like these):

TSA and contraband

I’ve been doing a good job this summer of satiating (at least a bit!) my ever-present wanderlust.

I’ve been doing a good job this summer of satiating (at least a bit!) my ever-present wanderlust.

Speaking of the TSA, they actually have a rather amusing Instagram account where they post pictures of confiscated items that people tried to bring on board airplanes as well as answer questions about whether or not specific items are allowed.

Travel tips

If you do happen to need to travel by air with your machine, here are a few tips:

  1. Take the lightest machine you own (only because it’ll be easier for you to carry through the airport. Most airlines don’t weight carry on bags). I know I talk about these Brother machines all the time but they really are incredibly lightweight and durable. And they sew well!
  2. Put your presser foot down on a piece of fabric and remove the needle. Make sure all your thread holders are folded or detracted if they’re foldable or retractable.
  3. Pack some foam or something else cushy around it in case it falls over on its side. I also like to put the machine inside some sort of plastic bag to protect it from water (just in case there’s a freak rain storm, or you drag it through a puddle or something is leaking somewhere).I’m a backpacker/hiker and bike commuter though so I pack everything into clear plastic drawstring bags. Because you just never know.If there’s extra or empty space in the bag or box with your machine, fill it up with something. Fabric, clothes, those air filled plastic pillows – whatever. The more secure a machine is in its case(or box) the less it’ll shift and bang around.
  4. If you happen to still have your machine’s original box and packing material, use that. You can tape the box up and either check it or carry it into the cabin with you. Be advised though, that if you’re taking it as a carry on, you’ll probably have to take it out of its box or case for security. So, bring a roll of packing tape with you so you can seal the box back up.
  5. Remember that the TSA officers are just doing their jobs and sometimes they have different interpretations of what that is or what items are allowed. I travel very often (mostly international) and if there is one thing I’ve learned it’s to always, always be kind and respectful (even if you think the person you’re dealing with doesn’t know what they’re talking about or are not understanding you). I spent almost twenty minutes at the Cairo airport explaining to an officer that I had metal bike pedals, metal clips in my bike shoes and a bicycle seat in my bag. By the end of it, we were both laughing and we both said thank you (I like to think that later, over dinner, he told his buddies or family about the crazy white girl who just biked across Jordan that went through his security line).

Fly, my pretties, fly!

I know that airport security measures can be annoying and I truly wish that there wasn’t the need for them (either real or imagined) but I’ve found time and time again that a pleasant thank you and a smile makes things go a lot more smoothly (and faster!) 😉

And with that, I’m off to JFK Airport. Safe and happy travels to all.

The (sometimes scary) Life of a Freelancer

The (sometimes scary) Life of a Freelancer

Camel fashion in Petra.

Camel fashion in Petra.

If you hadn’t noticed, I’ve been traveling a bit recently (And I’m actually preparing to head out tonight for one more adventure in a far-flung land). I tend to go on trips solo, often joining an organized group expedition that most likely involves riding my bike through some foreign country.

…you can’t keep putting off the things you want to do or the places you want to go on the assumption you’ll have time in the future to do them.

I meet lots of different people on these trips from all sorts of places and backgrounds. But two of the questions that every single person on this planet always seems inclined to ask are:

(1) What do you do for work?

And (2) some variation of How do you get so much time off work?

Different strokes for different folks

How do you get so much time off work?

How do you get so much time off work?

I give different answers to the first question depending on who’s doing the asking. Sometimes I just say I’m a tailor and pattern maker, though this confuses many people, as the fact that such a thing could be a career never occurred to them. Their idea of a ‘tailor’ is someone like their grandmother sitting at home in a rocking chair darning socks and patching jeans.

Sometimes I say I’m a tailor for film and television shows which usually elicits an “oh wow, that’s interesting!” I always answer that sometimes it is but most times it isn’t all that glamorous (I spend a lot of time hemming jeans and shortening men’s jacket sleeves) though I do enjoy what I do.

If the conversation continues from there it usually enters into the murky waters of “so you’re a freelancer?” Well, yes, sort of. But also, sort of no.

Am I a freelancer?

I am a freelancer - in a sense.

I am a freelancer – in a sense.

I’m a freelancer in the sense that I’m never completely sure where my next job might come from but I’m not in the sense that I belong to a union and therefore have excellent benefits and salary protection. Not all movies and television shows are union ones (if they’re not we call them independent films.) My particular local in NYC does not have what they call ‘a hiring hall’, meaning I’m responsible for procuring my own jobs; the union doesn’t send me on jobs or anything like that.

And I’m also not a freelancer in the way I get normally get paid on a project. Almost all film and television jobs use one of two payroll companies: Entertainment Partners or Cast & Crew. I get paid through them with taxes taken out and a W-2 at the end of the year. The nice thing about both of these companies is that they keep track of all your earnings throughout the years with all the different shows you’ve worked on so you can use them for employment and salary verification when you’re applying for things like mortgages (banks like employment verification!). They are, legally and technically, your employer of record.

Each show or movie sets up its own production company (usually an LLC) independent from whatever parent company it may have (NBC Universal, Disney, etc.) that in turn, enters into contracts with the payroll company and the unions.

You’ve got to know when to hold ’em & know when to fold ’em

My answer is very simple: “I just say no.”

My answer is very simple: “I just say no.”

If I get through all this mumbo jumbo financial stuff and the person I’m talking to is still actually listening, they’ll then ask about how I get time off.

My answer is very simple: “I just say no.”

…its good not to be available all the time.

It’s taken me a very long time to get to the point where I’m able to say no to things. When I was just starting out, I said ‘yes’ to absolutely everything. You kind of have to when you’re beginning, before you’ve built up your reputation. But now that I’ve been doing this for a bit over 25 years, I can turn down things I don’t necessarily want to work on and say ‘no’ to gigs if I’ve planned a trip or vacation.

Free spirit

It’s a glorious thing to be able to say no to something that sounds horrifying (like, for instance: an over night shoot way out in Queens or a huge period television show that some network executive thinks can be made with half the manpower than what is really needed).

Nancy Reagan just says no - you can too!

Nancy Reagan just says no – you can too!

It can be scary, for sure, because I never truly, completely know if I’ll get another job (freelancing is wrought with all kinds of anxiety!). But, if history is any indication, I will. And I try to trust that.

Another thing I’ve learned is that you can’t keep putting off the things you want to do or the places you want to go on the assumption you’ll have time in the future to do them. Because you won’t. Sometimes you just have to have a little faith.

I’m not saying it’s easy to get to the place I’m at. It’s not. I worked extremely hard for almost 20 years while never taking any sort of vacation or going anywhere. But, in my old(er) age work/life balance has become more important to me and, my connections and work reputation are strong enough to allow me to leave town for a couple weeks without jeopardizing my career.

Plus, its good not to be available all the time. Unless they’re a close friend, I never tell people why I’m not available, I simply say, “Sorry, I’m booked up for the next two weeks.”

Booked up on my own personal vacation maybe,  but they don’t need to know that.

Don’t live the same year 75 times and call it a life.

Summer Trends: Embroidery

Summer Trends: Embroidery

Summer Vacation 2017 is upon us!

Summer Vacation 2017 is upon us!

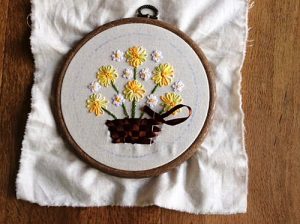
Summer Vacation 2017 is upon us, and as could be the case for any season and time frame, it’s showing up with its own trends. There are a number of these that you can apply to your sewing, but the one that I primarily want to focus on is embroidery. According to one source, “[t]he biggest trend that is coming in 2017 is definitely embroidery,” which makes it a popular topic to explore and try your hand at. For me personally though, it isn’t my main focus in sewing, so there’s plenty of room for me to learn and grow within that category. What better way could I have to do those things than to explore and research for the sake of a new blog post?

Start at the beginning

Let’s start with the very basics, like what exactly embroidery is. In regard to the world of sewing, that definition has been given as the following: “Embroidery is ‘thread art’ used to embellish a garment, hat or some other product by adding a sewn pattern. Generally, this sewn pattern includes a design and can also include lettering and/or monograms.” If you find that a bit too far-fetched of a definition though, think of it like drawing artwork on a product or fabric. Just as you would take a marker, colored pencil, or crayon to create an image on paper, “thread or yarn” can be used in embroidery to build the picture you mean to make.

Clearly, embroidery has changed over the years, but the long-reach of this style of artwork speaks volumes to its appeal & application.

Clearly, embroidery has changed over the years, but the long-reach of this style of artwork speaks volumes to its appeal & application.

Embroidery, as it happens, is not a new concept either. It dates back to prehistoric times — “to Cro-Magnon days or 30,000 BC” — so prominently that “fossilized remains of heavily hand-stitched and decorated clothing, boots and a hat [have been] found.” Clearly, embroidery has changed over the years, but the long-reach of this style of artwork speaks volumes to its appeal and application. If it has remained for so many millennia and through the technological changes within the later centuries, it’s safe to say that it’s a topic and technique that has captured interest through the passage of time!

Your only limitation is your own imagination

One reason for that appeal is clear since, because of the many forms embroidery can take, the possibilities for design are almost limitless. If you want a picture of a flower, a bird, a house, a doughnut, or a dragon on your work, you can add any of the above — or whatever else you have in mind — so long as you don’t over-exceed your own abilities. If you can physically create it, you can do it! It’s important to note though that this is one area that merits consideration since if you try for something too large-scale on your first embroidery project, you could fall short and become discouraged with the whole process. When you start off with such a bad experience, it can be a psychological obstacle to overcome if you want to better yourself in the field. Keep in mind then where you are with embroidery, and choose projects that are fitting for your level.

If you can physically create it, you can do it!

If you can physically create it, you can do it!

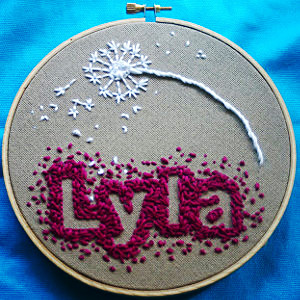
In essence though, embroidery can be incredibly personal and project-specific. You don’t just have to rely on the fabric at your disposal to create a work that’s perfect for you and your purpose. If you want to sew a blanket for a friend’s baby shower, for instance, you could add to whatever adorable fabric you use for that work by personalizing it with the baby’s name. If you’re making some kind of wedding gift, you could add the wedding date right onto the material. That truly is a beauty of embroidery. Whatever you want, if you physically can do it, it’s an option — even if you have to use an embroidery pattern to make it happen!

Unlock your creativity & see where it takes you

Add to whatever adorable fabric you use by personalizing it with a name.

Add to whatever adorable fabric you use by personalizing it with a name.

Of course, this can be applied to your clothing, as is evidenced by the notion that “Gucci, Dolce & Gabbana and McQueen” have all been credited with embracing this trend. The level of creativity involved with this clothing idea, again, can’t be overstated because you can tailor your designs to what you have in mind. If you want a blue top with a colorful butterfly on the left shoulder, you could make that happen even if you can’t find it in stores.

Overall, I honestly don’t know if there’s a more creative way to make your own items unique, so if you want to create a piece that’s as yours as you can manage, you might want to step into the world of embroidery! It’s trendy this summer, and a number of the popular embroidery concepts are very spring/summer-inspired — like flowers and birds. All in all, if ever there was a perfect time to step into this creative category, it’s now!

Carpet Magic from Egypt

Carpet Magic from Egypt

Some of the beautiful silk & cotton rugs can take up to 14 to 16 months to make.

Some of the beautiful silk & cotton rugs can take up to 14 to 16 months to make.

I visited a carpet making school while I was in Egypt.

The school, on Sakkara Road in Giza, was called ‘New Egypt for Oriental Carpets’. The building was a vast stone structure, wide stone steps leading up to the second floor showroom and into the main entrance on the ground floor.

Back to school

The front wood doors opened into a vast, high ceilinged, airy room. Looms of varying widths, reaching from floor to ceiling lined the walls. On two sides, children manned the looms. They were of all different ages, the youngest appearing to be around 7 –  all the way up to 16 or 18.

Each child sat a wood bench in a front a loom longer and wider than at least three or four of himself. They were all boys.

The children, along with learning how to make hand tied rugs from wool and silk and cotton, also study reading and writing. Acquiring the skill of carpet making allows them the opportunity to stay in their hometowns and earn a good wage for a trade. They can also continue their education elsewhere if they desire.

My guide and I stopped behind one of the youngest boys. He turned with a toothy grin to wave at me, then turned back to his loom. The speed and dexterity of his fingers as he tied the long strands of wool into knots was mesmerizing.

The oldest group of carpet makers at the school were no longer pupils but artists. They didn’t work from a preconceived mapped out design but from pictures in their own heads.

The youngest pupils work on the simpler designs made predominately of wool. They have long sheets of paper that show the colors required to complete a specific design – kind of like the directions that come with any rug latch-hook kit you can buy at a craft store. But much more complicated and a lot more extensive.

Snatch the pebble from my hand, Grasshopper

Another young man of about 13 years of age was working on a rug made of cotton and silk.

“Slow down,” said my guide, “Slow down so she can see.”

He dutifully slowed his flying fingers. He worked across the loom width-wise, tying strands of silk to a sturdy cotton thread already inserted in the loom. When he finished a row, he used a wired brush to push the knotted strand down tight against its neighbor.

He demonstrated the trimming process that happens at the completion of a rug, using heavy scissors to trim the fuzz like you do to an old sweater when it’s balled and pilled up.

On the backside of the rug, I could see the long threads left where he changed colors of silk. After he’d woven in all the strands, he would go back and cut and tie all the ends so that the back of the rug looked as beautiful and clean as the front.

The student becomes the master

The oldest group of carpet makers at the school were no longer pupils but artists. They didn’t work from a preconceived mapped out design but from pictures in their own heads. They used smaller looms they could stand up at, manipulating the contraption up and down with a lever by their feet, tying and weaving the yarns with their hands.

Some of the rugs can take up to 14 to 16 months to make – truly astounding in this world of mass, quick consumerism. All of the students and artists I encountered at the school seemed to have a genuine pride for what they were doing, and a patience I suspect is increasingly rare in the instant gratification, selfie-taking, googling, internet shopping world of many western civilizations.

Works of art
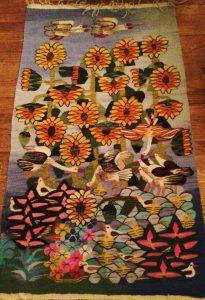
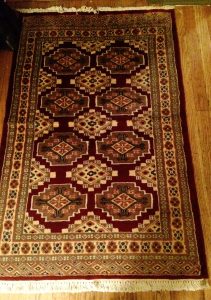
As soon as I laid eyes on you, I knew that you'd be mine.

As soon as I laid eyes on you, I knew that you’d be mine.

The second floor of the school was the showroom filled with all kinds of stunning rugs. Drinking a complimentary cup of tea, I wandered amongst the treasures for a good part of an hour (or maybe two). I finally decided on two carpets I wanted to purchase.

But, since I was in Egypt, the actual buying of things involved a thirty-minute bargaining session. I pretended I hadn’t already decided which rugs I liked the best and asked to see some more similar to my initial selection. I remained undecided for a significant amount of time, especially once price came into question, hemming and hawing and murmuring and looking around.

After settling on a cotton and silk rug, I then asked about the tapestries. I’d spotted the one I wanted quite some time ago. It was one of the artist done ones with yellow and orange flowers, swans, and blue sky and water with pink water lilies. After some more back and forth, we finally agreed upon a price for both the pieces I wanted.

The cherry on top
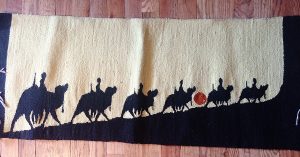
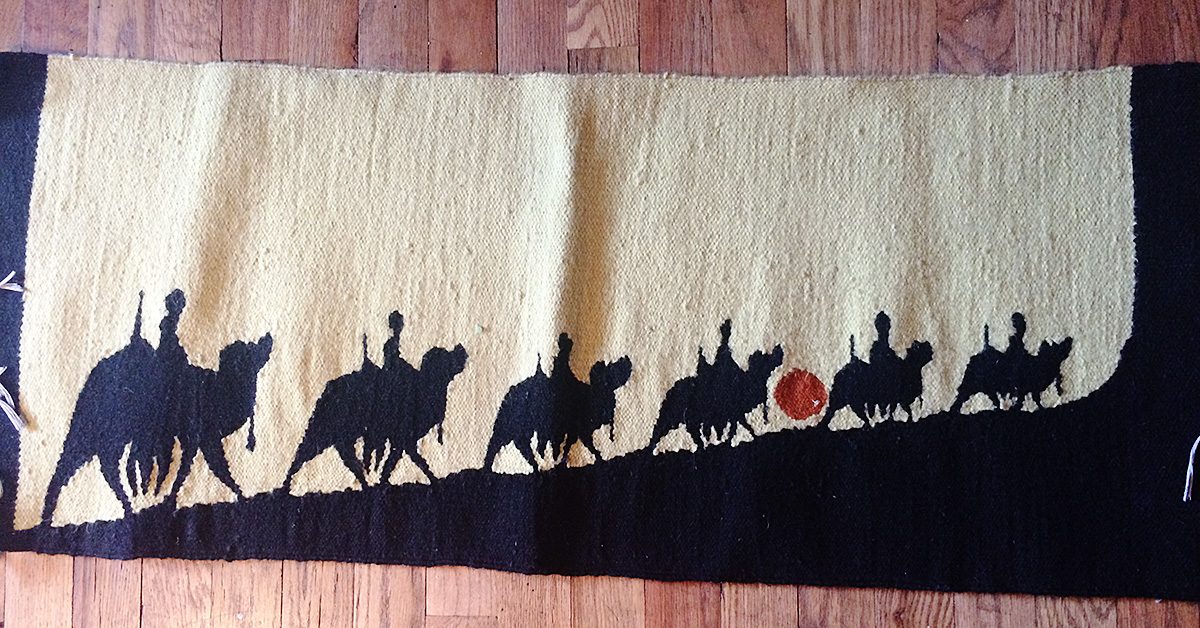
My freebie tapestry. A nice touch.

My freebie tapestry. A nice touch.

Then, in true Egyptian fashion, the salesman offered me one more tapestry I could choose from a pile as a gift. I suspect this pile consisted of the practice tapestries done by the younger students but they were all alluring in their own right and I choose a long narrow hanging of yellow with camel silhouettes.
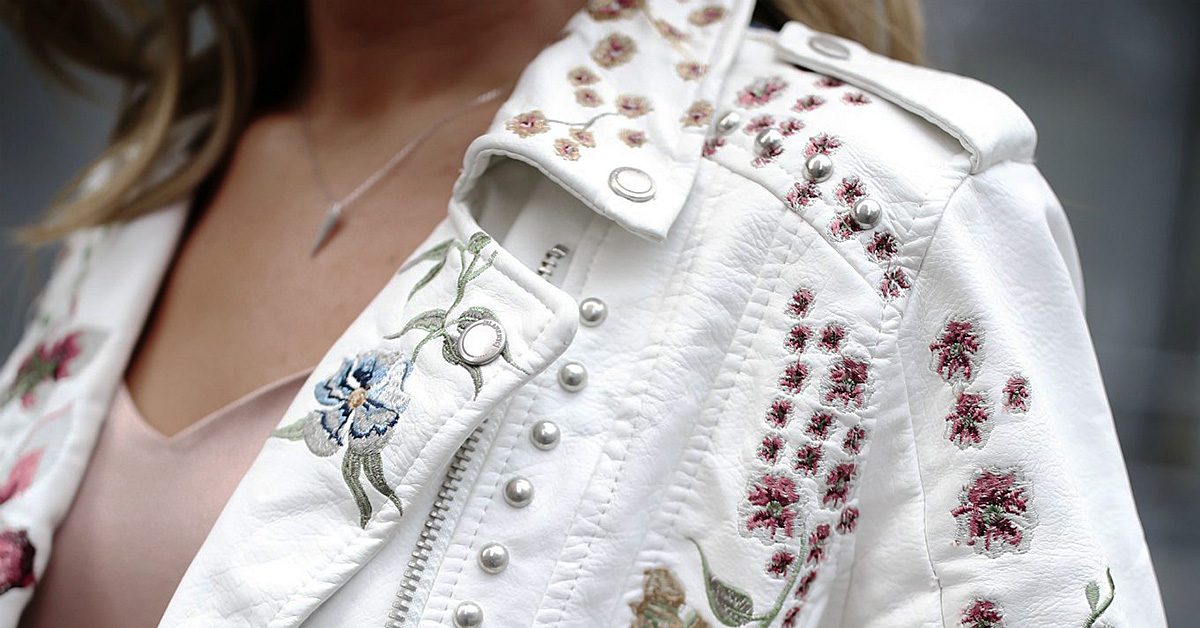
I left the school quite happy with my purchases and the opportunity to have seen the young carpet makers at work – and to contribute to the Egyptian economy and the school.
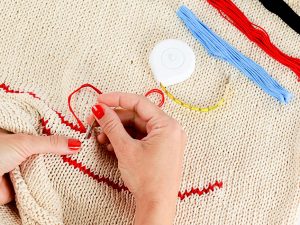
Now, back at home in New York City, my Egyptian carpets have been happily integrated into my home carrying with them the legacy and craftsmanship of centuries.