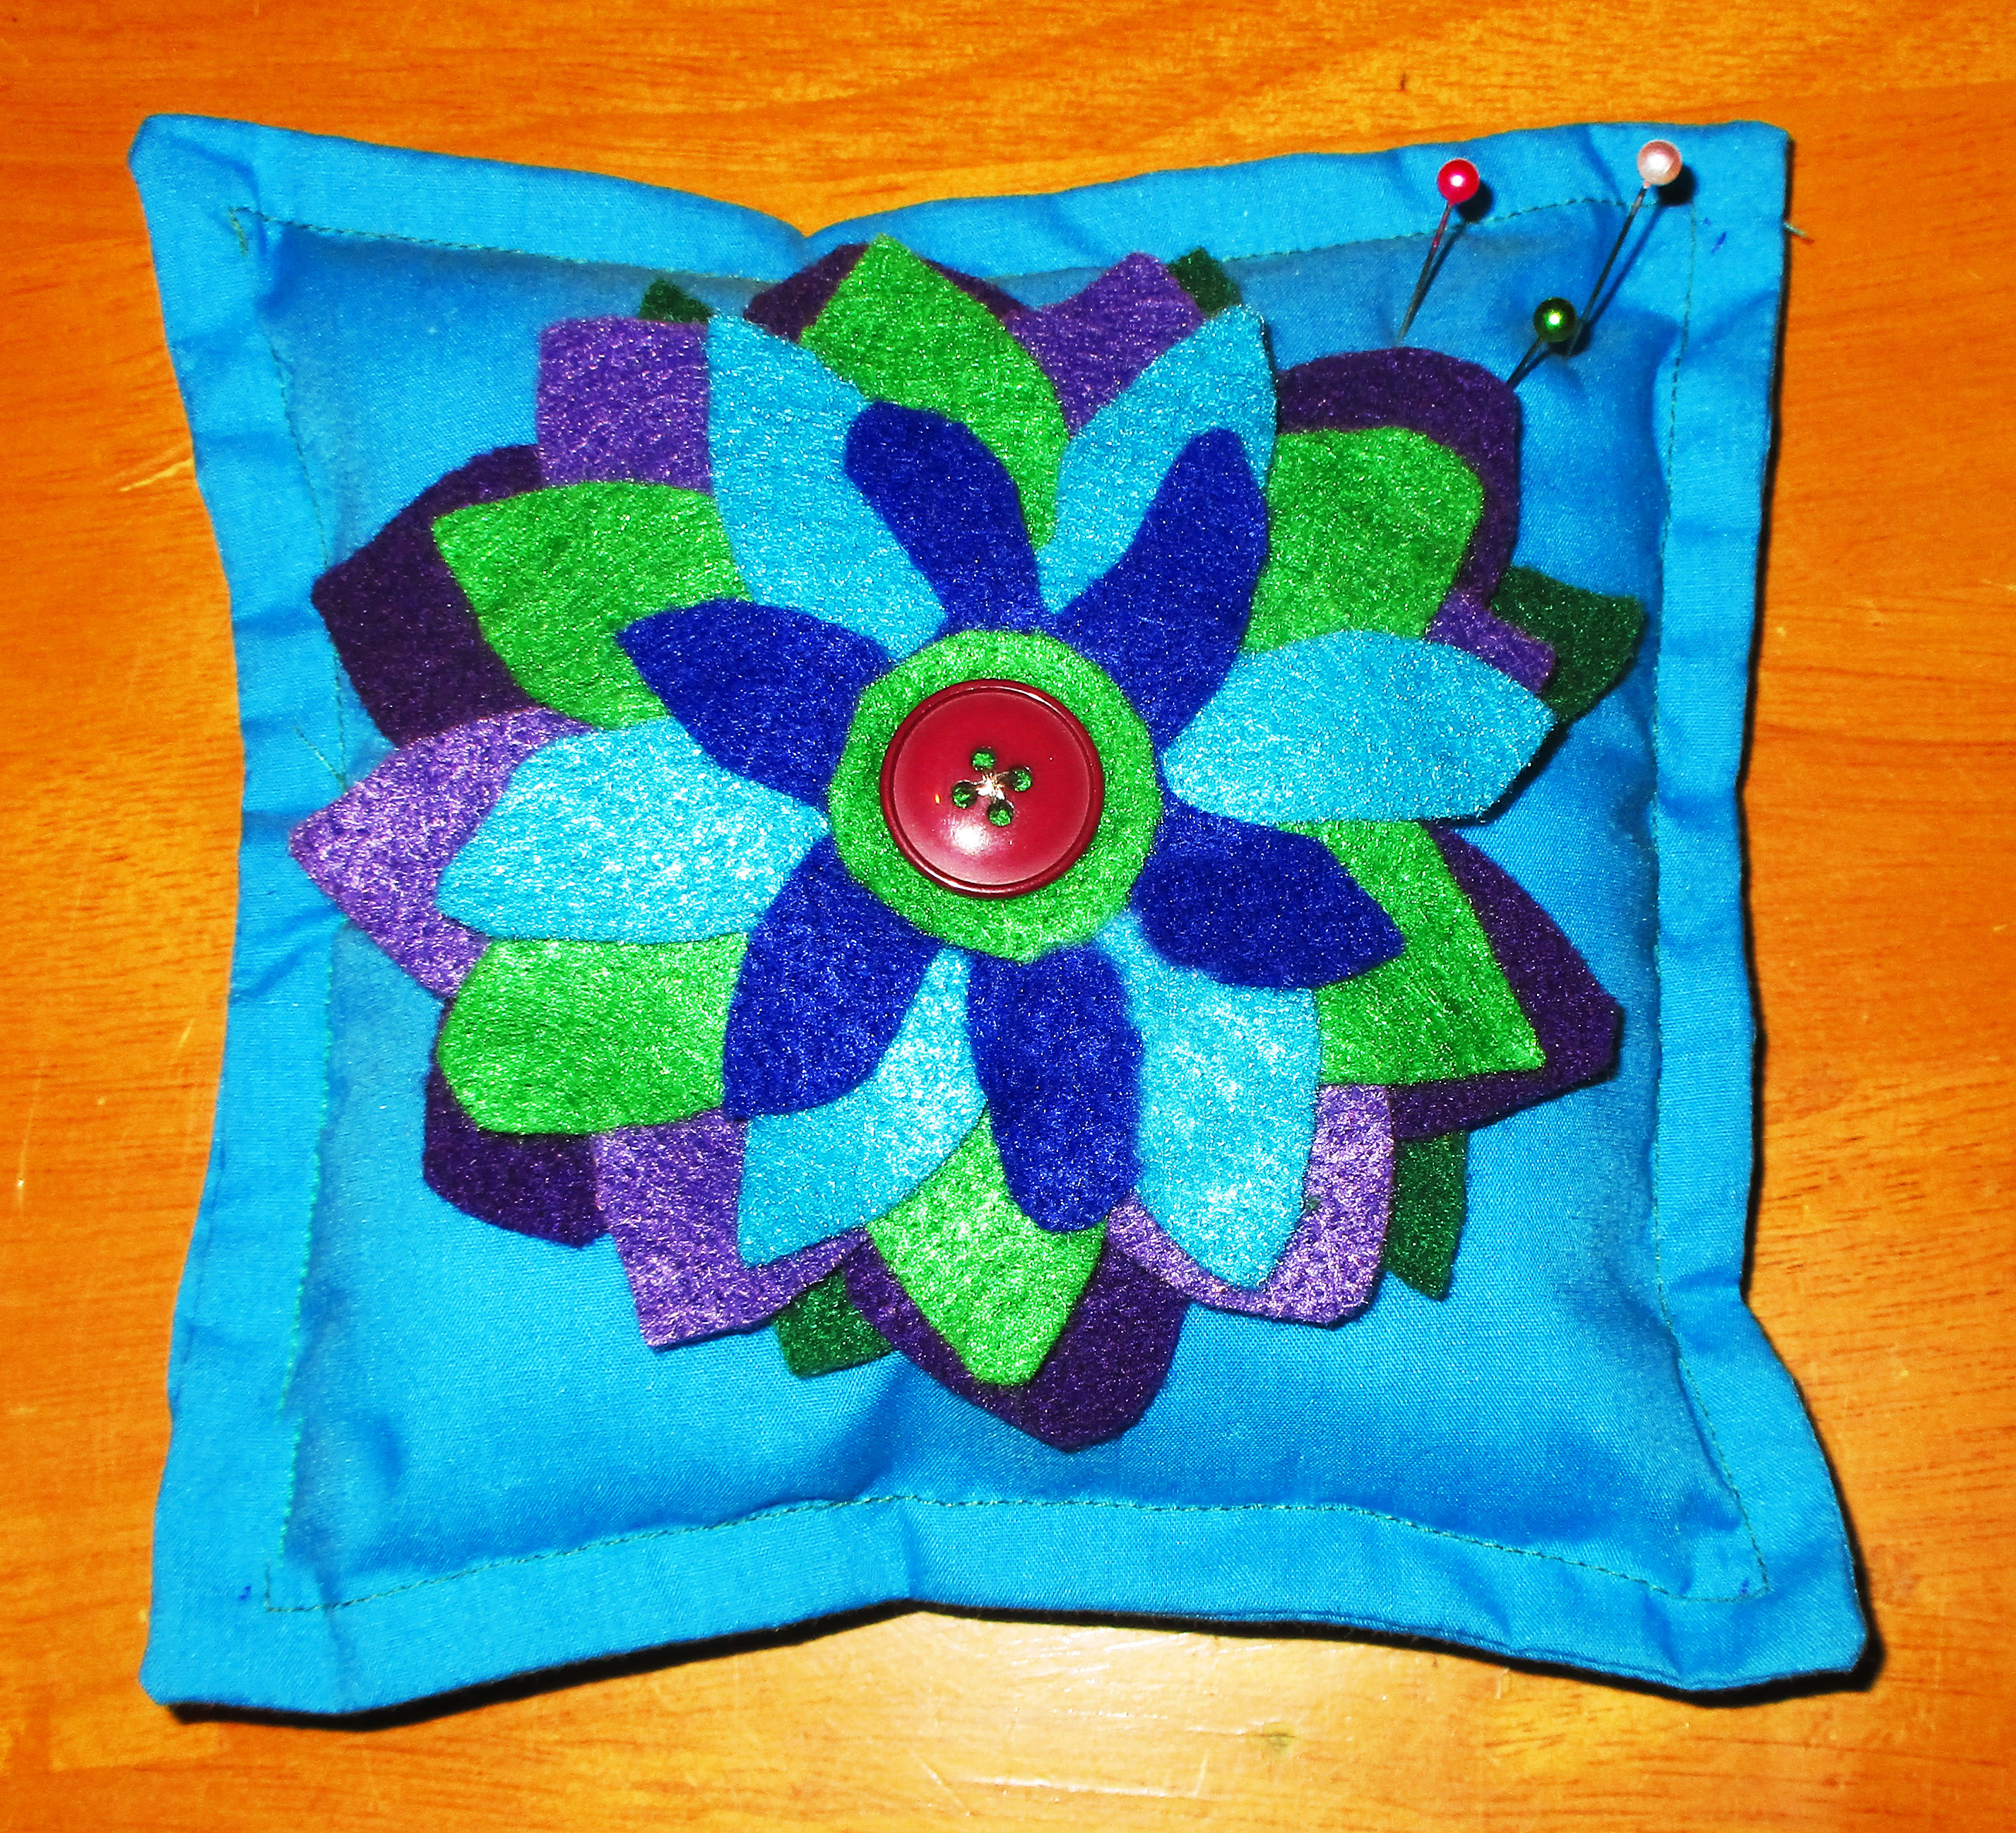
Felt Flower Pillow Pincushion
A pincushion is one of the first things you need for sewing. You will love yours if it is a pretty one and you make it yourself. This project is super easy and it makes a perfect first project at your new machine. This pincushion is a generous size and you won’t find one quite as nice for sale at the store.
If you are not an absolute beginner, you can whip up this pretty pincushion quickly for yourself or for a friend. This makes a sweet gift. You could even make these for friends who don’t sew by filling with lavender flowers instead of stuffing so that they can enjoy it as a pretty sachet instead.
Even non-beginners appreciate a fast project. Making one or a few of these might be a nice pick-me-up on an otherwise dreary afternoon.
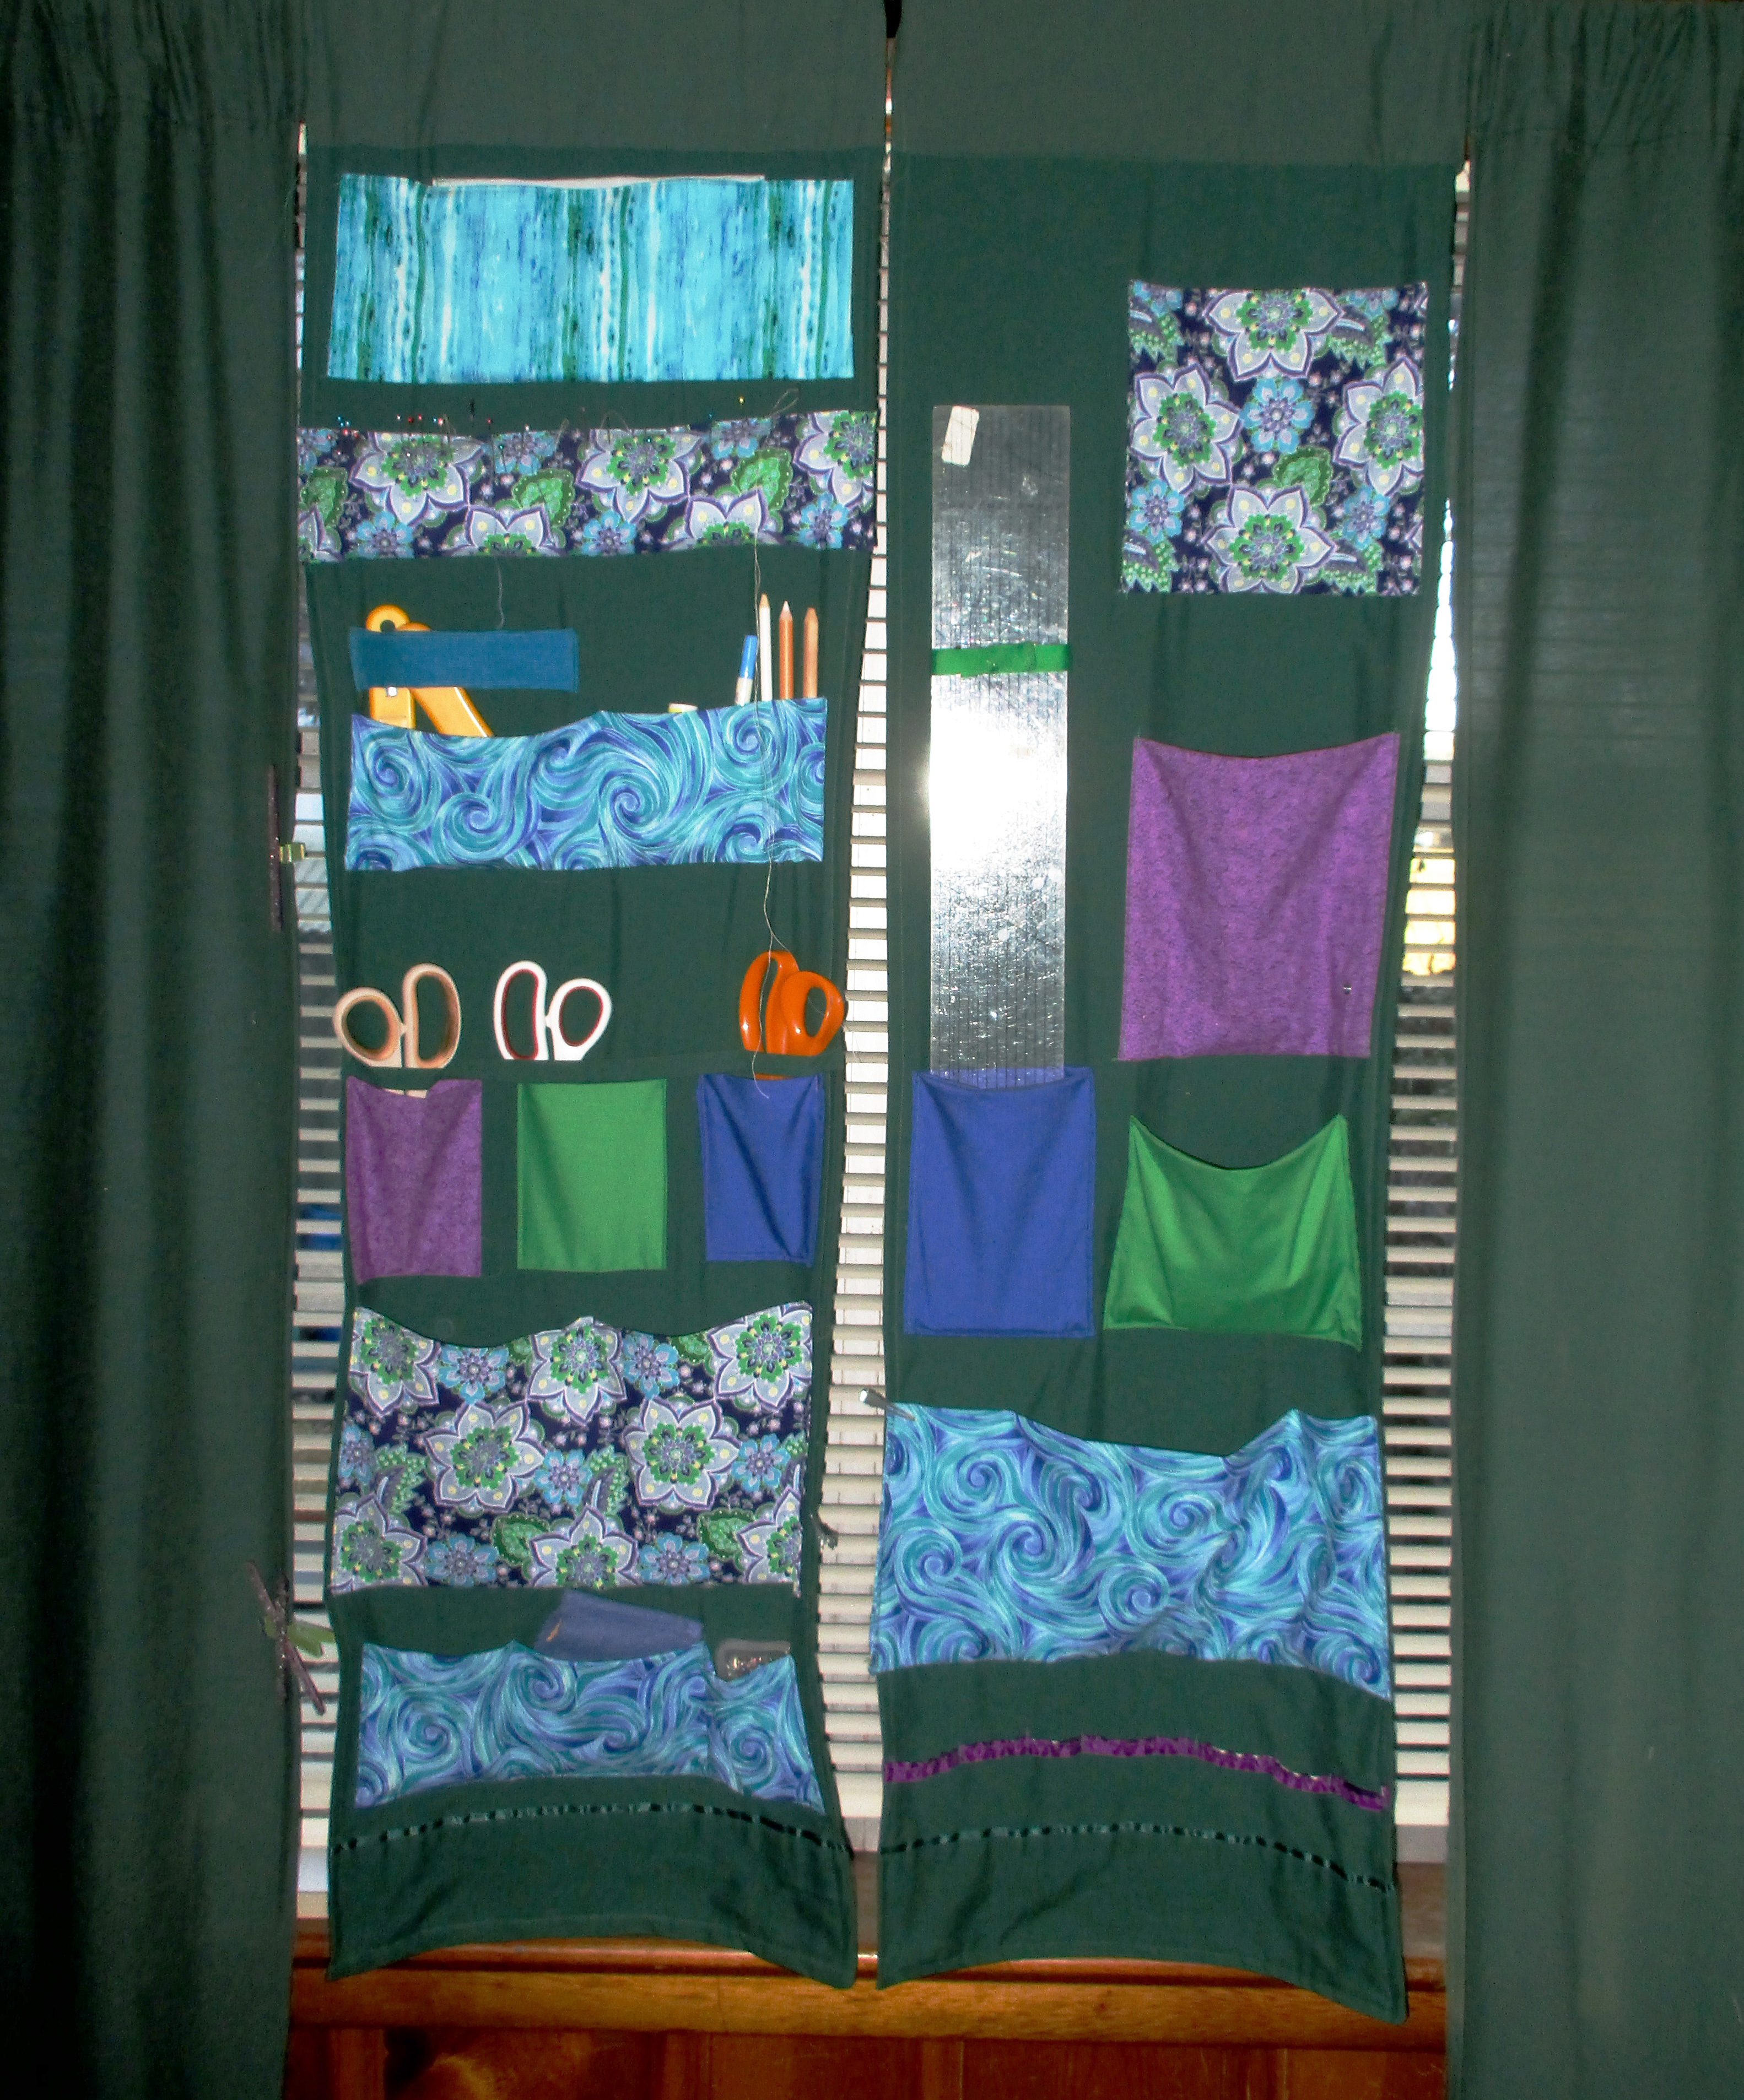
Though it does make a pretty sachet, this project was designed as a pincushion, and it is my favorite of the many in my room. I sewed snaps on the back of mine and made a permanent place for it on my sewing room organizer curtains.
Pin it
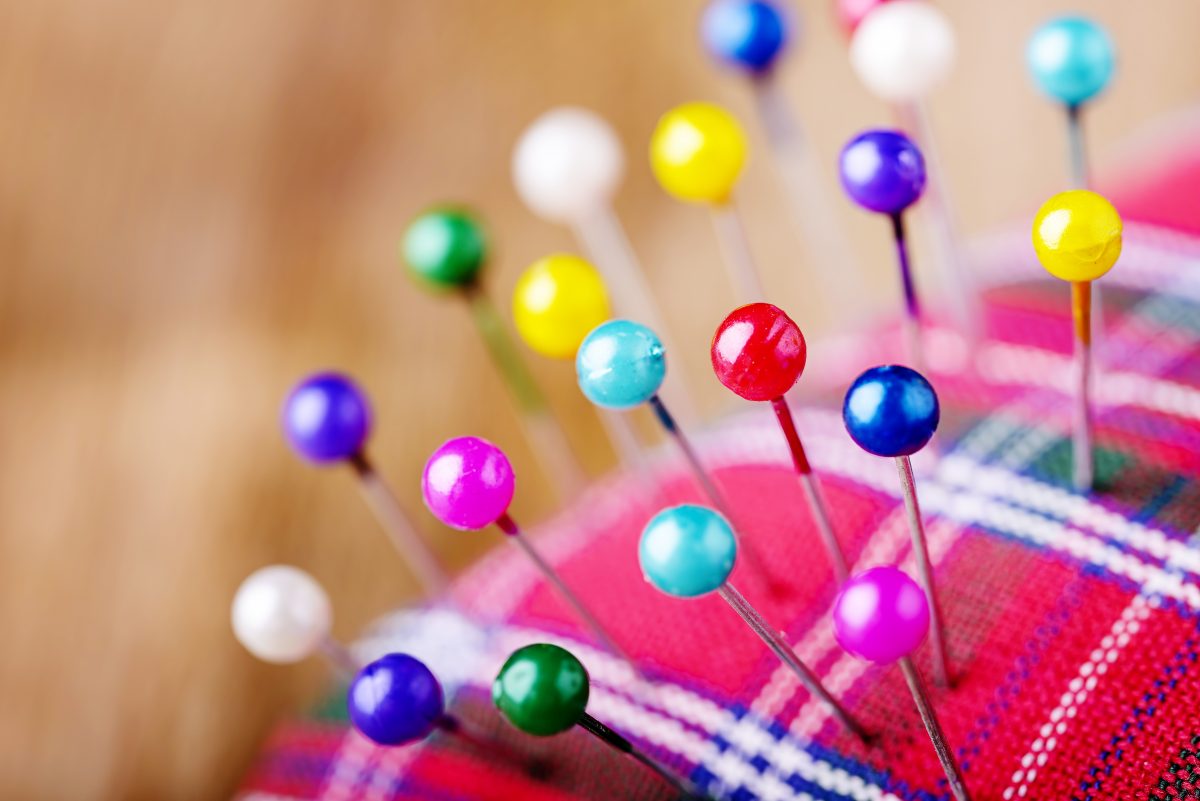
Speaking of pins, here’s an important word to the wise: All pins are not created equal! I highly recommend you further beautify this pincushion with head pins. Really, I can’t stress this enough- do yourself a favor and arm yourself with this kind of pin. Pearl or flower head pins are easy to see, find, and remove from your project while sewing. Plus, they are pretty!
To make this beginner project pincushion, you need:
Two six-inch fabric squares
Felt scraps, for cutting petals. I made mine using purples, greens, and blues. You could make a more realistic flower using all one color of felt, or perhaps several shades of the same color.
A button for the flower center
Embroidery thread
Polyester fluff or other stuffing
To make the flower:
I cut my petals into pointy football shapes. I tapered the petals at both ends to reduce bulk behind the button center.
Six graduated layers of six petals each make a nice, full flower. Use the six largest petals for the back layer, stepping down to the smallest set of six petals for the front layer. Also cut a small, one-inch circle of felt to place in front of your smallest layer of petals as the flower center.
Cut a three inch backing circle from the same color of felt as the back layer of petals and assemble all layers atop this circle and stitch them down by hand through the center. Then place the button at the flower center and sew the button down using embroidery thread in a contrasting color. I used a metallic silver thread in this example.
Now, set the flower aside.
Assembling the pincushion
Place the right sides of the 6″ squares together. Sew around the square, leaving an opening for turning. Be sure to back-stitch the beginning and end of this seam.
After you’ve done that, clip off the tiny corner triangles outside of your seam, and turn the pincushion right side out. Use a point turner or other tool to push the corners out well.
Now stuff. Stuff it nice and full, and then top-stitch to close your opening. I like to continue the top-stitching and go all around the entire square using matching thread.
Center your flower on top of the pincushion. Affix it by hand-stitching the backing circle to the cushion. The larger petals will prevent these stitches from showing.
And now you made a pretty pincushion and completed this easy project that fast.